Case mod - Corsair 600t

Soldato
Joined
22 Oct 2008
Posts
11,506
Location
Lisburn, Northern Ireland
I've had a previous case mod where I made an acrylic side window for my case

https://forums.overclockers.co.uk/showthread.php?t=18672545


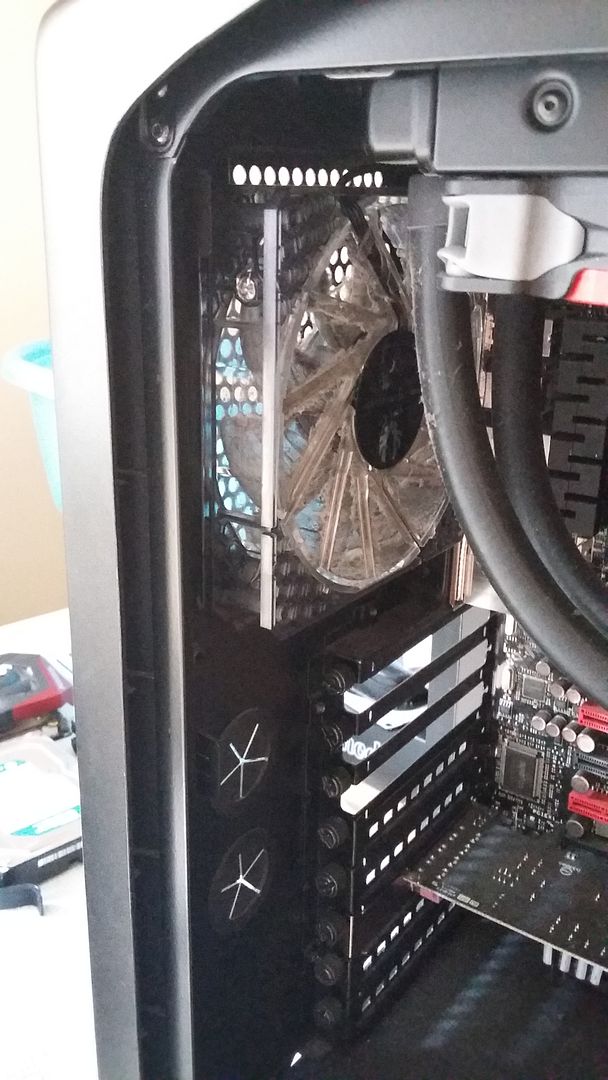
This however is a bit more of a mod to the actual case as opposed to the side of the case.

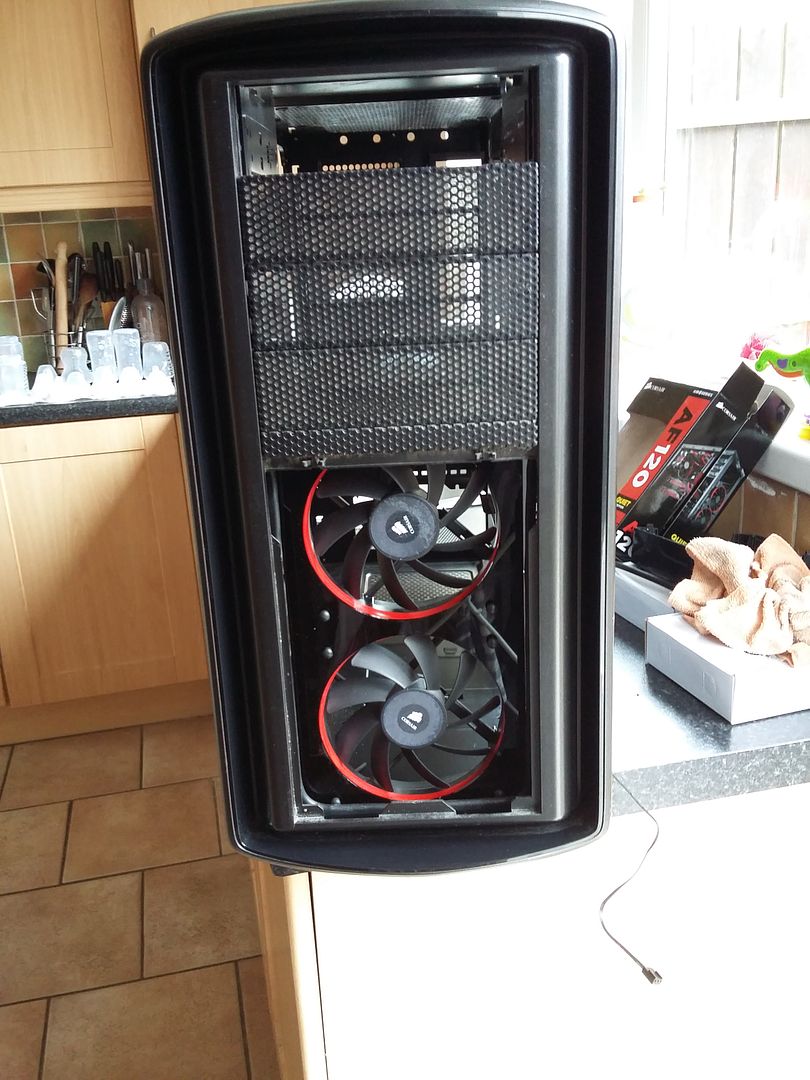
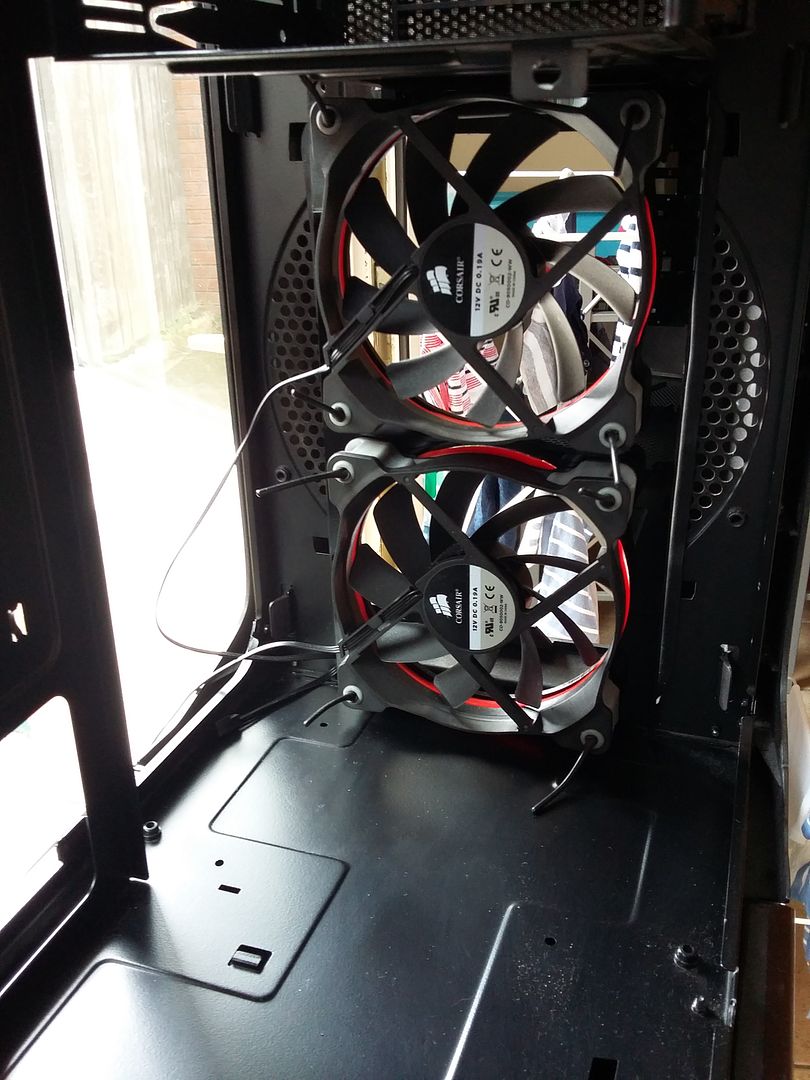
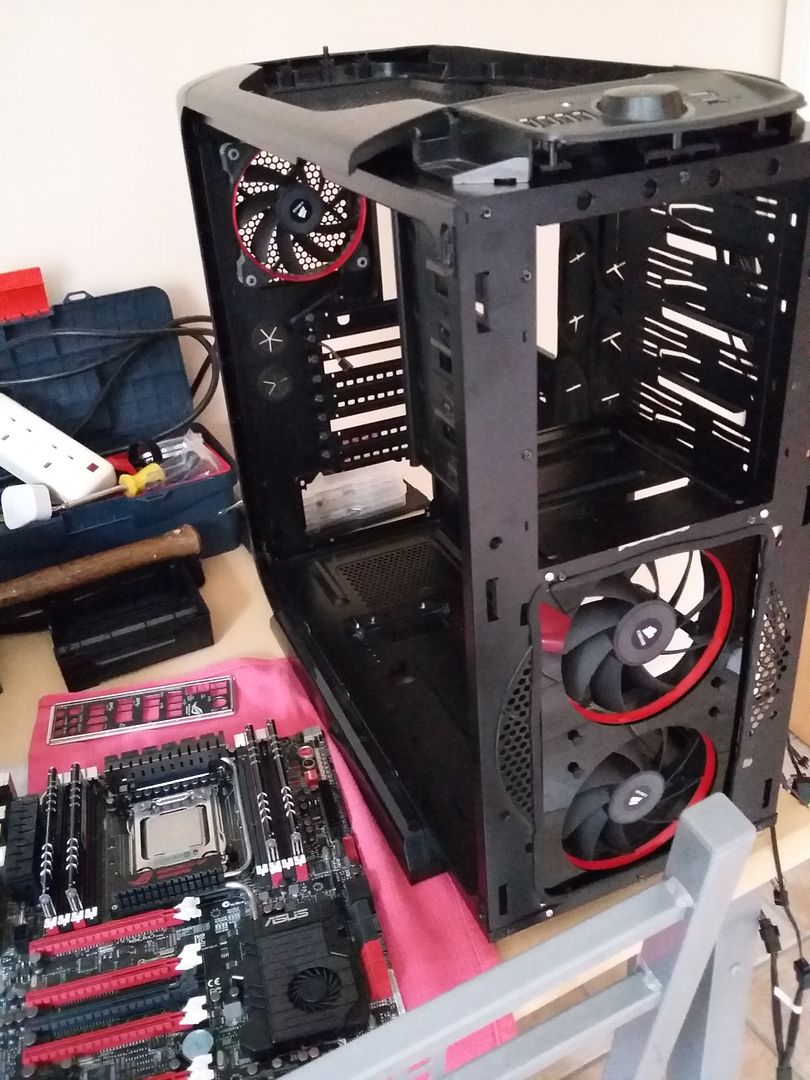
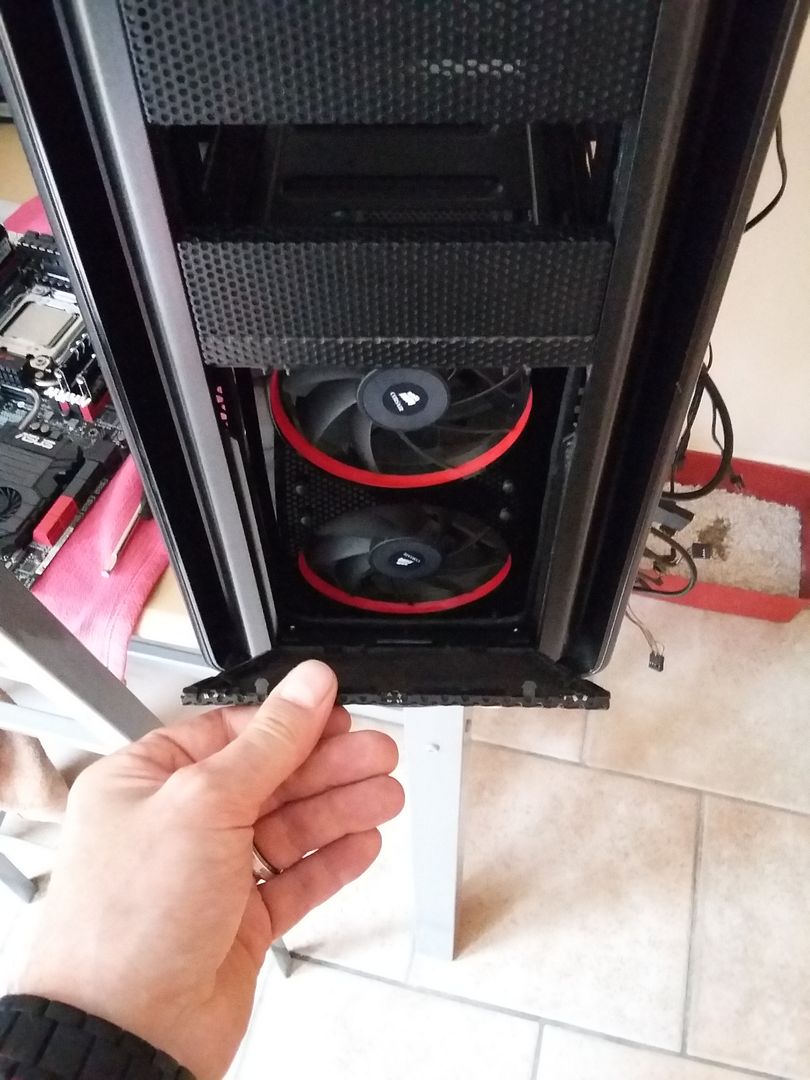
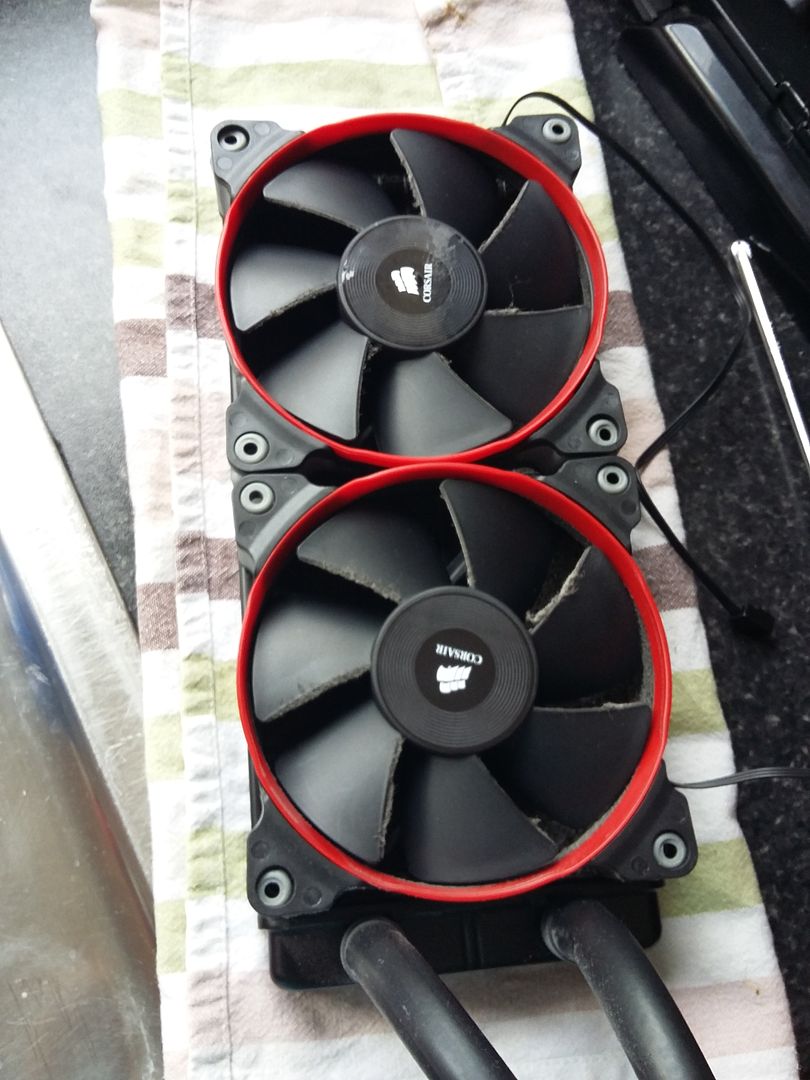
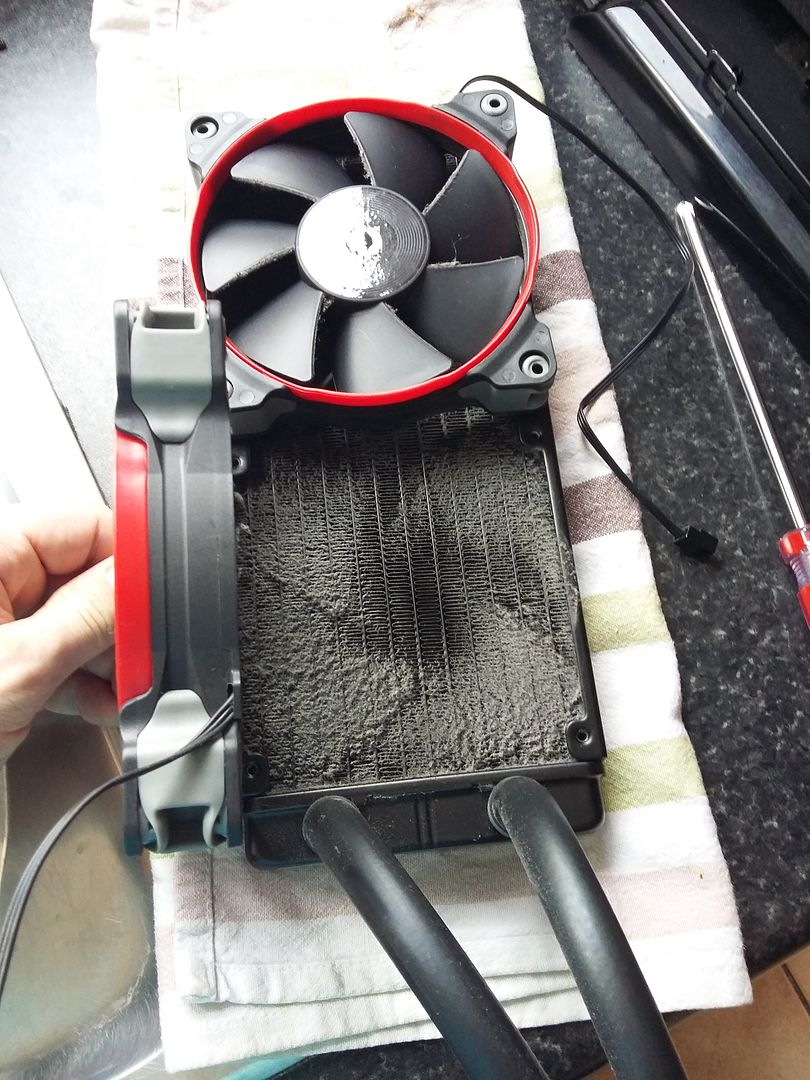
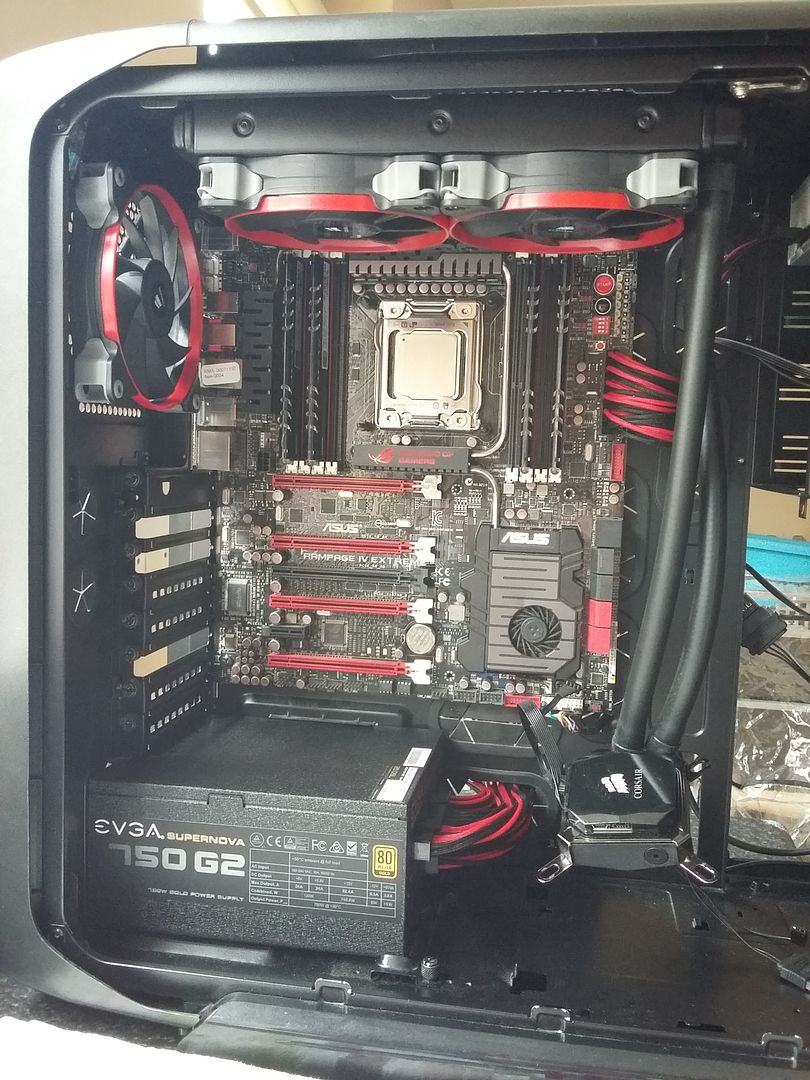
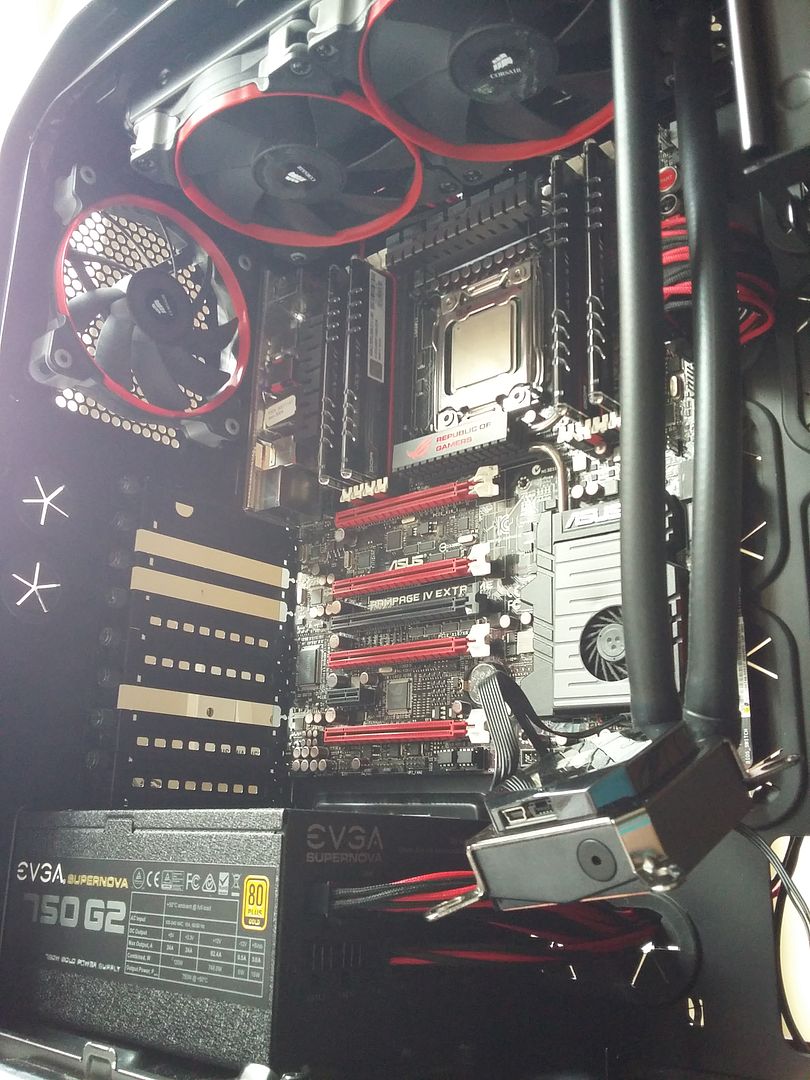
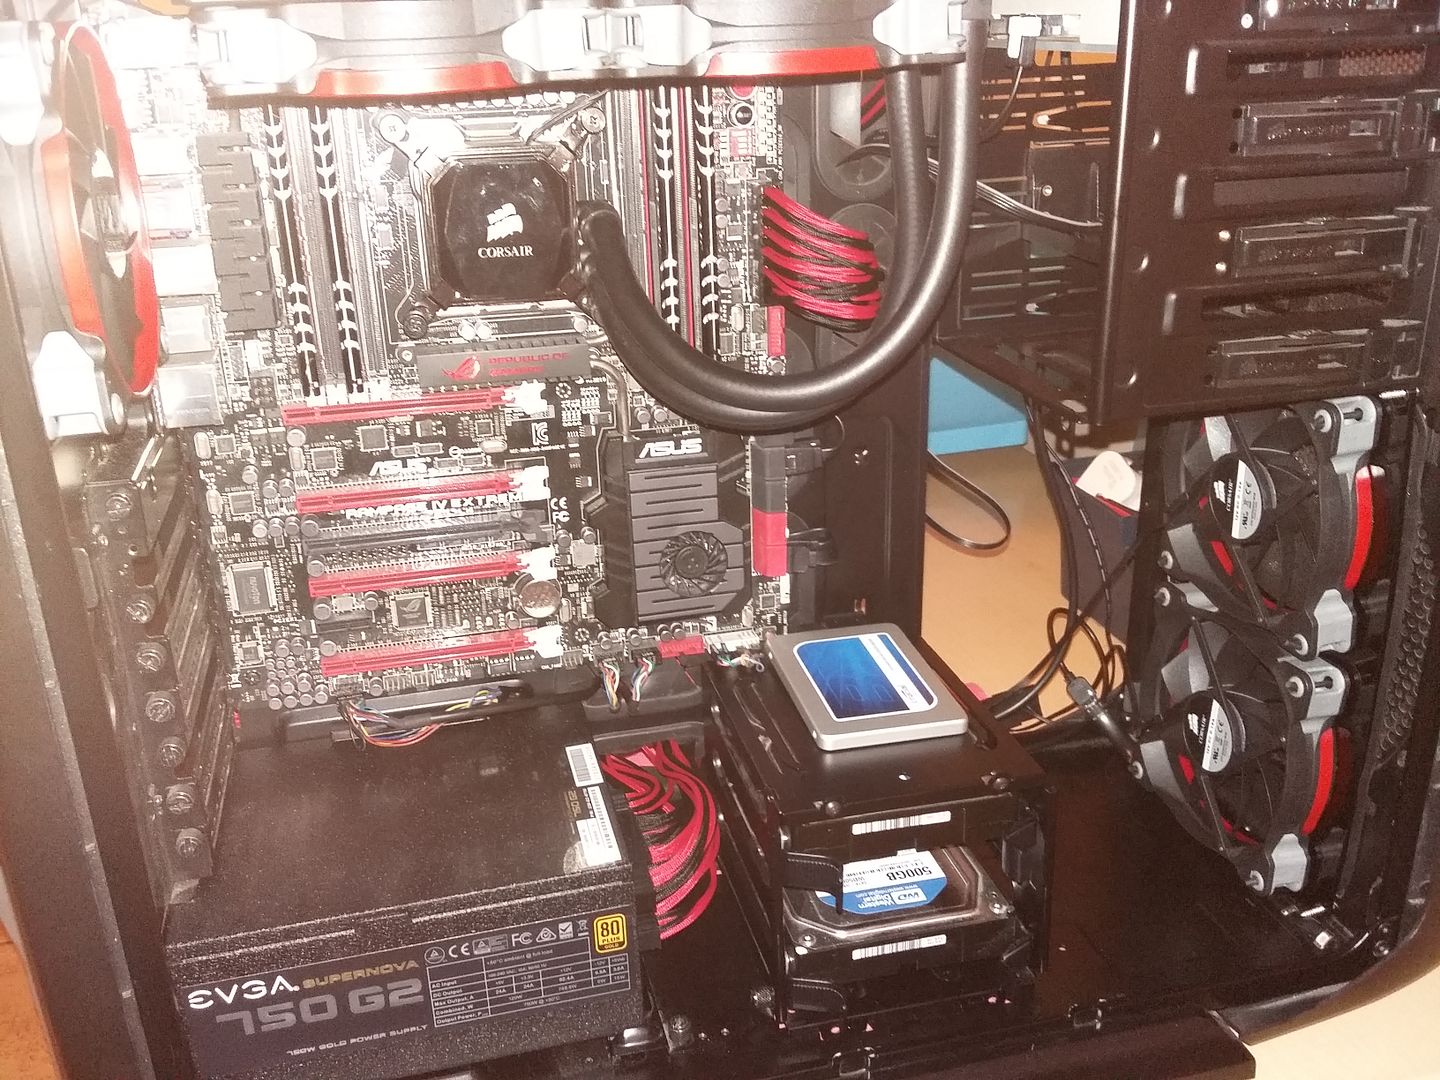
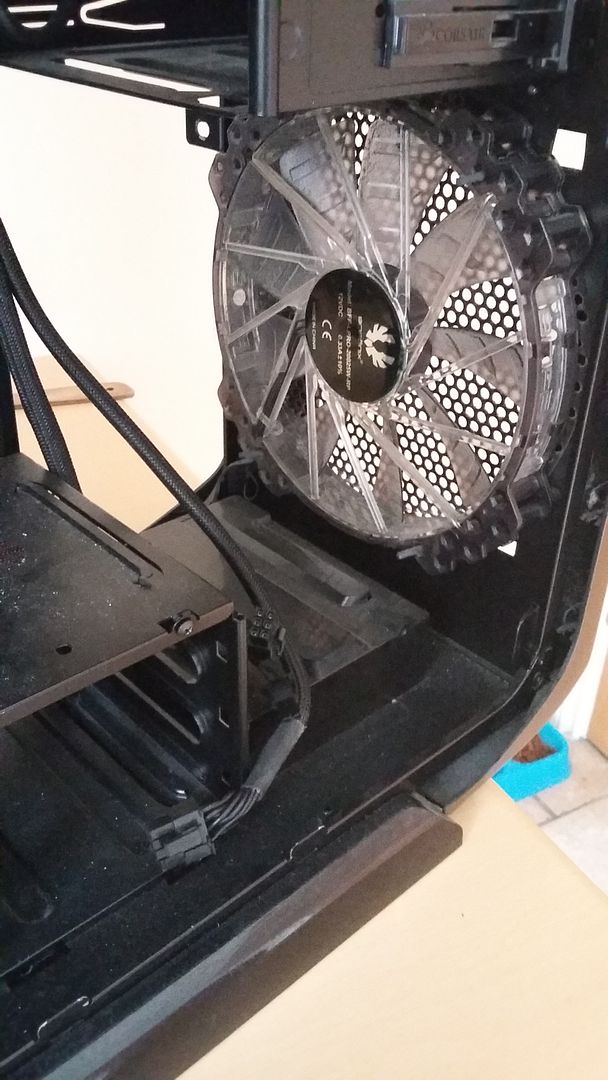
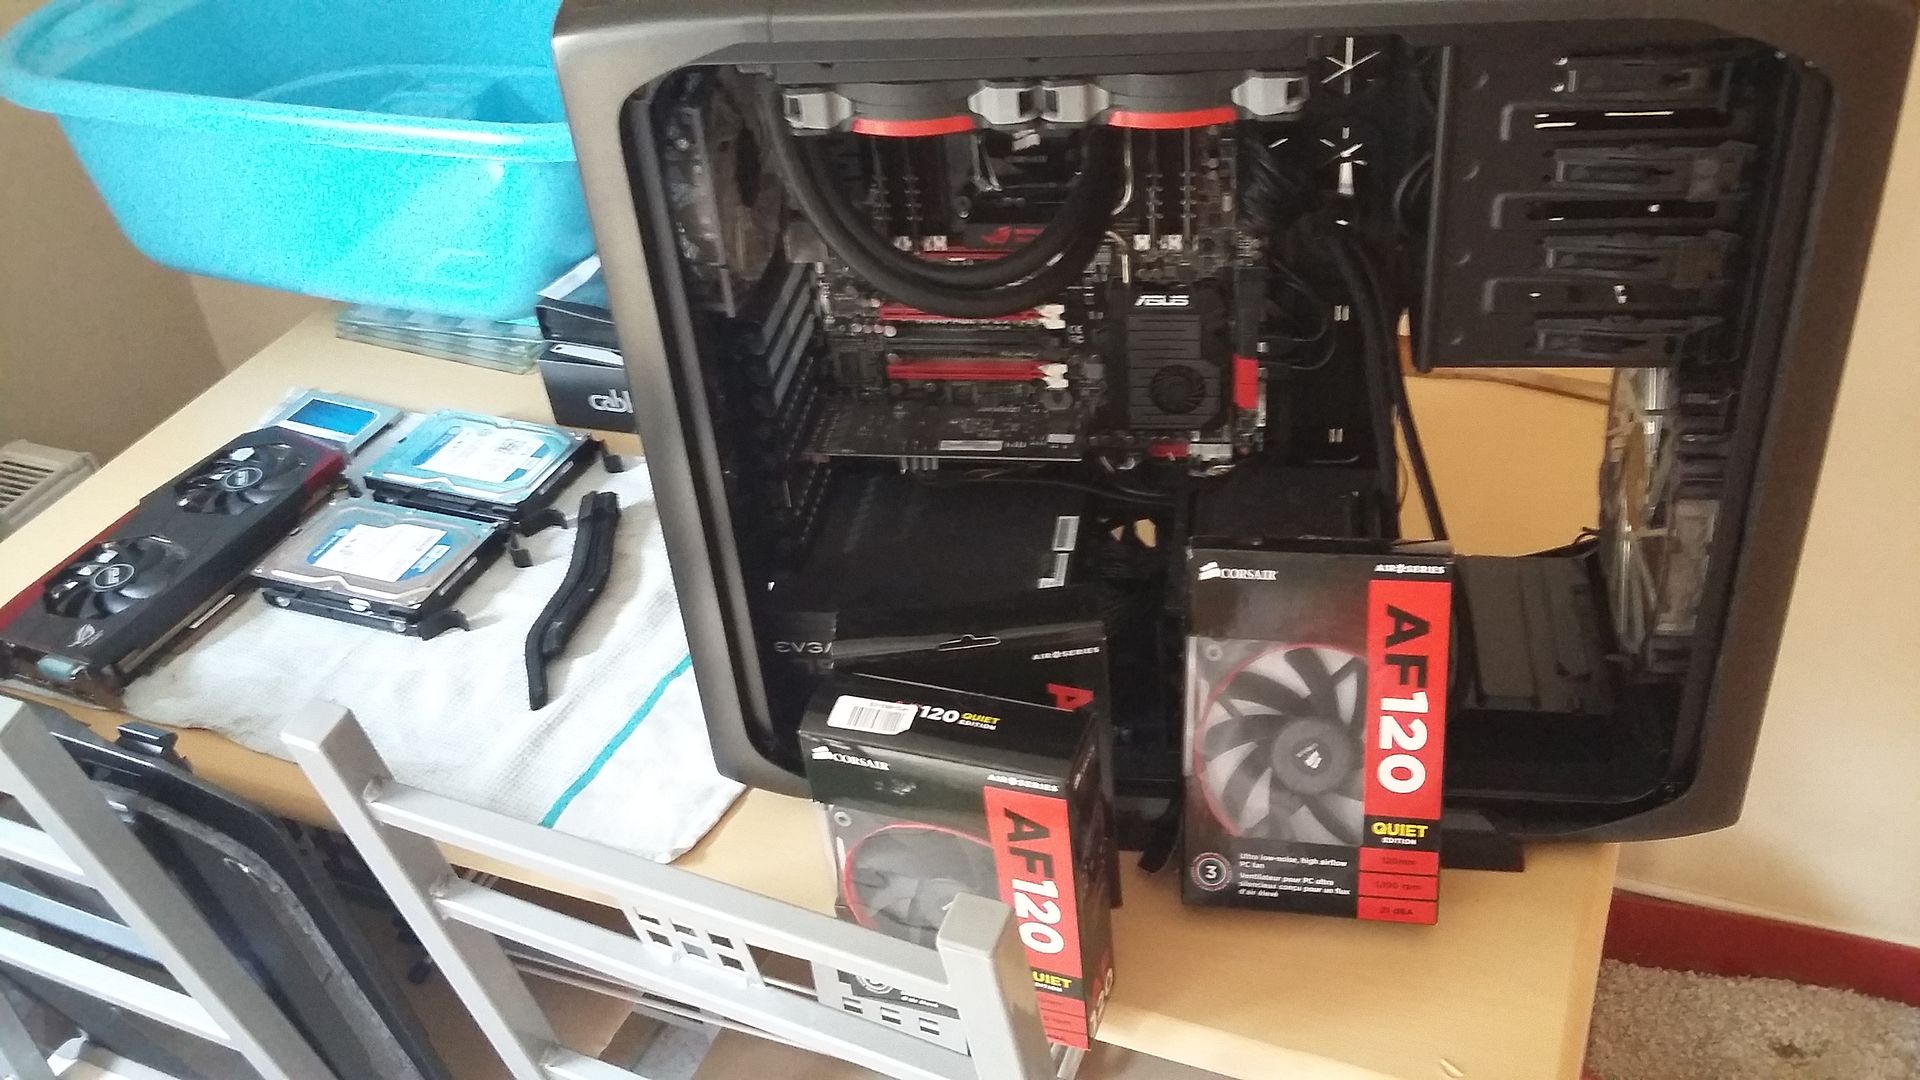
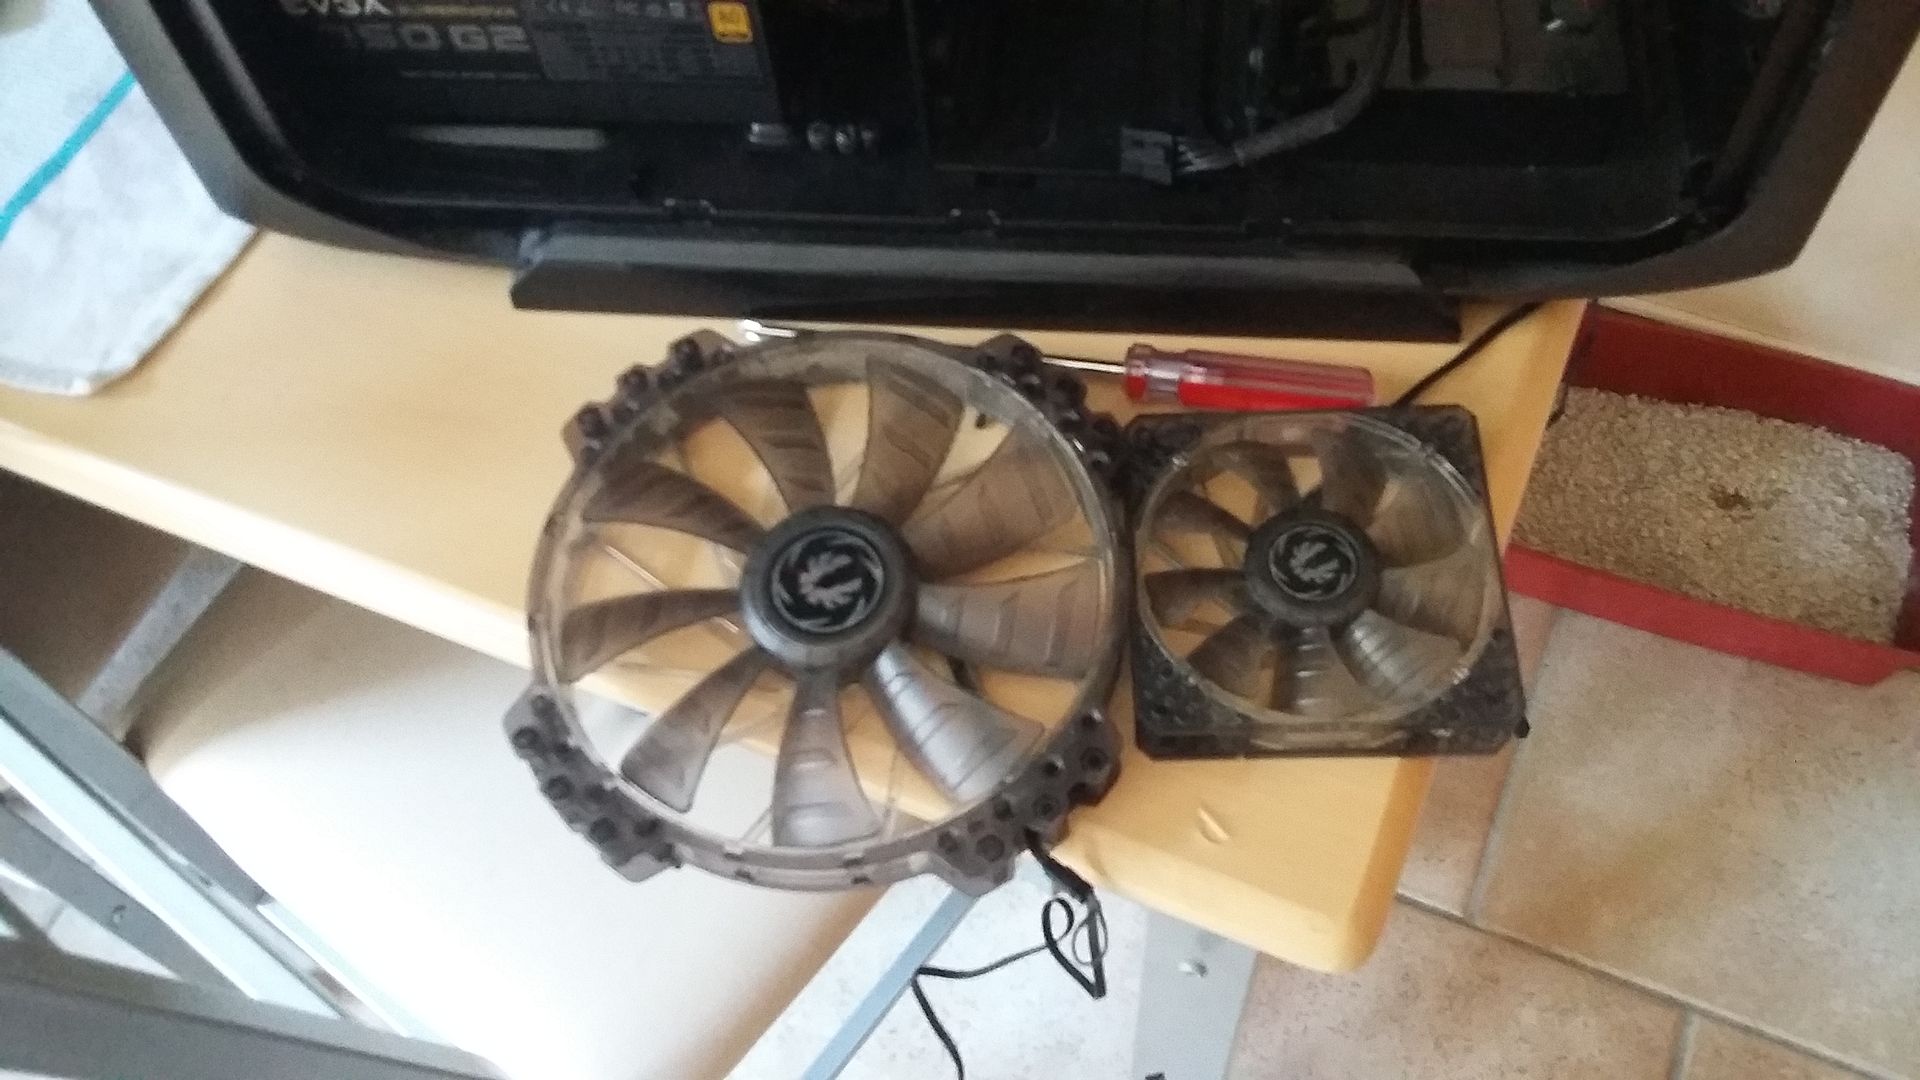
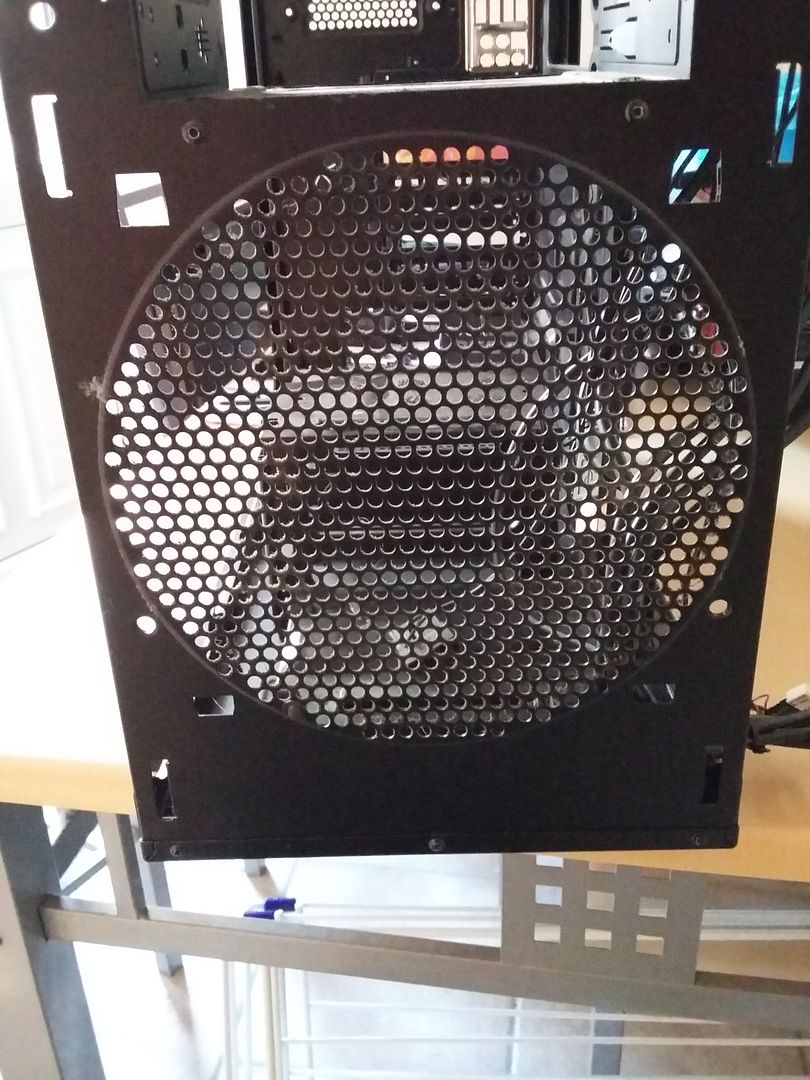
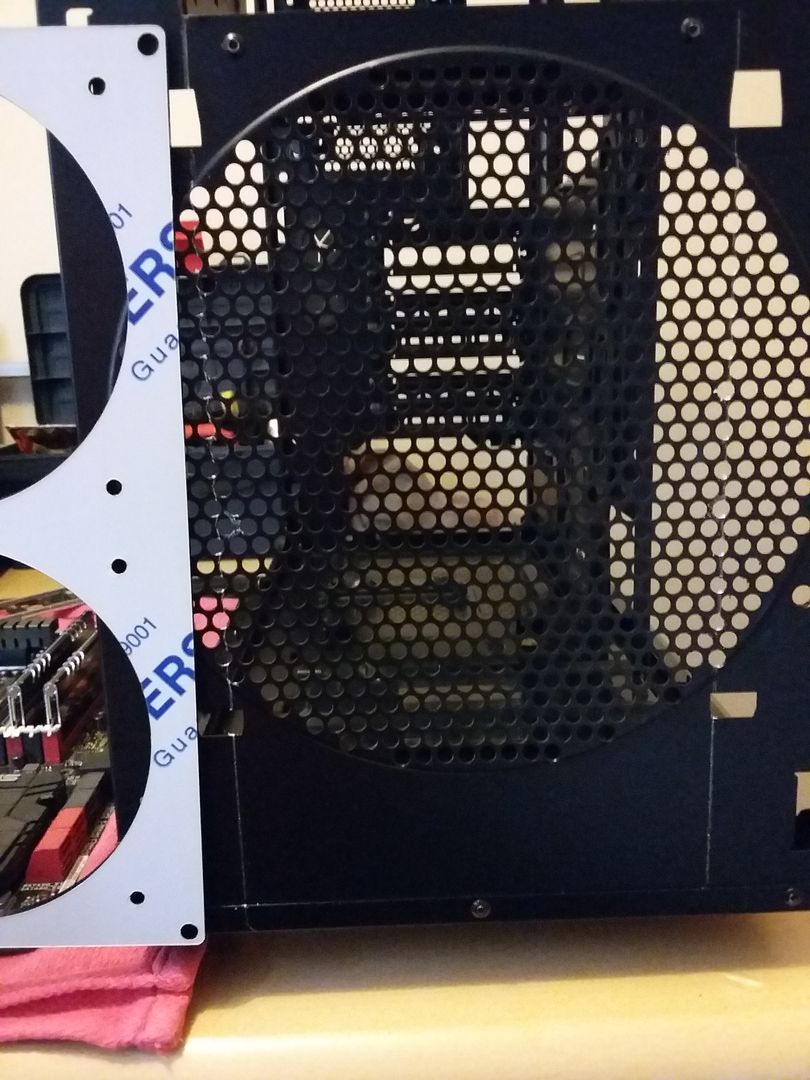
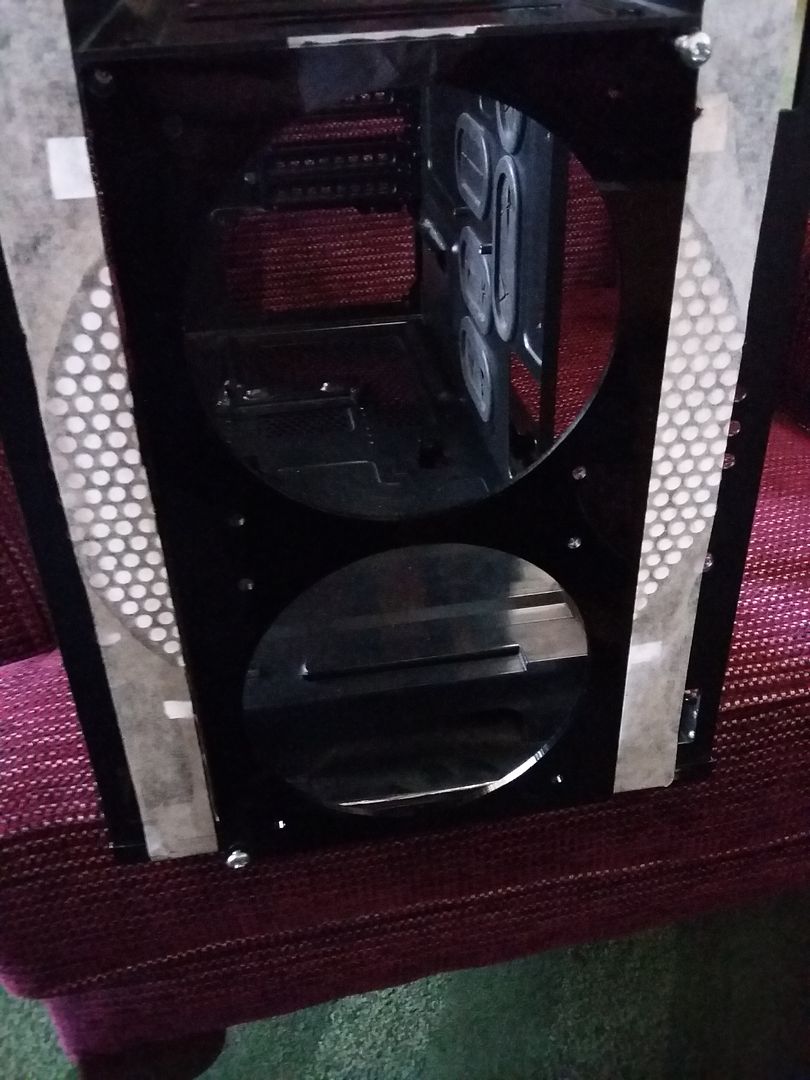
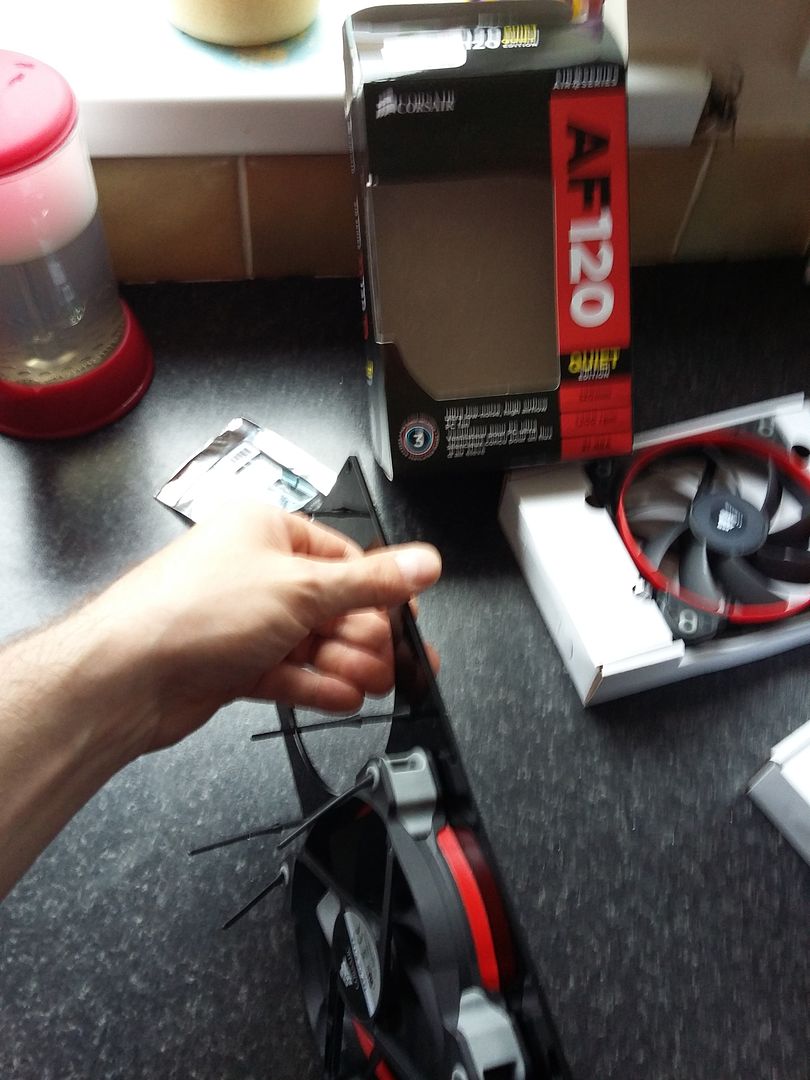
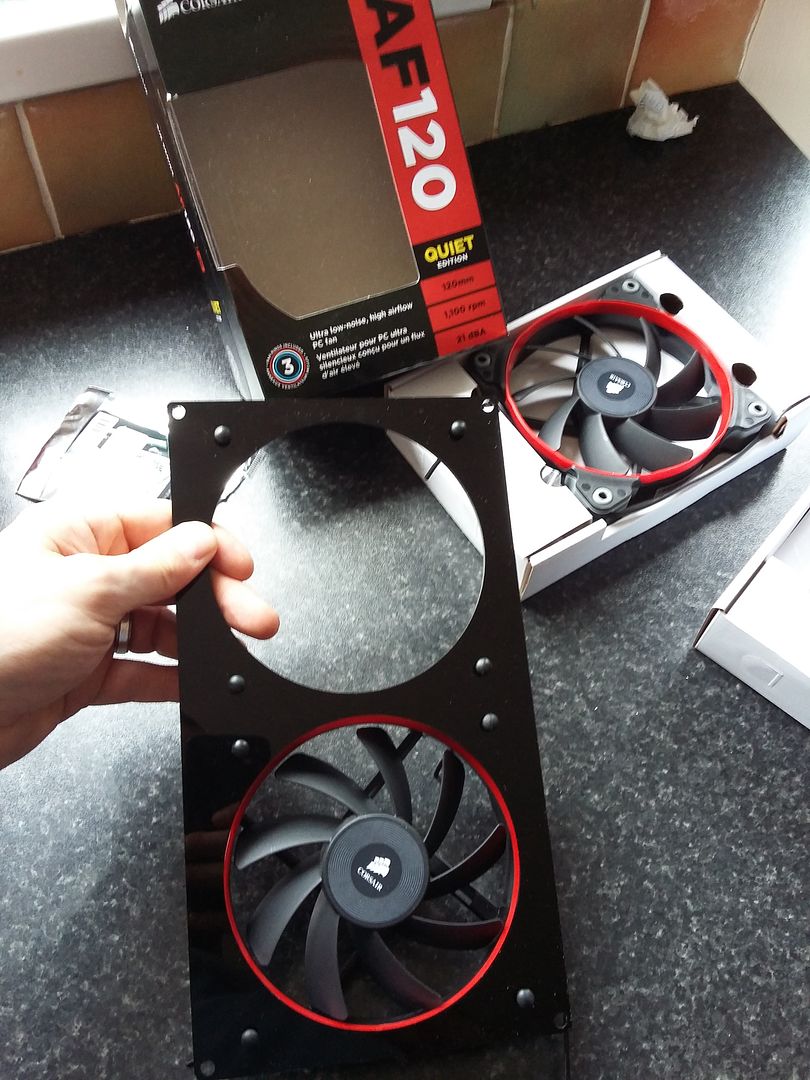
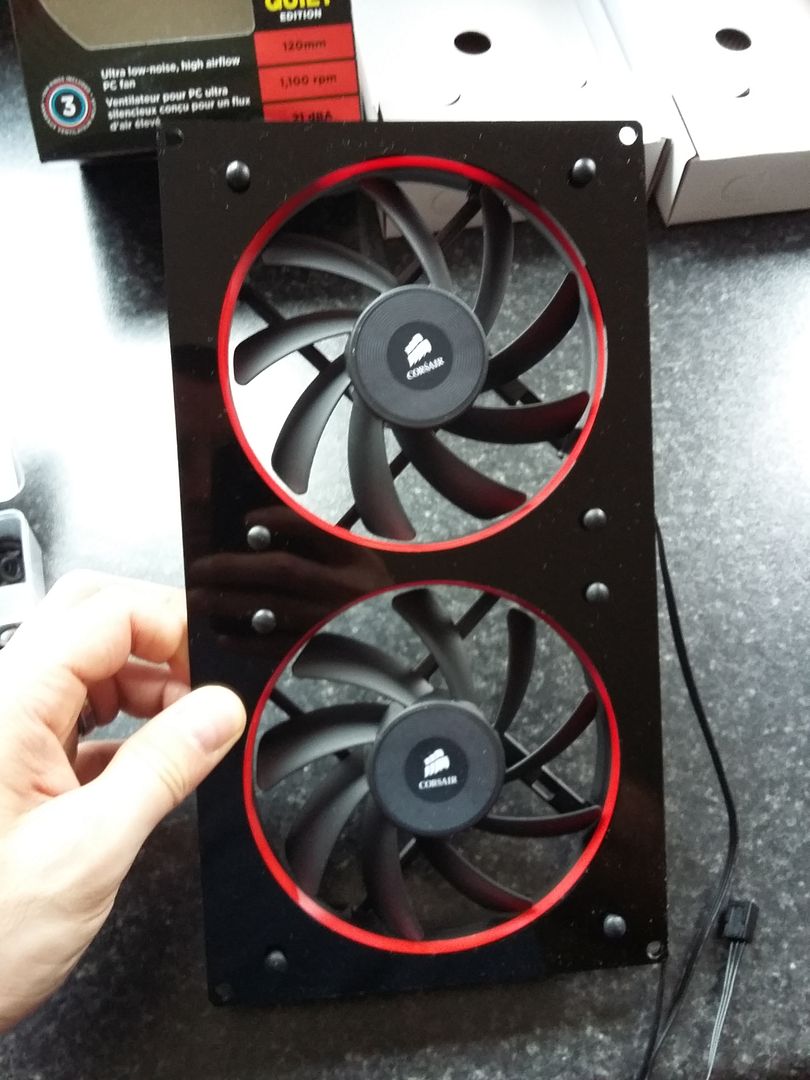
I am going to replace the front 200mm intake fan (bitfenix spectre white LED) with two 120mm Corsair AF fans with the red ring as the build is red and black.

I also have a third Corsair AF 120mm to replace the rear fan which is currently a 120mm bitfenix spectre white LED fan too.

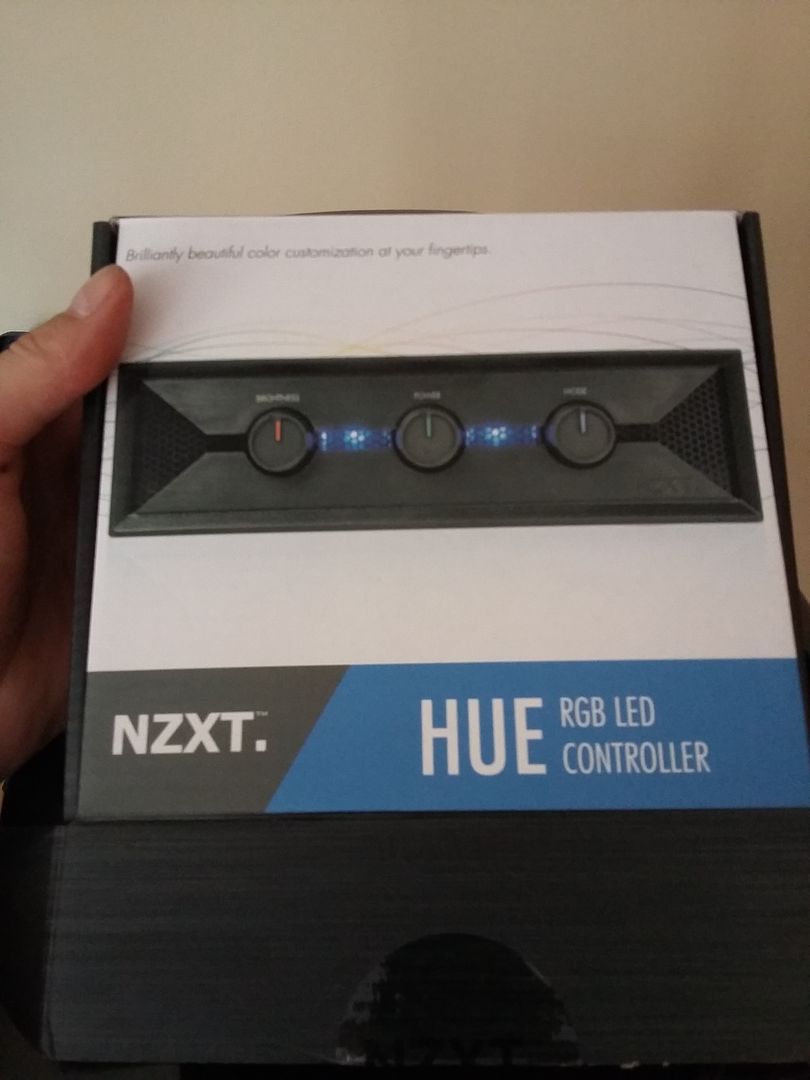
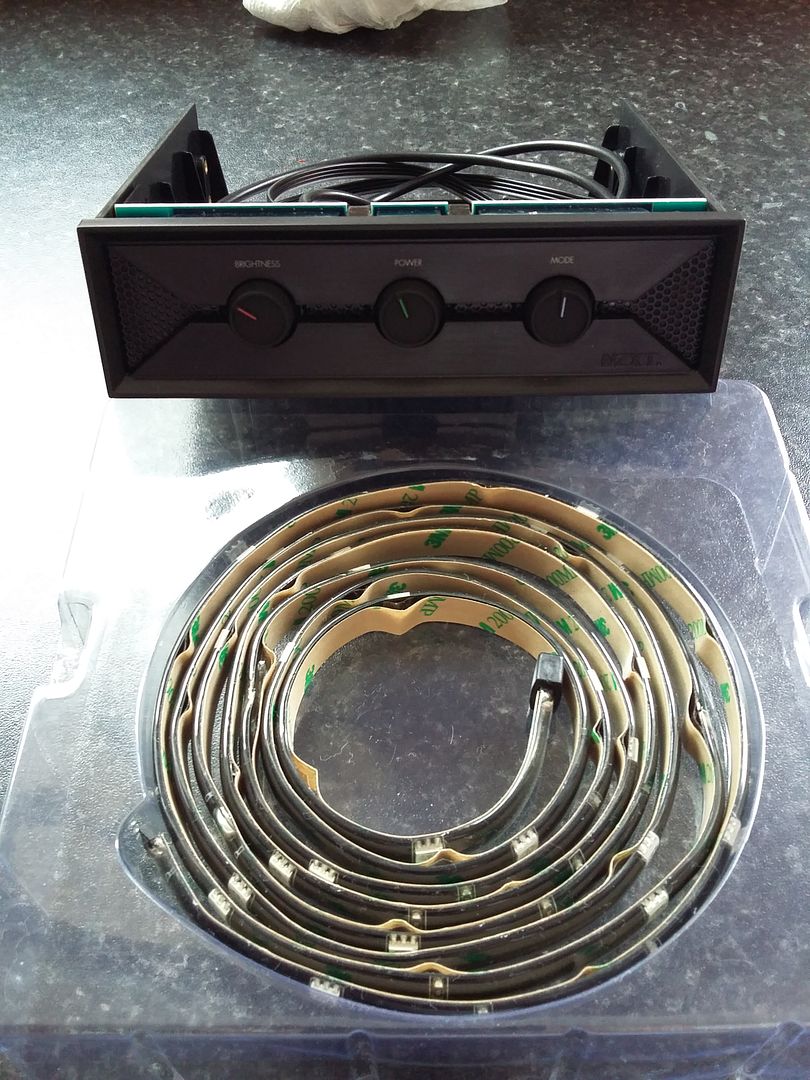
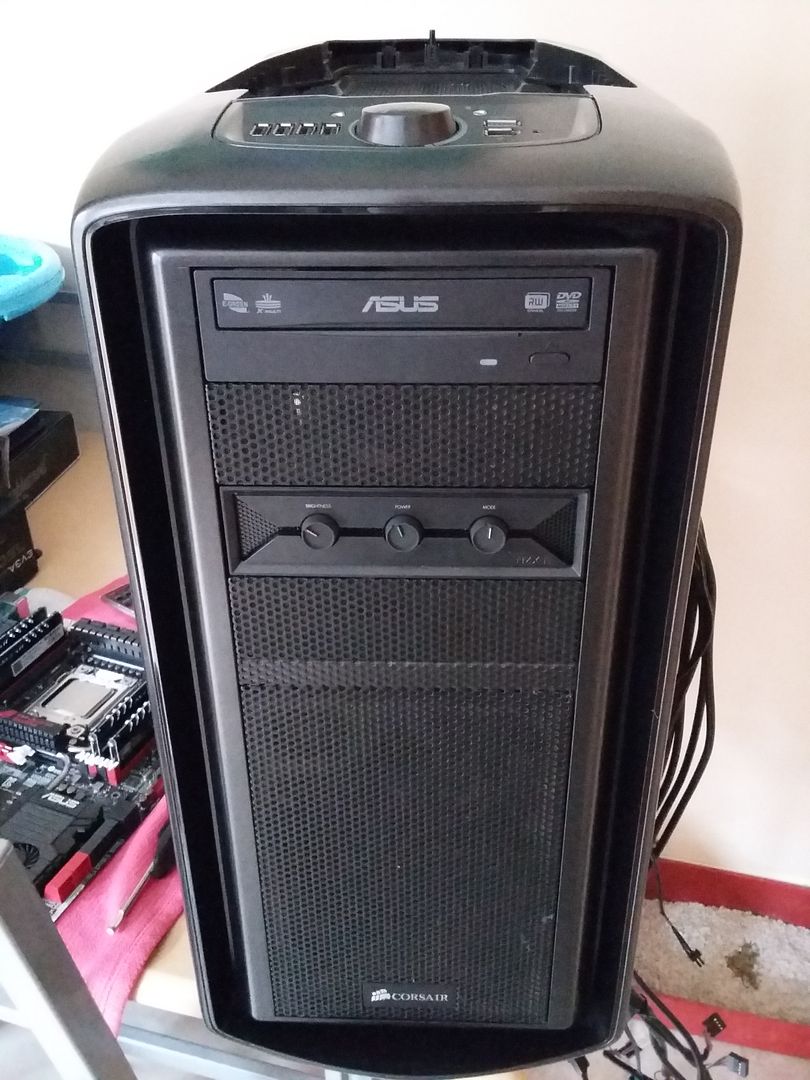
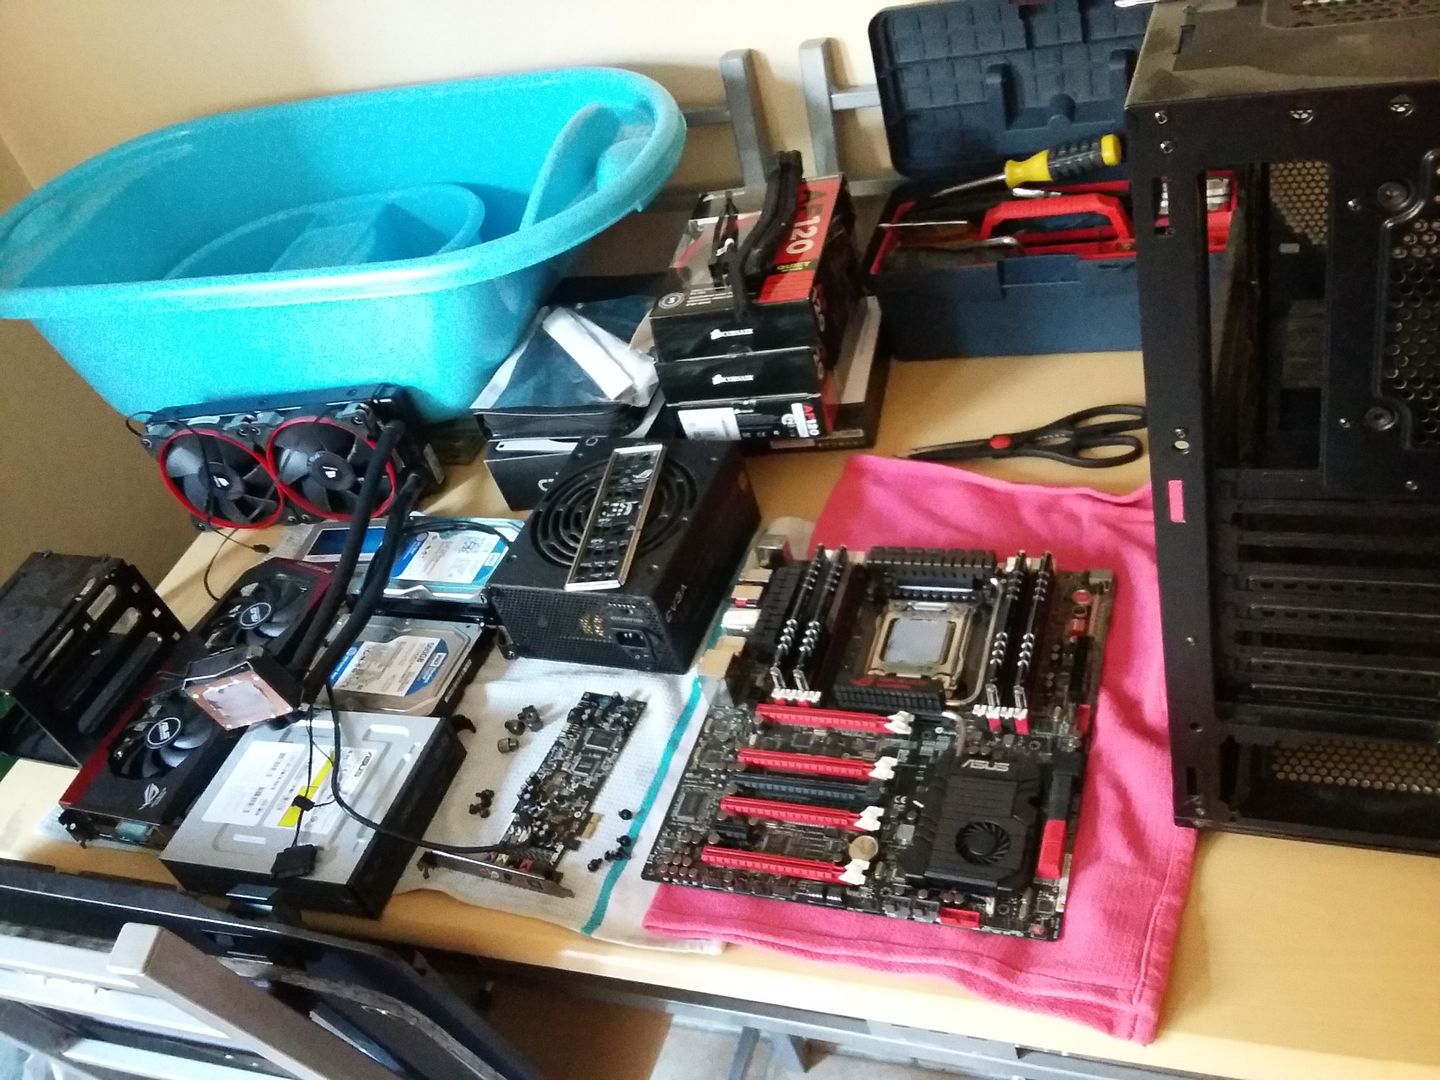
Also going into the build is a NXZT Hue LED strip and controller

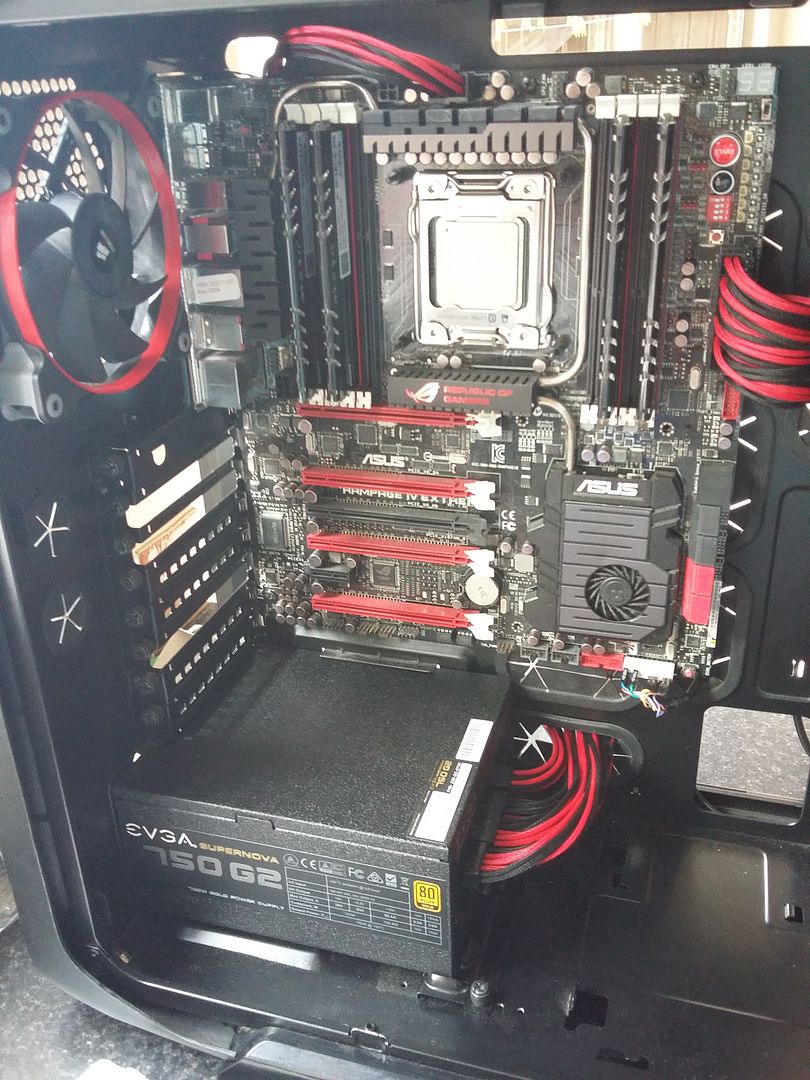
CableMod Red and black custom cable kit (pricey but was a birthday treat to myself)

MSI 980Ti.

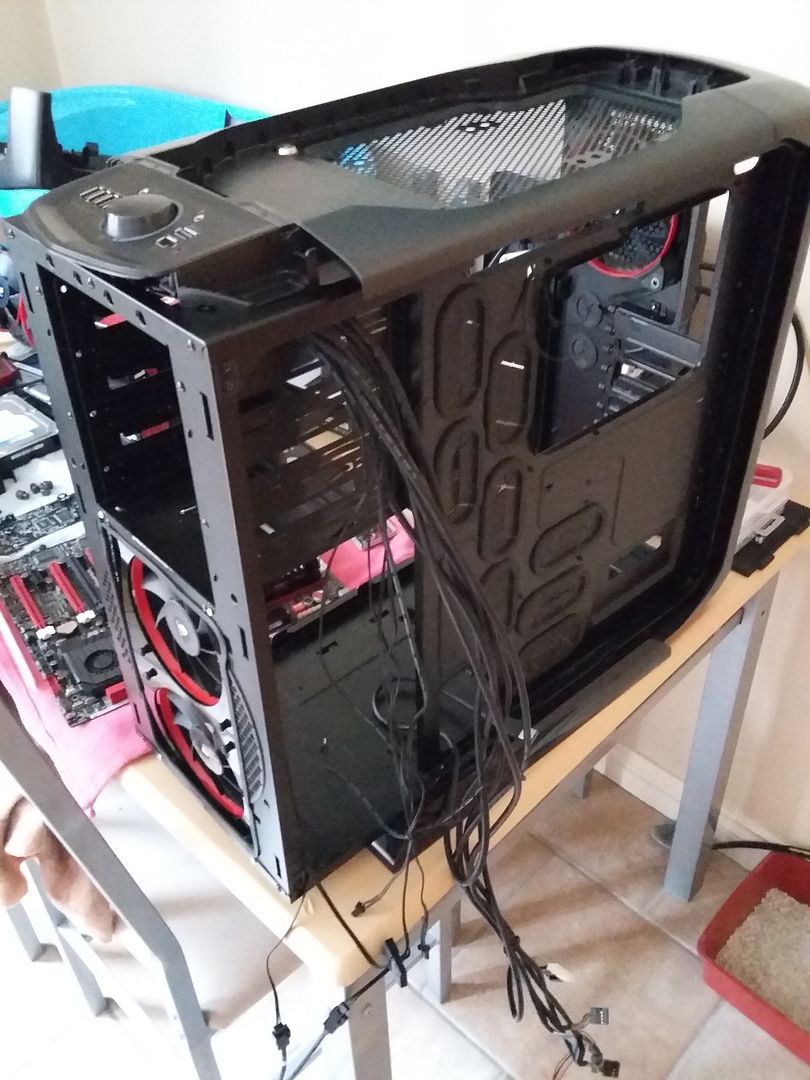
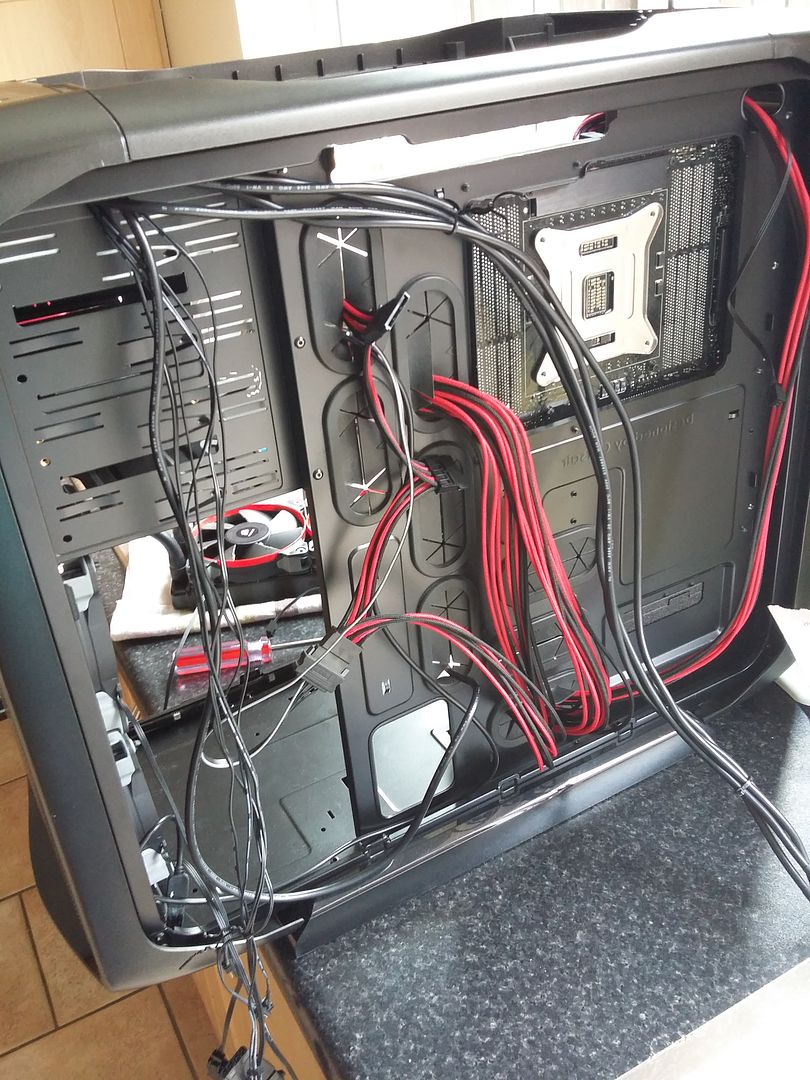
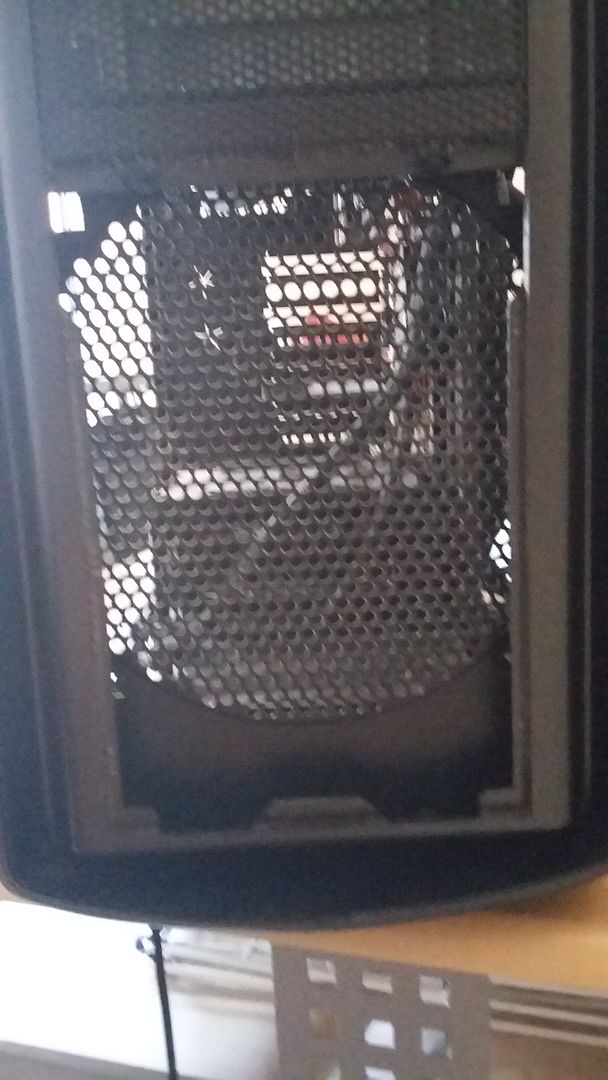
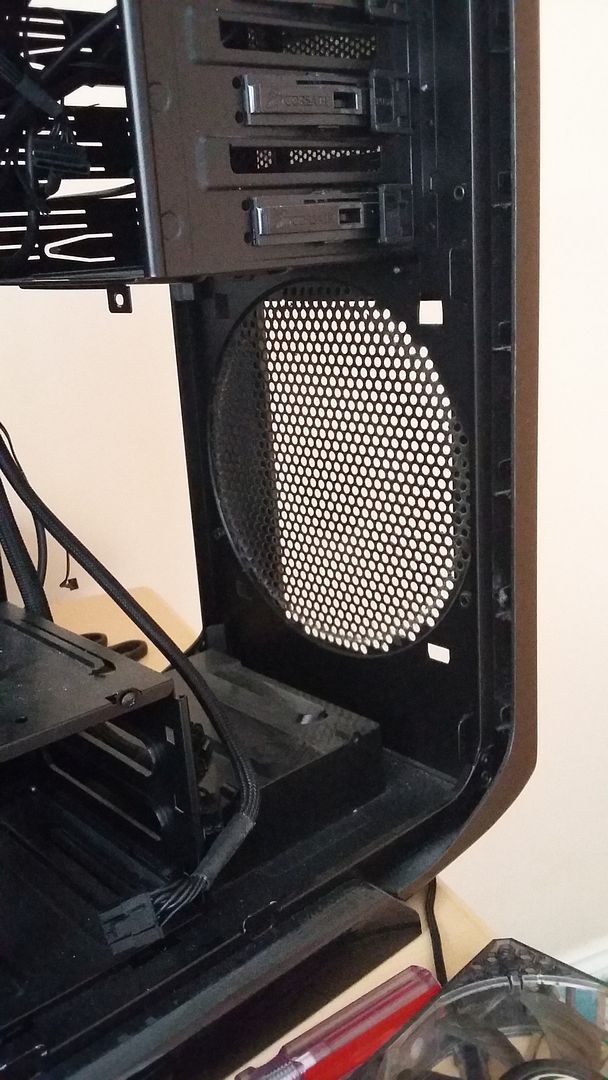
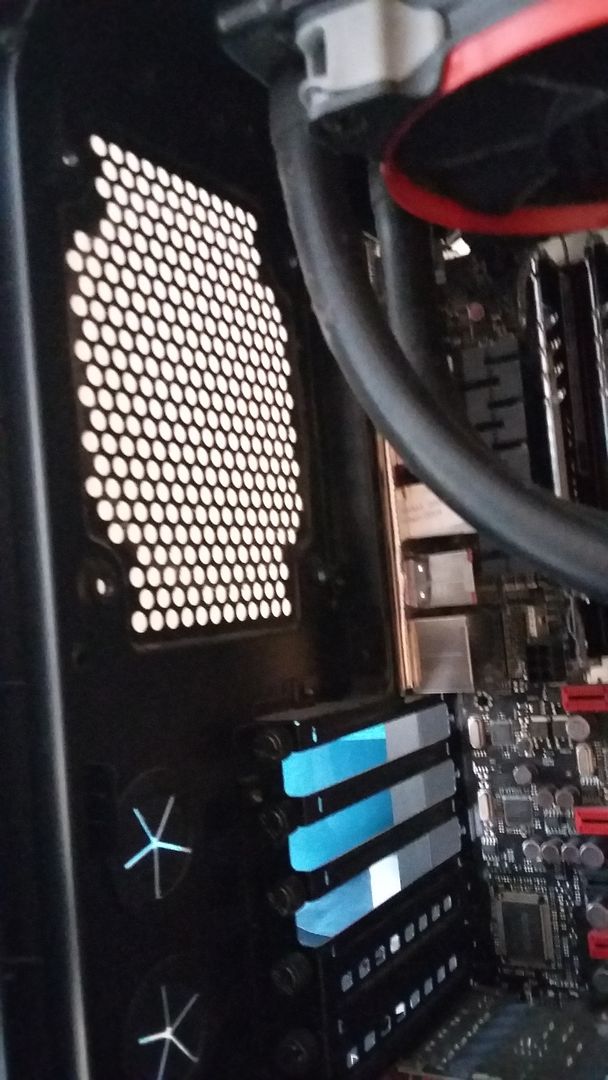
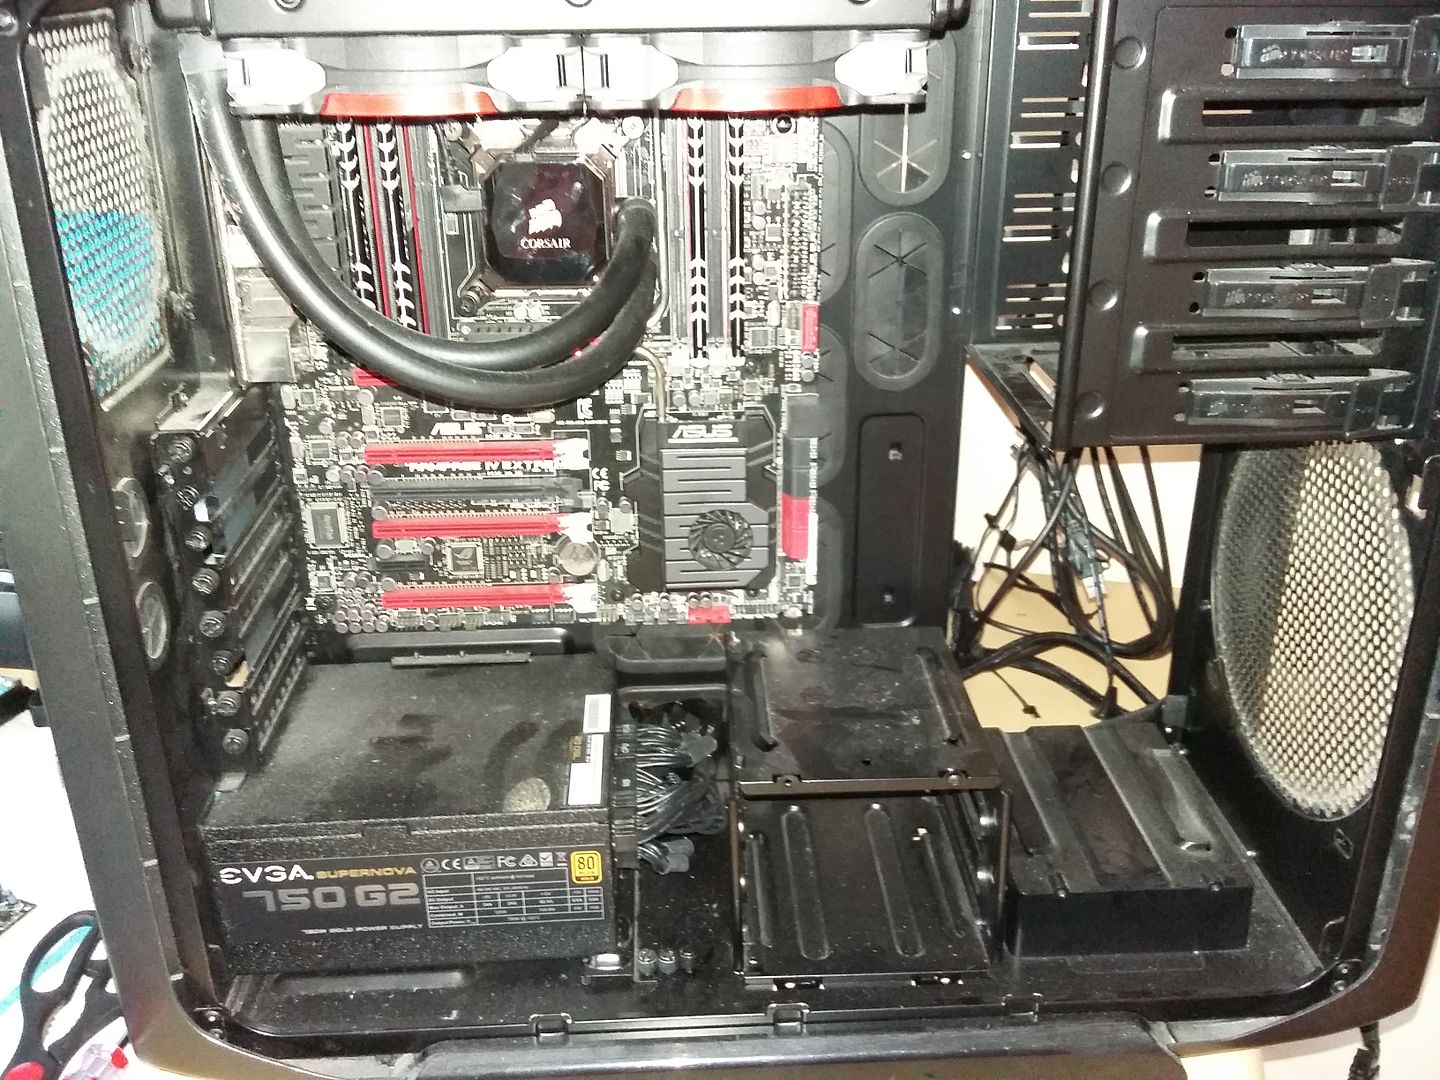
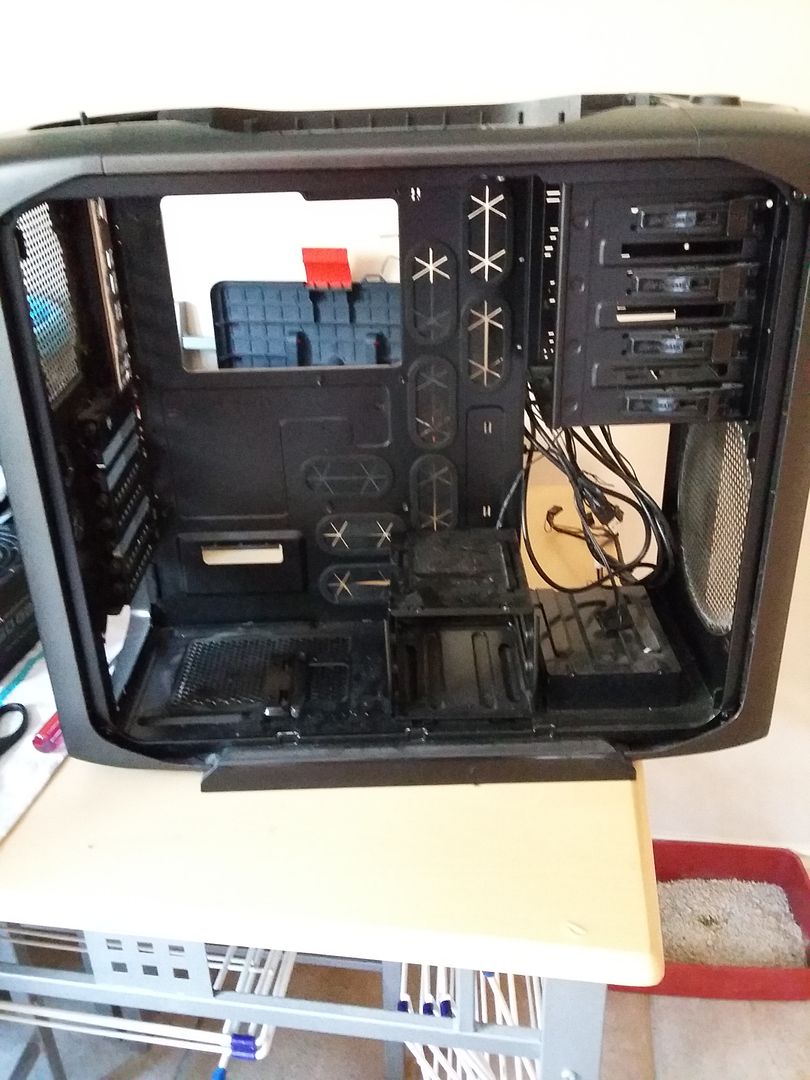
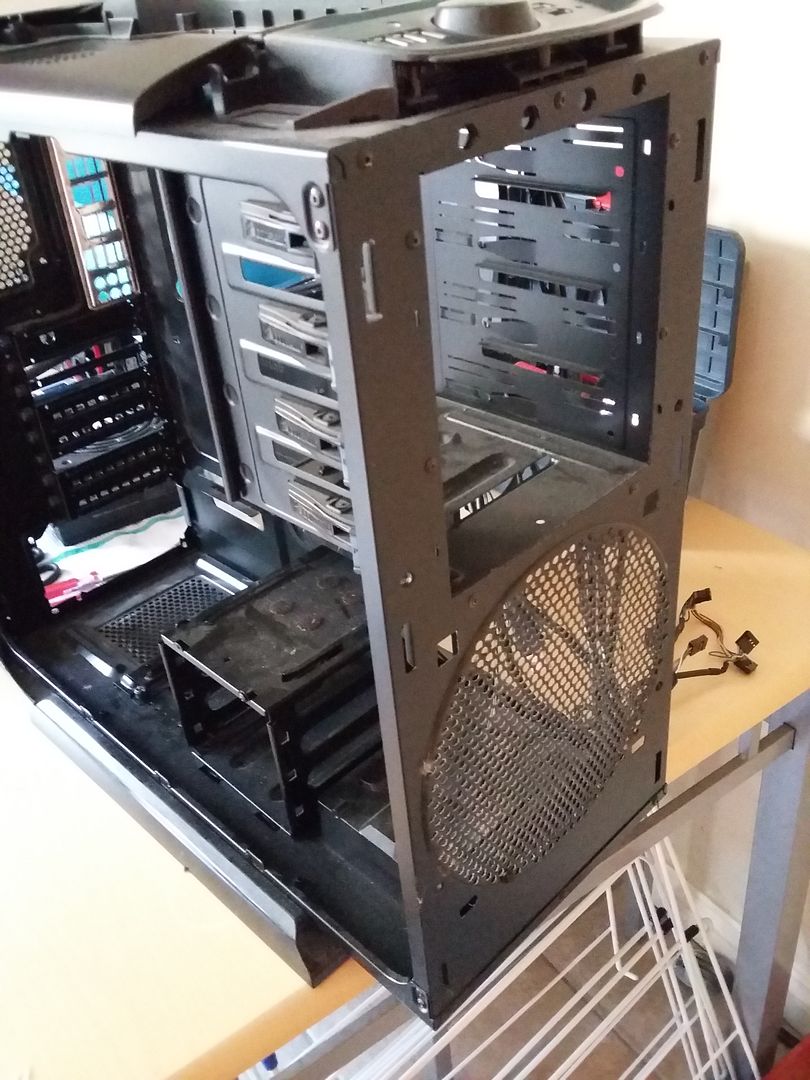
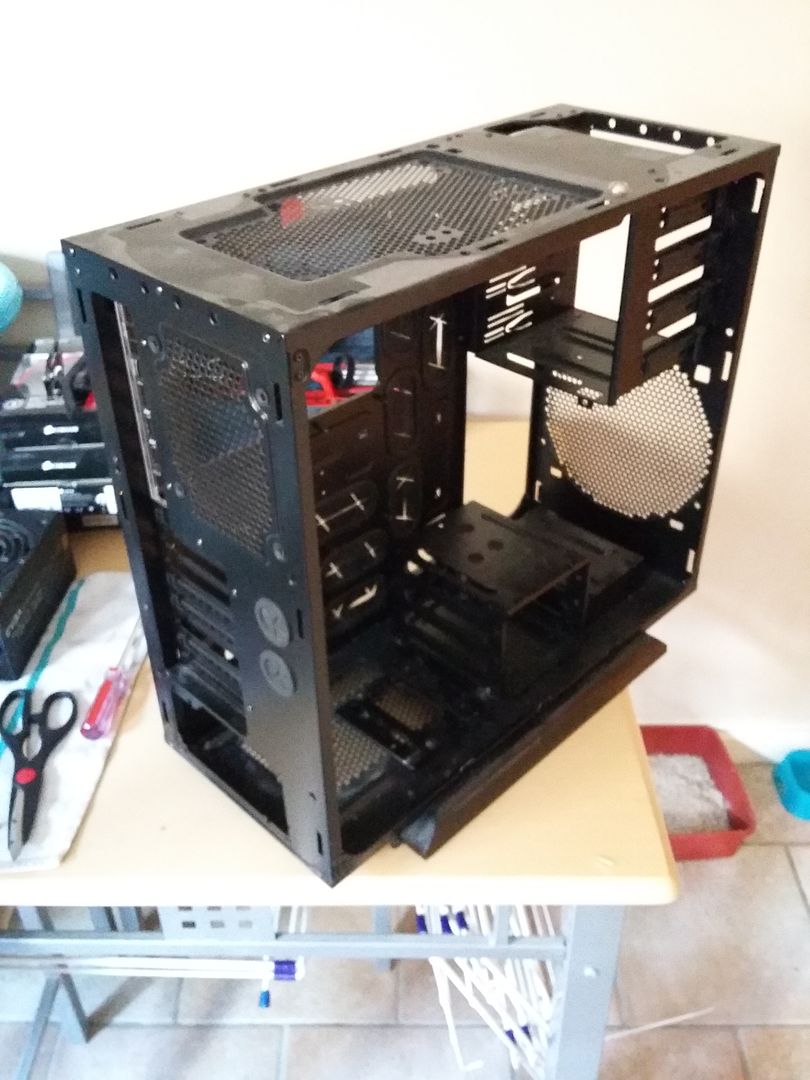
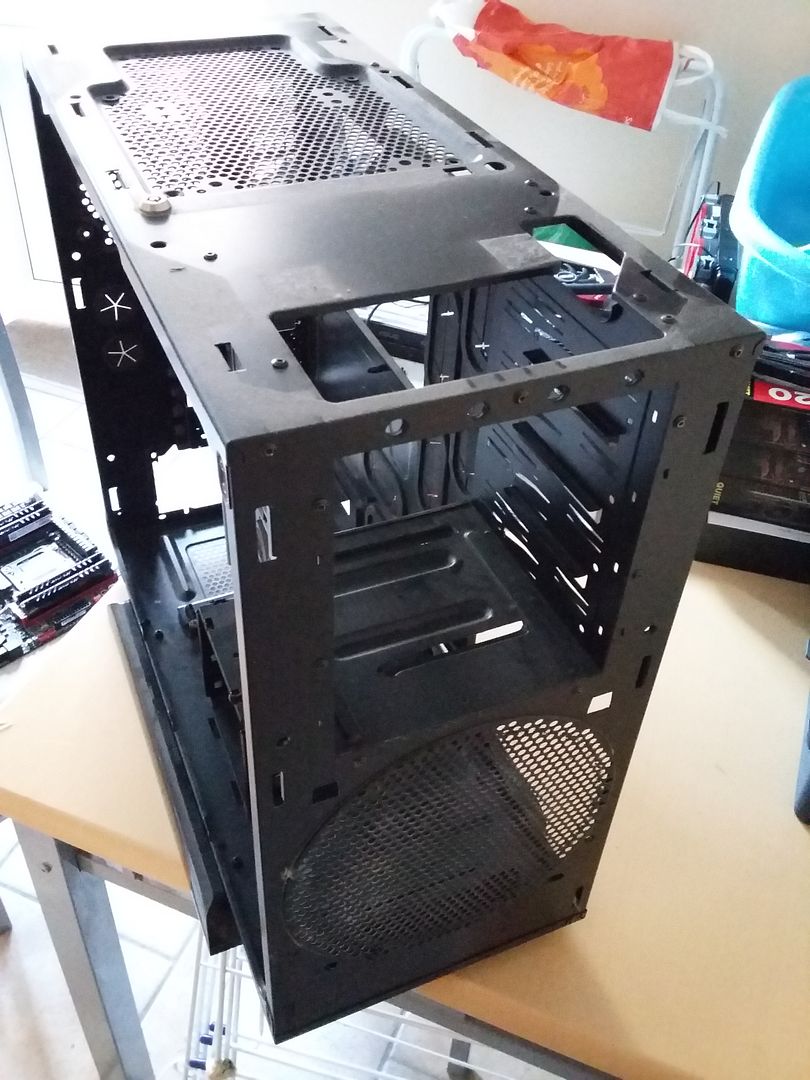
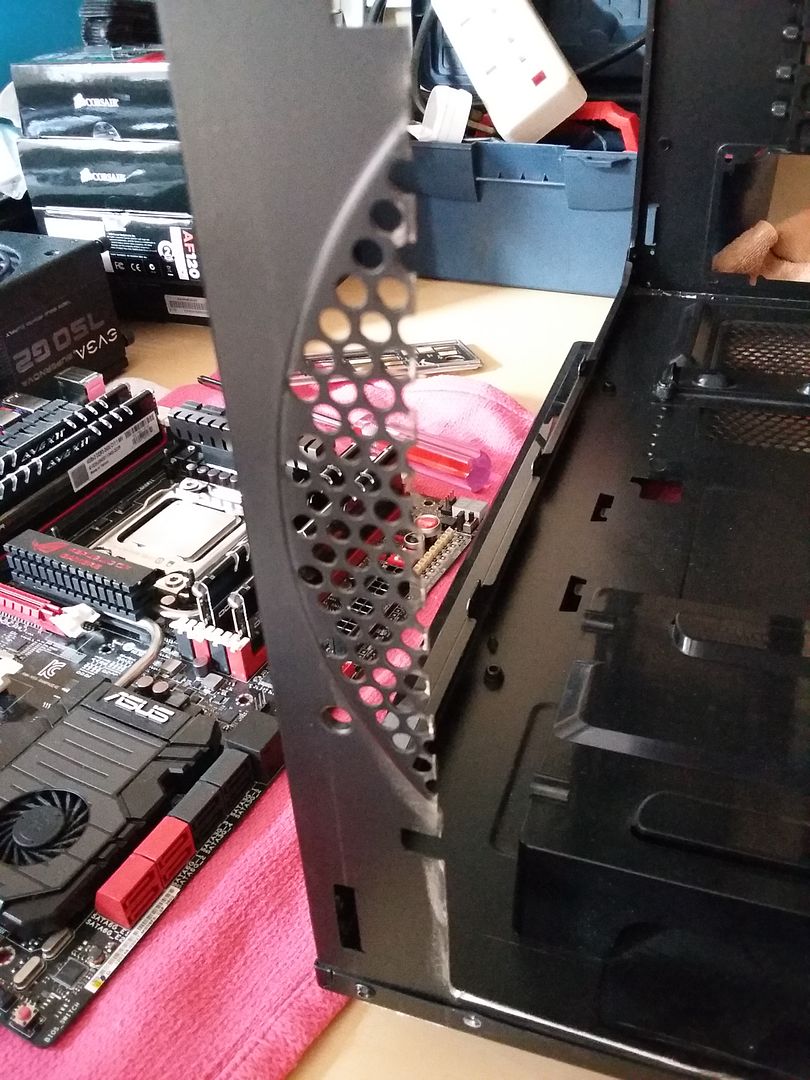
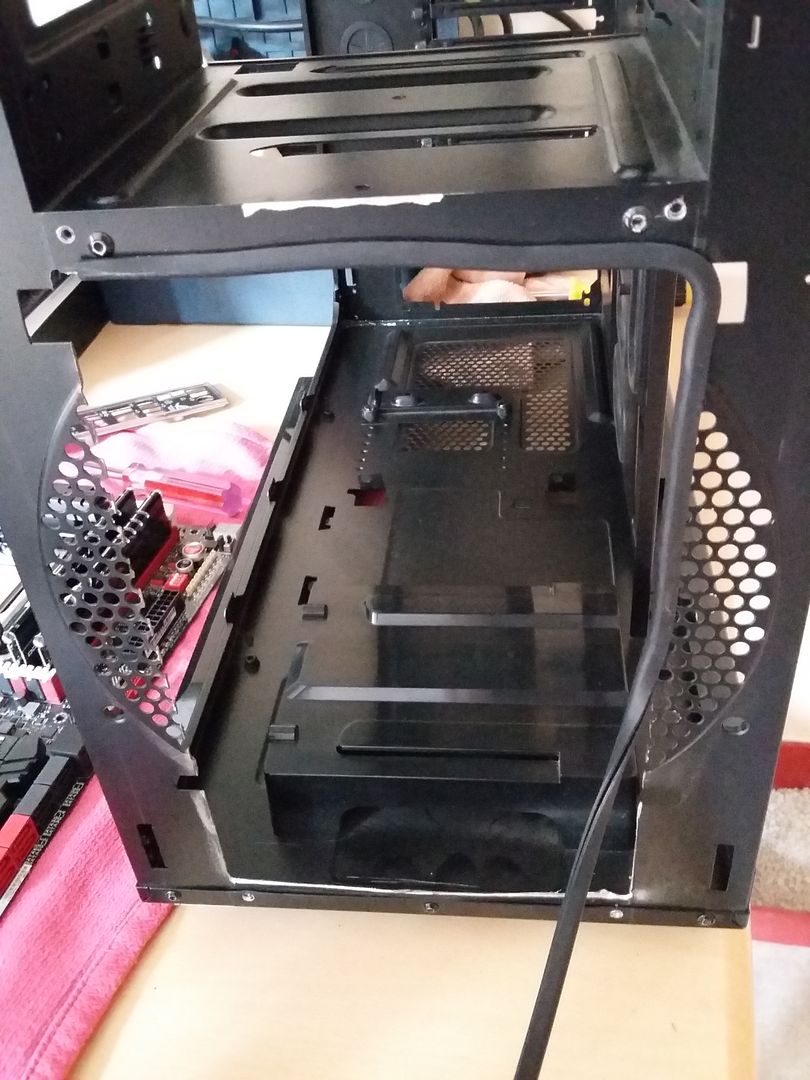
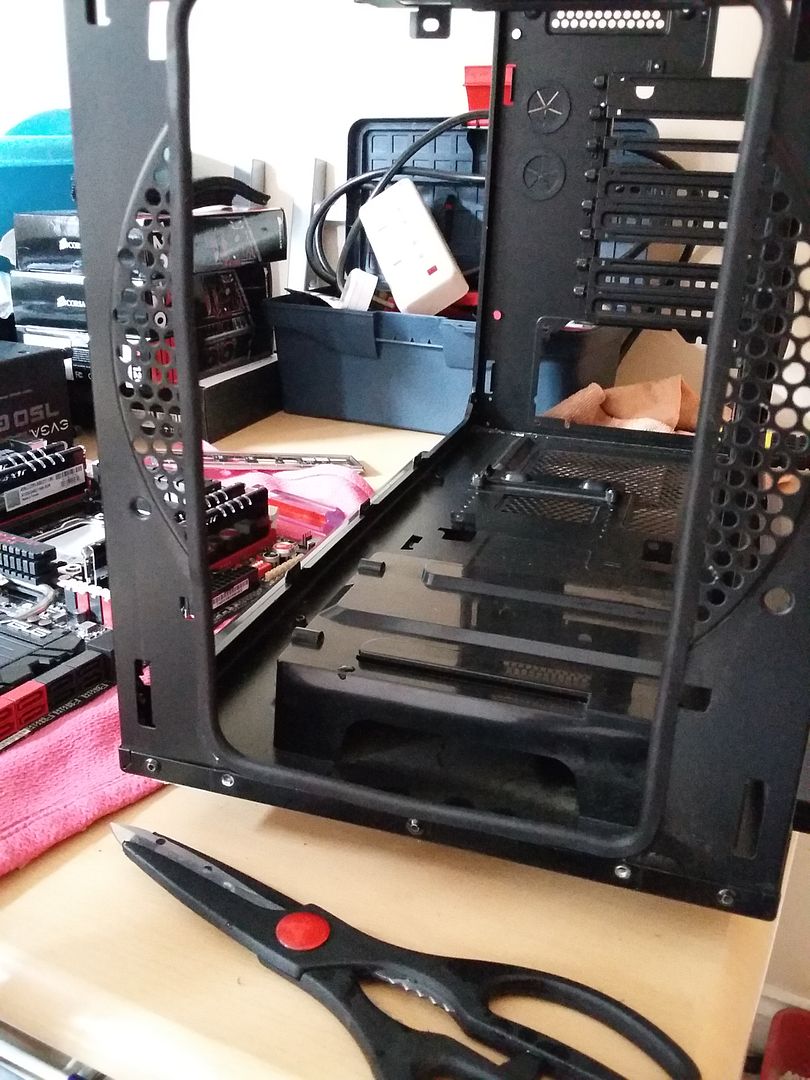
A total rebuild due to having to strip everything out to cut the case. Photo's incoming....
 
Soldato
OP
Joined
22 Oct 2008
Posts
11,506
Location
Lisburn, Northern Ireland
Ok here is a few pics of the front fan and rear fan and what they looked like. I've already started to strip the PC down before forgetting to take a few pics

20160828_112453_zpso6rvlhmn.jpg


Rear
20160828_112500_zpsd3n2zchu.jpg


Potato cam of the fans and what the inside of the case looked like with the partial red and black build colours
20160828_112920_zpszewwdgjf.jpg


20160828_113335_zpsjs4tmj9d.jpg
 
Soldato
OP
Joined
22 Oct 2008
Posts
11,506
Location
Lisburn, Northern Ireland
Ok fans removed from front and rear (excuse cat litter tray and no that's not a poop, just a wet patch which was later cleaned lol)

20160828_114842_zpsmzbvgl98.jpg


Actually decent enough fans but just didn't match the colours of my build so they had to go.


View from the front with the big fan out. This is the section that I'll be cutting out to fit the dual 120mms on a precut bit of dark acrylic

20160828_114848_zpsmpc7cr0l.jpg


Looking at the inside of the case where the front fan was, dusty so it'll be well cleaned out too.
20160828_114855_zpsuezwkiqw.jpg


Here is the rear again with the smaller 120mm exhaust taken out
20160828_114859_zpsu8fv18sh.jpg


The case now looking a bit sorry for itself now with most of the stuff removed, just need to clear it all out now to get cutting that metal
20160828_151705_zpsbobqu7ng.jpg
 
Last edited:
Soldato
OP
Joined
22 Oct 2008
Posts
11,506
Location
Lisburn, Northern Ireland
Ok I now have everything removed component wise and it's a bit bare and dusty looking
20160828_154224_zpss0dd9otn.jpg


The good thing about the 600t case, outside of its size and capacity, is the fact you can really strip it down to the bare metal by removing 3 moulded parts on the front, rear and top of the case. Here is a pic of me starting to strip off the moulded parts to get to the metal
20160828_154611_zpstjmojxqp.jpg


The fan controller part also comes out very easily. Here is the case then stripped bare....naked Corsair!!!!
20160828_155148_zpsk24sy8vw.jpg


20160828_155155_zpsuch1oqsj.jpg
 
Last edited:
Soldato
OP
Joined
22 Oct 2008
Posts
11,506
Location
Lisburn, Northern Ireland
A quick shot of the components laid out, wife not impressed that I'd taken over the kitchen table but that's what happens during a rebuild eh ;)

20160828_155427_zpsfaqoc3yp.jpg


....and yes a baby bath in the background. Not sure why I didn't move it the whole time I was doing this, it just stayed there! I've got baby twins so this build took days!
 
Soldato
OP
Joined
22 Oct 2008
Posts
11,506
Location
Lisburn, Northern Ireland
Ok back to the build

You can see the cut bit of acrylic I used as a mounting plate for the two fans. It still has the white plastic on it to stop any scratches and to make it easier to get the outline drawn for the cutting of the case too.

You can see what it will look like as I hold the mount up to where it will eventually go
20160829_182610_zpsraptxoxk.jpg


Lots of cutting and messing about before this works I can tell you. These 600t cases are really sturdy and well build. A dremel just wont do...


Quite hard to see but I used a white pencil (white colouring pencil) to mark off the bit to cut out
20160829_183230_zpshvavjsex.jpg
 
Soldato
OP
Joined
22 Oct 2008
Posts
11,506
Location
Lisburn, Northern Ireland
The dremel wasn't up to scratch and in fact I broke it trying to cut this so I had to take it into my Technology&Design department where they attacked the case with some nifty tools

20160902_105622_zpswadpiezv.jpg


Here is a pic of the case with the fan mount just sitting against the case to give you an idea of what it'll look like. I still have to get rubber U tubing to prevent any of the sharp edges from cutting myself while rebuilding the PC.


Another angle to show you the cut out...and a glimpse of the new staffroom carpet colour :p
20160902_105629_zpswj1gfijz.jpg
 
Soldato
OP
Joined
22 Oct 2008
Posts
11,506
Location
Lisburn, Northern Ireland
Ok so now I'm back home again and I need to sort out the sharp cut metal edges. A couple of quids worth of U tubing starts things off and stops health and safety nazis from screaming at me.

Sharp edges are sharp :eek:
20160902_172440_zpswonfqw9f.jpg


Here we go with the tubing around the edges
20160902_172451_zpsn0nipwrp.jpg


And we're done after a few mins
20160902_174229_zpssfm6s8kc.jpg
 
Soldato
OP
Joined
22 Oct 2008
Posts
11,506
Location
Lisburn, Northern Ireland
Now it's time to mount the Corsair AF fans on to the acrylic fan mount. I bought long length rubber fan mounts to make sure I had enough length to fasten the fans to the mount without any slackness. Need to have a solid mount to prevent vibrations.

20160903_114504_zps7sk4uqrt.jpg


20160903_114511_zpsokucrxbz.jpg


Finally we have both fans done
20160903_115404_zpsbhwy0m2n.jpg


Rear view
20160903_115411_zpsnnfacwps.jpg


I had to get a splitter as these two fans now make the case fan count up to 5 fans (2 front, 1 rear and 2 in rad on top) the 600t only has a fan controller able to run 4 fans so a splitter was sourced and works a charm :)
 
Soldato
OP
Joined
22 Oct 2008
Posts
11,506
Location
Lisburn, Northern Ireland
Time to give it a trial fit without any screws or bolt and see how it fits...
20160903_121650_zpsoo8mgohx.jpg


Not bad effort, need to file a few things down a little to get a snug fit against the U tubing...and it fits even better so it was attached to the case properly
20160903_121659_zpsd9ivrlmc.jpg


What it now looks like from the back of the case looking forward
20160903_121708_zpsjzfevi5i.jpg


Time to get the rear fan on as well
20160904_162003_zpspoy5dbrg.jpg
 
Last edited:
Soldato
OP
Joined
22 Oct 2008
Posts
11,506
Location
Lisburn, Northern Ireland
Right time to bling it up a bit with some subtle red lighting to enhance the red and black build colours.

Weapon of choice is the cheap but very capable NZXT Hue RGB controller and LED strip.

20160904_163813_zps10hgihj8.jpg


Unboxed and showing you what you get for your cash.
20160904_163857_zpshinmltoq.jpg
 
Soldato
OP
Joined
22 Oct 2008
Posts
11,506
Location
Lisburn, Northern Ireland
Next comes putting in the components again along with the new red and black cables from cable mods. I actually forgot to take pics until I was well underway so lots done...

I had ordered cable combs from OCUK but even the 3mm ones were too small and the custom cables kept slipping out. A real shame as given the time and effort I put into the new rebuild I wanted the cables to be neat and not a red and black spaghetti, as that's what it kind of looks now to me :(

I really need 2mm combs for these cables but OCUK doesn't do them.

20160910_133601_zpszubwsy39.jpg


This is just the start of the cables that will be need to be tidied up later...lots of them and not even finished yet!
20160910_133609_zpscev0kiwf.jpg
 
Soldato
OP
Joined
22 Oct 2008
Posts
11,506
Location
Lisburn, Northern Ireland
Next up is to install the H100 again and clean the radiator. My word this was a mess.

Looks fairly normal with the fans still on it...
20160910_133617_zpsszen2pci.jpg


But then...I took one fan off to see beneath and look at the dust!
20160910_133622_zpstrvz74mw.jpg


Both fans off lol....that's a disgrace haha
20160910_133638_zpssjnzakfn.jpg


All cleaned up though with a soft brush and some air jets and I'm putting the fans back on...
20160910_134331_zpsrjoeywb8.jpg


...and in she goes to the top of the case roof with the SP 120mm fans attached to the fan controller
20160910_135443_zps3uiqv1ll.jpg


20160910_135501_zpsmvliwr8t.jpg
 
Soldato
OP
Joined
22 Oct 2008
Posts
11,506
Location
Lisburn, Northern Ireland
Next was mounting the cpu cooler to the cpu itself (i7 3930k) I used the Cooler Master Extreme Fusion X1 thermal paste and got things on fairly easily.

20160912_211140_zpshmna8h6e.jpg


Also added the hard drives bay and put the SSD on top. The colour of the SSD is annoying as it doesn't fit so I'll look into hiding it somewhere in the case.

The LED strip went around the case edges. The 600t has a groove that the LED strip fitted into perfectly. You should be able to to see it starting at the front beside the two front intake fans and it goes under the two fans and around the whole side of the case and back down the side of the DVD and Controller side, until the strip runs out.
 
Last edited:
Back
Top Bottom