Associate
- Joined
- 10 Jul 2008
- Posts
- 741
- Location
- Huddersfield/ Stokesley
What did he use to W/C it?
What did he use to W/C it?

ooooooh cheers for that, will have to have alook ito it. So his 40 degrees was that loaded or idle?
I think he would have get better results if he mounted it outside using a rad box
")


right here we go.
Update time.
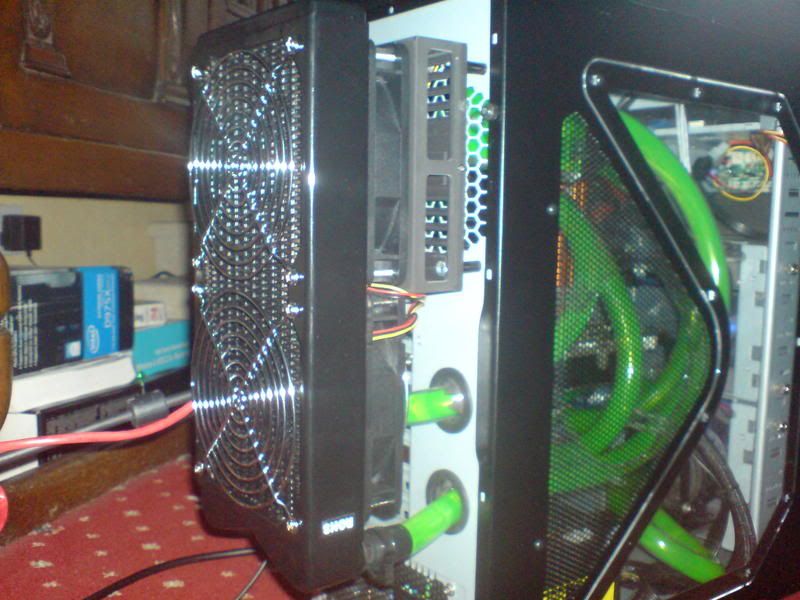
As mentioned i got the rad sorted out with a couple of Yate loon fans on. Also having done some reading i am initially going for a pull configuration with the fans pulling air from outside the case through the rad. Decided also to fit some form of shroud on the (potentially) produce a more even airflow and reduce any dead spots around the centre of the fans. No shround but basically used the outside of a couple of old broken fans!!
Next part was to drill 2 holes in the top of the case to allow the tubing to pass through from the ressy to the rest of the case. This was done using a simple 16mm drill bit.
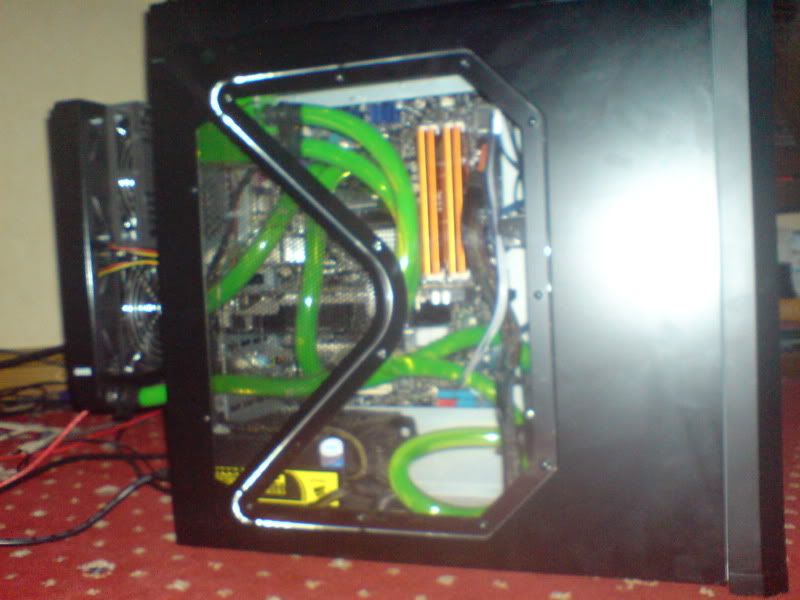
So case is basically prepared now so it was a case of stripping down the old motherboard/cooler etc. Cleaned up the previous gunk off the cpu and also decided to remove the cooler on the Northbridge and replaced the stock thermal gunk with some new fresh MX-2 thermal paste. Stock cooler put back on the board - no need to water cool this as well i decided
Had previously lapped my Q6600 anyway so no need to do it again!
Put the D Tek water block on the 8800gt. Only issue i had here was i had to remove 2 of the ram heatsinks to allow the block and barbs to fit. Will have to keep an eye on the temps and see if any issues with the heat from these but at the moment the block is fitted fine.
More to follow shortly


looks quite neat -
hows your cables
out of interest - why didnt you go for a full cover waterblock on the gpu?
@ AlanJ, what equipment did you use to W/c it? also have you got any shots in side the case so i can see where you put stuff?
Thanks
what are the temps your getting?