Lace paint - a how-to

Permabanned
Joined
9 May 2005
Posts
20,834
Location
NE8
Courtesy of Seth (owner of an awesome Hillman Minx wagon daily with DIY coilover conversion, trick wheels and perfick stance) on RR, thread here.

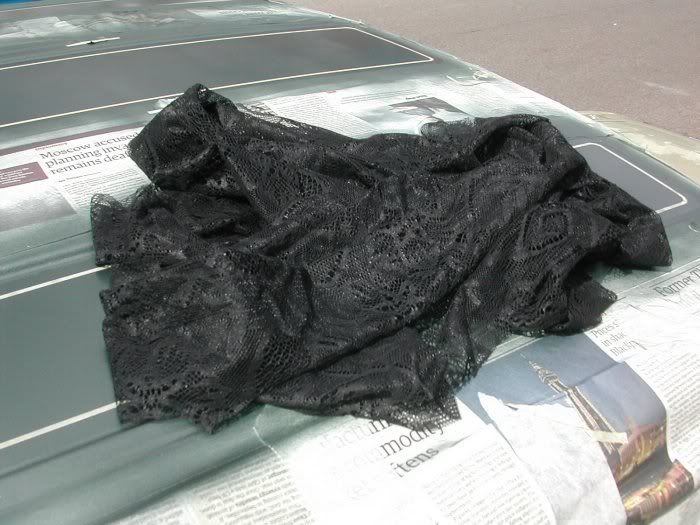
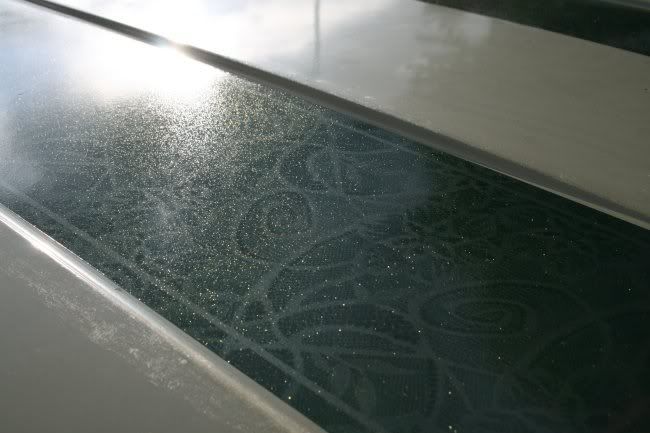
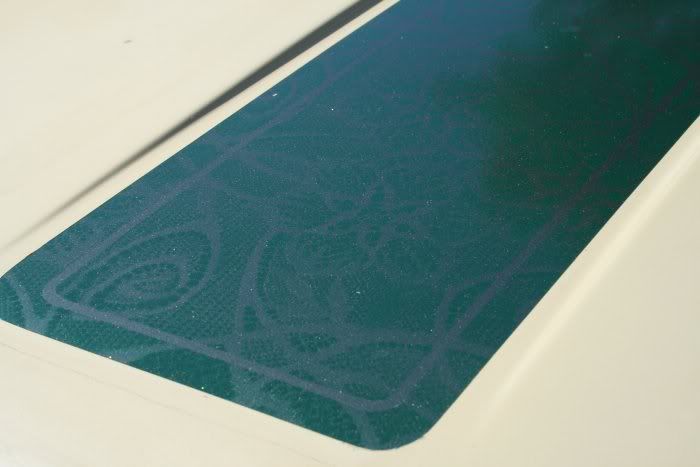
So a couple of weeks ago forum member Skinny started this thread on Lace paint. While I had pretty much worked out what I was going to do on the rest of the Minx's bodywork I had been having trouble deciding what to do on the roof. Being a wagon there are ridges in the panel to give it some stiffness but these make any paint design tricky as it wouldn't look right if it crossed those lines. That thread reminded me of lace work and made my mind up! Lets have a go. How hard can it be?!

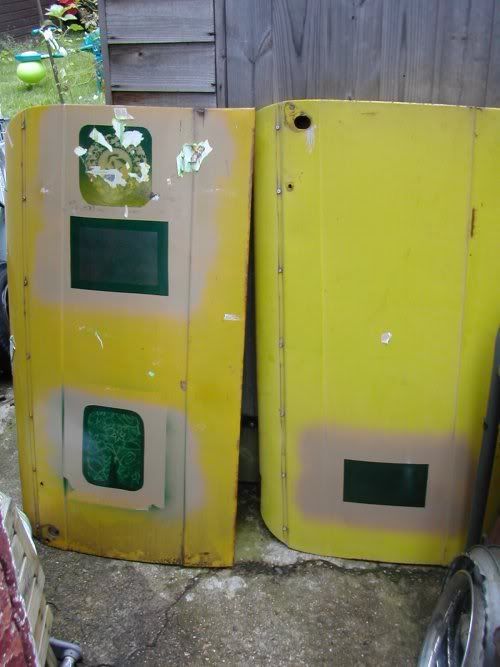
I spent some time looking at the pictures in the thread and any others I could find to see what I liked and what I felt "worked" and why. I also knew I wanted to use the same green with gold flake paint I used on the wheels. A few trials on a couple of scrap Herald doors (the first using a paper doily before the lace turned up) and my desire to keep it subtle rather than lairy led to the use of a grey/green base colour before applying the lace. This would result in a more time consuming process but I felt the results would be worth it.

Dscn0092.jpg


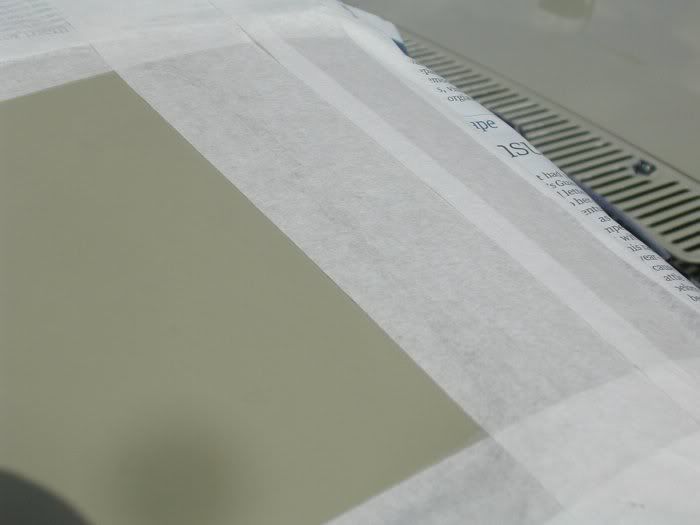
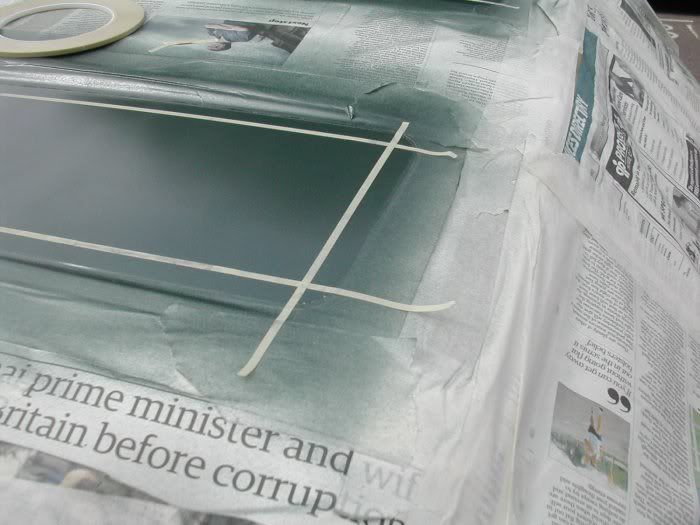
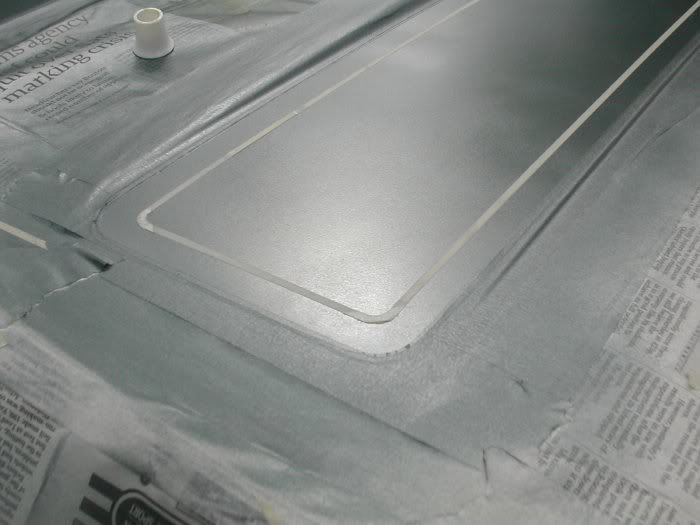
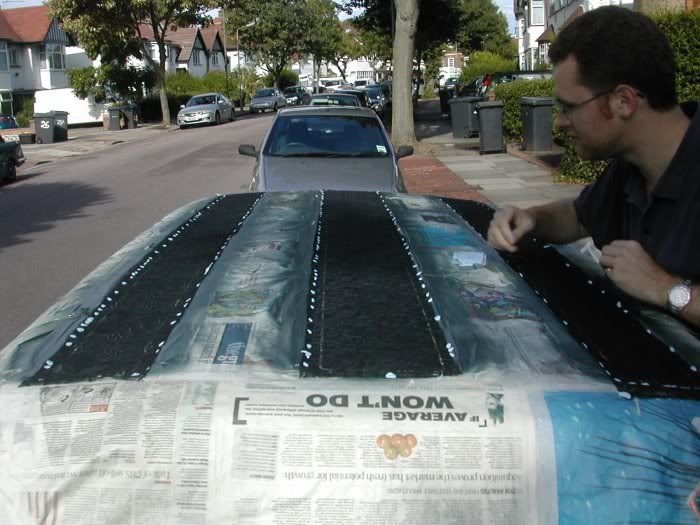
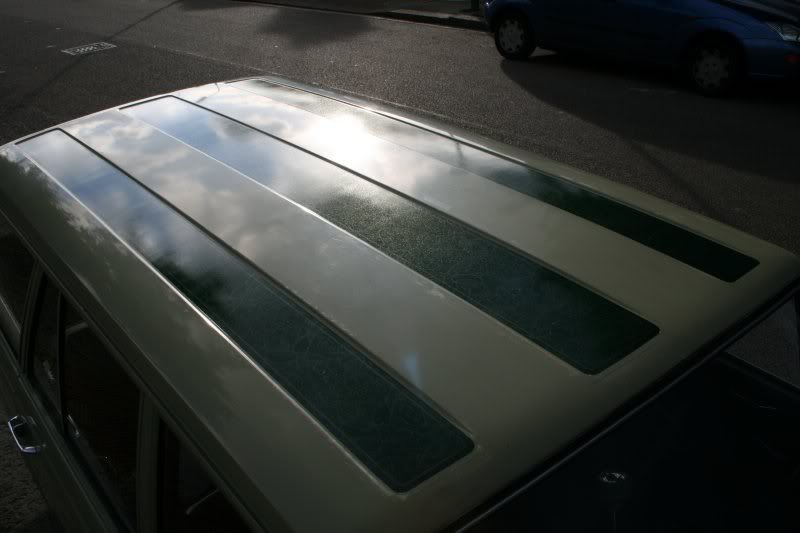
Eventually a day came that looked like it would be dry and not too breezy considering the outdoor location of my "spray booth" First to mask was the outer border of the base coat that would also be the extent of the lace-work.

Dscn0042.jpg


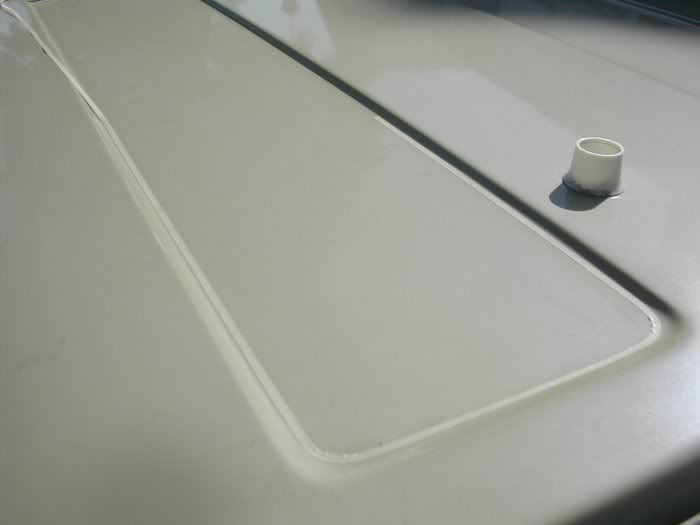
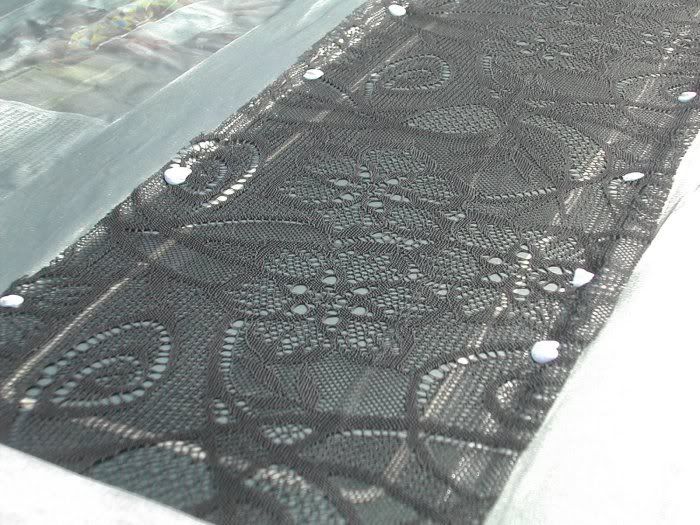
The tape is 1/8" (3mm) 3M Fineline and while it does go round quite tight bends I was pushing it a bit hence the slight ripple on the inside radius. These were later flattened by cutting the tape with a sharp scalpel at each ripple and pushing it flat.

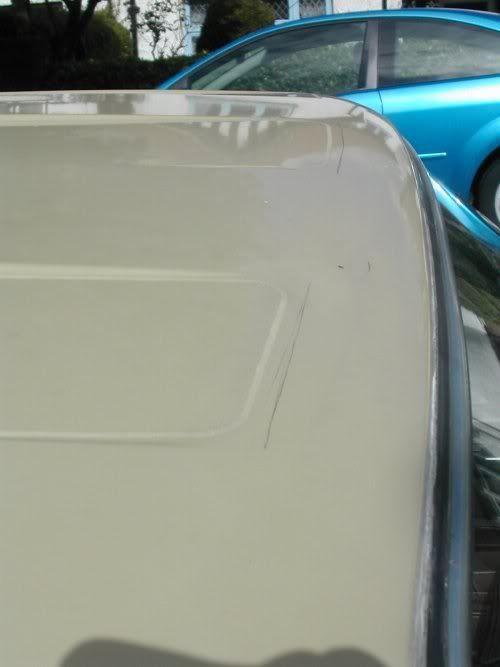
At the back of the roof there were panel lines to follow for the curves but at the front I had to use something to mark the corners to keep a consitent radius

Dscn0043.jpg


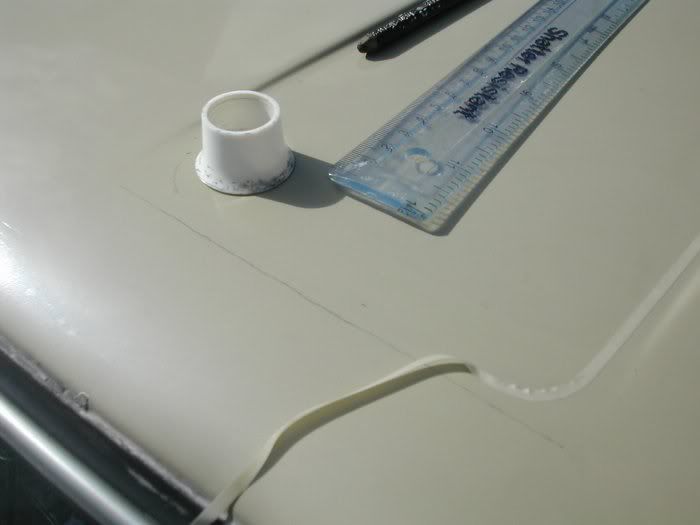
I also drew guide lines so the front ends of the panels copied the curve of the top of the windscreen.

Dscn0051.jpg


I used a ruler all round while laying the tape to make sure the lines were parallel and eye-balled along the length of the roof to check for straightness of the long runs, correcting as necessary. Unreeling a length of tape and then pulling it taught while lowering it towards the car helps get the lines pretty straight at first attempt.

Once the outlines where in place it was easy to lay more tape and newspaper down to fill in the rest of the masking. At the ends of the roof wide tape was layed over the boundary line....

Dscn0052.jpg


..and then a scalpel used to cut through this down the middle of the fine line tape. The waste then peeled away.

Dscn0053.jpg


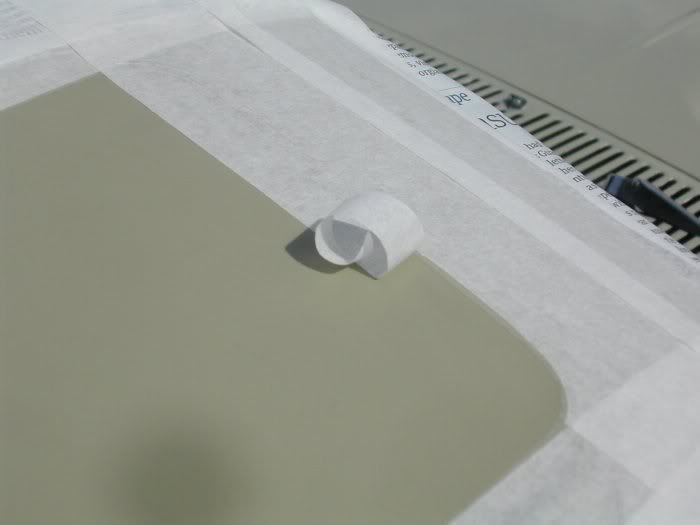
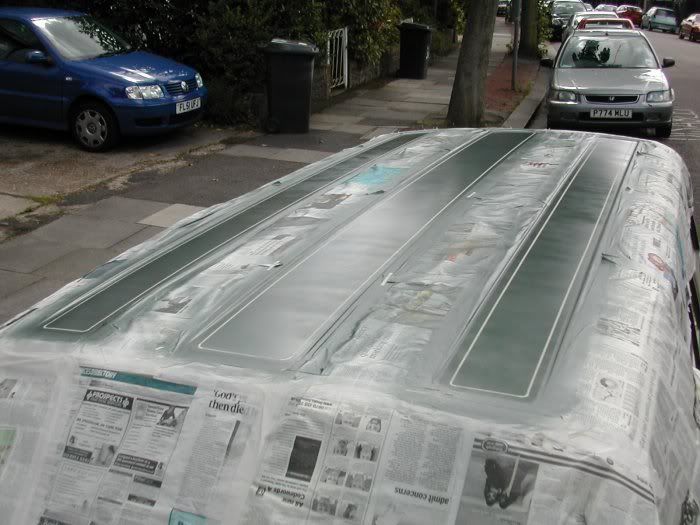
That is the method I have always followed in the past when masking the flames on other stuff/cars.

With more newspaper applied the spray booth was pretty much ready for paint. I used 1500 paper to key the original paint being careful not to damage the edge of *** masking. It was then wiped down with several goes over with a tack cloth some kitchen roll.

Dscn0057.jpg


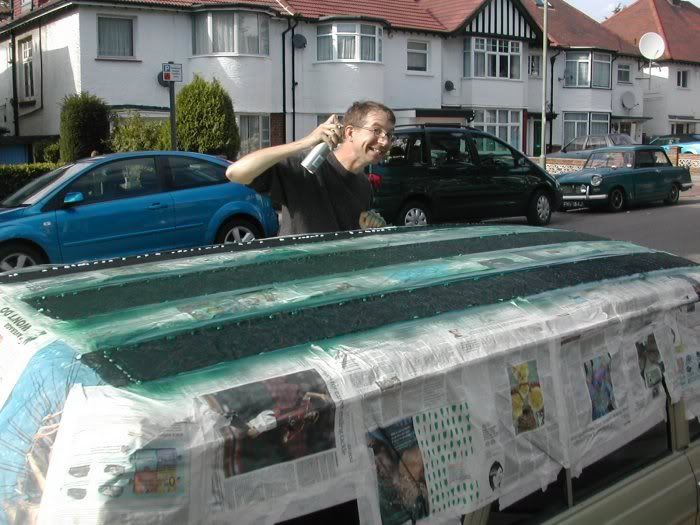
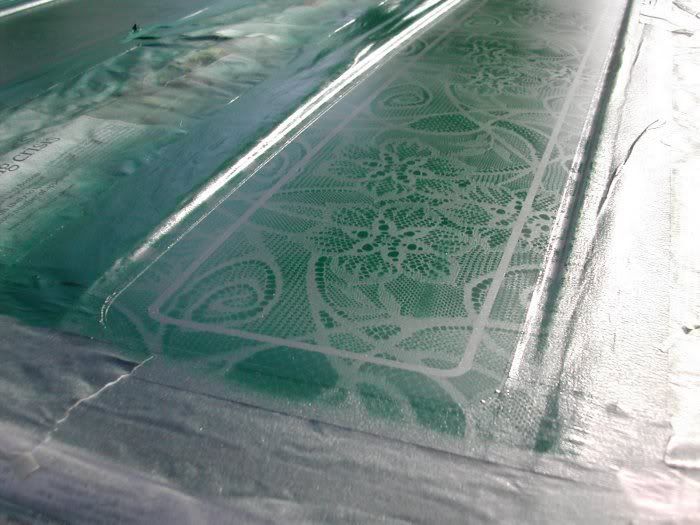
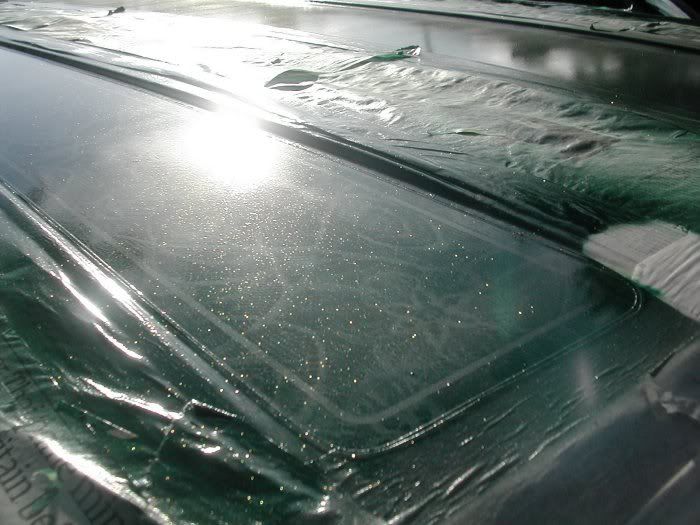
First to go on were two coats (first one pretty light as per photo) of Ford Forest Green Metallic. This was to act as the background colour of the lace.

Dscn0059.jpg


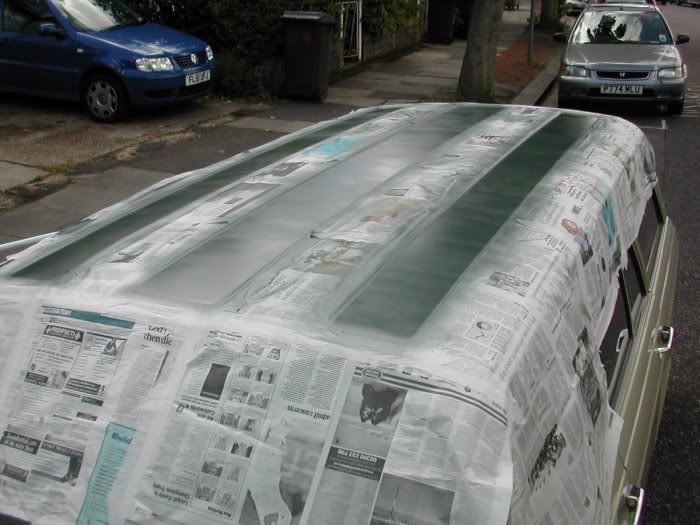
This paint was going to have to withstand some masking tape over the top and while my test panels had shown that it wasn't pulling up even if the tape was applied as soon as it had got touch dry I opted to leave it an hour before continuing.

*Tea break*

*n
 
From reviewing the various photos of lace paint it seems a border of some sort is a good idea. More fineline tape was layed down (Cheers Paul!) parallel to the outside edge so that this would end up as a "Forest Green" line without lace.

Dscn0060.jpg


Square corners obviously wouldn't cut it and the radii needed were too tight to curve the tape round so thicker tape was layed across the corners, the inner and outer radii drawn on and then cut using the scalpel.

Dscn0061.jpg


After quite some time this was the status of proceedings.

Dscn0062.jpg


On with the fabric!

Dscn0065.jpg


You may notice it was sunny in that photo. It didn't last. Typical summer weather had to make things difficult. Soon after getting the first panel of lace fixed down the car breifly tool on a shanty town appearance as the heavens opened. Handy roof rack, cycle carrier, Herald doors and cardboard to the rescue. Kinda. After the storm it was apparent the roof had got wet in various places and the lace was sodden so we had to peel it off and start again with a fresh piece.

Dscn0066.jpg


We discovered when laying that first piece that because of the closenes of the roof ridges and the fineness of the lace design masking tape wasn't going to be any good at sticking it down. PaulH to the rescue with the ideal solution. Bluetak!

Dscn0067.jpg


Here's a close up.

Dscn0069.jpg


The blue tack was used mostly through the larger holes in the lace to tray and pull it slightly taught over the paint. The looser it is the less defined the pattern will be, and again I knew from my practice goes that this man made fabric was going to shrivel a little once the paint hit it.

Wooo! Lets get to it with the Peugeot Conifer paint as used on the wheels (chosen due to the Pug/Talbot/Chrysler/Rootes connection ;))

Dscn0071.jpg


Off came the lace and bluetak to leave the fairly matt looking pattern with border tape still in place.

Dscn0072.jpg

*n
 
The border tape removed resulted in this.

Dscn0077.jpg


At this point I could get lairy with the flake (actually Plastikote Glitter paint). The technique I used was to lay down a coat of clear and then dust on some flake, spraying lightly and randomly on to the tacky clear. Then another light coat of clear to properly stick the flake as it had fallen - a heavy coat at this stage "melts" it so it all falls flat. Heavier clear coats can follow to try and bury it all and get a more even finish.

Dscn0079.jpg


A little while later it was time to peel off all the masking!

Img_5861.jpg


Yay! All done!

Img_5885.jpg


Img_5881.jpg


The metallic base coat gave an interesting result as it seems to change colour depending on your viewpoint, almost making the pattern disappear from certain angles.

Img_5892.jpg


It does look best with the sun on it though ;D

Img_5890.jpg


Now I might have to change the designs on the rest of the car!

Ackowledgements.

Skinny - Lace Paint Thread

Halfords - paint

Father in law - purchase of a broadsheet

PaulH - demon patience, colour choice and fish 'n' chip consumption

Mrs Seth - demon patience and thinking silly stuff like this is cool.

Who says you need expensive kit to get great paint? :D

*n
 
That's awesome. I have been watching Overhaulin on DVD and they did this on one of the cars. Love the effect, pretty awesome for a halfords rattle can.
 
Last edited:
Not something i'd put on my car, but thats a great effect and finish.

Good walkthrough and write up to boot. Good find.
 
[TW]Fox;12316472 said:
This thread does, obviously. Unless you count your grans curtains as a pattern on your car 'great paint'.

I prefer your grans curtains. They have a more quality feel ;)

It's a very popular technique and used by many of the top US custom car designers/fabricators (whatever you call them). They just use a bit of old lace material.
 
[TW]Fox;12316472 said:
This thread does, obviously. Unless you count your grans curtains as a pattern on your car 'great paint'.

It's a classic 'kustom' paint effect and fits the car and the car's style perfectly. What's more, he got a great result using rattlecans in the street.

*n
 
I rather think he hasn't - rattle cans in the street will produce an acceptable result but never a great result. You can't beat a proper bodyshop.
 
[TW]Fox;12316630 said:
I rather think he hasn't - rattle cans in the street will produce an acceptable result but never a great result. You can't beat a proper bodyshop.

I've seen cars win concours that were painted in the street.

You can't make such a blanket statement.

*n
 
Because pro kit is a time saving and fool proof environment for high volumes of insurance and customer work. I've known people paint with a roller on their driveway and then used wet sanding and rubbing compound to get a smooth durable finish.
 
Not my choice of colours but it's got the desired effect. If only you could get kandy flake green in a tin... Nice to know Plasticote doesn't wrinkle up when you put celly on it though :)
 
Because pro kit is a time saving and fool proof environment for high volumes of insurance and customer work. I've known people paint with a roller on their driveway and then used wet sanding and rubbing compound to get a smooth durable finish.

Exactly. Anyone with a modicum of training on the kit can blow over a panel or car with pro kit. To get an equivelant result with 'lesser' equipment requires a lot more skill and artistry.

Christ, cars painted in celly with brushes usually look better than most of what I see with a 2k blowover.

*n
 
It's a classic 'kustom' paint effect and fits the car and the car's style perfectly. What's more, he got a great result using rattlecans in the street.

*n


Somtimes i think the word "retro" is used to disguise badly modifying crap cars

But in some cases, they do it really well and produce really good results. This is one of them.

Really fits the car. Excellent result considering the method used.
 
Back
Top Bottom