Ayrton's Mclaren finished (Tamiya 1/20)

Soldato
Joined
17 Sep 2003
Posts
3,431
Hi all,

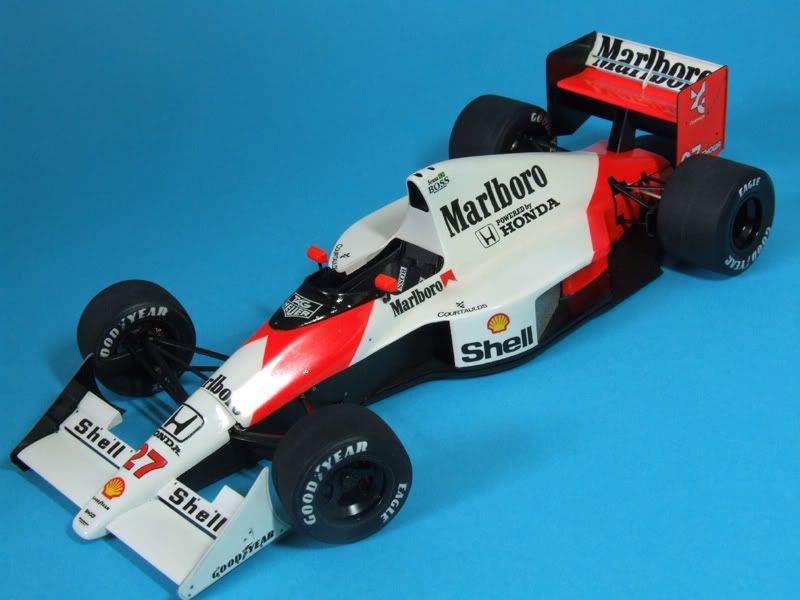
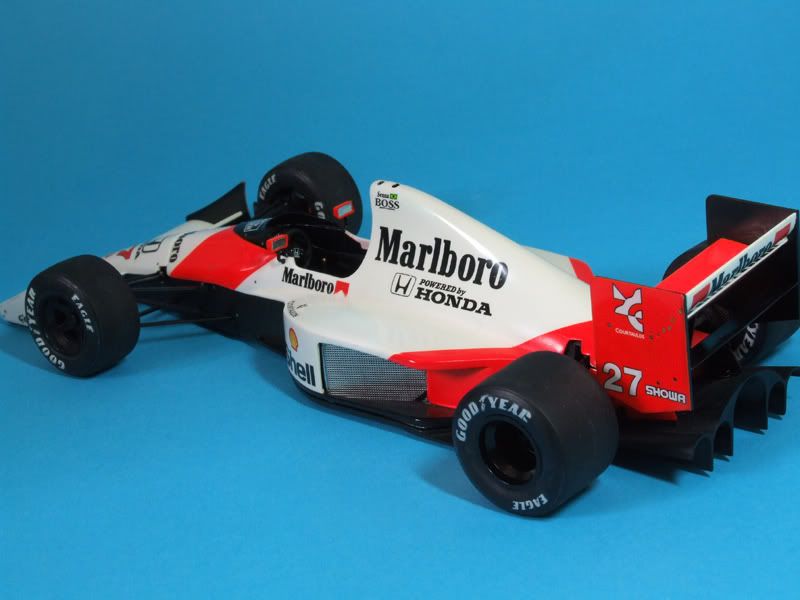
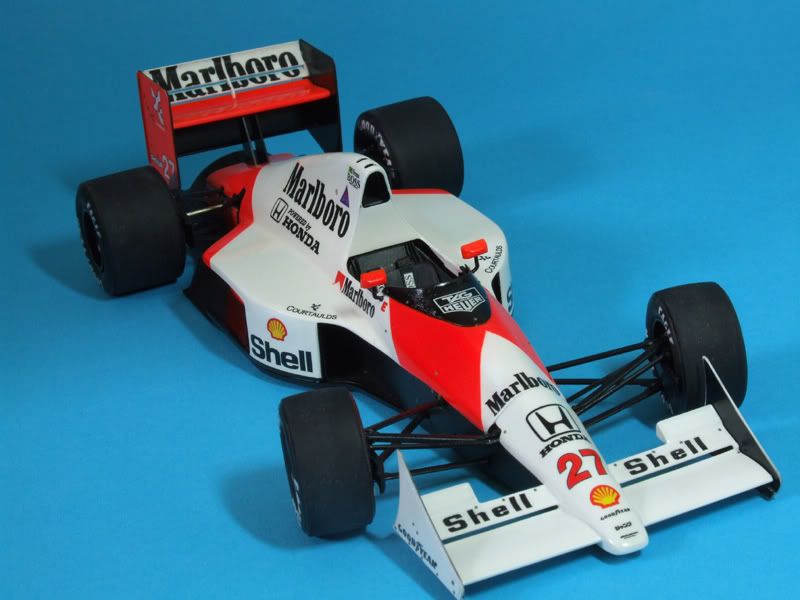
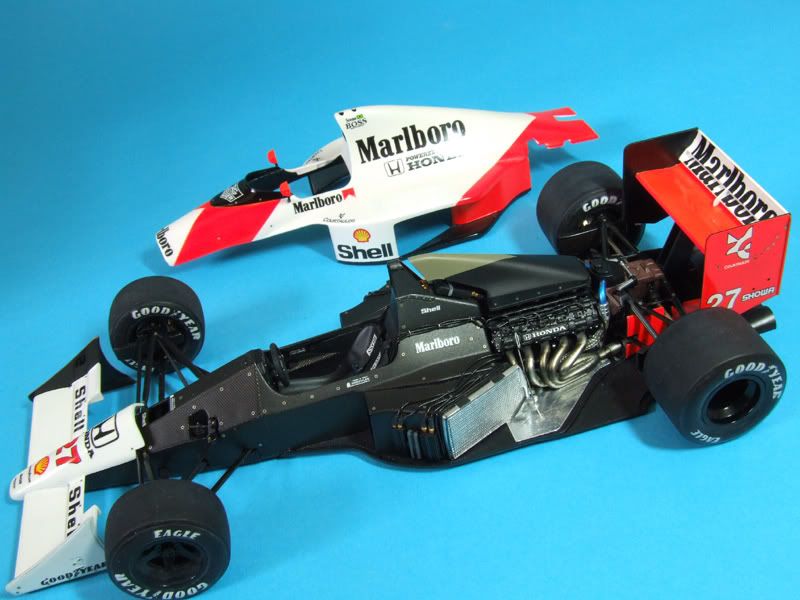
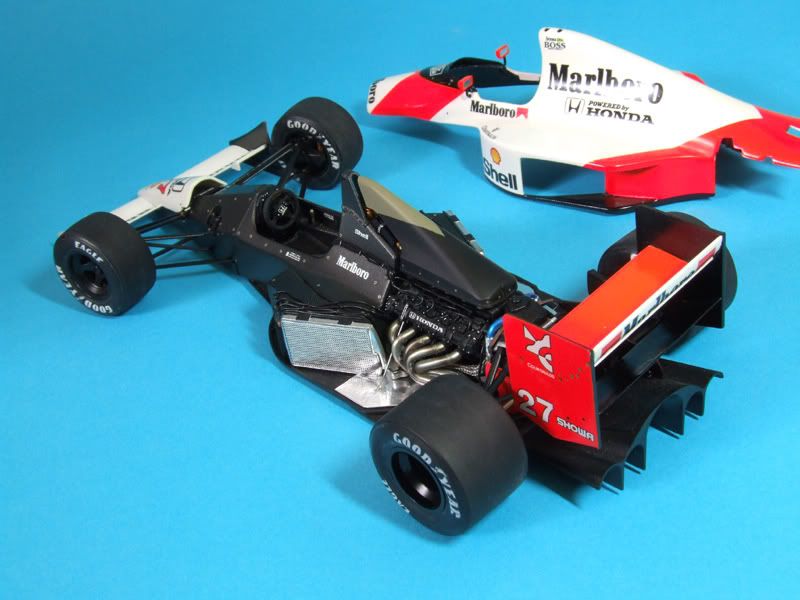
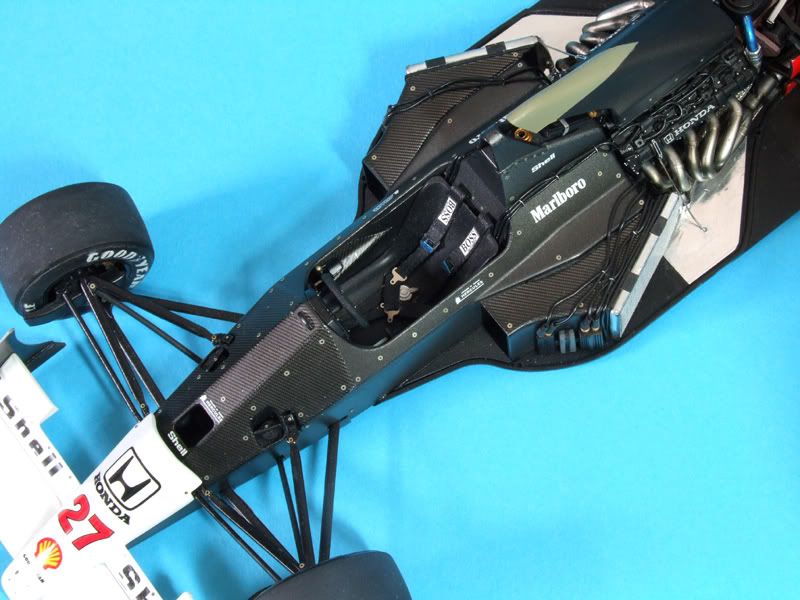
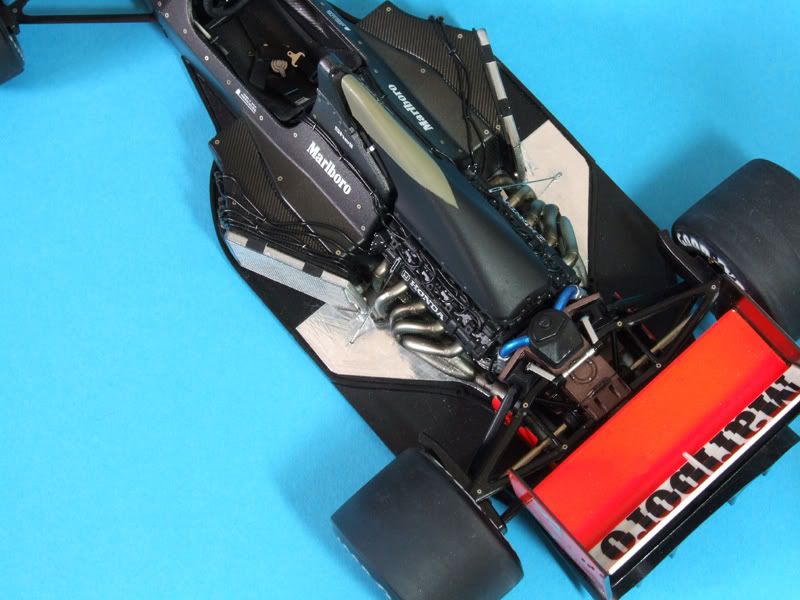
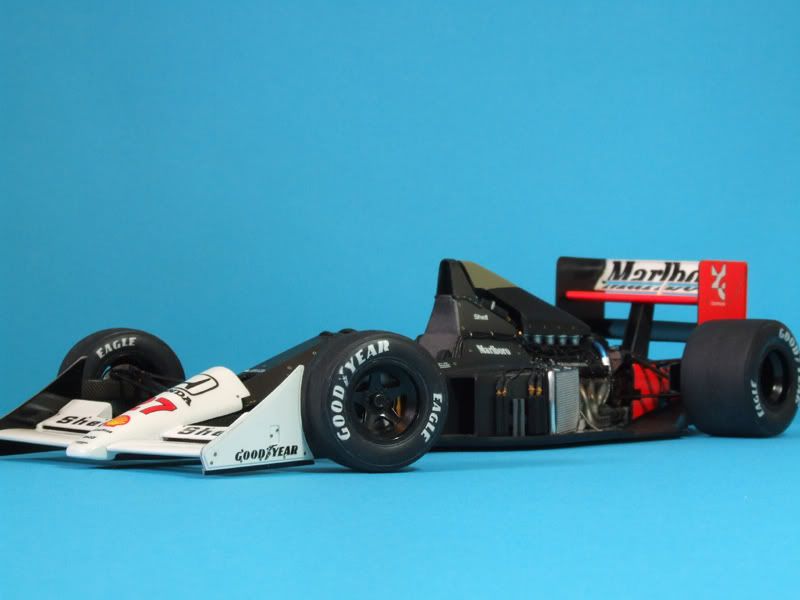
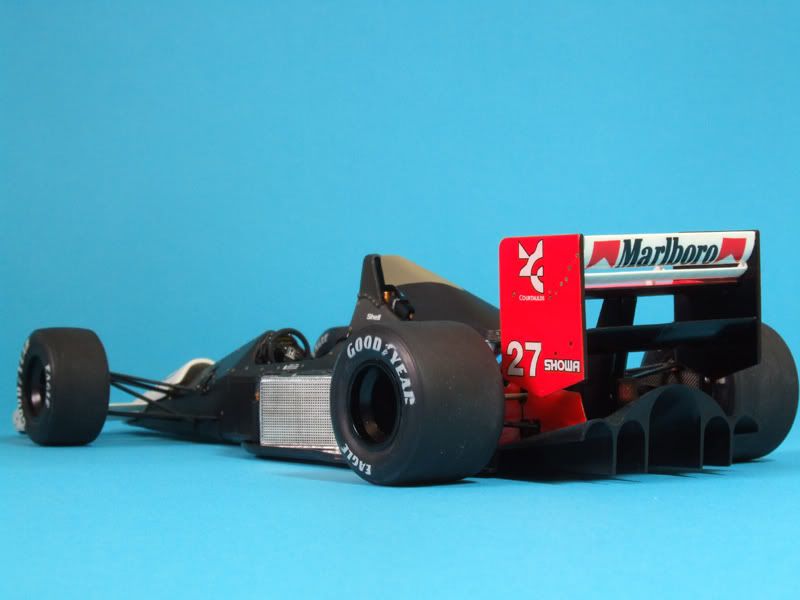
I just thought I'd post some final pics up of the final result, this is a 1/20 scale Tamiya kit of the most handsome Grand Prix cars ever built, (and driven by a god) - the 1990 Mclaren Mp4/5B.

This is a basic Tamiya kit costing around £15, all the aftermarket detail parts push the cost to 3 figures but she now sits on a Carbon Fibre plate in a glass display case in my spare room, hopefully protected from nosey cats :D

M1.jpg


M3.jpg


M2.jpg


M5.jpg


M4.jpg


M7.jpg


M6.jpg


M10.jpg


M9.jpg
 
I get annoyed if I get too much post in one day. That would drive me to insanity but that's an amazing thing you've done there. Kudos.

p.s. I'm pretty sure you won't fit in it.
 
What are the aftermarket parts that you've bought?

from memory - Malboro decals, carbon fibre effect decals, photo-etch seatbelt set, photo etched rivets (from the states) braided pipe with compression fittings (also from the states) photo etched Goodyear tyre stencils, 1 mil brass tubing, resin electrical connectors (knurled finish) with vinyl piping and heat shrink tubing, wire mesh for the radiators, colour matched Marlboro Mclaren flourescent Orange Zero paint, racing white, Halfords spray lacquer and other finishing products :)
 
Very nice Skii mate, may I ask for tips on putting transfers onto the models, because I'm still working on my Ferrari model and I've ended up ripping one in 2 and they keep moving around:(
 
Very nice Skii mate, may I ask for tips on putting transfers onto the models, because I'm still working on my Ferrari model and I've ended up ripping one in 2 and they keep moving around:(

Get yerself down to your local supermarket and get a bottle of Johnsons Klear floor polish, this is floor wax that works amazingly as a decal setting solution, warm the decal in warm water , and on the model take a fairly thick and soft brush and brush a layer of Klear on the spot you want to put the decal.

Take the decal on its backing sheet out of the water (20 seconds in the water is usually enough) and you should be able to slide the decal off the sheet and onto the model surface.

Take a damp cottonbud and manouver the decal into the position you want, and just touch the edge of the decal with some tissue to soak up the excess water - if you have any air bubble just push the decal with your cottonbud to ease the bubble out, failing that just ***** it with a pin

allow to dry for an hour.


feel free to brush another layer of Klear over the top to protect the decal later on, Klear also works brilliantly as it protects the decal from harsh solvents like lacquer if you want a really shiney finish :)

hope that helps :)
 
Thank you muchly for that Skii! Was using my hand or tweezers, realised that a cottonbud will work without damaging it and can move it around quite easily.
Muchos Gracias!:D
 
3 figures?! Would you mind breaking that down for me for a general idea. This is the sort of thing I need to get me away from the PC but still doing something productive (IE, not watching TV).

The model looks awesome by the way. The details really are worth the effort!
 
Back
Top Bottom