ITX - Custom Loop

Soldato
Joined
6 Jan 2013
Posts
21,849
Location
Rollergirl
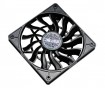
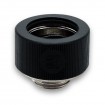
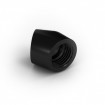
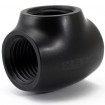
I'm going to do a full custom loop in an ITX case. I've decided to log the progress and maybe double it up as a wee tutorial on how to install PETG tubing into a loop. The build will be taking place in a Parvum Veer 1.0. and it's going to take months to complete, and this inevitably means some of the components probably haven't been released yet. :p

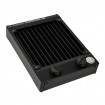
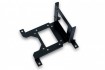
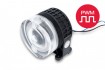
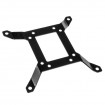
Likely CPU/MoBo will be Ryzen 2700x and I'm hoping that EK bring out a monoblock for one of the ITX boards, although I'm not holding my breath for that. I know that I can get a monoblock for a 8700k/Asus Z370i combo but I'm not yet convinced I want to go Intel for this build. GPU will be 1080ti with full cover EK block, but if a new GPU gets released during the build and it's a worthy successor to the 1080ti then I'll go with that.

Initially, I'll be focused on all the preparation work so things will be pretty dull and boring to start with, but hopefully the end result will be worth the effort. I'll do my best to update regularly.

TLDR: Images of finished job for those who don't want to read through the thread.

ZVXc9AQ.jpg

vRTdo4V.jpg

zaIfoQG.jpg

502tSqG.jpg

ZUKCQDi.jpg

YkgLLQr.jpg

riY1SdO.jpg
 
Last edited:
Soldato
OP
Joined
6 Jan 2013
Posts
21,849
Location
Rollergirl
I made a little progress today.

j6zQdyM.jpg

c0ckWB8.jpg

You can see at the bottom left clearance hole I nearly had a disaster when drilling due to the acrylic material, but thankfully it's just the outer panel (just as well I drilled them out individually) and it won't be seen when the build is done. I'll need to get some glue on it when I'm finished modding it.

PbM6nMA.jpg

DrqIxHM.jpg

fChpzaA.jpg

Top radiator installed, and already I can tell the fans will be millimetres away from the GPU. I really don't want to install the reservoir clips as I think it'll look much better without them, so hopefully I can get it all rigid with the connection to the pump.


And now need to wait for some supplies. :)

My basket at Overclockers UK:
Total: £214.57 (includes shipping: £0.00)


Ninja edit as I managed to sneak in a cheeky order for one of these as I think I may need it. :)

My basket at Overclockers UK:
Total: £14.73 (includes shipping: £2.74)​
 
Last edited:
Soldato
Joined
4 Dec 2015
Posts
3,221
Location
London
Hospital bracket to support the res might be an idea, 54mm is a standard plumbing size so I reckon that would fit the 60mm curve if you aren’t fixing the top? Or schoolboard clips, or Munsen rings if you can find the special size for the tube diameter and make some better looking mounts.

If you can line up the rear of the res also another idea would be cut a passtrough which would be a pretty tidy drain port if the connection will fit? Just fit a stop underneath and you could drain there plus turn it upside down and fill there...
 
Soldato
Joined
4 Dec 2015
Posts
3,221
Location
London
I already did that, see photos above. :)

I mean under it, would support the res also. I’d make something to support it, if you don’t maybe use double seal fittings to hold the tube in straight.

Edit, see you ordered quite a short res tube so maybe not an issue...
 
Soldato
OP
Joined
6 Jan 2013
Posts
21,849
Location
Rollergirl
I mean under it, would support the res also. I’d make something to support it, if you don’t maybe use double seal fittings to hold the tube in straight.

Edit, see you ordered quite a short res tube so maybe not an issue...

Ah, I understand now. I don't want any clips on the res, and I think I can maybe have such a rigid fixing between res and pump that I won't need to fix the res so long as I've secured the pump. However, your suggestion is not bad at all so I will definitely bear that in mind.

I really want to use the longer res as it fills the space really well, but it'll be tight so I've ordered the smaller tube as another option.
 
Soldato
Joined
4 Dec 2015
Posts
3,221
Location
London
Ah, I understand now. I don't want any clips on the res, and I think I can maybe have such a rigid fixing between res and pump that I won't need to fix the res so long as I've secured the pump. However, your suggestion is not bad at all so I will definitely bear that in mind.

I really want to use the longer res as it fills the space really well, but it'll be tight so I've ordered the smaller tube as another option.

Yeah I get that, clips are hideous - look up hospital clips in chrome or something. I think 54mm would fit the curve (60mm?) and if you leave the top part out it’s just a support. Or do the above and it’s sitting on the passthrough one end and just support the top.

Or make clear Perspex stands for it.
 
Soldato
OP
Joined
6 Jan 2013
Posts
21,849
Location
Rollergirl
DPD taking ages today, so I've gotten some further prep work done in the meantime.

I'm looking for some decent control over the tube bending as all the online tutorials seem to be a bit poor and reliant on guess work, so I've been trying to brain storm some techniques. I want to apply a bit of proper science to the process, and I've started off with a facility for 90º and 45º bends. :)

I don't think the 45º angle is exact, but it's close enough.

bbjHiRC.jpg

UGgKtIp.jpg

AQVR7at.jpg

Q2WI5z2.jpg

TUgJbQj.jpg

6mcTDwZ.jpg

EzPNzxe.jpg

rVdDuk8.jpg

3S2lJ6O.jpg
 
Soldato
OP
Joined
6 Jan 2013
Posts
21,849
Location
Rollergirl
Little update:

The toughest connection is the one between the 2 radiators; the back of the top radiator to the bottom of the front radiator. I might as well tackle this one first and test my bending kit out. :)

One minimum right angle bend to start with, and this will have to connect to an elbow fitting on the front radiator due to how tight things are. I then measured the distance for the next bend taking me up towards the top radiator and I am pleased to say it bends absolutely millimetre perfect. If anyone wants me to explain how to do that, just give me a shout.

XQ9MEVR.jpg

MSsLlAy.jpg

Now I need to add a third bend to bring it back toward the top radiator inlet.

UCk9xFe.jpg

q2nY7ud.jpg

I added a fourth bend to get me in towards the outlet and at this point I realise bend #5 won't happen because I've run out of tube! So, I add an EK fitting to the end and I'll order a little female to female right angle fitting to take it up to the top radiator.

uBQ9Vsq.jpg

XfZUOfw.jpg

Mrb3iri.jpg

More parts required...

My basket at Overclockers UK:
Total: £52.25 (includes shipping: £0.00)​
 
Last edited:
Soldato
OP
Joined
6 Jan 2013
Posts
21,849
Location
Rollergirl
I'm totally undecided whether to go 2700x or 8700k, and I might even hold out for the next Intel release.

In the meantime, I already own a full 6700k system with a 980ti Hydrocopper as a 2nd rig so all I need to do is pick up a temporary ITX Motherboard and I can crack on with this build... So that's what I did :)

m78lQTa.jpg

I want to get everything in to make sure things physically fit, and not surprising for an ITX custom loop... It's tight! Another curve ball is the design of the Parvum case which has the GPU sitting at a bad angle, and this is another little challenge to overcome (and all part of the fun). I might fab a little bracket to hold the GPU square.

jkjISeT.jpg

Note also, the length of the GPU... I've literally made it with 1mm to spare. :p

qsHyCZ4.jpg

So far so good, but I'll need to plan the rest of the tubing routes carefully as I want it to look decent and it's getting tighter and tighter with every additional component.

J2FG7jA.jpg

I can't order a block for the CPU yet as I might end up getting a monoblock depending on which socket I end up going for, so I'll head over to the MM and see if I can pick something up for the Z170 to tide me over in the meantime...
 
Last edited:
Soldato
Joined
28 Dec 2017
Posts
8,453
Location
Beds
Really ambitious build! Tempted to follow purely so I can see how you manage all the cabling ;)

Really enjoy the bending jig too. I made similar using a set of mandrels, but I just marked things out with a ruler and pencil based on each task and worked to those lines.
 
Soldato
OP
Joined
6 Jan 2013
Posts
21,849
Location
Rollergirl
Really ambitious build! Tempted to follow purely so I can see how you manage all the cabling ;)

Really enjoy the bending jig too. I made similar using a set of mandrels, but I just marked things out with a ruler and pencil based on each task and worked to those lines.

Yes, I'll need to use braided cable for sure as standard PSU cables will be a nightmare .. And I'll probably need to cable everything up before I install the tubes else I'll never get my hands in.

I actually think hard line runs are an advantage with small builds because I can literally construct the entire loop and then dismantle it all and be able to reassemble without issue. You can't do that with soft tubing.
 
Soldato
Joined
28 Dec 2017
Posts
8,453
Location
Beds
Yes, I'll need to use braided cable for sure as standard PSU cables will be a nightmare .. And I'll probably need to cable everything up before I install the tubes else I'll never get my hands in.

I actually think hard line runs are an advantage with small builds because I can literally construct the entire loop and then dismantle it all and be able to reassemble without issue. You can't do that with soft tubing.
Interesting point. I've just bent and fitted my first WC build and it's hard-line. I'll leak test today, then wasn't sure whether to fit cabling around it or strip it down. I've already planned all the cable routing but it might be hard work with tubes in the way.
 
Soldato
OP
Joined
6 Jan 2013
Posts
21,849
Location
Rollergirl
I've ordered some additional parts today, and I'll update here just in case anyone is following this with an interest in what parts they would need and what budget they would need for their own custom loop. :)

My basket at Overclockers UK:
Total: £57.85 (includes shipping: £11.10)
 
Back
Top Bottom