

Rather than create a separate post for every separate game, i'll post some screenies and settings for some of the current games that are tweaked to maximum effect 
INFO
FURTHER INFO
a) You may need to turn off all AA/FXAA settings in game if it's not working!
b) To test if it's working or not, press SCROLL LOCK to compare on/off in game
HARD RESET
COPY AND PASTE into SweetFX_settings.txt
INFO
it's a mod built on the InjectSMAA shader injector, that allows you to apply a suite of post processing shader effects to your games.
You may have tried another shader injection mod before, like InjectFXAA, InjectSMAA or FXAAtool. SweetFX improves upon all of these.
You can add SMAA anti-aliasing , sharpening and tweak the color, gamma , exposure and more.
It's meant to allow you to improve the look of your games and change the look and mood of it to your liking.
If you use SMAA antialiasing instead of MSAA or an even more expensive antialaliasing technique you can also make the game run faster (than with MSAA)
It can currently add:
* SMAA (anti-aliases the image using the SMAA technique )
* LumaSharpen (Sharpens the image, making details easier to see)
* Bloom (Makes strong lights bleed their light into their surroundings)
* HDR (mimics an HDR look)
* Technicolor (Makes the image look like it was processed using a three-strip Technicolor process )
* Tonemap (Light and color adjustments)
* Vibrance (Intelligently saturates (or desaturates if you use negative values) the pixels depending on their original saturation)
* Sepia (Sepia tones the image )
* Vignette (Adds a vignette that darkens the borders to the image )
* Dither (Dithers the image making it look like it was displayed on a monitor with more colors than actually present )
It works with all 32bit DirectX 9 , 10 and 11 games (and many applications).
It does NOT work with 64bit game executables - use the 32bit version of your game if it gives you a choice between 32 and 64bit.
It works with all graphics cards as long as they support at least shader model 3.
It should work on Windows 2000 and newer, both 32bit and 64bit. So far tested working on WinXP , Vista and Win7. Windows 8 is untested - please report your findings.
It may work on Linux using Wine - please report your findings.
Current version is 1.3
Version 1.3 is out.
Adds the Lift Gamma Gain shader which lets users adjust brightness and color of shadows, midtones and highlights.
Adds the Curves shader which uses S-curves to adjust the contrast of the image
Adds the Splitscreen shader which makes it easier to do comparison screenshots and videos.
Reversed the DPX blend setting so smaller numbers now mean less effect and not more (it's more logical this way)
Better default DPX settings
More conservative default Vibrance settings (down from 0.20 to 0.15)
All settings in the settings file now have ranges. (preperations for an upcomming GUI)
More details after I update the front page and the nexus page.
I personally love the new Curves shader and the Lift Gamma Gain is also a really powerful tool.
Further updates from members with personal settings!
http://forums.guru3d.com/showthread.php?t=368880
FURTHER INFO
a) You may need to turn off all AA/FXAA settings in game if it's not working!
b) To test if it's working or not, press SCROLL LOCK to compare on/off in game
HARD RESET
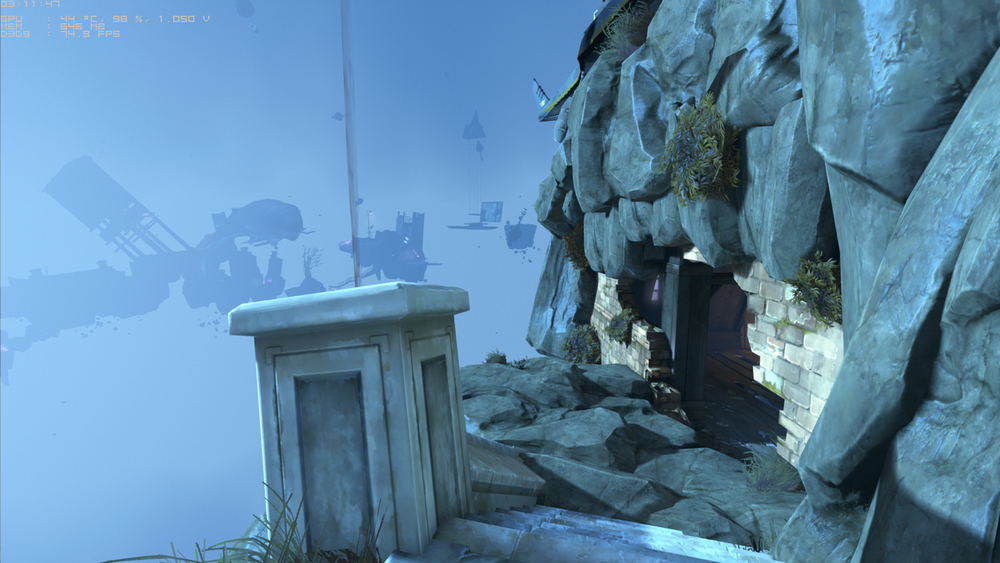
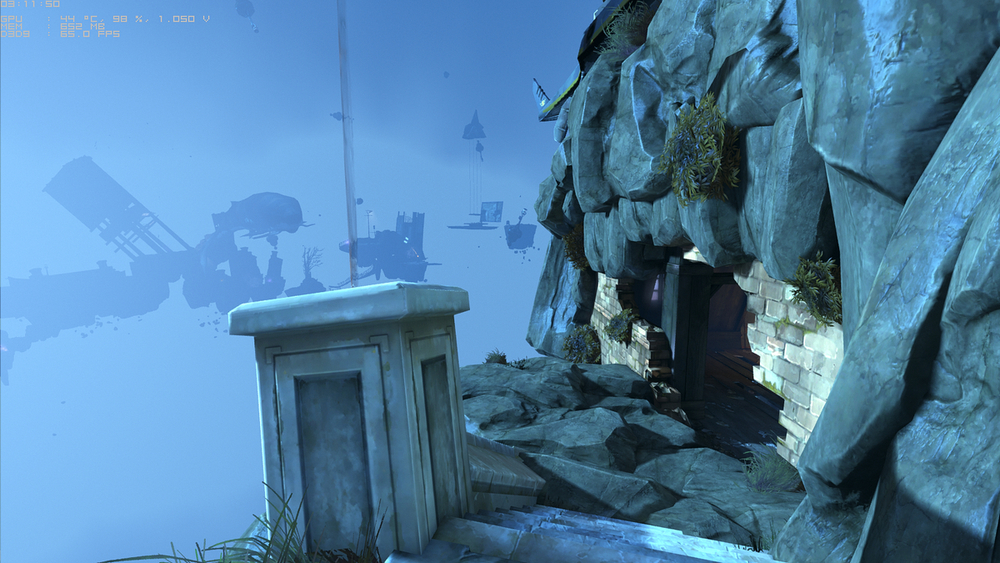
Before:

After:

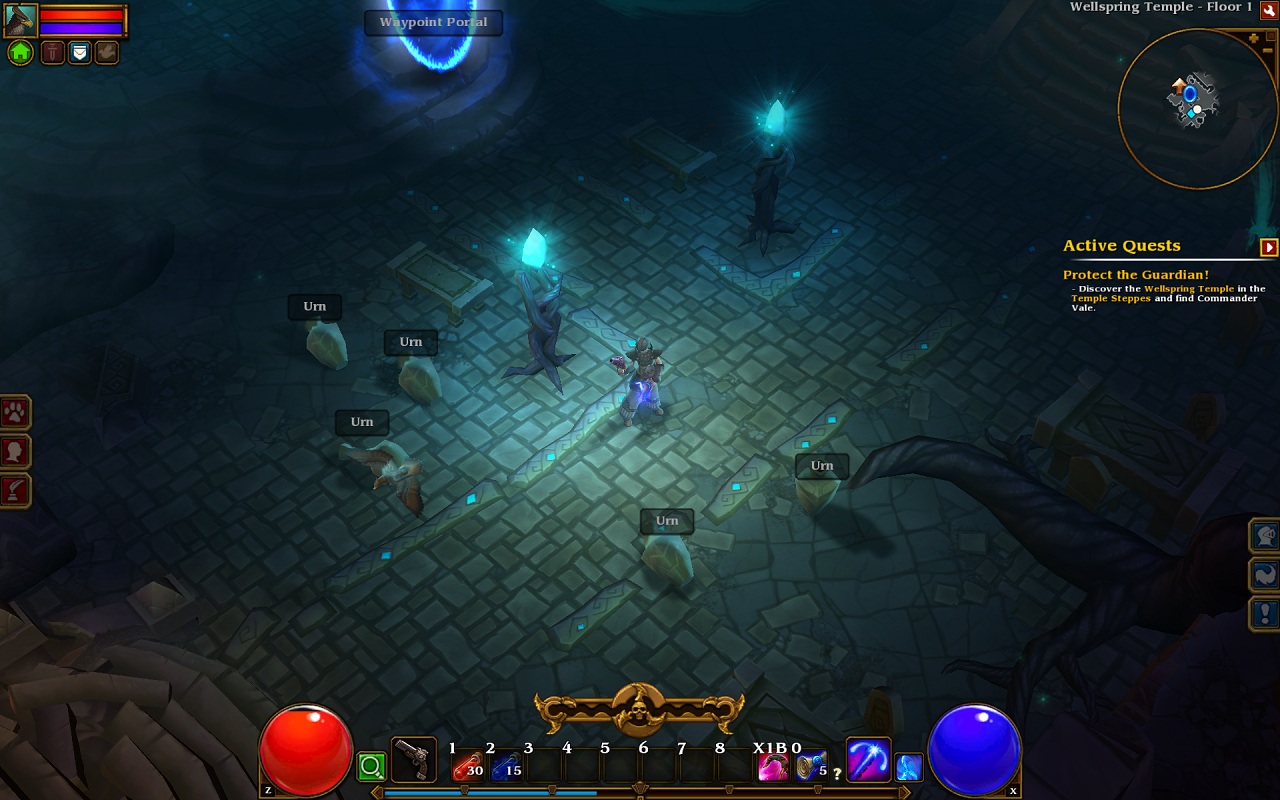
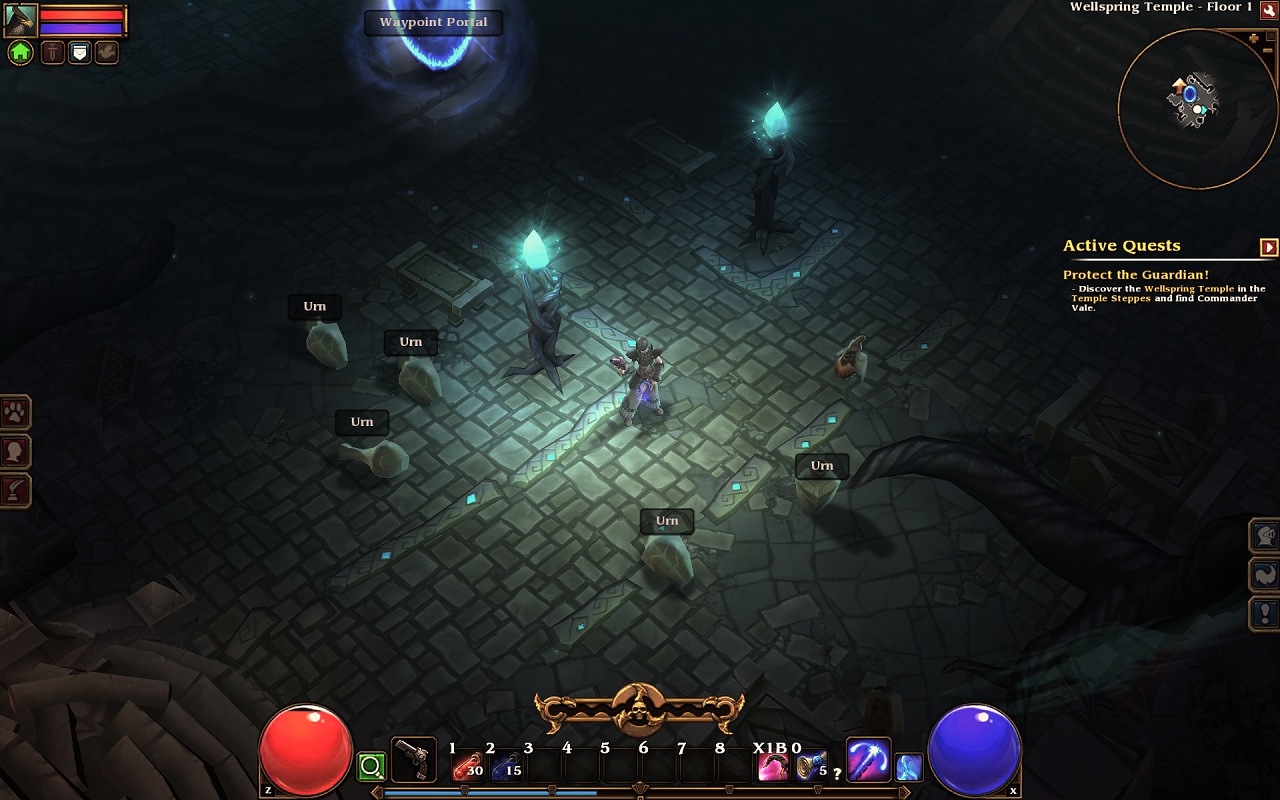
Before:

After:

After:
Before:
After:
COPY AND PASTE into SweetFX_settings.txt
Code:
   /*-----------------------------------------------------------.
  /                      Choose effects                         /
  '-----------------------------------------------------------*/

// Set to 1 for ON or 0 for OFF
#define USE_SMAA_ANTIALIASING 0
#define USE_LUMASHARPEN 0 //Also sharpens the antialiased edges which makes them less smooth - I'm working on fixing that.
#define USE_BLOOM 0       // Bloom makes bright lights bleed their light into their surroundings (relatively high performance cost)
#define USE_HDR 0         // Not actual HDR - It just tries to mimic an HDR look (relatively high performance cost)
#define USE_TECHNICOLOR 0 // Attempts to mimic the look of an old movie using the Technicolor three-strip color process (Techicolor Process 4)
#define USE_TONEMAP 0
#define USE_VIBRANCE 0    //Intelligently saturates (or desaturates if you use negative values) the pixels depending on their original saturation.
#define USE_SEPIA 0
#define USE_VIGNETTE 0    //Darkens the edges of the image to make it more look like it was shot with a camera lens. May cause banding artifacts.
#define USE_DITHER 0      //Applies dithering to simulate more colors than your monitor can display. This lessens banding artifacts (mostly caused by vignette)

#define USE_DPX 0         //Unfinished - Should make the image look like it's been converted to DXP Cineon - basically it's another movie-like look similar to technicolor
                          //I think the shader itself works, but the default settings need a lot of work. Maybe you can find some good settings?

   /*-----------------------------------------------------------.
  /                  SMAA Anti-aliasing settings                /
  '-----------------------------------------------------------*/

#define SMAA_THRESHOLD 0.08           // (0.08-0.20) Edge detection threshold
#define SMAA_MAX_SEARCH_STEPS 98      // [0-98] Determines the radius SMAA will search for aliased edges
#define SMAA_MAX_SEARCH_STEPS_DIAG 16  // [0-16] Determines the radius SMAA will search for diagonal aliased edges
#define SMAA_CORNER_ROUNDING 100        // [0-100] Determines the percent of antialiasing to apply to corners.

// -- Advanced SMAA settings --
#define COLOR_EDGE_DETECTION 1        // 1 Enables color edge detection (slower but more acurate) - 0 uses luma edge detection (faster)
#define SMAA_DIRECTX9_LINEAR_BLEND 0  // Using DX9 HARDWARE? (software version doesn't matter) if so this needs to be 1 - If not, leave it at 0.


   /*-----------------------------------------------------------.
  /                       LumaSharpen settings                  /
  '-----------------------------------------------------------*/
// -- Sharpening --
#define sharp_strength 0.25 // (0.2-2.0)Strength of the sharpening
#define sharp_clamp 0.030  // [0.0-1.0]Limits maximum amount of sharpening a pixel recieves - Default is 0.035

// -- Advanced sharpening settings --
#define pattern 4          // Choose a sample pattern [ 1, 2, 3 or 4 ] - 1 = Fast, 2 = Normal, 3 = Wider, 4 = Pyramid shaped.
#define offset_bias 1.0    // [0.0-6.0](1.0) Offset bias adjusts the radius of the sampling pattern.
                           // I designed the pattern for offset_bias 1.0, but feel free to experiment.

// -- Debug settings --
#define splitscreen 0      // Enables the before-and-after splitscreen comparison mode. Left side is before.
#define show_sharpen 0     // Visualize the strength of the sharpen (multiplied by 4 to see it better)


   /*-----------------------------------------------------------.
  /                       Bloom settings                        /
  '-----------------------------------------------------------*/
#define BloomThreshold 11.12
#define BloomPower 1.563
#define BloomWidth 0.268

   /*-----------------------------------------------------------.
  /                        HDR settings                         /
  '-----------------------------------------------------------*/
#define HDRPower 1.10  //Strangely lowering this makes the image brighter
#define radius2 1.00   //Raising this seems to make the effect stronger and also brighter


   /*-----------------------------------------------------------.
  /                      TECHNICOLOR settings                   /
  '-----------------------------------------------------------*/
#define TechniAmount 0.117
#define TechniPower 3.22
#define redNegativeAmount 0.88
#define greenNegativeAmount 0.88
#define blueNegativeAmount 0.88


   /*-----------------------------------------------------------.
  /                        Tonemap settings                     /
  '-----------------------------------------------------------*/
#define Gamma 1.08

#define Exposure -0.17

#define Saturation -0.51

#define Bleach 0.035

#define Defog 0.00  //How much of the color tint to remove
#define FogColor float3(0.00, 0.00, 2.55) //what color to remove - default is blue


   /*-----------------------------------------------------------.
  /                       Vibrance settings                     /
  '-----------------------------------------------------------*/
#define Vibrance 0.419  //Intelligently saturates (or desaturates if you use negative values) the pixels depending on their original saturation.


   /*-----------------------------------------------------------.
  /                         Sepia settings                      /
  '-----------------------------------------------------------*/
#define ColorTone float3(1.45, 1.35, 1.35)
#define SepiaPower 3.18
#define GreyPower 0.81

   /*-----------------------------------------------------------.
  /                       Vignette settings                     /
  '-----------------------------------------------------------*/
#define VignetteRadius 1.00  // lower values = stronger radial effect from center
#define VignetteAmount -1.00 // Strength of black. -2.00 = Max Black, 1.00 = Max White.
#define VignetteSlope 8      // How far away from the center the change should start to really grow strong (odd numbers cause a larger fps drop than even numbers)
#define VignetteCenter float2(0.500, 0.500) // Center of effect.


   /*-----------------------------------------------------------.
  /                        Dither settings                      /
  '-----------------------------------------------------------*/
//No settings yet, beyond switching it on or off in the top section.

//Note that checkerboard pattern used by Dither, makes an image harder to compress.
//This can make your screenshots and videos take up more space.


/////////////////////////////////////////////////////////////////
///////////////////////// Work in Progress //////////////////////
/////////////////////////////////////////////////////////////////

   /*-----------------------------------------------------------.
  /                      Cineon DPX settings                    /
  '-----------------------------------------------------------*/
//I have yet to find good default settings for this .. maybe you can?
float Red = 10.0;   //[1.0 - 15.0]
float Green = 10.0; //[1.0 - 15.0]
float Blue = 10.0;  //[1.0 - 15.0]

float ColorGamma = 0.9f;    //[0.1 - 2.5]
float DPXSaturation = 1.2f; //[0.0 - 8.0]

float RedC = 0.33f;     //[0.6 - 0.2]
float GreenC  = 0.37f; //[0.6 - 0.2]
float BlueC = 0.38f;   //[0.6 - 0.2]

float Blend = 0.397f; //[1.0 - 0.0] How strong the effect should be
Last edited:
")


