A new build log

Associate
Joined
25 Jan 2009
Posts
506
Hello Everyone. All of my components have arrived for my first build. To be honest, I’m apprehensive and excited in equal measure. I will try my best to take photos as I progress, but the camera I own is pretty awful so they might be of a poor quality.

I choose an AMD build, even though for the money I probably should have gone down the i5 route, and am still not sure why. I’ve tried my best to learn what I can from all you guys, but I will most likely need help on a step-by-step-basis :o. I can only hope that one day I can repay this help and offer advice to people with their builds. Anyway, enough of my ramblings, here are the components for my new build:

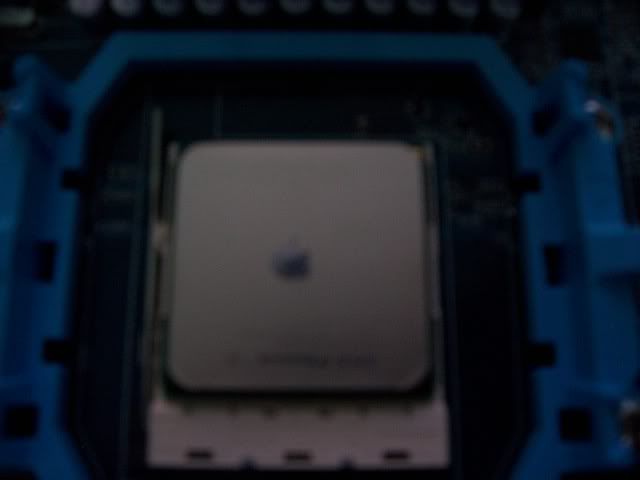
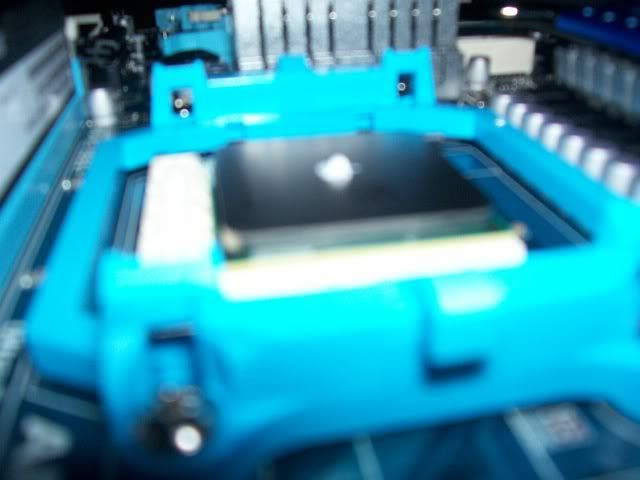
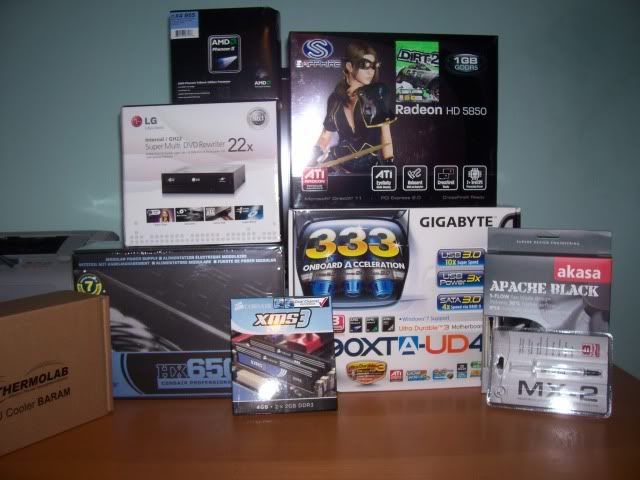
AMD Phenom II X4 Quad Core 955 Black Edition
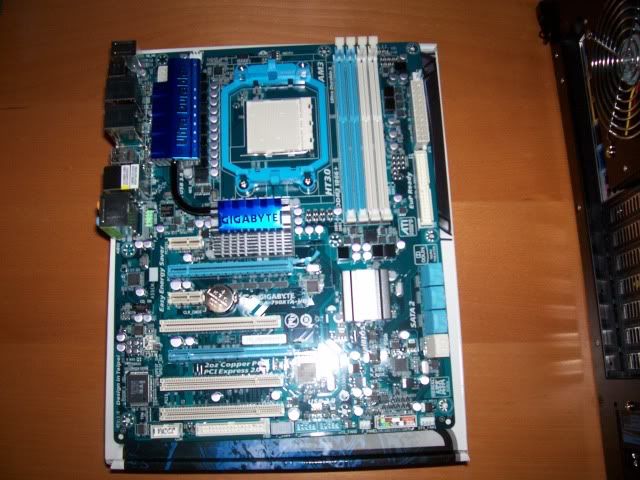
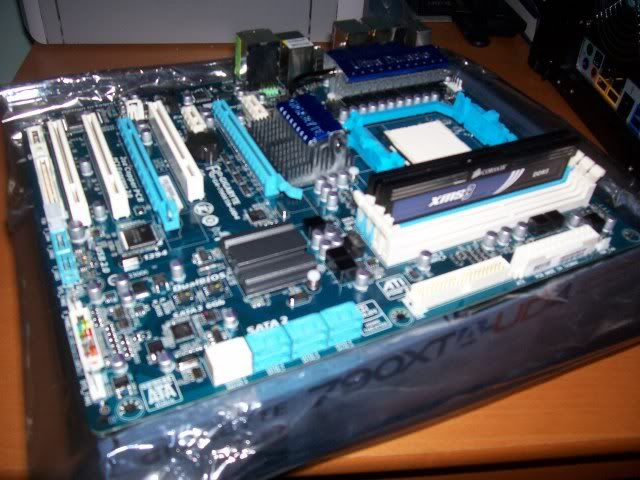
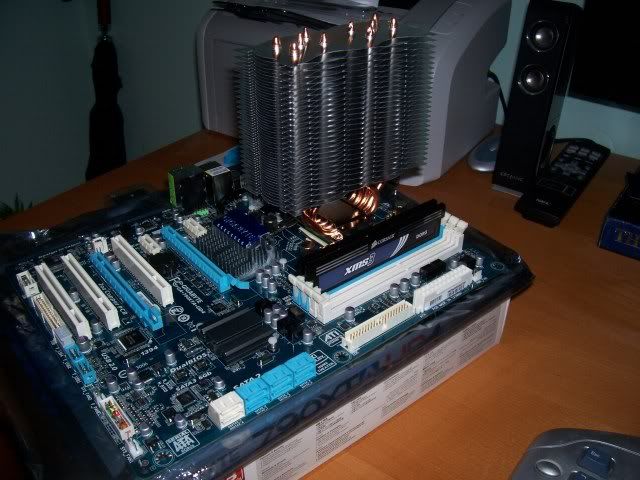
Gigabyte GA-790XTA-UD4 (Socket AM3)
Corsair XMS3 4GB (2x2GB) DDR3 PC3-12800C9 1600MHz Dual Channel Kit
Sapphire ATI Radeon HD 5850 1024MB GDDR5 PCI-Express Graphics Card
Corsair HX 650W ATX Modular SLI Compliant Power Supply
LG GH22NS50 22x DVD±RW SATA ReWriter (Black) - Retail
Samsung SpinPoint F3 500GB SATA-II 16MB Cache
ThermoLab Baram CPU Cooler
Akasa AK-FN058 Apache Black Super Silent 120mm Fan
Arctic Cooling MX-2 Thermal Compound

Picture065.jpg


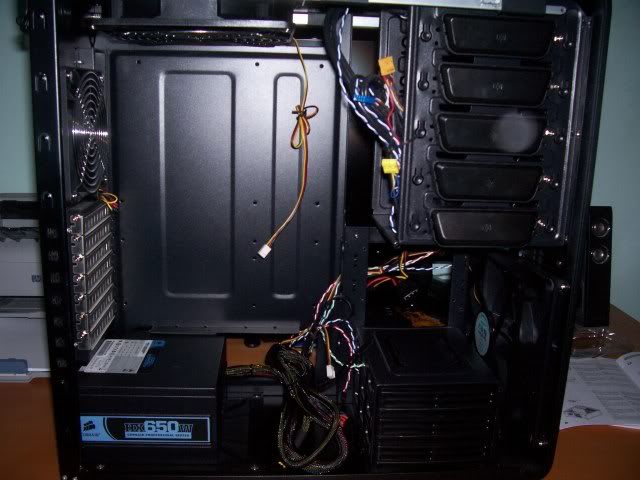
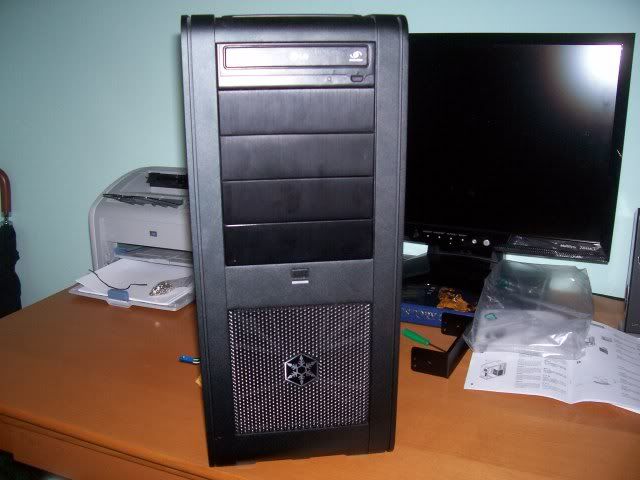
I will install everything inside a second-hand Silverstone Fortress FT01B-W Tower Case.

Old vs New

Picture079.jpg


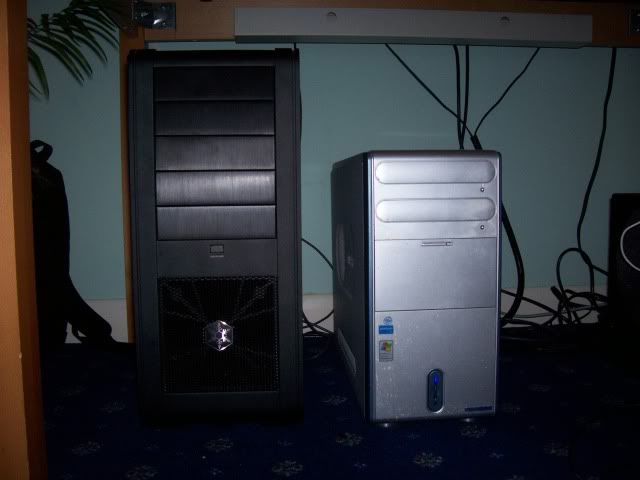
Though I've spilt some tea on my old case today, and the Fortress needs a good clean on the outside. Here are also a few of the rough specs of my old computer:

Intel Pentium D 820 2.6Ghz
1024mb DDR2 memory
ATI RadeonX700 Pro graphics card

As you can see, the new computer should blow me away (assuming I don't blow it up first).

Unfortunately, the build may take several days as I have to look after my niece and nephew for several days and I normally struggle to look after a plant :p. I'm planning to first install the PSU as greywolf's building guide recommends. I plan to install the PSU upside down as I've seen a lot of Fortress builds do this to intake cold air. Although, I will be placing the Fortress on a carpet, with dust and stuff, so I'm not entirely sure if that's correct.

I will post again after I've installed the PSU and have made the kids some food. :)
 
Last edited:
Thanks for all the good luck wishes. I was lucky enough to purchase the case for £60, so I consider myself lucky. I've just installed the PSU:

Picture147.jpg


I will now attempt to install the CD/DVDRW drive.
 
Well it seems to be very straightforward to install optical drives on the Fortress. I simply had to unscrew the front panel, press a large button to retract some metal pins (to allow me to slide the drive through) and then press the button again to keep it in its place:

Picture221.jpg


The black colour of the optical drive seems to blend in nicely with the case.
However, I again apologise for the awful photos.

I will continue this tomorrow methinks.

Thanks for the tips iNPUt. Talking of good lighting, I've just started to use a torch (damn energy saving light bulbs aren't bright enough). It's good to hear that it all went ok for you. Which case did you swap to?
 
Last edited:
Hello again. It's taken me a while to get back to the build due to other commitments. I've now installed the I/O shield and the standoffs. Unfortunately, the standoffs didn't have an 'A' next to them to show me which ones are for the ATX form factor. I've measured and compared the case's holes to those on the motherboard, so hopefully everything should be fine. I felt really sorry for the poor guy who forgot them during his first build.

I must admit, it seems to be a nice looking motherboard:

Picture301.jpg


I've also installed the RAM, but I was a little bit paranoid as to whether I was pushing too hard. However, the clips snapped back in place so I think it's all good. I've placed the motherboard onto the anti-static wrapping (although the wrapping is inside out as recommended to keep its anti-static properties. I also have an anti-static wrist strap connected to the earth ground via the wall socket, and I keep on touching the radiator like crazy. Oh dear :p.

Picture307.jpg


I think I will insert the CPU, heat sink, hard drive and other stuff tomorrow. Hopefully I will get there in the end. I think I'm most concerned about the thermal paste. Should I spread it with my fingers via a plastic glove, or put just let the heatsink spread it for me? In addition, do I apply the paste in a certain way for quads or because I'm using MX-2? I will also try to search the forum etc.
 
Last edited:
Before I insert the heatsink, could you please tell me if it looks like I have applied the correct amount of thermal paste? It's a bad camera, but hopefully it will enable you to tell.

Picture393.jpg


Picture395.jpg
 
This is a bit of a stupid question, but when I install the heatsink's backplate behind the motherboard do I install it behind the original plastic backplate (that came with the motherboard) or take this away and just use the heatsink's backplate? :o:)

Thanks for telling me it was the correct amount Ben-Irvine93. Bad pics it is then. Any advice for the the above question is greatly appreciated.
 
Last edited:
Well, the online (as shown by freddie64) and leaflet guide seems to suggest that I have to remove the backplate, so I think I will do that. Here is a picture of both back plates if it's any help:

Picture.jpg
 
I've just installed the heatsink and, fingers crossed, everything seems to be ok:

Picture582.jpg


I'm about to mount the heatsink's fan but am not sure which way to position it. I can normally tell with fans, but the blades on this one have baffled me (which is easily done). I'm hoping to use it to push warm air from the heatsink out of the case.

Either this way:

Picture681.jpg


Or this way:

Picture682.jpg


Also, should I bother with the anti-vibration pins that came with the fan? Thank you for all your help and patience so far.
 
Last edited:
Thanks again. I have one more question, but I should be fine for a while after this as I knew this would be my worst section. In relation to the adhesive part of the back plate, am I correct in assuming it should not be stuck directly to the motherboard but to the heatsink backplate as shown below. Again, I apologise if that's a stupid question. :p

http://www.thermolab.co.kr/?mid=baram_eng

(under the guide section)
 
I only ask because I came across this:

http://www.asayogure.com/cpu/

(section 5)

'Once the backplate is aligned, remove the adhesive cover, and press firmly on the backplate with the sticky side towards the MoBo's back, aligned with the holes, and affix it.'

just make sure that you affix the sticky side to the MotherBoard, and NOT the case itself

I'm assuming that it badly phrased?
 
Thanks for the link arknor. Though unfortunately I can't seem anything specific to answer the question. I just wanted to know if, in general, the adhesive sticker pad is applied to the directly to the heatsink bracket or to the motherboard? I just hope I haven't done anything stupid.
 
I stuck it directly to the back plate as I didn't like the idea of adhesive on the motherboard. As you say, it's still between the motherboard and backplate so it should be fine. Thanks arknor.
 
Hello again. It's been awhile, but things have been pretty hectic. I've finally managed to put the standoffs in the case and screw the motherboard to them.

I've also attached the heatsink fan and used the correct amount of thermal paste (I hope). Though as shown by the yellow circle, I think I may of rotated and attached the heatsink's fan in the incorrect position? Although it does seem to fit properly, and the arrows indicating airflow suggest it should be fine.

hghghghghg.jpg


767676767676.jpg


The fan's cable is positioned at the bottom of the fan (as indicated by the tiny arrow) if that's any help. Is this lead allowed to touch the heatsink in anyway whilst it's connected to the cpu fan header and the computer is running? I ask this, as at the moment it is hovering between the the case fan's grill and the heatsink. I'm wondering if it might rub against the heatsink during the fan's operation etc.

The hard drive is also installed although it is not positioned the same manner as shown in the build guide. It faces towards the side of the case:

Picture1024.jpg


I've installed the hard drive so that its ports are at the back of the above picture:

5555555555555555555555.jpg


The exposed circuitry is on the underside of the 3.5 bay. This seemed to be the only way to install it, so I'm hoping I will be fine. I must admit, the Fortress's instruction booklet is not much help for a beginner like me.

If everything is ok, I will now start to attach some of the headers.
 
Thanks eddie86. It's a real blessing to be able to receive help on this site. I'm trying to fit the front panel headers into he motherboard at the moment. I've tried to take a picture of my dilemma, but my camera has no light adjustment and it needs a flash in even mildly dark places (which is far too bright).

I've pushed some of the headers into the bottom row of pins with the writing facing downwards towards the bottom of the board (as in greywolf's picture):

dsdsdsdsd.jpg


When I start to insert the headers in the top row of pins, does the writing need to face upwards instead? I ask this as my board seems to be one that allows me to insert the pins both ways.
 
Last edited:
Back
Top Bottom