Air Flo Mini - Complete

Phase 1 upgrade

Now I have the basis of the build and the concept has successfully proven to work beyond expectation I figured it was time to make some hardware changes prior to implementing the revised cooling.


  • Phase 1 is to upgrade the GPU
  • Phase 2 will see a revision of the internal data storage
  • Phase 3 is the revision of the cooling arrangement


What to replace my existing 560Ti with...


The 660Ti some would say is the natural progression but with it’s current pricing??? Nah

The 660??? To much of a step down from the performance of the 660Ti and again overly inflated pricing for what you get in terms of performance per pound.

I have had my eye on this particular 7870 for a few months now, however it’s release price back in April was around the £280 mark (sorry but I refuse to pay above £225 for a GPU these days); by chance a couple of weeks back I stumbled apon it and with a price tag of only £150 it was a no brainer!!!


Review Link


I present to you the PowerColor HD7870 PCS+


user56605_pic29770_1347733917_zps19c1f99a.jpg


user56605_pic29771_1347733917_zps12478f12.jpg


user56605_pic29772_1347733917_zps9c65e4e8.jpg


user56605_pic29773_1347733917_zps0e8e4147.jpg


user56605_pic29774_1347733917_zps2d20e38c.jpg


user56605_pic29775_1347733917_zps432023fe.jpg


user56605_pic29776_1347733917_zps960c9e89.jpg


Not only is the custom cooler aesthetically pleasing to the eye it’s also very efficient and whisper quiet.


user56605_pic29777_1347734383_zps1ab6f6cf.jpg


Oh the PCS+ also overclocks like the devils own on stock voltages :D

(I’ve yet to have a proper play about with it).
 
Last edited:
Phase 1 upgrade - PowerColor HD7870 PCS+ Installation

One installed PowerColor HD7870 PCS+ :)


user56605_pic29793_1347810459_zps455228a0.jpg


user56605_pic29792_1347810459_zps42b39b94.jpg


user56605_pic29791_1347810459_zpsb9ce2f0f.jpg


Phase 1 Complete :D
 
Last edited:
Phase 2 upgrade

Pre upgrade the internal storage for the build consisted of -


1 x 128Gb Kingston HyperX SSD (Blue) not to be confused with the Kingston HyperX 3K (Black), the difference being the performance of the HyperX series is more in line with that of the OCZ Vertex 3; this was my Windows 7 drive.


1 x 500Gb Seagate Momentus XT Hybrid, this was used for mass storage.


My original plan was to supplement the above with another SSD, this time a 240Gb; however things do change as you’ll see...


Purchase number 1


A 240Gb Kingston HyperX 3K SSD purchased from a mate of mine.


user56605_pic29806_1347992516_zpsd97d6aa0.jpg


user56605_pic29807_1347992516_zps84207af8.jpg


It’s in pristine as new condition as you can see, he's a top bloke :)


Purchase's 2 and 3


Now purchases 2 and 3 can be directly attributed to another mate, he had posted a link to a competitors website on his blog; they were retailing 120Gb OCZ Vertex Plus Series SSD’s for only 40 quid (these you will note are SATA 2 SSD’s).


Hmmm I have 2 free SATA 2 connections, yup I’ll have 2 of those thank you lol


Behold!!!


user56605_pic29808_1347992516_zpse7e5fef0.jpg


You Have Twins!!!


:D :cool: Waheyyyyyy!!! I now can put together the SSD only rig I've always wanted :cool: :D
 
Last edited:
Phase 2 upgrade - Installation Pics

Well now you’ve seen what’s going in to the build it’s time to show you how it’s been installed...


First of all the 120Gb Kingston HyperX and the 240 Kingston HyperX 3K have been relocated to the rear of the motherboard tray (pics to be posted at a later time) following the removal of the Silverstone SST-FP58B (5.25" Slim ODD Bay with Internal 2.5" Bay); I wanted to free up a 5.25" bay for possible future use.


So where to install The Twins???


Simple solution


Remove the adjustable holder which resides in the base (it’s a handy feature that supports the weight of large air coolers), it’s surplus to requirements in this build.


user56605_pic29791_1347810459_zpsb9ce2f0f.jpg


user56605_pic29810_1347998750_zps9851b465.jpg


user56605_pic29811_1347998750_zpsded58b82.jpg


Sometimes the simple solutions are the best :D
 
Last edited:
looking pretty awesome :D

Got mine built and running then the onboard sound went so had to RMA my motherboard.....replacement arrived today though so re-build tonight :D

Really happy with the case/cooler/fan controller, thanks for the advice. Great being able to dial down all the fans, pretty much silent when not gaming

Your very welcome :)

The FC6 is a great bit of kit

ooo you changed to a Precision since i last looked, good choice!, i like them more too, gives you a lot more options

you could maybe mount the ssds behind the mobo tray?
tho they look quite nice on display too

Thank you, it's a great case just like the TJ08; agreed certainly more versatile though :D

I can't fit any more SSD's behind the motherboard tray sadly (there are 2 already mounted there), I like the naked on display look of The Twins though :)

that fan controller looks familiar :D

Hey Flame :D

lol I thought it might ;)
 
One thing I did notice is that is takes away a bit of the fan power though. I got the 1850 GTs but the top fan speed that shows on the FC6 is around 1650.

Is this the case for you too or am I missing something?

I'd like to be able to give you a definitive answer but can't...


My own experience when using a pair of AP-15's with the FC6 was that one would run at 1650 and the other at 1750, I'm now running them off a Bitfenix Recon and the same pair of fans will run at 1700 and 1800 respectively.


It doesn't really bug me to much as they are set to run at 1500 regardless but it's still shall we say strange :confused:


do you ever use this rig or just take pics of it??? :D


lmao I'm using it now :p


And besides it's photogenic :D
 
Last edited:
Now the hardware...

...upgrade is complete I decided to benchmark it at it's current overclock of 4.6GHz


user56605_pic29865_1348181718_zpsccd0d8b7.jpg


I will have to say I'm very very happy with that :D


The updated specs for Air Flow Mini Concept are now as follows -


Case - Silverstone PS07

Motherboard - ASRock Z77 E-ITX

CPU - Intel i7 2600K clocked @ 4.6GHz

RAM - 8 GB (2x4GB) Samsung Green DDR3 PC3-12800C11 1600MHz 30nm Dual Channel running @ 2133MHz (9-10-10-21 2N) @ 1.50v

GPU - PowerColor PCS+ HD7870 GHz Edition 2GB GDDR5 PCIe 3.0

PSU - Silver Power S460SL 460W 80Plus Gold Fanless Silent Modular


Internal Storage -

1 x 120GB Kingston Hyper X SH100S3/120G SSD
1 x 240GB Kingston HyperX 3K SH103S3/240G SSD
2 x 120GB OCZ Vertex Plus Series OCZSSD2-1VTXPL120G SSD's


Cooling -

Antec KÜHLER H2O 620 with 2 x Scythe Gentle Typhoon AP-15 120mm 1850 RPM Cooling Fan’s (D1225C12B4AP-15) (front mounted push pull configuration)
1 x BeQuiet Shadow Wings SW1 120 mm BQT-T12025-MR-2 (front intake)
1 x BeQuiet Shadow Wings SW1 120mm PWM BQT T12025-MR-PWM (rear extract)
 
Last edited:
Phase 3 is the revamp of the existing CPU cooling components which consisted of -


  • 1x Antec KÜHLER H2O 620 Liquid cooling system with a push pull fan configuration
  • 2 x Scythe Gentle Typhoon AP-15 120mm 1850 RPM Cooling Fan’s (D1225C12B4AP-15)
  • 1 x Lamptron FC6 4 Channel Fan Controller


The replacement of FC6 was the initial priority, the FC6 only has 4 channels; for what I have in mind Ideally an additional channel also.


Meet it’s replacement...


The Bitfenix Recon


The Recon is a five channel controller, perfect!!!


user56605_pic29864_1348175151_zps2946c0a7.jpg


Flawless in operation and with a touch screen you can switch off the Recon is almost perfection, almost...


It does have 3 flaws however -


  • The quality of the 4 pin pass through molex connector is p*ss poor at best
  • The USB connecter is glued in place so you will have the additional spaghetti to tidy away if you elect not to connect it
  • The temperature probe connection complete with all the temperature probes is glued in place also


Gotta up your game on the small things Bitfenix...
 
Last edited:
So I...

...ran another benchmark test


Running the same 4.6GHz but this time under Windows 8 x64 (the previous benchmark I ran under Windows 7 x64)


user56605_pic29882_1348349573_zps1ac6c7a5.jpg


user56605_pic29883_1348357216_zps009a0883.jpg


It would appear the boys at Microsoft have developed an operating system that now actually utilizes Hyper Threading, this can only be a good thing for i7 processors as is clearly demonstrated :)


Please note I'm not advocating the use of Windows 8 x64 over Windows 7 x64, the test was to merely highlight the improved support for Hyper Threading.
 
Last edited:
Why...

..do we spend so much time and effort selecting components and then building a PC from scratch to then overclock it?


Why don’t we just get something off the shelf from a mass outlet retailer?


I’ve heard those questions asked so so many times...


The reasons are numerous, the enjoyment of building something unique and tailored to your own needs, the sense of achievement when it powers up the first time etc


But in laymans terms this is why...


Running a 4.6GHz CPU overclock, Memory running at 2133MHz and GPU running at 1185MHz GPU Clock and 1285MHz Memory respectively


user56605_pic29897_1348508144_zps1570f200.jpg


user56605_pic29895_1348508144_zpsa7b316af.jpg


user56605_pic29904_1348509942_zps027541cf.jpg


user56605_pic29896_1348508144_zps4b281b8e.jpg


CPU, Memory and GPU running @ stock speeds


user56605_pic29902_1348508234_zpsdb465fc9.jpg


user56605_pic29900_1348508234_zps11ba0154.jpg


user56605_pic29903_1348508253_zpseaaab7f2.jpg


user56605_pic29901_1348508234_zps6653332c.jpg


This translates to -


Custom PC Benchmarks Suite 2007


Image editing an increase of 26.7% (from 1692 to 2143)
Video encoding an increase of 30.8% (from 3004 to 3930)
Multitasking testing an increase of 33.2% (from 1540 to 2051)
Overall Score an increase of 30.3% (from 2079 to 2708)


CINEBENCH 11.529 x64


An increase of 31% (from 81.61FPS to 106.84FPS)


This is part of the reason why we do it ;)
 
Last edited:
A silver lining...

Just a quick update


I recently purchased a BitFenix Recon as part of the Phase 3 upgrade


user56605_pic29864_1348175151_zps2946c0a7.jpg


After receiving the Recon I was less than impressed with 3 issues


  • The quality of the 4 pin pass through molex connector is p*ss poor at best
  • The USB connecter is glued in place so you have the additional spaghetti to tidy away if you elect not to connect it
  • The temperature probe connection complete with all the temperature probes is glued in place also


Despite this I went ahead with the install and despite it only having 10W per channel (on the packaging it was rated at 30W, it was also advertised as such on the website I purchased it from) it has proven to be a great bit of kit.


However one further issue...


The Software!!!


I was going to have another attempt to get it to function correctly earlier (attempt number 3), I tried to download it from the BitFenix website and low and behold it was a broken link... :rolleyes: :( :mad:


However this story has a silver lining

I stumbled apon some third party software written for the Recon, let’s just say I now won’t be downloading the official software as the program in question works flawlessly even in Beta form :D
 
Last edited:
The Home Stretch

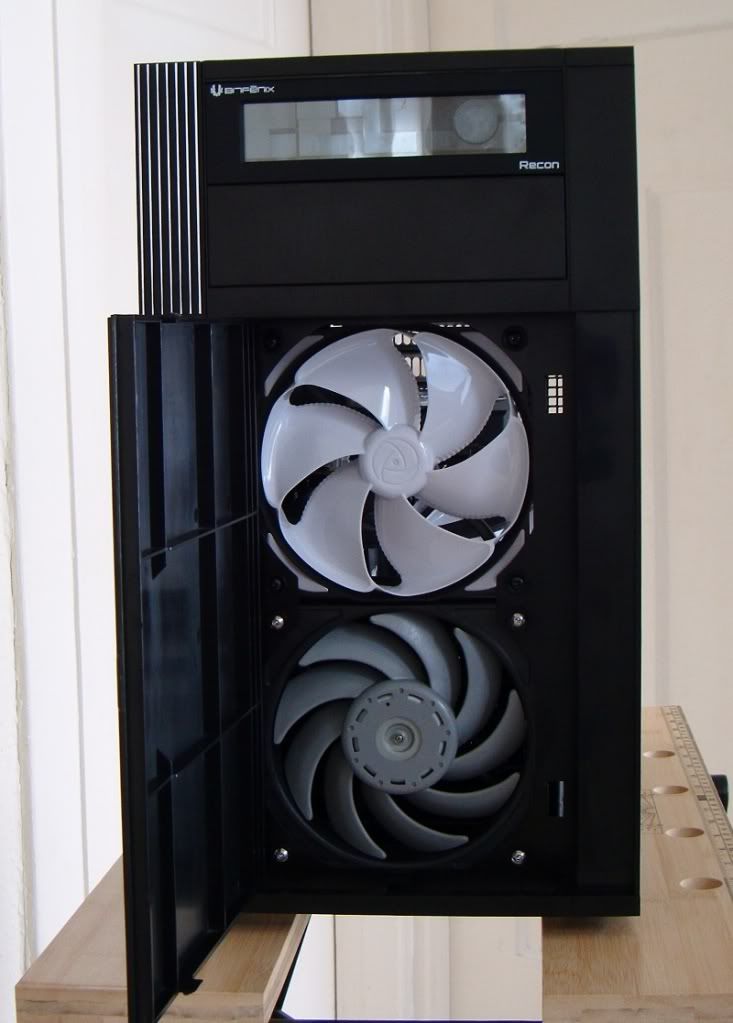
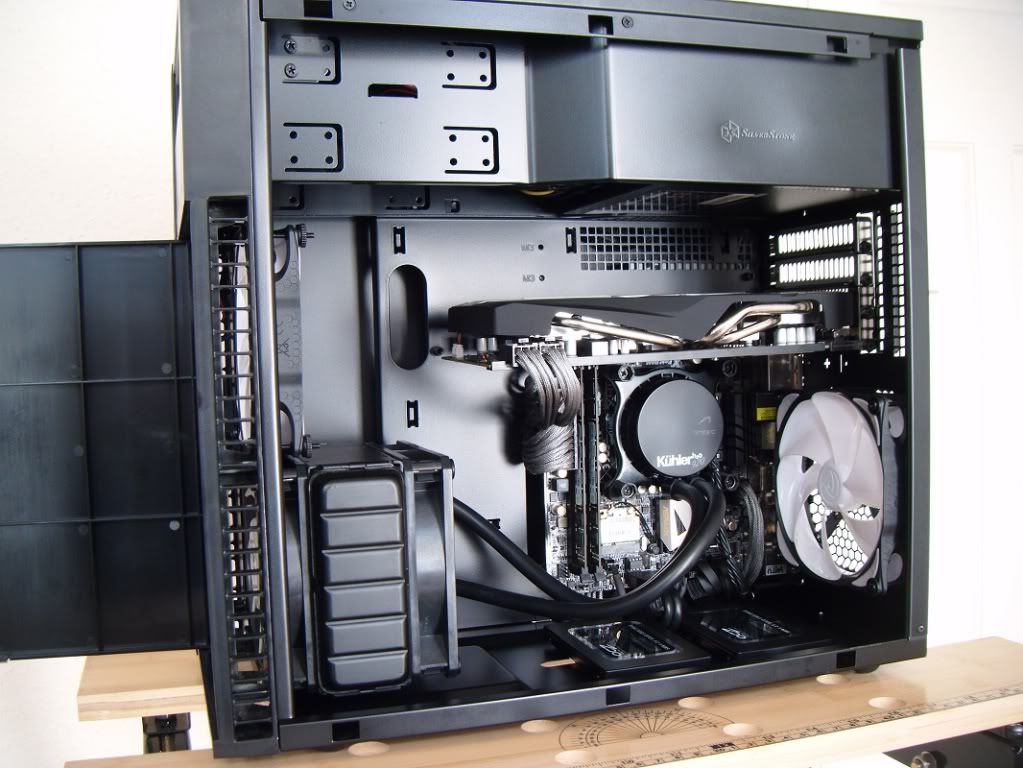
Well the phase 3 instal is now complete :)


This included the installation of the following -

  • 1 x BitFenix Recon Fan Controller
  • 1 x Antec Kühler H2O 920
  • 2 x Noiseblocker NB-eLoop B12-3


So effectively with the exception of a few cosmetic touches I plan to add at a later date the upgrade is now complete and I can now enjoy the end of my labours :D


Here are a couple of teaser pics for your scrutiny (I'll upload more soon), any comments or feedback are more than welcomed.


DSCF1001R_zps7c400b2e.jpg


DSCF1003R_zps9dca7f1b.jpg
 
Just out of interest, did you need to cut the backplate of the Antec Kühler to fit it around the ASRock E-ITX eSATA socket?

Fit it around is a bit of an overstatement for a diagonal cut which takes 2 minutes with a hacksaw lol

It's not a major inconvenience and doesn't render the back plate useless if you change motherboards, I certainly wouldn't let it put anyone off buying an ASRock Z77 E-ITX :)
 
Looks awesome mate!

Out of curiosity, was thinking of getting the 920, whats the dimensions of the RAD? Case is low profile hence the ask.

Think I may be able to get the cooler in but would like the dimensions to confirm rather than order one to find it doesn't fit.

Thanks.

Thank you

Here you go mate, dimensions as requested :)

151 mm (H) x 120 mm (W) x 49 mm (D)
 
I was just wondering if it was the same backplate as my Kühler H2O 620, sounds like it is. As you say it's pretty easy to cut, I used a pair of cable cutters.


Yes mate it's identical to the backplate packaged with the 620


Sorry I wasn't being rude in my reply and if it read that way I apologise :)
 
Back
Top Bottom