BackDraft Evo (a Nanoxia DS1 Build)

Associate
Joined
31 May 2012
Posts
237
nTFHBvsl.png.jpg


BackDraft Evo...


BackDraft is a concept I’ve been toying with for some time (12 months plus), the basic brief is for a high air flow water/hybrid cooled rig for general use, video encoding, gaming and to satisfy my passion for overclocking and benchmarking; as both the CPU and GPU will be overclocked a heavy emphasis will be on cooling but I also want for it to be nigh on silent and energy efficient.


As the name suggests it will be a project that evolves in stages.


2 of the principle components -


An EVGA Z68 FTW Motherboard :cool:


i2bxm0Hl.jpg


aa0oyh6l.jpg


Hy5AG0ll.jpg


IJLDXH1l.jpg


3NItmIWl.jpg


58X95FMl.jpg


fbw3nHSl.jpg


1jwOetxl.jpg


opMuVyll.jpg


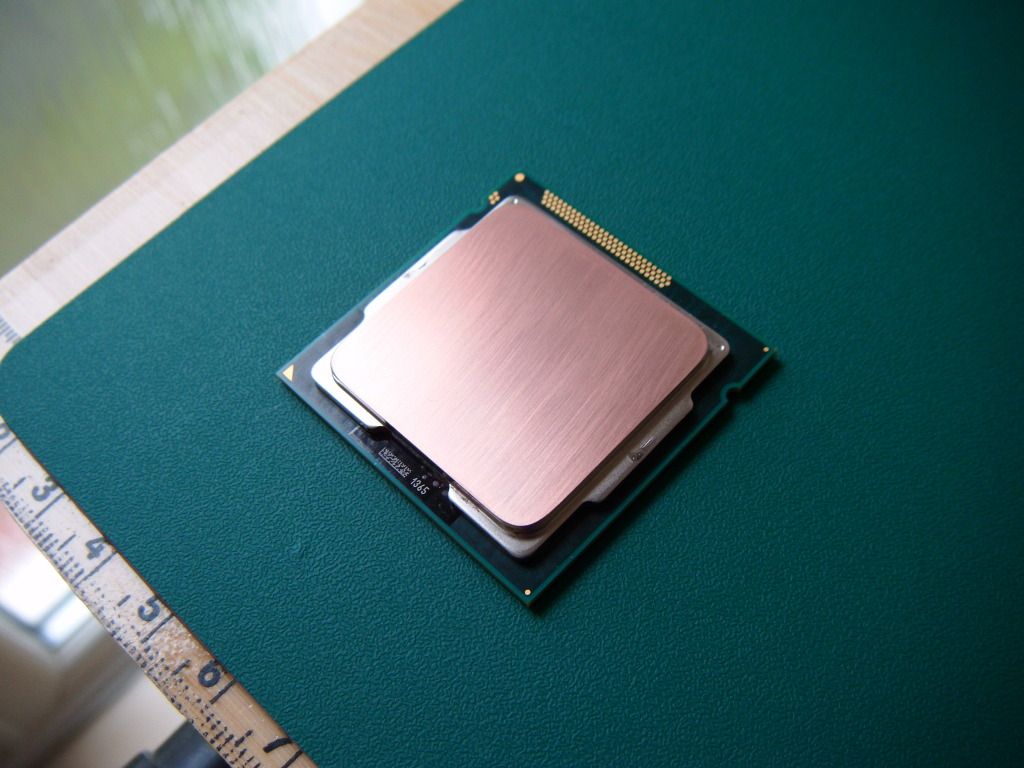
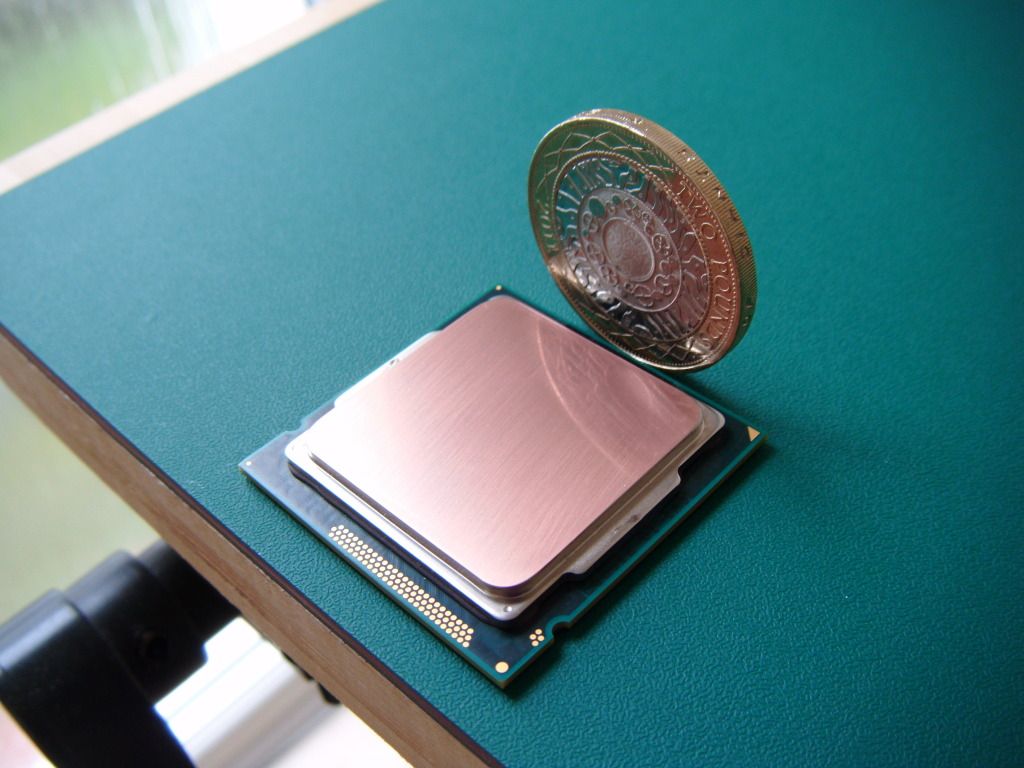
My performance lapped 2600K :D


FKr9Hyal.jpg


27Xfcljl.jpg


maFgWStl.jpg


And here is some more of the pre build stockpile just after Christmas


ZcvsICZl.jpg
 
Last edited:
The case I’ve opted to use is the Nanoxia Deep Silence 1

Very R4 I think you’ll agree

(it wouldn't surprise me if they are manufactured at the same facility lol)


Z0Rp4zgl.jpg


aRVgaqDl.jpg


HxL3jtDl.jpg


my56YBEl.jpg


vmtKRpxl.jpg


The first nice touch is the pop up I/O panel


enoEDFAl.jpg


IBjgsKGl.jpg


Next up we have in the rear area of the top cover a sliding mechanism called "Air Chimney" by Nanoxia, raising this panel up gives any underlying fans the breathing room needed while still offering some sound encapsulation.


XTD7dqAl.jpg


Pop open the front and you have two slider variety fan controllers (three channels apiece).


WjTbiEWl.jpg


Three 5.25" drive bays and below those there are two 120mm fan mounting points behind the bottom door with removable mesh dust filters.


BPK9QNHl.jpg


a8dgYpul.jpg


YO1OIuJl.jpg
 
Last edited:
Here are a couple of features I'd like to mention -


3pwGE7Rl.jpg


Another well thought out touch.


wcGU9J7l.jpg


The eight hard drive bays are divided into three cages, two for three and one for two drives;thanks to the two modular bays and the secondary placement possibility, you can pretty much mix an match to suit your requirements.


And now to strip it down...


HBKoNtJl.jpg


Front panel PCB

From left to right you - reset button, power button, two three channel fan connections and a power connection for the fan controller.


1DokO49l.jpg


The associated connections

From left to right - power switch IO, power LED IO, reset button IO, two groups of three male (3 pin) fan connections and a 4 pin molex connection which powers the fan controller.


9NJRSyql.jpg


Roof mounted IO panel PCB

From left to right - two USB 2, two USB 3 and HD/AC97 audio.


suMe0vcl.jpg


The associated motherboard connections

From left to right - USB 3, USB 2 and HD/AC97 audio.


And now finally the chassis in it's naked form.


WaeybDWl.jpg


ckV9lwRl.jpg


vjiuVGVl.jpg


bJ98jicl.jpg


S61xDLDl.jpg


PsmV8Sel.jpg


I've replaced the standard tubing grommets with the solid rubber grommets provided (another nice touch), I'd rather they weren't there in the first instance but hey that's me lol.


vfjP9phl.jpg


You have around 20 mm of space behind the motherboard tray to route cables.


AXXVbIwl.jpg


Right impressions on the chassis so far...


Nice build quality
Some well thought out features
You can mount 240 radiators in the roof and horizontally in the front of the case out of the box


The bloody cheap case feet have to go!!!
 
Last edited:
I finished stripping down my former rig this morning and couldn't resist doing a size comparison (the smaller chassis is that of a Silverstone PS07).


2XmB4XDl.jpg


CfDCBLVl.jpg


IORIZEpl.jpg


And now on to the subject of case feet...

The standard case feet on the DS1 are just nasty and cheap for lack of a better word, my only gripe of the entire case.


Now spot the difference


U9LfNZFl.jpg


Before


JNvgzaVl.jpg


After


Some of MNPCTech's finest Silver Diamond Knurl Case Feet :D


Pure quality and I love em!!!


z5fMTagl.jpg


kcEzQC4l.jpg


I've used the washers that come with the feet as spacers on the underside of the chassis and 4 x 6-32 25mm long screws to mount them, end result = PERFECTION :cool:
 
Last edited:
The DS1 has provision to mout fans as follows -


Front: 120 mm x 2 (included)
Rear: 140 mm fan x 1 (included)
Side: 120/140 mm x1 (optional)
Top: 120/140 mm x2 (optional)
Floor: 120/140 mm x1 (optional)


These are the fans that come with the case (2 x 120mm mounted in the front and 1 x 140 mounted as the rear extract)


81P6PWCl.jpg


sMC4e5hl.jpg


For obvious reasons I won't be using these.


My choice in weapon so to speak will be these...


b3bD30Ql.jpg


gc0il3rl.jpg


They are Xilence 2CF's (the 2CF prefix stands for 2 Component Fan)

Yes I've gone for German yet again lol

Other than being aesthetically pleasing and well built (they use a semi rubberised cable braid) they are designed so that the vibration of the fan is effectively damped due to the rubber compound frame; the rubber frame in turn serves as a stable and vibration retardant base for the fan motor.


Further more they tie in to perfection with the colouration of the motherboard :D


lIzWK2dl.jpg
 
Last edited:
Time to do some testing of the components and some mocking up -


First up the Installation of the motherboard


pqsGKt7l.jpg


FQkMIPZl.jpg


0pUH0ODl.jpg


Looking at that I couldn't of placed the holes for cable routing any better if I designed the case myself :)


Now you only have to do a web review search or pick up a recent publication and you'll see how highly regarded the new Corsair H100i is; so how do you improve it's already excellent performance?

Well you could use fans that produce a higher static pressure than the standard Corsair fans, you could front and back the H100i with two pairs of fans in a push/pull config, you can even use a shroud to eliminate the deadspot of the push config fans...

Me, I've done all three of the above


The H100i will be mounted vertically at the front of the case hence the name of the build - BackDraft


First up is the high static pressure push fan element of the build


hNSMczjl.jpg


Two AP15's, a personal favourite, tried, tested and in my opinion the best radiator fans money can buy.


Another component of the build is the BitFenix Recon


1iwTlSkl.jpg


K4T9OzWl.jpg


I'm not a fan of the fixed (glued in place spaghetti) but this is one very very impressive bit of kit especially when used with the third party Phoebetria software; despite it still being an evolving Beta application it functions far better than BitFenix's own Recon control software (please note it doesn't yet support the mobile phone app).

Download Link


And here we have the H100i unit with two pre installed Xilence 2CF's (the pull element) and a 30mm Pulse Modding 240 shroud.


KwPxBoJl.jpg


hpr3W3El.jpg
 
Last edited:
AND THIS IS WHERE THINGS WENT PEAR SHAPED


Sequence of events -

New project build assembled, wired up and ready for first start.

Power on.

Flawless, not a single error code or beep and straight into the BIOS.

It’s then I notice the CPU temp 68, 69, 70... yup climbing rapidly with no sign of leveling out.

Instant switch power down.

Check the H100i block/pump and backplate YET AGAIN (pc ocd at play here).

All good.

hmmmm

Power on again and much the same, this time however I’m looking at the interior of the case as it powers up.

H100i block illuminates with white illuminated logo which then goes bright yellow, pale yellow, muddy brown then off...

It repeats this process this process twice before a loud shrill squeal is heard to come from the block and I once again power down before the CPU exceeds 90 degrees C!!!!!

The *******g CPU is on stock settings!!!!!

At this point I uninstall the H100i.

I then install a stock out of the box Intel reference CPU cooler and low and behold the CPU temp settles at 30 degrees C...


Now all I can say at this point is Corsair I hope your Customer Services are up to speed because your quality control and product truly SUCK!!!!!
 
Last edited:
Sorry to hear that, the build looks really nice btw. Does it sound like the pump isn't working or is it not getting a firm enough contact with the IHS?

Out of interest you mention the GT AP15s being your recommended choice for radiator fans. I've always used air cooling so I'm a layman in terms of watercooling but on the surface of it the large bearing in the middle looks like it would affect the surface area of the radiator being cooled - why is that the AP15s are so good is it just the RPMs?

Anyway hope you get this problem sorted out.
 
BackDraft Evo...

BackDraft is a concept I’ve been toying with for some time (12 months plus)

I thought it was related to the Kurt Russell film when I saw the title.


My performance lapped 2600K :D


Misc035_zpsf9481a2e.jpg


Misc040_zps626d2864.jpg

Copper? thats how they look when lapped?
 
corsair have a very good RMA service so you'll get sorted in no time after raising a ticket with them.

Hey James :)

To Cut a long story short...

Corsair expected me to return the H100i back to the Netherlands no less at my own expense, when I queried this they said I could indeed RMA the unit back to the vender but wouldn't get the (please note) LATEST VERSION of the H100i; basically it now transpires they have now modified the design of the H100i.

I basically gave up trying after 2 weeks of being bounced from pillar to post.

Sorry to hear that, the build looks really nice btw. Does it sound like the pump isn't working or is it not getting a firm enough contact with the IHS?

The pump emitted a loud squeal and promptly died out of the box :mad:

Out of interest you mention the GT AP15s being your recommended choice for radiator fans. I've always used air cooling so I'm a layman in terms of watercooling but on the surface of it the large bearing in the middle looks like it would affect the surface area of the radiator being cooled - why is that the AP15s are so good is it just the RPMs?

Anyway hope you get this problem sorted out.

Fans for radiators require a high static pressure rather than volume of air shifted as in RPM, the AP15's have a mix of both :)

I thought it was related to the Kurt Russell film when I saw the title.


Copper? thats how they look when lapped?

Yes the IHS is just coated copper V F :)
 
Right after a time out and rethink following the H100i fiasco and my decision to go for a full CPU/GPU watercooled loop...

I've done a wee bit of shopping :D


First up some more hardware -


One Adata XPG Gaming v1.0 8GB (2x4GB) DDR3 PC3-16000C9 2000MHz Dual Channel Memory Kit


JabzHBRl.jpg


YA7275Cl.jpg


One Creative Sound Blaster Z OEM Sound Card


UfItBPSl.jpg


4kSYY4fl.jpg


And now some of the watercooling components -

There was never any doubt as to my preference as regards the CPU block and despite my initial reservations as to the CSQ series redesign...


1 x EK Supreme LTX CSQ CPU Copper Acetal Waterblock


bDFZZpTl.jpg


I've decided not to go for a full cover waterblock for the GPU on this occasion, I've thought ahead to the long term and upgradability of the GPU; for this reason the ideal choice was the EK VGA Supremacy CSQ Copper Acetal.


SN8DYsjl.jpg


Choice of fittings -


EK CSQ 14 45 Degree Rotary Elbow Fittings Silver


KEtZ1fKl.jpg


EK EN PSC 14 Compression Fittings Nickel Silver


LWGCizll.jpg


And lastly some of these -


Primochill Silver Ghost Compression Fittings


50RaolWl.jpg


Now roll on the weekend so I can get some work done!!!
 
Last edited:
Back
Top Bottom