Hi there,
I am starting a thread about a project of which would involve the integration of hardware into a custom built desk, which I am planning.
I would mainly appreciate help on material choices and how the devices could retain use.
Currently my ideas are based on these items;
Surface Type
Mouse, Keyboard & Gaming Surface
Hot Switch Shared Network Drives
USB Extensions
Cable Management
The concept of designing a custom desk is for ergonomic purposes to create a setup based around useful functionality which a standard desk just does not include.
Possible Size of Desk: 1500mm x 650mm (Note, these are estimated; they can be extended or shortened).
1. Surface Type
I would like to line the desk, fully, in a formula much like the rubber or soft plastic which coats standard gaming mice in today's market, for example; the TtEsports Black Element or the older Razer Naga mouse. I am aware that these are not "new" but they still host the same material in question. I have found products such as the "Plastidip" range, but I am unsure of the finish it would provide.
2. Mouse, Keyboard & Gaming Surface
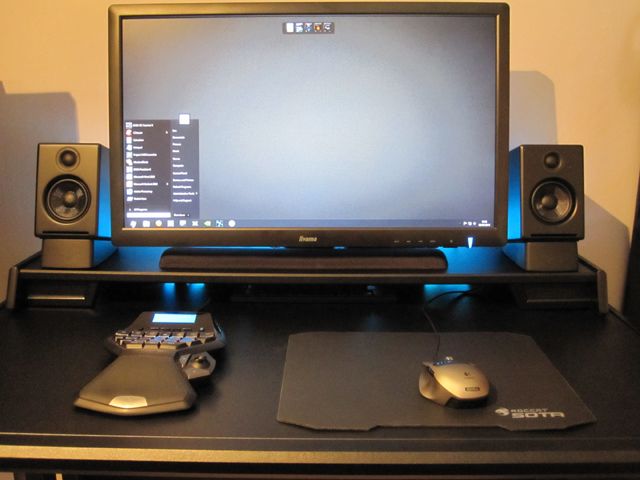
I have planned to engrave a 5mm area into the desk which would be occupied by a couple of the large or extended (920mm x 294mm) Razer Goliathus pads (one in front of the other), leaving a flat desk surface where the pads could not slide or move. This will allow the mouse and keyboard to have more of a lower profile look, also removing stress from the wrist.
3. Hot Switch Shared Network Drives
I would like to use a network sharing device which is already setup, such as a D-Link Share Center Plus etc. I would like this to be mounted somewhere which would help towards convenience of hot switching drives, but I want the device itself to be hidden, not cluttering the desk surface.
4. USB Extensions
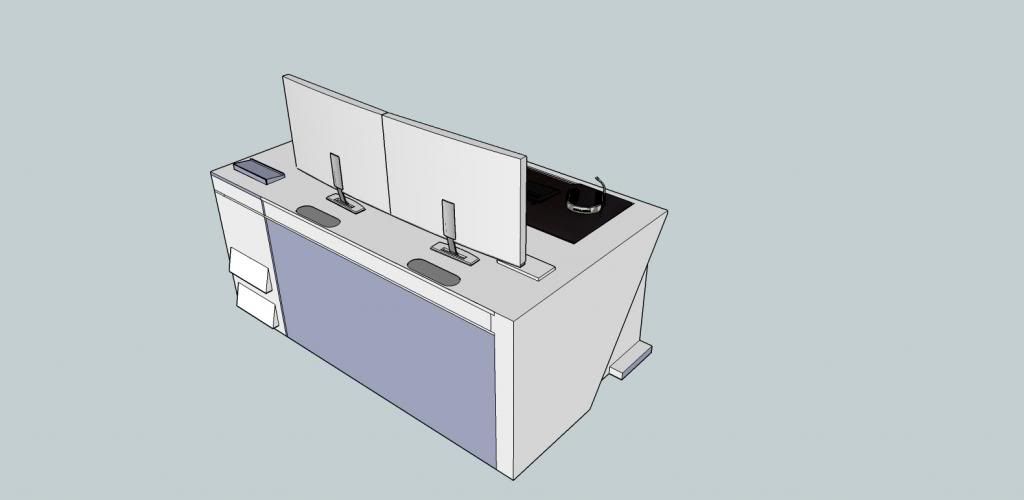
Using a powered USB extension which plugs into the PC and mains I hope to mount the device into the desk, cutting a vertical slot into the surface, of which would fit perfectly allowing flash devices to be plugged in easily. I will also use a shutter lid for this device, therefore sticking on the lines anti surface clutter aspects, where it is also convenient as it will be sunk into the desk and not displayed.
5. Cable Management
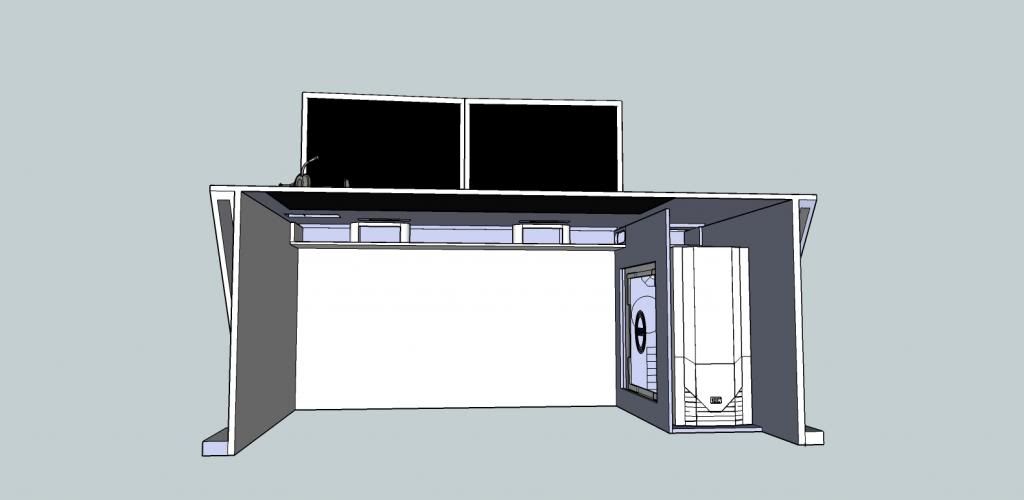
This subject will always be at the top of any enthusiasts list, although number 5 here , as there are several means of keeping cables tidy and free from being cluttered or tangled. Since I want to keep my case in a cabinet under the desk (preferably the right side) would it be possible to run the cables directly through an accessible cavity built under the desk surface at the back without causing hazard?
I would love help and ideas on any of the subjects raised to be commented on this thread, as I am going to be building this desk very soon.
-Note, I will be building this from scratch, I will not be customizing a current desk. This allows me to extract any ideas from you with choice of material etc!
The desk will support 2 or 3 27" monitors which is undecided yet.
ANY IDEAS OF WHICH I HAVE NOT INCLUDED ARE WELCOMED!
Thanks,
REConnect (Will).
I am starting a thread about a project of which would involve the integration of hardware into a custom built desk, which I am planning.
I would mainly appreciate help on material choices and how the devices could retain use.
Currently my ideas are based on these items;
Surface Type
Mouse, Keyboard & Gaming Surface
Hot Switch Shared Network Drives
USB Extensions
Cable Management
The concept of designing a custom desk is for ergonomic purposes to create a setup based around useful functionality which a standard desk just does not include.
Possible Size of Desk: 1500mm x 650mm (Note, these are estimated; they can be extended or shortened).
1. Surface Type
I would like to line the desk, fully, in a formula much like the rubber or soft plastic which coats standard gaming mice in today's market, for example; the TtEsports Black Element or the older Razer Naga mouse. I am aware that these are not "new" but they still host the same material in question. I have found products such as the "Plastidip" range, but I am unsure of the finish it would provide.
2. Mouse, Keyboard & Gaming Surface
I have planned to engrave a 5mm area into the desk which would be occupied by a couple of the large or extended (920mm x 294mm) Razer Goliathus pads (one in front of the other), leaving a flat desk surface where the pads could not slide or move. This will allow the mouse and keyboard to have more of a lower profile look, also removing stress from the wrist.
3. Hot Switch Shared Network Drives
I would like to use a network sharing device which is already setup, such as a D-Link Share Center Plus etc. I would like this to be mounted somewhere which would help towards convenience of hot switching drives, but I want the device itself to be hidden, not cluttering the desk surface.
4. USB Extensions
Using a powered USB extension which plugs into the PC and mains I hope to mount the device into the desk, cutting a vertical slot into the surface, of which would fit perfectly allowing flash devices to be plugged in easily. I will also use a shutter lid for this device, therefore sticking on the lines anti surface clutter aspects, where it is also convenient as it will be sunk into the desk and not displayed.
5. Cable Management
This subject will always be at the top of any enthusiasts list, although number 5 here
 , as there are several means of keeping cables tidy and free from being cluttered or tangled. Since I want to keep my case in a cabinet under the desk (preferably the right side) would it be possible to run the cables directly through an accessible cavity built under the desk surface at the back without causing hazard?
I would love help and ideas on any of the subjects raised to be commented on this thread, as I am going to be building this desk very soon.
-Note, I will be building this from scratch, I will not be customizing a current desk. This allows me to extract any ideas from you with choice of material etc!

The desk will support 2 or 3 27" monitors which is undecided yet.
ANY IDEAS OF WHICH I HAVE NOT INCLUDED ARE WELCOMED!
Thanks,
REConnect (Will).


 , here a few screenshots;


