Soldato
Joined
22 May 2010
Posts
11,884
Location
Minibotpc
Another year another build, maybe a little simpler this time round as i'm feeling a little lazy but fancy a change.

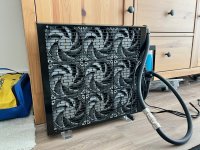
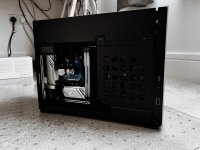
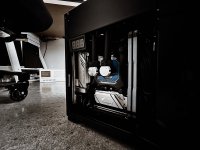
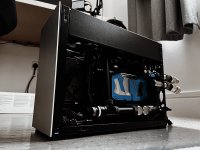
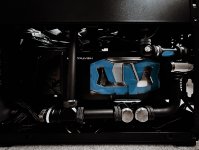
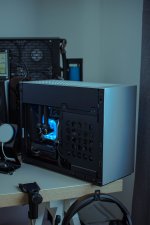
So my previous build will be downsized from a Phanteks Evolv Shift X to a Dan A4 H20 Silver, from a extremely tall itx system a 11 litre small compact build keeping with the custom watercooling. However all the watercooling heat exchange will kept outside of the case so i will be utilising my heatkiller MoRa 360 Radiator setup with the pump and res mounted to it.

This means the case will only consist of the core components:

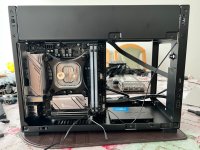
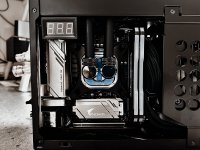
9900k clocked to all core 5.1ghz with XSPC Raystorm Neo block
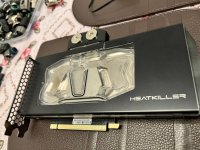
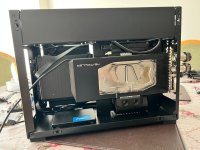
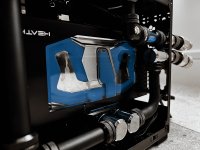
Palit 3090 with Heatkiller V block
Corsair SF750 Platinum 750w psu - I will possibly look at shorter cables in the future for a much cleaner build
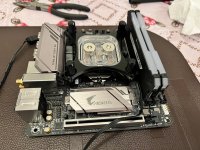
Gigabyte Aorus Wifi pro itx board
Corsair vengeance rgb pro 2x16gb 3200mhz ram
2x Noctua NF-S12A Chromax airflow fans (intake or exhaust, not sure yet)

Storage:
2x 2.5" 2TB SSD drives
2x NVME 1tb drives

External cooling:
Hardline tubing (Corsair Hydro XT black)
Heatkiller MoRa 360 Radiator
Phanteks T30 120x30mm fans x 9
Heatkiller D5 pump res combo
Noctua NA-FC1 fan controller


Aside from the gpu and psu that will be creating abit of heat (mostly gpu from the backplate as the rear memory chips get hot!) there isn't much else so the case internal itself should stay relatively cool. This begs the question whether i should have the top 2 fans as intake or exhaust. I'm leaning more intake so i can further cool the gpu backplate but this will introduce a problem of dust being blown straight into the case and i don't plan on using a filter at the moment to not impede airflow.


Pictures to follow once i get everything together
 
Soldato
OP
Joined
22 May 2010
Posts
11,884
Location
Minibotpc
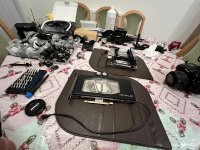
Full disassembled my Cyberpunk 2077 build. Was a shame to see it go but i really needed abit more space on my desk and its nice to have a pc that you can easily move around and maintain.

i4E39VC.jpg


Everything cleaned and washed through and remounted. A fair bit of gunk in the gpu block surprisingly, i don't even know what it is if im honest but it was stuck in the fins in the block, might be the cause of my slightly elevated gpu temps. With the mobo out i was finally able to mount my second nvme drive instead of using a nvme enclosure and attaching via usb c saving me abit of room here.

iVIAjFf.jpg
SCDaLrb.jpg


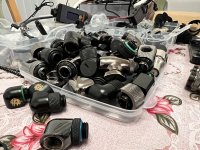
This huge pile of fittings soaked in Deionised water for a bit then rinsed and soaked again. They were a little gunked up from the fluid but the soaking helped break it down, then wiped down with a clean microfibre.

5IIFSUa.jpg


The MoRa 360 radiator also drained, pump swapped out for a cleaner one with braided cables. The rad coolant was surprisingly clean, no bits or gunk in it. Should be safe to reuse i think.

y2DjrCu.jpg


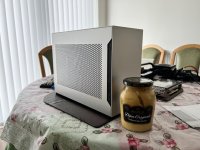
The new Case! Jar of mustard for size comparison.

MdX9GZU.jpg


Mobo install, just shows how small this case really is!

asMwPJ9.jpg


GPU test fit and tubing run planning

5EJFumL.jpg


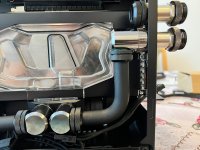
First tube run, a simple but clean 90.

GVGKLkW.jpg


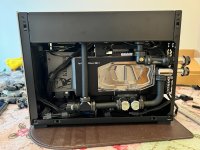
All plumbed up and last minute checks on the lines and fittings for tightness. I haven't used a leak tester, some people swear by them and it does help but in this instance i just didn't have one on hand.

JEVDOCs.jpg

C4EGtp9.jpg


Filling this baby up, slow mo style!


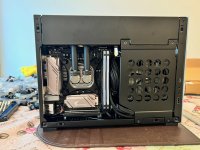
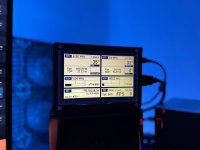
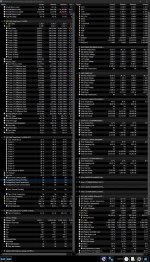
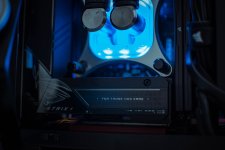
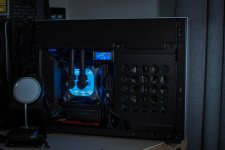
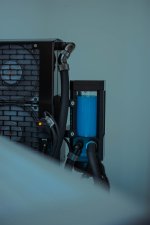
Final build pics and changed my config on my stats panel to suit.

rbPOcbD.jpg

OpsQ9r5.jpg


Possibly a few more mods to come, i forgot to install a flow meter. Will incorporate this at a later date.
 
Last edited:
Soldato
OP
Joined
22 May 2010
Posts
11,884
Location
Minibotpc
When your radiator is larger than your case. Looking real clean. I need to shrink my build down to something like this. Always learning something new :)
Was thinking today how i could make this really portable with quick disconnects and a single 240mm radiator so i could still use it if i took it out anywhere. All i have to do really is install a 240mm radiator, rearrange my pipework somewhat to suit the radiator and fan installation and then make the QD's and tubing at the rear abit longer so i can connect the 2 QD's together to form a self contained loop.
 
Soldato
OP
Joined
22 May 2010
Posts
11,884
Location
Minibotpc
Also, messed around with undervolting last night and i got a nice stable 906mv for 1920mhz, i was able to drop it some more to do 896mv but i don't think it will be stable in the long run.

With this in mind, i was able to stabilise around 318w at full load while running Heaven Benchmark on a loop for 30 mins with max temps on the core around 43c and hotspot, jct temp around 55c
 
Soldato
OP
Joined
22 May 2010
Posts
11,884
Location
Minibotpc
Soldato
OP
Joined
22 May 2010
Posts
11,884
Location
Minibotpc
Upgrade coming!

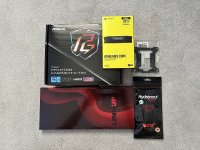
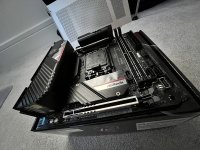
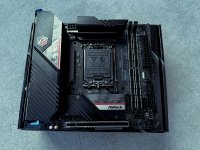
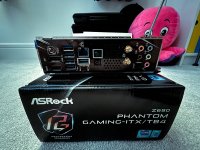
Decided in the end to go for Alder Lake with DDR5 5600mhz C36 Corsair Vengeance Ram with a 12700k chip and a Asrock Z690 ITX TB4 motherboard.

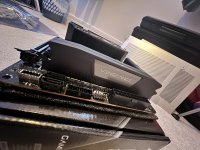
Also needed a PCIE gen 4 riser to make use of the gen 4 3090 i already have plus a LGA 1700 bracket for XSPC Waterblock.

TQSZXa5.jpg

pCdpVSI.jpg

SnCYq8x.jpg

YJIDbFv.jpg

zlVH03B.jpg
 
Soldato
OP
Joined
22 May 2010
Posts
11,884
Location
Minibotpc
how does the riser look is it angled in the same way I have a lian-li 4.0 riser but it keeps dropping down to x8 on one boot and then back to x16 so thinking of getting a replacement but want to find one with same orientation.
I took advice from a reviewer who linked to me the correct one that works and is the correct length. I've not installed it yet but gonna do it all tonight so will keep you informed.

I can't link you due to forum rules but if you search this:

LINKUP - Ultra PCIe 4.0 X16 Riser Cable [RTX3090 RX6900XT x570 B550 Z690 Tested] Shielded Extreme High-Speed Vertical Mount Gaming PCI Express Gen4┃Dual Reverse Connectors {20cm} Designed for ITX​

 
Soldato
OP
Joined
22 May 2010
Posts
11,884
Location
Minibotpc
I am also using a Linkup riser cable that I got from the rainforest. The range of choice available made it really easy to get the correct cable that fitted best with the case and situation I had. The Lian Li cable I was trying to use was way to long and was unworkable so I got the Linkup one and has worked perfectly for me. I have had no issues in over a year and I was expecting it to be problematic, very happy I was wrong.

Linkup would certainly be my goto choice for a new project in this area.
I read a review that Lian Li actually uses Linkup for its OEM cables in their cases, i dunno if its true but it kinda makes sense since they have so many different cable types and lengths and even specific ones to work for a specific case. They have a chart to show you which cable works for which case, its really handy.

It's really expensive though, this cable did cost over £70!
 
Soldato
OP
Joined
22 May 2010
Posts
11,884
Location
Minibotpc
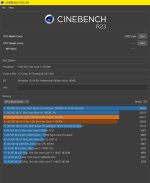
After some evening testing last night, till very late 3am! I was slowly approaching the limit for a level 5 (lowest setting) for the LLC with the auto voltage set for 4.9ghz on the Pcore. I set the lowest possible LLC at level 5 with the auto voltage setting 1.31/1.32v for 4.9ghz it drops the voltage down to 1.28v during R23 bench. The temps are good and stable with plenty of headroom.

Ecore is set to the limit for this overclock to 4.0ghz, any higher and R23 will crash when you start the benchmark.
Ring Ratio is set to 4.1ghz, though from 4.0 to 4.1ghz it did nothing to R23 score.

The problem now lies with setting the pcore ratio to 5.0ghz as the auto voltage will automatically jump to 1.34/1.35v, though this technically is well within the 1.4v safe limit that i've been reading about, it pushes the temps to around 90c on a custom loop and does require LLC level 4 at a minimum though i've had better results with Level 3 which pushes the temperatures even higher.


I'm thinking at this point whether its just worth sticking to 4.9ghz pcore and 4.0ghz ecore or push it to 5.0ghz pcore and 4.1ghz ecore and deal with the temps as this temp is only during R23 bench, during normal gaming it will happily sit around 60/65c depending on the game.

4.9ghz pcore
4.0ghz ecore
4.1ghz ring ratio

vQzqaqc.jpg
-------------------------------------------------------------------------------------------------------------------
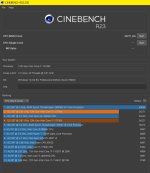
Edit: here's the run with
5.0ghz pcore
4.0ghz ecore
4.1ghz ring ratio.

Max average temp 94c! Ouch! Vrm temps sitting at 85c. Really have hit the limit here, but im still unsure how to use the voltage offset as it works in mv which means setting something like -100 should be -100mv but im getting crashes during post and windows and -100 seems to be the limit too.

KcGxk7K.jpg
-------------------------------------------------------------------------------------------------------------------
Edit 2: Here's the final run

5ghz Pcore
4.1ghz Ecore
4.1ghz Ring ratio

VID Voltage 1.35v and Vcore voltage 1.328v with temps average 94c again

5OpKFA5.jpg


It's an improvement but barely!
 
Last edited:
Soldato
OP
Joined
22 May 2010
Posts
11,884
Location
Minibotpc
After 2 days of playing about with the overclock i've finally settled for something thats lower volts and much lower temps.

i've ended up with the following overclock:

5ghz p-cores All core
4.1ghz e-cores All core
4.2ghz ring ratio
Offset voltage of -50mv which brings my voltage down to 1.264v and a max temperature (highest core) 86c which was yesterday when ambient temps were touching 28/29c! Expecting that to be a few degrees cooler today.

VID Voltage is still 1.345/1.35v but i can't see in the bios where i could adjust that, not that its really affecting anything but im just happy to finally be able to bring that vcore down to something more reasonable for the overclock i've set.


With the cpu overclock now set i've begun overclocking the ram.

My Corsair Vengeance 5600mhz (2x16gb) C36 kit is a Samsung Bdie but there's not much out there right about this kit since its relatively new. I don't know if its voltage sensitive or temperature sensitive or both?! To start i've set the XMP profile 3.0 which runs the kits rated speed which has been tested on Memtest64 30 passes and no errors. I'm not gonna do 8 hour passes at this stage, im more testing to see if a setting i've changed has made a negative impact. Once i'm happy with the overclock i'll see about a longer test to really make sure its table.

So far just nudging up from 5600mhz to 5800mhz has been stable, no adjustments needed.
Going for 6000mhz now and will test via the same 30 run loop for errors. If its not stable i'll come back and up the voltage to 1.3v from 1.25v and go from there.

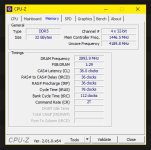
J7aVuD2.jpg

Note: The BLCK for whatever reason is not running at 100mhz on auto? I have to manually adjust to 100.25mhz to get a full 2900mhz. Because the BLCK dictates the clocks for the pcore, ecore and ring as well the same problem persists so an adjustment will see it at the correct speed.
 
Soldato
OP
Joined
22 May 2010
Posts
11,884
Location
Minibotpc
self notes:

Stock memory kit rated for 5600mhz

5800mhz xmp timings and rated voltage 1.25v stable (30 min aida64 memory test)
6000mhz xmp timings and rated voltage 1.25v unstable, raised voltage to 1.28v stable (30 min aida64 memory test)

XMP timings are 36-36-36-76 command rate 2N

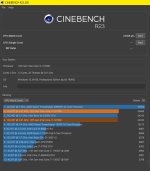
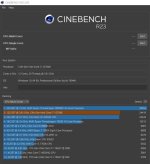
Rerun R23 to see effects:

Fct4PtH.jpg

I guess there is an effect? gained 200 points. (note i had bumped the Ring Ratio to 4.2ghz previously as well).


Q89PoTN.jpg
 
Last edited:
Soldato
OP
Joined
22 May 2010
Posts
11,884
Location
Minibotpc
that mora 360 is insane!
Probably one of my best investments in watercooling, i've bought and sold so many different radiators over the years but the MORA 360 has been a solid use component that i've been transferring from build to build. Simply because it always sits in the same position on my setup and all i need to do is configure the tubing runs in the case. Makes life so much easier and simpler with the Quick disconnects and gives me a huge cooling potential.
 
Soldato
OP
Joined
22 May 2010
Posts
11,884
Location
Minibotpc
Updates:

Since my last post i have changed motherboards, on initial stages i really liked the Asrock board! Easy to use, bios isn't too overwhelming and enough settings to get a decent overclock. However things went abit downhill from there with the VCCSA voltage which i had no idea about until someone on another forum pointed out that it was way too high. I tried to get as much info as i could regarding this voltage but it seems this board is a rather rare sight on the itx community and i ended up contacting Asrock tech support for help. They too agreed the voltage was not right and was quickly to investigate the issue. During this time i was worried it would damage my cpu so out of desperation to get things right i ended up sending the motherboard back to the retailer for a refund and now im the owner of the Asus ROG Strix Z690-I motherboard. Tons more settings and features compared to the Asrock motherboard and all in all i've managed a better and more stable overclock than previous. At the same settings as my old board im achieving a higher score on R23 bench which is great! The extra bonus being at a lower voltage too which means lower heat output and lower vrm temps.

The only real gripe with the board is the awful Armory Crate software which is needed to control the rgb headers. I couldn't get it to install no matter what i tried! Kept failing and coming up with a 200 error whatever that means! I ended up looking for an alternative software to control rgb headers and landed on SignalRGB which is working fine so far aside from using abit of the cpu usage around 2%.

Also an update regarding the ASrock board incase someone stumbles upon this. ASrock techs support reached out and confirmed the voltage is a misread and its actually within limits although they did not confirm how much the default voltage actually is. They said a new bios starting 11.x will fix this and remove/disable the reading to avoid future confusion. So if you have this board, apparently its nothing to worry about and you should download the latest bios 11.x to fix this.

XSPC also came through with a silver mounting bracket for the XSPC Raystorm EDGE block! Many thanks to Rob from XSPC for this!


CPRl7VV.jpg

a2HEWHN.jpg

cVwEEPn.jpg

HW4DRfx.jpg

Nlf9tlm.jpg


5ghz P, 4ghz E, 4.2ghz Ring

nKVXkw2.jpg


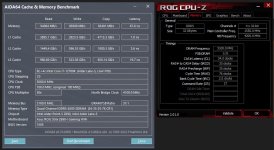
Corsair Vengeance 6200mhz OC XMP settings @1.35v VDD, VDDQ, 1.21v Memory controller.

eQMt4pa.png
 
Soldato
OP
Joined
22 May 2010
Posts
11,884
Location
Minibotpc
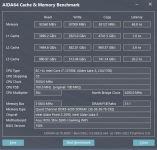
A little further with the timings tonight, it's a pain because every little tweak i need to run memtest86 to test for errors.

Now running 34-35-35-76 1T @1.38v. I'll continue to push until i need more voltage.

fT6Az98.jpg
 
Back
Top Bottom