Deep End

Associate
Joined
23 Jul 2011
Posts
156
Deep End - First time Watercooling and Modding (600T)

Hello everybody! After seeing all the fantastic work on here I thought I would start a project log of my very own!

TLDR

This is my first proper computer and my first attempt at overclocking, watercooling and modding so lets rock!

Long Version

Well this is my introduction I guess. About a year ago my laptop died and I decided to build my first gaming PC. It’s evolved pretty quickly and in about November I settled on some hardware that I was pretty happy with:

• Intel i7-2600k
• Asus P8P67 Pro
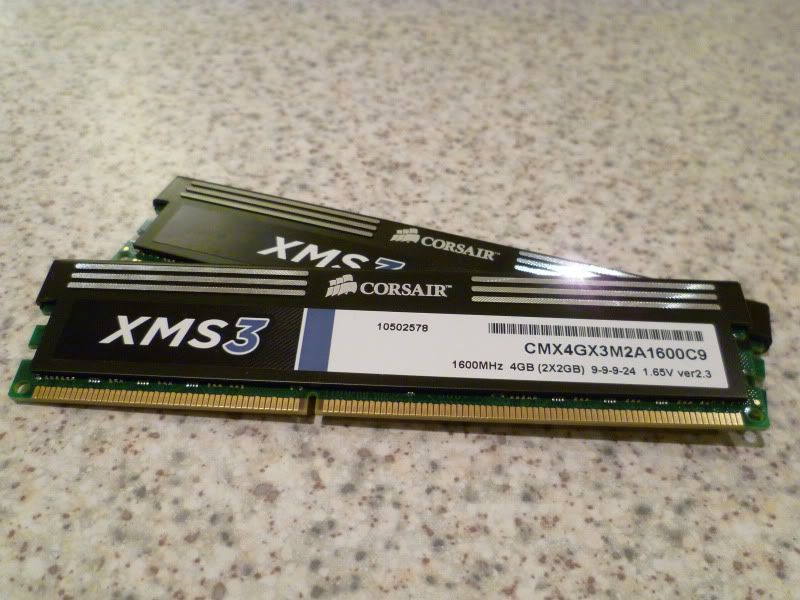
• 8GB Corsair XMS3 RAM
• KFA2 GTX580 1.5GB
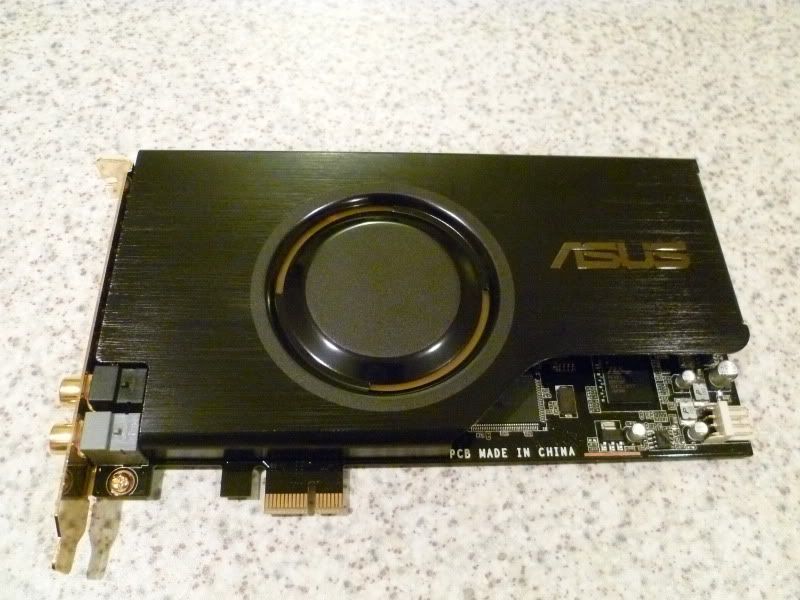
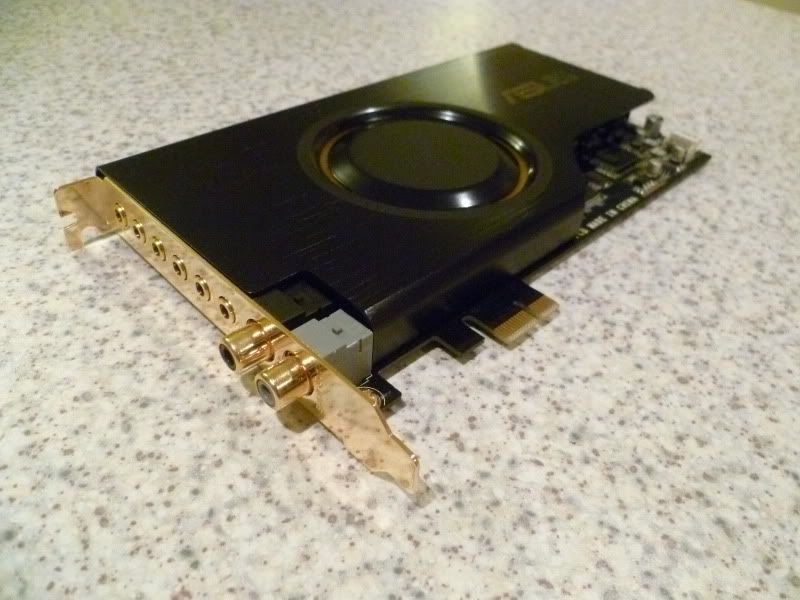
• Asus Xonar D2X
• LG BH10LS30 BDRW
• Crucial C300 64GB
• WD Caviar Green 1TB
• Coolermaster Silent Pro Gold 700W
• Corsair 600T Graphite

I’m pretty happy that this is a pretty solid PC for both gaming and my Uni work. Should see me through until I finish my course or I get bored! I initially started with everything air cooled and life was good.

I then started an awesome job which opened my eyes to what was possible, however I didn’t know anything about watercooling or overclocking so this was jump in at the deep end!


So let’s throw some ideas out there. The 600T has room for a slim 240mm rad in the roof and a 200mm fan in the front which is perfect for a 200mm rad. I really liked the XSPC dual bay res/pump combo and it seemed a great space saver. Last of the main parts I’ll be using are the EK waterblocks in nickel/plexi as in my personal opinion nothing else on the market looks better and the performance isn’t too bad to boot! So now I have a kit list for my cooling.

• EK Supreme HF
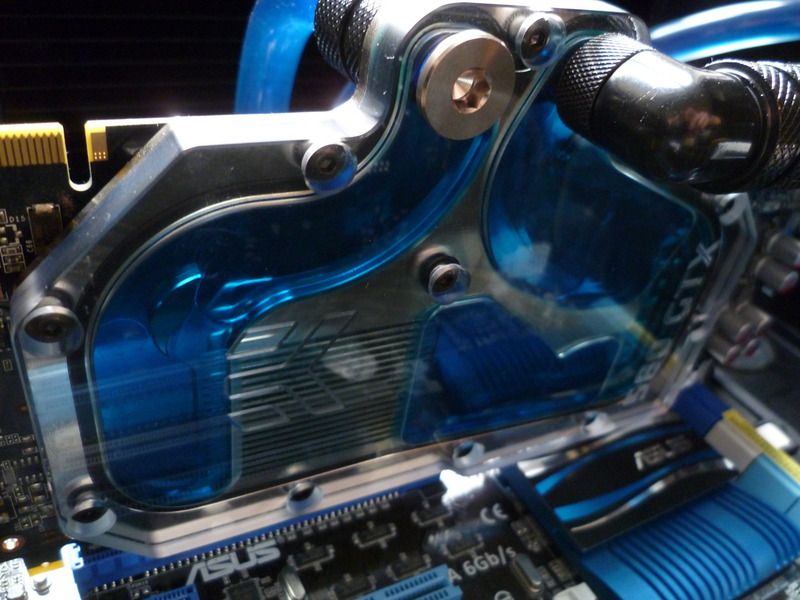
• EK VGA Supreme
• XSPC X2O 750 dual bay pump resevoir
• Hardware Labs Black Ice 240 Radiator
• Phobya Extreme 200mm Radiator
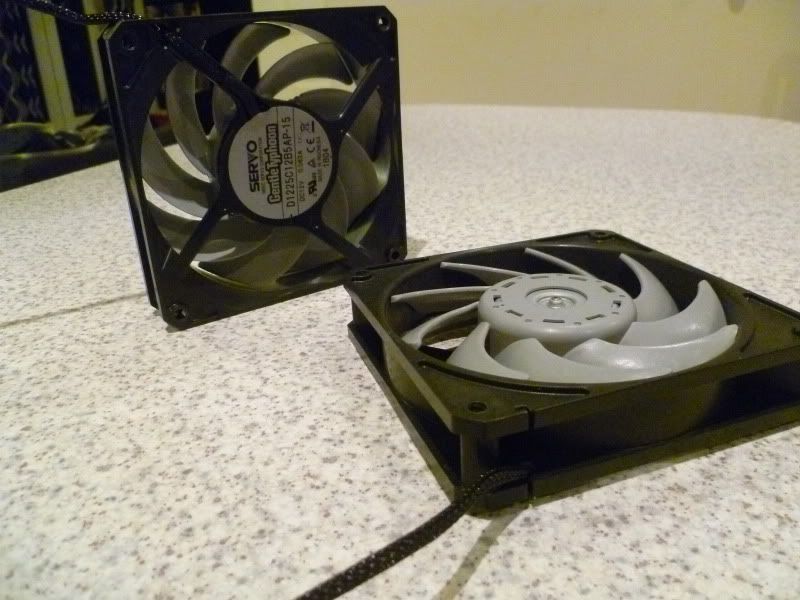
• 3x Scythe Gentle Typhoon 1850rpm
• A suitable fan for the phobia rad
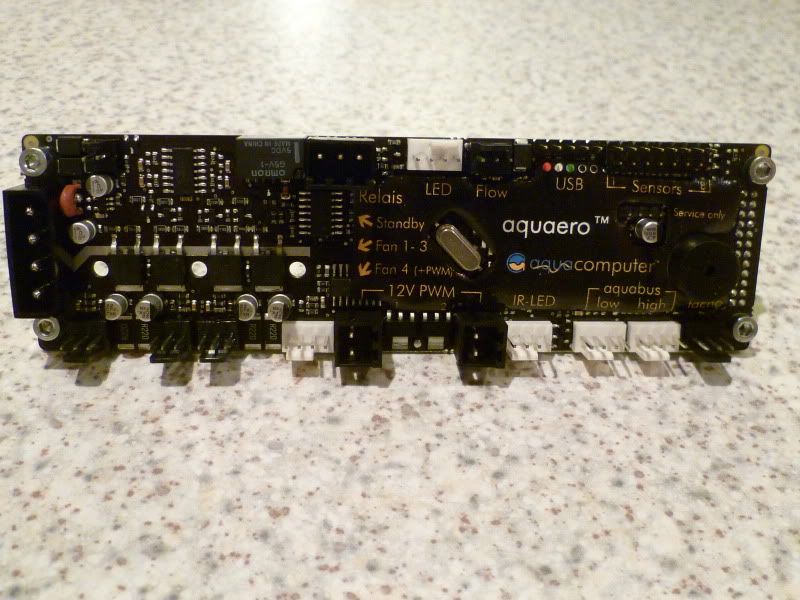
• Aquacomputer Aquareo 5 LT
• EK Fittings all round
• Mastakleer Hi-Flex Tubing

And 30 seconds in paint to put my plan in a picture!

plan.jpg


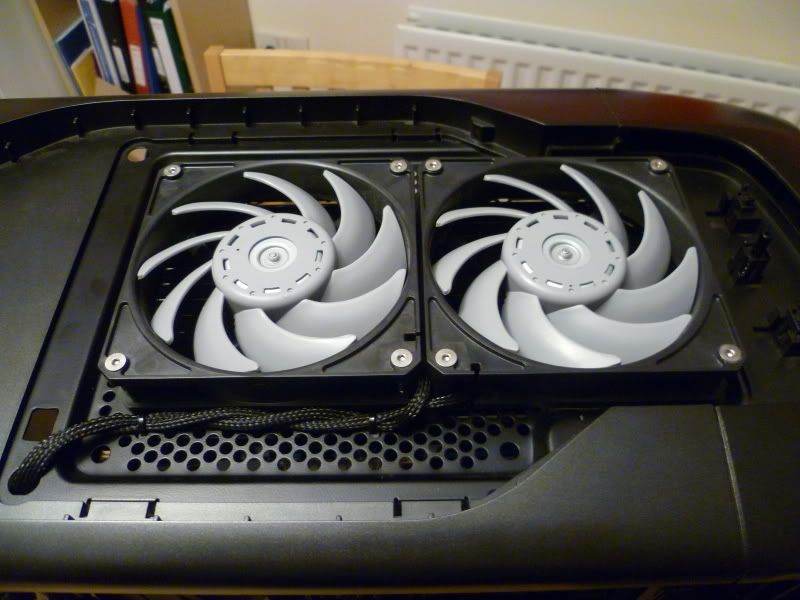
Well the plan is as above. I also have to say that I have started playing around and I found out a couple of things. The fans make noise as they draw air through the grills on the case and thus starts my adventure into case modding.

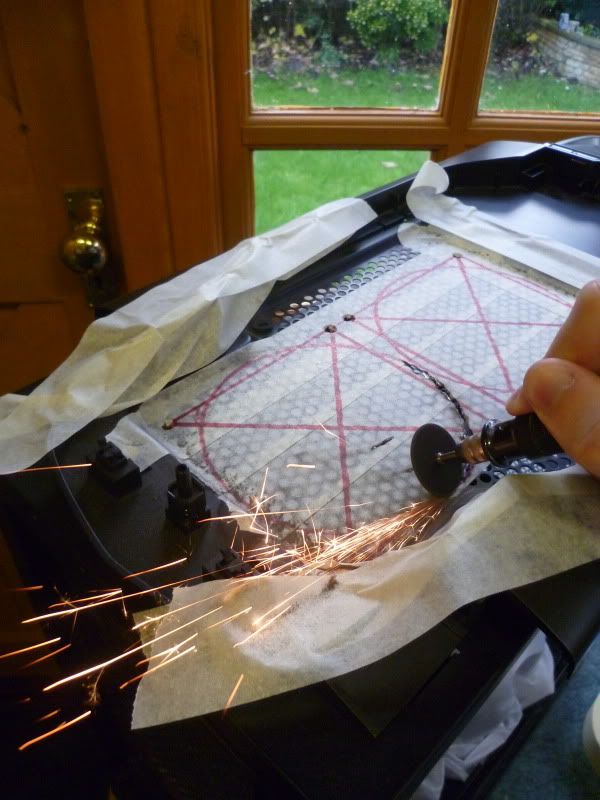
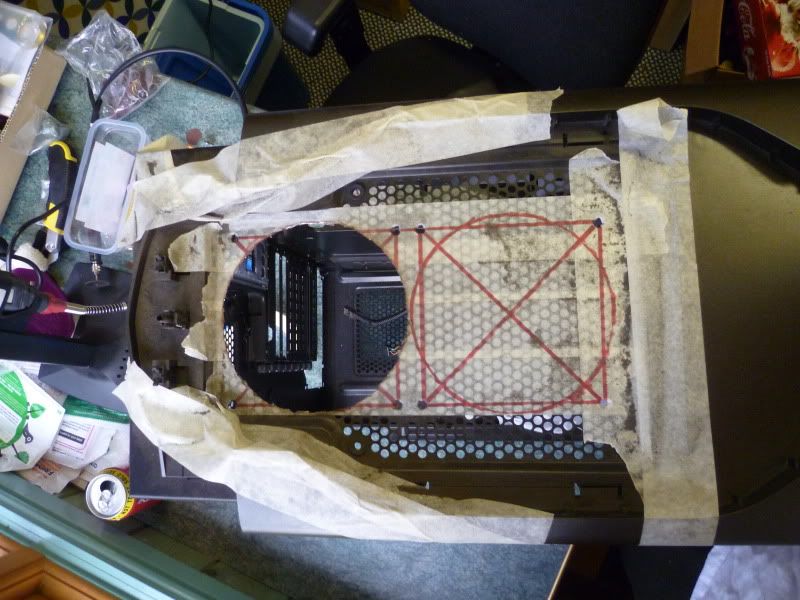
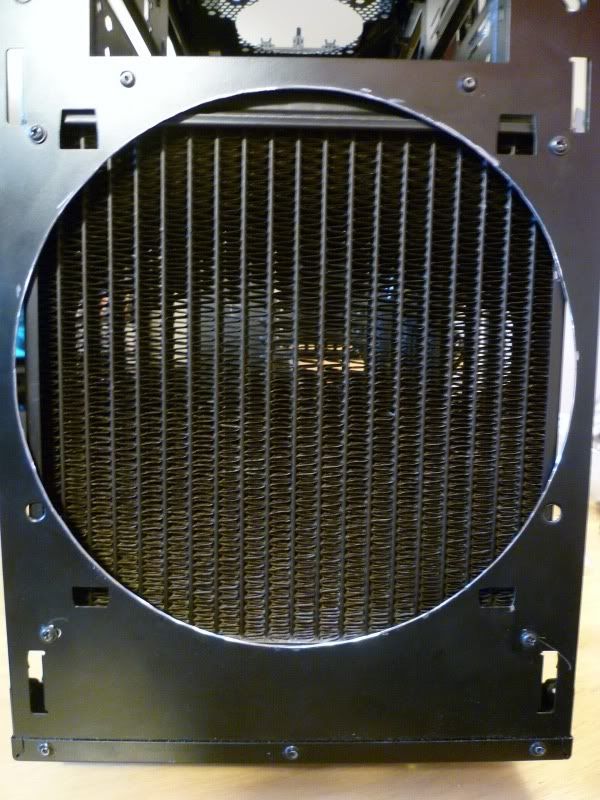
I marked up the holes I wanted for the fan, I guess starting my dremel experience with circles may not have been the greatest idea but it turned out pretty well for a first attempt!
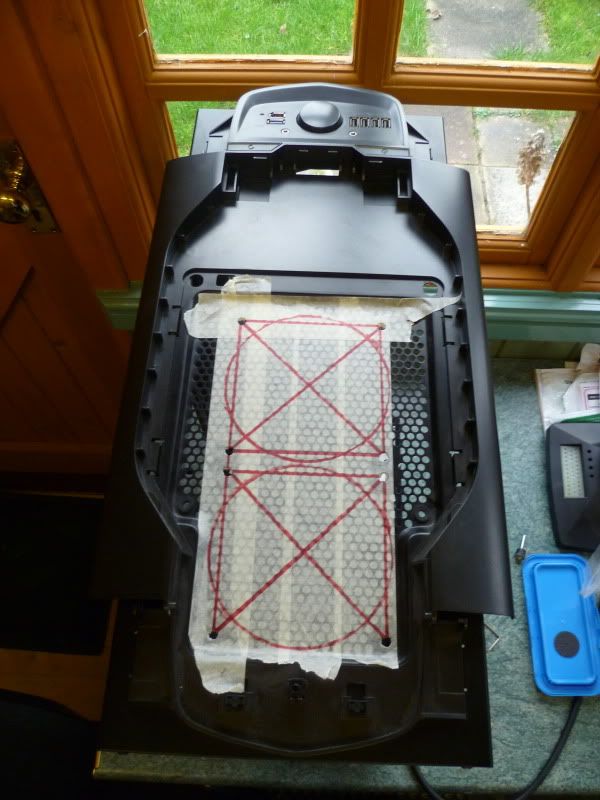
P1000488.jpg


Obligatory sparks photo

P1000495.jpg


One down

P1000496.jpg


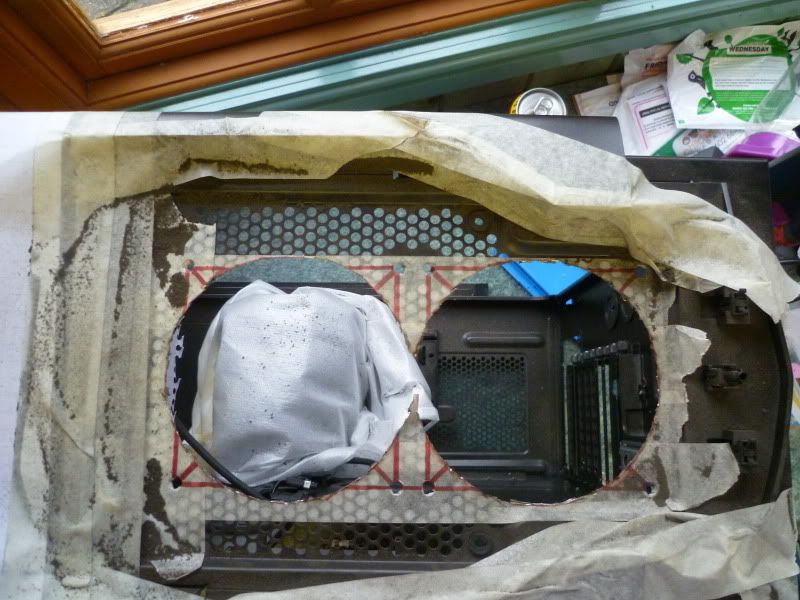
and two down

P1000499.jpg


I didnt like the points in the middle so I squared those off too.

I then ran into a problem, my last cutting disk. I guess the front grill will have to wait!
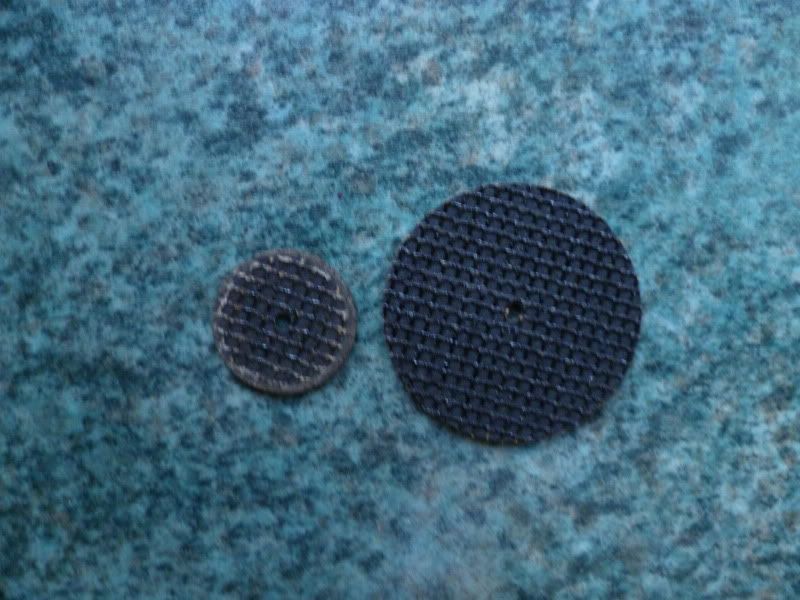
P1000503.jpg


I guess that's all there is so far folks. My plan is just to make this PC as sleek and as powerful as possible so stay tuned!:)
 
Last edited:
Glasses and a mask are a must! I had a couple of disks break and I'm glad I was wearing them! I was also covered in black dust so I'm very grateful to the mask. You can't RMA body parts!

Back to the build!

It’s been a long time since my last update. Over the Christmas holidays I was quite busy and then back to work in the new year. I got some bits and pieces done but nothing to warrant a real update until now.

I started off by braiding all the cables on my gentle typhoons. This is quite and easy and relaxing task. Much nicer than when I had a play doing my power supply that’s for sure! I think I’m going to be buying some proper tools for that!

P1000552.jpg


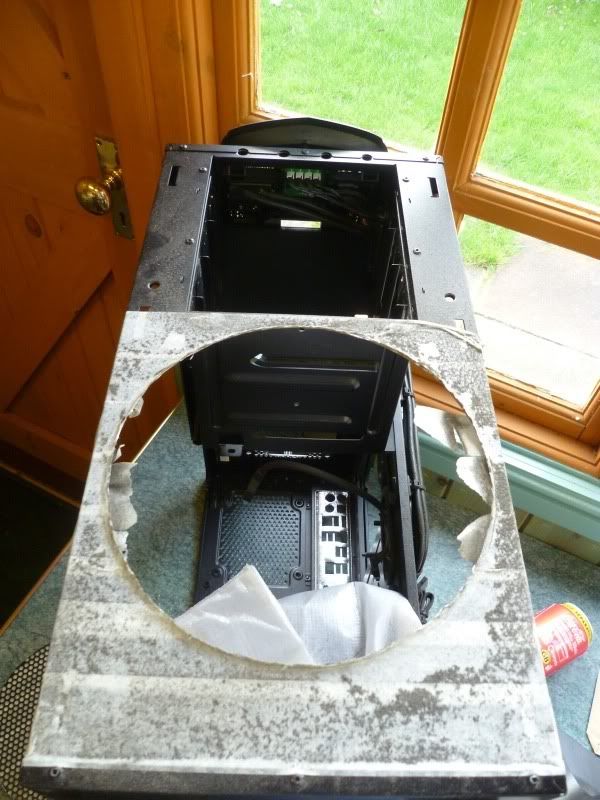
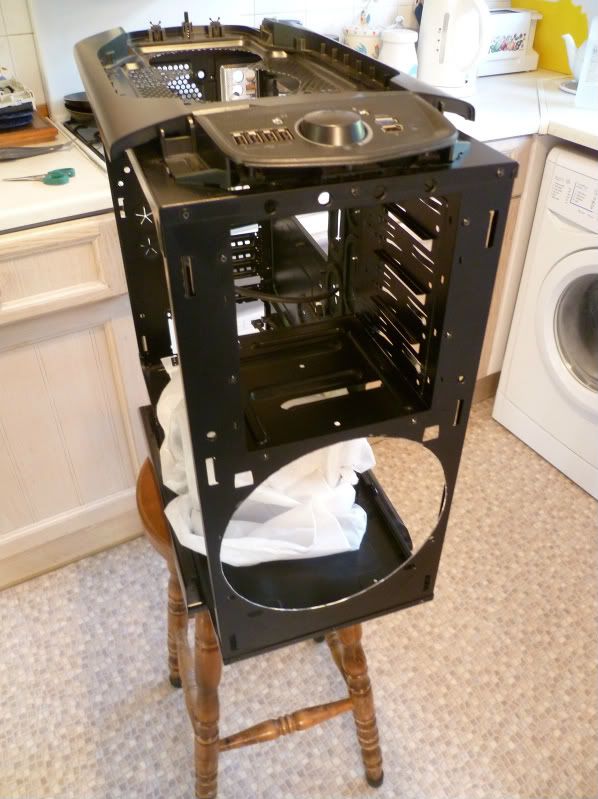
I also got my hands on some more cutting disks and managed to remove the pesky grill out of the front of the chassis. This grill produces so much noise with the fan behind it I was glad to get rid.

P1000542.jpg


P1000544.jpg


I thought I would include some pictures of some of the hardware I will be using.

P1000567.jpg


Just some XMS3 RAM bit boring but it will do the job

P1000581.jpg


P1000580.jpg


Asus Xonar D2X – Fantastic sound quality from this. I was a bit sceptical but the difference between this and on board is pretty huge.

P1000561.jpg


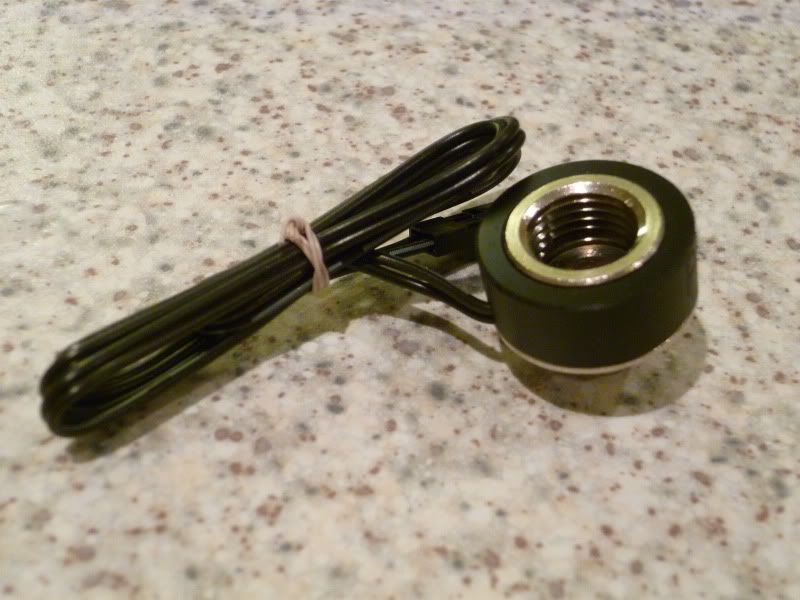
I wanted to be able to control the fans better than the motherboard would allow and this was recommended on these forums so I got one. I’ve had a bit of a play with it using my spare PC and it’s awesome. So customisable. I intend to have dynamic fan control using the temperature sensors. (pictured below). I love how slow it can get the GT’s down too. I also like the fact it will turn them off completely so I’m going to do some experimenting when its all finished and I’m hoping for near silence while browsing and light work with only any real fan noise while gaming hard.

P1000566.jpg


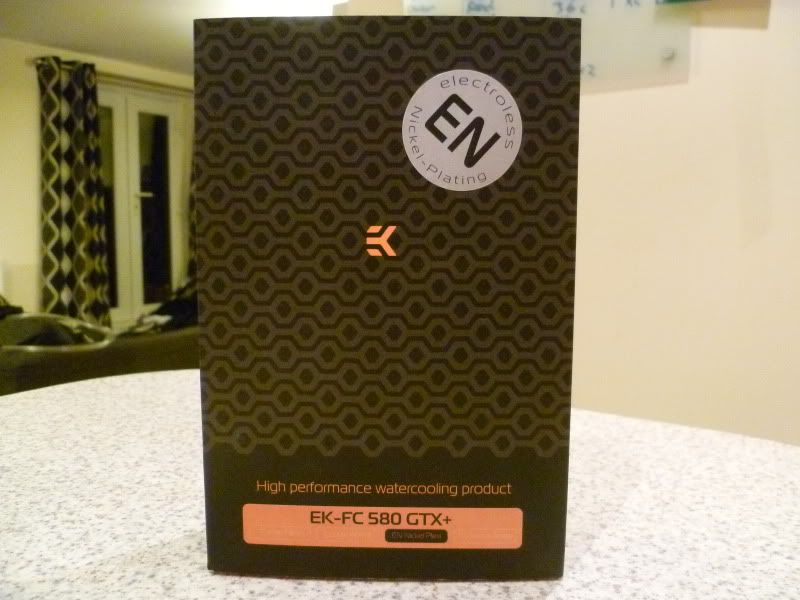
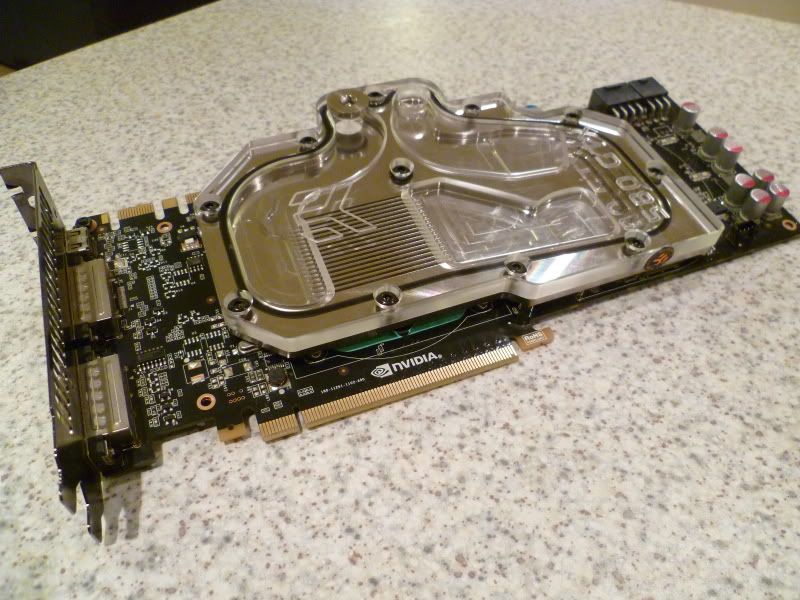
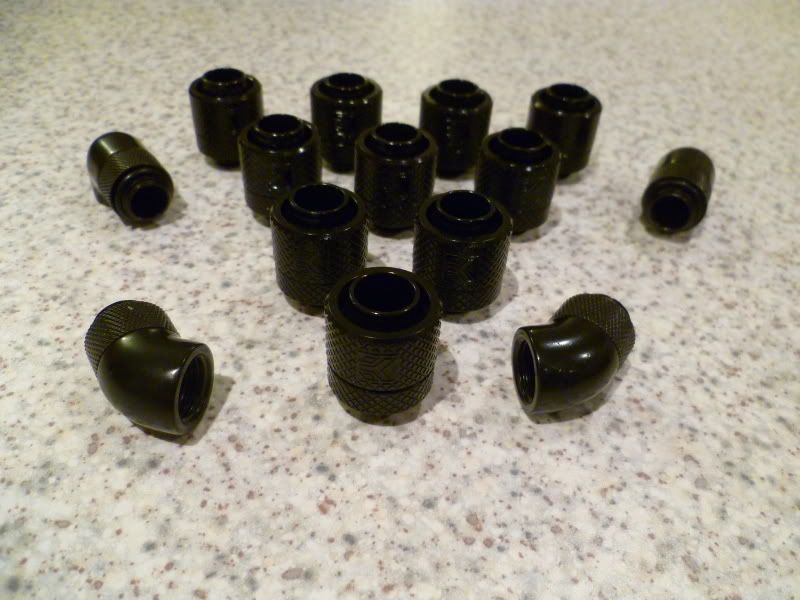
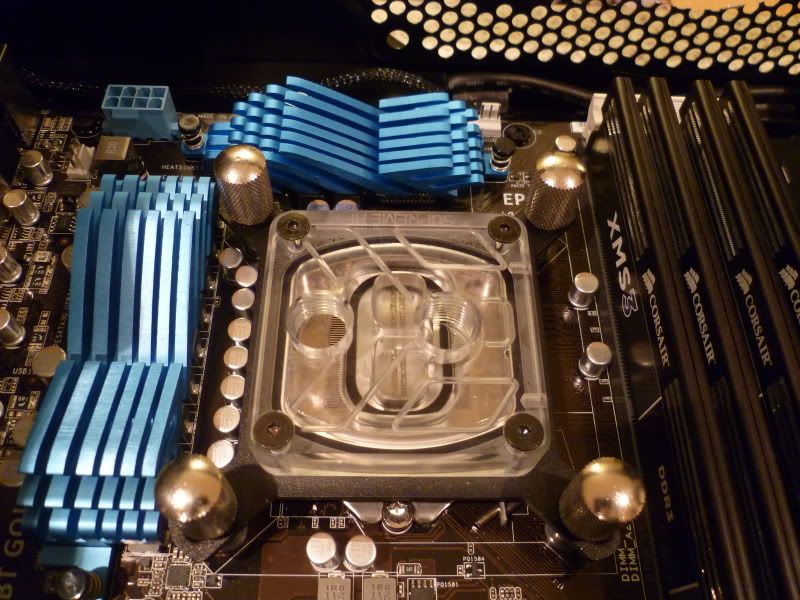
Water blocks, fittings and pumps. These are all pretty standard parts. I changed my mind on using the EK VGA Supreme so that went back and I decided on using a full cover block. One lesson learned don’t compromise. It costs more in the long run.

I love how these blocks look with coloured fluid running through them. I guess its going to have to be blue to match the motherboard but we’ll see.

P1000574.jpg


P1000575.jpg


P1000591.jpg


P1000585.jpg


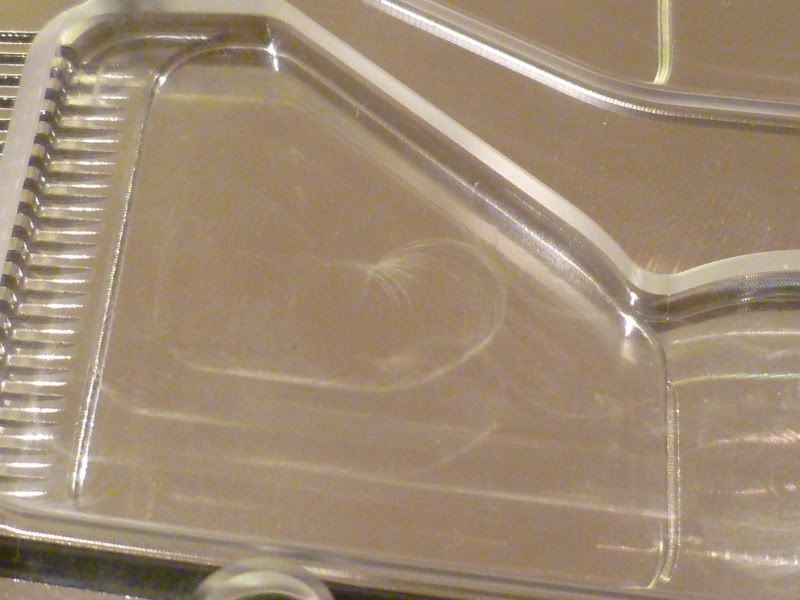
The only thing I’m a little disappointed with is I can clearly see tooling marks on the plexi on the GTX580 block which spoils it. I’m reluctant to send it back as I’ve fitted it now (plus its already taken me one RMA to get this block. I guess I may end up just getting a new top at some point. Shame for the price of a premium product.:(

P1000579.jpg
 
Last edited:
I also decided to chuck some of the components in the case to get a picture in my mind of how it will all look and where the tubing routes will run. I can’t wait. I still need to get the Dremel back out as the front of the chassis needs some minor surgery in order to mount the 200mm Phobya rad. I could mount it to the fan mount but to me this seems like a compromise and I’ve already learned my lesson on that. It also means I can get my hands on a Coolermaster Megaflow which should move a lot more air than the standard Corsair fans.

Anyhoo that’s all the updates I have for now. I need to find some trim to neaten up the fan holes and I also need some more mounting hardware for my rads and fans but it will come in time. I’m getting Battlefield withdrawal. My housemate has it on the Xbox and it just isn’t the same:p

P1000572.jpg


P1000573.jpg


P1000569.jpg
 
I will be using Mayhems Blue, ordered today!

I had quite a busy weekend all in.

Firstly I got myself a new toy!
r00005v3.jpg


I wish I had this when I started cutting! It makes cutting through the chassis a breeze!:eek:

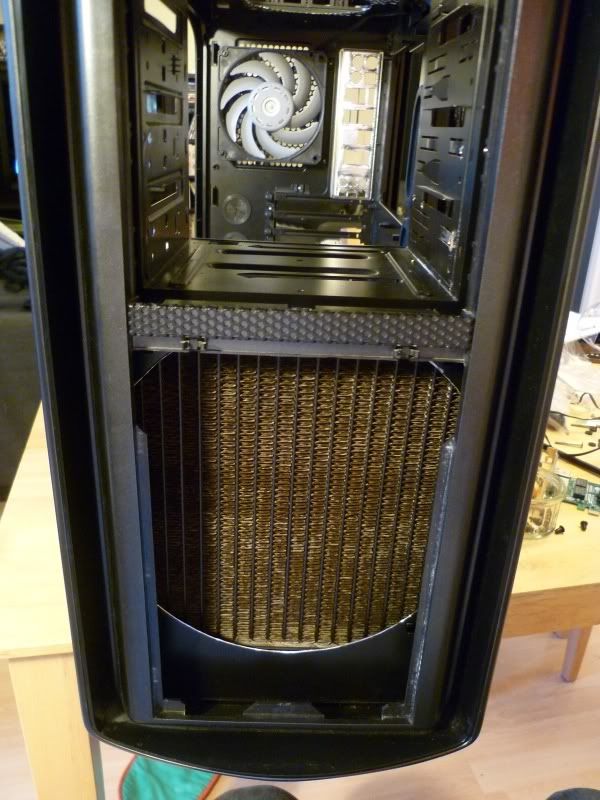
Unfortunately I don't have any work in progress pictures but I had to remove some of the metal from the front of the chassis using a cutting wheel and a grinding disk. Once everything was nice and flat I measured up drilled some mounting holes et voila!

P1000597.jpg


P1000594.jpg


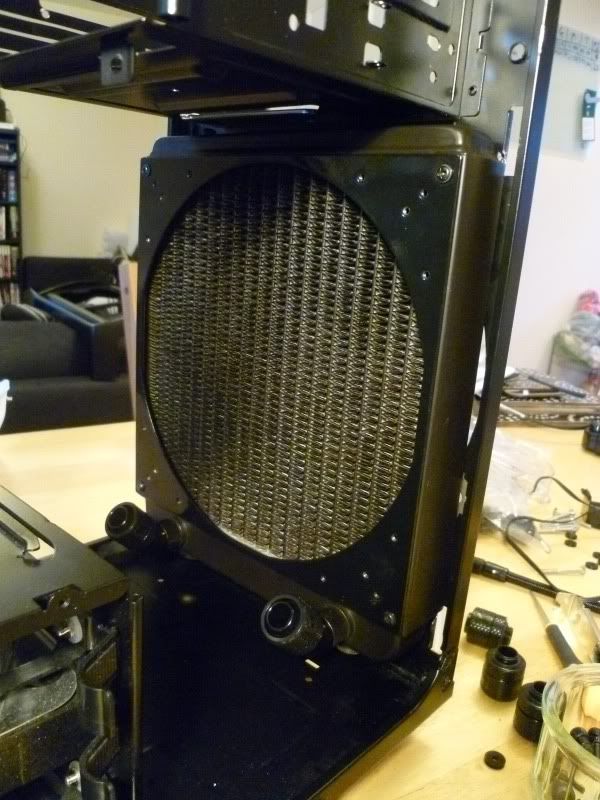
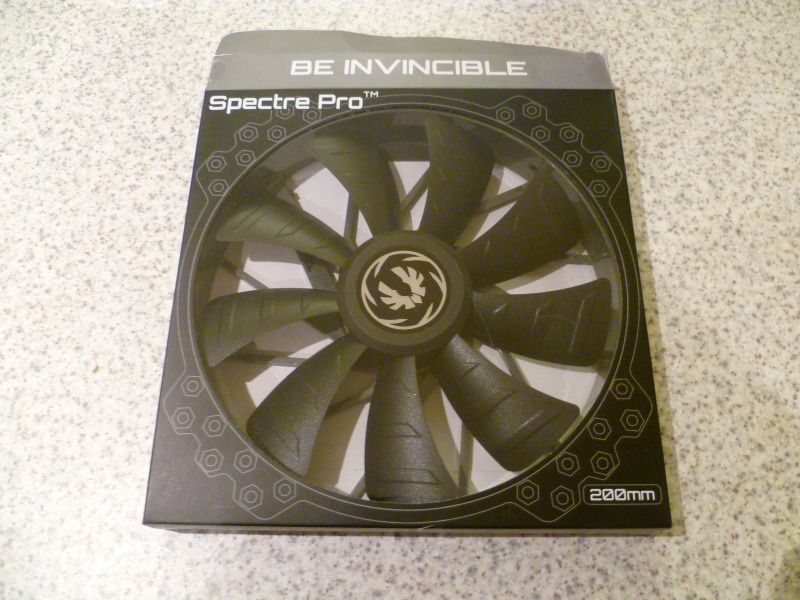
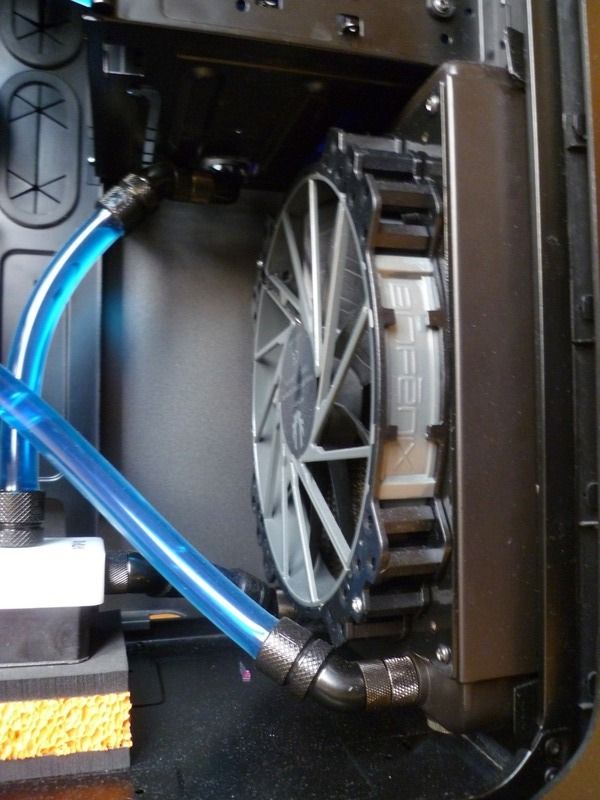
Rad mounted in the front. Nice and secure ready to have the fan mounted on the back pulling cool air through. I have a Bitfenix Spectre Pro on its way to me which looks like one beast of a fan!

I know the bare edge of the chassis looks a bit of a mess so I have some neoprene trim coming to cover it although you dont notice so much with the plastic case on.

P1000600.jpg


Anyway I managed to get the Gentle Typhoons in the top. I countersunk the fans meaning I could use some lovely hex head machine bolts I bought. They also allowed me to use some silicon anti-vibration washers to futher hush them.

P1000607.jpg


Right, Thats all for this evening!

I welcome any feedback. As this is my first real build I really appreciate any comments made! Especially if you have any ideas where/how I can improve!

Night!

P.S Is there any way I can change the title of this thread? I would like a more descriptive thread title. I think I went a bit vague!

P.P.S It appears my pictures didn't rotate. Any ideas? They are the right way round on photobucket??
 
Last edited:
Ta, I did the stupid thing of thinking I had everything I need but my PC has been sat for the last week waiting for a 45 degree and a 90 degree fitting. Very frustrating. I'm also waiting on a shipment of thermal paste and a new fan.

Always plan carefully! You always need more rotarty fittings than you need!
 
Still waiting on parts to arrive. I keep having to check the post box at work! I'm really hoping they come today so I can get cracking this weekend. In the mean time I got a nice little bonus and decided to treat myself so I got a couple of new peripherals!

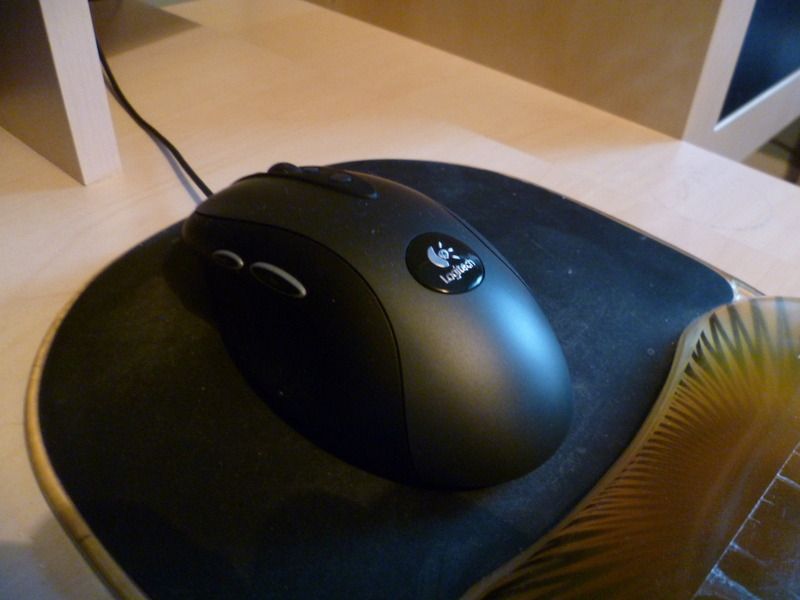
Logitech G400 - I have an MX518 at work and it suits me to the ground so this is the logical choice!

logitech-g400.jpg


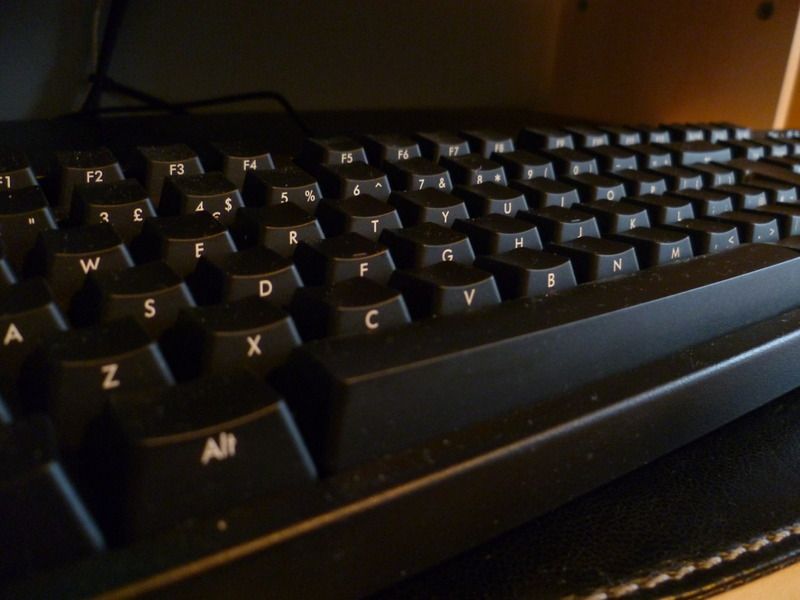
This was the real splurge! A Filco Majestouch Ninja! Cherry MX Browns and those glorious key caps! Mine is a UK layout but other than that the same as this. Everyone thinks I'm mad for spending this much on a keyboard! (I may be but oh well:D!)

majestouch-ninja_800.jpg


Sorry for the stock photos. I can get some of my actual KB\Mouse when they arrive if anyone would like!
 
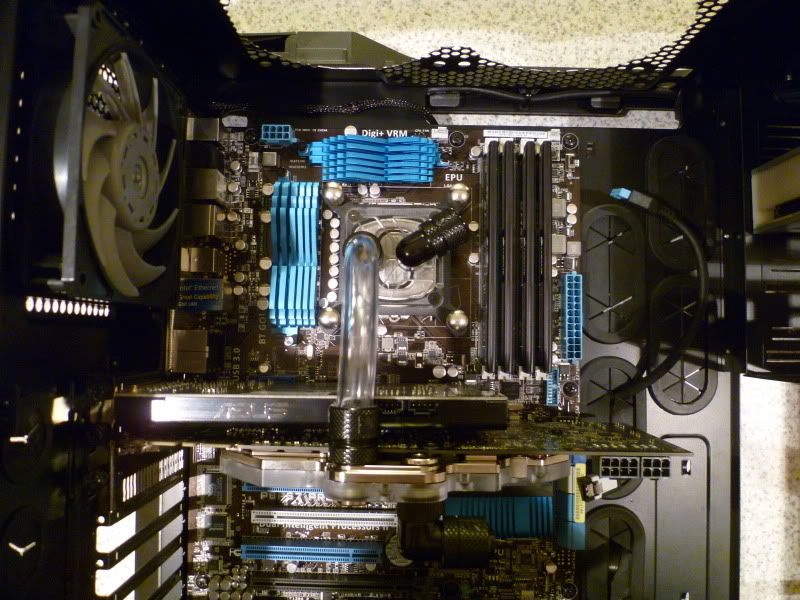
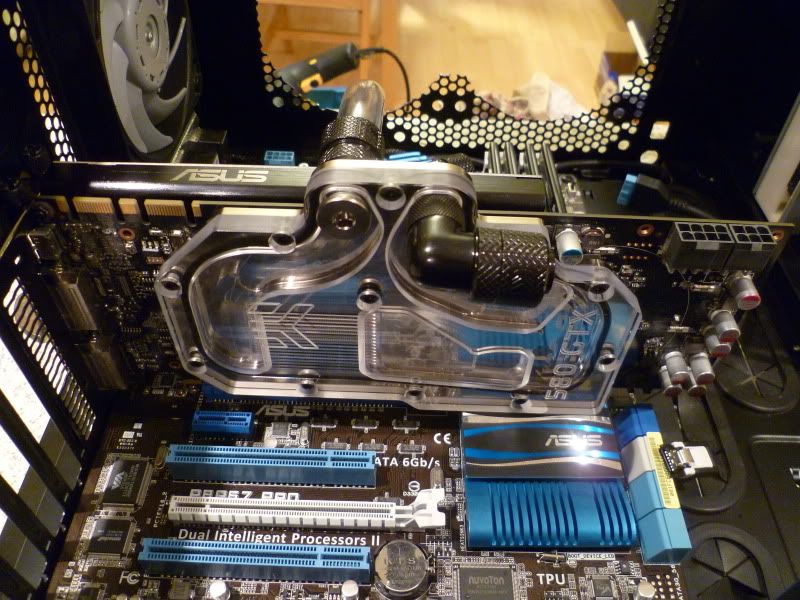
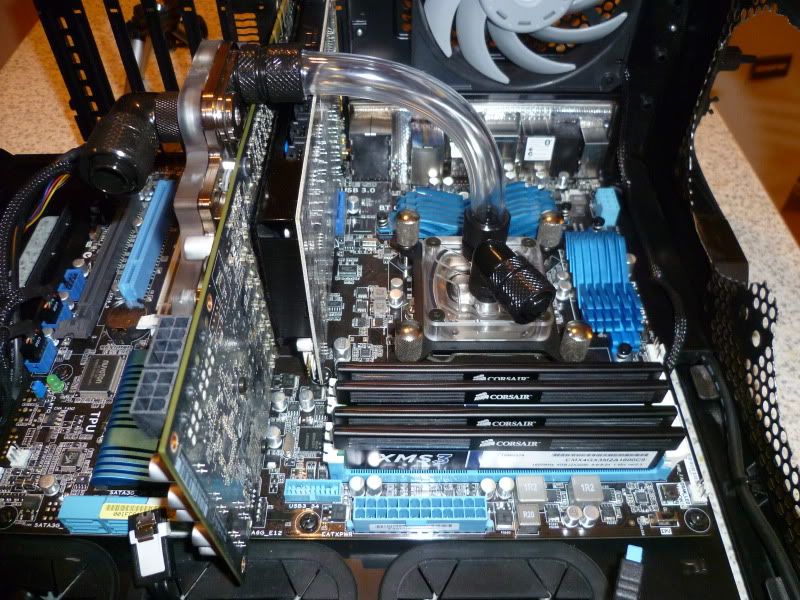
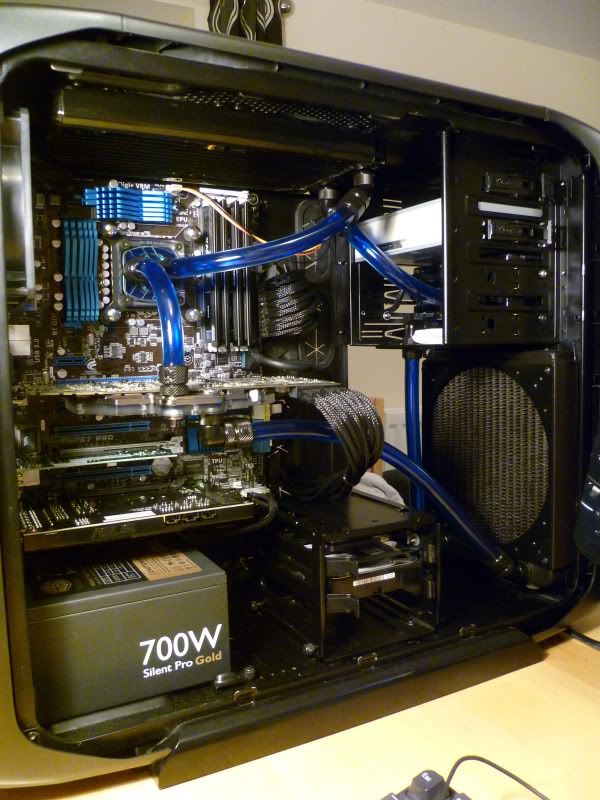
Well, I'm not very good at this project log malarkey! I'm just too eager to get on with things to take pictures. So here is some pictures as it stands now. Please ignore the cable plugged into the CPU fan header I will braid it in a bit. I'm just using it to give the motherboard an RPM reading from my aquaero 5 for the moment while I play around.

Unfortunately the fluid looks a lot darker than I had hoped so I may take some out and mix some distilled water to lighten the colour. I'm also still waiting on my fan for the front. The supplied corsair fan moves less air than a mouse fart so there isn't a chance I'm using that!

P1000654.jpg


P1000657.jpg


P1000655.jpg


The lighting in this room is awful! The flash screws up pictures too! I will take some decent ones when I get it fully finished!

I also have a roll of matt black vinyl on order to cover the bluray drive! Why don't they make the casing of these black?

What do you think? It plays BF3 on ultra no problem and the fans (missing one!) Barely kick in so I think I can get this uber quiet! Just can't wait to get it finished!
 
Lol it is a PITA dragging a tripod & camera to show WIP rather than just get things done even is still after a few logs lol :D.

Really looks excellent for your first mate :).

Thanks, doing a build like this really makes me appreciate how much work must go into a stunning build like yours! Maybe one day but I'm a long way off that yet!

Looks like a beast :D the fluid looks awesome. How long did it take to put everything together? :)

I've had the base system running of air for a little while now, then I put the CPU under water and finally put the GPU under water. All in its taken a fair few months but I'm sure if I was to repeat it I could do it in a few days. I've learned a fair few lessons along the way. Thing like plan and plan and plan what you need. Otherwise you have to end up doing multiple orders and waiting patiently for the postman! Also a decent set of tools are a must. I spent about £40 on a dremel and it made such a difference! The fluid is the lovely Mayhems UV Blue. I want it a little lighter so I'm either going to add some distilled water or grab some UV LED strips.
 
Great looking build dude.
£100 for a keyboard !!!!

About 4 years ago I was drunk and spent £240 on a keyboard and mouse. Got a right telling off from my girlfriend for buying her something as well.

On the plus side we are still using the same keyboard and mouse 4 years on and she uses it more than I do.

Really Nice build, I really like the way the 580 water blocks line up with the CPU block. I wonder if the x79 lines up at all

Thanks! It does seem a bit extravagant to spend that much on a keyboard but I believe its well worth it. I pulled an old Compaq keyboard out of a skip at work out of curiosity and it turned out it has Cherry MX Brown switches. I cleaned it up now use it daily (I'm the only one with a beige keyboard:D) It has meant that every other keyboard feels so bad to type on I had to get one for home! If you haven't tried a mechanical keyboard, try and get a go on one they are awesome! I managed to justify the price to my girlfriend as I'm going to be writing a dissertation at the end of the year and 10000 odd words will feel much nicer on a good keyboard!

I'm also looking at the X79 boards and wondering the same, I don't think they will because of the RAM slot placing. Oh well! Well out of my budget anyway!:p
 
D'oh. My measuring skills fail. I can't get the fan between the rad and the fitting so its drain the loop time and add an extension. I'm also not entirely satisfied with the pump/res combo. Where it is attached to the metal chassis it resonates all the pump noise but because of the design I have no way to dampen it :( so much for my nice silent build.

I have to take it apart and I'm not happy with it, I hardly even got to use it :rolleyes:. I guess this is all part of the learning process but still pretty miffed.
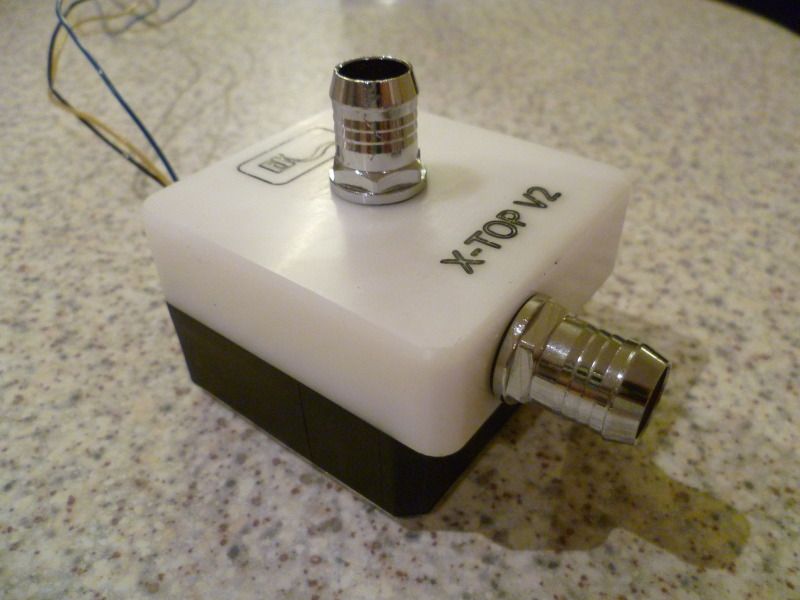
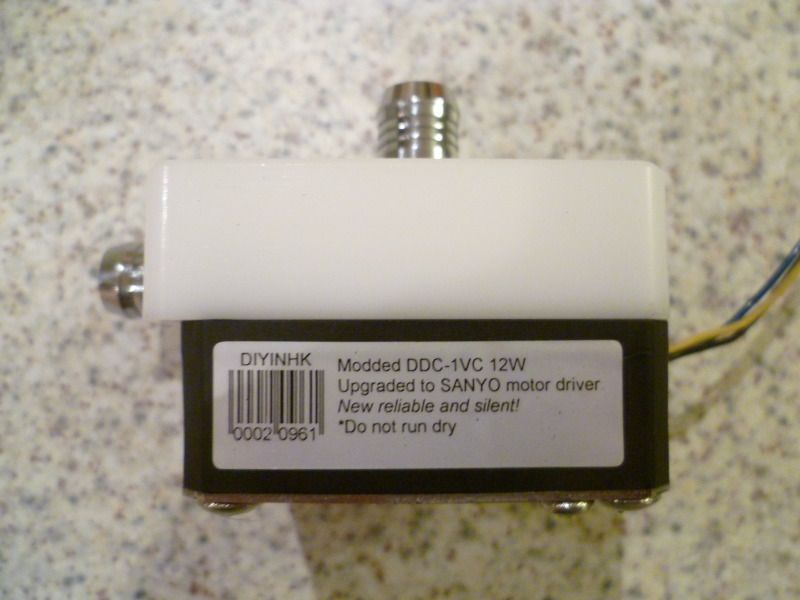
Such as these things are in life I may have just found a nice chap willing to sell me a cheap Laing DDC so my mind is whirring with ideas.

I love this hobby but it can get frustrating. Even more so when you add a little water to the mix!
 
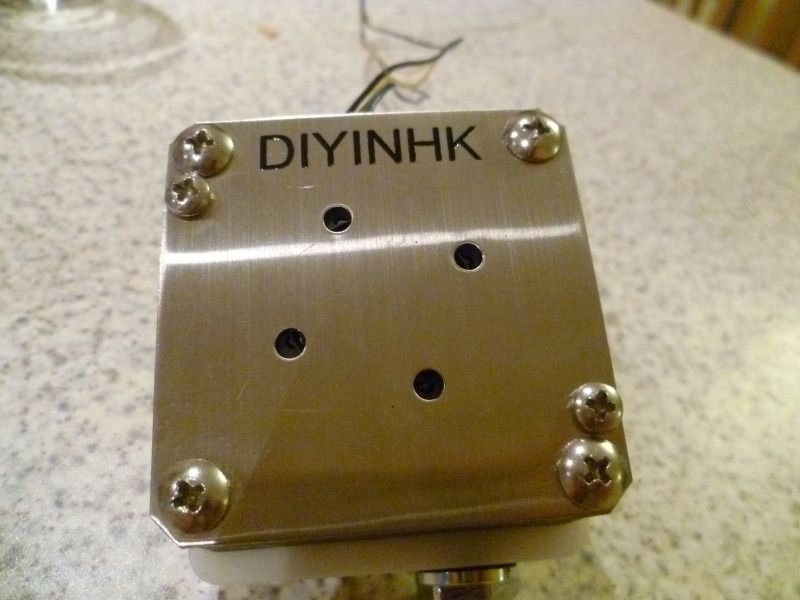
Well, I have made the decision. The XSPC pump is going. I have a Laing DDC with a DIYINHK PCB ready to replace it and I think I'm going to be getting a XSPC dual bay reservoir, I still love how they look but I don't want to compromise on functionality! The only problem with the new pump is that it has a lovely EK Top on it but its white! Of course this goes beautifully with all of my black hardware. Oh well :). The chap I got it of was fantastic and the price I paid I can not complain :D! (whats the criteria for members market?)

Can anyone recommend a way of decoupling the pump from the chassis. I've been looking at the foam sandwiches which look pretty good.

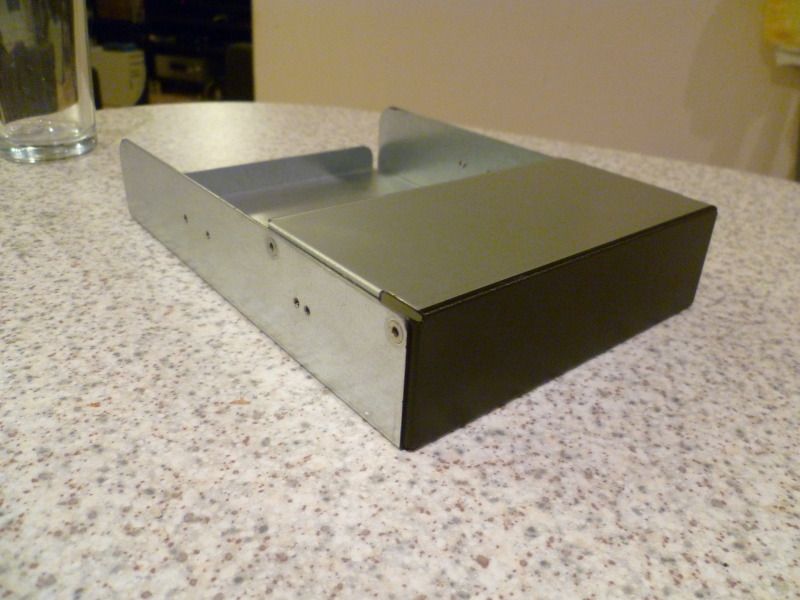
I also think I have found a good way to mount my Aquaero 5. I have a steel blanking box that fits in a 5 1/4" Drive bay. Its a bit long so it may be Dremel time this weekend!

I'll add pictures when I get home.
 
So as promised here are some pictures!

New (hopefully quiet) pump!

P1000690.jpg


P1000693.jpg


P1000695.jpg


Blanking box to mount the Aquaero 5 LT internally

P1000698.jpg


Finally one beastly fan for the front 200mm radiator. Should move a little bit more air than the supplied corsair!

P1000700.jpg


Again I have to order some more components to get the pump in place, which means entirely draining the loop. Luckily I'm free this weekend and I have an old housemate coming to stay so I can have an extra pair of hand for lifting and draining.

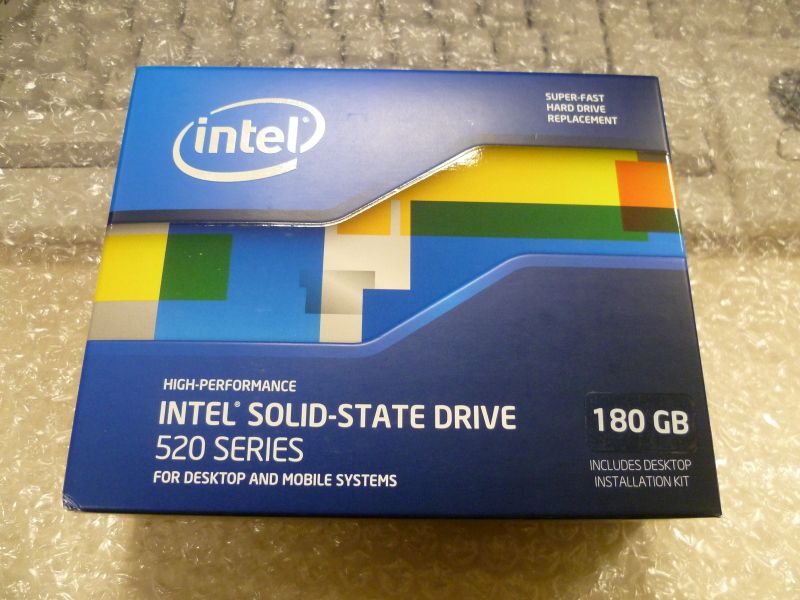
Also I'm eying up one of these for a little more room for programs and games. I'm just hoping 180GB will fit everything.
 
It's glorious to type on isn't it!

Just a sly update! I got some packages today so I can really crack on this weekend!

Today is going to be a good day:D

P1000703.jpg
 
Woop woop. Mostly done. Some cable tidying and a little love with the dremel on the drive bay for the ssd and I'll be back in business. I will get some photos that arent in awful light! The fluid is now the same colour as the heatsinks but I got a UV striplight and there seems to be not a lot of UV reaction from any of my coolant :confused:!

P1000711.jpg


P1000709.jpg


P1000708.jpg


Still some bits to do here and there but what do you think?
 
!)

I have the same case as you and it's great for modding. your build has given me a few ideas and if I may ask you a few things....what sort of money layout are we talking about for:

1. Entire build
2. Just water cooled setup(fans and rad with the fittings)
3. Can you take a pic of what you have in the top drive bay area
4. Where is the bit that you fill with the fluid, where have you stored that? I'm not 100% sure about water cooling so I don't know if I'm talking out my ****
5. What way do your fans spin i.e. what is the airflow look like? and what way is the liquid flowing around the loop?

Sorry for that but you've got me really keen

It's not entirely finished yet that will be this weekends job, but I'll answer as best I can.

1. If I had bought everything brand new it would probably cost me about £2000 all in. However I probably paid full price for about 1/3 to a 1/2 of it. So in total I recon it owes me a smidge over £1200.

2. Water cooling would probably retail somewhere in the region of £500 but as I've hunted deals left right and center. I've managed to get it cheaper.

3. I will take a picture of my drive bays when I've finished them. They are still a work in progress (mostly in my head at this point I need to get on with them)

4. The reservoir is an XSPC dual bay res. It sits in the bottom two drive bays. It has a fill port in the top so I have to slide out my optical drive to fill or drain the system. (Next time I build I will fully incorporate a drain plug and fill port as this is a bit of a handful to pick up and drain!

5. The water flows:

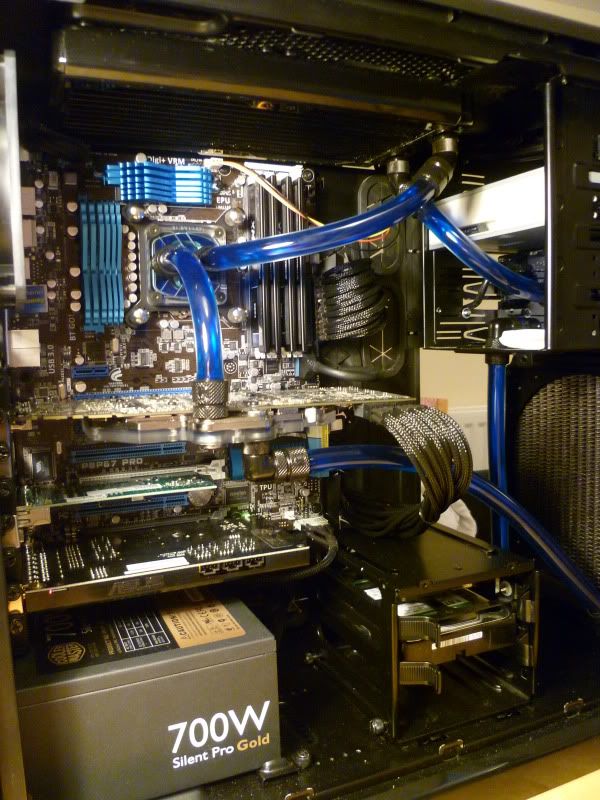
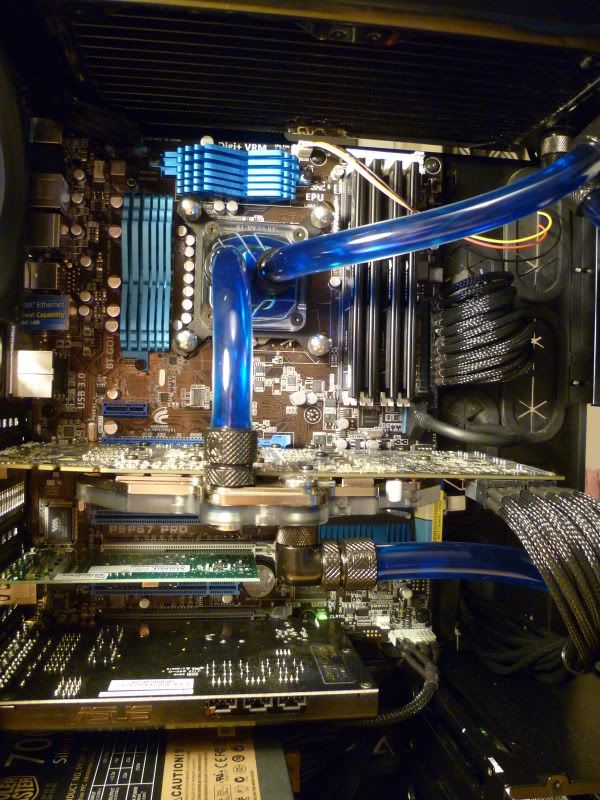
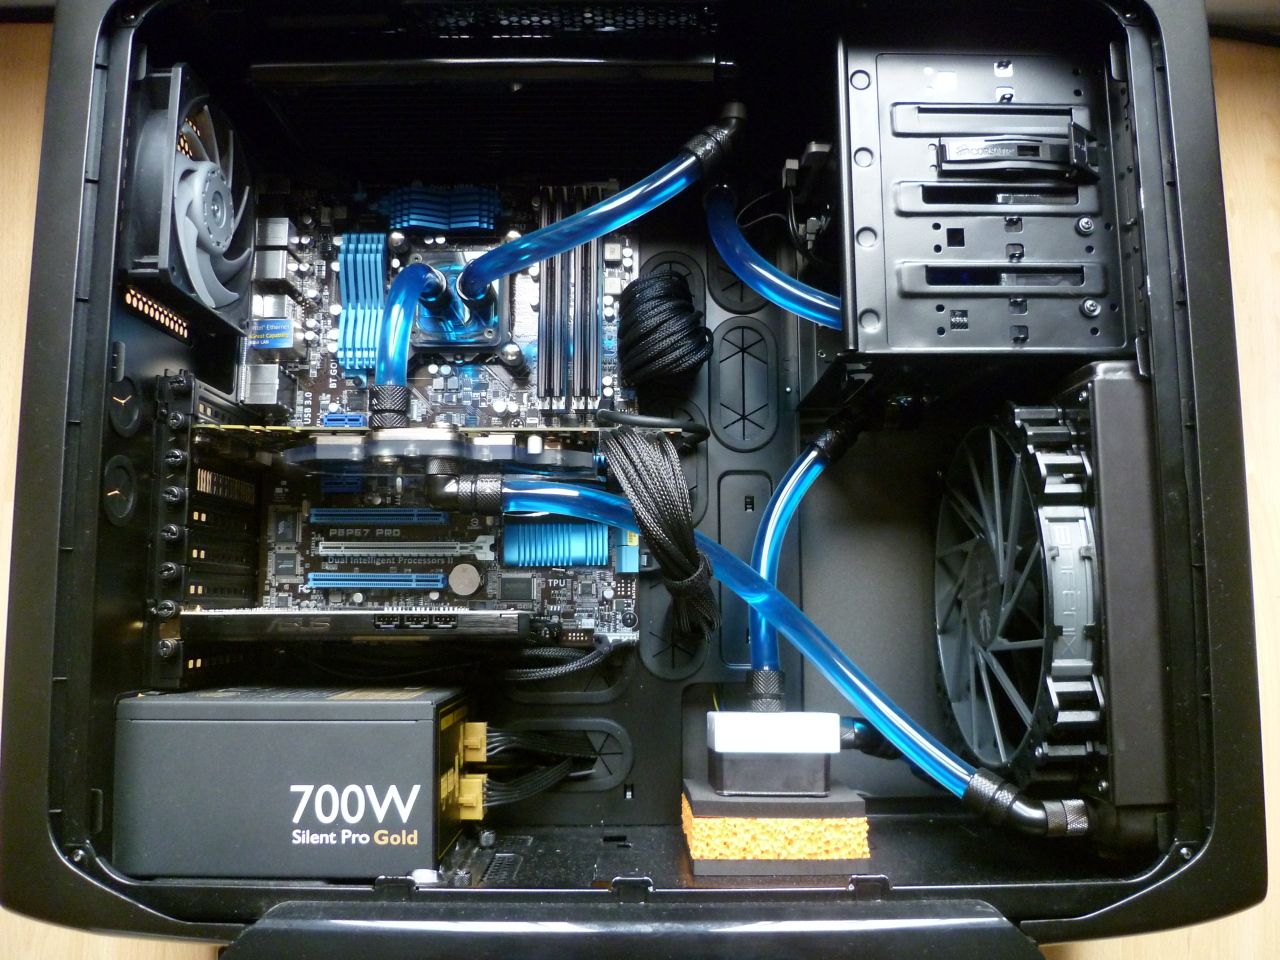
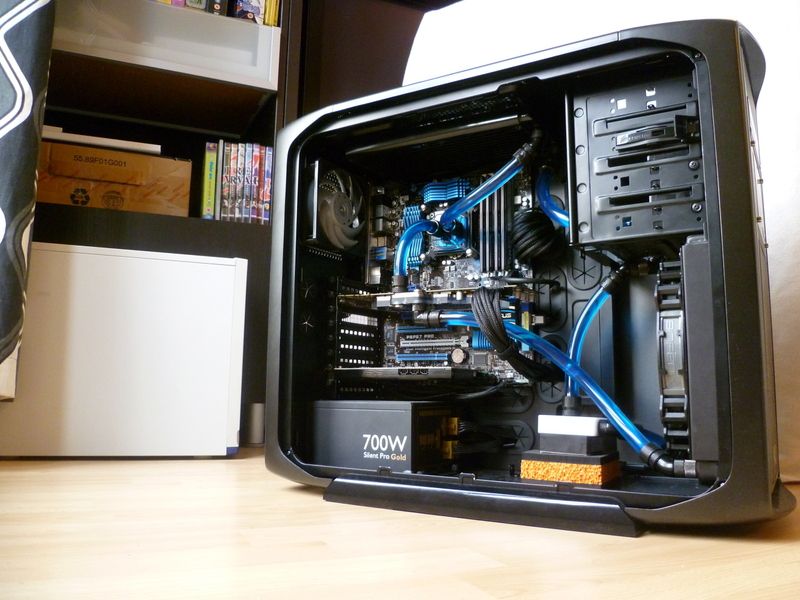
Pump > 200mm Rad > GPU > CPU > 240mm Rad > Reservoir > Pump

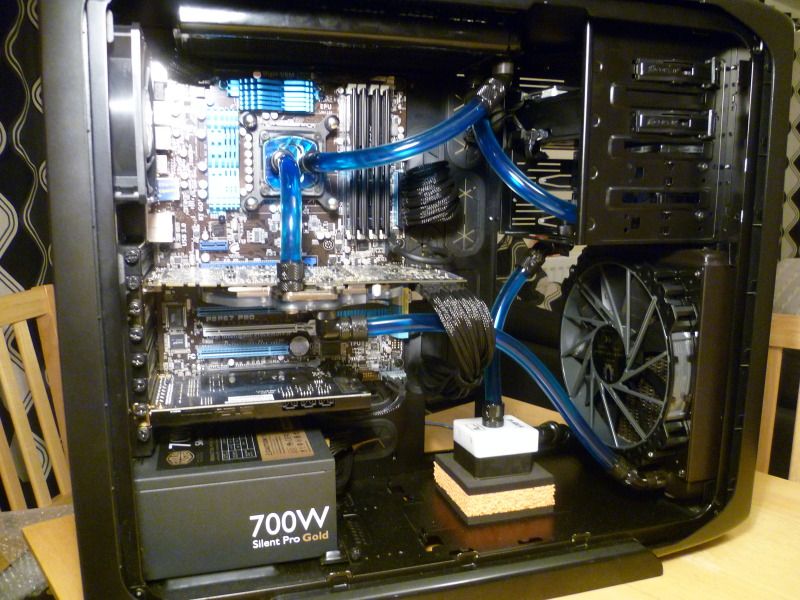
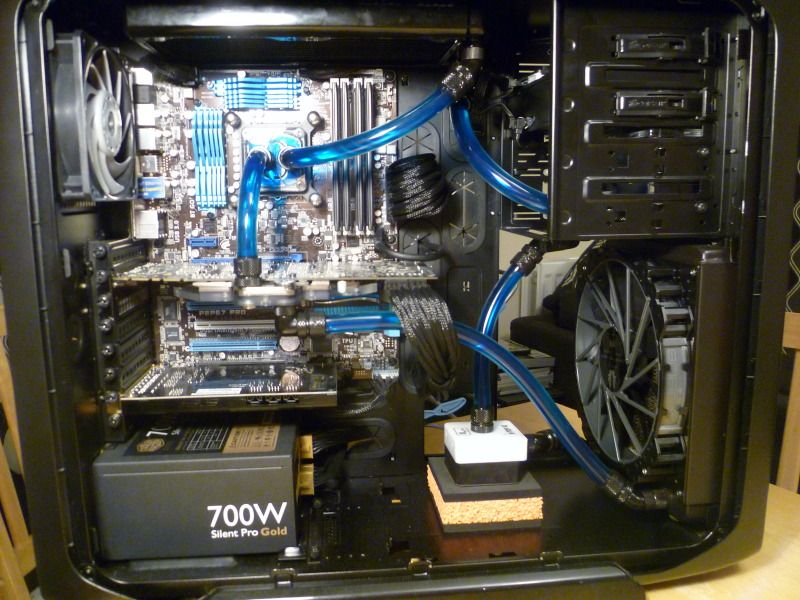
All rad fans draw cool air from outside the case through the rad and the last 120 draws hot air out of the case. Fans and pump are all connected to an Aquaero which is reading 5 temp sensors. I can run it quite happily all fans switched off for browsing and light office tasks. When the temps ramp up the fans kick in and keep in under control. Makes for a very quiet PC.
 
just sat on top of my optical disk drive until I get the drive bay adapter sorted. I just needed to put it somewhere to keep it out the way for the moment. I haven't decided whether or not to use the 1TB caviar green or a 500GB WD Scorpio blue (2.5" out of my old laptop) I'm thinking 2x 2.5" drives will be neater and easier and I'm not pushed for storage as I have a server in my loft.
 
Last edited:
I just got everything installed on my new SSD and it flies! Love this system. Just getting battlefield back installed and I'll try and get some good shots over the weekend for you guys. Just had a quick play with overclocking again and I got the CPU Prime95 stable at 5.0GHz so I'm pretty happy. I will now try and get the voltages as low and stable as possible. Next I'm gonna overclock the 580 and see just how far it will go.
 
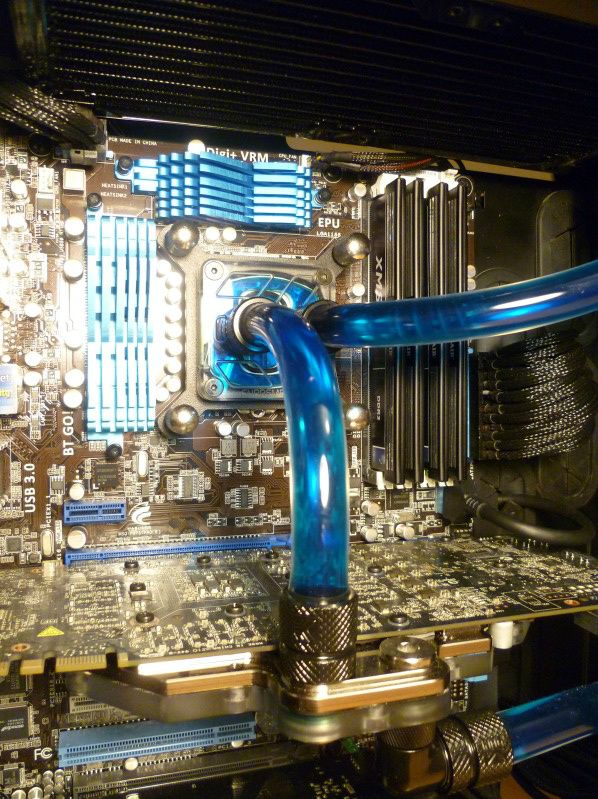
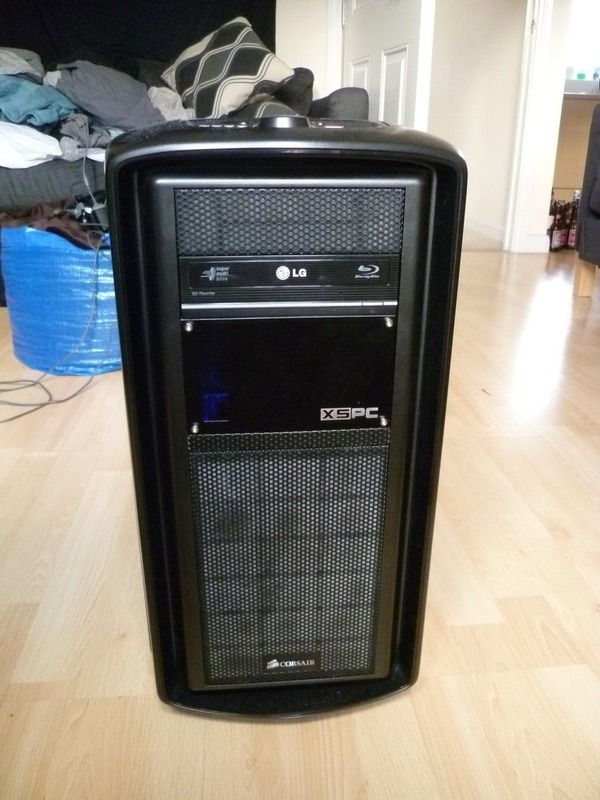
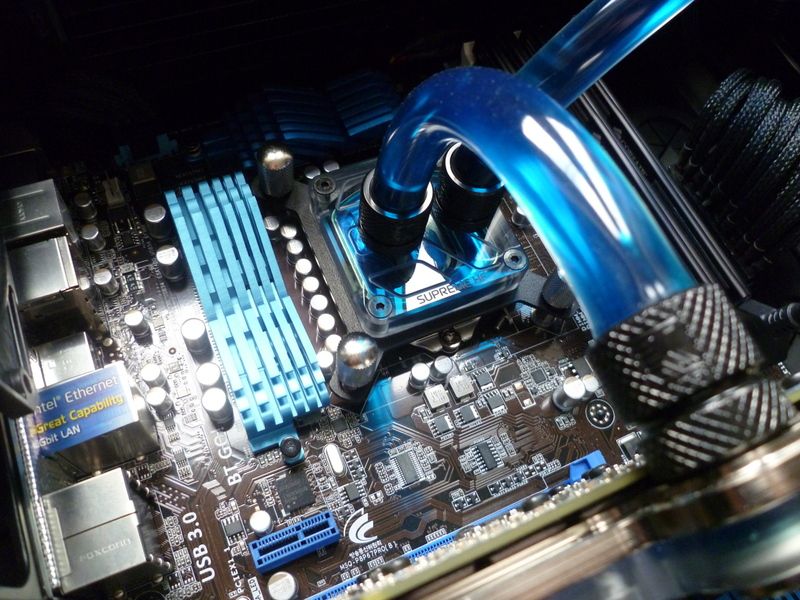
Well here are the pictures. This is how it shall stay for the foreseeable future. I would like to make a few changes here and there but as you can see. When it is in place I can't see it anyway!

Front of chassis

P1000726.jpg


Inside

P1000727.jpg


P1000733.jpg


A few details

P1000730.jpg


P1000750.jpg


P1000728.jpg


My Keyboard and Mouse

P1000767.jpg


P1000768.jpg


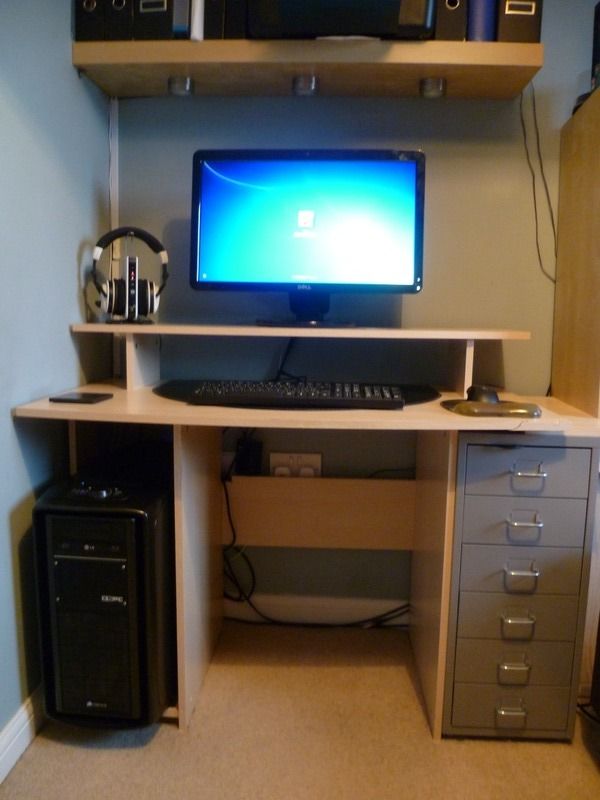
And where she lives!

P1000759.jpg


I've stopped here as its in a state that I'm very happy with. Plus I'm just about to embark on building a dream PC (TJ11 mmmm) Unfortunately it is not my place to show it but I will see about getting some pictures of the finished machine for you guys. I'm going to be very busy but it's gonna be epic!
 
Back
Top Bottom