Fix batten to wall - what screws and plugs please?

Soldato
Joined
14 Jul 2005
Posts
9,018
Location
Birmingham
Hi all,

I never remember what plugs and screws are good and what the sizes are. Often end up with a hole too big or weak fixing.

I need to fix a 35mm thick batten to a 100mm thick brick wall.

Simple Im sure, I just want to know what is the right plugs and screws to use please, and what size masonry bit to use.

Thanks
 
Agree I am a massive fan of the duopower as well.
My only issue with the duopower is the mess they can make on removal if you really need to remove them.

The only time I use anything else now is if I need to mount something seriously heavy when I will use frame fixings/hammer fixings.

 
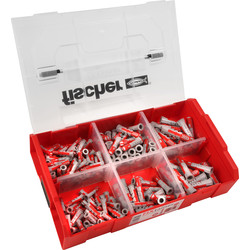
Fischer duopower the only plug you'll ever need for anything, 6mm or 8mm or 10mm available.
Agree I am a massive fan of the duopower as well.
My only issue with the duopower is the mess they can make on removal if you really need to remove them.

The only time I use anything else now is if I need to mount something seriously heavy when I will use frame fixings/hammer fixings.


That's great, but what size do I want and what screw size, and what masonry bit size please.
 
Screwing 2x pax wardrobe to it.

35mm quite thick batton because the gap to the back is quite large, wall is not true.


They’re massively overkill for fixing a batten into brick. See my post above and save yourself a few quid.
I have never had any luck with red plugs, always turn in the hole when screwing in.


I already have some 5x100mm screws - that would be 35mm in batten and 65mm in the wall. The top part of the screw is unthreaded - don't know if I need this or fully threaded screws.
 
Last edited:
Screwing 2x pax wardrobe to it.

35mm quite thick batton because the gap to the back is quite large, wall is not true.


I have never had any luck with red plugs, always turn in the hole when screwing in.


I already have some 5x100mm screws - that would be 35mm in batten and 65mm in the wall. The top part of the screw is unthreaded - don't know if I need this or fully threaded screws.

So this is really just anti tilt in effect?

If so then I would either just use some long frame fixers (I do have a load so thats why I use them)
Or drill the best plugs you have into the wall. Screw through the batten into the plugs.
(drill small holes in batten, and into wall to mark wall locations.

How good is your drill and how old? I find when using a cordless, especially if its getting on you may end up with over size holes as your working it.
As such you will get a less perfect hole thats probably slightly oversize.

When I am doing important ones they tend to be larger and as such I just use the SDS. Mine is corded but its worth the few mins to run an extension and go through anything like butter compared to by Bosch pro cordless drills (have , no comment ;) )
The SDS makes such light work that with no resistance at all I tend to get more perfect holes if that makes sense.

Always make sure you blow out the holes properly, oooer missus. If you leave any powder in there it acts as a lubricant for the plug. Worst case just use a hoover. But a blower is best.
 
I have an SDS and some masonry bits.

Yes its anti tilt only but I want it to be strong against the counter weight of the wardrobes as they weigh a bit with doors on.

I don't currently have any plugs of any kind other than some cheapo tat ones I had for years in a poundshop multipack.
 
Cheapo tat plugs will never help.

These are what I use when I want to go deep into something like breeze.
Cannot recommend them enough for heavy stuff.
If your going to be doing a decent amount of these wardrobes then 1 box will probably do your lot.

Used them to screw breeze blocks to the bottom of my self build greenhouse and its quite amazing the hold just 1 gives. (most blocks got 2, but with one screwed on in initial testing I couldn't get it to move)

 
Last edited:
Cheapo tat plugs will never help.

These are what I use when I want to go deep into something like breeze.
Cannot recommend them enough for heavy stuff.
If your going to be doing a decent amount of these wardrobes then 1 box will probably do your lot.

Used them to screw breeze blocks to the bottom of my self build greenhouse and its quite amazing the hold just 1 gives. (most blocks got 2, but with one screwed on in initial testing I couldn't get it to move)

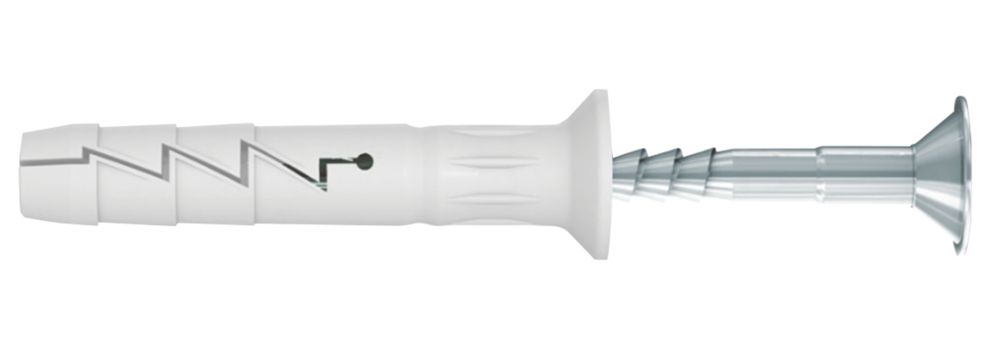
Ok cool so is the grey plug itself 100mm long, or is the whole screw 100mm long? Does some of the plug stay in the batten?

Sorry for questions on something so simple but it does my head in how many different products there are and what sizes of drills/screws each one needs.
 
Last edited:
Ok cool so is the grey plug itself 100mm long, or is the whole screw 100mm long? Does some of the plug stay in the batten?

Sorry for questions on something so simple but it does my head in how many different products there are and what sizes of drills/screws each one needs.

The plug and screw are the same length, well within reason.

You drill through the batten into the wall, hammer in then tighten the screw. I prefer to do more screw tightening than hammering personally.*
If you have a combi drill bit then you would do that in one pass.
If you dont you would drill the hole in the batten, then drill the hole in the wall.
Offer the batten up to the wall, push in then hammer in the fixing. Then tighten by hand.


* The final part can bend, especially if you do not drill deep enough. Personal choice however.

Edit, replaced with a better how to
 
Last edited:
The plug and screw are the same length, well within reason.

You drill through the batten into the wall, hammer in then tighten the screw. I prefer to do more screw tightening than hammering personally.*
If you have a combi drill bit then you would do that in one pass.
If you dont you would drill the hole in the batten, then drill the hole in the wall.
Offer the batten up to the wall, push in then hammer in the fixing. Then tighten by hand.


* The final part can bend, especially if you do not drill deep enough. Personal choice however.
So Im just concerned how deep I have to go.

The batten Im fixing will be 35mm.

The wall is 20mm plaster, 100mm brick, 20mm plaster.

So a 100mm long plug, will only be 45mm in the brick if it sits flush with the batten. If it sits flush with the wall, Im nearly through the wall the other side but also then only 45mm of the screw is in the plug so not reaching the end.
 
Last edited:
Only really need to drill 40mm into the masonry. So adding on the batten - I’d just go for some 5x80mm. The extra girth will resist twisting. Any big standard uno plug will do.

Make sure you tap it beneath the surface.

Frame fixings are good as you only really have to drill one hole rather than levelling, drilling one in, temp fixing it and then drilling the rest. Or be proper Gucci and predrill your holes in the batten and use a marksman marker thing when you’ve levelled it.

Dead simple. Biggest mistake is not withdrawing the drill bit to allow the waste to come out properly which will foul the plug.

Also - either have someone with the hoover and nozzle, or masking tape an envelope under where you’re drilling the hole - will reduce the amount of waste ending in up on the floor.

Depending on how soft your wall is, brick or block - might not necessarily need the hammer on for the full drill sesh. It’s normally hammer action that blows the hole out.
 
As for countersinking- goes without saying. But if it’s a soft wood - the effect of an impact driver will probably pull it in without splitting it. If you’ve just got a drill with a driver bit on - might not have the power to do that and you’ll need to countersink.
 
We moved and refitted two Pax wardrobes. The stability screws go through brackets inside the wardrobe. I did not batten the wali just measured and predrilled and plugged the holes before rebuilding the wardrobes. I used red rawlplugs with no.8 screws 65 to 70mm.

The intention is to stop the robe falling onto you, not stop it moving back as well. It works perfectly well, they are very stable.
So you have a length of screw basically in free air bridging the gap to the wall? I don't like the sound of that, I'd rather things tight, and 35mm is quite a big gap to bridge without something in the middle.

I also need to think how I am going to fill the rest of the gap to the wall and around the ceiling for a fitted look. It won't be easy with how far wonky the walls are. Will take photo later for advice.
 
Back
Top Bottom