

Garage conversion

Soldato
Joined
23 Mar 2005
Posts
3,963
We've been meaning to upgrade the garage for ages, and now I've been kicked out of what used to be my home-office, it seemed like the perfect time to go full man cave!

The garage is currently a single skin brick double garage with concrete block "support pillars" on each wall and 2 up-and-over garage doors. The plan is to put down an 'industrial' rubber floor (50x50 tiles) and then batten the walls ready for wiring and insulation. I've decided to go with insulated plasterboard for convenience. I'll insulate the ceiling as well and put in lighting. One of the doors is going to be sealed in behind a false wall, and the other is going to be replaced - thinking an insulated roller door so I can get rid of the ugly iron work of the up and over.

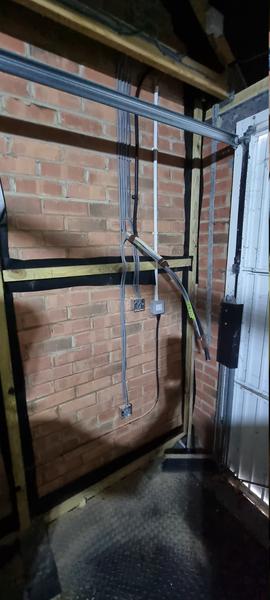
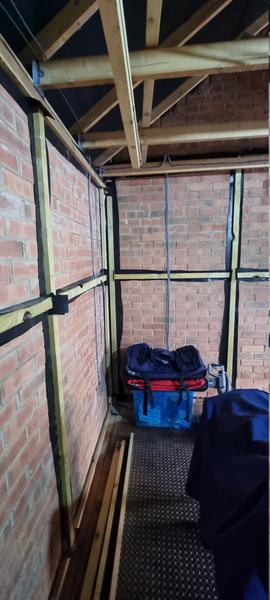
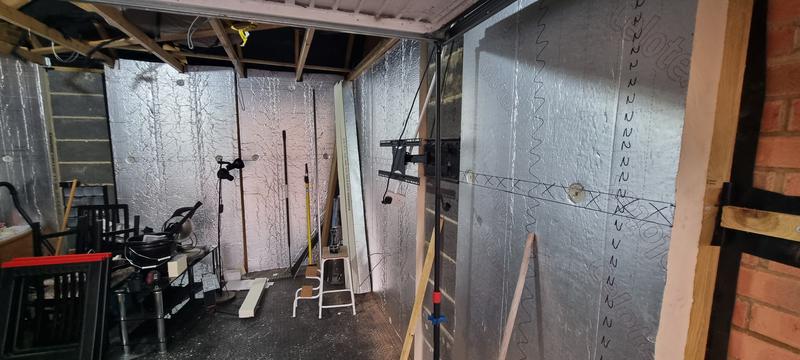
The floor went in fairly easily, and I have finished most of the battening for the 3 walls. Couple of pics of the progress so far:

https://i.~ibb.co~/ksp5N666/IMG-20250815-WA0003.jpg

The flooring worked well, although I may use some rugs in the living portion of the conversion - the idea is to have one side for tools and workshop, and the other for gaming / movies etc...

https://i.~ibb.co~/FbRgzXhm/20250730-164845.jpg

https://i.~ibb.co~/tTHb4kkN/20250730-164858alt.jpg

I could use some advice on the concrete columns. They are a single column of concrete block build up against the brick walls. They are a pain as they break up the wall and mean I will have to either box them in, or come up with a creative solution. I've had a few thoughts but need some guidance:
  1. Options: Simply box them in with the kingspan / celotex - a pain, but a simple solution.
  2. Turn them into a feature. I was looking at somewhere between 50mm and 75mm insulated plasterboard. The concrete comes out about 80mm from the battens, so I could leave it just proud of the new walls. Presumably leaving them like that would be a massive no-no for the insulation properties of the room. Can I seal them? Is there any way to make that work and still keep the room warm? I was toying with putting a vinyl wrap over whatever the sealed solution was as decoration?
  3. Turn them into a light feature: I'm still deciding on the lighting solution for the space, but I like the idea of mounting LEDs on the pillars and covering them with a translucent sheet of acrylic to use them as 3 (fully colour controllable) light fountains in the room. Again - Any way to seal the concrete? How do I stop the heat leeching out through it?
Any other thoughts / advice greatly appreciated - never done this before so a voyage of discovery!
 
Last edited:
Well, I wasn’t wrong - it was definitely a voyage of discovery! All of the major construction and decoration is done. Electrics and (boy is my timing great) air Con!! Are in. Just down to the tidy and rearrange stage. My messiness is coming back to haunt me as the floor is going to take a lot of elbow grease to clean (if anyone has top tips for removing plaster from plastic garage flooring I’d be grateful!)

It has turned out better than I expected given my lack of skills (let’s never talk about what’s under the wallpaper!)

Will post up some picks when I have them hosted.
 
Did you have to notify for change of use?

Realistically even if you did after 10 years it's not enforceable anymore, and if you want to move solicitors will just put an indemnity in which is peanuts in the scheme of things.

No one is going to even think about dobbing you in to the council, it would have up be someone who A
Doesn't like you. B. Knows about planning regulations and C. Finds out about it.

Just not gonna happen it's not even worth thinking about.
 
Updates. Now that construction is done, I thought I make good on the promise to post the journey. Hopefully it can help someone avoid all the obvious traps I fell into! :p

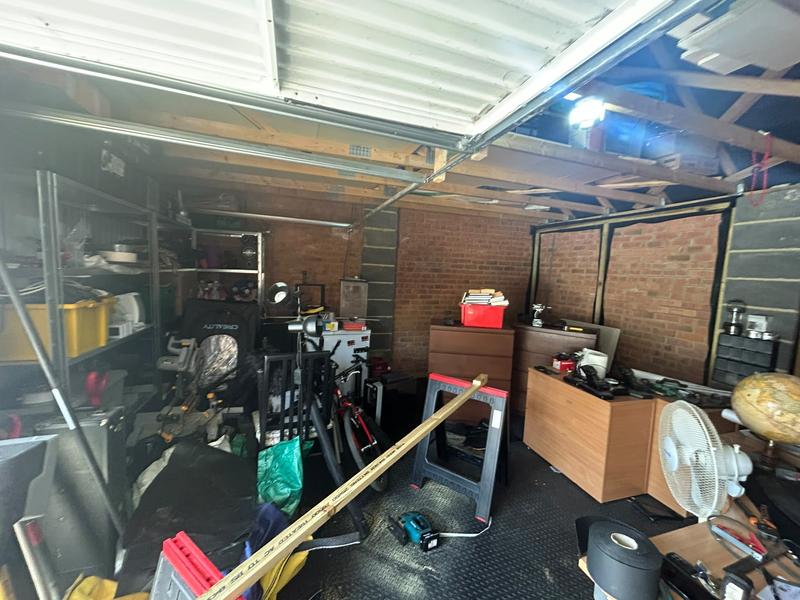
The garage is a detached, double garage, with single skin brick walls, and a column of concrete breeze block in the middle of the 3 walls that don’t have the doors. Delightful place to game in since my office was claimed by the missus! Freezing in the winter, and baking in the summer. The whole place was powered off a spur from the downstairs ring, providing a double socket and the lights.

The plan was to get it wired, insulated, lit, and heated, turning it into a man cave. Effectively half for gaming and half for tools etc… As with most garages, it was just used as a dumping ground for everything we didn’t want in the house.

After considerable reading around, I decided that insulated plasterboard over battens was the most sensible way to proceed. First up was the flooring. I went for an “industrial strength” PVC interlocking tile that actually turned out better than expected. Pics to follow.
 
Last edited:
https://i.~ibb.co~/fdNLtGV6/G-Floor-Battens.jpg

That first one shows the floor quite well - looks waaaaaay better when clean! Followed the standard advice on the battens - backed with damp proof course and spaced according to the Kingspan guidelines... My first mistake! The idea was sound, but it didn't account for the frustrating concrete pillars, which meant I needed to adjust the spacing. Not entirely my fault as I still didn't have a plan for the pillars, and the search for suggestions online was surprisingly frustrating - there were many decisions I had to make that no-one else in the world seemed to have ever made before (or my Google skills have finally failed me! :cry:)

New electrics in next to the old. Full ring for the garage, and a separate line for the charger.
 
Last edited:
20251107-125608.jpg
20251107-125522.jpg
20250730-164842.jpg


Pics that should have been above!
 
good. keep it coming. I too have a double up and over and wondered about replacing with a roller. But people say rollers rattle and make a lot of noise
 
Last edited:
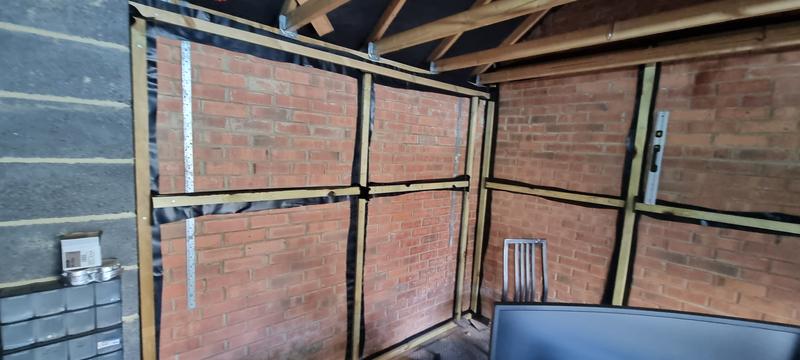
Couple of mistakes I made with the battens. On the right side of the lower pic you can see there is no batten at the top. I put it behind the joists, set at the 240cm to match the insulation thinking it would give better support to the top. All it meant is it was nigh on impossible to screw in the insulation, and I had no batten to attach the plasterboard to!

Second was spacing. I eventually decided that instead of messing about with boxing in the concrete pillars, I simply used extra thick insulation and boarded straight across them. 120 Celotex on the battens, and then 40mm on the pillars lined up perfectly. What I didn’t do was calculate the spacing to go straight across the pillars, so they were left as an odd size for the eventual plasterboard. Rather than bodging it, I left 2 of the pillars with just insulation to create feature pieces, and did it right on the 3rd wall.
 
good. keep it coming. I too have a double up and over and wondered about replacing with a roller. But people say rollers rattle and make a lot of noise
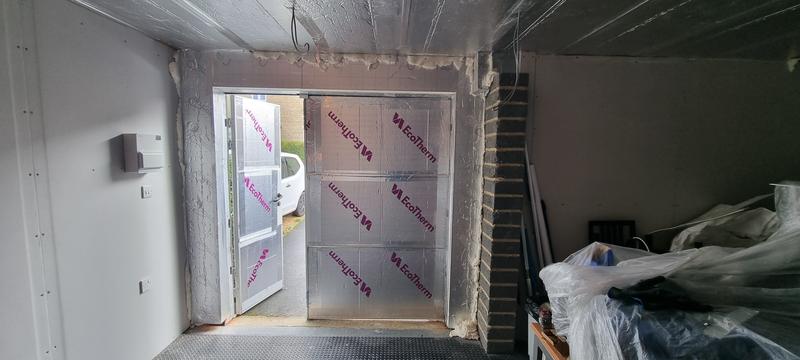
Yeah - those doors was a real PItA. The whole frame messed up all my plans so they went. I toyed with rollers, and as I’m going with a Star Wars theme, I did ponder creating some sort of cool spaceship automatic door arrangement, but common sense prevailed and I went for standard 1/3 2/3 outward opening doors. I have only done one side for now, and on the other side I have left the up and over, but removed all the metalwork and locked it permanently in place. I then just boarded across it so there is now only one entrance to the garage, but it still looks like a double from outside.
 
good. keep it coming. I too have a double up and over and wondered about replacing with a roller. But people say rollers rattle and make a lot of noise
We have a roller and its not to bad. The nice thing is you can stop it at any height rather than waiting for it to fully open/close.
 
20260213-095312.jpg
20251204-154258.jpg


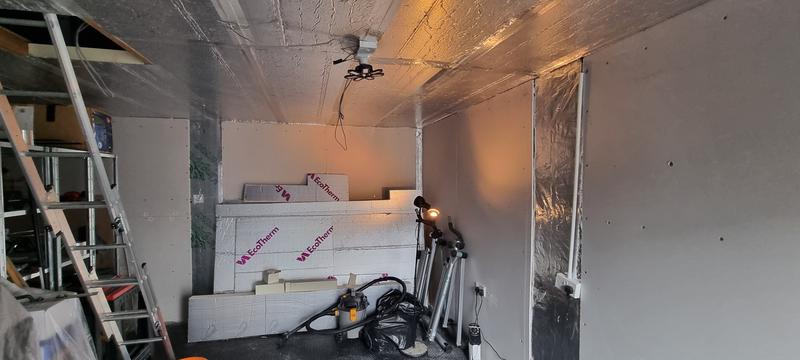
Some shots of the insulation and the new doors. They came uninsulated, so I added that myself. Probably the biggest challenge was the fact that the garage was not empty. I hired out a storage unit and put a load of stuff in it, but really my life would have been far easier if I’d stumped up for a bigger unit nd properly emptied the garage first. Every job seemed to require moving everything in there to the other side, and then back for the next :mad:
 
Last edited:
20260213-095319.jpg
IMG-20260702-WA0009.jpg
IMG-20260702-WA0007.jpg


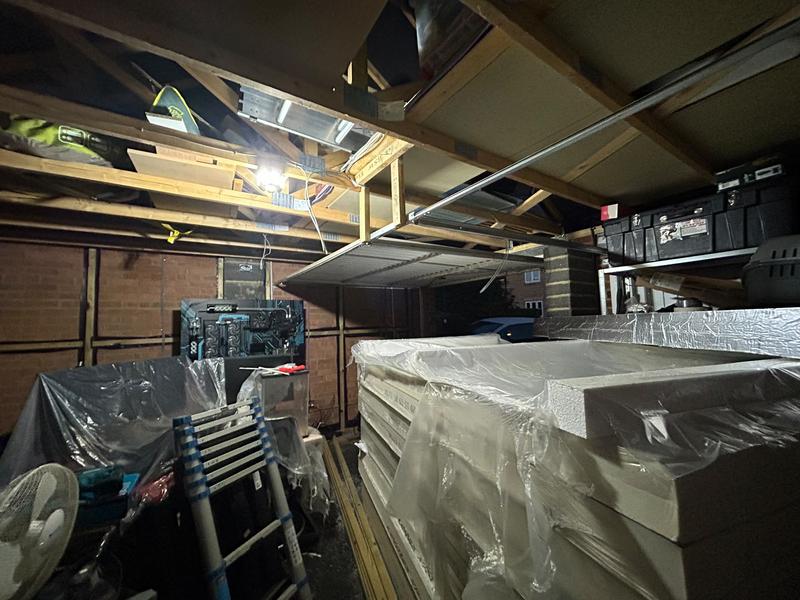
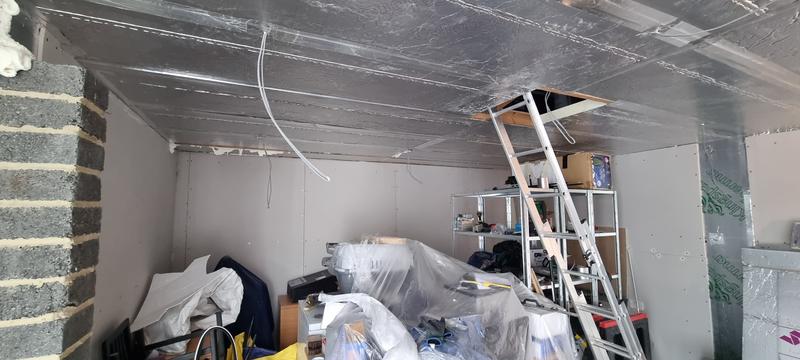
This is what I mean about having to work around the clutter :eek:

Good news was… it got worse when the insulation arrived!


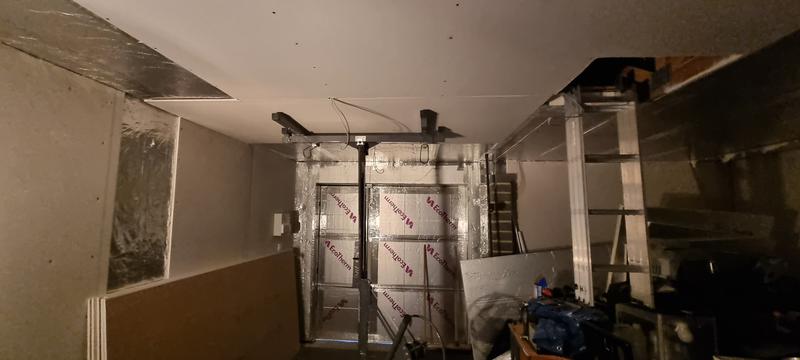
I originally planned to use insulated plasterboard for the ceiling and just attach it to the beams, but in the end I decided against it as it would lower the ceiling. So I insulated between the beams and then plasterboarded across - given I was doing it solo, I also didn’t fancy trying to work with the weight of the insulated plasterboard.
 
20260213-095323.jpg


Once the wall were done it was time for the ceiling. Insulation was nice and easy as the gaps were (mostly) regular, and as long as I cut it accurately, I didn’t even need to fix them in place. I have used 100mm insulation tape throughout - probably my favourite product, cheap, effective and hides all sins :cry: I can confirm that the moment I put up the last insulation board on the ceiling, I realised what I had done… I had been used to just chucking everything up into the rafters through the open gaps, they were all gone… several things up there are bigger than the loft hatch… hope the next owners want them :p

20260213-161808.jpg


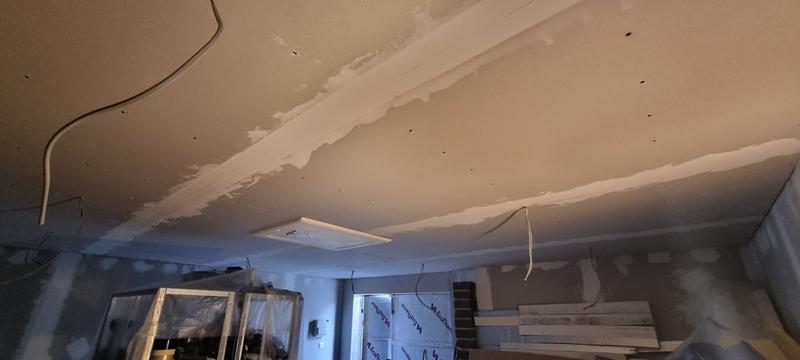
Plasterboarding was also surprisingly painless. Used a mechanical hoist and it did a brilliant job of positioning and holding the boards in place. I had finally learned my lesson at this point and made sure the joins were distributed and broken up and not overlapping the insulation.


20260417-132741.jpg


I watched loads of brilliant YouTube videos explaining how easy it is to do jointing (with or without taping). Having had a go, completing all the walls, the ceiling, all the screw (and other holes we won’t mention) I can confirm it is not as easy as they make it look! I realised pretty early on that it was going to look pretty terrible and only really had 2 choices: pay someone to bring it up to standard so I could paint; or change decoration plans and hide my shame behind wallpaper…

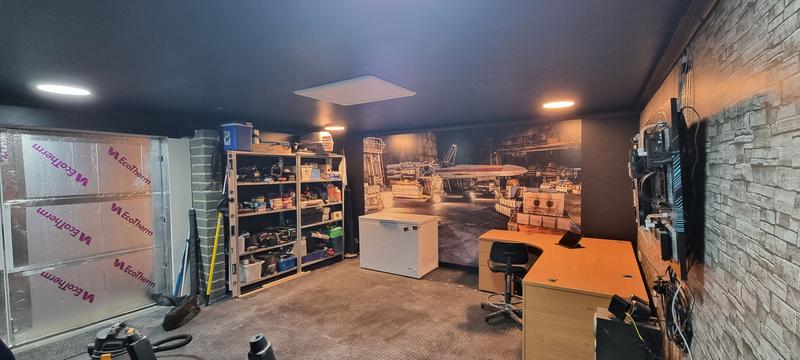
I’m no good at plastering, but it turns out the self adhesive vinyl wallpapers are an absolute godsend! I used it on the walls and the ceiling and the finish was way better than I expected.

20260629-135022.jpg


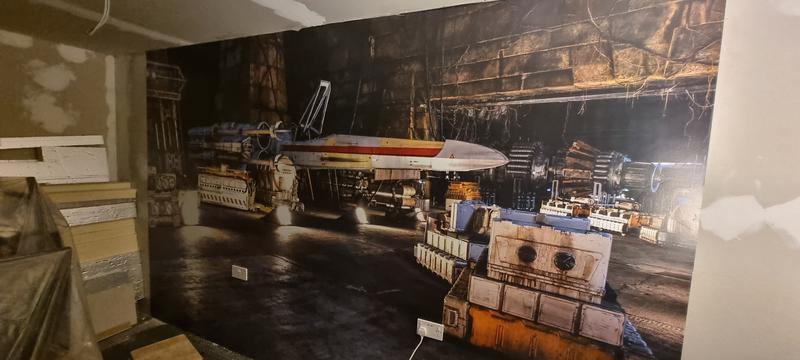
The mural was the only bit that was traditional wallpaper that required glueing. It came in 8 pieces and in spite of my concerned, looks amazing, and actually went on nearly flawlessly!
20260510-164702.jpg
 
Last edited:
Back
Top Bottom