Associate
- Joined
- 6 Nov 2010
- Posts
- 887
- Location
- Behind the camera...
Ok, I have ruthlessly stolen this idea from another forum, so sue me, a good idea is a good idea.
I know i'm always looking for advice, so I thought others would be too.
I would love to see a thread where people would be willing to share images before, and after, editing (and possibly a brief description of what was done).
This thread could be of great help to those of us still learning (and still very interesting to the more seasoned photographers among us).
If you don't feel like listing the steps, then just a before and after will do.
I'll start")
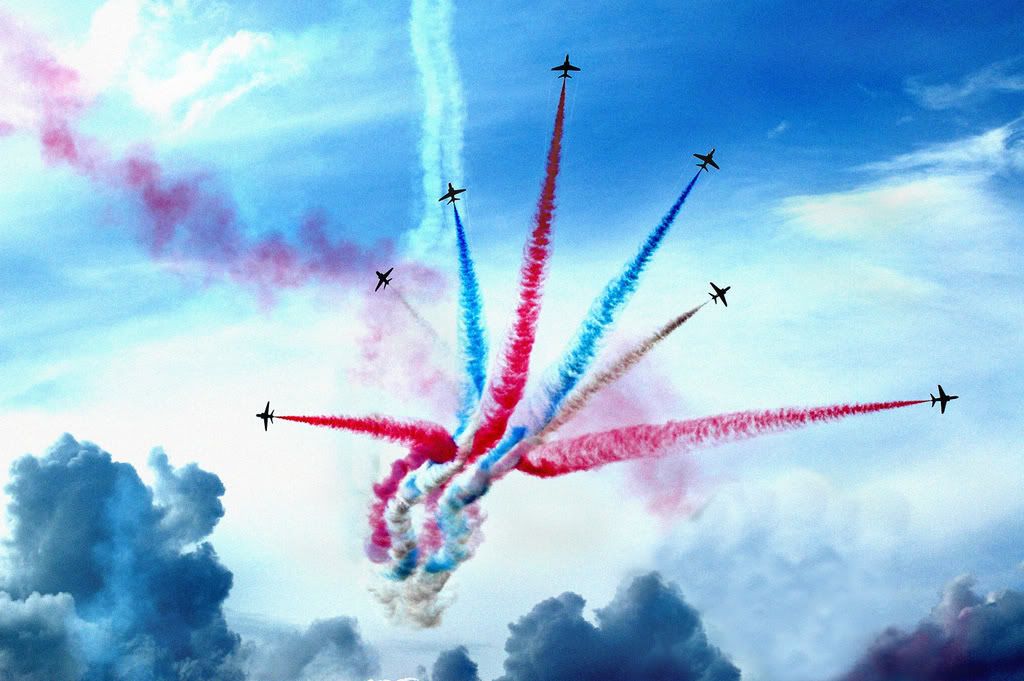
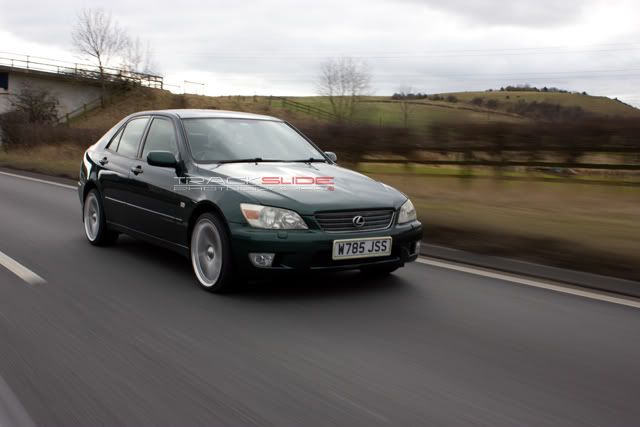
Only basic PP steps taken in lightroom and photoshop, adjusted exposure, blacks, recovery and vibrance, added gradient filter and a touch of vignetting, Exported to photoshop, lowered the car, cloned out the bottom left corner, added smart sharpen @ 200% and 2.0, added watermark... Done
Had to lower the car as it was horribly high lol
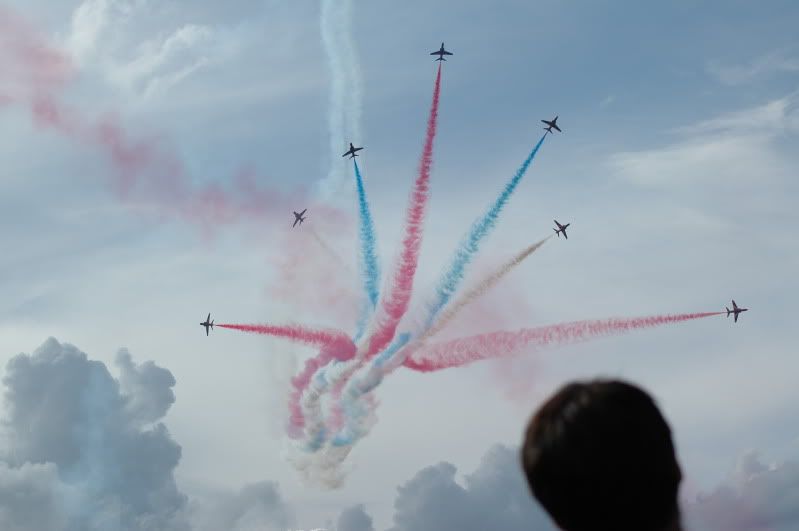
original:
Edit:

Lexus IS200 Motion Shot by Trackslide Photography ©, on Flickr
I know i'm always looking for advice, so I thought others would be too.
I would love to see a thread where people would be willing to share images before, and after, editing (and possibly a brief description of what was done).
This thread could be of great help to those of us still learning (and still very interesting to the more seasoned photographers among us).
If you don't feel like listing the steps, then just a before and after will do.
I'll start
Only basic PP steps taken in lightroom and photoshop, adjusted exposure, blacks, recovery and vibrance, added gradient filter and a touch of vignetting, Exported to photoshop, lowered the car, cloned out the bottom left corner, added smart sharpen @ 200% and 2.0, added watermark... Done
Had to lower the car as it was horribly high lol
original:
Edit:
Lexus IS200 Motion Shot by Trackslide Photography ©, on Flickr
Last edited: