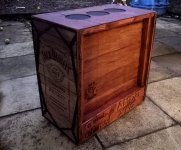
Jack Daniel's - #OnTheRocks

Associate
Joined
29 Jan 2016
Posts
223
Location
Scotland
UmhKGHy.png

Special thank you to my sponsors
ASUS Republic Of Gamers
EK WaterBlocks
Cablemod
ADATA
AMD UK
Jack Daniel's Tennessee Whiskey


Project Background

During Lockdown, i got a little bored.
Contacted Jack Daniel's UK and asked about a possible partnership on a new build.
We spoke a little back and forth, they agree'd to send out some empty bottles, bar matt, glasses and some other merch.
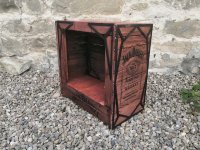
I got to work on the design of the case + The Way it will loop.
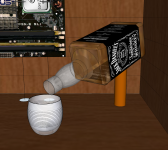
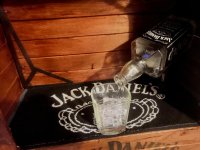
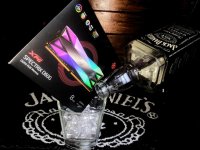
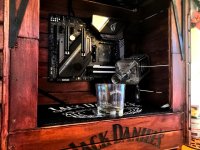
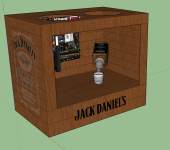
I think the main feature will be the JD bottle, pouring liquid into the tumbler in the center front of the case.

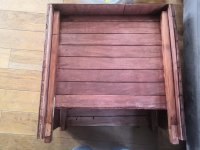
When designing the case, i wanted to leave enough space on the rear, to allow for an open back.
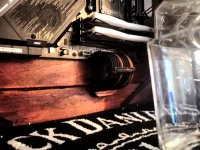
Showing the loop, cables, and GPU which will be mounted on the back.

Once i had the case done, i reached out to my usual partners and showed them the progress and things just took flight from there.

SPEC LIST
At this moment in time, i'm not able to share the full parts list. Will update as they come in.
MEMORY: XPG Spectrix D60G DDR4 @3200mhz
SSD: XPG Spectrix D40G M.2 SSD 512GB
Cablemod: Custom made to order cables.
CPU: AMD Ryzen 3800X
Cooler Master: MasterFan SF360R ARGB 360mm

EK Waterblocks cooling list

EK-CPU Lignum - Walnut
EK-Quantum Vector Strix RTX 2080 D-RGB - Nickel + Acetal
EK-Vector Strix RTX 2080 Backplate - Black
EK-HTC Lignum 10/12mm - Walnut
EK-CoolStream Classic PE 360
EK-Quantum Inertia D5 PWM D-RGB - Acetal
EK-AF Classic Angled 90° - Black
EK-AF Classic Angled 45° - Black
EK-CryoFuel Clear (Premix 1000mL)
EK-AF Extender 6mm M-M G1/4 - Black
EK-AF ALU T-splitter 3F G1/4 - Natural Grey
EK-CryoFuel Dye Pack
EK-HD PETG Tube 10/12mm 500mm


ASUS ROG UK Parts

ASUS ROG Strix X570-E Gaming Motherboard
ASUS ROG Strix RTX2080 OC Edition

Work progress done so far....

First step was visual planning, i use Sketchup for all my designs, while it's not the best or prettiest, it's by far the easiest to use.
m25z6iF.png
VHcm9cB.png

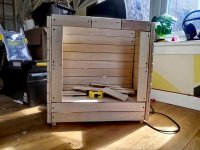
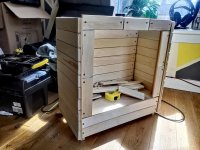
After i was happy with the initial designs, i grabbed my jigsaw, drill, electric screw driver, tape measure and got to work.
YmxnZP9.jpg
vEitTt2.jpg

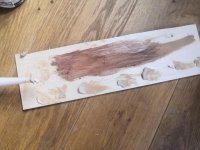
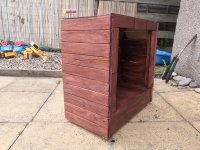
Once i had the shape i wanted, i sanded a little, and put down the initial staining i wanted.
7yAabA4.jpg


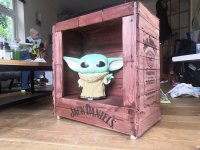
Once i was happy with that, i took the case apart and out to my laser cutter/Engraver.

QHnMJGm.jpg

I done this for both sides.

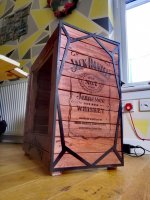
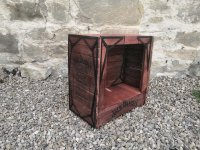
Next i felt it was missing some sort of edge, a frame if you will.
So i went to my cutter, played around and after 2 days, finally settled with these black frames.
N9TULOk.jpg

I also wanted this frame on the front, and inside.
cL62PQU.jpg
AdHcrJO.jpg


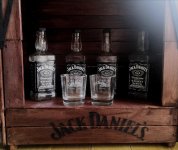
Things begun to arrive from Jack Daniel's

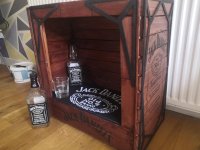
Very early into the project, My bottles, glasses and matt arrived.
So... Back to work i went.
8DmYbUB.jpg
ZbyaHxp.jpg z3oWjU9.jpg pcRWGrL.jpg


Yesterday i decided to test run the loop, to make sure everything was working as expected.

Was very very pleased with the results.


That's everything up to date as of right now.
Parts Are in the mail, i can only wait for those.

Next stages will be
1. Drilling out holes for the cables (Individual angled holes for each braided cable)
2. Bore holes for the loop
3. Strip down, sand down the case, re-stain using sponge.

Will update as and when progress continues.
Thank you for reading.
Appreciate your time <3
Craig
 
Last edited:
Will the bottle pouring the "JD" be a separate thing, or are you including it into the loop, somehow?
Will be part of the loop. The plan is to have a small rubber insert or use a nonreturn valve to stop the flow from going backwards when the system is off. Thus making sure the glass never overflows :)
 
Last edited:
Aggggghhh !!!, I clicked this thread and settled in for a nice long perusal, fantastic opening etc, thought it would be a great multi-page read, didn't note that the thread was a few posts long!!

And now I want to follow it post by post, and at the same time leave it and come back when I can read the whole thing.....decisions !!

For the newbie, can you advise how the apparent "magic trick" forever filling glass works ?

I'd love to show you, however i can't due to competitors parts that I'm using for test loop.
Pump is directly under the glass.
Driving fluid up into the bottle, giving a constant flow.

Subbed - the attention to detail is superb. Look forward to your progress updates.

*Additional: Looking at your location - isn't this build verging on blasphemous?
Shhhhhh... No one needs to know :P

Oh my word, this will be lovely. I've wanted to try a JD-themed build myself but never had the time or the funds, so I shall live vicariously through yours!

Love the concept of pouring a glass, much better than my idea of a D5 housing fashioned after a barrel and feed the loop that way :)

Thank you :)
Been wanting to try this one myself for a few years now, after seeing a jack Daniel's outdoor water fountain.
Definitely where the inspiration came from :D
 
Update!

Woring on the rear of the case this weekend.
Need it be as simple as possible, as there's no cover. (Completely open)

c0EejJU.jpg

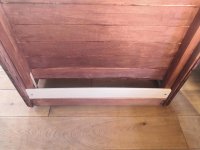
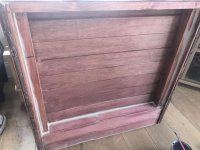
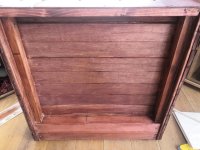
While the back looks rough, i'll start with adding 2 slats to the bottom.

9PZe7Fp.jpg

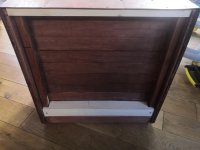
I then want to close this off, i use 3mm thick Plywood birch.

Muv1gO2.jpg

Also added a top bar to level the top off.

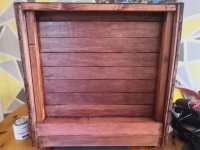
Once i was happy with that, i stained it to match

gidi1i0.jpg


Rear will no go down for sanding to really smooth it all off, then re-stain. :)

Yes, i double stain. Gives it a nice effect having fading stains.

Will be replacing the top panels in the coming 24 hours.
Removing screws and replacing with plugs to make it even smoother.

Thanks for checking back!
Craig
 
7GtvFYQ.png

Time has come to start filling the gaps and staining them. Pretty straight forward process.

Tested it first to make sure i had the right stuff.
AHnpp8Z.jpg

This is just flexible wood filler.
Nothing fancy, £8 tube from B&Q Does the job.

Fill er up!
MEkjJ26.jpg

Yuck, such a horrible color lol

XWt14j9.jpg

Ledge at the bottom still needs a touch up, but i'm slowly getting there.

Will update again tomorrow :)
Thanks for looking
Craig
 
xpg-logo-main.png


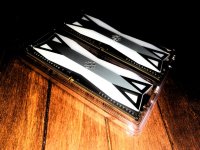
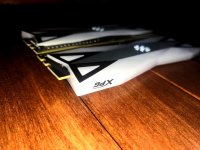
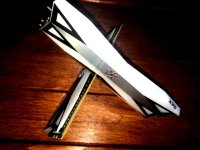
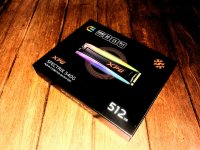
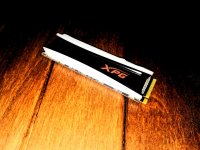
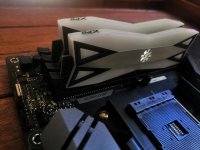
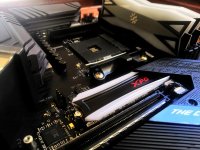
Products from XPG / ADATA Have arrived today!
While these are white they will be orange when lit.

XPG sent out 16GB of Spectrix D60G @ 3200mhz DDR4 Memory
&
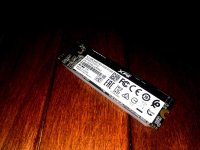
XPG 512GB M.2 SSD Spectrix S40G

H43oSnL.jpg
AaiiyCg.jpg
JDpA7XQ.jpg
foqo7V8.jpg


BfaZVgm.jpg
WG1wHm6.jpg
50AAZQV.jpg

Also have a delivery from Cablemod, will update shortly.
Thanks for looking
Craig
 
CableMod_logo1.png.1070a889c2ce0766ea5012fe3224562d.png

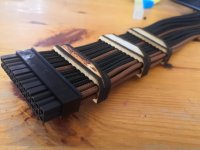
Fresh in from Cablemod.
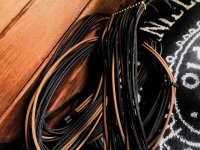
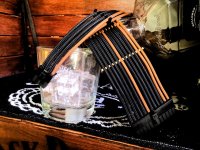
Has these made to order to fit the case colors and the correct length.
Cablecombs will be cut from birchwood and installed at a later date.

pBvDRGw.jpg
o7FQly4.jpg

Now all i'm waiting for the Motherboard and GPU in order to move forward.
Once they're here, i cn crack on with putting in the PSU + Drilling all the holes for cables.

Check back later
Craig
 
7GtvFYQ.png

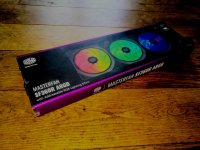
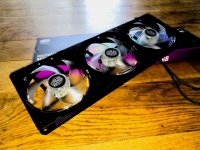
Finally received my CoolerMaster SF360R ARGB Fans.
Bought these for £30 the other week.
As per CM world series rules, every scratch build bust contain at least 1 CM product.
So yeah... This will do :)

rLwsYsM.jpg
IoTG5P5.jpg

Will be cutting the vents on the case this week and fitting the fans.
Craig
 
Diggin' the cable colour mix - perfect blend; just the right amount of orange blended in.

Are you having a colour rotation - or a warm continuous glow (fans ARGB)?
I think, for the lightingt, i'll leave it on a dullish orange/brown.
Just enough to notice, but not enough to overpower.
 
w0lo8dL.png


After a long day, i decided to put more work into the build.
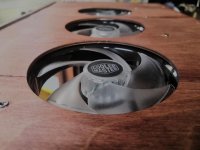
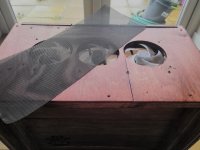
Started with messuring up the fans, lining up the laser cutter and cutting the circles.
I then put the fans in and screwed them on.

PyjvMgt.jpg

I'm putting these as intake, so i want to use some kind of dust filter.

3p1zvAm.jpg

After this, i was unhappy with all the screws and holes and lines.

So i done it all again on fresh wood, Re-cut the holes, this time i used no more nails, and made sure it was absolutely solid.
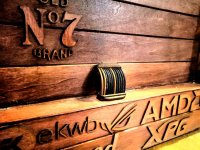
I also wanted to add some of the sponsor logos, so i laser cut them out of the same wood, and stuck them on the rear.

pKN3KP0.jpg

Overall, very happy, still some work to do, but happy with the progress this weekend.
bfUf6b0.jpg

WIll do some more cleaning and trimming over the next week.
Craig
 
dOSPbcV.png

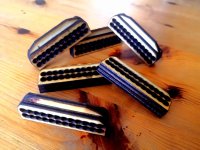
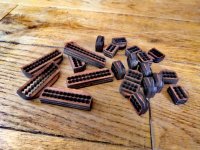
Decided to crack on and do the cable combs while waiting for the last of the bits to arrive.
These look chunky, and they are. However for good reason. These will be attached to the case, so i needed more surface area to makesure they stayed attached.


Once cut, i glued the 3 pieces together and this is how they look before being stained.
kBdObEE.jpg
40QPDms.jpg


After i stained the 24pins, i went to make the 8 pins too. Turned out rather nice

PXBHOE1.jpg

All i have for the time being i'm afraid.
Thanks for looking
Craig
 
dOSPbcV.png

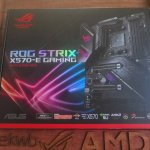
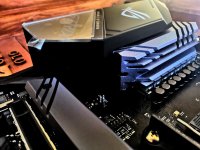
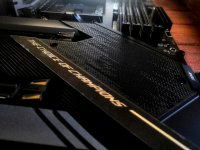
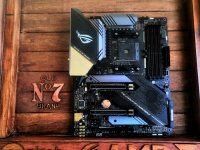
Motherboard arrived today from ASUS UK.
Really nice bit of kit too.
The ASUS ROG Strix X570-E Gaming

kcihQWe.jpg

fuM78oX.jpg
01Suum0.jpg
pWW9gYF.jpg

Put the RAM and SSD in

DCn3TDu.jpg
zQyq8Qz.jpg
Ezp8sAA.jpg


After this arrived, i got to work on the cables.
24pin + USB extensions to save needing to go inside the case.

MGBb1Qa.jpg

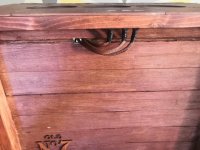
This is how the cables look on the rear of the case

l0qcdAb.jpg


The USB extensions go from board, out back and up to the top.
I used some crappy brown sleeving and duct tape, because i'm cheap :P

VBK9M5x.jpg

MUCH more to follow, can't do it all in 1 post
thanks for looking
Craig
 
dOSPbcV.png

EK Waterblocks package made an appearance today too.
I'm only going to show the CPU block for now, i'm still very much in the deep end with figuring out the loop and how it's going to work.

This, is the EK Signature Edition Lignum CPU Block.
This block, is nothing short of breathtaking.

123050584_3187245678046360_829100862360569376_n.jpg

122851501_3187245791379682_1557521714846584059_n.jpg

123089623_3187245934713001_5080476863759191428_n.jpg

123123170_3187246028046325_3315675419239654652_n.jpg

122777155_3187246131379648_2951233262974063267_n.jpg

122856171_3187246228046305_7695016152163759724_n.jpg


I also got to work on the coolant.
There's a reason it's darker in the bottle. This is because i'm running 10/12mm tubing, if i didn't make the coolant darker than normal, it'd look like **** instead of jack daniel's.

123047296_3187493554688239_4758886819915915819_o.jpg

122866946_3450013658381009_2108741040457173108_o.jpg


That's about all i have time for tonight.
Will have plenty to come this week. As everything is here, i just need to spread out my work, and not rush this. As i want to take apart everything at the end, and do a video of the whole build being put together and filled.

Thanks for looking!
Craig
 
Thank you
This is looking sweet, coming along nicely.
Made me want a drink though :D.
Ugh man, i was so tempted to drink this last night, had to keep reminding myself it's coolant lol
My word that cpu block is incredible:eek:
Isn't it just! I wish i had done the case in walnut now.
Fabulous work.
Thank you :)
wow great job, what's the plan with the reservoir? are you going to leave it open? what about dust and other particles that might accumulate in the liquid?
I have already thought of this, and applied messures to resolve the issue. Details will come eventually :)
 
dOSPbcV.png

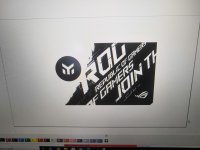
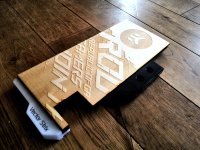
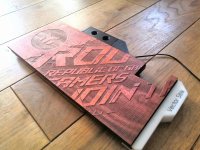
Decided to get to work on the GPU block's face plate.
Wanted something wooden ofc, but with 2 logo's (Ek + ROG)

This took me about 2 hours to design + Cut + Etch + Stain
Wood is Birch Ply and costs me about 30p per A4 sheet.

First, i use AutoLaser to do my cutting, and coraldraw12 to do all my designing.
So much easier to work on coral then export as an AI file.
nCdgYfk.jpg


The cutting and etching process takes about 45 minutes, i have the laser on a lower speed to get a deeper etch.
Once done, i test fitted and it's perfect.
5ji5Okf.jpg

The orange marks are from the smoke, unfortunetly, i cut in my shed with a large fan on, and the fan extracts the smoke out of the front of the laser instead of the back, which causes the smoke to run over the wood leaving horrible orange stains.
I really need to get my rear extractor fan set up properly.

But.... never the less, staining immediately takes this away.
and i'm left with finished parts like this

US5dtd5.jpg

If anyone would like this file sent to them, feel free to message me.


Thanks for looking.
Craig
 
dOSPbcV.png

Just a quick update today.
Not really had a huge amount of time to get much done.
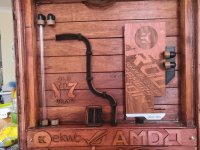
At the moment, i'm working on the rear of the case, placing everything where i want it.
Still tons of work to do, but for the time being, i'm very very happy with how it's starting to take shape.

YwHFeRP.jpg

Ignore the mess around it lol
This is basically how it will look when finished.

Still to do
1. GPU arrives tomorrow, will block it, and do the GPU cables.
2. Run the Tubes from bottom and top to the GPU.
3. Clean up the marks on the back.
4. Create a small shroud for the cables up top (USB's) with my logo on it.


Still to do inside.
1. Run the tubes from CPU to GPU (WIll be a parallel loop to keep it clean)
2. Re-do the reservoir (Bottle) tube.
3. Clean up

After all this is done, i will dissasemble the entier build, and do a video of it all going together and filling the loop.
Unfortunetly my CPU is still not here, so it's a waiting game.

As always, i appreciate all your replies and look forward to doing more.
Thanks for looking.
Craig.
 
UmhKGHy.png


Some large updates.
Over the weekend, i finished the loop, ran a leak test and ran into several issues.
Majority was recorded, and because of the leaks that happened, i just trashed the video.
So looks like i'm skipping the build video and just moving to final images + Videos.

At this moment in time, it's just touch ups here and there that are required, cables to moved around inside etc.

Anyway, here's a couple shots from last night and a live video of the build that was done on facebook last night.

ELhz2f4.jpg

9AnTZrd.jpg
U02Bsgd.jpg


Video:


Thank you for looking
More to follow soon
Craig
 
Back
Top Bottom