My '67 Triumph GT6 - An Ongoing Project Log

Associate
Joined
25 Feb 2007
Posts
2,060
Location
Bedfordshire
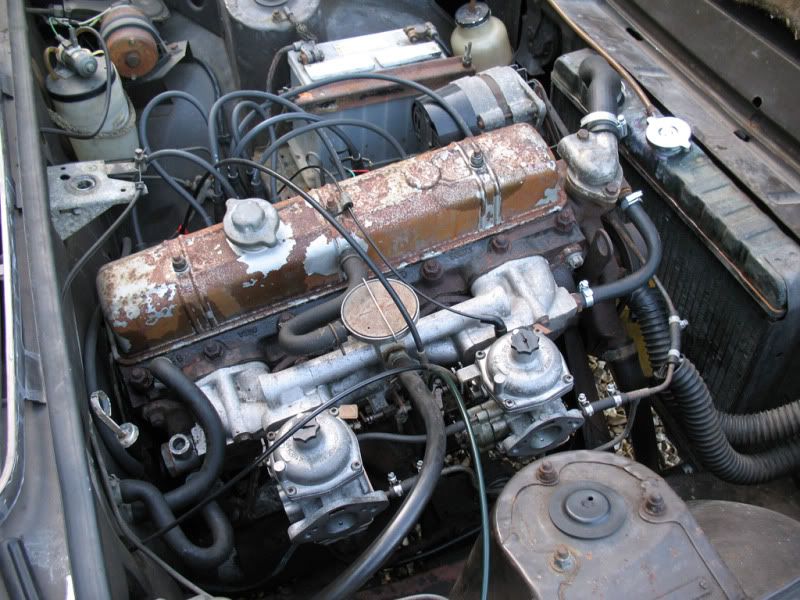
As some of you know I purchased a 1967 Triumph GT6 last year with the view of learning some mechanics. I haven't really posted about it on here so I thought it was time to put up a ongoing progress log thread as you guys might find it interesting.

I am a complete novice when it come to car mechanics so this has been and continues to be a massive learning experience for me. I wouldn't have got as far as I have with the car if wasn't for some good (and much more knowledgeable) friends of mine so a lot of the credit should go to them.

So far I haven't really done much “mechanical” work on the car. The rear transverse leaf spring was replaced by a garage near me. I would have loved to do that myself however I don't really have the space or equipment to do it in my garage (lifting equipment etc...). Here is a list of thing that were done last year:

  • Replace the rear leaf spring
  • Replaced the radio with a genuine 60's unit (Which had FM on as standard) and place a speaker in the car.
  • Re-trimmed the centre console
  • Replaced the handbrake cable
  • Refitted new locks throughout the car
  • Swapped the number plates for some proper black as silver ones (This totally transformed the car)
  • Refurbished the front triumph logo badge

The opportunity to do some proper work on the car has now presented itself because in true Triumph and British Leyland style, the car has decided to break. One of the carbs had decided to start leaking fuel whenever the throttle is applied, resulting in a loss of power. When I asked a mate of mine about this he said it is probably because the fuel needle in inside the carb is sticking. Pressure then builds inside the carb due to more fuel being pumped into it and the only place it has to go is through a gasket or one of the throttle bars. Needless to say this isn't good as it makes the car completely un-drivable. So to fix this I had to strip the carb down, replace the gaskets that I break, determine and fix the problem (it may not be the needle) and put it back together. Unfortunately the carbs fitted to the GT6 were Zenith Stromburgs which are a lot more complicated than SU's (see exploded diagram). Anyway, here is the obligatory picture of all the new shiny parts that arrived the other day. (apologises for the poor quality phone pictures)

IMAG0013.jpg


As you will be able to see from the exploded diagram below, the carbs on a GT6 are very complicated. The part that had broken was part 63 on the diagram. The one thing we didn't want to do was move the fuel jet (part 56). Doing this would adjust the amount of fuel going into the engine and either make it run rich or weak and it is a complete nightmare to get it right.

gt6early_plate_k.jpg


So we took the carbs off and took them apart so we could get to the float chamber to change the needle valve.

IMAG0016.jpg


When we got to the float chamber we replaced the needle valve and we also noticed that the fuel floats were sitting far too high in their default position. The highest point on the float should have been 18mm from the joining seat around the float chamber. It was at 22mm, so we decided to put this to its correct height (which we later found out was a bad thing to do, I'll explain why in a bit).

photo2.jpg


This was then repeated on the other carb where float was also out by 3mm and was also “fixed”. Everything was then put back together and fitted back onto the car along with some new air filters.

IMAG0022.jpg


We started the car up and it was running like a dream when it was cold – the smoothest it had ever run. So I decided to take it out to get the engine warm to see how it would go. All was well to begin with however as the car started to warm up it would no longer idle and would stall at every opportunity. At this point I knew something wasn't quite right so I decided to drive it back so we could have a look at it. On the way back after pulling out of a junction, at about 3200 rpm in 1st gear, it had the biggest backfire I have every heard come out of a car. It quite literally shook the whole car as if a firework had gone off underneath it, so I pulled over to take a look at the damage. At first I thought the bottom end had blow out but there was no oil leaks and everything looked good in the engine bay. That car just wouldn't idle at all at this point and it was a really challenge to get it back home. It was obvious now that the car was running far far to rich, which would explain why it was running so smoothly when we started it from cold and so poorly when it was hot. We hadn't changed the fuel jet setting so it must have been something to do with the floats. It then dawned on us that because we had altered the float level the jets would be out of alignment by the amount we had adjusted the floats by. As the floats are new closer to the top of the float chamber more fuel is getting pushed through each time. (I'm sorry for the poor description but it is very hard to explain as this is one of the most intricate designs of I device I have ever seen. You really need to see one to fully appreciate how it all works).

So this is where the car is at now as I didn't have any more time this weekend to look at it. The next job on it is to tune each of the carbs (something I didn't want to have to do as it is very hard) and then balance them so they are running in harmony with one another. This is done my screwing in or out the jet adjusting screw (part 59) and adjusting the two arms between both of the carbs. Hopefully I'll get to do that next weekend. I only need to be able to get it to a level where the car is drivable on the roads so I can take it to a rolling road and have it fine tuned by a professional as there is no way I will be able to get it at 100% with the tools that I have available to me.

I'll try and keep this thread up to date as I will hopefully be doing quite a bit of work on the car over the next few months so it is all up and running for the summer.
 
Associate
OP
Joined
25 Feb 2007
Posts
2,060
Location
Bedfordshire
on something nice and old like that I'd keep it on carbs.

This is my thinking as well. As cool as it would be to mod the car up I really don't want to detract too much from the original design, even though it was massively rubbish in some areas (rear suspension). This is after all quite a rare car now. About 15,000 Mk1 GT6s were built however only about 2100 (I forget the exact figure) were for the UKDM. All the rest were sent over the America. Buy my reckoning there can't be that many left on UK roads and as such I think it would be a shame to totally change the way Triumph saw the car working.

Anyway, here is a picture of one of the devices i am going to have to use to properly calibrate the carbs.

IMAG0023.jpg


I had never seen of heard of one of these devices until my dad shoved it in my hand and said "You're probably going to need this mate". Apparently it is used to measure the slight differences in the RPM of a engine. It works by connecting one wire (hidden in a compartment in the bottom of the device in the picture) to the distributor and another to an earth. This can then read the electrical signal coming out of the distributor and thus determine for fast the engine is running. That all sounds well and good but I hope it still works as my dad said he hadn't used it in 35 years.

We need more pics!

There are more pictures in my sig from when the car was running and the weather was nice :D

Same here. It's a lovely little thing.

:D Thanks. When you compare it to the size of a modern car it does look very very small. I'll have to take a picture of it next to my dads TT as a comparison so you can see how small it actually is. I only just fit in it and i'm 5'11 :D
 
Last edited:
Associate
OP
Joined
25 Feb 2007
Posts
2,060
Location
Bedfordshire
This weekend’s Saturday afternoon was spent tuning up the carbs on the GT6. This was achieved with some degree of success however the car isn’t running as sweetly as I would like.

Last weekend the car wouldn’t even idle on its own so tuning from its current state wasn’t really an option. As such I did what the Haynes manual suggested on both carbs; screw up the jet (part 56) right up to the top of the air piston (part 41) and then proceed to unscrew it three full turns. With this setting the car started on the second attempt which was better than last week and isn’t too surprising as it normally needs a bit of fuel pumping through from the tank. Once the engine had warmed up it was obvious that it was running much better than last week, however it was idling at 900 RPM which is far too high as it should idle at about 600 ~ 650 RPM.

The way to test if a carb is running too rich or too weak is to raise the air piston 0.8mm (about the width of the pointy end of a flat blade screwdriver). If the carb is set up right there should be no change in the RPM or engine note. If the RPM increases it is running to rich, if it goes towards a stall it is running too weak. Needless to say I had one running too weak and one too rich. So I started adjusting the jet by 1/8 turns on the adjusting screw on both the carbs. Doing this I have managed to get the engine idling at about 700 ~ 800 RPM. I can artificially get the engine to tick over at 600 ~ 650 RPM by partially covering up some of the air intake on the carbs. You can tell it is supposed to tick over at this speed as the engine note totally changes and the engine sits perfectly still on its mountains. Even so it is now running better than it ever has while it has been in my ownership and my dad commented when I drove it up and down the road that it sounded much smoother so it is at least drivable again now. However, no matter what I tried I couldn't get it down to its proper idle speed and it was at this point I noticed two things as to why the RPM wasn’t going down as much as I expected.

1. The vacuum hose between the distributor and the front carb had split.
2. The air piston wasn’t returning right to the bottom on the front carb after the engine was reved. Below is how it should look, however it was sitting about 1.5mm higher than this one.

IMG_1566.jpg


Point one shouldn’t have made much difference, however it will have to be fixed before I do any more setting up. I may as well have everything correct before I go any further.

Point 2 is much more likely to be the cause of why the RPM wasn’t going down. At first I though this was happening because we replaced the diaphragm and it wasn’t allowing the correct travel of the air piston. However after speaking with some people it would appear much more likely that it is the jet and needle that are not quite in alignment. This can be fixed by undoing to jet holding chamber (Part 59) and then re doing it up again. A simple fix (if it works) but at this point it had started to rain/hail and I didn’t fancy leaving the car out in those weather conditions. Plus the fact that the vacuum hose needed fixing so I couldn’t really do much more carb tuning I thought it would be best get the car back inside.

So the next thing to fix is the vacuum hose before I can move forward. Currently it is just a rubber hose that runs along the fuel pipe. While this is functional enough it doesn’t look too nice. As most of the pipe work on the car (brake and fuel pipes) is copper I’m going to make the vacuum pipe out of copper also. Problem is the vacuum pipe is just over 3 feet long and goes right round the front of the engine. This will evolve quite a large piece of copper pipe (not cheap for its size) and some very precise pipe bending. To do this I have ordered a mini pipe bender which should hopefully arrive sometime this week. This will mean I will be able to make the new vacuum pipe one evening in preparation to look at the carbs again next weekend.

So even though I haven’t got the car up and running perfectly, it is running and it is drivable again which is essentially what I wanted out of the weekend. Hopefully next weekend I’ll be able to get the carbs sorted and move onto the next thing.

Oh and for everyone who commented on how how small it is, here are a couple of comparison photos between it and my dads TT and my C30. As you can see the modern cars are so much bigger than it which can be a little daunting when you are out driving and a huge truck decided to overtake you :p

IMG_1563.jpg


IMG_1564.jpg
 
Associate
OP
Joined
25 Feb 2007
Posts
2,060
Location
Bedfordshire
You'll find that replacing the vacuum line should make a difference to how it runs on the move - besides being effectively an air leak that will upset the mixture for three cylinders, it'll also affect the timing under load.

Strombergs are actually pretty damn good when set up well, the only issue you occasionally get is that the rubber diaphragms split and they just stop being a carburettor.

The vacuum line usually just runs over the rocker cover, by the way - it's about 12" long from the factory and ties into that unused bolt and mount in the very middle :) It should be a small-bore plastic pipe.

IMG_5472.jpg


A la :)

Ah I see. Mine is currently runs along the fuel pipe. Here is the root im going to make the copper pipe take.

IMG_5472.jpg


Throw the Strombergs into your neighbours garden and follow the path of enlightenment :D

GT6_engine_birk.jpg

As cool (and expensive) as that is i'm trying to keep the car quite original in its workings so there isn't going to be any modding :p
 
Associate
OP
Joined
25 Feb 2007
Posts
2,060
Location
Bedfordshire
Well sorry for the lack of updates but I have been quite busy over the last few weeks. Quite a bit has happened in the world of the GT6. The first thing to do was to fix the vacuum pipe between the distributor and the front carb. As the current pipe had split in two separate places it was going to be easier to make a new one. When the car was restored by the previous owner they has all the pipes made out of copper so I thought I would be a nice touch to make this pipe out of copper as well. Lucky my dad has a spare bit of 1 meter copper pipe which was ideal for the task. So I ordered a mini pipe bender off of the net so I can get the pipe to follow the fuel pipe round the front of the engine.

IMG_1569.jpg


After a bit of measuring, swearing and pipe bending I ended up with this...

IMG_1570.jpg


...which fitted perfectly round the engine

IMG_1567.jpg


IMG_1568.jpg


I then trimmed up the ends to the correct length and connected it all up.

Next I had to reset the jet on the front carb so the air piston would fall back down to the bottom of the carb. This didn't take too long however it meant I had to start the retuning process again. Annoying but not the end of the world. So I spend the next hour or so trying to get the engine to idle properly and it still was having none of it. It would idle fine, I would then rev the engine and it would not return to the previous tick over rate. It would be about 200 RPM higher. After more swearing and head scratching I found that one of the role pins that hold to connecting rods between the carbs together was the wrong diameter. This meant that the rear carb could be open but the front carb may not be when opening the throttle. When letting off of the throttle the opposite would happen and the rear carb could be “closed” but the front one still slightly open still. This was causing the engine to be ticking over at a higher rate after the engine was reved.

This problem was easily fixed with the correct role pin however I still couldn't get the engine to idle properly. It was at this moment I starting fiddling with the connecting rods and noticed that there was a bit of play between the butterfly rod (part 3) and the carb casing on the front carb (apparently a common problem with old carb on this car). This play is what was causing the engine not to idle properly as I could change the engine RPM but moving the butterfly rod with my thumb. This was bad news as there is no way I could fix this and it would require a replacement carb. Bad times. That said though the car was still perfectly drivable all I had to do was alter the idle RPM so it would idle at around 800 ~ 750.

The following weekend was the Triumph International at Stoneleigh Park and I decided to do the 120 mile round trip in the GT6. The journey up to the show went well although I noticed the car didn't want to rev too well between 1300 RPM and 2000 RPM. I didn't think much of it as the car in general was running well.

The show itself was brilliant. Loads of Triumphs (as you would expect) and I even got asked to put mine inside the show itself. Unfortunately I forgot my camera and the only picture of the day is this. I have no idea at what I'm laughing at.

IMG_0328.jpg


When looking round the auto jumble I found a company that specialised in reconditioning carbs. £260 for a set for my GT6, bargain I thought I'll get me a set of them as that will fix the play issue on the front carb. Unfortunately the company didn't accept cards so would have to order later on that week when I could write them a cheque.

On the journey home things went a bit downhill however. The performance of the car in low revs got worse to the point of when I pulled out of a petrol station I got another big backfire. Nothing like the one before but it was enough stop the engine. After a bit of pushing we got the car to a lay-by and discovered that the sticking air piston issue had returned. The car would run fine but on some occasions this piston would stick open and put too much fuel into the engine, which is what we the think caused the backfire. Luckily I managed to get the car home without any more issues but it was clear that the carbs were just worn out and need replacing.

So this week I took delivery of some shiny new parts :D

IMG_1581.jpg


I purchased a new rocker cover as the old one is slightly distorted where the previous owner has done it up too tight. This was causing a slight oil leak and this needs to be fixed. I have also purchased a new temperature sender in the hope that it allow the temperature dial to work.
 
Associate
OP
Joined
25 Feb 2007
Posts
2,060
Location
Bedfordshire
Well it has been a long time coming but the car is finally running again :D . (Video evidence below)

The first job was to turn up some new throttle linkages as the old ones were worn and not very aesthetically pleasing. I decided to make them out of stainless steal and copper so it would all match in with the rest of the engine. Here is are a couple of pictures of the locking sleeves.

IMG_1599.jpg


IMG_1600.jpg


The ends that are round go on the carbs and the oblong ends hold the linking rod. They are oblong to allow for slight movement as the two carbs are not directly in line. The small perpendicular holes on the cab side of the sleeve are threaded to take a grub screw so we can adjust the balance between the carbs.

Once all the parts were made it didn't take too long to get it all fitted onto the car.

IMG_1601.jpg


However as per usual there was a slight problem. The 40 year old throttle return spring decided to break. Not a problem I thought, it can't be that hard to get a new one. Well I was wrong on that. They don't make a Mk1 throttle return spring any more so I had to get a Mk 3 one, which is 2 inches shorter *sigh*.

To get round this we had to make an extending arm for it. Nothing to hard but it was just a bit annoying as it put us back a week in getting the car sorted. Here is my poor attempt in a photo of it. I'll get a better photo when there is a bit more light.

IMG_1605.jpg


All that was left to do on the carbs was to tune them so with this in mind I thought I would fit the nice new rocker cover that I had purchased. I took the old over off and cleaned all the crap off of when sealing lip around the head.

IMG_1583-1.jpg


As you can see from the picture above it did look very nice (with the cover off and on :D) however I couldn't get the bonnet to close when it was fitted. At first I thought all I would need to do was adjust the bonnet (the GT6 bonnet has height adjustment on it) but it was already at its full adjustment as shown in the below photo:

IMG_1603.jpg


I later found out that these rocker covers are the same over all triumph straight six engines and anre not designed with the GT6 in mind. Even more annoyingly the originals are no longer made so that only left me with one choice, fix the old one. In fairness this didn't take too long. A bit of light hammering and some silicon gasket seal stuff and all was well.

Tuning the carbs was a bit problematic and it has taken me 3 attempts to get it to where it is now. However I think all the effort has been worth it as it now sounds very nice and much better than it did a few months ago. That said I don't think I will ever be able to get it perfect as I don't have all the proper measuring equipment. Here are some comparison videos.

Old

New

Next job is to fit a new speedo as the odometer in my current one broke about 4 months ago and to get some new tyres for it.. That said the car now drives very well and I have a few classic car shows lined up for it including:

  • Woburn classic car show
  • Classics on the common
  • Silverstone classic
  • Pistonheads Sunday Service (15th May)

If anyone is going to these pop over and have a chat :).
 
Associate
OP
Joined
25 Feb 2007
Posts
2,060
Location
Bedfordshire
Thanks for all the nice comments guys :)

Good stuff! You shouldn't need masses of kit to get it right - a bit of tube, looking at the plugs and keeping an eye on the economy/temperature is usually all you need if you take the time and document the incremental changes :)

Yeah that's the plan. It is about right now and on the two trips I have taken the car on since it has been done I haven't had a problem. As you said, I'll just have to keep my eye on it.

Nice looking car you have there.

If you want an alloy rocker cover, you will need to go for the SAH one, which are quite rare and expensive these days. They have the rear cover loped off and put back at a slopping angle so the bonnet clears.
However, the steel rocker covers are a) lighter, b) quieter and c) cause less emulsification on the cold days we have.

As for your carb tunning, there are a lot of peeps about with the right tools, should check on either the club triumph forums or the sideways technologies forum if anyone is near you who can give you a shot of them.

I did read about the SAH one on the club triumph forum. Even this one can still have fitting issues on early GT6's so there was no guarantee that it would have worked. Plus the fact that they are several hundred pounds now if one comes up for sale. As such I decided that it wasn't really the way to go.

Lovely little GT6 you have there - Bodywork looks good too (Bodywork always ends up costing as much as the Car to resolve, so it's best to get one with good bodywork).

Good to hear and see it is running nicely...if I get a place nearer to Work, I'll probably trade in my ever-reliable, but boring Corsa for one a GT6 or Spitfire (I had a 1500 once upon a time) as I won't be doing nearly as many miles.

That was the main think I was looking at when I was looking for a car. Bodywork on triumphs and indeed most old cars is an expensive thing to put right if it goes wrong. For example I think a new bonnet for a GT6 is about £800 and then you have got to paint it as well.

As for running one as an everyday car, I'm not sure I would want to. Its not exactly a cheap car to run. In the 9 months I have owned the car I have done 1200 miles in it and it has cost me over £1.30 per mile I have done. That said that figure should start to go down now that it is summer (I can drive it more often) and I cant see any expensive purchases in the near future.
 
Associate
OP
Joined
25 Feb 2007
Posts
2,060
Location
Bedfordshire
Well I think it is time for a thread update. It has been a busy summer for the GT6. It has been out most weekend either at shows or for my driving enjoyment. I reckon I must have put about 750 miles on it over the last 4 months. I say reckon because the odometer is still broken. This is however on my list of things to fix over the coming winter months.

The highlight of the summer was taking the car to the Silverstone Classic. This event really was a lot of fun with so many classic cars in attendance. Camping was good fun however getting everything in the GT6 was a bit of a squeeze. None the less “Camp Triumph” was established and bacon was eaten for every meal :D .

IMAG0047.jpg


Both of the days I was at the event my car was on the front of the Triumph Sporting Six stand which was really cool:

206062_10150240721492027_512762026_7736903_7825966_n.jpg


The whole event was just excellent, from the racing to having a nose round the pits at 60's F1 cars. I really would recommend it as it is a brilliant weekend.

The GT6 also had its MOT last weekend. I was a little apprehensive about this as it has failed on the handbrake before. However it turned out that my fears were unfounded as it passed with flying colours with no advisories which I was quite chuffed about.

So, over the next couple of months I am going to be doing some work on the car fixing a couple of things up, doing some servicing and hopefully doing a bit of upgrading. The first thing on the list is to do a service on the car. This will include but not limited to changing the engine/gearbox/dif oil, change the coolant and change brake pads. I am also going to order a new speedo so the odometer can be fixed.

Over the summer months it was quite apparent that the car does not like the heat. It is fine while it is running along but as soon as you stop the temperature goes through the roof. If left idling for any amount of time it will start to overheat/stall which when in heavy traffic is not good. To rectify this I am going to be fitting a Kenlowe fan. As I think I mentioned before I am trying to keep this car as standard as possible however I think this upgrade is a necessary one as it will make the car much more usable and reliable in hot conditions.

One of the other things that I will have to fix is the new carb linkages that I made. They have somehow become loose around the roll pins. This is allowing the front and rear carbs to open differently. Not the end of the world but the car will run better once this is fixed.

I'll be updating this thread a bit more frequently over the next couple of months as I will be working on the car not driving it :). I'll finish this post with a couple of pics I have taken over the last couple of months:

IMG_15502.jpg


IMG_1671.jpg
 
Associate
OP
Joined
25 Feb 2007
Posts
2,060
Location
Bedfordshire
Great stuff!

OT but the original cooling system shouldn't have any problem dealing with hotter weather - these things did work when they were originally released. An electronic fan may not be the best idea, as you could simply mask the underlying fault.

I'd have a good going through the cooling system - check the gauge, sender, pump, rad, thermostat, flush it all out, replace where necessary and so on. Also - make sure your mixture isn't too lean. If it is, that'll cause it to overheat with ease. It may not even be getting hot as the gauge and sender calibration can vary (or fail) over time, leading to inaccurate readings.

An electric fan never hurts, mind, especially in traffic - but it's worth retaining the conventional mechanical item too, as that helps circulate air through the bay.

For example, I used to run the most head-gasket failure prone of the smaller Triumphs, the 1850HL, and I could sit in 30 degree heat in stationary traffic for long periods before the gauge would start getting up to the 3/4 mark. Never went higher, though. Admittedly the GT6 does have that big ol' lump of cast iron under a relatively tight hood, mind...

Yes this was my thought as well. I'm going to do a full cooling system flush first before I buy anything. I did replace the coolant last winter and when I drained it it came out clear, however there may be a slight blockage that could have formed over the last 12 months.

The sender was not working when I got the car however that was replaced and it does appear that the gauge is giving sensible readings. None the less it doesn't hurt to check these things. When driving around and the car can get air the temps stay at the half way point. Its when I get caught up in a queue for a traffic light for 5 mins things start to go wrong. Too me that does indicate a flow problem of some kind

I'm going to have to do a bit of measuring if I am going to put in an electronic fan as there isn't too much room between the conventional fan and the radiator. I'm guessing it wouldn't make any sense to fit the fan in front of the radiator as that would obstruct air flow? :confused:
 
Associate
OP
Joined
25 Feb 2007
Posts
2,060
Location
Bedfordshire
So over the last couple of weekends I have been making some new carb linkages. After some inspection of the old ones my fears were confirmed, the roll pins had worn the brass causing the carbs to not open in sync. So the new design was going to have to be a bit more robust than the old one. As luck would have it I came across a set of universal joints that would do the job. So after a bit of modification I ended up with this:

IMG_1805.jpg


IMG_1806.jpg


These ones don't contain any roll pins so nothing should get worn. I just have to wait for the glue to set and they will be fitted tomorrow.

I have also acquired some engine oil and some new break pads which shall be sorted tomorrow if I get chance. The speedo has also been sent off to be repaired so that should be back with me in the next couple of weeks ready for the Pistonheads Sunday Service at Silverstone.

Another job I'm thinking of doing is making some foot well lights as the interior light is pretty weak. I can't seem to find a nice looking bulb holders that will take a Festoon bulb though. I don't really want to go down the LED road either as I want it to look as standard as possible. Has anyone ever found anything like this?
 
Associate
OP
Joined
25 Feb 2007
Posts
2,060
Location
Bedfordshire
Ok, time for a bit of an update on the GT6. Over the last couple of months it has mostly been upgrades done rather than fixing stuff which has been a welcome change :p. At the beginning of February I sent the speedo off to be fixed as the odometer had stopped turning 12 months ago. I had been keeping track of all the miles I had done in the car while it was broken and requested that the mileage be adjusted accordingly. Getting the speedo out wasn't the easiest job but after a bit of prying and loosening the steering column it came free. One of the things that has bugged me about the indicator lights were that they were not really bright enough, so I decided to make my own. The lights that were being used were small filament light bulbs. I wanted to convert them to LED as they give a much brighter light. As the speedo has a coloured lens these LEDs would still look original but just brighter which was ideal. The only issue was how to fit them. As luck would have it the old filament light bulbs had the same thread on them as some touch bulbs I found in my local hardware store. I modded these bulbs by smashing the glass and pulling out the filament. The top was then modded so I could solder on a resistor and and LED in place of the glass.

IMG_1808.jpg


A test run was then done and they worked first time :D. Its quite hard to tell from the picture but the LEDs do put out much more light.

IMG_1811.jpg


On the 4th March it was the Triumph Show at Stoneleigh Park. This event is brilliant for getting some bargain parts and there is a good selection of cars on show as well. As luck would have it I managed to find an original GT6 steering wheel up for sale. These normally sell for silly money (£200+). After a bit of haggling I got it for £65 :). Quite a good deal however it came with one downside – the steering wheel came with no boss to fit it (hence the low price).

IMAG0109.jpg


No problem I though, I'll just make one. This turned out to be quite a bit work as I'll now explain. As you can see from the picture above of the speedo lights, the steering wheel is locked into place on the steering column by some splines. Are very hard to make on the equipment I have available to me. The other issue was with the increased diameter of the new wheel (15” vs 13”) clearance would be issue with the gear stick. To get round this the new boss would have to be made in 3 parts and then another part to go on the front to hold the horn push. As I was unable to make the splines I purchased a moto-lita boss

KGrHqRHJDgE8ftWV3DlBPSryeMuQ60_12.jpg


This would not fit onto the new wheel so it had to be machined down to a flat base

IMG_1812.jpg


The next job was to make an extension so clearance of the gear stick could be achieved. This extension block as made out of aluminium (its lighter than steal and this is a sports car after all).

Here is the block on the lathe before any “sculpting”

IMG_1813.jpg


Slowly getting there...

IMG_1815.jpg


A plate was also made to fit onto the top of this extension so the wheel could lock into it. Cutting this plate was hard work.

IMG_1814.jpg


This plate was then put onto the milling machine to have the square cut into it so the wheel could lock into it. Holes were also drilled and tapped into both sides of the extension so bolts could hold it all together

IMG_1817.jpg


IMG_1818.jpg


After some light final cuts on the lathe to get a nice finish this is the end result

IMG_1819.jpg


The top mount for the horn push was then also turned out of aluminium with a hole through the middle so it could then attach to the extension via the tapped hole in the centre of the locking square

IMG_1824.jpg


This is the back of the top mount. Note the holes had to be made so bolts could be used to secure the wheel.

IMG_1823.jpg


Next job was to clean up the wheel itself. To be honest this didn't need to be done but I like shiny new stuff so I masked up the wheel and got polishing.

Before
IMG_1820.jpg


Non polished Vs Polished
IMG_1821.jpg


After
IMG_1822.jpg


And here it is all fitted with the reconditioned speedo

IMG_1872.jpg


Here is the old wheel for comparison
IMG_0261.jpg


A vast improvement in looks in my opinion and it has made the car much easier to steer as well. This coupled with a new set of tyres in the correct size (155/80/13) have totally transformed the handling of the car. The car rides much smoother now due to the tyres and the steering is much lighter now due to the small width tyres and larger steering wheel.

Next job was to fit an electronic ignition unit that I purchased from ebay. Here is a link to the unit itself which I have been very impressed with.

http://www.ebay.co.uk/itm/Universal...CarParts_SM&hash=item2eb11e9e31#ht_2897wt_952

The unit came with some very comprehensive instructions on how it fit it. Here is the diagram the best explains how it works

ElectronicIgnitionDiagram.jpg


As you can see the unit is essentially patching into the existing ignition system. This has some very distinct advantages.

1)It is very very easy to fit
2)If you wish to go back to the original system all you have to do is connect the condenser back up and disconnect the unit.

Fitting of the system took all of 15 minutes.

IMG_1873.jpg


On starting up the car after fitting of the unit it fired up immediately, something which it rarely does when it has been standing for 2 months. On the test drive as the car warmed up properly I started getting a misfire. Odd I thought so I checked the carb tuning which was fine. After a bit of digging it turned out the be the coil degrading due to the increased voltage going though it. A Lucas DLB105 sport was purchased and the misfire was cured.

lucas---dlb105-sport-12v.jpg


The engine now starts much easier and it is much smoother when accelerating. Not bad at all for such little outlay. I really would recommend this electronic ignition – just make sure the rest of your ignition system can take the voltage it puts out and that you get the right variant of the ignition system for your car.

So, what's next for the car. Well the alternator has started playing up and it is only putting out 12.5 volts instead of 14v at idle. When then engine gets up to 4000 RPM it start putting out the correct voltage. So the next things to check are:

1)The pulley ratio between the crank and alternator are correct (I don't think the ignition light was on before so this situation is unlikely)
2)See if the belt needs replacing. Again unlikely as it was changed a couple if thousand miles ago and it seems tight.

If none of these prove to be true it looks like its new alternator time.

Another thing I have got to do is fit in some footwell lights. I picked up these units at the triumph show

IMG_1874.jpg


The bulbs in them need upgrading as they are only 1watt and I'll need figure out how to fit/wire them in. Other than that the car is ready for a summer of driving. It has already been out once this year, a Pistonheads meet Silverstone the other month

419250_10150666087552020_622572019_9026734_2062729100_n.jpg


More fixing, upgrading and adventures to come soon :)
 
Associate
OP
Joined
25 Feb 2007
Posts
2,060
Location
Bedfordshire
Time for a bit of a thread update think as it has been a year since in last did one!

Noting too major has needed to be done on the car and it spent most of its time at shows, meets and being driven at the weekends throughout the summer of 2012 (Pictures at the bottom of this post).

I did however manage to track down why the car got so hot. The thermostat was not fully opening so it needed to be replaced. A simple job I thought. All I need to do is open up the housing an put a new one in. Oh no, nothing is ever that simple on this car :(. When I went to unbolt the housing the bolts has seized. This was not unexpected and just applying some heat should get them out. Nope that didn't work either and in the end the bolt sheared off. ****!

IMG_1942_zps271f3f14.jpg


After various attempts at getting the stud out it was clear it would have to be drilled out. After doing this we had to use a tool called a helicoil as the original thread was destroyed.

IMG_2026_zps447f07ed.jpg


This tool works by drilling a hole which is larger than the original and threading it. Then one of the “springs” that you see in the picture above is screwed down this. While it is hard to tell from the pictures the cross section of the spring is a diamond shape so it will screw into the larger hold and create a thread of the original size down its centre. Using this method the old bolt came out and allowed us to fit the new thermostat. While doing this I also replaced the top thermostat house as the metal had become brittle. Annoyingly this small housing cost £45 but I guess that is preferable to it failing.

The MOT came around in the autumn and it got through with only two advisories.

  1. Anti-roll bar bushes on the far side being a bit loose.
  2. Front brakes not being balanced.

Fixing the anti-roll bar was pretty none eventful however pushing rubber bushes down it was a little time consuming. Here is the bar when I took it off and before it was repainted (Obviously the kitchen is the best place to do this sort of work :D).

741170_782258129135_2072382550_o1_zps8e8ffdeb.jpg


Fixing the front brakes turned into quite an annoying job but this time it wasn't that cars fault. My initial thought was just to change the front brake pads as they were most likely worn out. After jacking the car up and taking the old pads out it was evident that the old calipers were going to need replacing as one of the pistons on each side had seized. So I ordered a set of brand new calipers along with some braided hoses for the front and rear. Swapping over the calipers wasn't too bad just a little messy. Anyway I got them all fitted

IMG_2001_zps98aa70fc.jpg


IMG_2002_zps2f3eb020.jpg


IMG_2003_zpsab31b062.jpg


The hand brake was then adjusted as the cable has stretched a little. This is done via this square adjuster on the back of the brake drum.

IMG_2004_zpsddee5b98.jpg


Bleeding the brakes was a massive pain as there was some air trapped in the tubes so I decided to let the car settle and come back to it the next day. This where things got interesting as when I came back to the car the next morning there were two puddles of brake fluid under each of the front wheels. I initially though it was some left over fluid from the bleeding but I had wiped the calipers clean and after leaving it again for another half day it was obvious that both of the new calipers were leaking!! After some reading around it tuns out that I'm not the first to experience this with these new calipers. Another example of china chucking out poorly made parts :(. So some original re-con Girling calipers were purchased and fitted on. Bleeding this time was quite easy with no trapped air which was a bonus.

The car has had a bit of a tune up as well due to the car running much cooler now. I still haven't got it quite right but the engine sure does go now. 40 – 70 is suprisingly fast for a 46 year old car. I'll have to get a video of it at some point.

The next thing to do is to replace the seat with some are are more comfortable. The current ones are period styled bucket seats which not very good over long journeys. I have purchased a set of original reclining seats but these will require recovering as they are knackered.

IMG_1955_zpsdf745307.jpg


The seat re-con kit (foams and covers) cost me £260 which I didn't think was too bad.

The other thing the car needs is some body work doing to it. The paint has seen better days and there is some rust coming though on the front and rear arches. So a respray and body work will be needed, not looking forward to that bill as going to be around £6000.

Anyway, the car will be used over the next few months. It will be at the Silverstone classic on the Triumph Sport Six stand as well as going to some pistonhead events as well.

Pictures :).

DSC_0104_zpsac32d6ff.jpg


DSC_0103_zpsb36c73c6.jpg


My ideal two car garage. I need one of these Ginetta G4s in my life

P8260311eidt_zpse0d9084b.jpg
 
Associate
OP
Joined
25 Feb 2007
Posts
2,060
Location
Bedfordshire
Humm, 3 and a bit years since an update. I think one may be due as a fair bit has been done on the car.

The seats that I mentioned in the last update were stripped, frames cleaned and repainted, re-upholstered and fitted back into the car.

893364_846129310775_810085087_o_zps653d6b17.jpg


1292986_852858764895_1970062341_o_zps6c3b4cb9.jpg


They are a huge improvement over the old seats in terms of comfort. They don't hold you quite a well but I can live with that.

The car has also had a re-spray 2 years ago and it looks much better for it. It's missing the front lettering in this picture but that has been added back on now.

11898569_10100204649859695_1967740969662815687_n_zpsukjvsjco.jpg


I moved house after the respray so work on the car has been minimal over the last 18 months. The car was driven over the summer. During this time the condition of the gearbox has got worse. It has never been great in this car, mainly because GT6 gearboxes are notoriously rubbish, but it has managed OK during my ownership. It has always been in the back of my mind that I'm going to have to do something about it but finding a good gearbox for one is next to impossible now as the parts are not made any more. When an upgraded, stronger gearbox came up for sale the other night on one the many Triumph groups I'm a member of I snapped it up. Pricey but it'll be worth it as I'm never intending on selling this car.

So I have now challenged myself, a novice mechanic, to do a gearbox swap in the garage of my new house that hasn't been fitted out yet. It seemed like a good idea at first but now I'm not so sure haha.

Anyway the method of getting the box out doesn't seem to bad on the face of it. As the transmission tunnel can be removed, the car the gearbox can be taken out from inside the car. This means the engine doesn't have to come out and I don't have to have the car on a lift. Here is someone doing it on a Spitfire.


So a lot of work to do over the next few weeks in the cold, dark garage which hasn't got electric running in it yet.......wish me luck!
 
Associate
OP
Joined
25 Feb 2007
Posts
2,060
Location
Bedfordshire
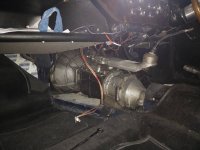
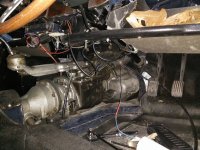
So work started the other day and I have gearbox exposed

uoSvSL9.jpg

ZXSsM3t.jpg

The gearbox is a lot smaller than I was expecting so I can see now why people take it out through the car. Not too sure how to progress now as I've winged it so far. Going to take a look in the workshop manual and the Haynes manual to see if they can offer any guidance.
 
Associate
OP
Joined
25 Feb 2007
Posts
2,060
Location
Bedfordshire
The gearbox is out :D

FNMBwhFh.jpg

C79TKLMh.jpg

It took myself and my dad 7 hours to get it out in the end all because of a stud not coming out of the block. Hopefully we'll be able to get it out now that the gearbox is out of the way. I don't really fancy having to drill this one out :(.

Uap7pVgh.jpg

Off to get the new gearbox tomorrow.
 
Back
Top Bottom