Although this advice is only applicable to certain requirements, this is what I'd do.
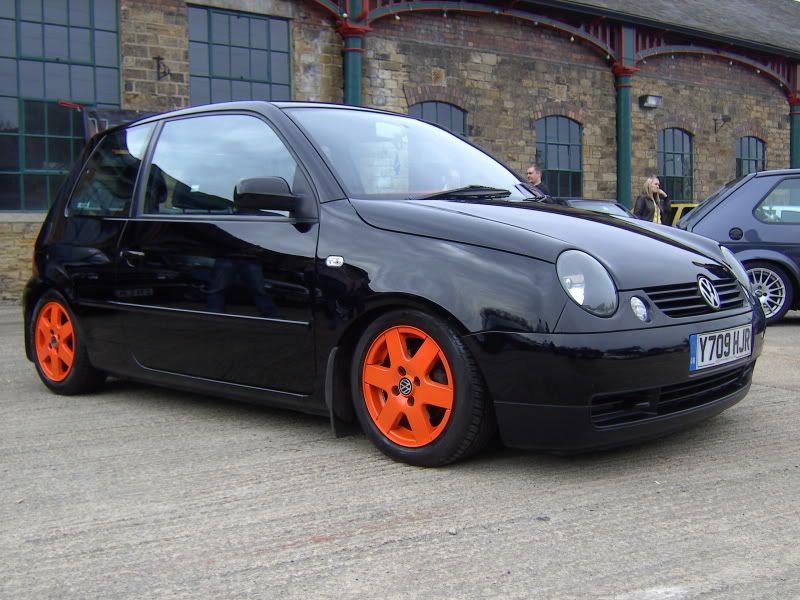
It's a simple shape, so I'd choose the circular selection too. Create a circle about the right size of the alloy. (Hold down ALT, while placing the cursor in the middle of the alloy and drag to lock down the centre point).
From here, you can right click, and Transform Selection. Choose, distort and make it fit perfectly over the alloy area.
Now, go to the layer pallete. Make sure your car layer is selected. There's several small icons at the bottom of that pallete. One looks like the contrast symbol. Half white, half black circle. Choose Vibrance.
Now, for the selection you made, a new layer attached to your car layer will appear. This is an Adjustment Layer. Photoshop bread and butter Editing this will change different things depending on the type. And will only do so in the area you have selected. To the immediate right of this, is the layer mask. This defines what area you have selected for this Adj Layer to modify and is editable at any time. To do so, click the layer mask (should be a box, with black and a white circle at the moment). This is symbolising the White area being the affected area. It's a mask remember, think of the black as Opaque, and the white as the visible area.
Ok, I hope I haven't lost you so far!
So the Vibrance layer is now there. Click it. Above, should be the adjustment settings for this layer. The Vibrance Adj Layer has 2 settings. Saturation and Vibrance. Saturation controls the colour amount. The lowest settings will turn this colourless. The vibrance does almost the opposite and can intensifty colours. Just slide the Saturation settings down for now. There are plenty of ways to achieve similar things in PS. I like these Adj Layers because they are editable at any time and exist as separate layers. Nothing is permanent.
So now the wheel is colourless.
Incase that wheel selection is gone, we'll need to select it again. The Vibrance layer layer mask box. Click it whilst holding CTRL. This shortcut selects all visible areas of the layer and works in normal layers too. Now your selection is back.
Click the car layer and then the Adj Layer button. Select Hue/Saturation. This can be used to change colours. Or, to change Saturation. You can't make it black and white and add colour in the same Adj layer though. Hence the Vibrence layer and this one. Although you could have used 2 seprate Hue/Saturation layers instead.
Ok. Make sure the Hue/Sat layer is ABOVE the Vibrance layer. click, then drag above and let go. Simple. Order matters. Above layer adjusts what's underneath, even other Adj Layers. We want to adjust what's been made made black and white, not make black and what we have changed the colour of...
So click the Hue/Sat layer. In the same area of Vibrance layer, adjust sliders. Firslty, check the Colourise button. The Hue slider selects the colour to modify. Saturation is how much colour to give the colour chosen. Lightness, is self explanatory. Play around to get the colours you want.
Now. One last thing. Click the Hue/Sat layer. Directly above it should say "normal" in a drop down box. Click this and select "overlay". These are your blend modes and determine how the layers interact with colours on the other layers. Overlay is good for this, because it takes into account the shadows and contours of the underlayer. Normal, would be more like slapping a colour on top. Experiment with others too and learn their purposes.
--
There you go! There are loads of ways to achieve what you want in Photoshop, but this way you get used to a massively useful set of tools that will change the way you use PS for ever. It might seem complicated now, but once you get the hang, it will literally take you 10 minutes if that.


") My skills go as far as Magic Wand --> Change Colour --> Change % lol
My skills go as far as Magic Wand --> Change Colour --> Change % lol 


 It's actually a pretty quick process, I've just described it in detail that's all.
")