Project Bloodfang - Case Labs Black and Red Build
- Thread starter kindai
- Start date
More options
Thread starter's postsI know caselabs do amazing cases, but being used it. would you say its well worth the £700 you paid as this could nearly buy you 4 Enthoo Primo's. And how does the size compare because i know that they are both huge ?
The CL is still quite a bit bigger.
So, was bored so decided to get the CPU and Mobo sorted.

All laid out ready to go... it wont stay this tidy

CPU in, even after doing this many many times, the horrible crushing sound when you tighten those clamps still makes me cringe!!

Waterblock on, unfortunately I had to lift it off about halfway down, fortunately the spreading of the TIM was still relatively in the middle (it was waterblock weight only, no pressure had been applied) and mostly still globbed up, so hopefully there wont be any issues there, I may take it off and completely re-apply just to be sure.

Nice and snug

Lets get it settled onto the tray.

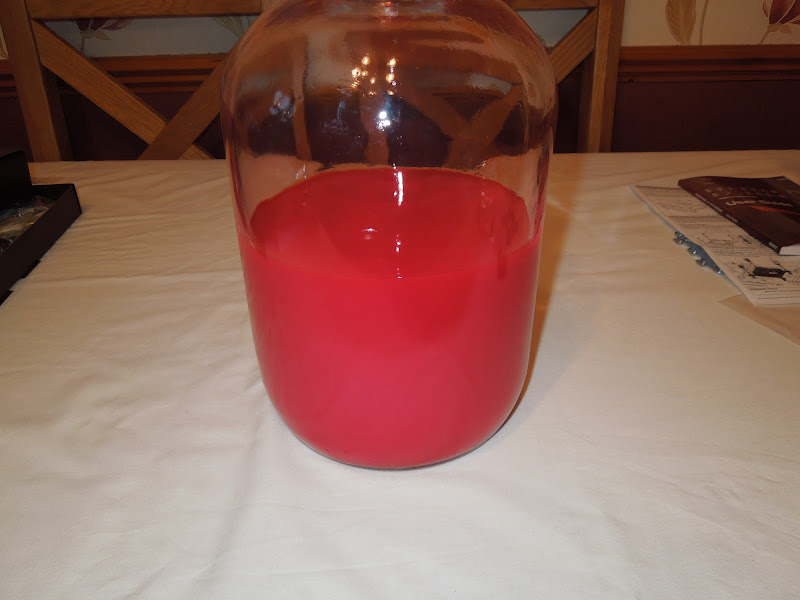
So I also decided to mix up the coolant ready, sure it may be a few weeks away before it's needed, but no harm and it means I can get the color absolutely perfect This time around, not so right, I forgot to order some blue so just ended up with this pinky color! Bah!!!


All laid out ready to go... it wont stay this tidy

CPU in, even after doing this many many times, the horrible crushing sound when you tighten those clamps still makes me cringe!!
Waterblock on, unfortunately I had to lift it off about halfway down, fortunately the spreading of the TIM was still relatively in the middle (it was waterblock weight only, no pressure had been applied) and mostly still globbed up, so hopefully there wont be any issues there, I may take it off and completely re-apply just to be sure.
Nice and snug
Lets get it settled onto the tray.
So I also decided to mix up the coolant ready, sure it may be a few weeks away before it's needed, but no harm and it means I can get the color absolutely perfect
 This time around, not so right, I forgot to order some blue so just ended up with this pinky color! Bah!!!
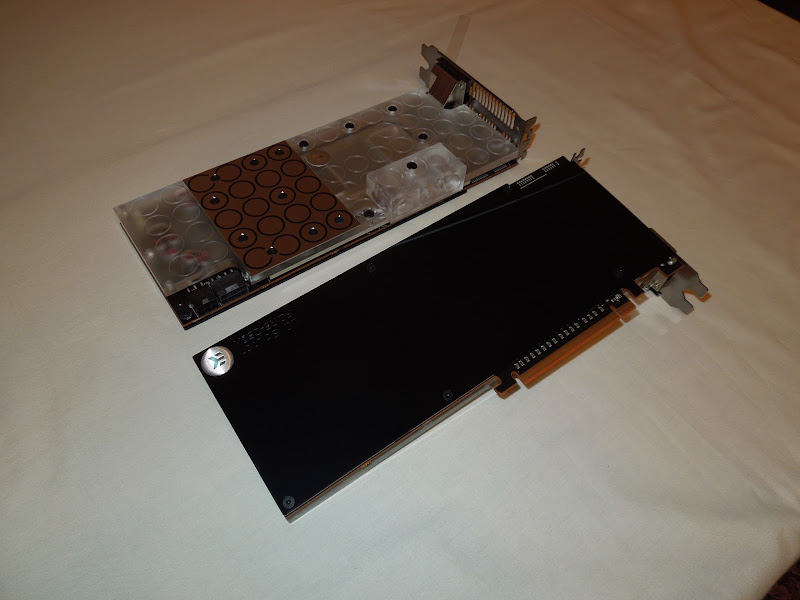
So a boring update today. I wasn't realy happy with the looks of the current GPU blocks, so ordered the full length frosted CSQ ones, this way, they will match the blocks on the mobo.
Heres how they looked before

Ready to go...

First remove the old block, and reapply thermal interface materials, this is what a naked 290x looks like.

I couldnt realy take any photos of the next part, because it pretty much involved me having to grow a 3rd arm to hold the card and waterblocks in place, whilst screwing it in place.
Anyway, the end results...


Heres how they looked before
Ready to go...
First remove the old block, and reapply thermal interface materials, this is what a naked 290x looks like.
I couldnt realy take any photos of the next part, because it pretty much involved me having to grow a 3rd arm to hold the card and waterblocks in place, whilst screwing it in place.
Anyway, the end results...
Associate
- Joined
- 28 Dec 2011
- Posts
- 193
My favourite armour set for any class in wow!!! looking forward to this  That case humongous! subbed
 That case humongous! subbed
I like these blocks.
To be honest other blocks aren't full cover for me, only those which cover everything.
I feel the same, they just, they're nice enough much still "meh". Need to find somewhere to lump em now, having £200 of useless blocks knocking around isn't fun

So today had the PSU turn up. Many of you know what bitcoin mining is, and unfortunately it means theres currently a very short supply of high power PSU's. So getting hold of this particular monster PSU was difficult.

So lets open it up? Eh... very tidy.

A very nice package provided by corsair there.

It very rare when grabbing something that you feel the quality instantly, but this PSU, wow, it just oozes quality all over.


So lets take a close up of the rails. Yes thats right, the +12v has 100.4 Amps... pretty scary stuff! Personally I prefer divided rails, but they are rarely come by nowdays, and the safety measures inside these PSU's are top notch.

32 giggidybytes of C10 2400Mhz RAM. As sexy as those heatspreaders are, they'll be disapearing in the future...

The 2 radiators for the graphics cards. I could use a single higher density radiator, but that requires higher pressure fans, and more noise. So opted to run 2 radiators for the 2 cards and use low RPM fans instead.


Finally, a shot of all the hardware so far!

So lets open it up? Eh... very tidy.
A very nice package provided by corsair there.
It very rare when grabbing something that you feel the quality instantly, but this PSU, wow, it just oozes quality all over.
So lets take a close up of the rails. Yes thats right, the +12v has 100.4 Amps... pretty scary stuff! Personally I prefer divided rails, but they are rarely come by nowdays, and the safety measures inside these PSU's are top notch.
32 giggidybytes of C10 2400Mhz RAM. As sexy as those heatspreaders are, they'll be disapearing in the future...
The 2 radiators for the graphics cards. I could use a single higher density radiator, but that requires higher pressure fans, and more noise. So opted to run 2 radiators for the 2 cards and use low RPM fans instead.
Finally, a shot of all the hardware so far!
So today finally got around to building the mount for the 2 pumps.
Unfortunately the pictures taken in constructions wern't great, so only pictures of the end result. Forgot how much fun it was doing metalwork/engineering.


Pumps in place.

And all in the case, I intentionally put some overhang of the mounting plate near the motherboard partly to hide the pump cables (even though i'll be sleeving them) and as an additional place to attach stuff if needed.
Sorry for the dust!


Unfortunately the pictures taken in constructions wern't great, so only pictures of the end result. Forgot how much fun it was doing metalwork/engineering.
Pumps in place.
And all in the case, I intentionally put some overhang of the mounting plate near the motherboard partly to hide the pump cables (even though i'll be sleeving them) and as an additional place to attach stuff if needed.
Sorry for the dust!
Very nice m8
Thanks
 It was definately the better option than drilling into a very expensive case
So today had a box of bits turn up from the US. I have heard amazing things about these cougar fans, however, finding somewhere in the UK that has them at a good price was near impossible. So had to get them from the US.

Also grabbed some of these splitters to make cabling and fan control easier. 1 in 5 out.

140mm and 120mm next to each other

Now the screws black ice provide are CRAP. Look at this. No room to actually attach them to the radiator in any way, let alone with a easy mount from CaseLabs.

So a trip down the builders merchant for some longer screws and some black matte spray.


As for the orange in the fans? Well, a little model builders acrylic paint takes care of that.

So mounted up the 3 radiators, the unpainted one needs to be re-done, but another trip down the builders merchant to pick up some washers needs to be done first.

Stacky....

Also grabbed some of these splitters to make cabling and fan control easier. 1 in 5 out.
140mm and 120mm next to each other
Now the screws black ice provide are CRAP. Look at this. No room to actually attach them to the radiator in any way, let alone with a easy mount from CaseLabs.
So a trip down the builders merchant for some longer screws and some black matte spray.
As for the orange in the fans? Well, a little model builders acrylic paint takes care of that.
So mounted up the 3 radiators, the unpainted one needs to be re-done, but another trip down the builders merchant to pick up some washers needs to be done first.
Stacky....
Associate
- Joined
- 5 Jul 2009
- Posts
- 844
- Location
- DONcaster
Looks epic I just don't like ek ever since they went all circly

