Project - Scorpion (Lian Li PC-A71F mod)

Permabanned
Joined
15 Nov 2008
Posts
6,968
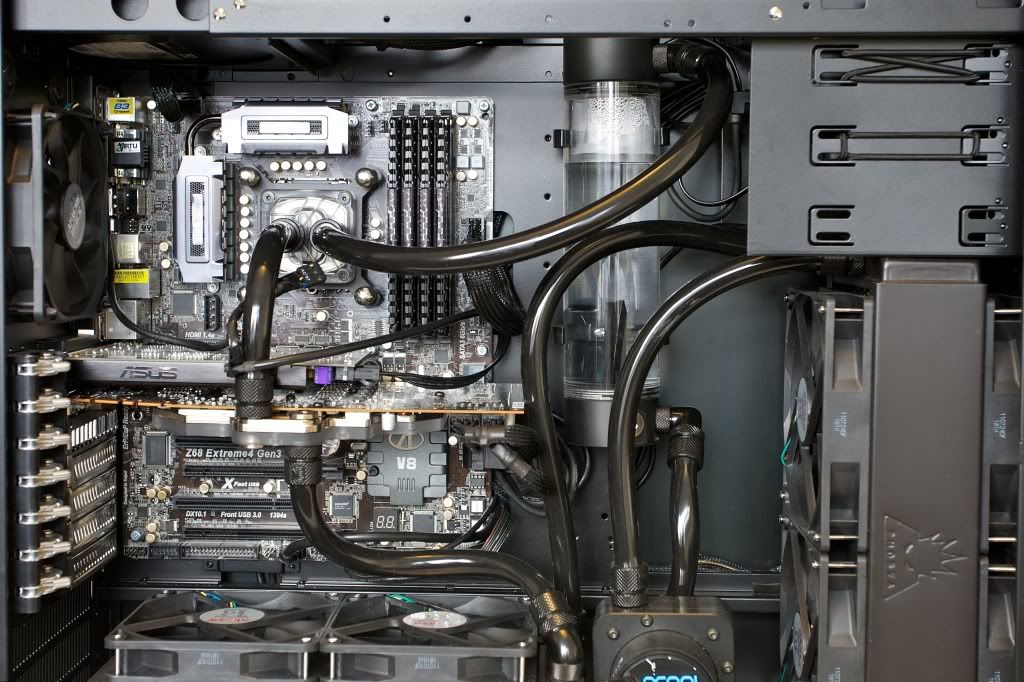
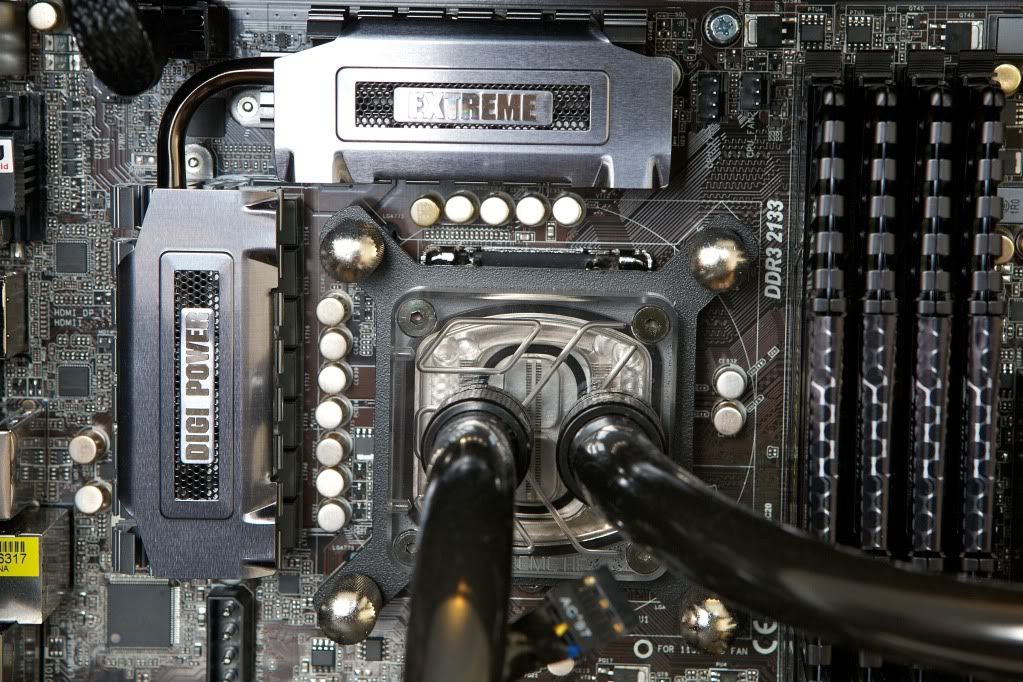
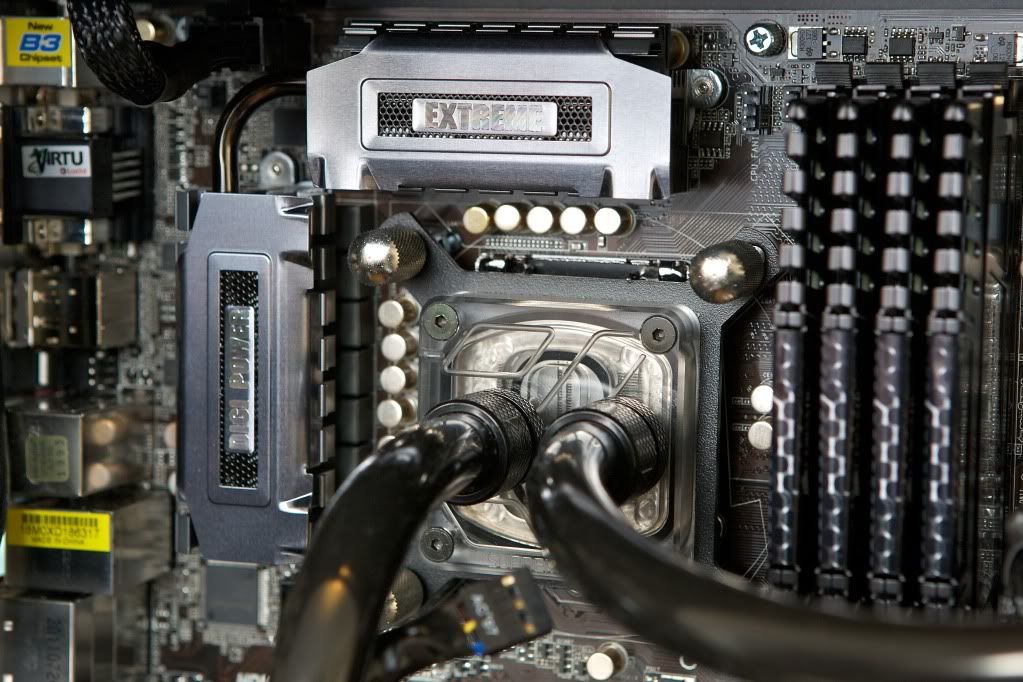
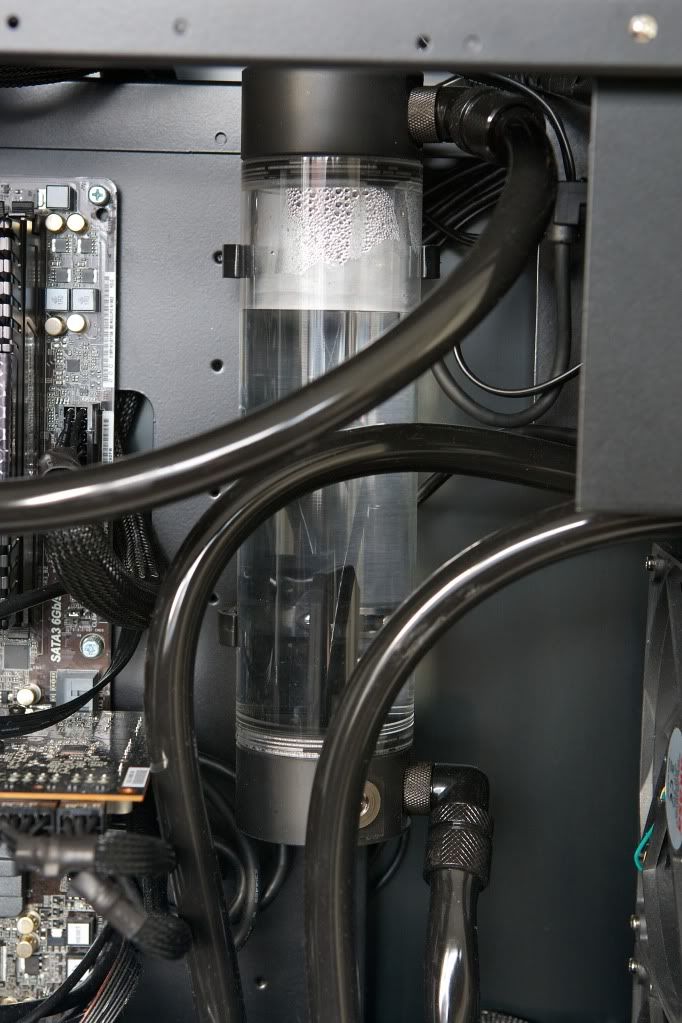
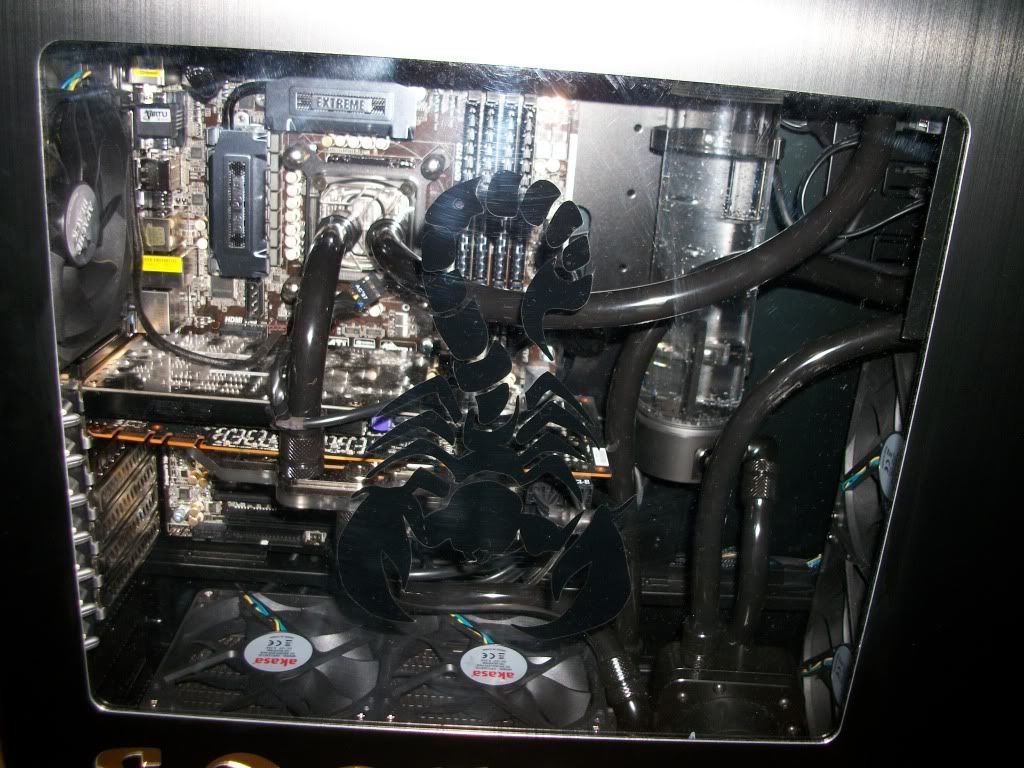
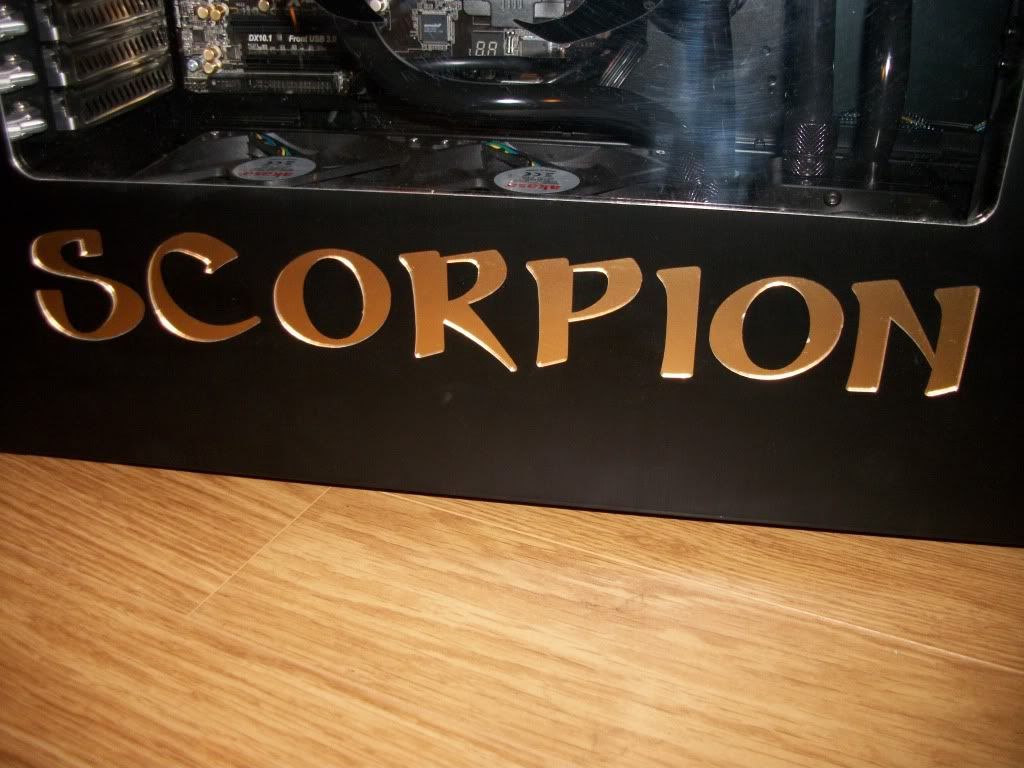
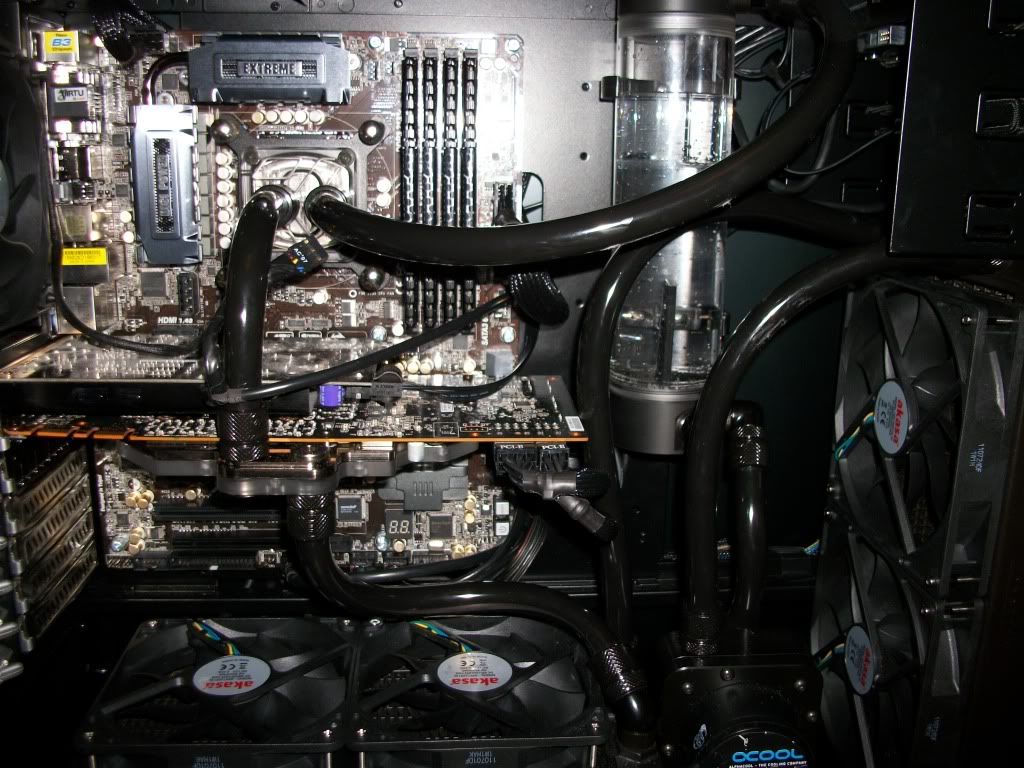
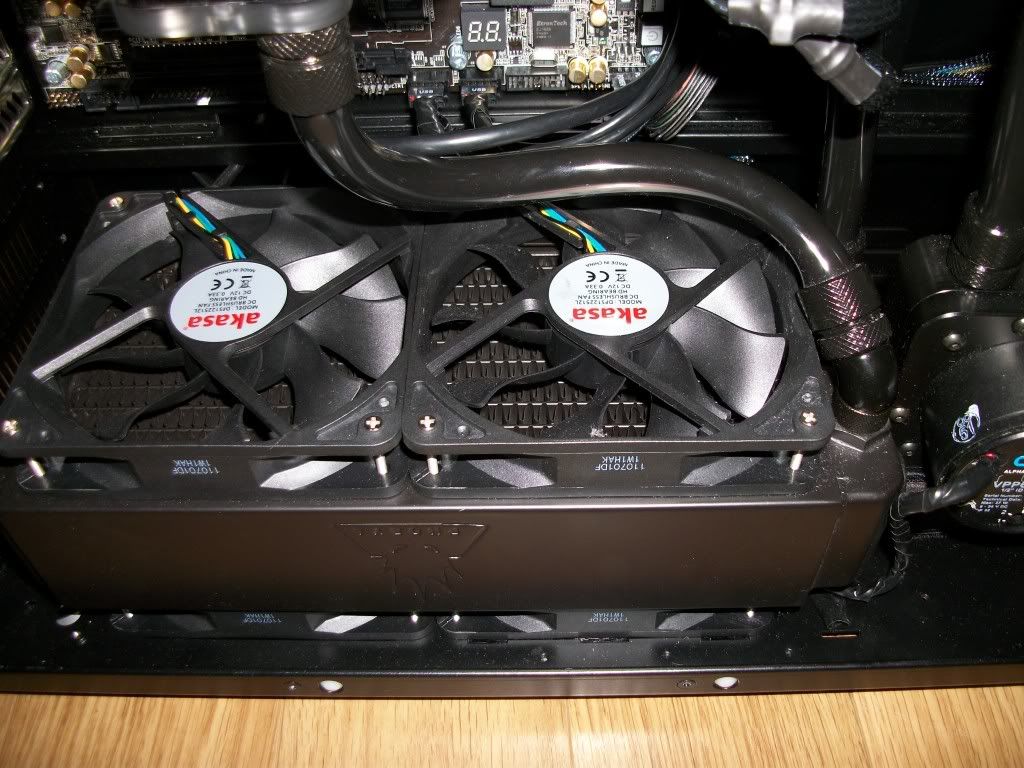
Heres some decent pics of my finished build, putting them here as Ive kinda run out of space lower down, my build log continues after
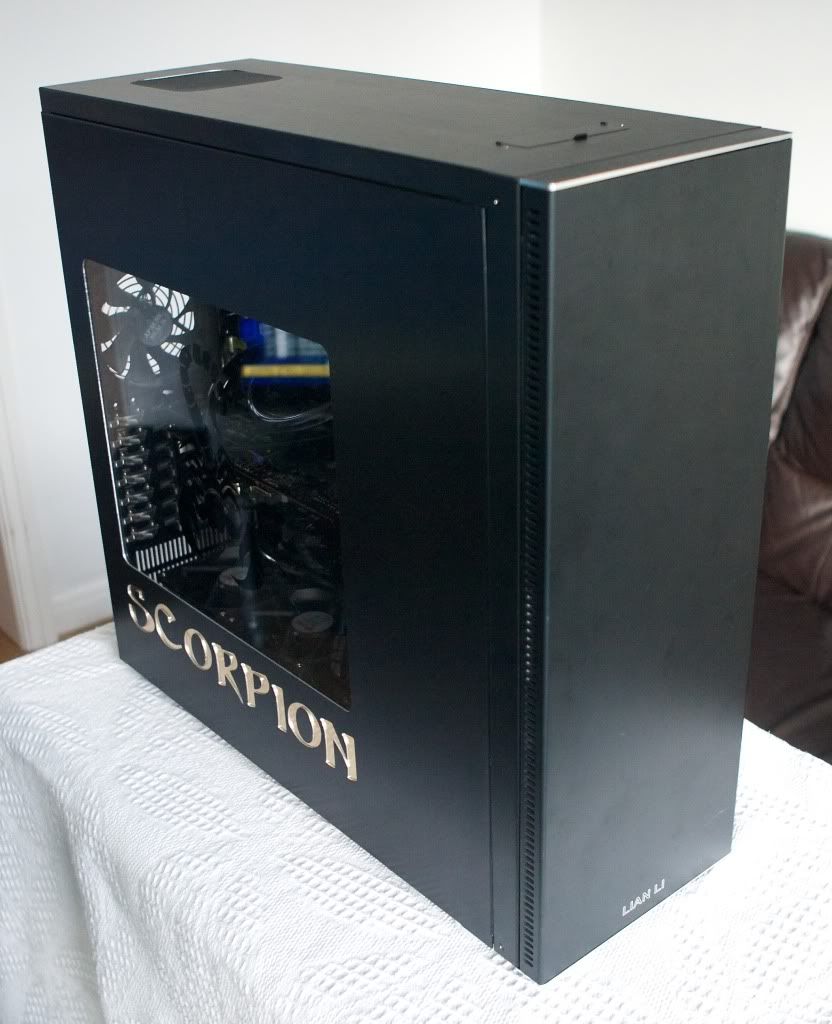
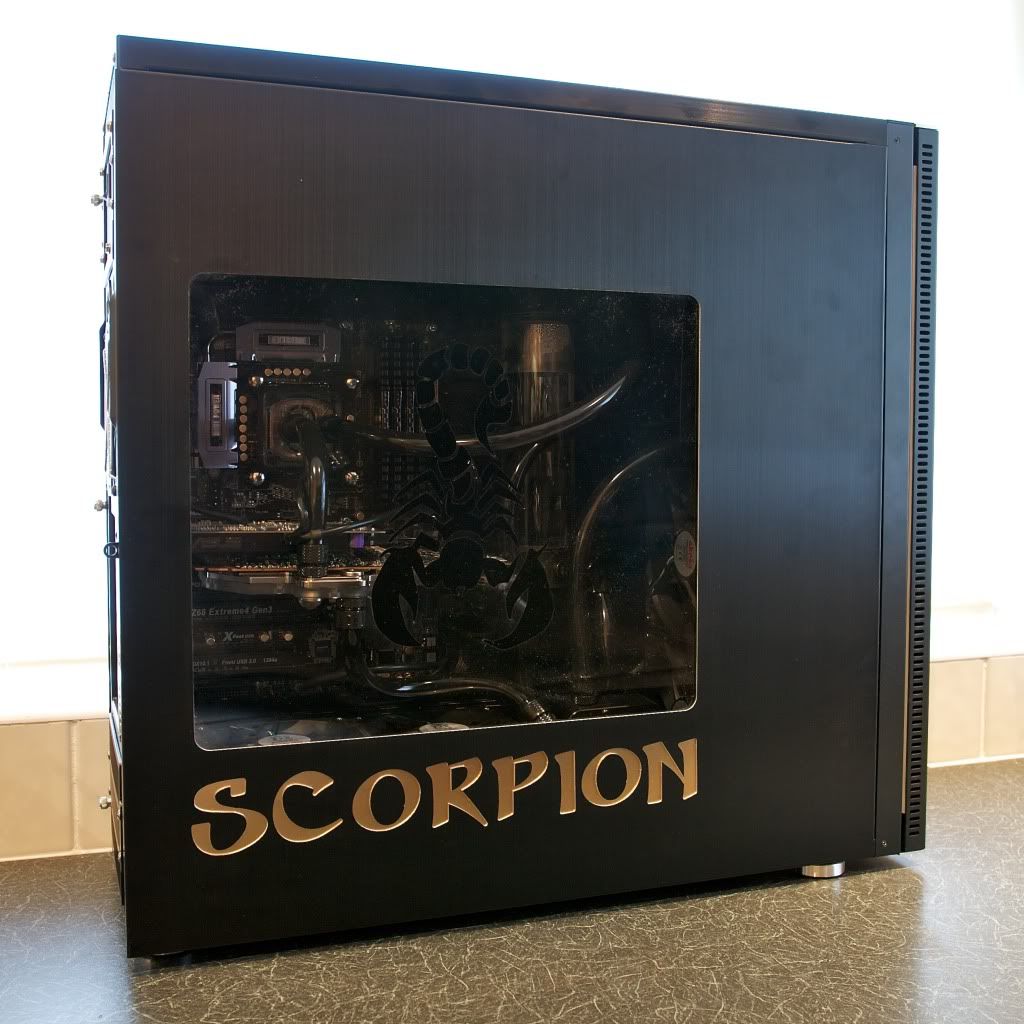
MJD_0581.jpg


MJD_0564.jpg


MJD_0568-1.jpg


MJD_0572.jpg


MJD_0574.jpg


MJD_0577.jpg


MJD_0578.jpg


Well I've decided I'm finally going to go for it and over the next few weeks I'm going to rebuild, watercool and mod my case.

The idea is to put the following into my case

Mobo: Asrock Z68 Extreme4 Gen3 Intel Z68 (Socket 1155) DDR3 Motherboard
CPU: Intel Core i5-2500K 3.30GHz (Sandybridge) Socket LGA1155 Processor - Retail
RAM: Corsair Vengeance 16GB (4x4GB) DDR3 PC3-12800C9 1600MHz Dual/Quad Channel Kit (CMZ8GX3M2A1600C9)
GFX: OcUK Extreme H2O GeForce GTX 580 1536MB GDDR5 [EVGA Superclocked] (I know its a bit cheaper to do it myself but I dont mind paying small premium for OcUK to do their thing)
SSD: Crucial RealSSD M4 256GB 2.5" SATA 6Gb/s Solid State Hard Drive (purchased)
Storage: Seagate Barracuda 7200.12 1TB SATA 6Gb/s 32MB Cache - OEM (ST31000524AS) (may hold off and re-use current HDD due to pricing)
PSU: Corsair Professional Series AX850 High Performance 850W Modular '80 Plus Gold' Power Supply (CMPSU-850AXUK) (may go for 750 not decided yet)

Along with the following watercooling parts

Rads/Fans: Front Phobya G Changer 280
Akasa AK-FN062 Apache Black Super Silent 140mm Fan - 4 Pin PWM
Bottom Phobya G Changer 240
Akasa AK-FN058 Apache Black Super Silent 120mm Fan - 4 Pin PWM
Pump: OcUK D5 Vario Pump & EK D5 X-Top V2 Value Combo
CPU block: EK Supreme HF CPU Waterblock - Nickel Plexi **2011 Compatible**
Res: EK Multioption Reservoir X2 250 Advanced
Tubing: Tygon 7/16" ID [16/11mm] Tubing - Clear (R3603)
Fittings: EK PSC Compression Fitting 7/16 [16/12mm] - G1/4 - Black (10 should cover it I think)
In fact I may go for the OcUK gold ones instead
Fluid: Mayhems X1 UV Oil Black Premixed Watercooling Fluid 1L (I'd like to try Golden Fluid, to offset, but not sure if there is any)

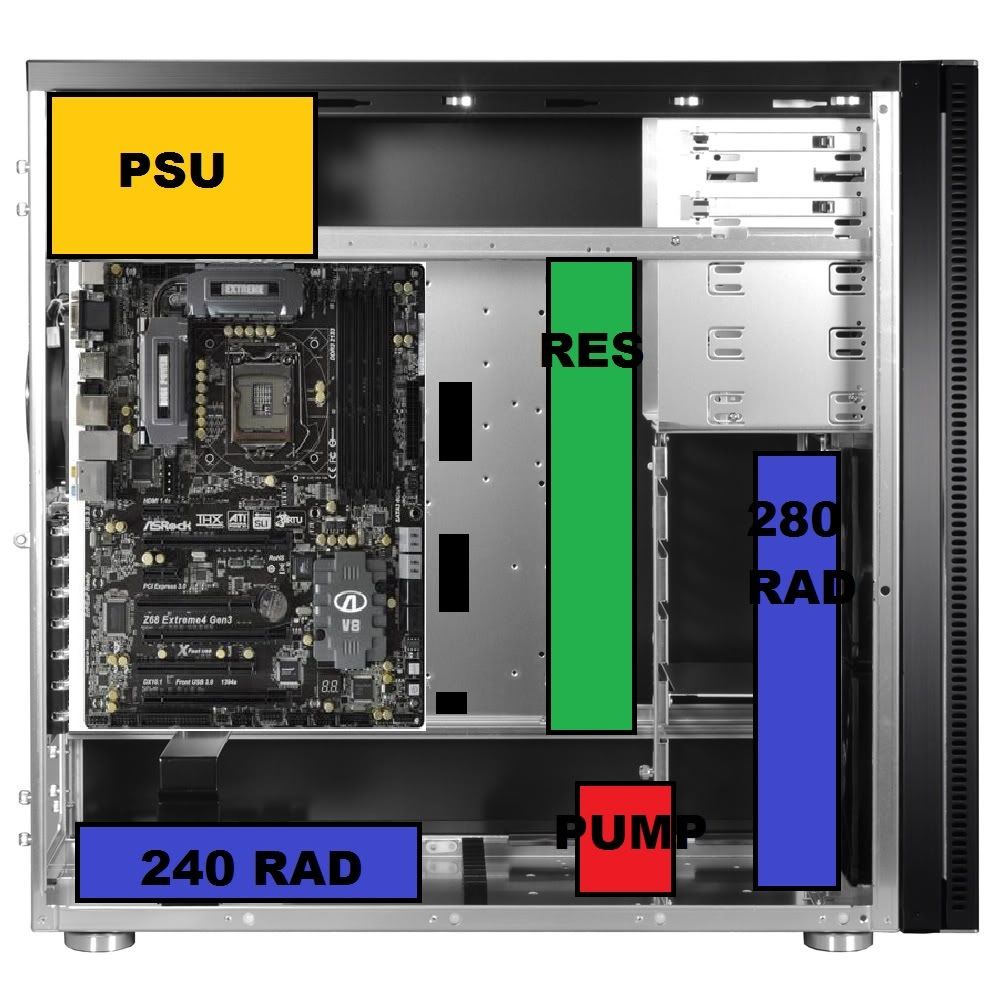
Intended loop order would be res>pump>280>240>gpu>cpu>res

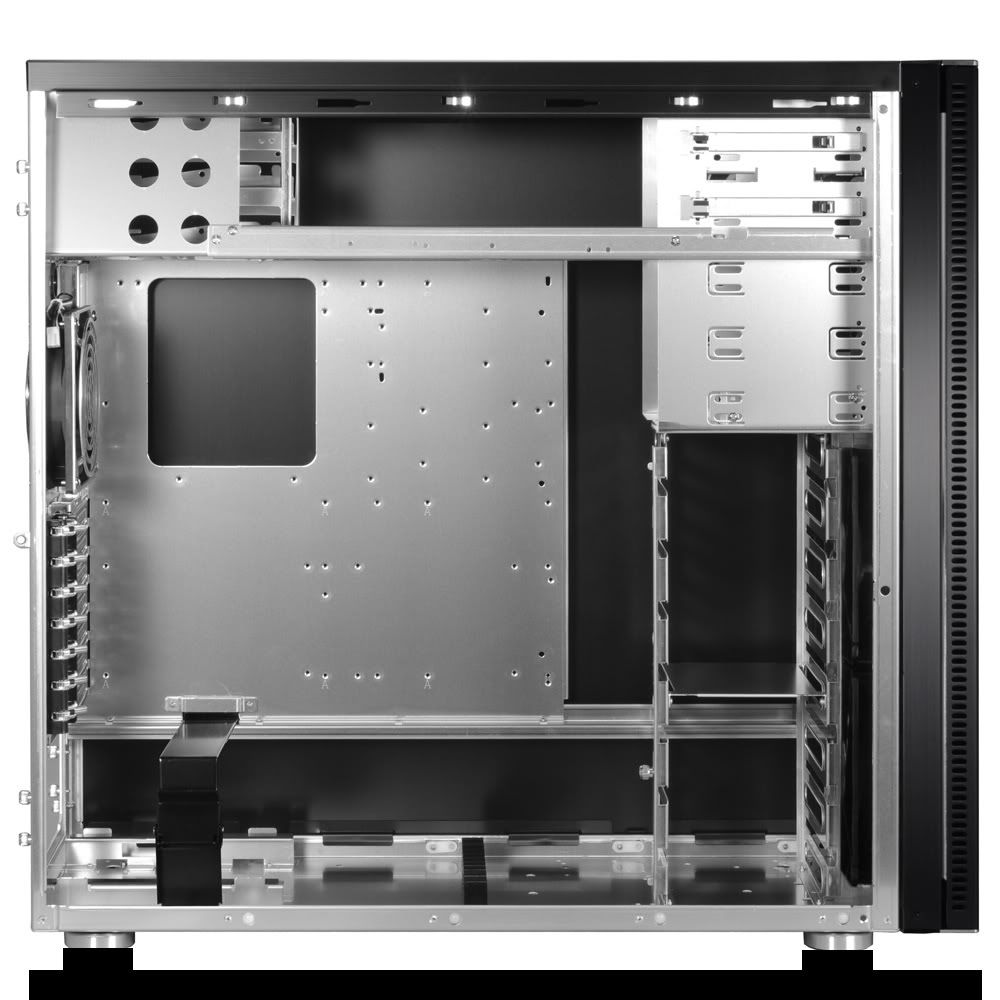
So, my case as is (well not my actual case but an image of an unmodded case)
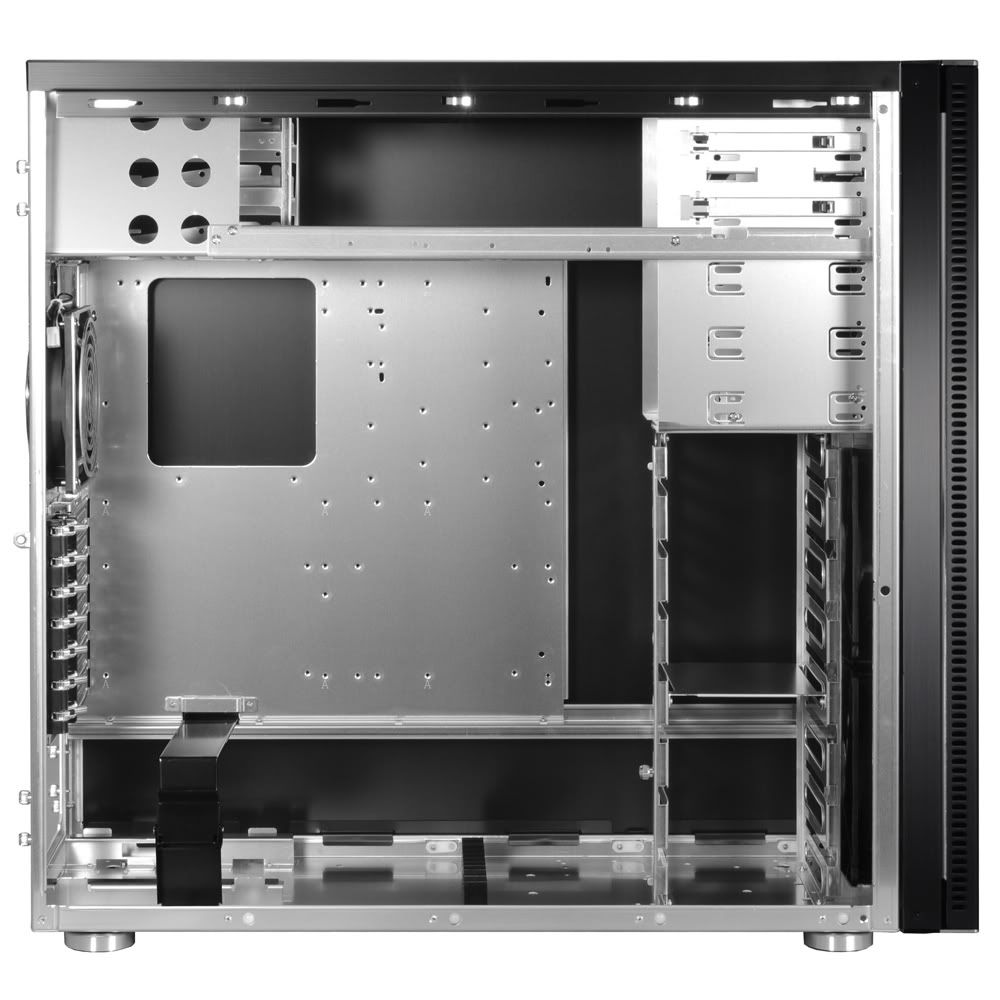
a71f-04.jpg


I plan to install a 280 rad in the front and a 240 rad on the bottom, to do this I'll be removing the front HDD rack and cutting a few holes in the bottom of the case for fan intakes, as well as adding a couple of holes for cable management. I'll be adding a hole for air intake in top of the case for the PSU to use as intake, this should put it on a separate loop to rest of case and help stop it heating up too much, though I will only have one case exhaust but shouldnt be an issue - positive pressure and all that. I'll also get the internals powder coated black. (Update - I may cheat and send my case to be modded/painted cost dependent, by time I've forked out for dremel/holesaws etc prob be similar cost)

Most mods go for top mounted rads, but I want to try bottom mounted, having all rad fans as intakes and just leaving the two at the top as exhaust, this should maintain a good airflow as this image shows

My professional paint images, lol

Intended airflow
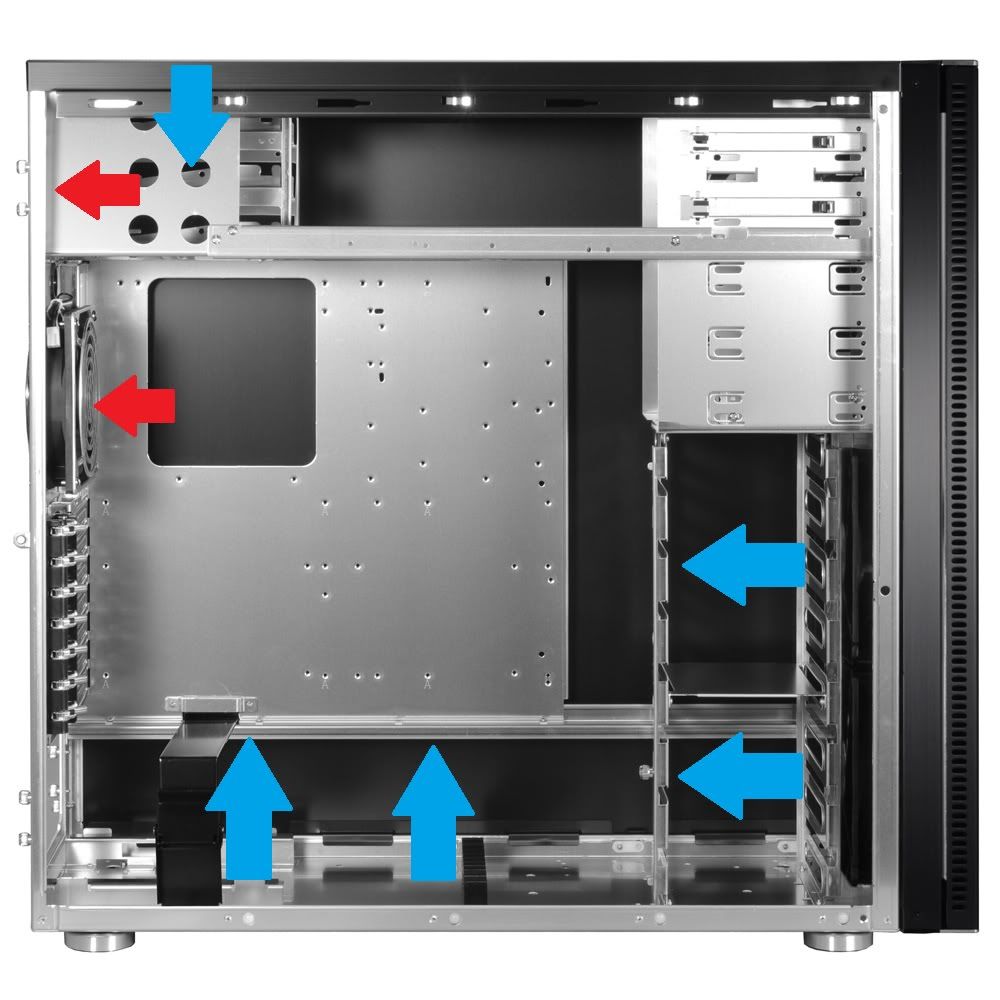
a71f-04flow.jpg


Placement

a71f-04b.jpg


And to supplement air intake from the bottom of the case, I'll be creating a simple stand for my case like this, it will lift my case off the floor to reduce dust intake and create a bit more space to allow intake of air
a71f-04stand.jpg


Lastly, once its all done, I'll be adding a window to my side panel, and etching it, should look something like this, the colour of the bottom etching to be gold to match the mobo caps and fluid if I can source gold fluid

sidepanela.png


So, that's my plan, it may take me a while, particularly to get started, so could be a coupla weeks before first update but I'm looking forward to getting going (couldn't not post plans now I've decided :D)
 
Last edited:
Well if anyones actually reading this, things are starting to happen
Purchased the SSD from OcUK over the weekend, was meant to arrive today (Mon) but I guess tomorrow will have to do, just as well I got all week off
Purchased the PSU, had to go with the 750W version, which I'm sure will still be ample anyway so no drama, but also had to source from elsewhere as OcUK don't have either model in stock, and I needed to order today as I need PSU to measure out on case for modding.
Also purchased rads and fans, so these can be provided to company who are doing modding to ensure fit is correct, yay :D

I have decided to send it off to be cut/powder coated as the cost is about the same and I'm sure the finish will be higher.
Anyhow once PSU arrives Tue (fingers crossed) I can strip out current components and mark up case for modding then send away, hopefully have it back within a couple of weeks so I'll order rest of the bits whilst its away then when I receive it I can start building, should be relatively quick as no modding to be done by me, I hope, lol

OK I've stripped my case down, mostly quite simple, Lian Li have provided interchangable plates for PSU mounting and blanking, so I can move PSU to top very easy and blank off bottom.
I've removed the front and rear HDD caddies, though not sure ATM if I'll put the rear caddy into the optical bays to mount HDDs or if I'll go for bungee suspension in the optical bays direct. I'll wait n see later (leaning towards suspension.
I had a bit of a nightmare getting the front door section off, because as well as the screws at the top, on the sides at the top, on the sides at the bottom, there were three on the front at the bottom, "hiding" behind the door, lol crysis solved now though
The PSU in this case sits on a bracket which lifts it an inch off the floor of the case, this had a rubber pad on top to reduce vibrations, assume it came with case not PSU, cant remember now though. This caused two issues, one the PSU being a warm component appears that it semi melted the pad onto itself, no visible signs but it was a ***** to get the PSU off, and I do mean a *****, I was convinced it was held in by another bracket or something it was that well held. And secondly, I need to remove this bracket as it is where I plan to mount my 240 rad, and its held in by pop rivets rather than screws, so I cant remove it myself, going to have to let someone do it for me when I send it for modding/powdercoating.
Good news is I can easily change my door to open other way when I get it all back

Case as was, ace cable management I know

IMG_0529.jpg


As far as I got disassembling before getting stuck (temporarily) on front bit

IMG_0533.jpg


And once I'd worked it out

IMG_0535.jpg


View from front

IMG_0536.jpg


View from back, none of the backing plates (PSU or blanking one) attached ATM

IMG_0537.jpg


Next time I see her she should be looking mighty different

Oh, and how I'm running ATM

IMG_0532.jpg
 
Last edited:
Got a load of bits through today then

Rads, fans, PSU (got other day actually) and SSD

IMG_0543.jpg


The rads seem really good quality, though to be fair I dont have anythign to compare them too but they feel nice and heavy and solid. The fans are good quality, these will all be getting sent off along with my case to ensure the mounting holes cut fit exactly :D

The PSU alongside my Case for comparison (and its a big case for anyone who doesnt know)

IMG_0539.jpg


Fortunately when opening it up the actual PSU itself is a wee bit smaller

IMG_0540.jpg


The quality of the cables supplied with the PSU is awesome, one of main reasons I spent the little extra on the Corsair AX unit, no need to braid these myself

I'll put another pic up later/tomorrow once I've got it all packaged to be sent off, then it will be a quiet couple of weeks til I get it back and can start building

Was going to put another pic up but got carried away with the packing and sealed the box before I realised, lol, wasnt going to open it up again, just have to wait now for a coupla weeks to get it back and start building, in the mean time I'll be buying the rest of my parts

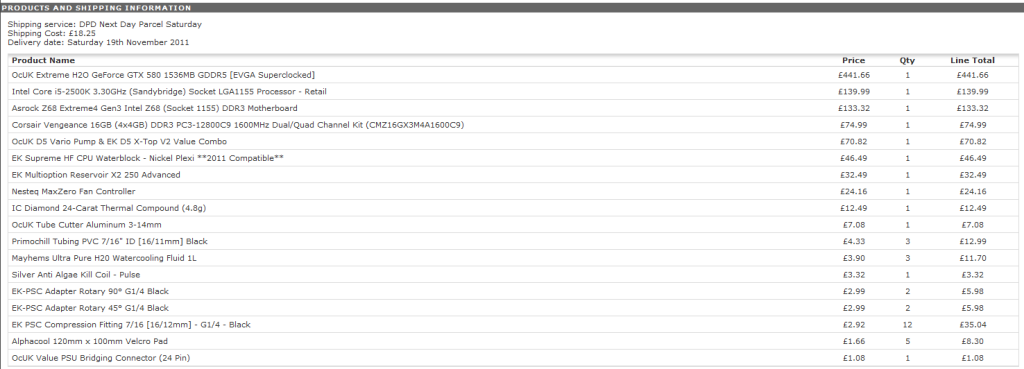
Well I've ordered the final bits :D

basket.png


I've also rang OcUK and they're going to use the IC Diamond TIM to block my gfx card for me before shipping

Received all my bits through Mon (14th), bit of ordeal though it worked out well, I ordered Fri (11th) afternoon and as it said to allow 24-48hrs lead time on gfx card and because of work, I paid for Sat delivery on 19th, Typically after popping out for an hour Sat (12th) morning I get back in to find they've attempted to deliver a week early, and left the usual calling card saying they'll try again next working day, Mon(14th). Got in touch with OcUK explaining I wouldn't be in and could they arrange re-delivery the following Sat as originally planned, they said no problems. Anyway I got home from work on Mon to find they'd redelivered Mon, fortunately my house mate was in at the time, at least I've got everything. :D I'll get pics up at weekend

Well I found some batteries for my cheapy camera (Koadak C182) now it appears either the camera isnt so good, or Im not so good at taking photos, probably the latter, lol, but heres a few anyway

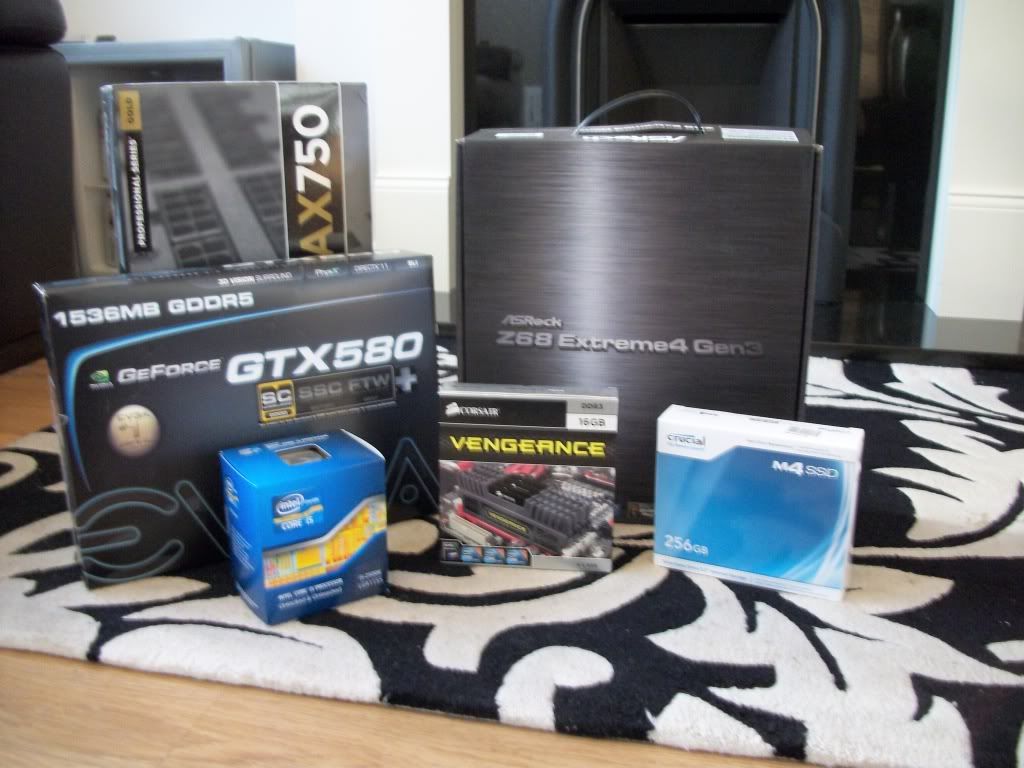
Main bits

100_0235.jpg


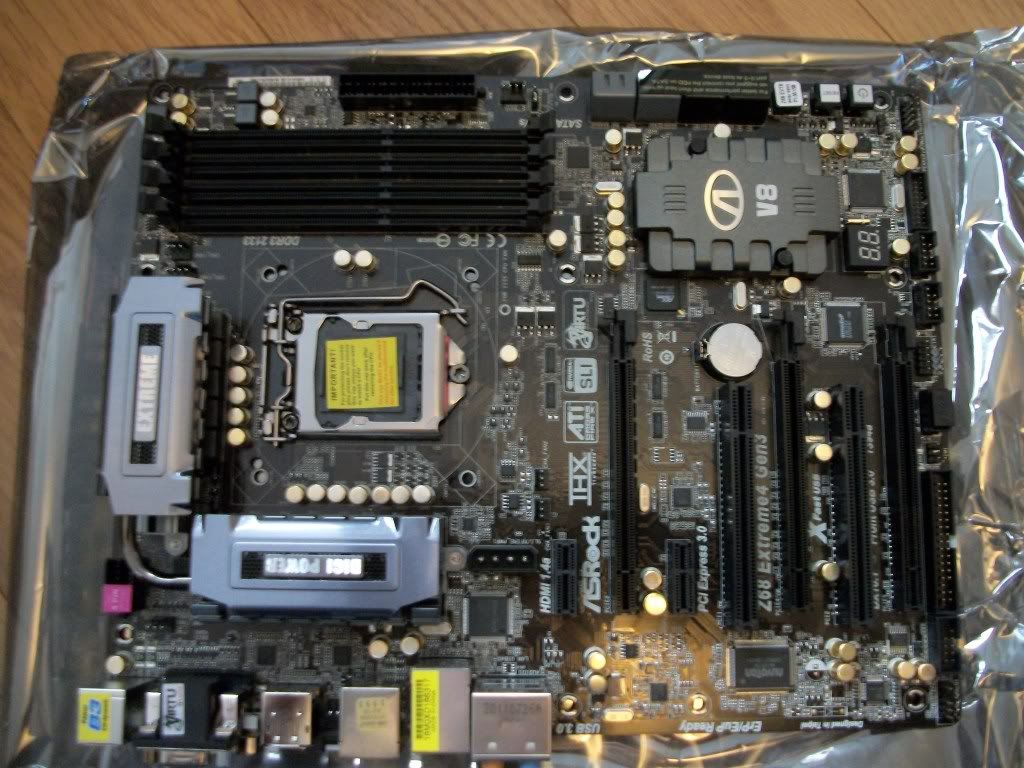
Left to Right (L2R), GFX card - OcUK H20 580 (as you see EVGA SSC 580 which OcUK fit EK block to) PSU in background - Corsair AX750, CPU - i5 2500K retail, RAM - 16Gb Corsair Vengeance Black, SSD - 256Mb Crucial M4 and the Mobo in back - ASRock Extreme4 Gen3
I'm also adding from current set up 1.5Tb WD Green and Asus Xonar Essence STX
Oh and a DVD-RW :D

100_0235.jpg


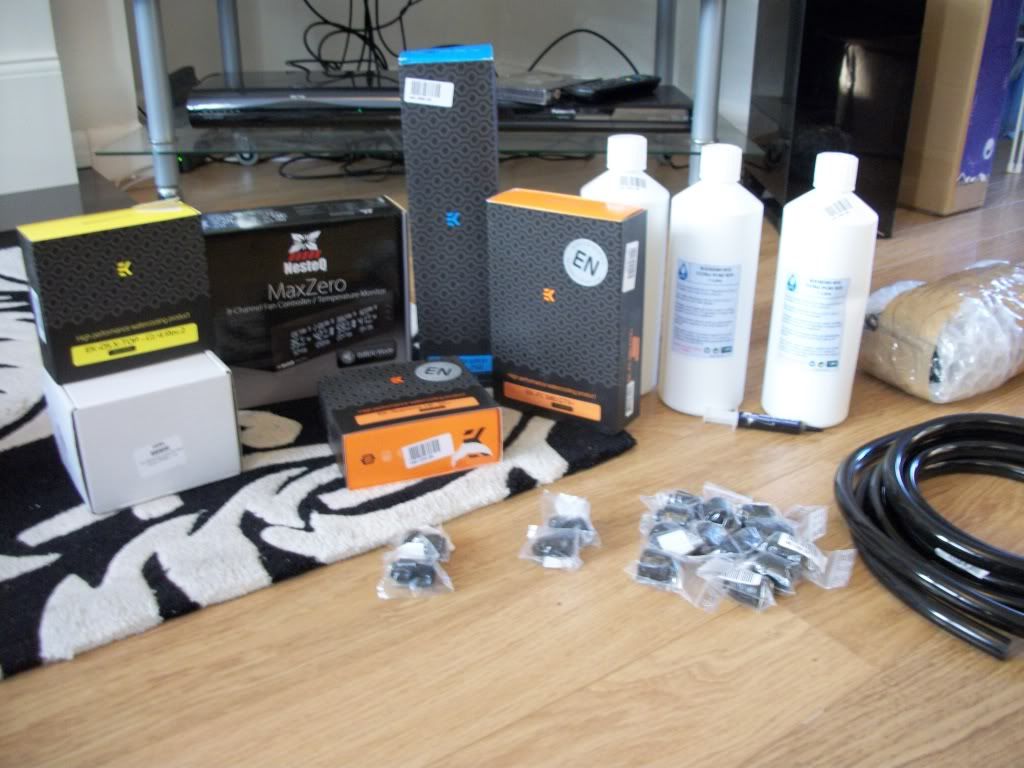
Watercooling bits

100_0237.jpg


L2R - D5 pump with EK top, Nesteq fan controller, EK HF supreme CPU block, EK 250 Advanced Tube res, box for EK GPU block, Mayhems Ultra water & TIM, primochill 7/16 black tubing and compression fittings scattered at front

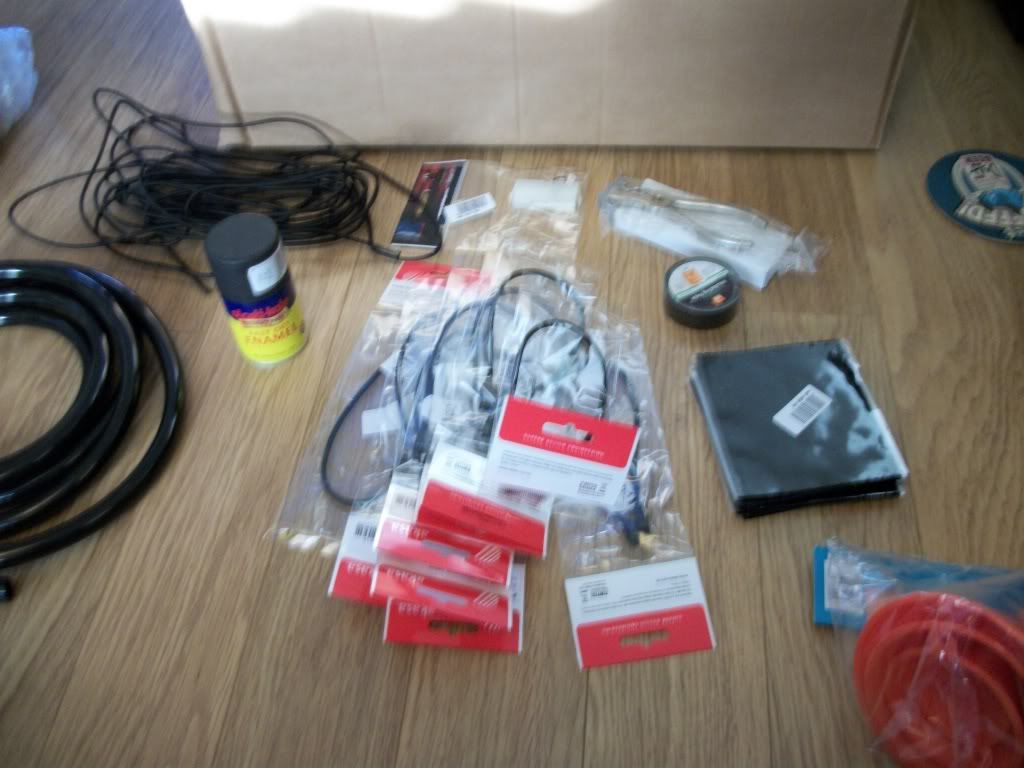
Miscellaneous bits

100_0238.jpg


L2R - Tubing on left again, 3mm Black Bungee Cord, Black Enamel Paint, Fan extensions, PSU bridger, PTFE tape, hosecutter, velcro pads, funnels
I've also bought some 1m SATA3 Black cables to make routing easier, not pictured

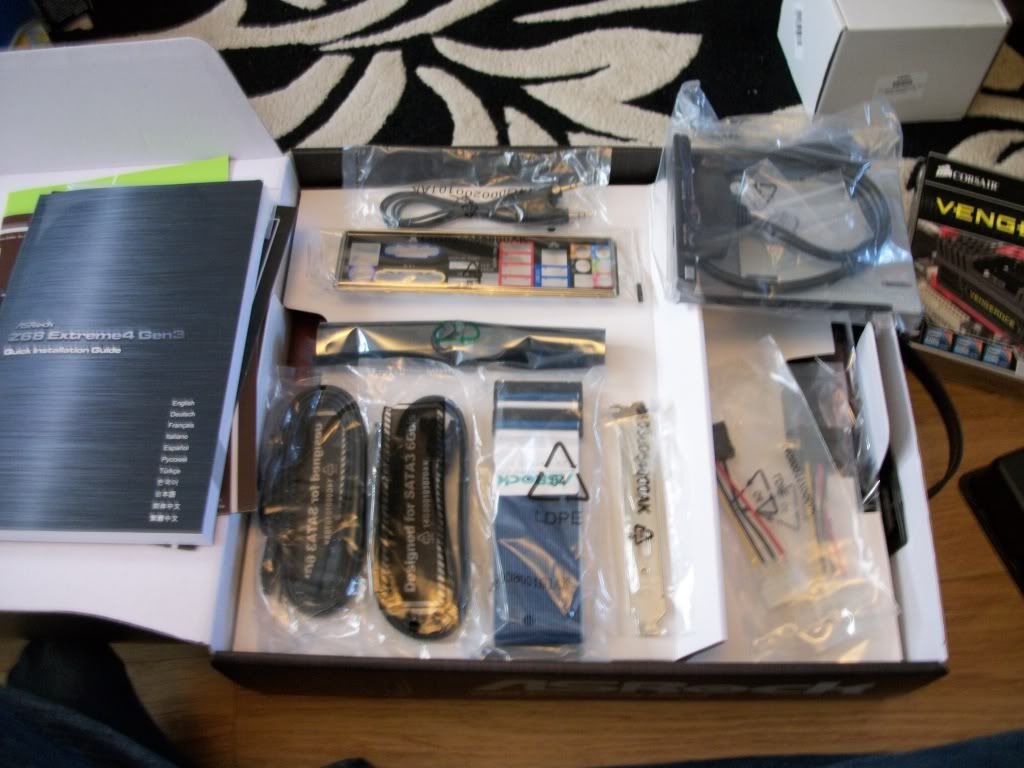
Mobo accessories

100_0239.jpg


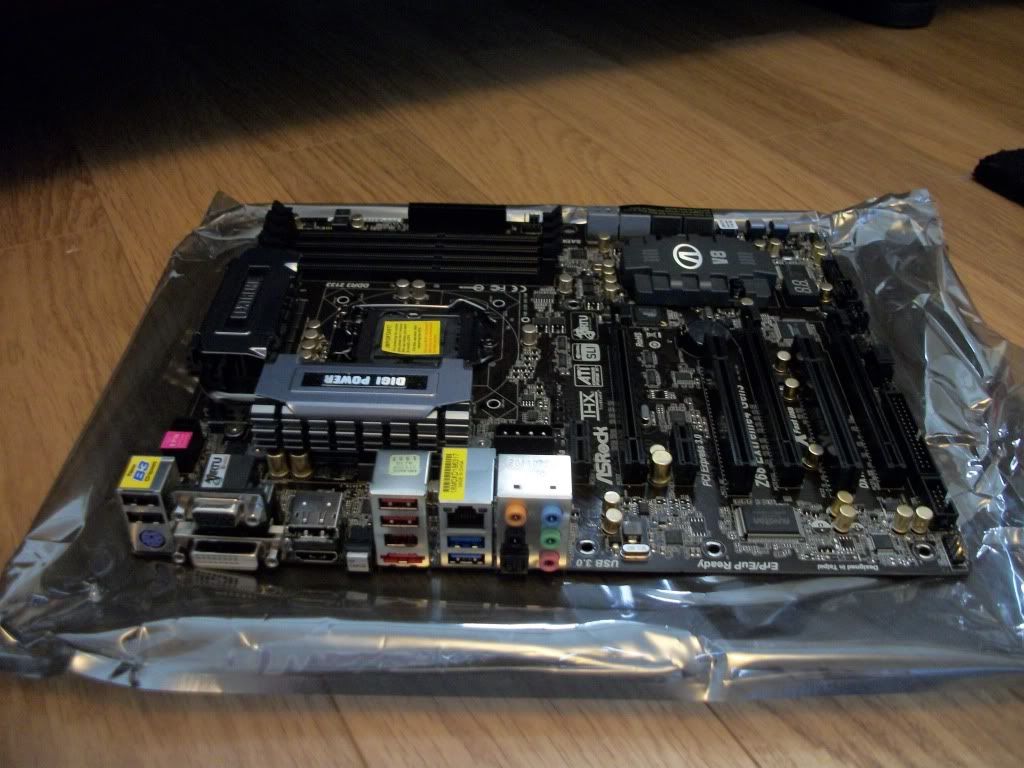
Mobo

100_0241.jpg


100_0242.jpg


Now the Macro mode seems to agree with me more than the normal

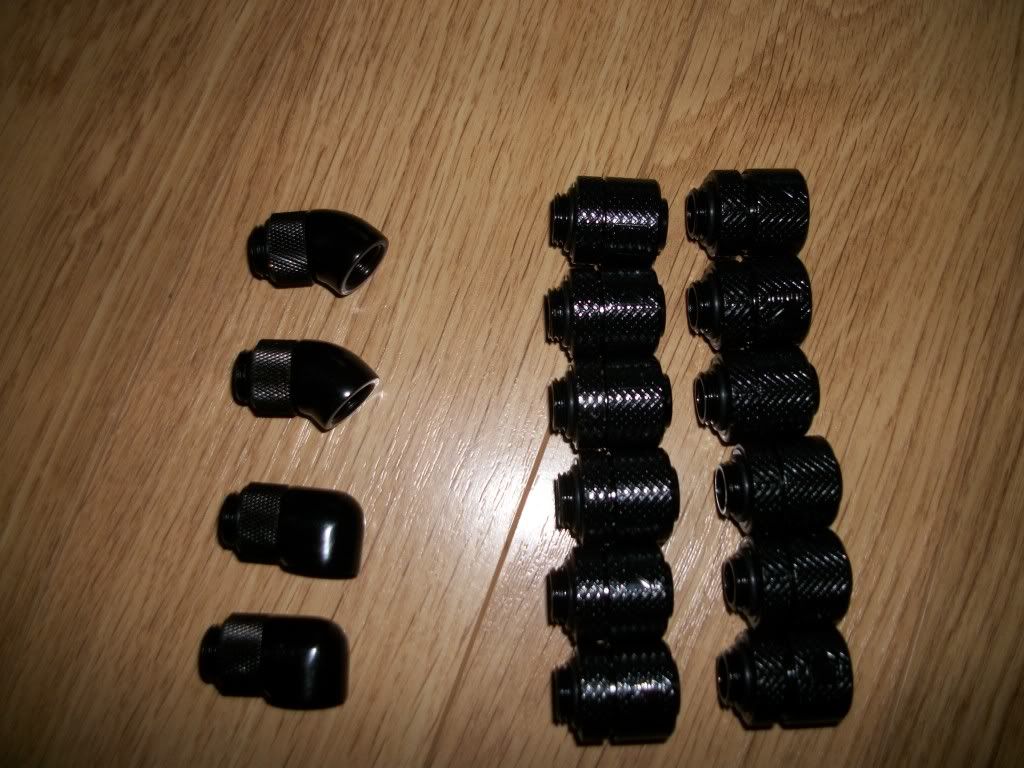
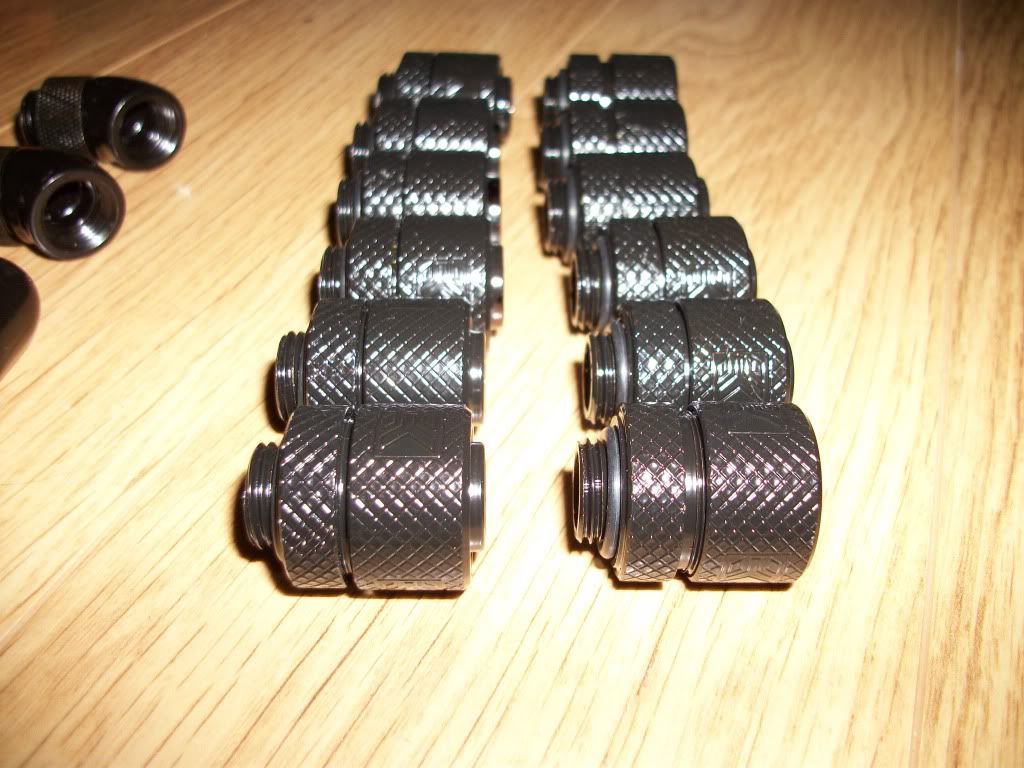
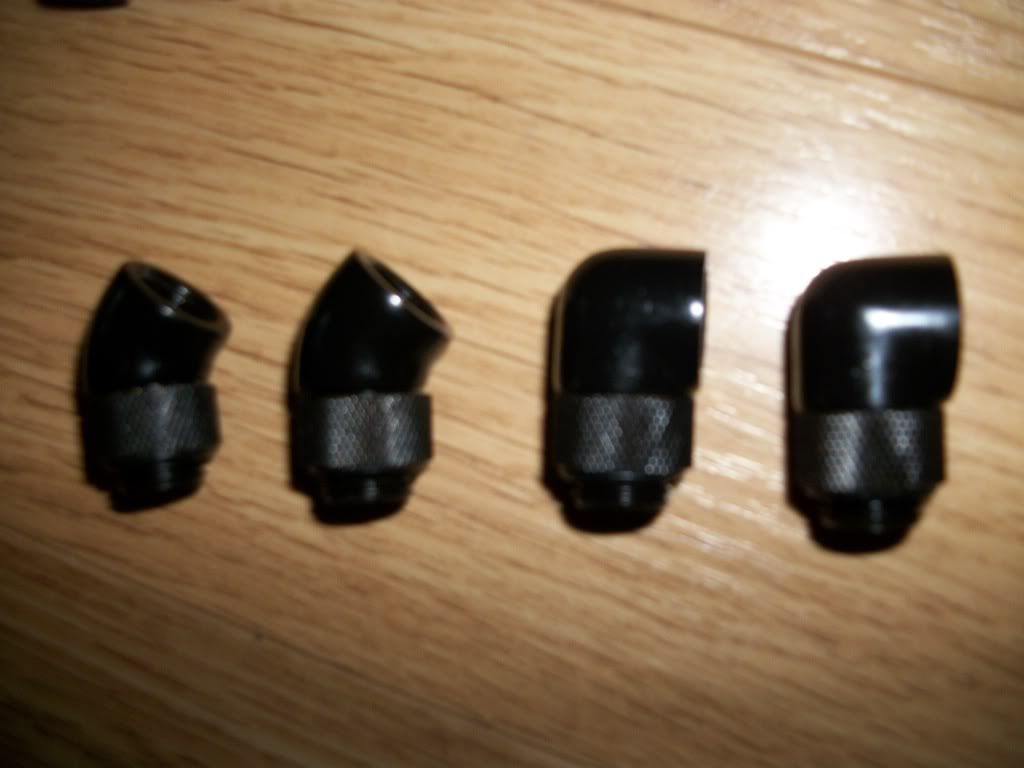
Compression fittings

100_0243.jpg


100_0244.jpg


100_0245.jpg


Well, mostly, lol, 45s and 90s in last photo a bit blurry
 
Last edited:
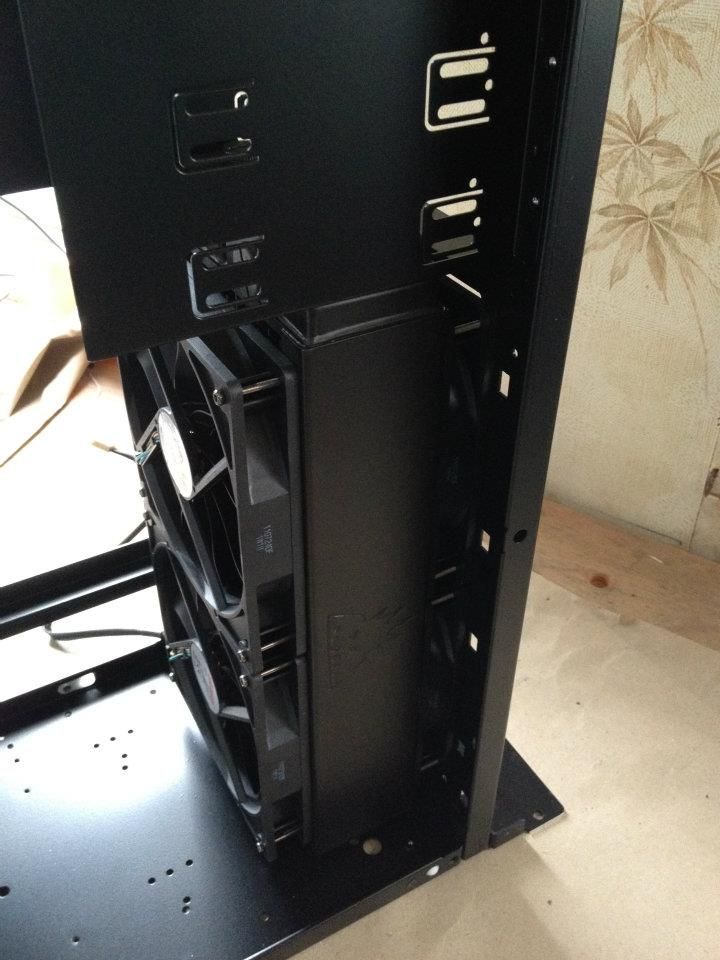
Case has been sent away, and company have got back to me, doesn't look like the radiator fits quite as well as planned, although theres two front 140mm fans already, these sit flush with the bottom of the 5.25" caddy, as such the rad is a bit too tall

IMG_0243.jpg


Fortunately I'm assured its easily solved by cutting a breakaway in the bottom of the caddy like this

IMG_0244.jpg


This is something I hadn't envisaged, I didn't attempt to dry install it myself before sending away, just as well I sent rad and fans with the case really. Excellent service form the modding people, if I was allowed I'd say name but forum rules prohibit it. Anyway I'm definitely glad now I decided to send case away to be modded rather than hack away at it myself

Well I get my case back Sat, so will hopefully be getting it all squared away then, fingers crossed I manage to complete build in the one day
In the mean time, the modding company have provided a few teaser photos for me/us

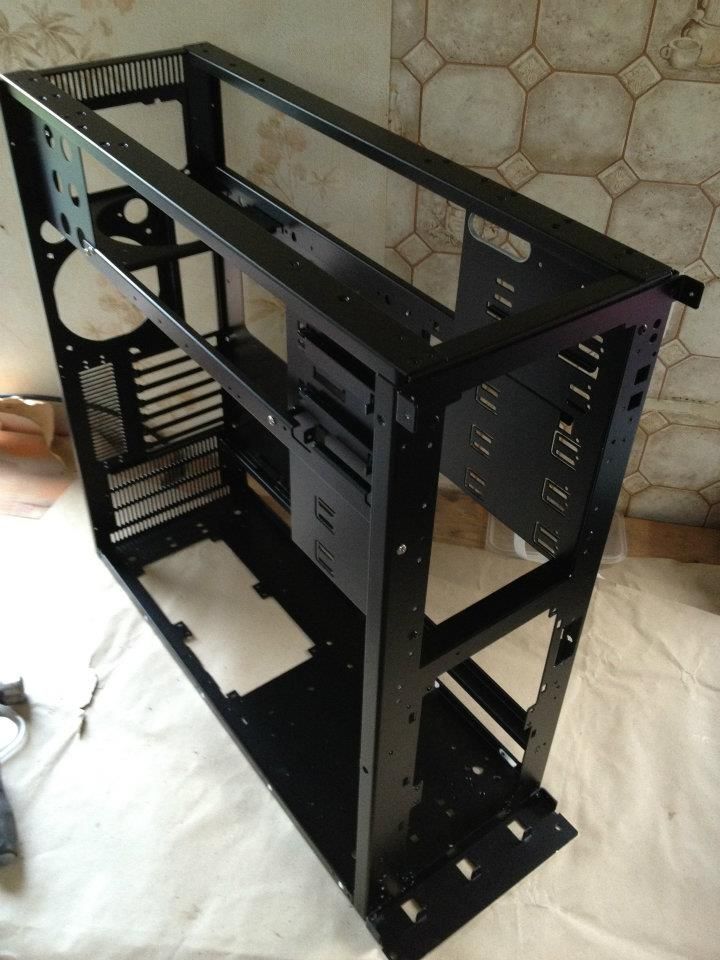
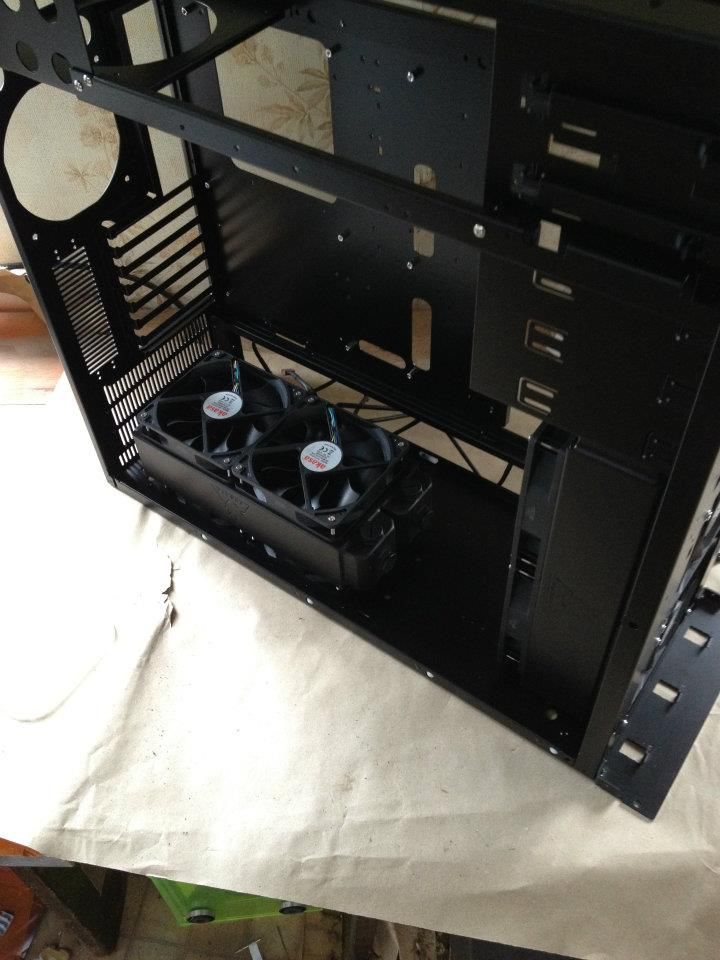
Case frame powder coated black

378818_199520633462439_165474050200431_427661_624542635_n.jpg


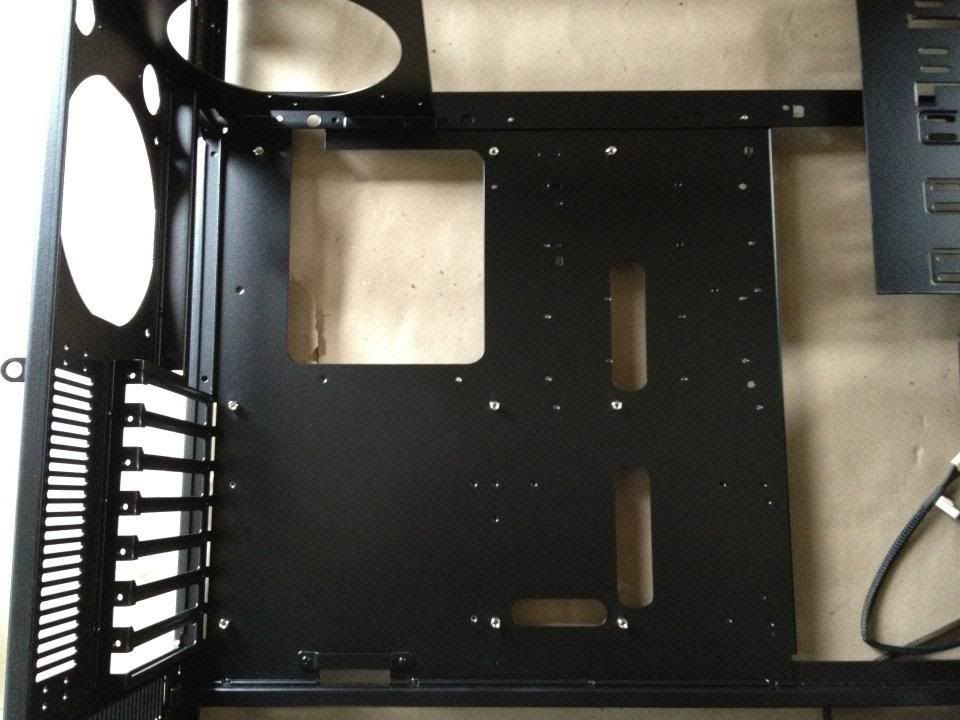
Close up of mobo cutouts

373777_199520720129097_165474050200431_427663_1393169684_n.jpg


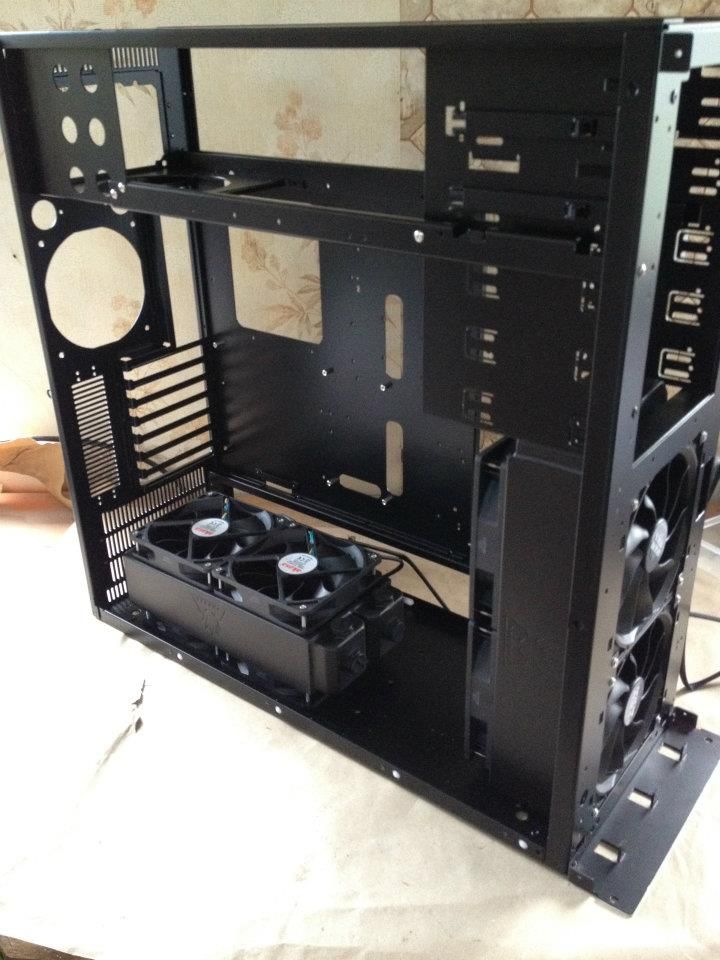
Overview of case with rads installed

390091_199520810129088_165474050200431_427665_329497410_n.jpg


Front rad

389395_199520680129101_165474050200431_427662_750687267_n.jpg


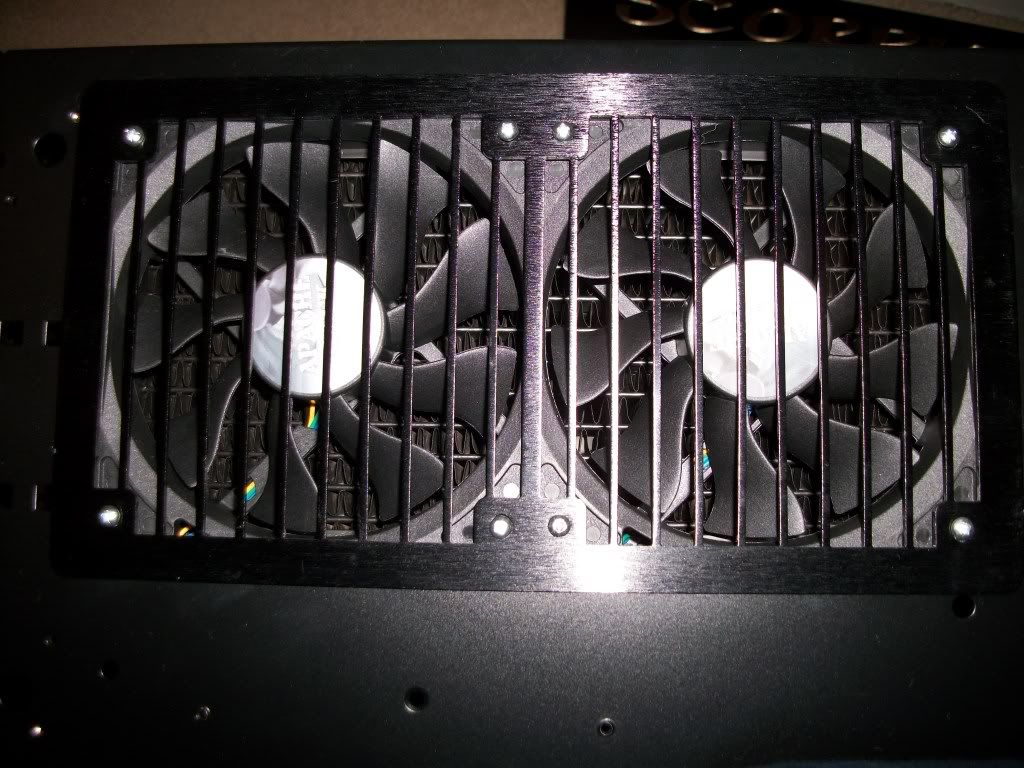
Bottom rad

379431_199520753462427_165474050200431_427664_871048623_n.jpg


Very nice of them to install rads, though not sure if they'll of permanently installed them or just done this to see how it looks, don't know if it will ship like that? Either way I'll have to be taking them out as I need to flush them, shoulda of thought about this first before sending them I guess, lol

Looking good to me, when I get it Sat I'll upload pics of side window and top mesh cut and case fully re-assembled, then various ones of me attempting to install it all, just so hope it all works first time :eek:

Grrrr
Just heard and apparently courier company, citylink, haven't turned up to collect
So I'm not getting this Sat after all, I'll have to get midweek n build next weekend
Impressed I am not!!!!

Well its finally arrived, I'm like a kid at Xmas, yes mine has come early :D

Heres a couple of quick (and crappy I know) pics

Side panel fitted

100_0246.jpg


Side panel on its own

100_0249.jpg


Top panel cut out for PSU intake

100_0247.jpg


Bottom rad grill

100_0251.jpg


I must say it looks simply awesome, especially the side panel, very impressed, unfortunately my poor camera/photography skills dont do it justice

Looking forward to my rebuild, I will get some better pics, I'll either learn how to use my camera properly or borrow my mate (who's a photographer), the latter if its an option
 
Last edited:
Well I've spent all day building it up, and just leak testing/removing air bubbles now
I'll put full update on tomorrow, with some pics :D

And I'm done (build wise), for now

So pics first

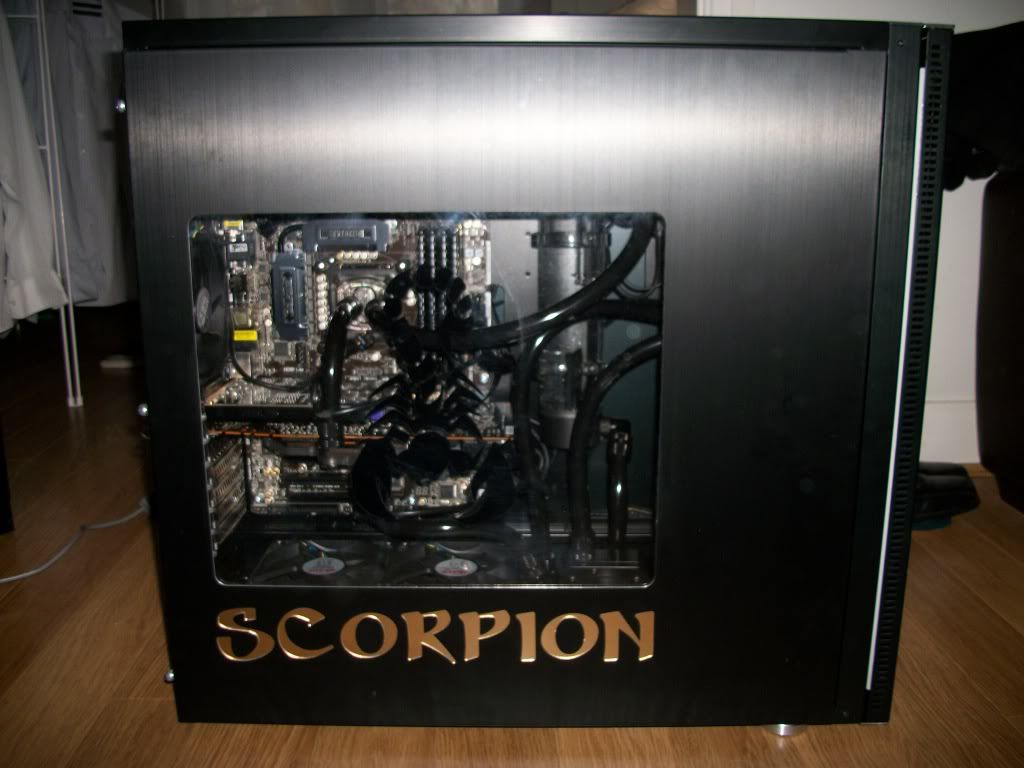
Case fully assembled

100_0265.jpg


Close up of window

100_0264.jpg


Close up of writing

100_0263.jpg


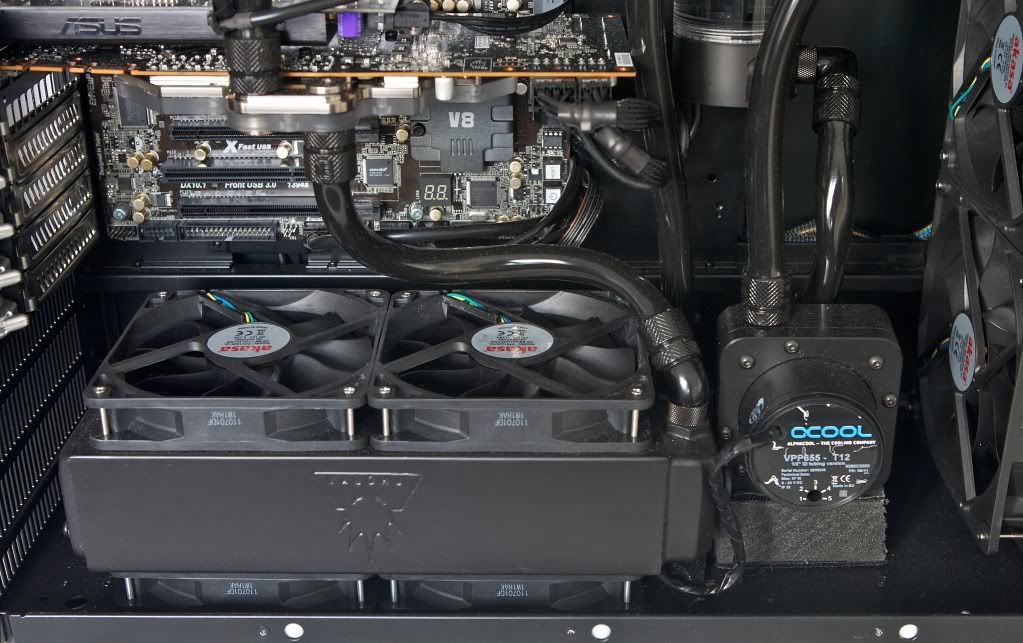
Internals

100_0266.jpg


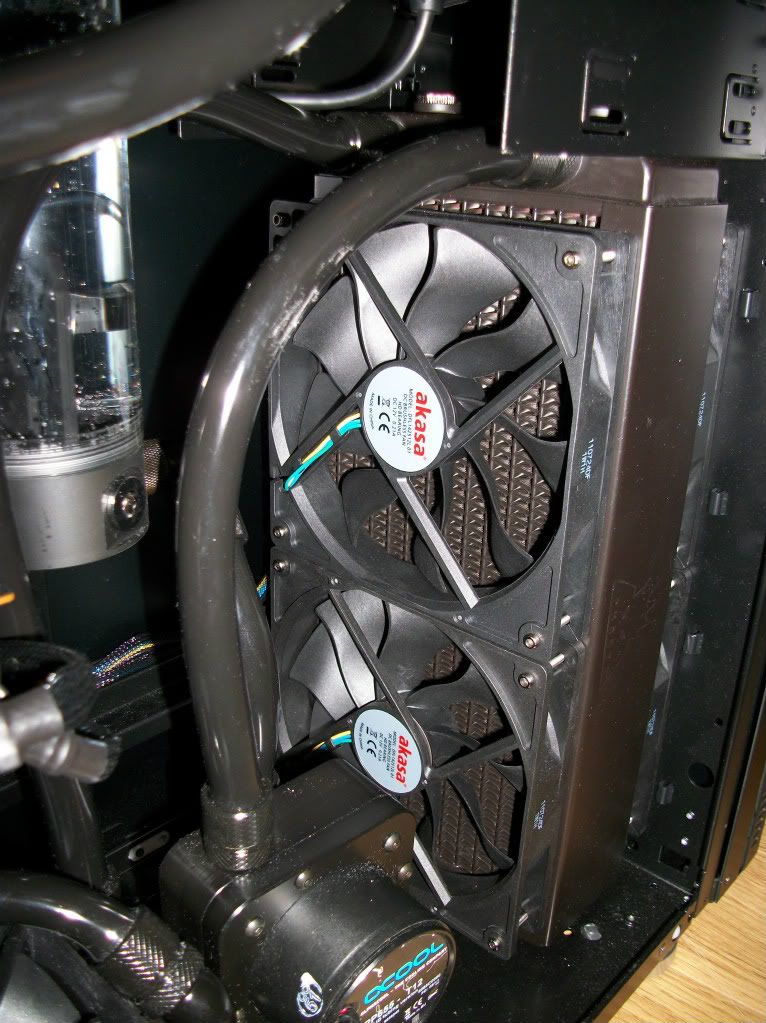
Bottom Rad

100_0267.jpg


Front Rad

100_0271.jpg


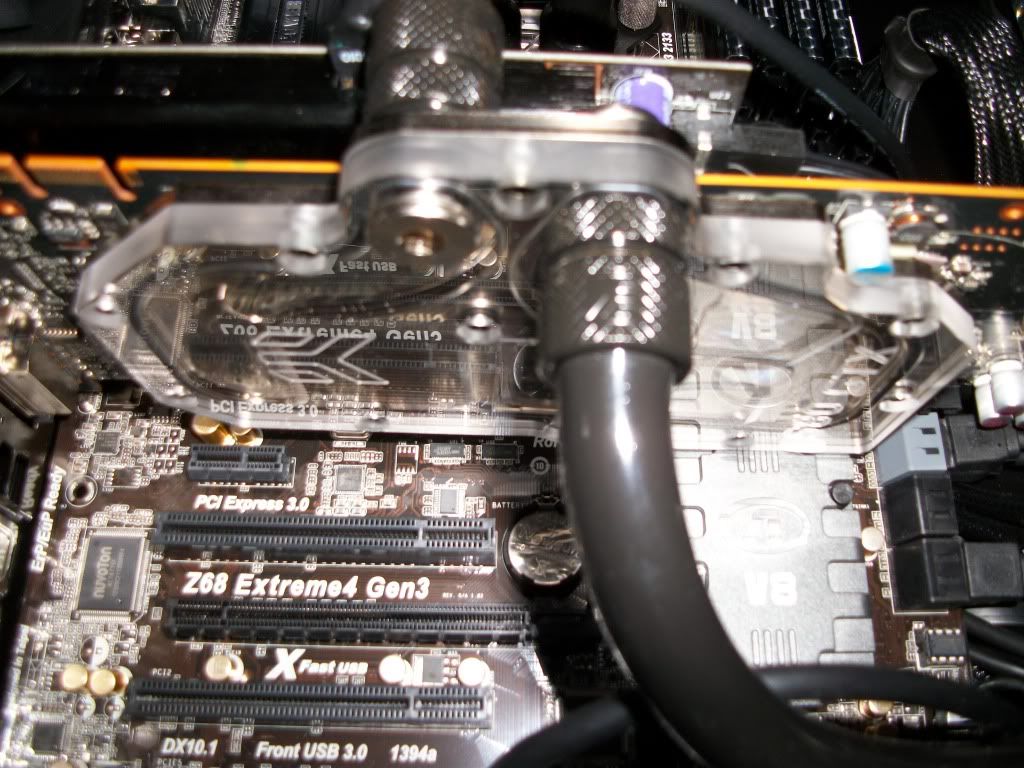
GPU

100_0268.jpg


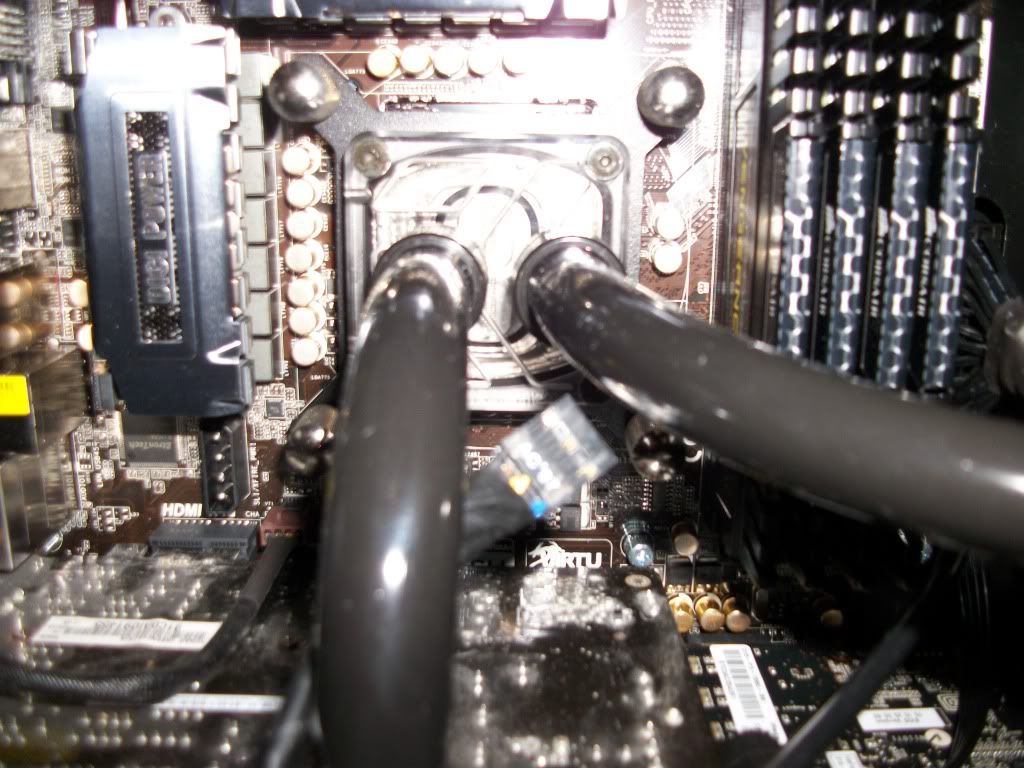
CPU

100_0269.jpg


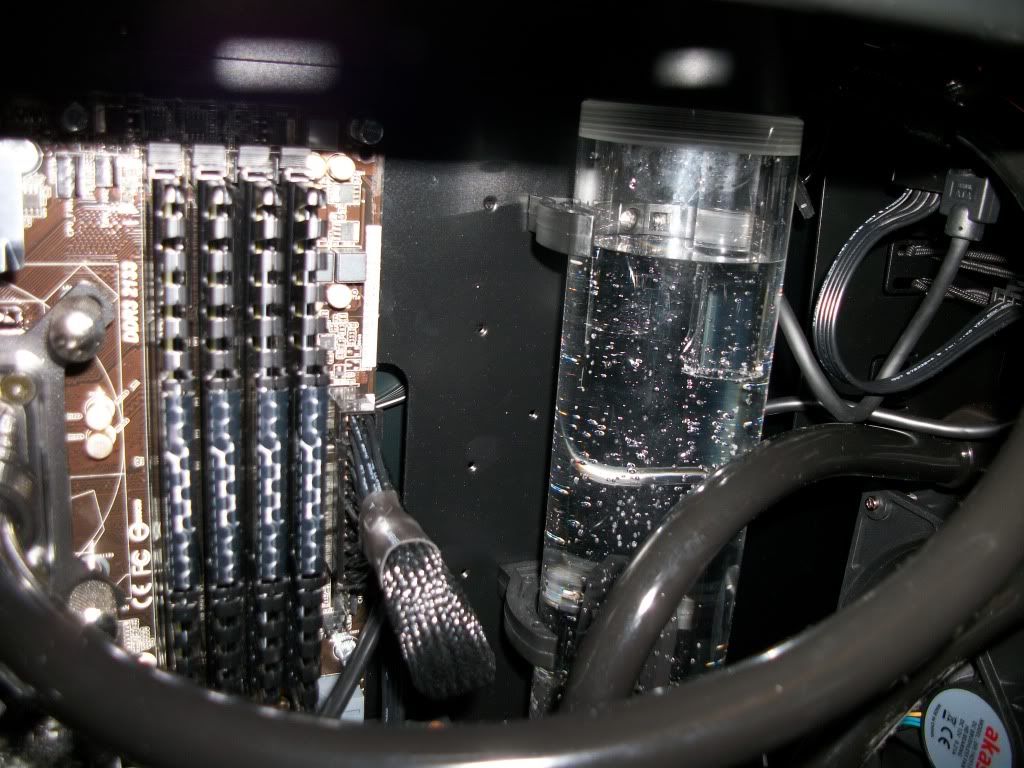
Res

100_0270.jpg


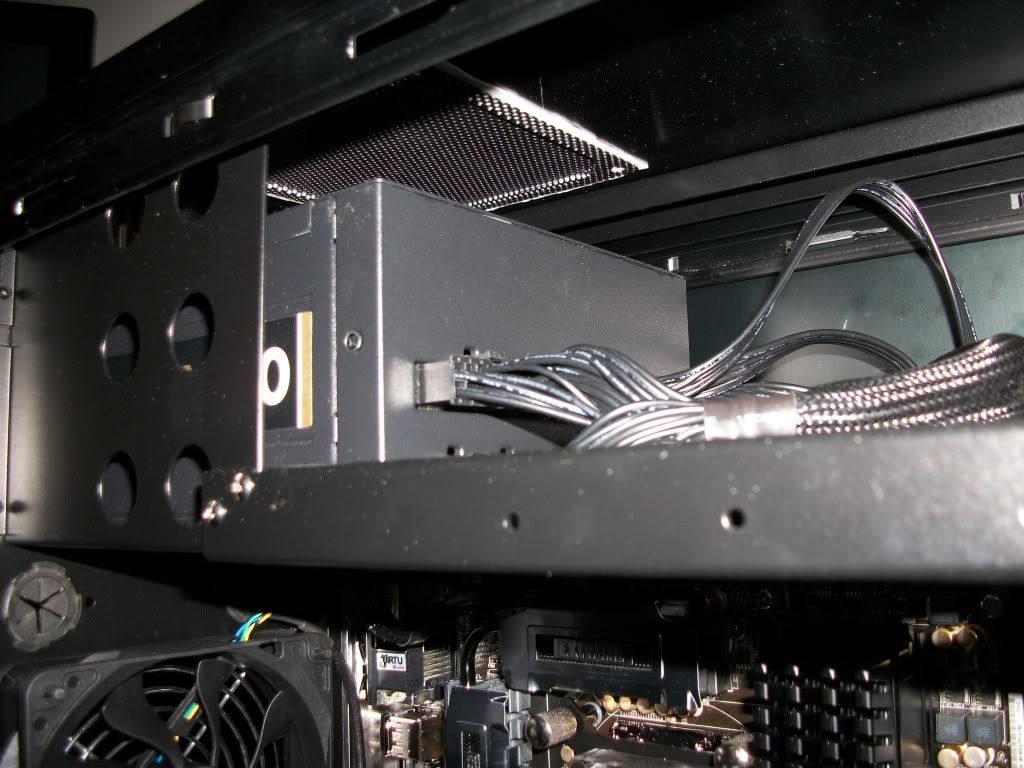
PSU with new intake

100_0273.jpg


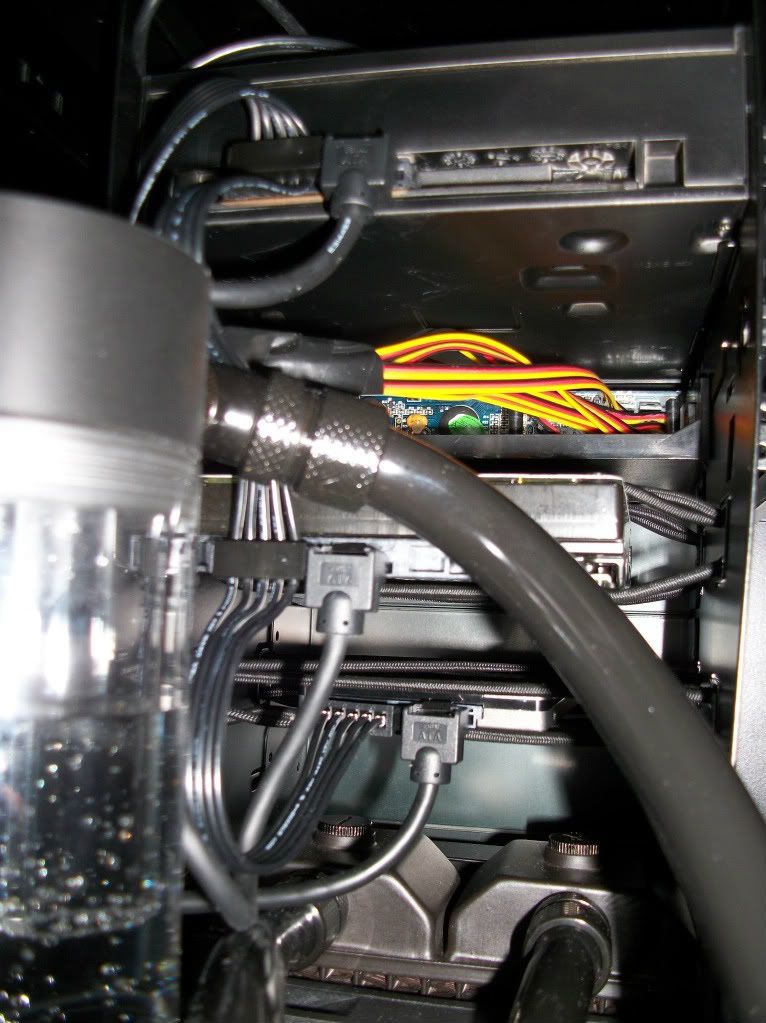
5.25" caddies

100_0272.jpg


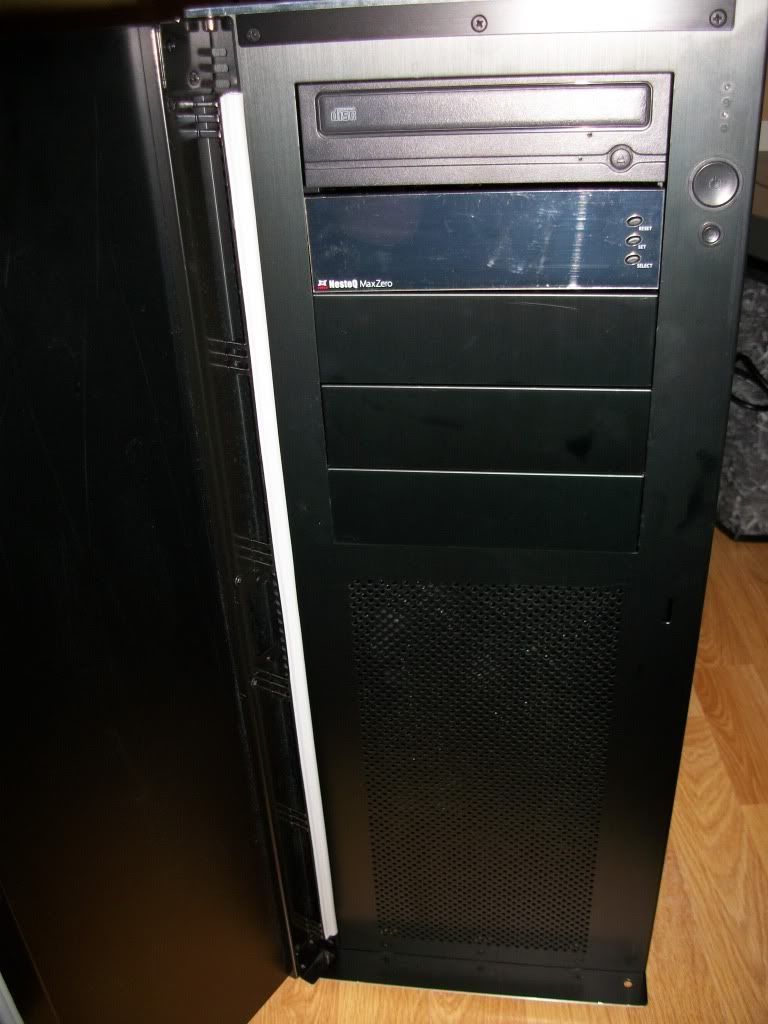
Front of case

100_0274.jpg


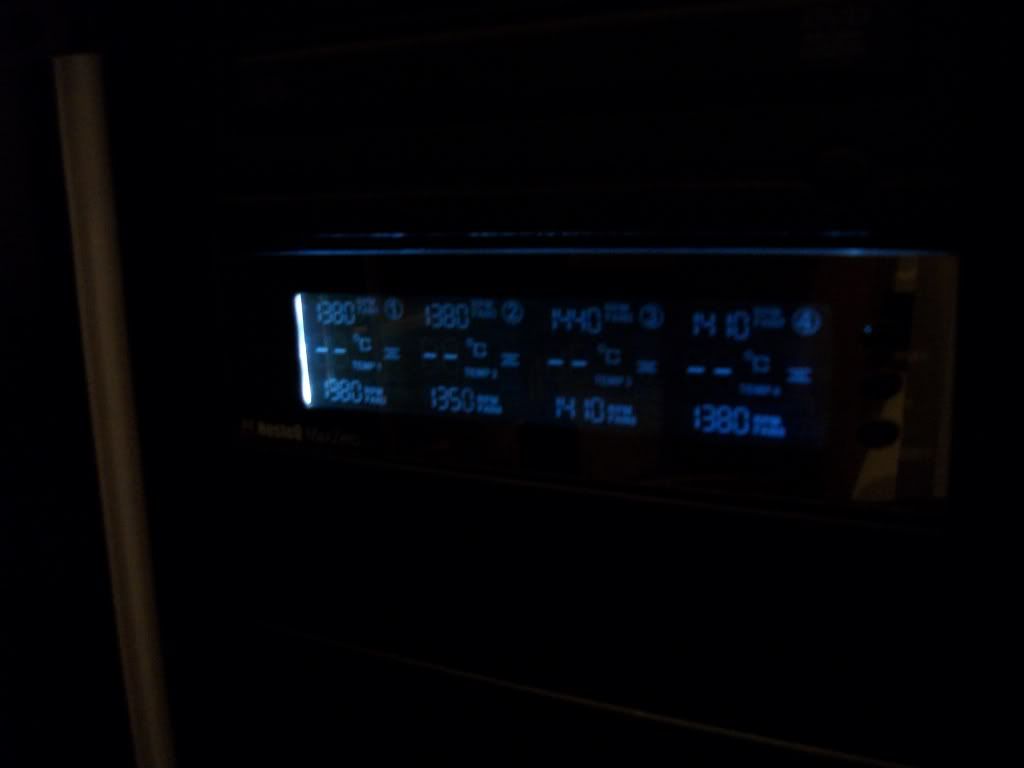
Fan Controller

100_0278.jpg


I need to work out how to adjust fan speeds, lol

Lessons learned/Issues

OK well firstly when disassembling the case, there were lots of screws, and I mean lots, at the time I figured when it came to reassembling I'd work out where they all went, and whilst I have, my case is back together, I seem to have quite a few spares which I cant work out where they came from, oh well not to worry (til my case falls apart next week anyway)

Next I guess would be that I've learnt the correct way of installing the pump, it didnt come with any instructions so I got "in" and "out" wrong first time round, did post a question here but I was to impatient to wait for a reply so thought I'd give it a go, no harm done, other than having to retube. Other slight (or not) thing with the pump is I've broken it already, the variable bit anyway, the red adjuster was set to 2 when I received it and thought I'd try turning it using a small screwdriver to set it to 5 whilst filling loop/leak testing and removing air bubbles, it seemed stiff, and snapped. Oh well, I guess its no longer a d5 variable just a d5, I'll live

The cable management was not much fun, whilst there is space behind the mobo tray, its not that deep (between tray and side panel) so it was very difficult trying to get side panel back on, then when I did I dislodged one of fan connections so had to go back and redo it all :mad:

All in all, it went quite well (fingers crossed) havent overclocked yet but I'm sure itll be easy enough and once I have I'll post some screenies of temps etc, CPU & GPU are idling at 22 & 21 respectively ATM

I'm definitely glad I paid to have my case done for me, I'm really impressed with the finish, much better than I could have ever hoped to achieve, and it was all quite reasonably priced too
 
Last edited:
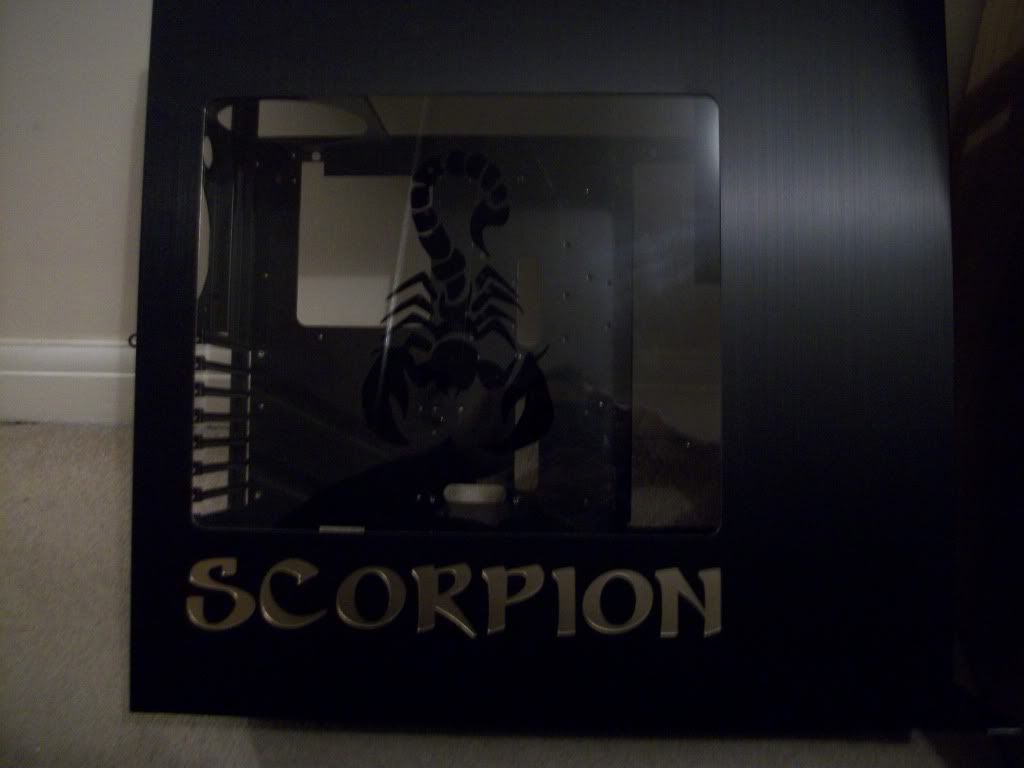
There'll be a few more over next coupla days, as I finalise stripping it down n put up lessons learned from the process, but then I send my case away to be modded/powdercoated so it'll then be a coupla weeks til I get it back and can start the actual rebuild process
 
No, I couldnt find anywhere in UK that did the exact one, and had seen varying reports on whether the others fitted exactly, or needed minor modding, couldnt be bothered getting it shipped from US.
Was going to mod it myself, which is part the reason why I thought bottom mounted, if it went wrong less visible damage, then I thought about it and thought, well everyone does top mounted rad mods, and I quite liked the idea of bottom mounted for 1) being slightly different and 2) as I said above I reckon the airflow will be better, when you look at all decent air cooling case they all go intakes front/bottom to exahusts top/back so figured this would allow me to stick with that principal. But then when I looked into modding n tools needed, as well as sending it off to get powder coated, the company I'm sending it to for powder coating can do the mods for me too, for the same cost as it would cost me to buy the tools, and I'm sure to a much higher standard than I'd bodge, lol. I may not get as much of a sense of achievement out of not doing it myself, but its still my design :D
 
Yeah I get that, but Im cooling both CPU and GPU, the two main things, so the only other things are HDDs and mobo chipsets which produce relatively little heat anyway, and hopefully whilst it will all be warm air the amount of actual flow will be enough to keep cool
I'll soon find out anyway :D
 
Granted they produce little heat, but then, they don't like huge amounts of it either ;)

Your PSU will also be drawing in warmer air.

No I'm having a hole cut in top panel for PSU intake so its on a separate loop


I guess if temperature was really an issue you could reverse the fans on the 280 Rad. Ok, it wouldn't quite go with the traditional physics airflow, but it wouldn't be the end of the world and might work.

Best of luck with the build, I'll keep an eye on it :)

kd

True but hopefully this wont be necessary ;)
 
Originally I was going to do it myself, however now I'm having it done for me professionally so it wont get messed up, and a Lian Li mesh installed too

Its always struck me as convenience why people have normally put their rads in the top of cases, as in this is where there is most free space, it doesn't necessarily mean its actually the best option. I'm not saying it isn't but I don't think the option I'm going for is going to give me any problems, if it does its a lesson learnt, a very expensive lesson granted, lol
 
Last edited:
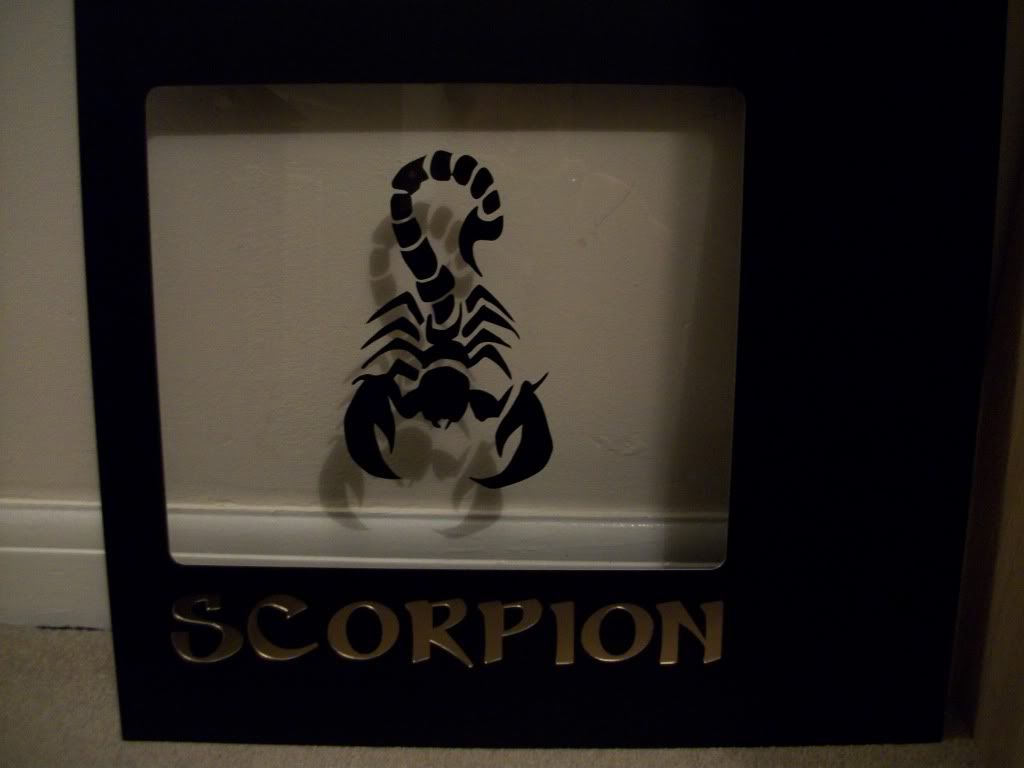
Yes my camera sucks (its my iPhone) I have a cheapish camera but the batteries have died havent used it in ages. One of my best mates is a professional photographer so whenever we do anything everyone just leaves the pics to him, lol
Few more quality pics to admire now anyway :p
 
Cheers guys, bit disappointed I dint get case back today, was looking forward to getting cracking, damn Citylink, I took a few pics this aft of bits, but appear to of misplaced my cable, (actually had a clear out last week and think I may of binned it, lol) D'Oh

Also assembled up the mobo/cpu/ram/SSD and installed windows, just to check it all works (it does :D), as its been a while since purchase now and was wary of going to fire it all up next weekend only to find something had arrived DOA and needed RMAing, only things not tested now are gfx card (its pre-fitted with waterblock) and all the water stuff (guess pump is only thing that could actually not work really)

I've put my old rig directly into HTPC, Silverstone LC17 case, was going to sell it all on and buy new low power bits but by time I'd done that I wouldnt really be making any money and would have a lower powered machine, so now my HTPC is basically a second gaming mahcine, [email protected] and 1gig 560Ti

So fingers crossed, and toes, for next weekend go ahead

Setter, once I get it all back as I say I'll put up some more pics so you can see whats been done, in case it gives you any food for thought

With Christina Hendrick's and Scarlett Johansson's cleavage in the same shot i'm not surprised ;)

Lol

Its cos I did it quick on your request, so I blame you, lol, all my pics are on secondary HDD which is waiting to be installed in new comp, so once I get my system up & running I'll sort it out for you again mate ;)
Well obviously not all, got a few wallpapers on this one, but my gallery is on other HDD
 
Last edited:
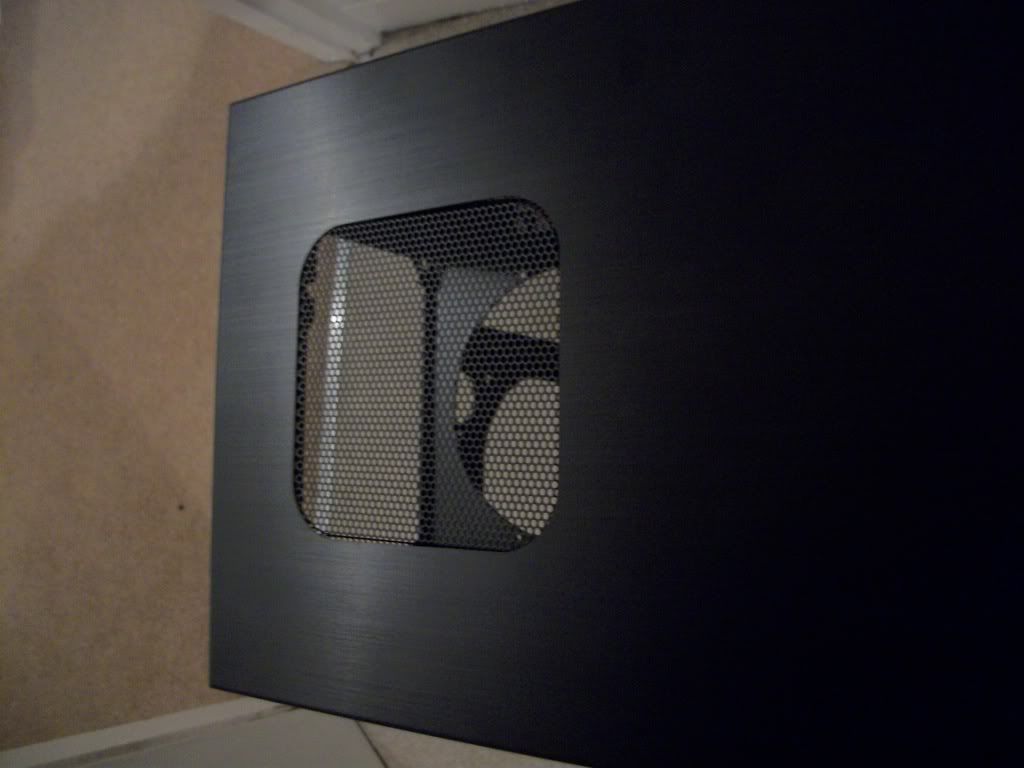
That is a bright blue, lol
Gigabyte and MSI do blue so I wouldn't imagine it'd be too hard to match
But for me black is timeless, like ATM a lot of these white builds look really good, but will they still look so good in a couple years? I'm not sure
 
Case has finally arrived, so I'm on for my rebuild this weekend :D yay
Put a couple of quick pics up to show the work I've had done, apologies for the poor quality, I will get better ones at weekend, I promise
 
Cheers

No, must admit I didn't think about it at the time, wasn't until I'd sent it off I thought about it, but as my gfx card/sound card brackets will not be black not 100% sure it would have been best anyway (half black half silver?), though I may look at seeing if I can spray them gold to match the gold writing on side panel and caps on board, if I can I should be able to do gfx/SC myself if I mask them up well and I'm careful, this way it would offset the black quite nicely I think, I'll wait and see

As I say the side panel looks even better in the flesh as it were
 
Well I've finished my rebuild :D phew, was not much fun doing it yesterday, though this was prob made worse by the hangover from hell (works do Fri night)

Still need to clock, work out fan controller and longer term I'd still like to get some gold fluid in there if I can, but that wont be for 6 months at least til I refill loop
 
Cheers mate

It does look a bit better (clearer) in real life, as there's no light within the case so you cant generally see in, that was one thing I was unsure on myself, internal lighting, initially it was a big no no, initially I wasn't going to bother with the window and just add some soundproofing to the panels, but then I thought I couldn't have all that lovely WCing goodness hidden away so went with the window. I may look at adding some lighting, in a bit, though it would be optional (i.e. I'd be able to leave it off 95% of time and just turn it on for show) but not sure if white or yellow (guess they don't do gold lighting) would look better. I can always experiment

Overall I'm pleased, may not be quite as good as some of the other projects in here but its been my first full project and first WC build so I'm happy, granted I may of cheated a little by not doing the mods myself, but there's no way I would have got them to this standard and it would have cost just as much for me to try. And its still my design after all :D

Got my fan controller working, though its not manually adjusted, the speeds go off the temp measurers, you have four preset speeds, 1 (Off) 2 (low) 3 (med) and 4 (full) though my fans are 1300 rpm and I have the 120s on 3 going at 750 and the 140s on 2 going 680., but yeah these speeds are linked to temp ranges or something, still not 100% tbh but without temp sensors in they just run full whack, I wasn't going to bother with them, but when they're in you can set them to adjust so at temp below 30 they're 0, 30-45->1 45-60->2 etc. Obviously this is case ambient temp not water temp as they're not in line sensors or anything. But yes I have mine running as before and they're silent and cool
 
It seems really good quality, but as I've said its my first build so I have nothing to compare it to, but its nice and heavy, seems well made, the fins haven't bent at all, even when I've accidentally touched them, in fact it didn't even need flushing really, I flushed both but the boiling water I put in both came out crystal clear, as did the deionised that I flushed them with after, I haven't clocked yet, don't know why, and also have plenty of cooling, a 280 and a 240 for CPU + single GPU is OTT by all accounts, but I figured you cant have too much, but CPU and GPU haven't gone above 25C yet, granted I've not really stressed them yet
 
Cheers RJC

What are you aiming for with your clock – maximum possible within voltage tolerance or a balance between a respectable clock and low voltages?

Balance, main reason I wanted to try WCing was the noise limiting factor, so I wont be looking for max OC as Id then have to run fans faster, plus I doubt anything over 4.5GHz will be necessary really, so should be able to make this quite easy with low volts/temps and hence keep the quiet goodness
 
Back
Top Bottom