Project.....Side mounted radiators, that's all :D

Associate
Joined
26 Aug 2009
Posts
1,299
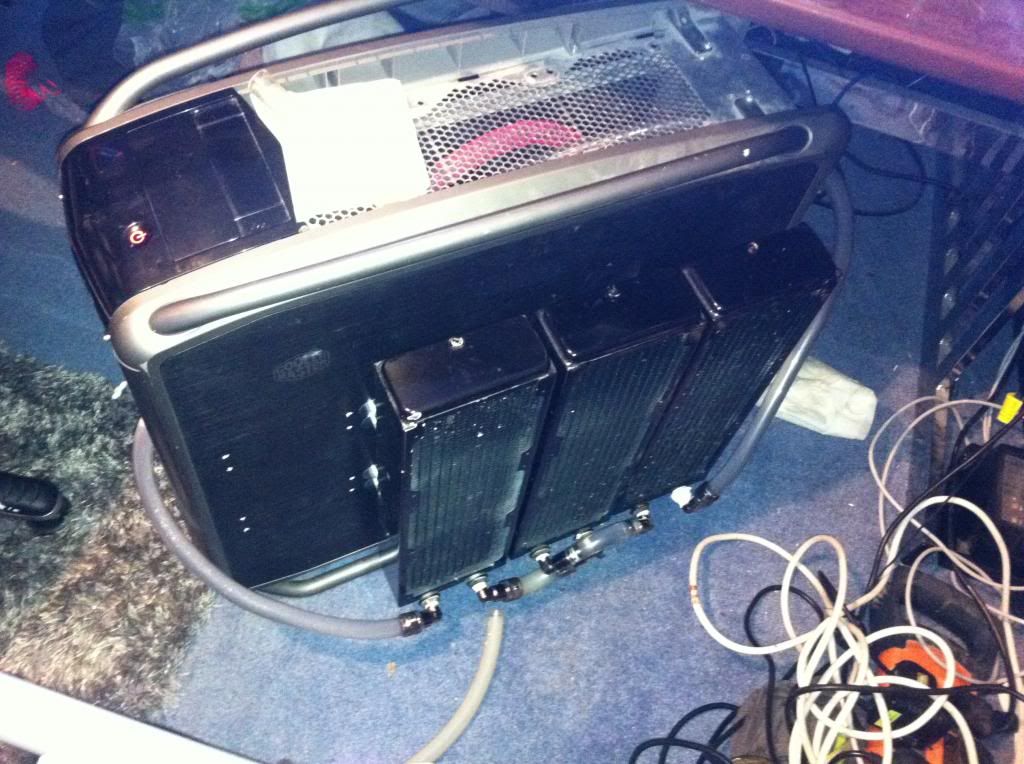
I couldn't find many people who had done this before so I thought I might as well share my experience as I go. Long story short I'm downsizing from a MM Ascension Extended case to my old Cooler Master Cosmos S, but didn't want to loose the cooling performance of four large radiators. The solution, mount them to the side of the case.

Now sure, plenty of people mount rad's externally, either on the back or on the top that's pretty standard these days and all the parts you need either come with a good case or can be readily bought. However mounting in this fashion needs a bit of planning, something to which I haven't done a real lot of if I'm honest. I'll be doing this mini project over a few weeks as and when I get cash for new water cooling fittings (PM me if you have any 90 degree 1/4" fittings) as I don't want to dismantle my current rig completely and be without my "precious" for a month.

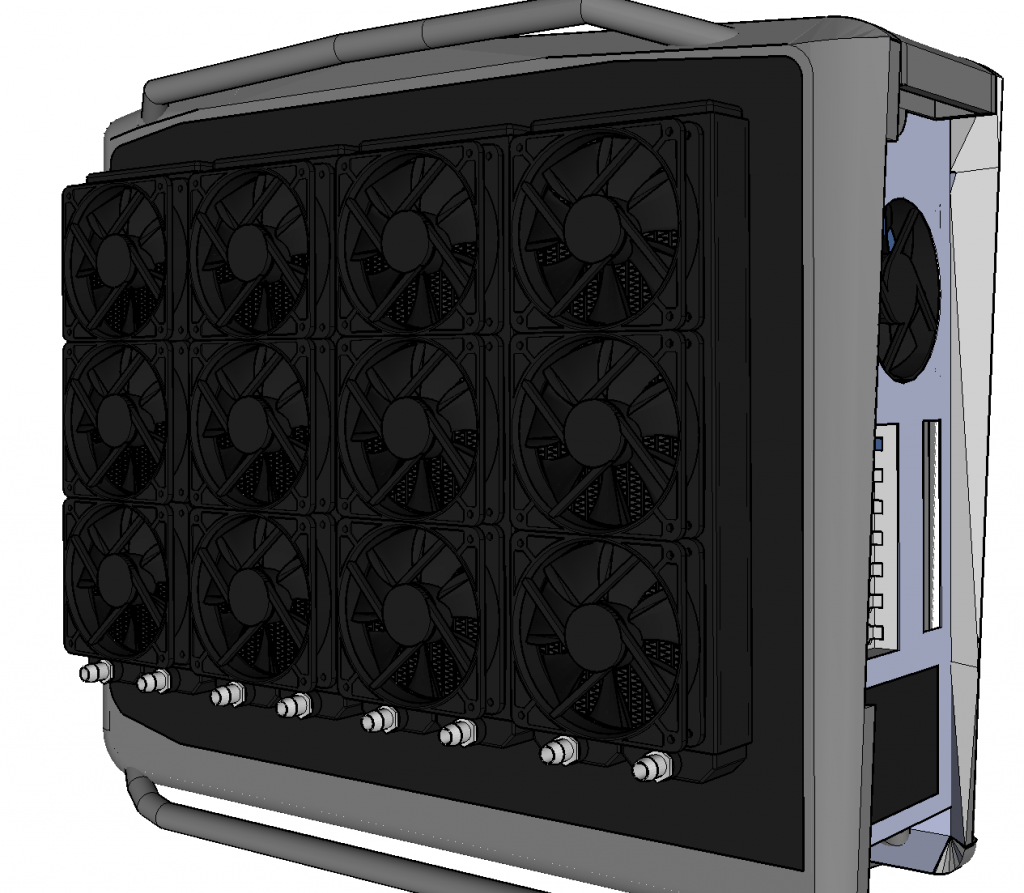
So on and on, here is my basic idea for how I want the project to end:
CosmosSSideMountedRadiatorsRear4Rad_zps19bce8dd.png


The radiators are stood off from the case using steel tubing I got from B&Q for £3, there is enough in one length to mount all of the radiators, I hope.

The flow will be setup like so:
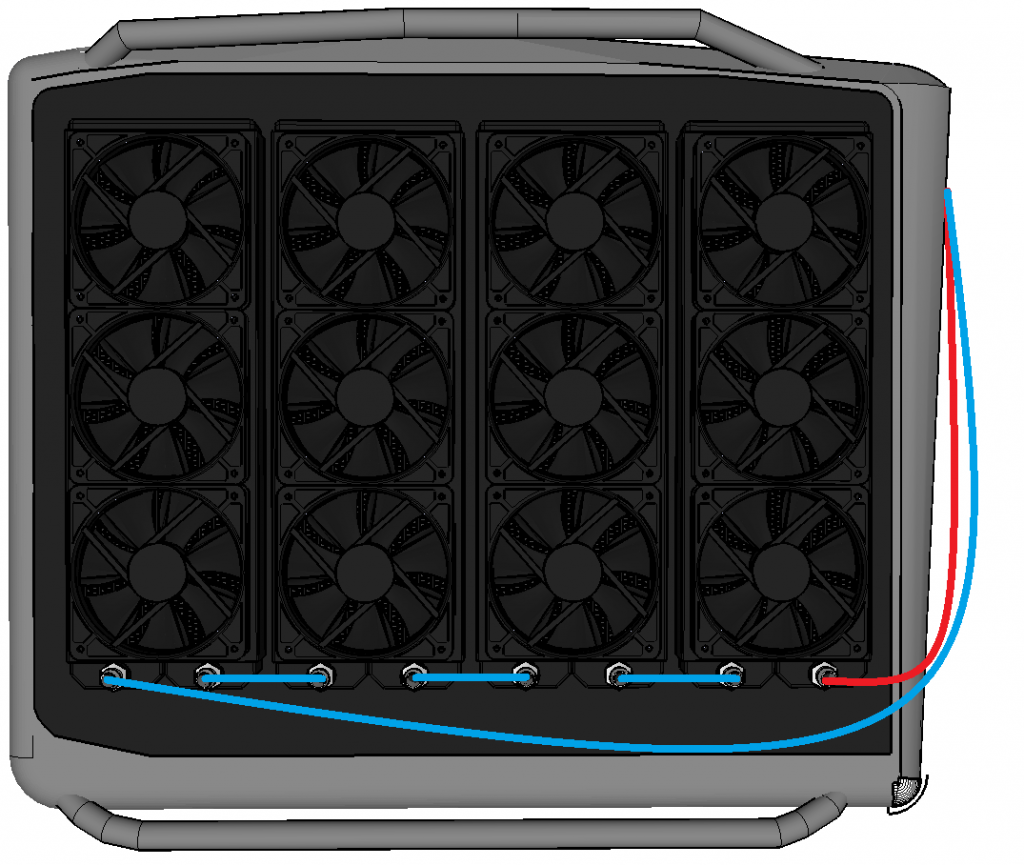
CosmosSSideMountedRadiatorsFull-Side4RadFlowDiagram_zps34eece5a.png


Someone said about drilling large holes into the side panel and having the tubing come from behind, however in the Cosmos S achieving the necessary plumbing behind the motherboard tray would be a challenge and somewhat expensive. Sure it would look a lot better, but hell if it works it works and I can always find a better way in the future.

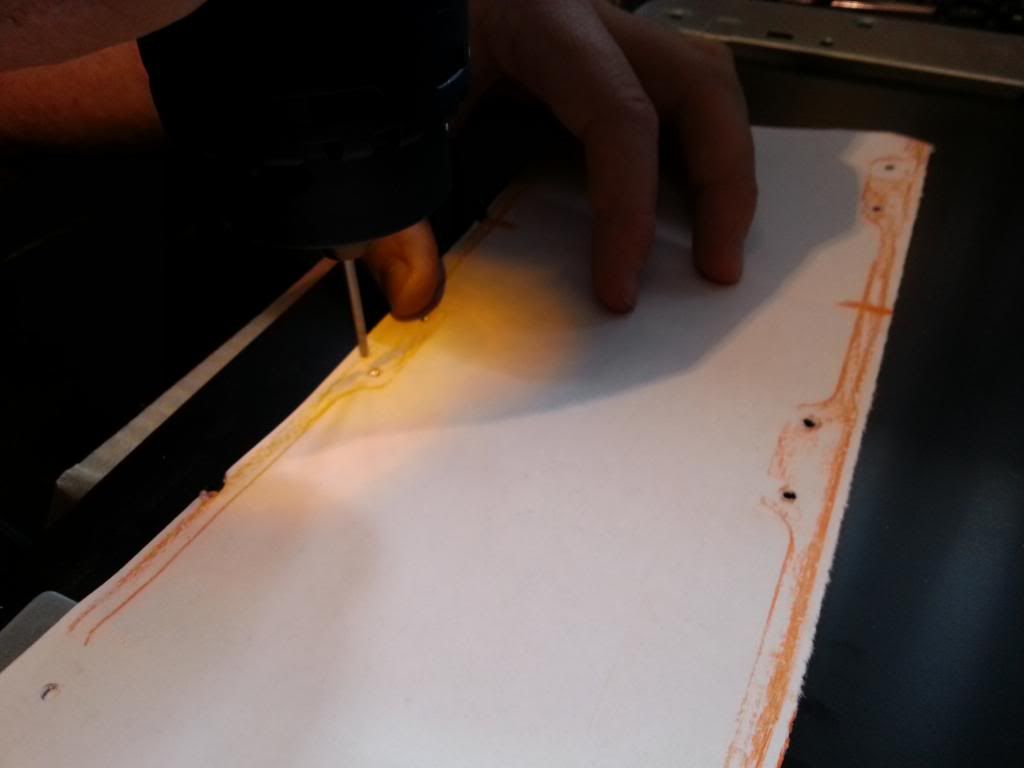
I made a 3/4 template (A4 isn't large enough, had no A3) of one of the radiators I had that wasn't in my current build by tracing it onto A4 paper. I then used this to plot the required holes onto the side panel.
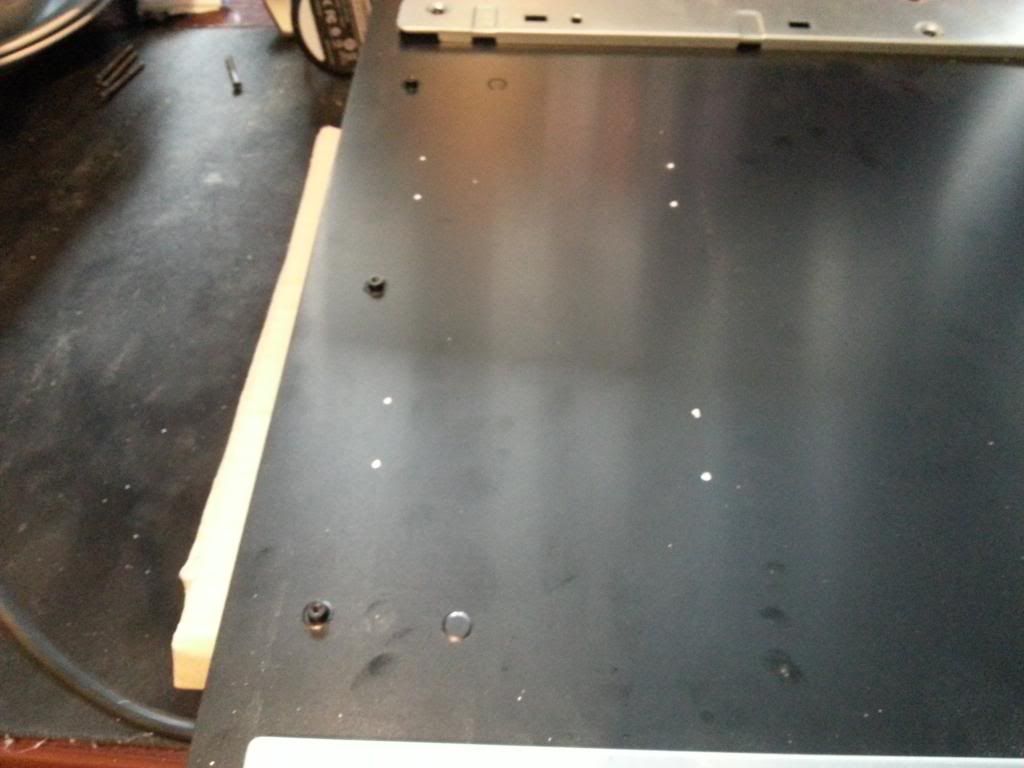
20130427_164416_zpsc3030e6f.jpg

20130427_164424_zpsa82837f1.jpg


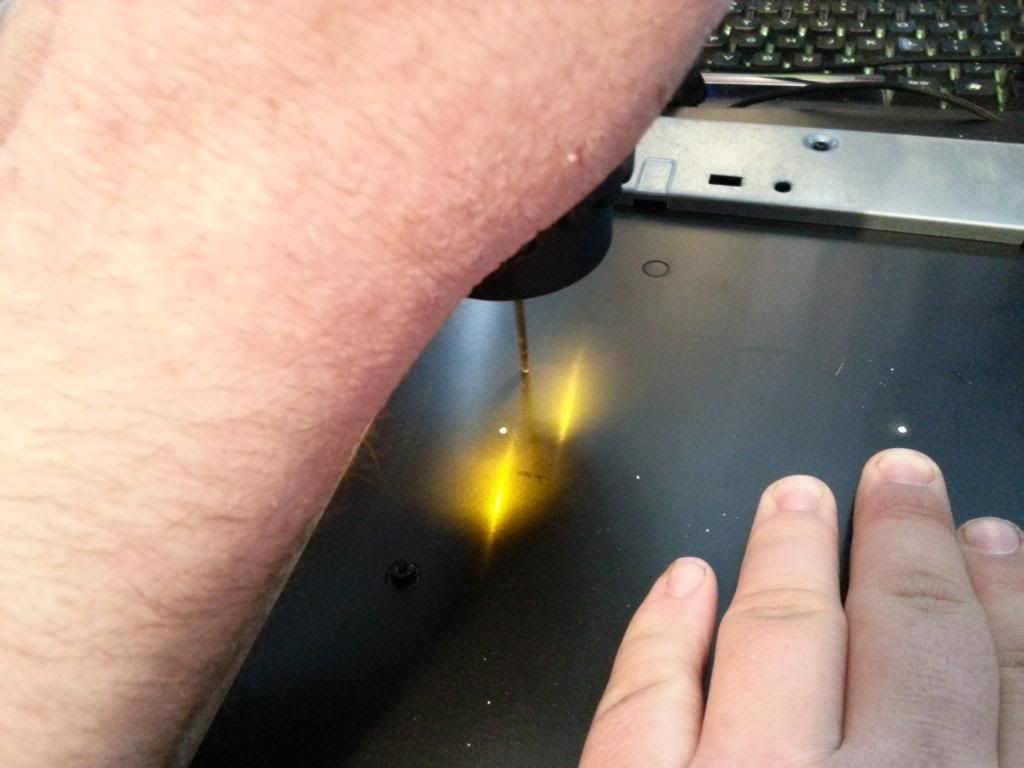
I used a high speed rotary cutter to drill the holes:
20130427_164436_zps0f22732e.jpg


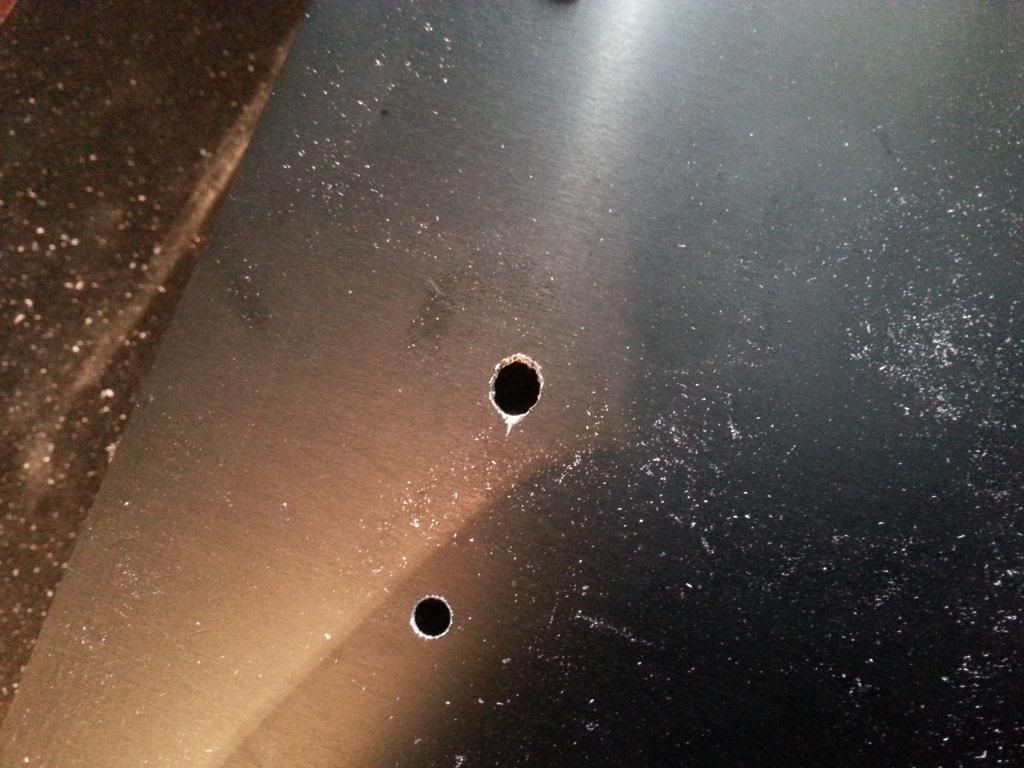
However I couldn't figure out where the heck the precision unit had gone for it so it was done free hand, and with something spinning at god knows what RPM it's easy to mess up:
20130427_165045_zps054b72b6.jpg


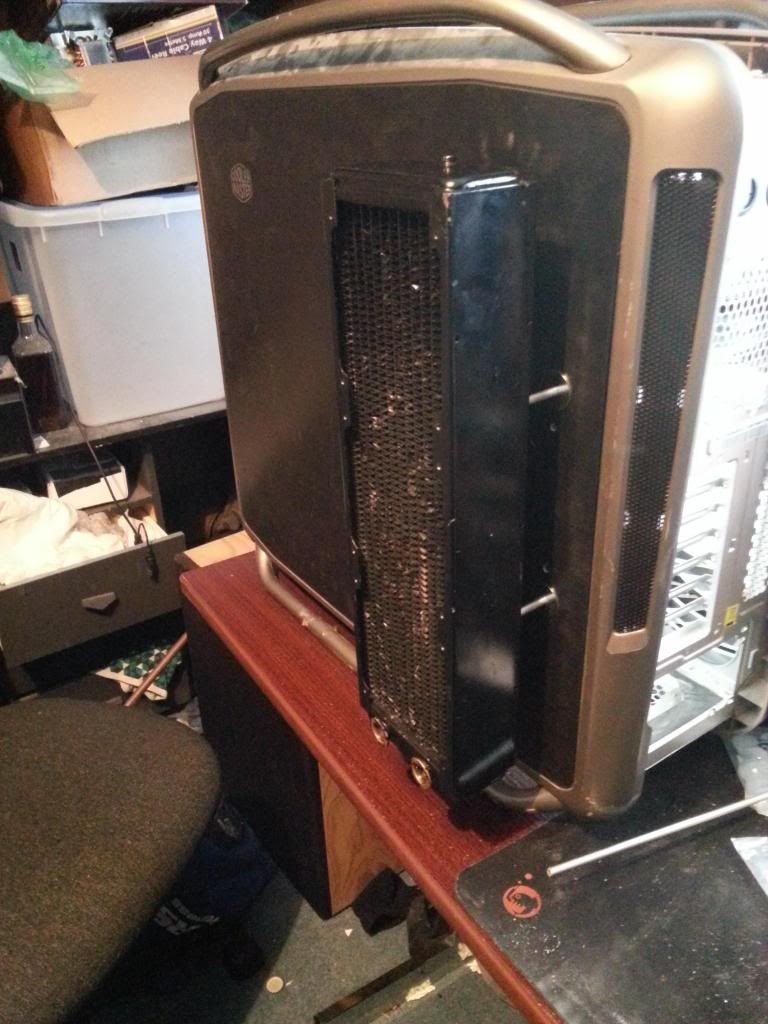
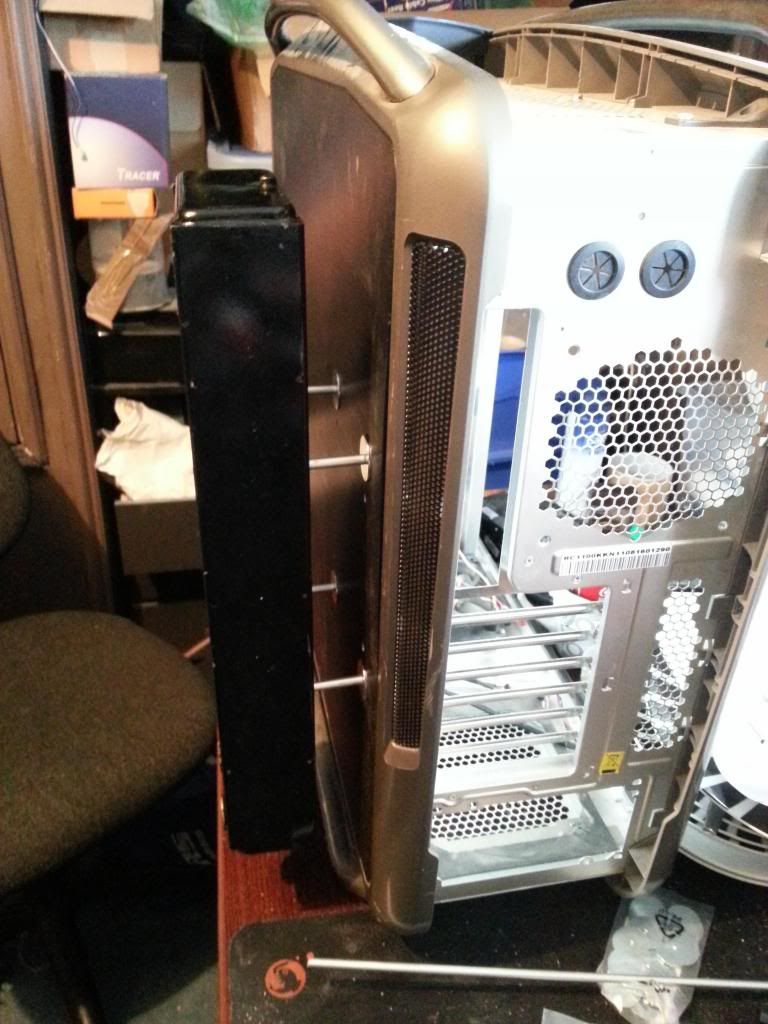
So this is it mounted, I was going to use just 8 holes at first but have decided with the two outer rad's to use all 12 to give the side panel more strength (not done yet). Even now with just four bolts this rad isn't going anywhere, however it is convexing the side panel just enough to make the locking mechanism of the Cosmos S hard to latch properly, and it can drop off it not done correctly. I will likely add a rescue harness to the outside rad's which connects to the handles atop the case so if that panel does unlatch it can't go far.:
20130427_174943_zps48eec416.jpg

20130427_174947_zps78b4e9dd.jpg


I might get a bit more done today if possible, I'm thinking to drain my loop in my current rig, take the rad's out and put a single EKWB 320mm on to get me by. This way I can mount all of the rads to the case and find out if there is an issue with balance, if so I may have to construct a pair of stands to go under the rad's. Feel free to throw any ideas at me on ways to improve, except for tidying my work place :D.
 
Last edited:
Right... wouldn't it be easier to put fan & radiator from your car instead of all those little fans ?

Might be a tad lound :D

As for hardware there is the following:

Code:
Mainboard: Asus Rampage IV Extreme
CPU: i7 something or other (I forget)
RAM: 12GB Corsair XMS 3 @1600Mhz (Getting some 2400Mhz later this year)
GPU: 2x 7970's under water, getting a third when I can afford it.
PSU: Corsair AX1200 after it comes back from RMA
SSD: Samsung 250GB
HDD: 2x 2TB WD Caviar Green

Then all of the water cooling gear including twin D5's. FIVE! Thermochill PA120.3 (4x thick 1x "Thinner" :D), a res to be decided upon but an EK tube res for now and a HDD water cooling "Box".

Around August time I will be buying some nicer fittings to replace the barbs/compression, a new CPU block and MB blocks to match the GPU's and some RAM blocks too. I will also be adding a fan+pump controller to the mix too which will likely come next year depending how much I earn this harvest (seasonal worker).

I'll be back out with the drill this weekend to attach the last radiator to the side panel, my apologies for not uploading any pics of the three which are on now I've been busy as hell at work. I've placed an order for some 90 degree fittings which go to 3/4" OD tubing, so yep you guessed I'm using 3/4" where I can. I won't be using aurora for this build as I have with my previous two, more likely a UV die or possibly nothing at all and just DI water + kill coil.

This weekend will also involve a good few hours of washing the remnants of Mayhem's Aurora from the rad's as there are tons of "pearls" in them: This was caused by me not bleeding them properly, leading to the pearls dropping out of suspension in the trapped air. I plan to do this with standard "hot as hell" water + vinegar, followed by a 10% Isopropanol mixture, followed by three hot water rinses and finishing with two DI water passes at 1hr each.

The vinegar should remove a lot of "gunk" that most loops build up, and the IPA will get shut of any "Aurora" that is left in them. I will be using an old EK 2.0 pump to do this as IPA will micro fracture many plastics at these concentrations, something I learnt when I ran 100% IPA through a res/pump/rad loop and cracked my res and did god only knows to the pump.
 
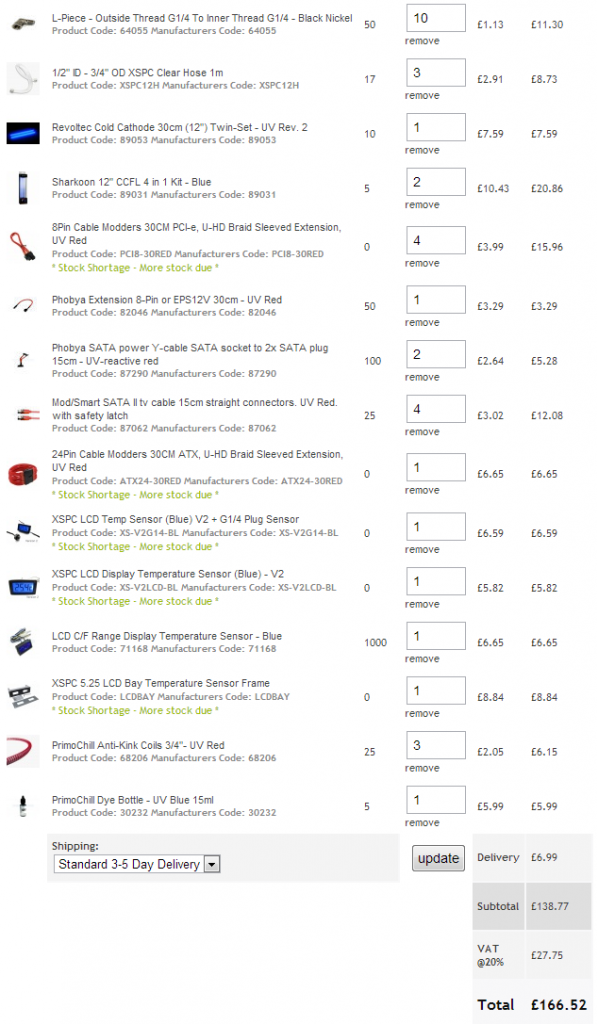
These are the parts I have lined up to buy for the weekend that will enable me to begin building. I'm going to order tonight without looking around other sites to find better deals but if anyone does spot something which can be had for less elsewhere please feel free to say, just don't mention the site where it is available else face the wrath of the don's :D

 
Well, no parcel today, I guess every company is not as good as OcUK :(

I'll be mounting the last two radiators tomorrow, which brings me to a slight update from my previous post's which I forgot to mention:

A massive thank you to "pgi947" for the FREE radiator, which brings the total to FIVE! This one will be mounted atop of the case in a similar fashion to the others (Standoffs and washers with a screw through).

I've also decided not to bring the tubing out the rear of the case, but rather use another user's advice of who's name I forget which is to drill 3/4" holes into the side panel and bring the tubing out this way. I will have to buy some quick release connectors from somewhere (wanted thread going up) so I can still remove the side panel when needed, but man are those things expensive.

I'm also looking for a 400 ml tube reservoir to use inside the case rather than a bay res. I find they are far tidier looking, easier to fill and attach to pump's with a simple G1/4" double male connector. I might use two in the following fashion depending what price I can get them for:

Res 1>Pump 1>GPU's>CPU>Res 2>Pump 2> Rad's> Res 1

Failing that it will go:

Res> Pump 1> GPU's>CPU>Pump 2>Rad's> Res
 
Yer I'm looking into making a support structure to go under neath the side radiators to give the whole case some extra support. I might even grab a hold of some brushed aluminium from a metal merchant near me, remove the bars/legs/feet....things from the bottom of the case and replace with the metal sheet. The added surface area, around 3" out either side, should hopefully prevent the case from tipping over so readily. I will likely add wheels or rubber feet to this metal to give clearance for the PSU fan.

I've not had chance to do any work this weekend on the project as I'm currently in the middle of boarding out my loft in preparation for a conversion. Also my parts didn't arrive so all I could have done anyway is mount the last radiator, so not exactly a huge progression. I am hoping the new parts will arrive Monday so I can at least get some tubing laid out.

I decided not to buy everything on that list due to the cost of timber needed for my loft, but I will be getting everything on that list (and more) in the coming months. I'm planning on a third 7970, or even selling these and going Nvidia (no fan boy :D) and grabbing a hold of some much needed faster RAM. I wouldn't mind a second SSD to partner my Samsung 250GB, but that's a luxury item that isn't needed.
 
I've managed to make some progress on this build today. I ran into quite a few problems along the way, like a motherboard pretending to be dead and coming back to life for no reason, and leaking 1.5L of water :(

I'll start with the radiators seen as that's what this project is about. When I came to put the last two rad's onto the case, I couldn't find the threaded rod I was using to make bolts with. It's looking like I will have to wait a while to get some more, so I decided just to go ahead with constructing the rest of the rig.

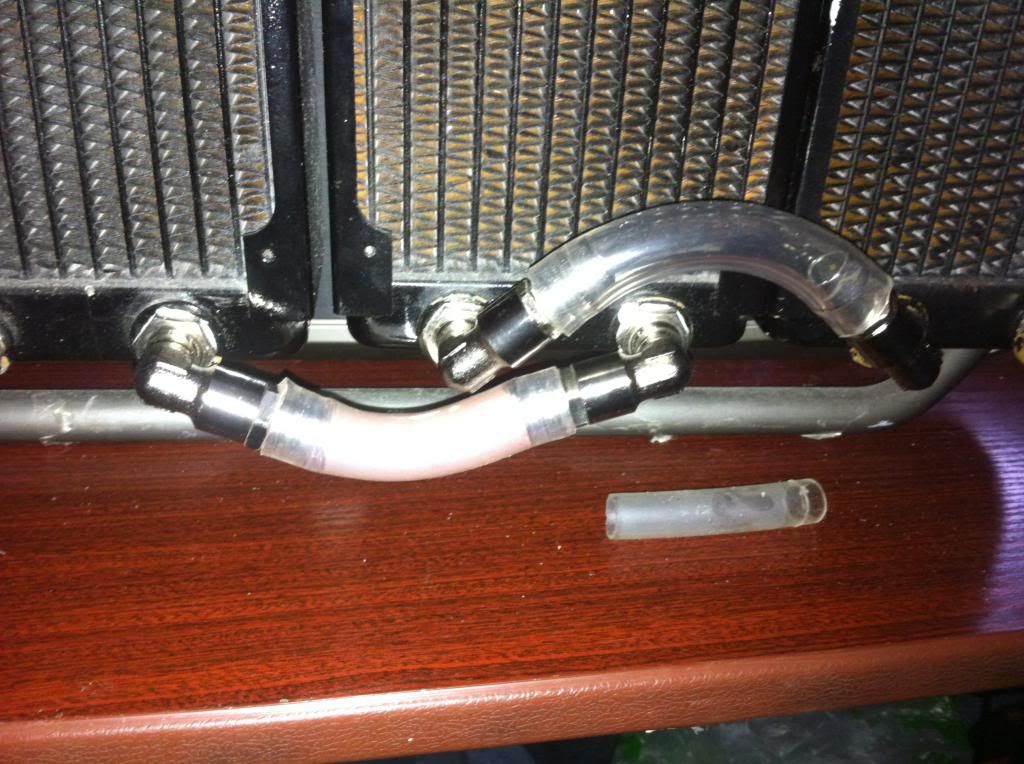
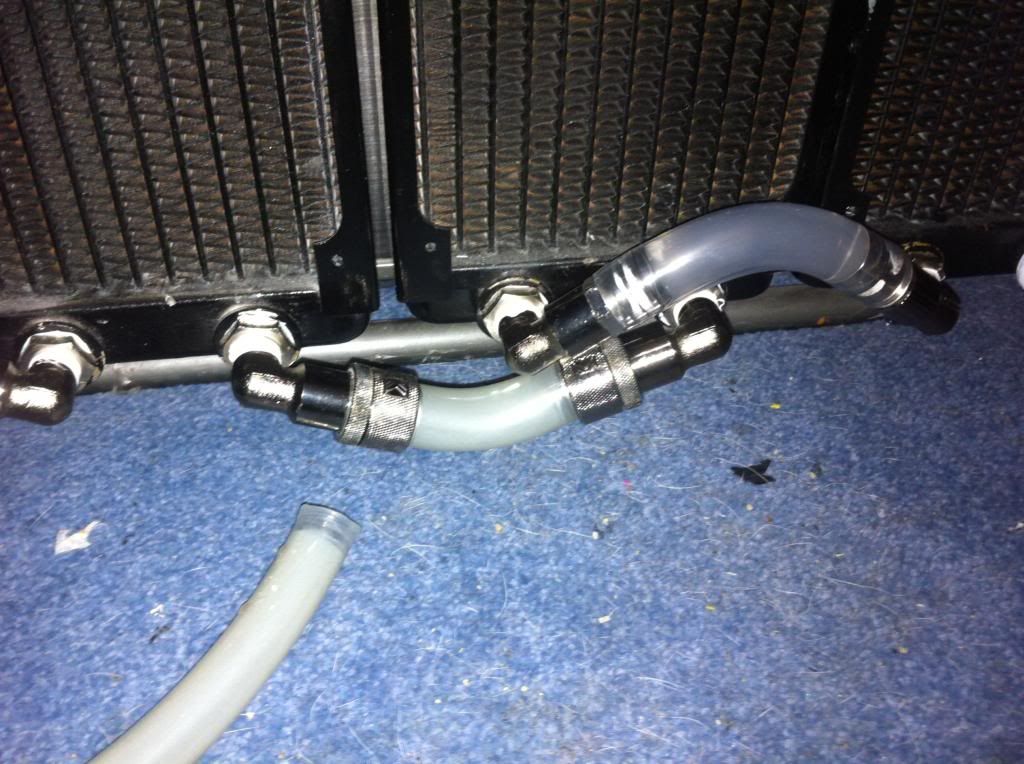
First step, connect the rad's in series. An easy enough task I thought, couple of elbow's, whack some tubing on jobs a good'n. This right here, leaked well over a litre of water in a few seconds:


A few compressions and a roll of PTFE tape later and all is better (sort of):


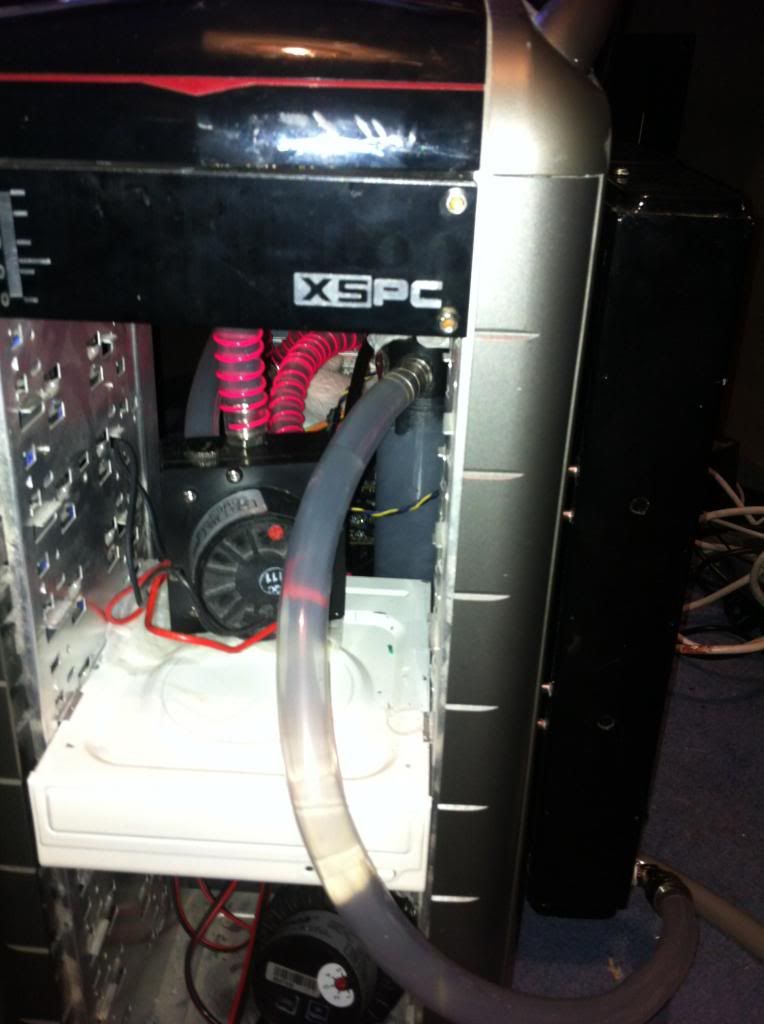
I opted not to drill through the side panel to put tubing through as the angles needed are to tight to run 3/4", even 1/2" would struggle. Because I was 12" short on the tubing I ordered (3m worth) I've had to put the return tube through the front of the case instead of the rear. I'm going to order another 1.5m and do the job properly:

That far right elbow where the "feed" comes in, that still drips. Long story short it wasn't when I filled the loop and was an hour later, and I did not feel like draining the entire rig just to fix a drip outside of the case. Fow now I've put a towel under it and wrapped the entire thing in PTFE tape to slow the flow a bit. I'll be draining the loop on Wednesday>Weekend and will fix it then.


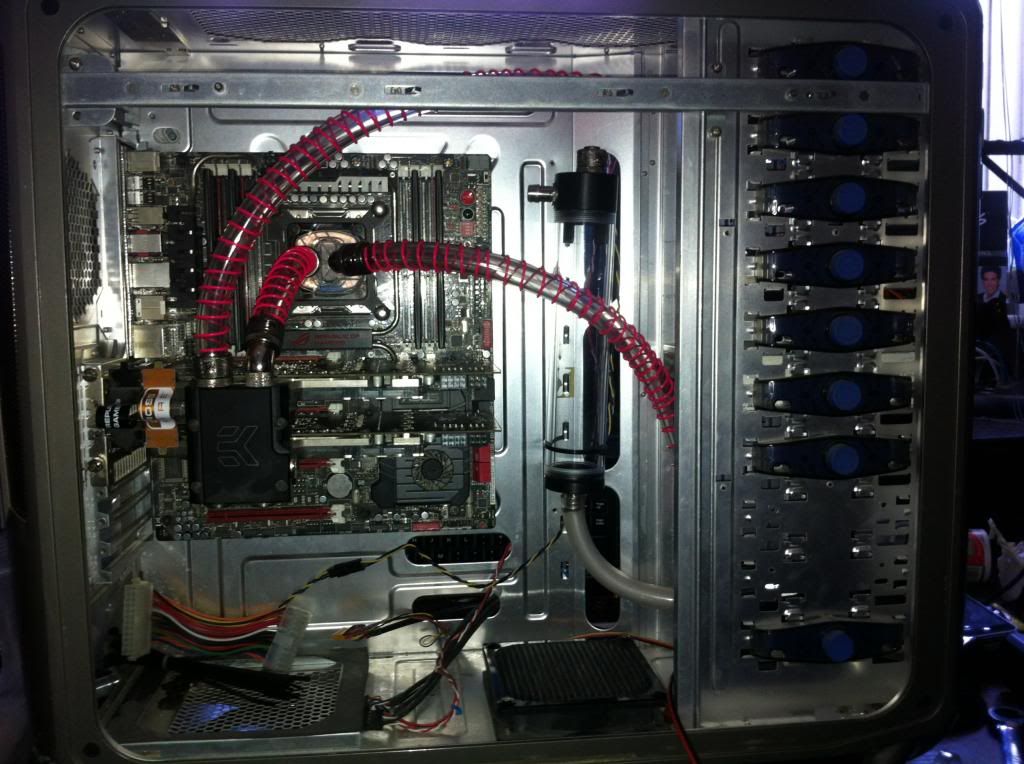
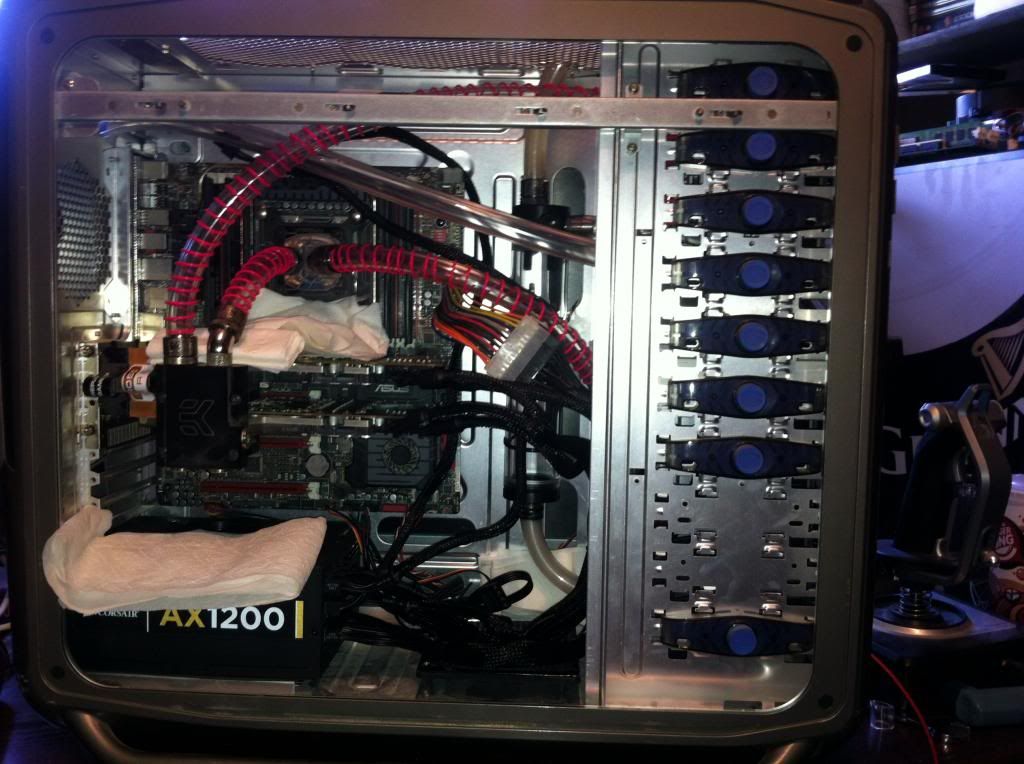
It took me around an hour to route the internal tubing and position the pumps and res' in a fashion which took the least room and tubing:


The loop config is as follows: Tube Res>Pump 1> CPU> GPU's> Bay Res> Pump 2> Rad's > Tube Res

Steps still to go on this build at least:
- Drain Loop
- Attach last two radiators
- Return tube to go through rear of case
- Anti-Kink coils on all tubing
- Fill with EK UV Blue coolant (Arrives Wednesday)
- Place all the fan's
- Buy a fan controller with LCD display
- Buy in-line temp monitors
- Buy flow meter
- Buy UV Cathodes
- Buy Blue Cathodes
- Figure out how to hide all the fan wires
- Buy UV reactive cabling
- Hide the HDD's and SSD
- Cable management
- Dust the entire build
- Maybe add a perspex sheet to my side panel
- Anything else I think of


To be honest I'm amazed I got this all done in just a day, I was planning for it to take me around 2 weeks to get even this far. Now it's just a matter of raising the cash to buy the extra's I need/want.
 
Last edited:
Looks mean :cool:

One suggestion...

Running the tubing in the front, perhaps mod some 5.25 covers to hold some bulkhead pass through? Would make the tube routing into the front a little more professional :D

I'm going to run it through the back. I only had about a half meter left, and just to get the system running I threw it through the front. I must admit though I did consider modding one of the front covers to pass some tubing through :D

That tube I mentioned which leaked and I replaced the barbs with compressions, well the second one did too when I began playing the new Metro game. I forgot that barbs with 3/4" aren't water tight without clamps, and even at that not perfect. I'll be buying some more compressions and using them everywhere just to be on the safe side. As it stands I only have barbs in areas that aren't over electronics and will just make a big mess on my floor.
 
A good tip for anyone using a tube res in the Cosmos S, if you're having trouble filling it and don't mind taking a set of snips to the case you can easily cut a hole in the fan grill at the top, allowing tubing to pass through. Works a treat and the tube tucks neatly under the top cover for future use, just be sure to bend or seal the end to prevent an unwanted spillage :)
 
I haven't forgotten about this project. We are just about to start harvest on the farm I work at and I've been none stop for the past month. I'm hoping to get the last two radiators attached in the coming weeks, and then the rest of the list tackled as and when I can.

I have some parts to sell from this rig, namely the RIVE mainboard and CPU. I will also be selling the Mountain Mods Ascension case if I can get a good price for it, although I doubt I will even see a return on the cost of the artwork :( but I can hope.

Sorry for the wait.
 
For those who haven't yet seen this rig was destroyed when a hose came off my pump.

I forget your name now bud (sure I could find you in my emails), but the guy who sent me a radiator for free to use on this project. Do you want it back, or some sort of payment for it? I feel bad accepting something for free for something that it will no longer be used for :(
 
Very nice build.
Whats the model of that high speed cutter thingy you used to drill holes in case?
Diameter was really small and I need a tool like that a lot.
Cheers

Off the top of my head I can't remember and I don't have it to hand, but I believe it's known as a "Precision Drill". They are about £30 in B&Q, you might find it cheaper to find a metal fabricator to drill the holes for you with a CNC machine as the drill bits are easy to break and are not cheap :)
 
Me? :D

Its ok matey, keep hold of it or pass it on to someone who needs it :)

Tried claiming from contents insurance on the damaged parts?

Yep :)

I'll pass the charity on when I come to sell my Mountain Mod's case on here, I'm sure someone will be happy for it. Unfortunately, and rather stupidly, I don't have contents insurance. Guess who is kicking themselves now huh :D
 
Which Rad is it? Just out of curiosity.

It's a "slim" (still considered thick by normal standards) Thermochill PA120.3 with 25mm spacing. It will only fit certain cases, such as the mountain mods ascension (I'm looking to sell one of these cases with custom art work).
 
Nice to see another Cosmos S :) I mounted my res on a 240mm rad in the drive bays. I wasn't crazy enough to try mounting anything externally. She's already a beast ;o

Yer she was really getting that way, but with this accident I won't be continuing the build :(

Mounting externally is really easy if you're wondering, all you need is a decent drill, some washers and tubing (to stand the rad's off from the panel) and the correct bolts. Using thinner rad's would help a lot as ballance was becoming an issue with this build and if I ever got around to mounting the fourth side radiator I would probably have had to fashion a support stand.
 
So, I gave the rig a test today and it would seem the mainboard (at the least) is dead. I tested with the following configs and always got the same result, being a brief (2ms or so) burst of life and then nothing with exception to the final config in which I get nothing at all; I'm unsure if this is by design of the board or the symptom of a deeper issue as most boards I have had in the past will still power on but throw a "beep" code when there is no CPU and/or RAM installed.

- MB, CPU, 10GB RAM, 2x 7970's
- MB, CPU, 2GB (single stick) RAM, 2x 7970's
- MB, CPU, no RAM, 2x 7970's
- MB, no CPU, no RAM, 2x 7970's

As mentioned the first three show some sign of life, albeit for an extremely short period of time; IE enough to allow the pump to move water approx 1CM through the loop. The final config does nothing to show any signs of life other that the usual LED's which are lit when there is power to the main board. I will test the 7970's in my current working rig tomorrow to see if they still work, failing that it's a good chance to add the second 5970 I have lying around :D
 
I'm hoping to get a few spare hours today to put the GPU's into my current rig and give them a quick test. Does anyone know if it's okay to run them water free for even a couple of minutes?
 
So I decided just to go full hog and install the cards properly, and if they didn't work I was going to throw the whole lot out my window, pile it up, and burn the lot of it.

Turns out they still work :D. Well I'm typing this in safe mode right now seen as Windows is throwing a 0x101 error at me. Any ideas on that one?
 
Have any parts been destroyed, in testing so far?

I tested Mobo, CPU, GPU's and RAM all together and had no joy. The GPU's are the only components I have tested in a completely separate rig. I've just reinstalled Windows (now on 32bit, forgot my PE installer wasn't x64 :() and the BSOD has gone away, I still need to reboot to finish driver installation but it's looking good up to now.

The Corsair AX1000 PSU is 100% dead, it just blows the fuse in the kettle lead as soon as you jump start it. I'm going to open it up at some point, see if I can identify the broken components. It might just be a bit of trapped water, or as bad as a fused transformer.

CPU is very much likely dead, but I will test the Rampage board and CPU next weekend with fresh RAM and a working GPU.
 
Back
Top Bottom