Project Ying Yang
No Ying Yang really..... I'm not into that far-out kinda travelling, this project rig is going to be black and white with the Ying of the AMD CPU to the Yang of the Nvidia GPUs
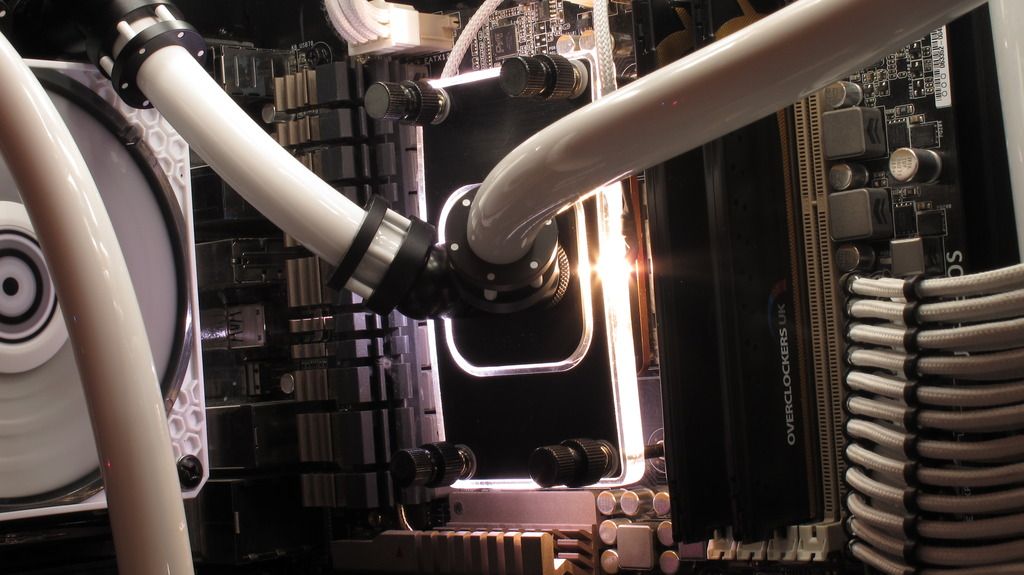
The Teamsheet:
Corsair 800D Case
AMD FX8350
Asus Sabertooth 990X R2 Mobo
KFA2 Galax Infin8 Back 970s SLI
Kingston HyperX 8GB 2133MHz OCUK edition RAM
Intel Jackson Ridge OC'd SSD
1TB Other HD
XSPC Raystorm CPU Block
Hardware Labs Stealth 120mm Rad
XSPC 360mm Rad
Laing 18W DDC-Pump with Clear Top
Monsoon Chaingun Range
Primochill 16/11 White Tubing
Mayhems White Pastel Fluid
Primochill Tube resevoir
AOC Gsync Monitor
Ducky Shine3 TKL / Cherry Mini Mech Keyboard experiment
Logitech G502 Mouse
Roccat Kave XTD Cans
With the kind Sponsorship of OCUK - Monsoon for all the fittings
==============================
So, I was in the middle of upgrading and reassembling my loop and was lucky enough to be picked out of rjkoneill's thread here to receive some Monsoon fittings and give the chain gun compressions a good going over to see how they come out
(they are bloody great btw).
Sponsorship offer thread.
http://forums.overclockers.co.uk/showthread.php?t=18658865
I had already decided on the spec and the colour scheme of the plan and was potching about cleaning and reassembling/planning the rig when I got the nod that I would be included for the Monsoon fitting sponsorship.
So, let's take a look at some of the Monsoon hardline fittings themselves before I get into the build. I'm not a pro reviewer/photograher just an average guy so excuse the layman look at the parts!
I received:
12 x Monsoon Chain Gun Fitting 3/8" x 5/8" Multi Pack - White
(WC-168-MO - CGF-3858-4-WH)
4 x Monsoon 16/10mm (OD 5/8) Rotary 45° - Matte Black
(WC-112-MO - MON-RO-45-58-MB)
2 x Monsoon 16/10mm (OD 5/8) Rotary 90° - Matte Black
(WC-102-MO - MON-RO-90-58-MB)


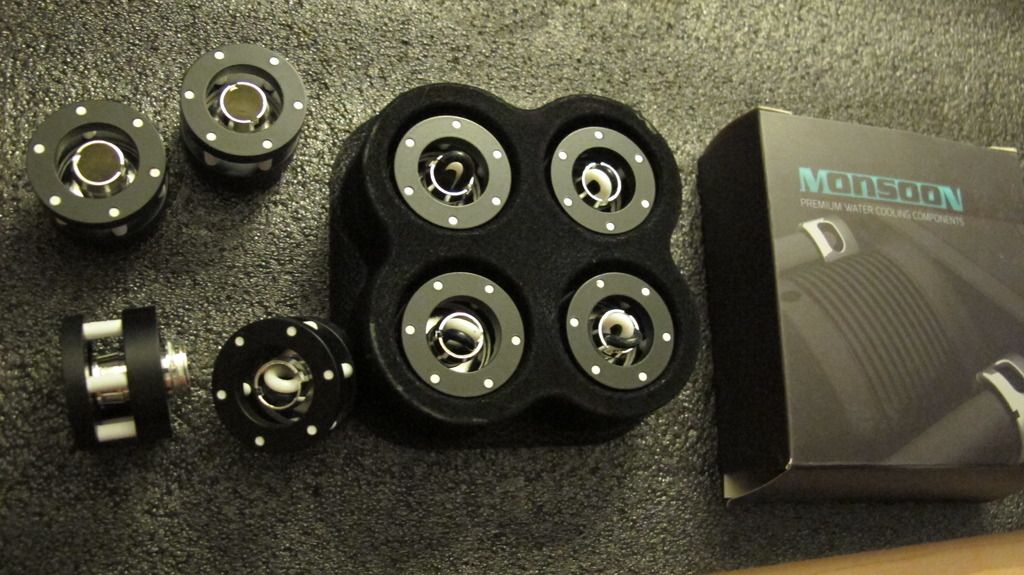

If anyone is wondering how they work, you can probably tell from the following pic, it's a standard compression set-up with the inner barb and then the outer sleeve. It's the outer sleeve that has taken a daring and different design, but works really well.
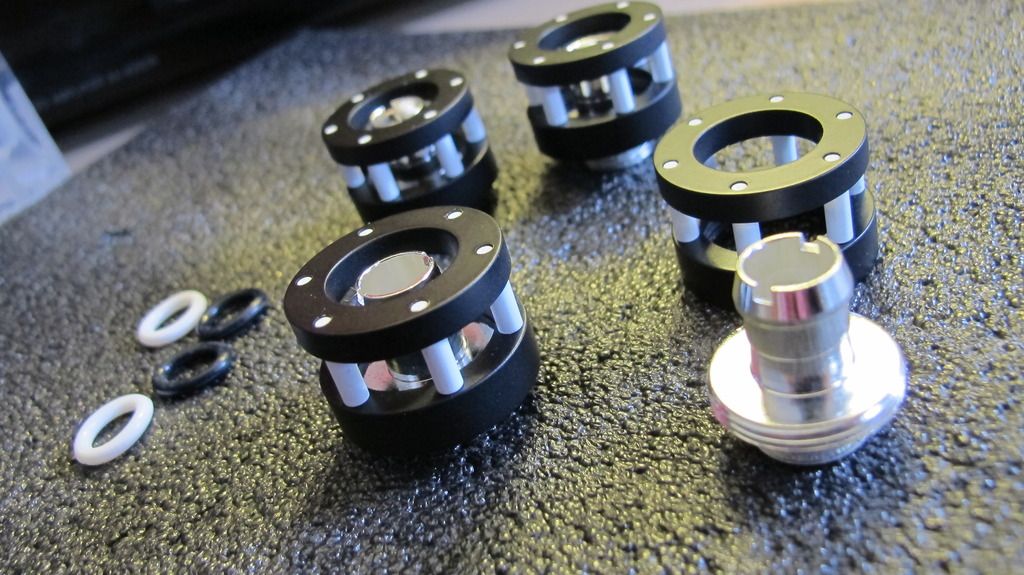
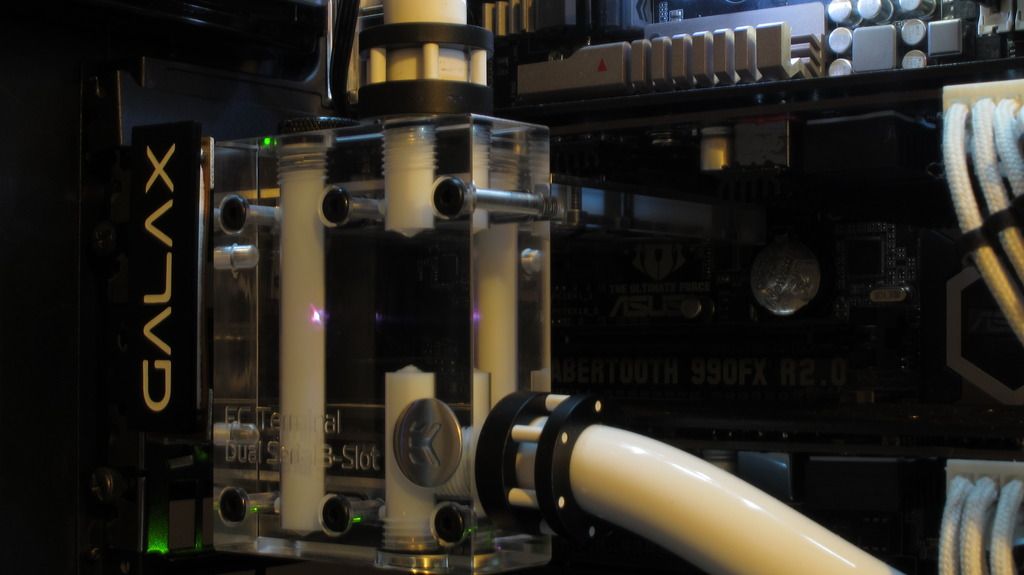
The black and white matching quite nicely with the backplate of the Infin8 970 card:
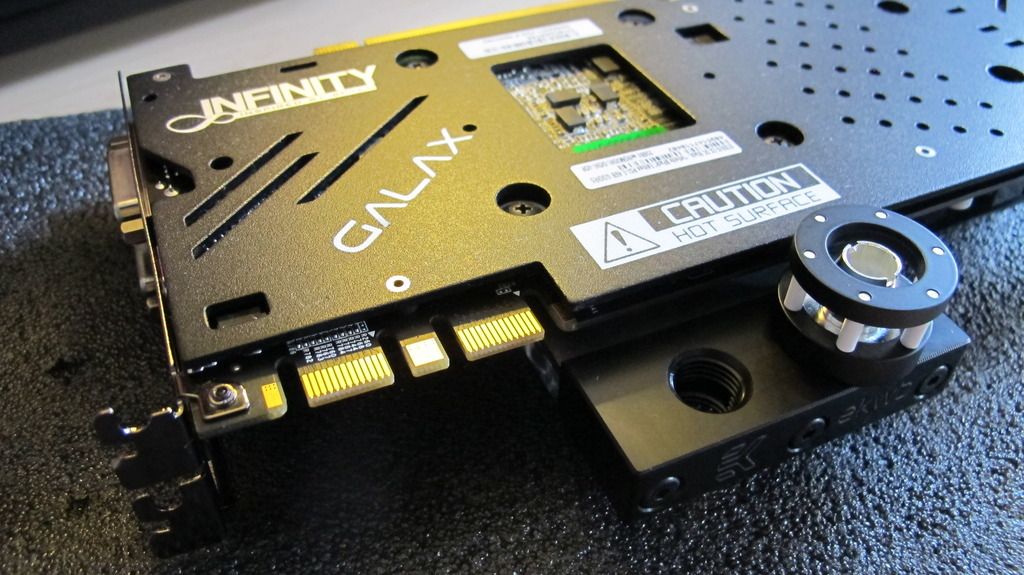
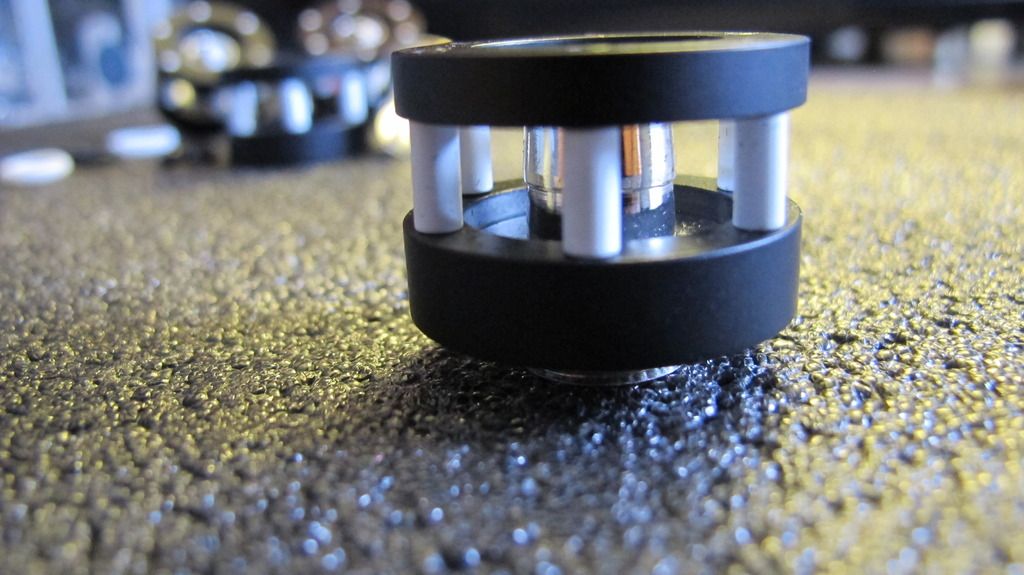
and in action:

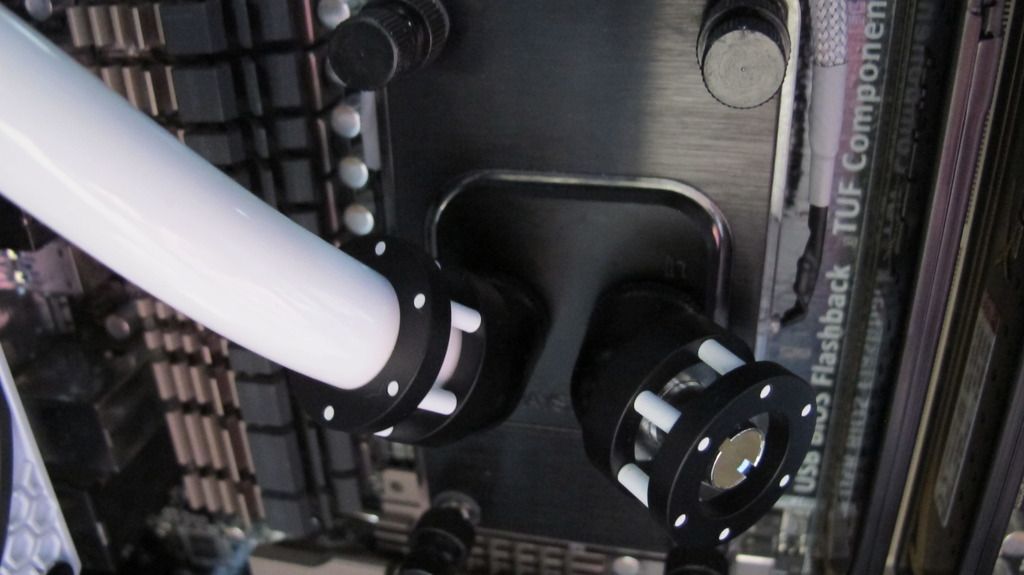
My impressions so far have been really good with them. They are a heavy, solid but of kit, and the styling really sets them apart from the standard compression styles of EK, XSPC etc, and the outer sleeves especially feel very well made. It would be great to get some feedback on how they look.
They were easy to use once I got over a little issue with the tubing.
I really struggled a little with the tightness of screwing them up with the Primochill tubing I had, but getting the micrometer on the tubing, it was 2mm too wide in places compared to the 16mm outer diameter.
A bit firmer and a bit of boiling water on the tubing and we got there
=========
So, onto the build.
I had previously ran the following loop since Dec 2011, with no issues with the Mayhems liquid stopping it's job, great stuff :
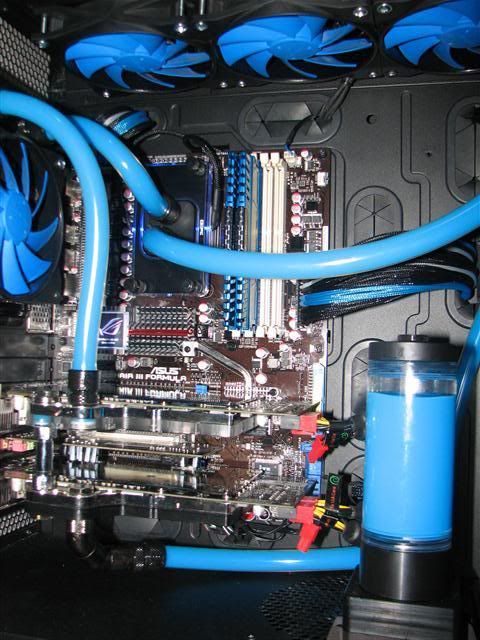
Still in the 800D, so the first job was to strip it all down, give the case a bloody good clean and look at the state of the blocks and parts of the loop to see what could be re-used.
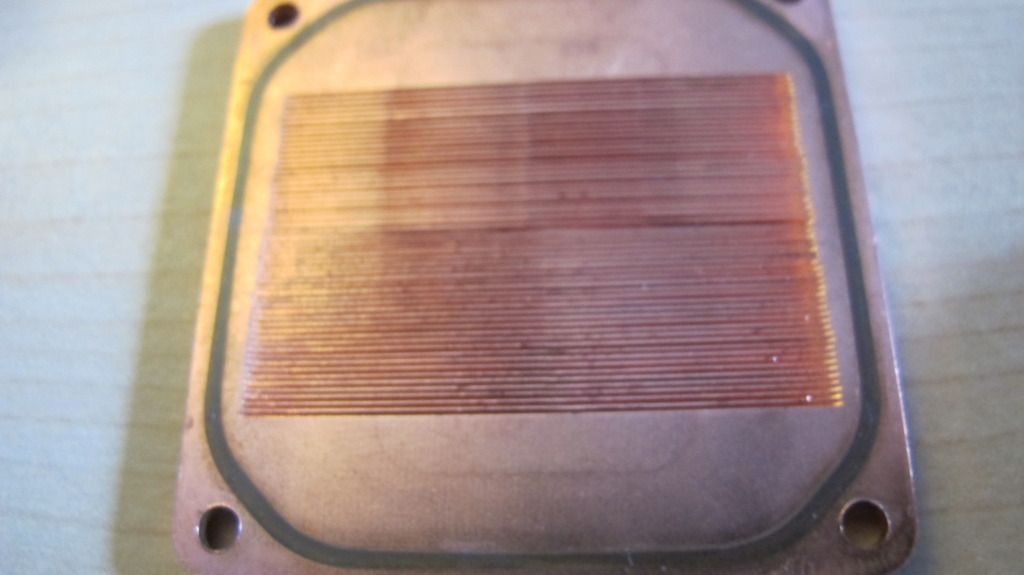
The CPU block came out in better shape than I thought:
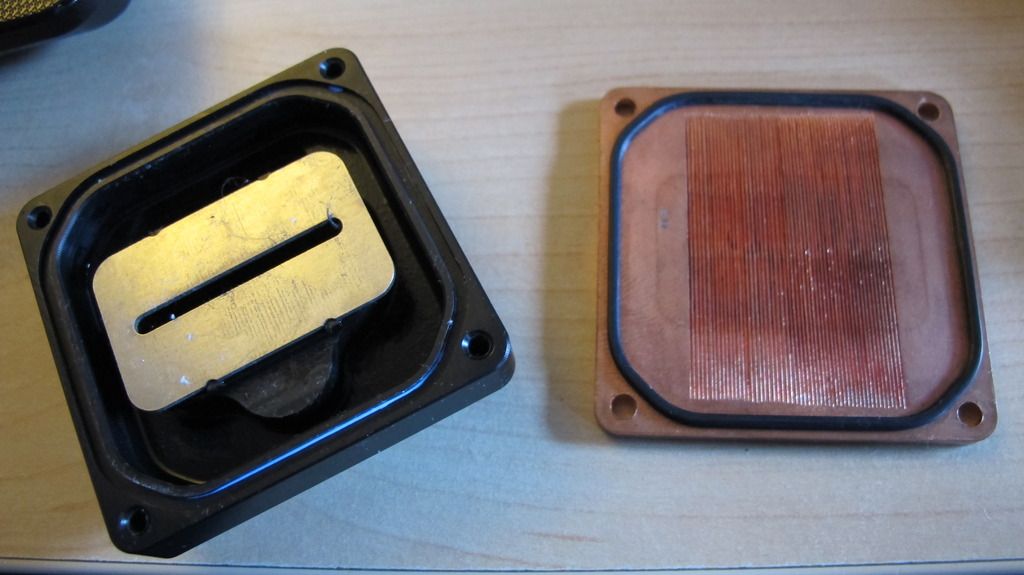

I was expecting all kinds of gunk in there after 3.5 years.... props to the Mayhems fluid. So a quick clean and polish of the outside later:

For the rest of the loop, it was reassembled outside of the system and water with a little vinegar ran for 4 hours to clean, then 2 separate lots of di-ionised water for 3 hours each to give the rads and pump a clean, plus the old GPU blocks to sell on.
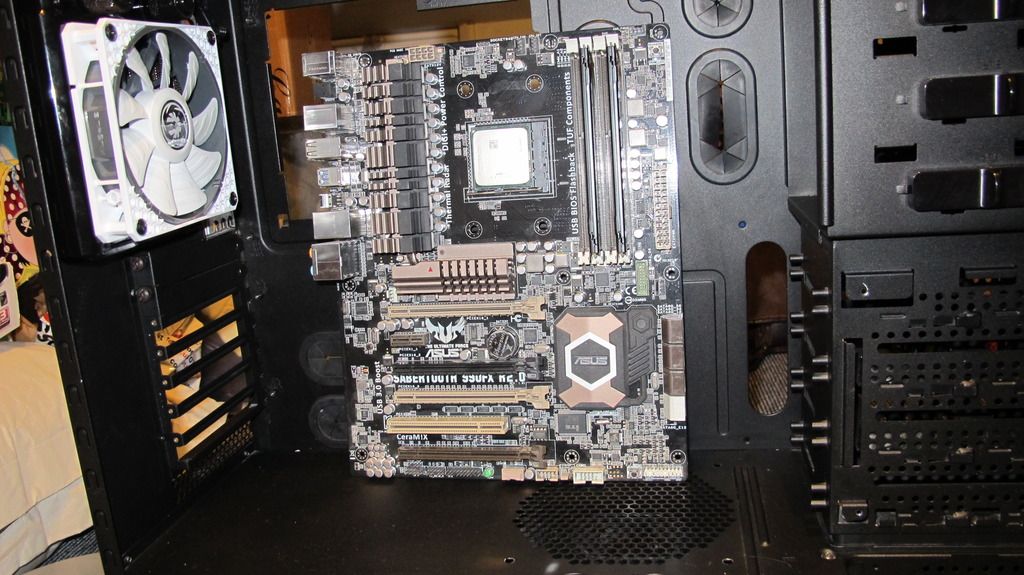
I then set about getting the mobo in the case and sizing up how the loop was going to flow:
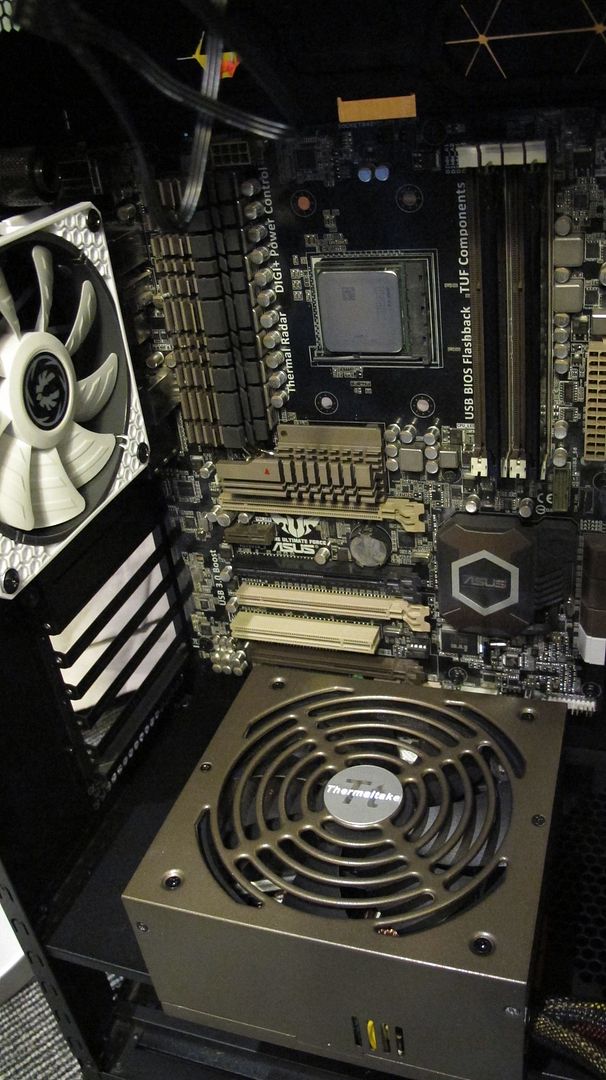
The Thermaltake 875w PSU is a great match for the Sabertooth mobo colours:
I also got the fans onto the 360 rad and cables sorted. This is the bulkiest item in the case and it needs to go in early to fti everything else around it. There's no other obvious place for a 360 rad other than the 800D ceiling.
Once the Mobo was in and I had a fair Idea where to fit the rest of the parts, I had to get some holes into the case. It occurs to be with hindsight that I should have taken the mobo back out of the case whilst drilling, metal shards/dust causing obvs shorting risk. One to remember for the future and a lucky escape.
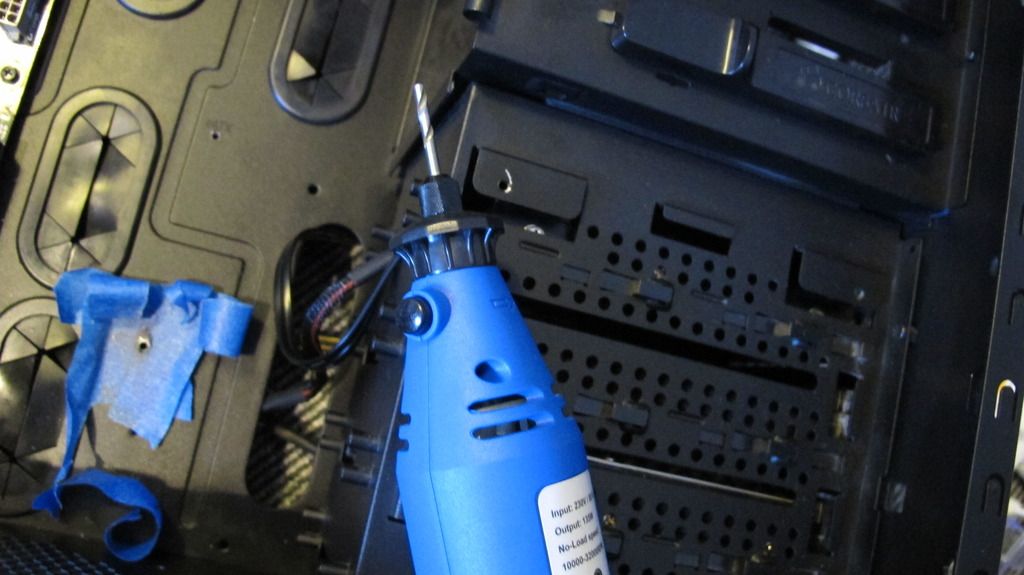
Also, I;ve had the 800D for a good 4 years but this is the first I've drilled this case. It is made like a tank and takes a lot more effort to get through than any other case I've drilled holes in!
Here, the tube radiator clamps are in, and holes for securing the DDC pump
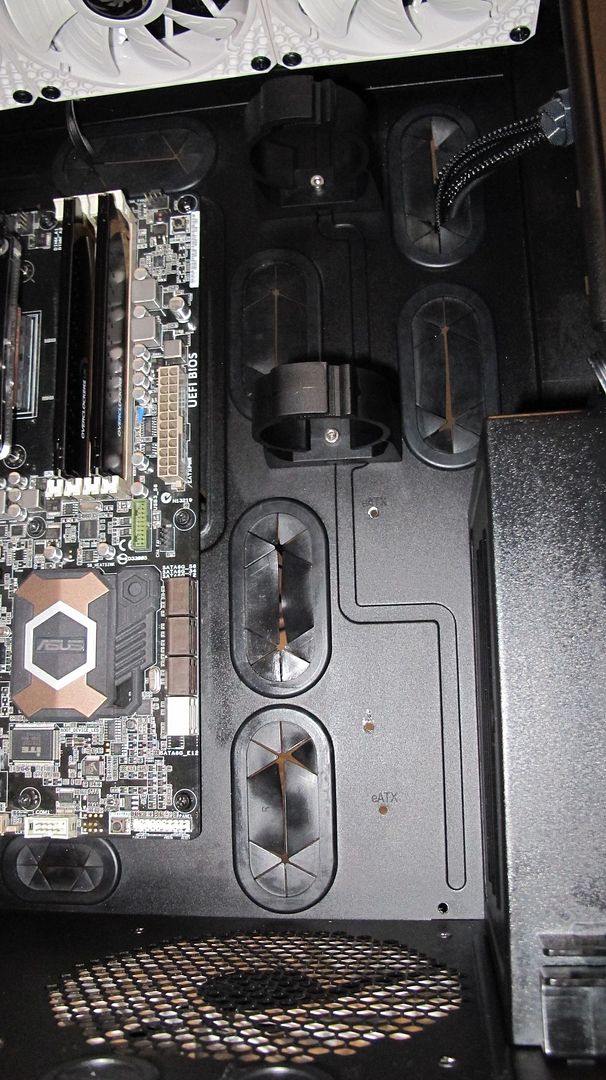
The intention is for the pump to be secured to the back of the case with it's output vertically up towards the top 360 rad
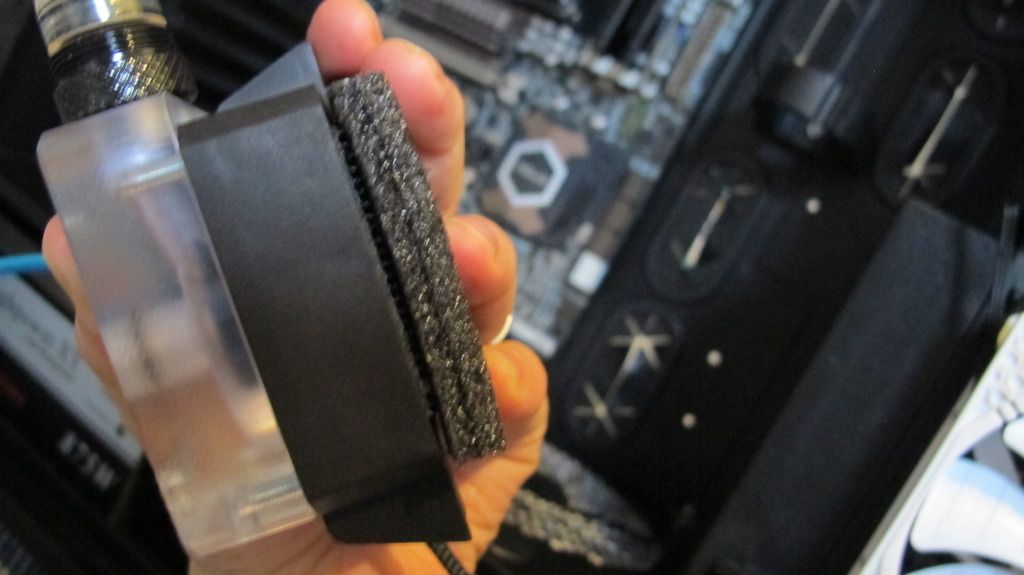 .
.
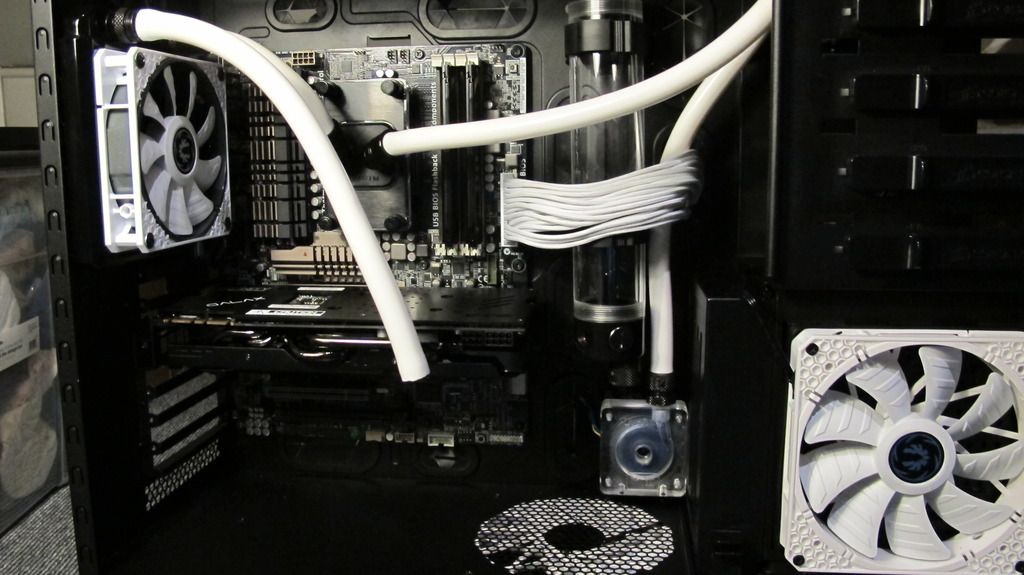
A quick test and the shape is roughly as so:
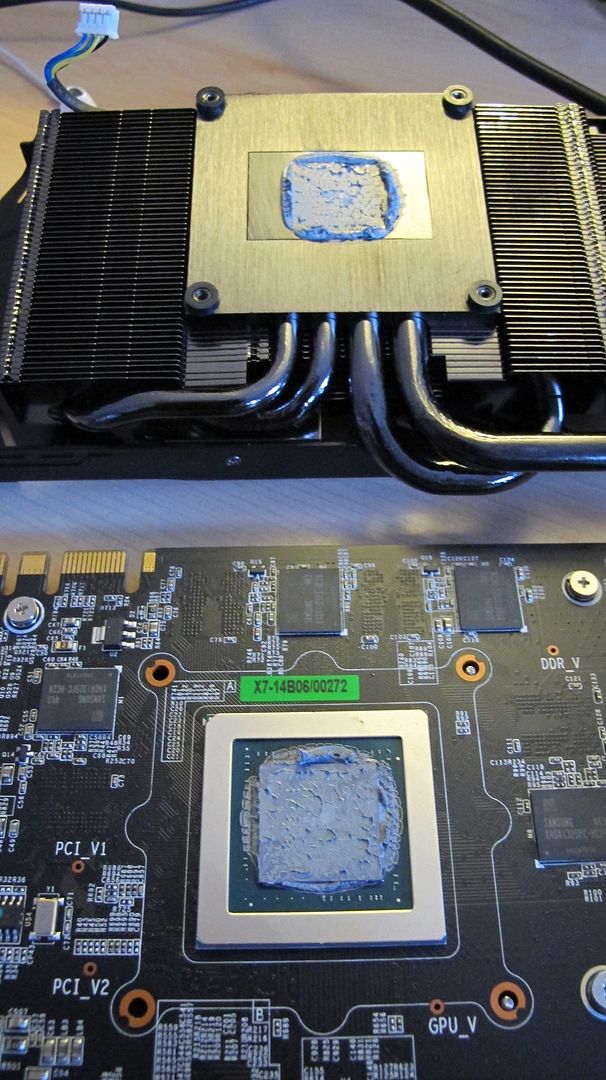
Next up are the GPUs. Fans off, that's a load of TIM they get on there at Galax/KFA2.

Then cleaned up and adding on the heatsinks to the Ram and chips
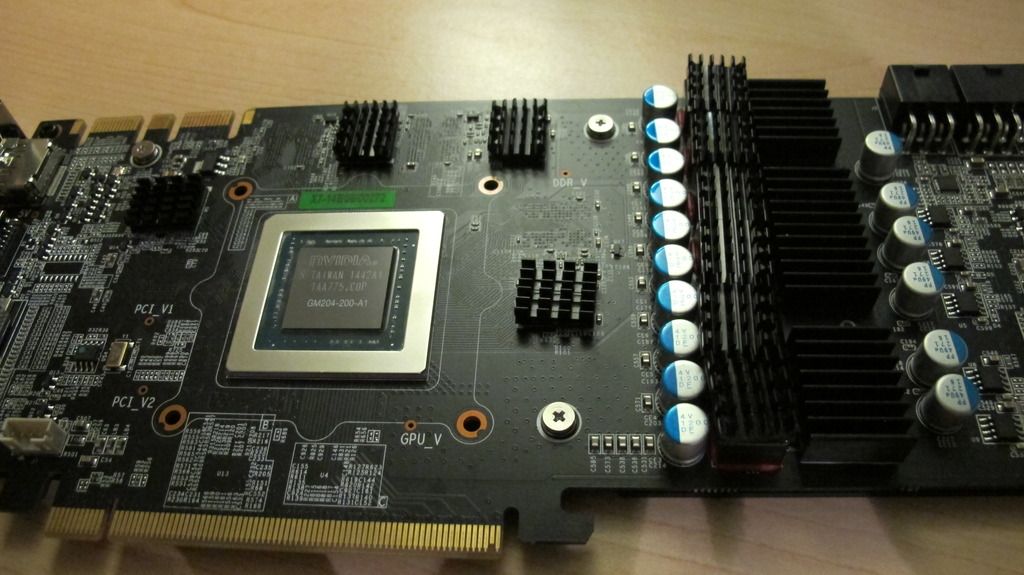
and block on:
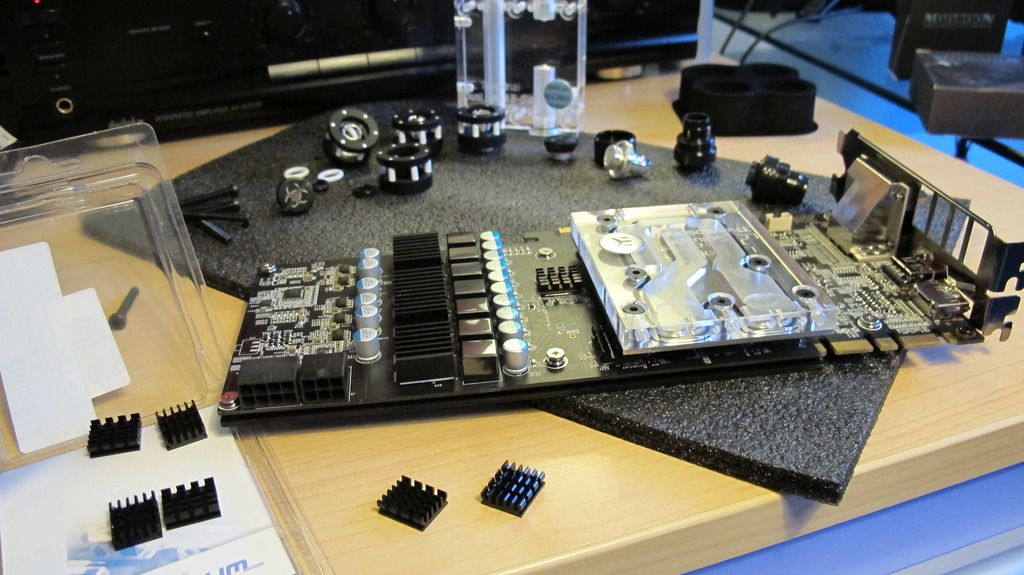
This is the EM Thermosphere block as they canned any plans for a full cover block on the infin8.
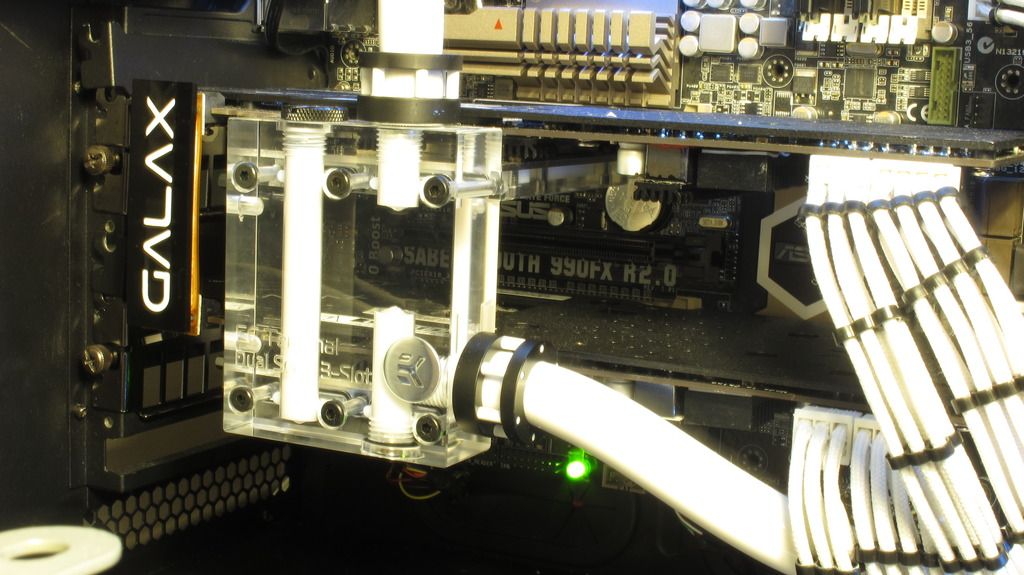
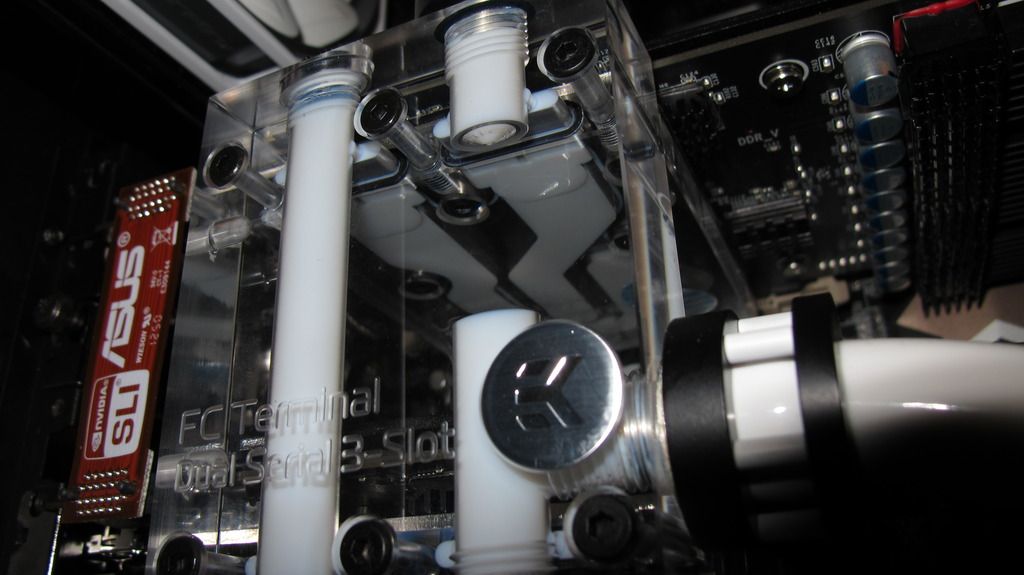
The cards will be bridged with an EK FC terminal.

Now I have to think to myself maybe I err'd with going for the clear plexi bridge. On other builds I've always really enjoyed seeing the fluid through the plexi. With hindsight maybe this would look better with the black terminals..... I'll see how I get on with it.
Thermosphere block ends removed:
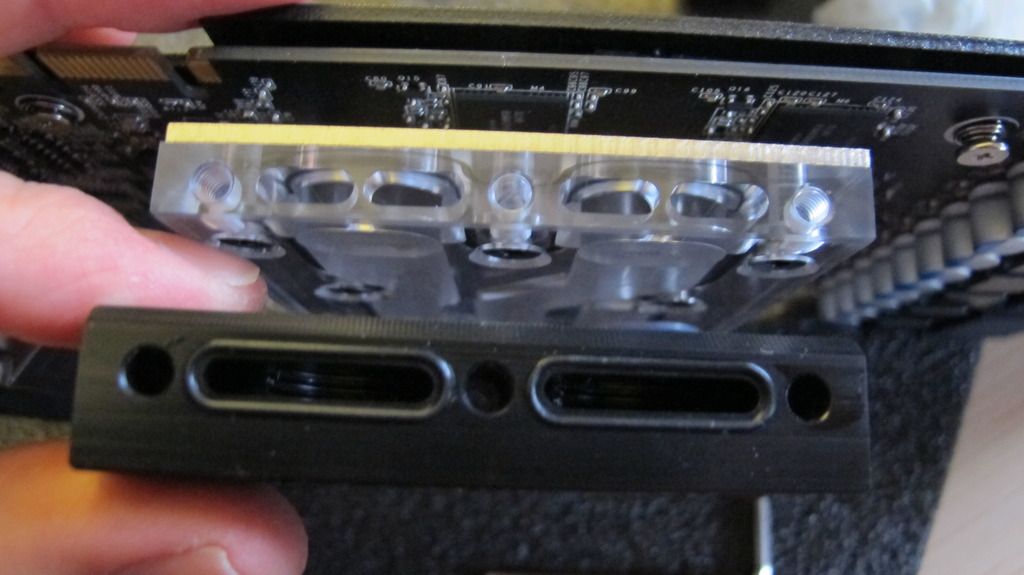
Block on, a quick test, and Nooooooooooooooooooooo!
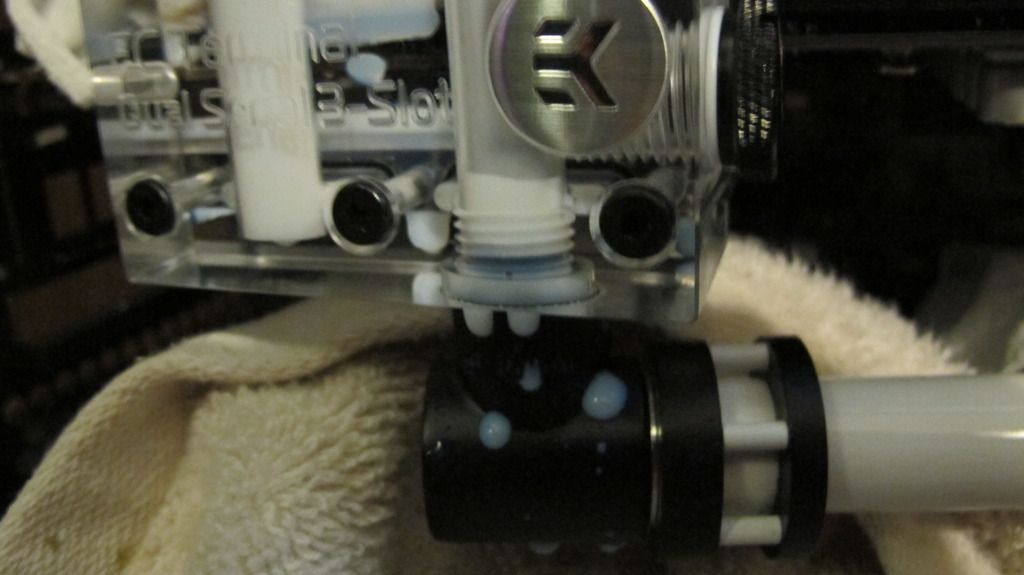
The first of a few leaks until I got used to how tight these Hardline fittings needed to be treated with the Primchill tubing.
And bridge done!
----
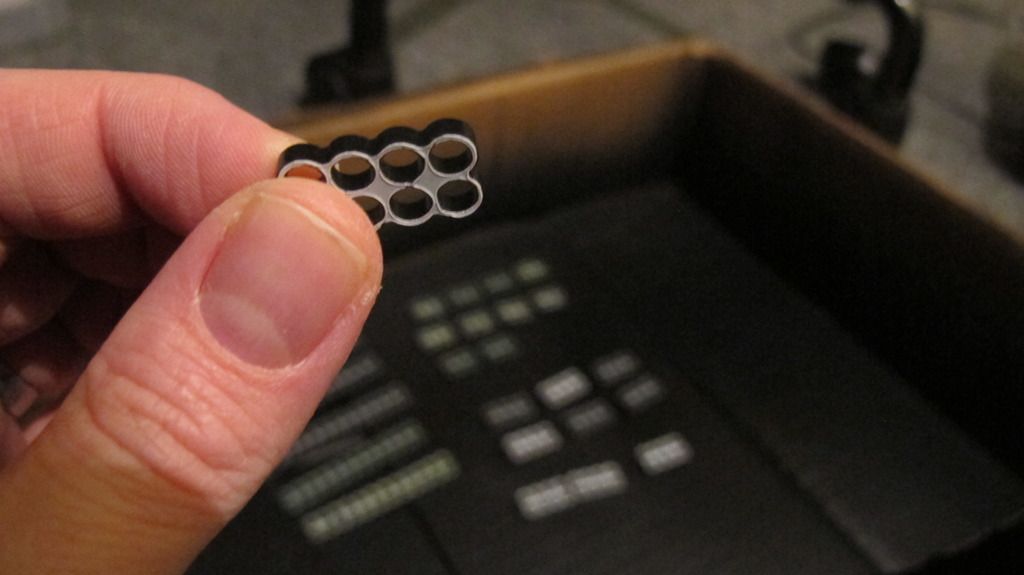
Next up was the cabling and stealth combs. The cabling is white, with white socket ends and black stealth cable combs for the contrast and keeping the cables looking very 2015. When I first got the cable combs I was disappointed at the quality.
I mean, look.... they are not all black, the edges are rough and look poorely manufactured:
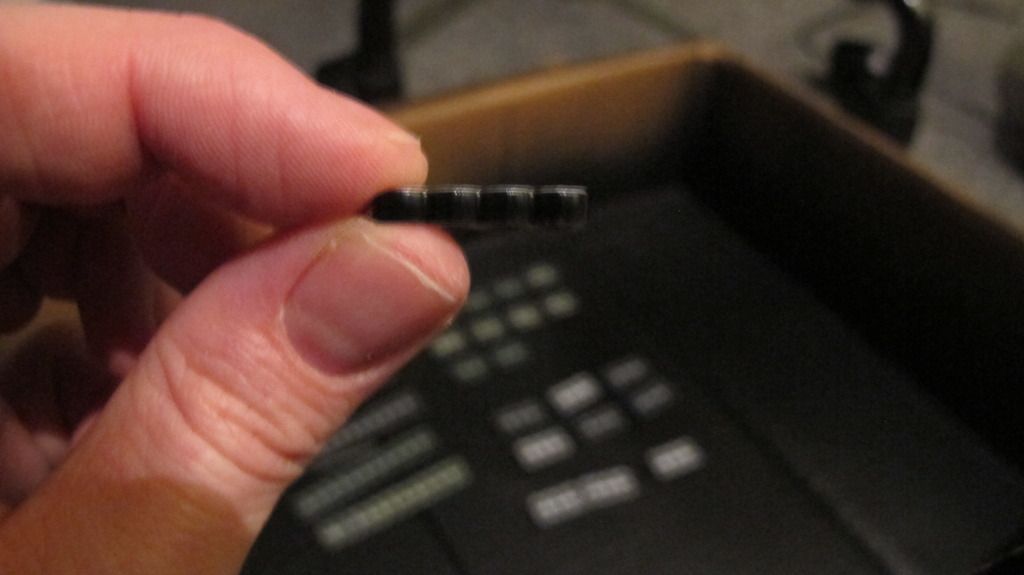
I'm not having any of that.... so they get sprayed with Plastokote
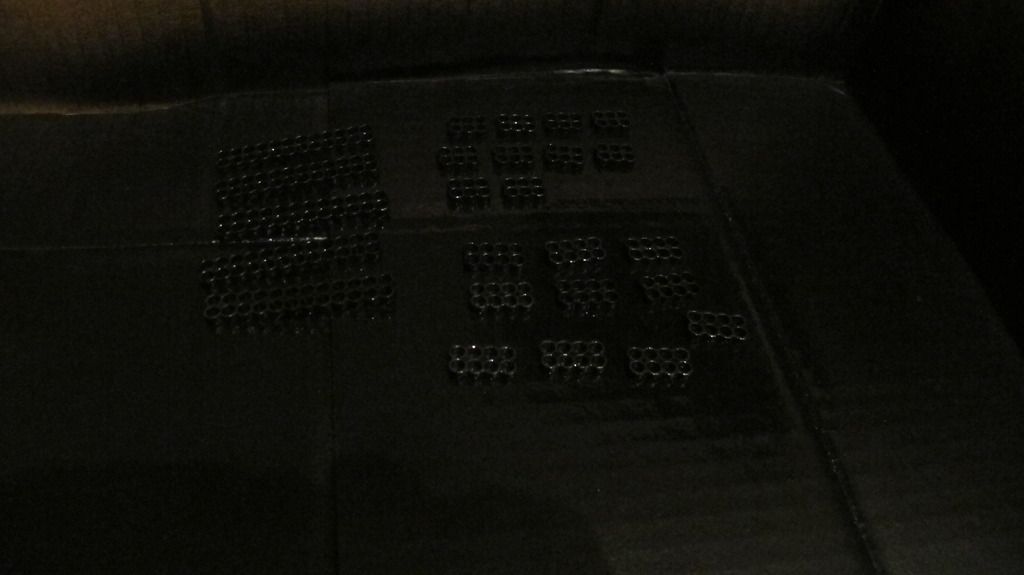
oooh....... waaaaaaait........ whaaaaaaaaat? That's not white, they aren't poorely finished, that's just the protective temporary plastic coating....
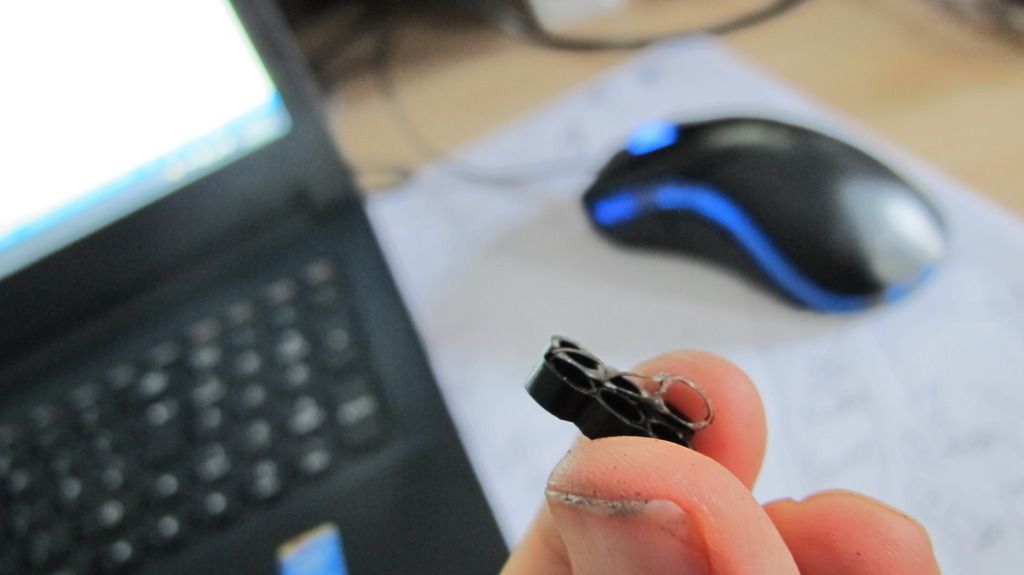
what a dick!.... the combs were fine.
a few mins later....

Using some hammered and machine filed down iphone SIM keys, the best thing I've found for cable pin removal, and we are on track with the cable combing
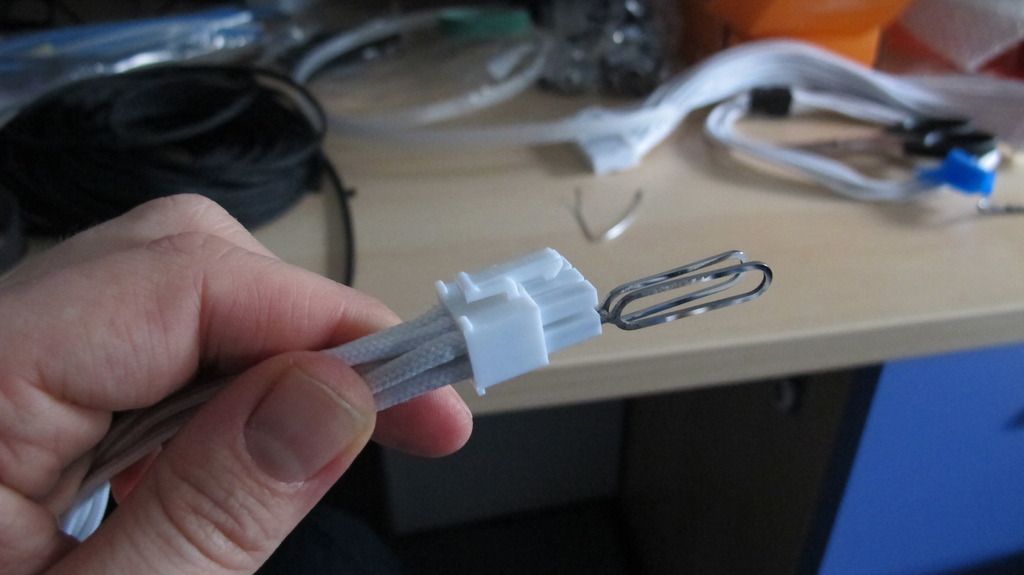
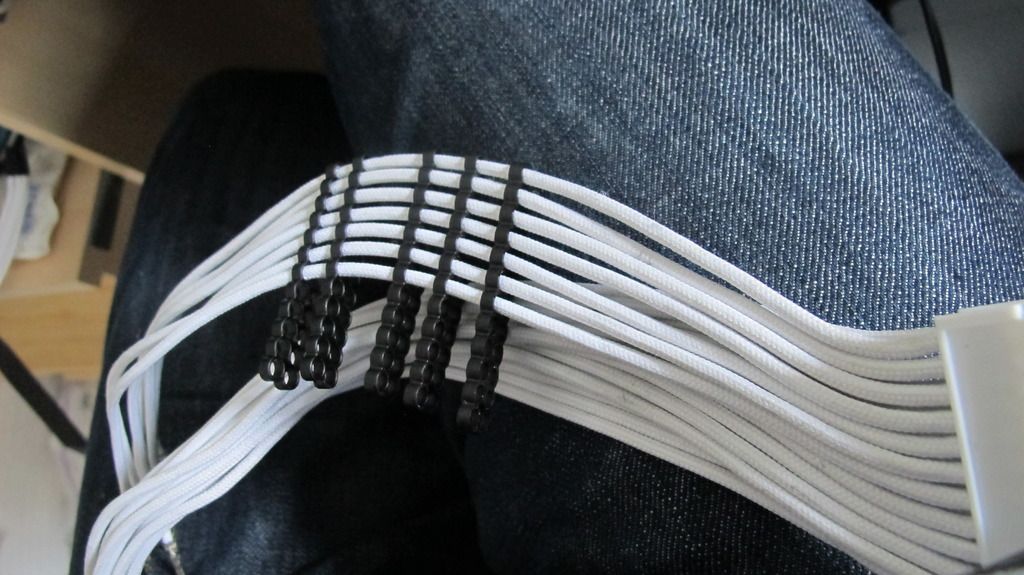
I also got the following SLI bridge cover done. I just can't take to any of the main SLI bridges on the market... both EVGA, ASUS etc all look a bit garish and OTT.
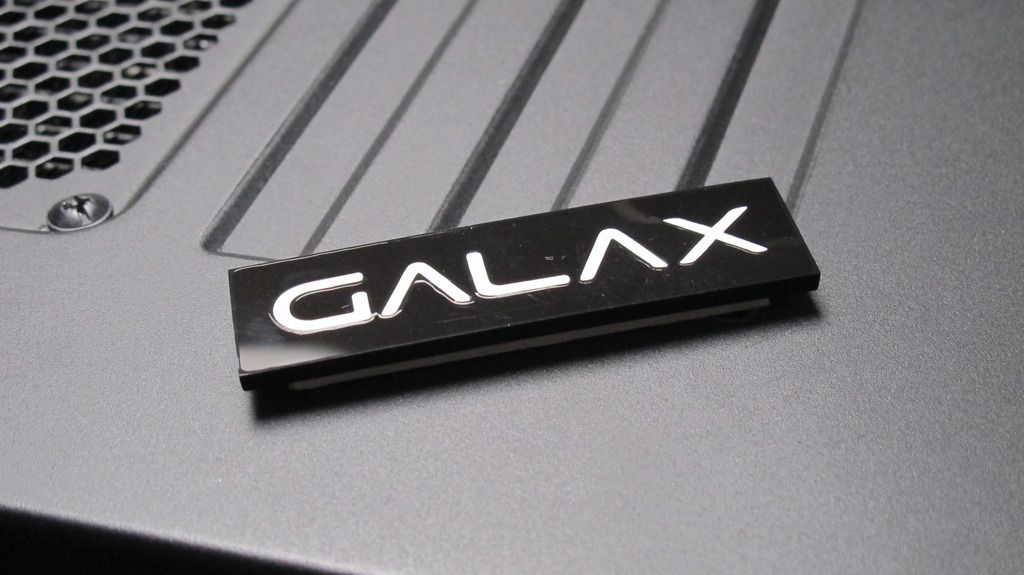
This should just stick right over the ribbon cable...... and was £4 from the e - bay.
And that's most of the prep done! Time to start putting it all together!
--------------
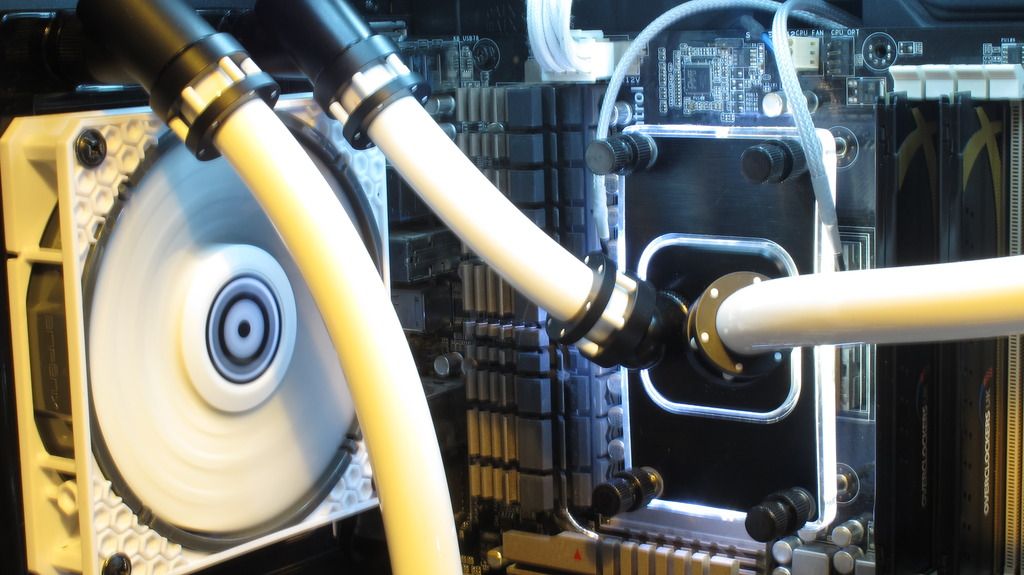
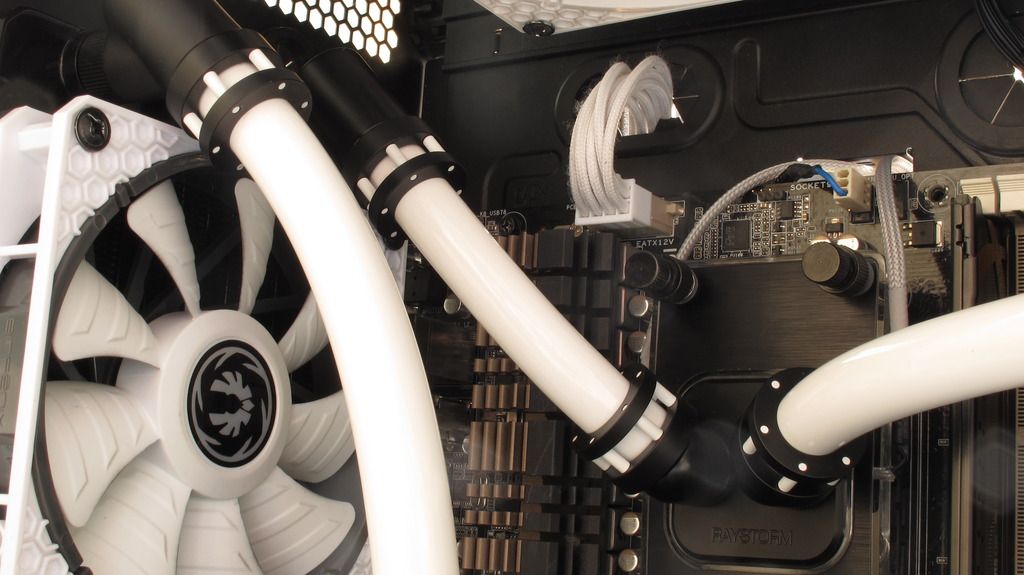
The Monsoon Chaingun fittings are large, so if you are considering them, you may need some extra fittings. A good example is attaching the fittings to the 360 rad at the roof of the case. There would have been no room next to the fans to put the compression fittings. Instead I used the 45 degree fittings to both lift the fitting point off the radiator and point the cable back into the case. Still a close fit!


CPU block done:
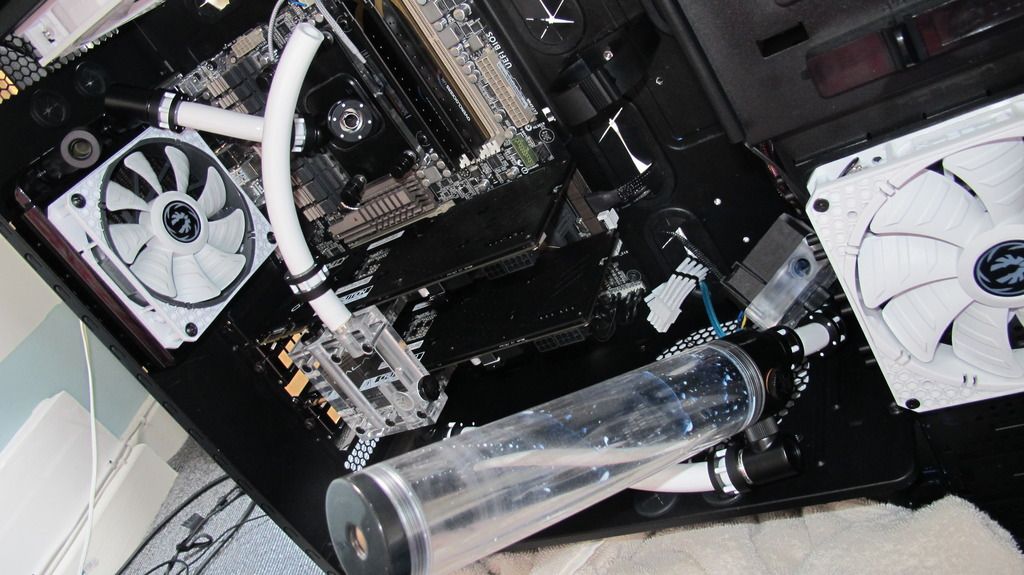
into the GPU bridge
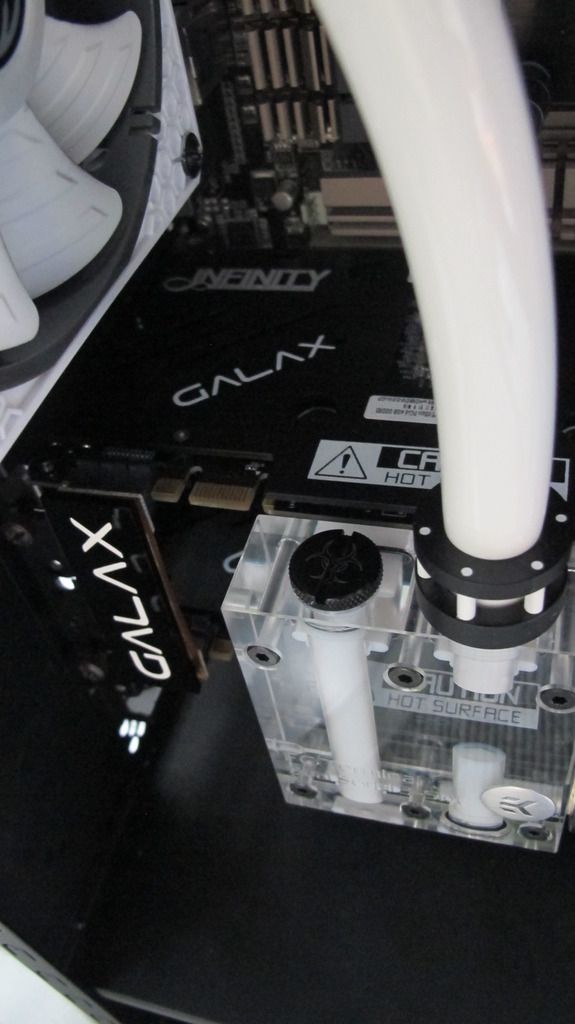
and start filling the loop!
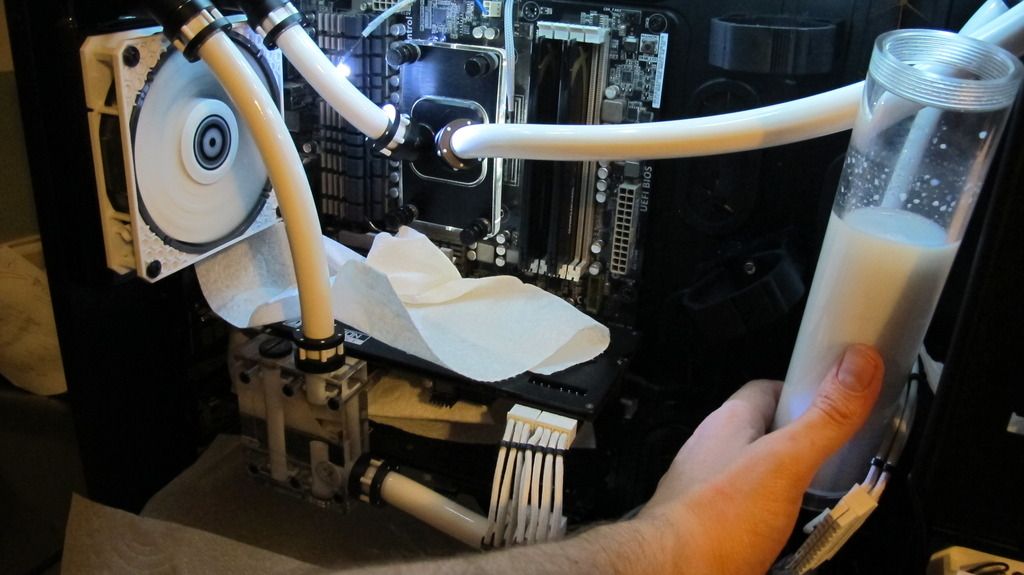
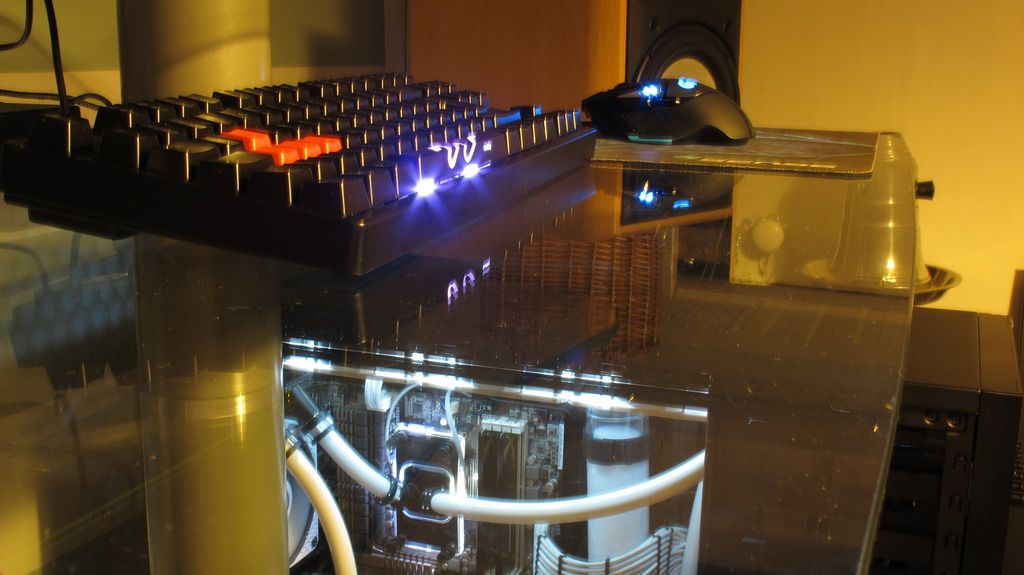
And there we go, more or less done!
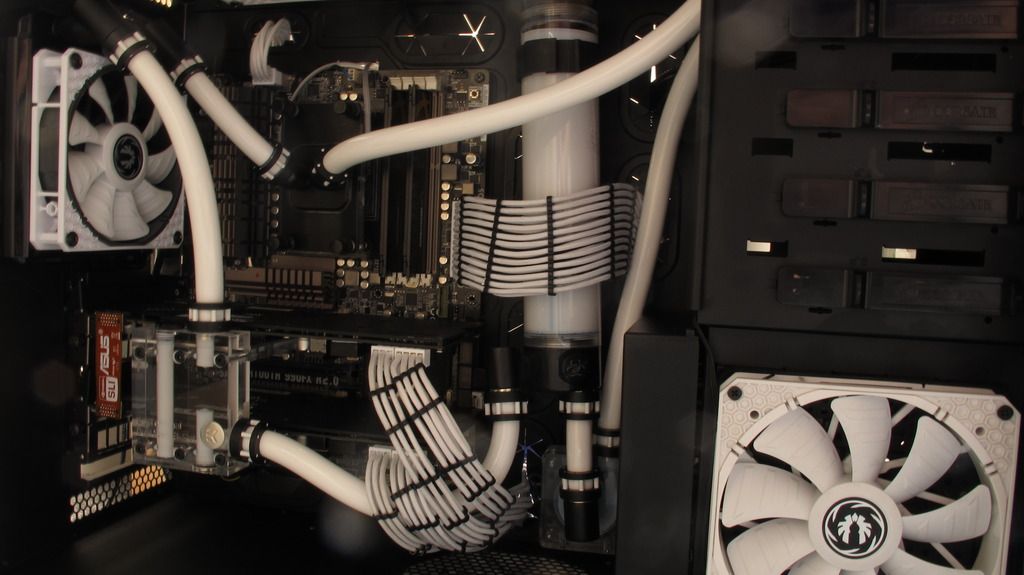
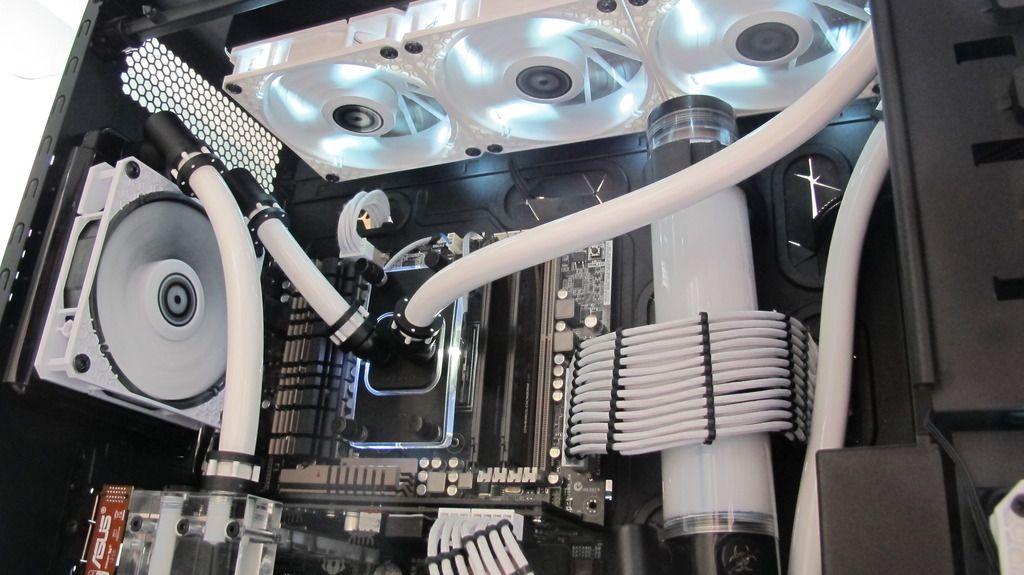
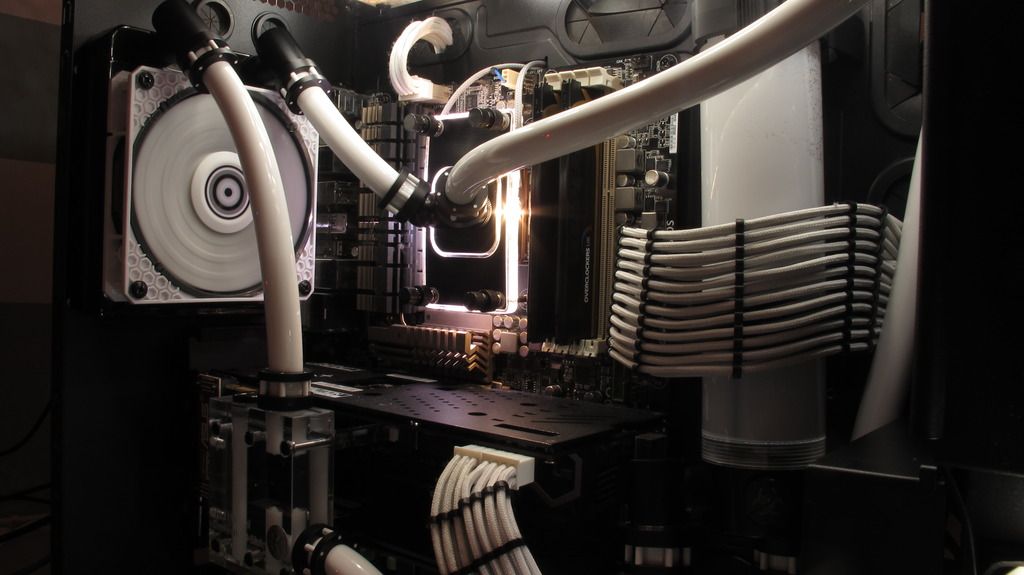
----
I'll follow up with some decent pics of the fittings, loop, case etc in the next post and some benching after. Cheers!
No Ying Yang really.....
 I'm not into that far-out kinda travelling, this project rig is going to be black and white with the Ying of the AMD CPU to the Yang of the Nvidia GPUs
The Teamsheet:
Corsair 800D Case
AMD FX8350
Asus Sabertooth 990X R2 Mobo
KFA2 Galax Infin8 Back 970s SLI
Kingston HyperX 8GB 2133MHz OCUK edition RAM
Intel Jackson Ridge OC'd SSD
1TB Other HD
XSPC Raystorm CPU Block
Hardware Labs Stealth 120mm Rad
XSPC 360mm Rad
Laing 18W DDC-Pump with Clear Top
Monsoon Chaingun Range
Primochill 16/11 White Tubing
Mayhems White Pastel Fluid
Primochill Tube resevoir
AOC Gsync Monitor
Ducky Shine3 TKL / Cherry Mini Mech Keyboard experiment
Logitech G502 Mouse
Roccat Kave XTD Cans
With the kind Sponsorship of OCUK - Monsoon for all the fittings
==============================
So, I was in the middle of upgrading and reassembling my loop and was lucky enough to be picked out of rjkoneill's thread here to receive some Monsoon fittings and give the chain gun compressions a good going over to see how they come out
(they are bloody great btw).
Sponsorship offer thread.
http://forums.overclockers.co.uk/showthread.php?t=18658865
I had already decided on the spec and the colour scheme of the plan and was potching about cleaning and reassembling/planning the rig when I got the nod that I would be included for the Monsoon fitting sponsorship.
So, let's take a look at some of the Monsoon hardline fittings themselves before I get into the build. I'm not a pro reviewer/photograher just an average guy so excuse the layman look at the parts!
I received:
12 x Monsoon Chain Gun Fitting 3/8" x 5/8" Multi Pack - White
(WC-168-MO - CGF-3858-4-WH)
4 x Monsoon 16/10mm (OD 5/8) Rotary 45° - Matte Black
(WC-112-MO - MON-RO-45-58-MB)
2 x Monsoon 16/10mm (OD 5/8) Rotary 90° - Matte Black
(WC-102-MO - MON-RO-90-58-MB)


If anyone is wondering how they work, you can probably tell from the following pic, it's a standard compression set-up with the inner barb and then the outer sleeve. It's the outer sleeve that has taken a daring and different design, but works really well.


The black and white matching quite nicely with the backplate of the Infin8 970 card:

and in action:


My impressions so far have been really good with them. They are a heavy, solid but of kit, and the styling really sets them apart from the standard compression styles of EK, XSPC etc, and the outer sleeves especially feel very well made. It would be great to get some feedback on how they look.
They were easy to use once I got over a little issue with the tubing.
I really struggled a little with the tightness of screwing them up with the Primochill tubing I had, but getting the micrometer on the tubing, it was 2mm too wide in places compared to the 16mm outer diameter.
A bit firmer and a bit of boiling water on the tubing and we got there
=========
So, onto the build.
I had previously ran the following loop since Dec 2011, with no issues with the Mayhems liquid stopping it's job, great stuff :

Still in the 800D, so the first job was to strip it all down, give the case a bloody good clean and look at the state of the blocks and parts of the loop to see what could be re-used.
The CPU block came out in better shape than I thought:


I was expecting all kinds of gunk in there after 3.5 years.... props to the Mayhems fluid. So a quick clean and polish of the outside later:


For the rest of the loop, it was reassembled outside of the system and water with a little vinegar ran for 4 hours to clean, then 2 separate lots of di-ionised water for 3 hours each to give the rads and pump a clean, plus the old GPU blocks to sell on.
I then set about getting the mobo in the case and sizing up how the loop was going to flow:

The Thermaltake 875w PSU is a great match for the Sabertooth mobo colours:

I also got the fans onto the 360 rad and cables sorted. This is the bulkiest item in the case and it needs to go in early to fti everything else around it. There's no other obvious place for a 360 rad other than the 800D ceiling.
Once the Mobo was in and I had a fair Idea where to fit the rest of the parts, I had to get some holes into the case. It occurs to be with hindsight that I should have taken the mobo back out of the case whilst drilling, metal shards/dust causing obvs shorting risk. One to remember for the future and a lucky escape.

Also, I;ve had the 800D for a good 4 years but this is the first I've drilled this case. It is made like a tank and takes a lot more effort to get through than any other case I've drilled holes in!
Here, the tube radiator clamps are in, and holes for securing the DDC pump

The intention is for the pump to be secured to the back of the case with it's output vertically up towards the top 360 rad
 .
.A quick test and the shape is roughly as so:

Next up are the GPUs. Fans off, that's a load of TIM they get on there at Galax/KFA2.


Then cleaned up and adding on the heatsinks to the Ram and chips

and block on:

This is the EM Thermosphere block as they canned any plans for a full cover block on the infin8.
The cards will be bridged with an EK FC terminal.

Now I have to think to myself maybe I err'd with going for the clear plexi bridge. On other builds I've always really enjoyed seeing the fluid through the plexi. With hindsight maybe this would look better with the black terminals..... I'll see how I get on with it.
Thermosphere block ends removed:

Block on, a quick test, and Nooooooooooooooooooooo!

The first of a few leaks until I got used to how tight these Hardline fittings needed to be treated with the Primchill tubing.
And bridge done!

----
Next up was the cabling and stealth combs. The cabling is white, with white socket ends and black stealth cable combs for the contrast and keeping the cables looking very 2015. When I first got the cable combs I was disappointed at the quality.
I mean, look.... they are not all black, the edges are rough and look poorely manufactured:


I'm not having any of that.... so they get sprayed with Plastokote

oooh....... waaaaaaait........ whaaaaaaaaat? That's not white, they aren't poorely finished, that's just the protective temporary plastic coating....

what a dick!.... the combs were fine.
a few mins later....

Using some hammered and machine filed down iphone SIM keys, the best thing I've found for cable pin removal, and we are on track with the cable combing


I also got the following SLI bridge cover done. I just can't take to any of the main SLI bridges on the market... both EVGA, ASUS etc all look a bit garish and OTT.

This should just stick right over the ribbon cable...... and was £4 from the e - bay.
And that's most of the prep done! Time to start putting it all together!
--------------
The Monsoon Chaingun fittings are large, so if you are considering them, you may need some extra fittings. A good example is attaching the fittings to the 360 rad at the roof of the case. There would have been no room next to the fans to put the compression fittings. Instead I used the 45 degree fittings to both lift the fitting point off the radiator and point the cable back into the case. Still a close fit!


CPU block done:


into the GPU bridge

and start filling the loop!

And there we go, more or less done!


----
I'll follow up with some decent pics of the fittings, loop, case etc in the next post and some benching after. Cheers!
Last edited:


