PWC: Project White Craze

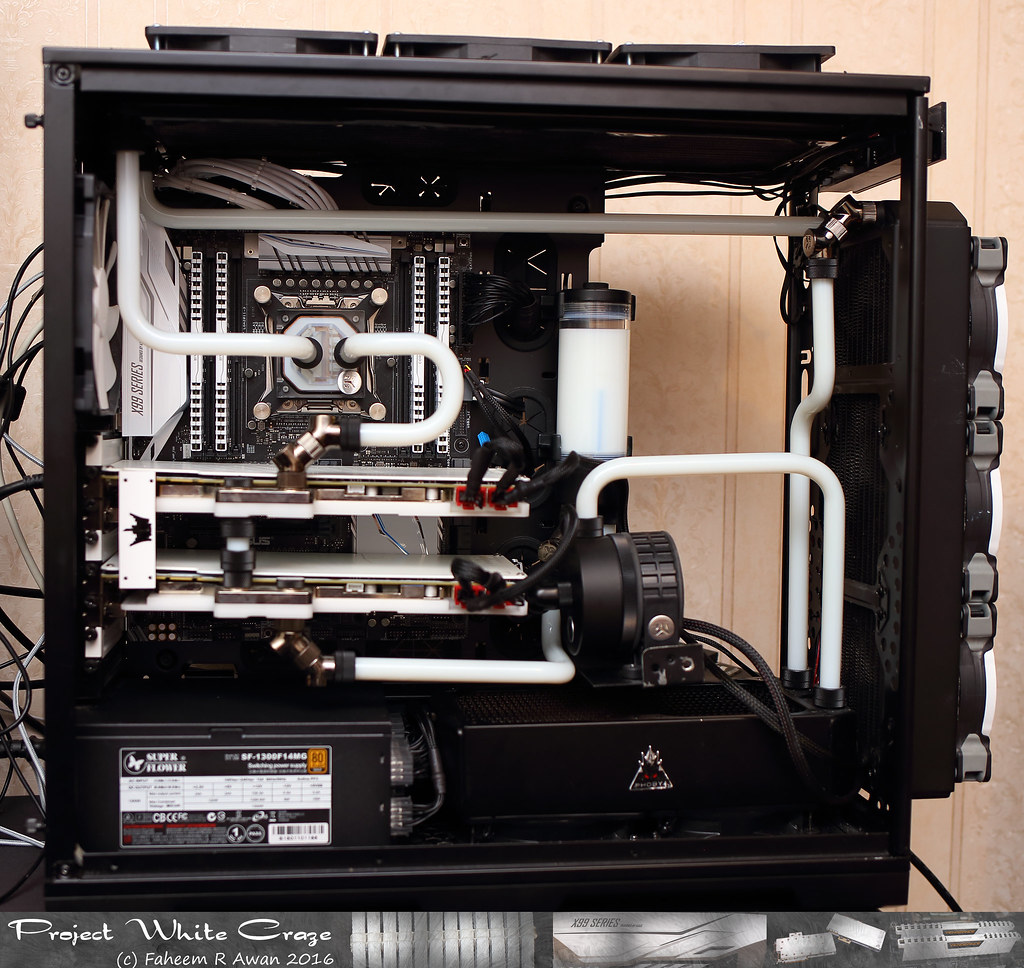
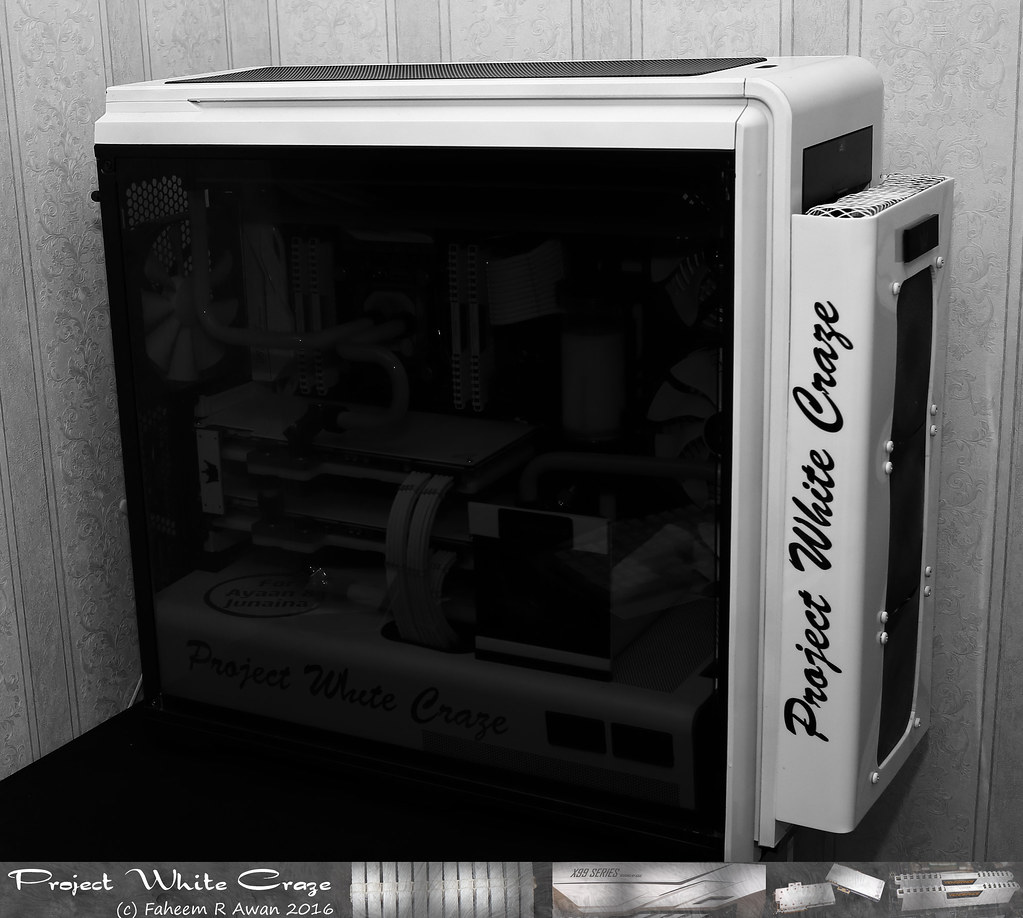
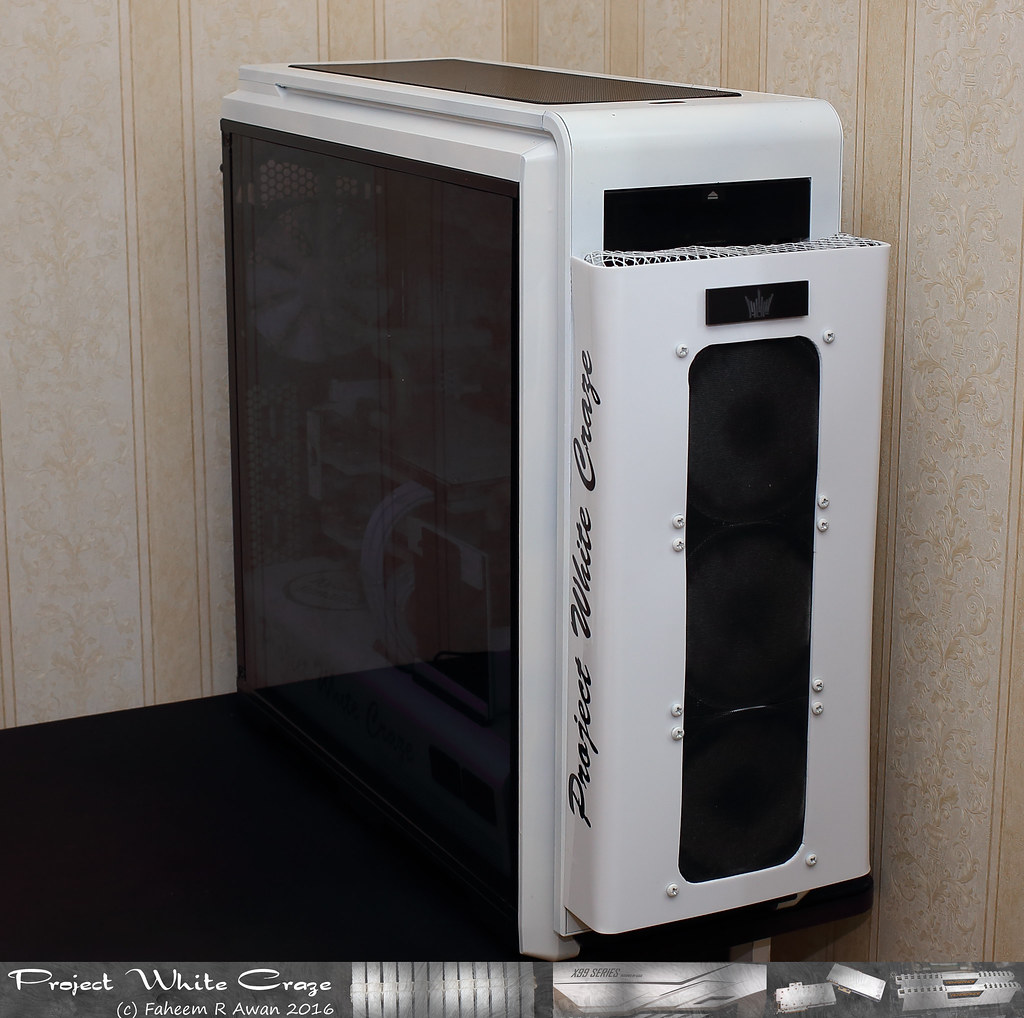
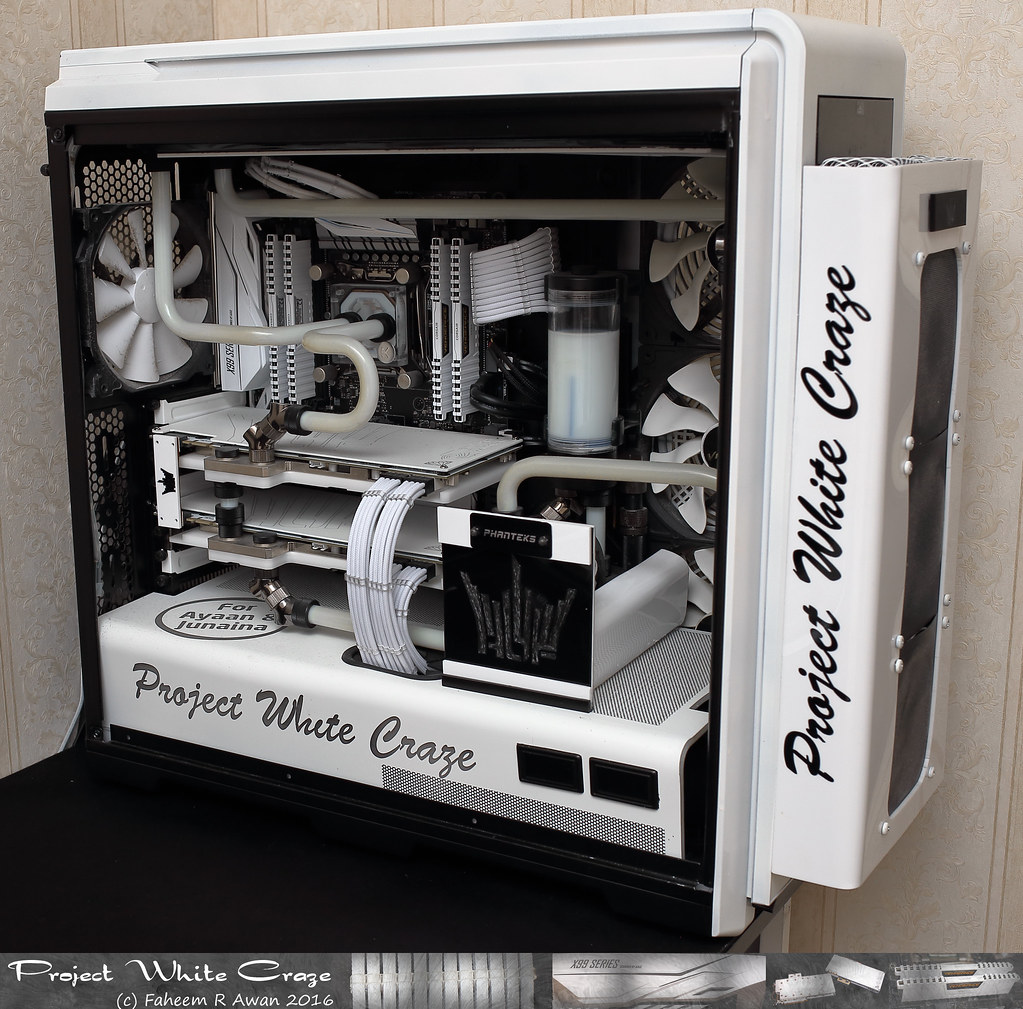
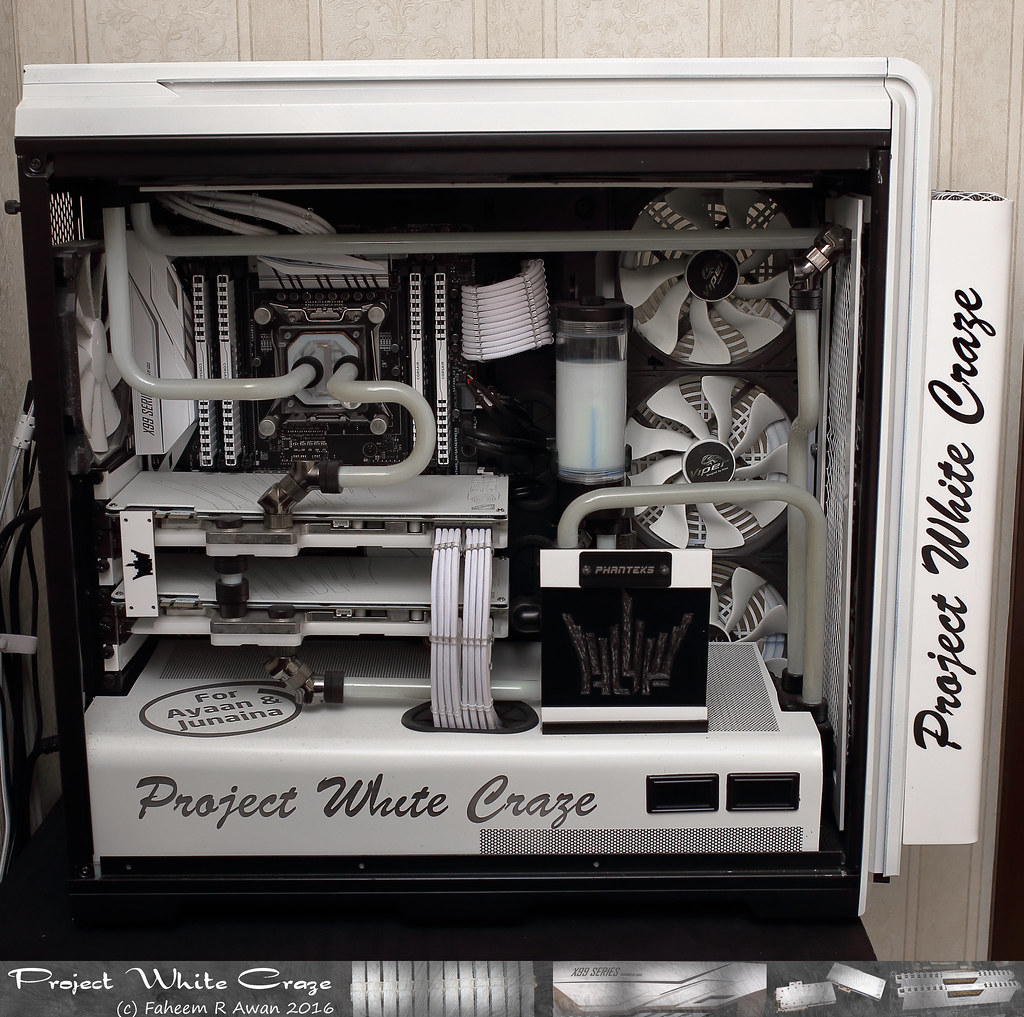
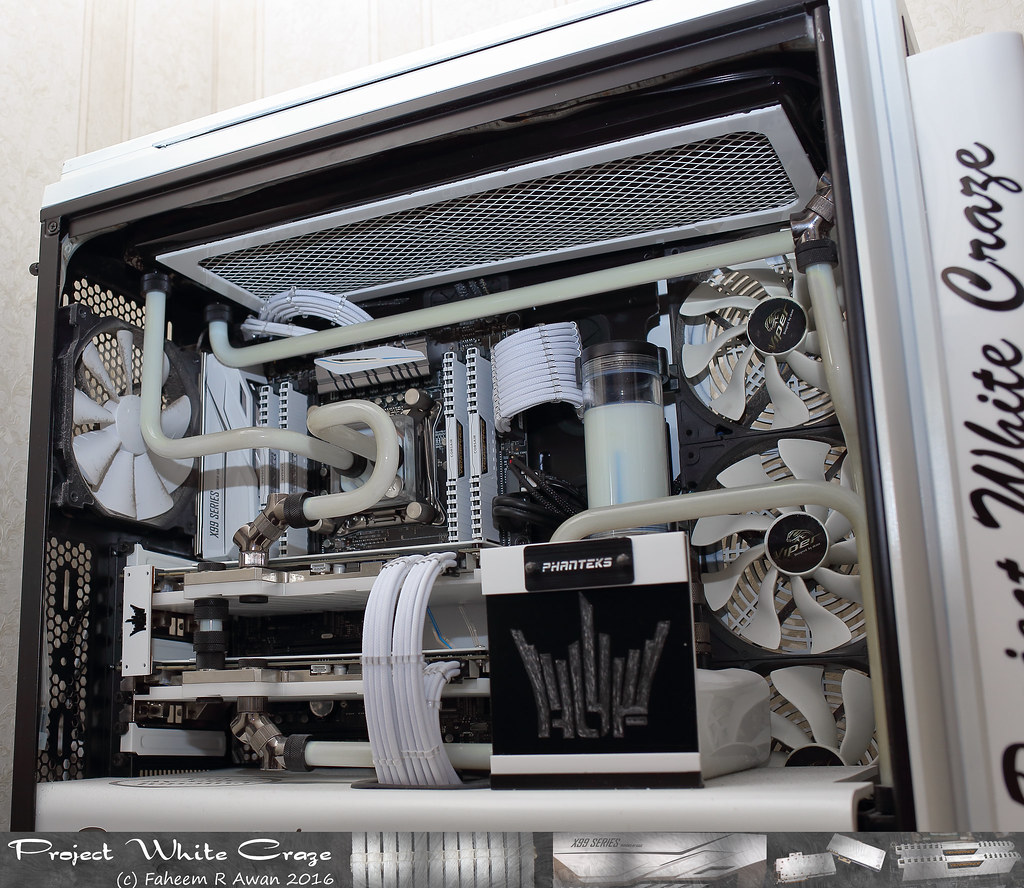
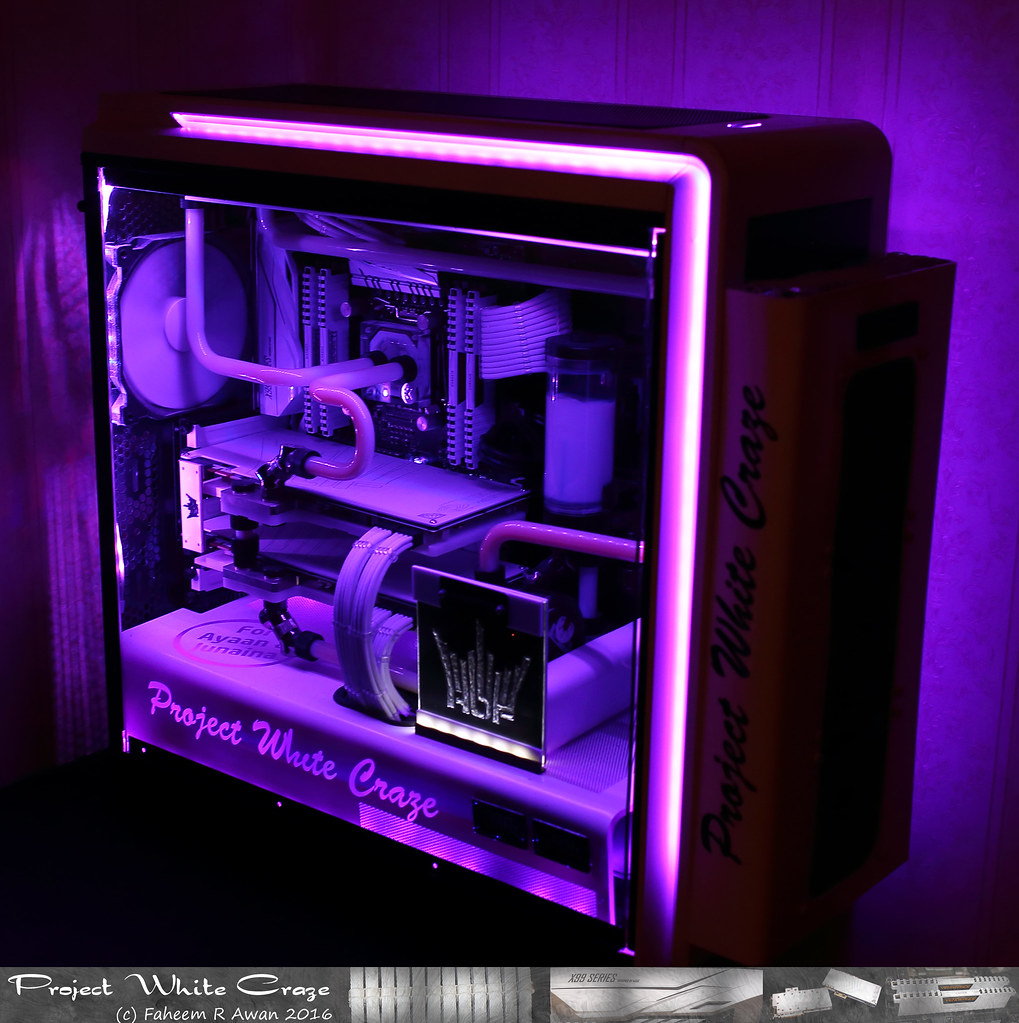
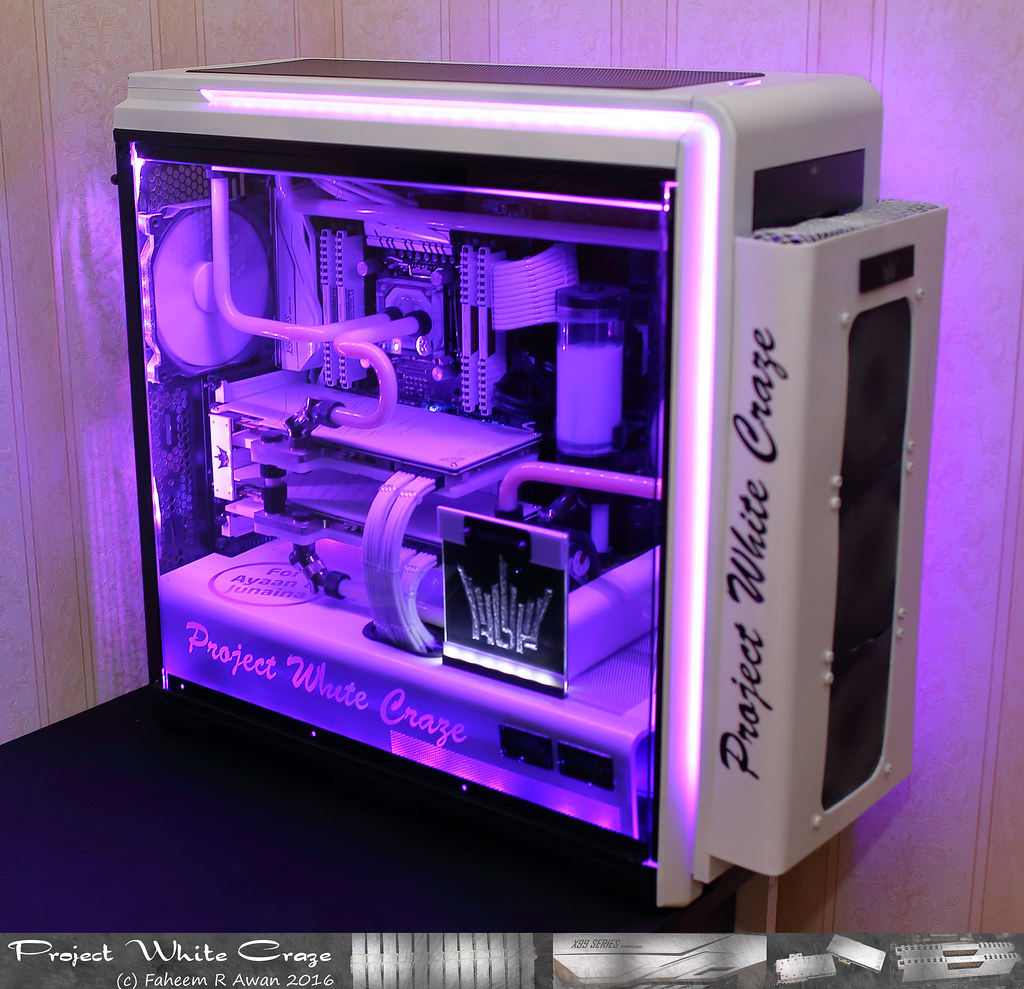
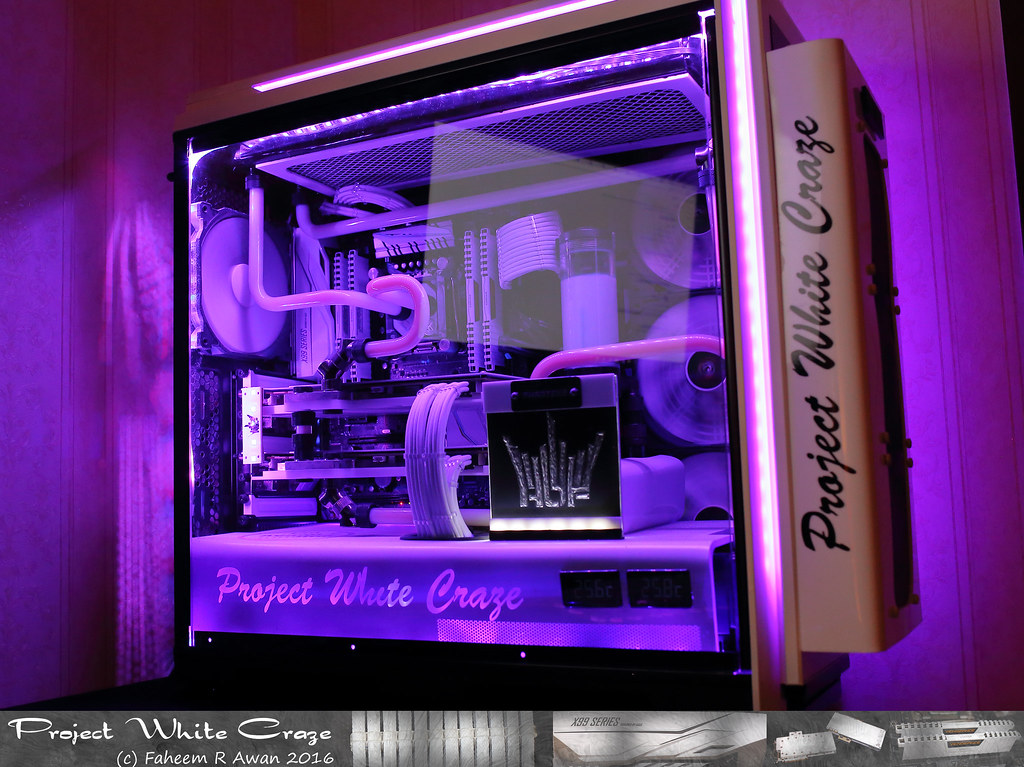
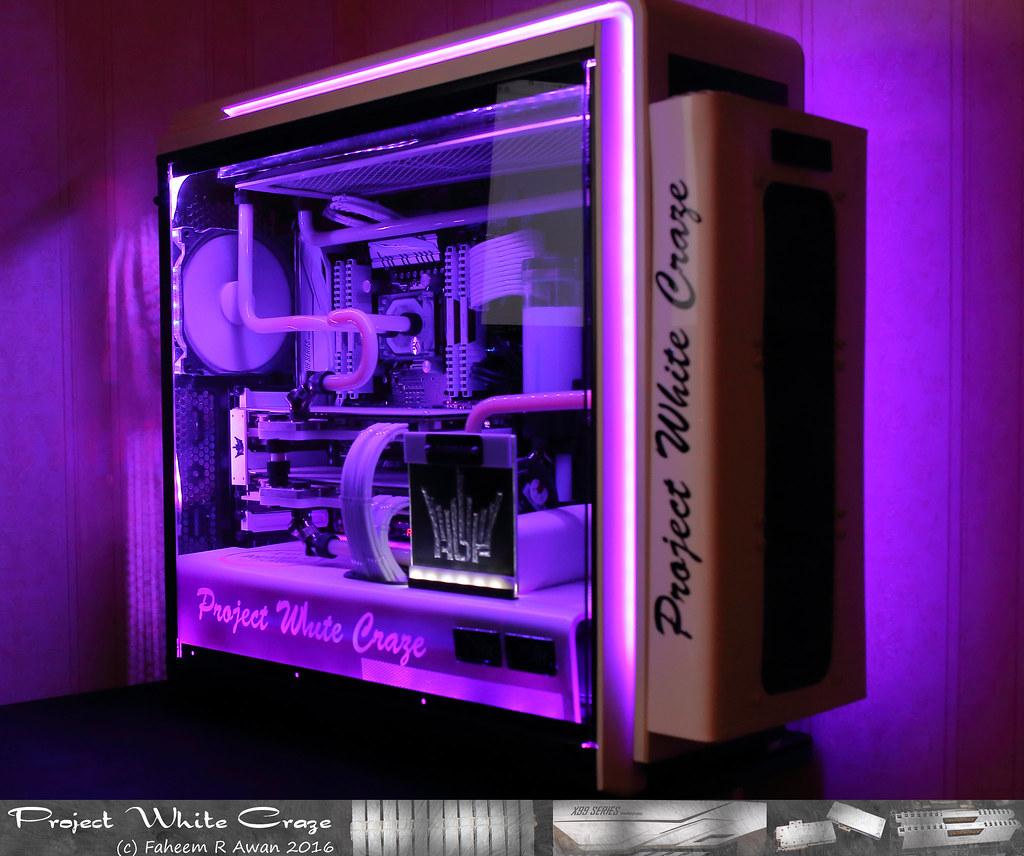
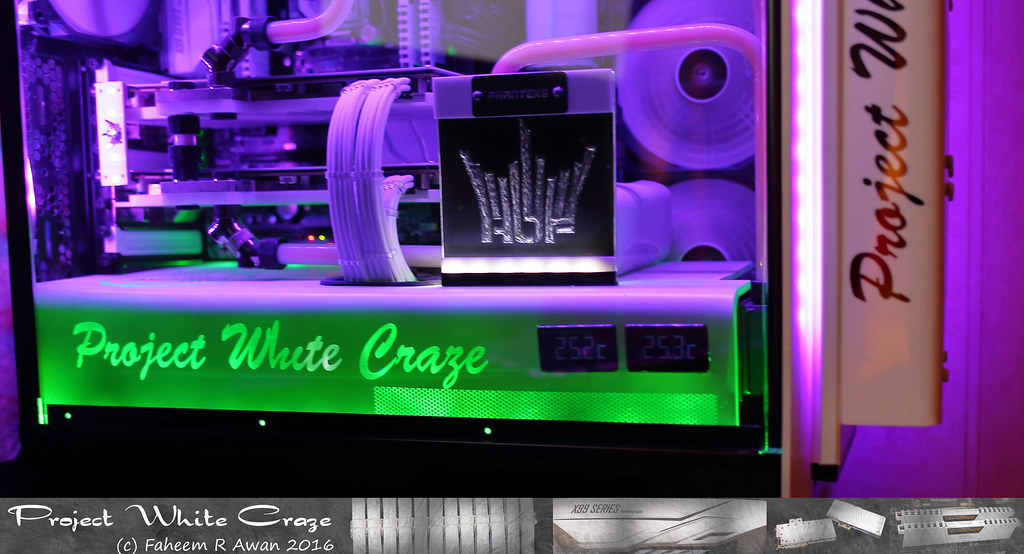
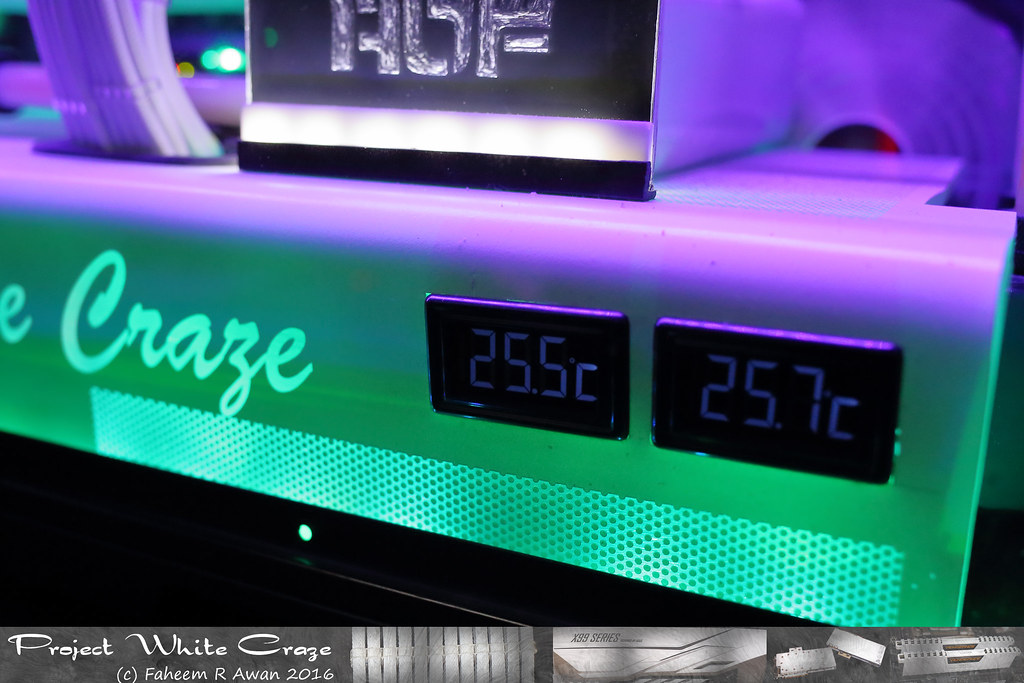
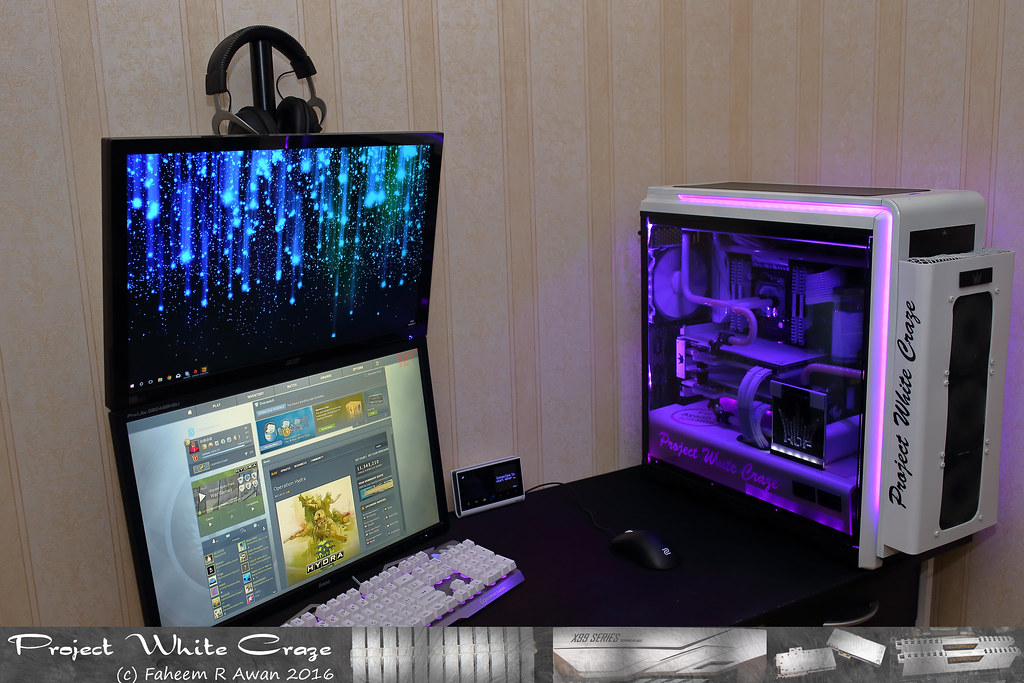
The PSU and bottom radiator cover is ready. I dedicate this build to my lovely children and you can see their names on it. :)

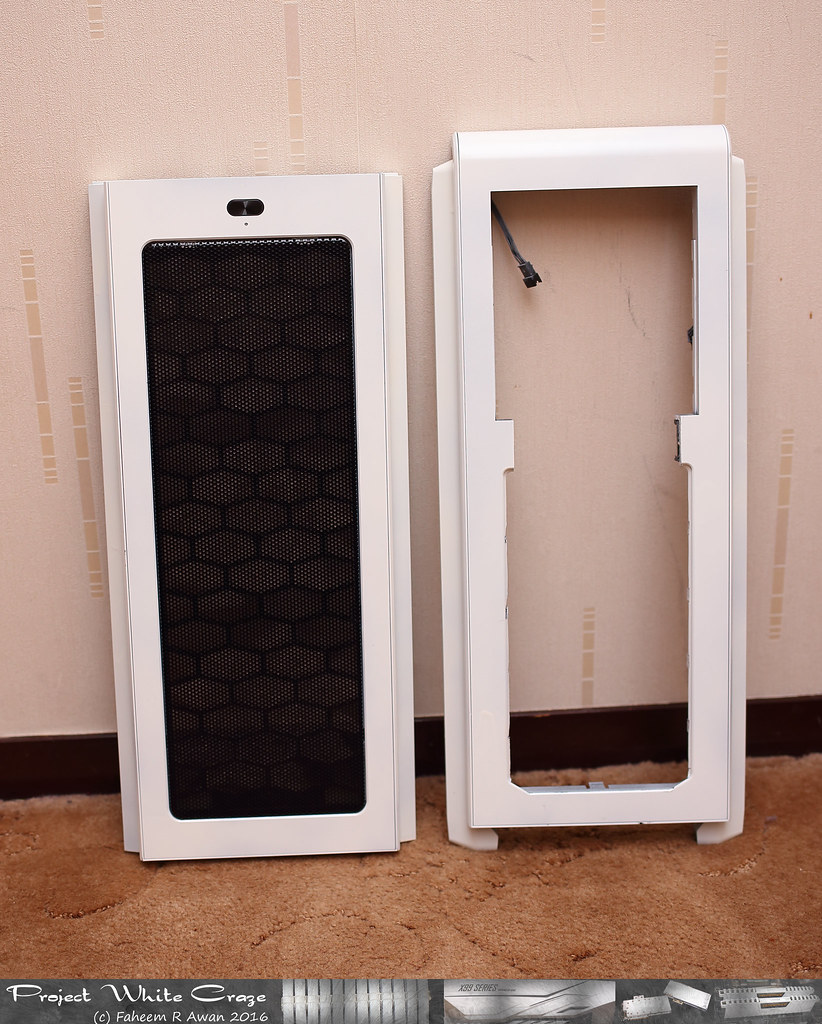
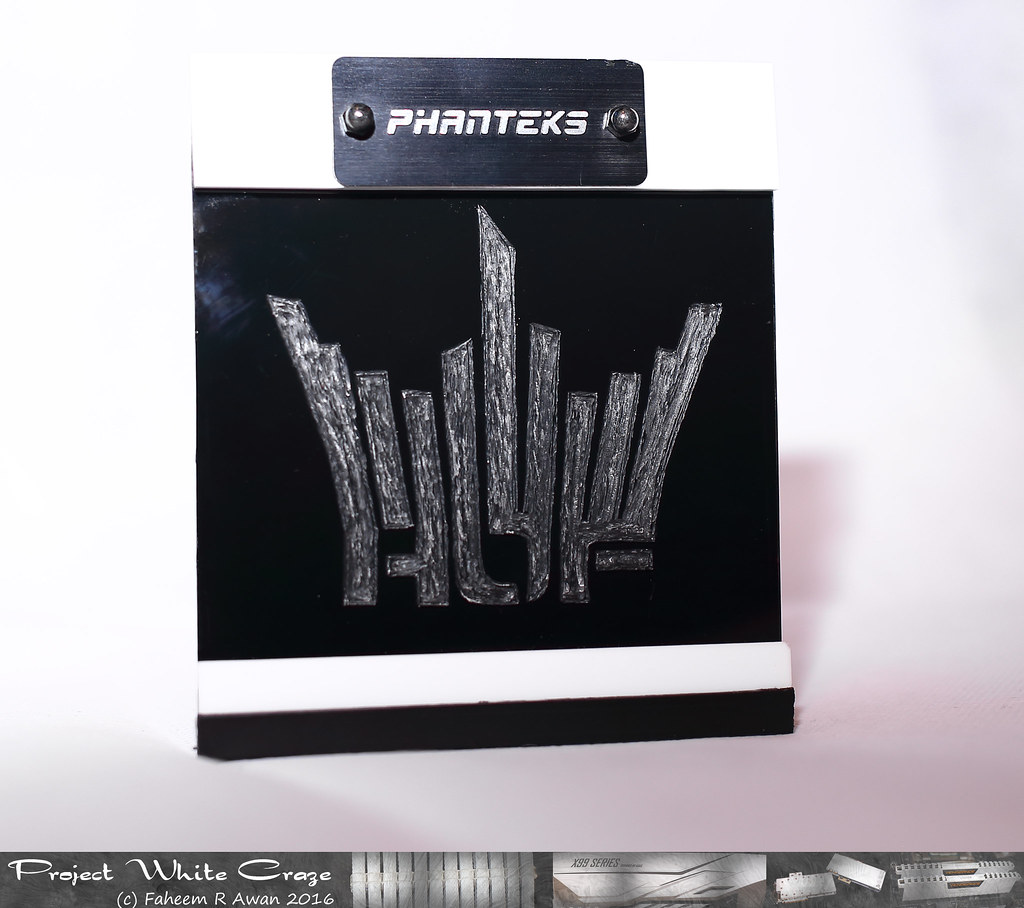
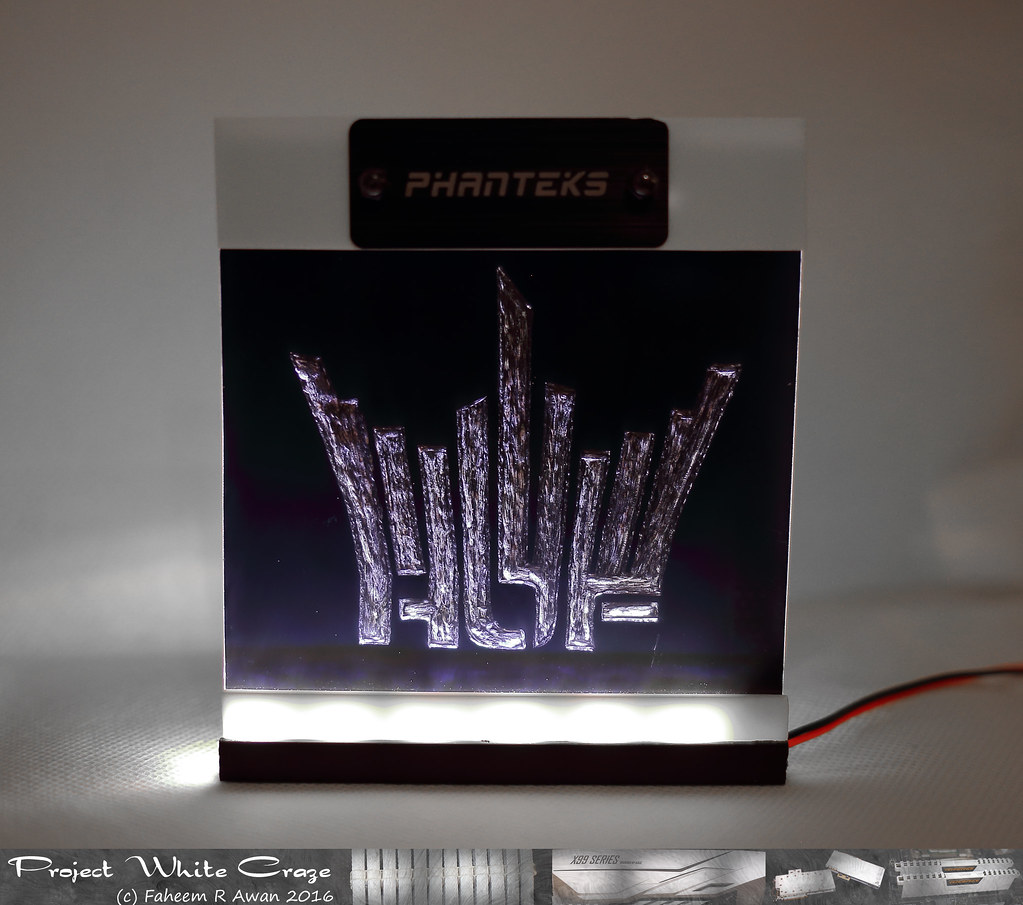
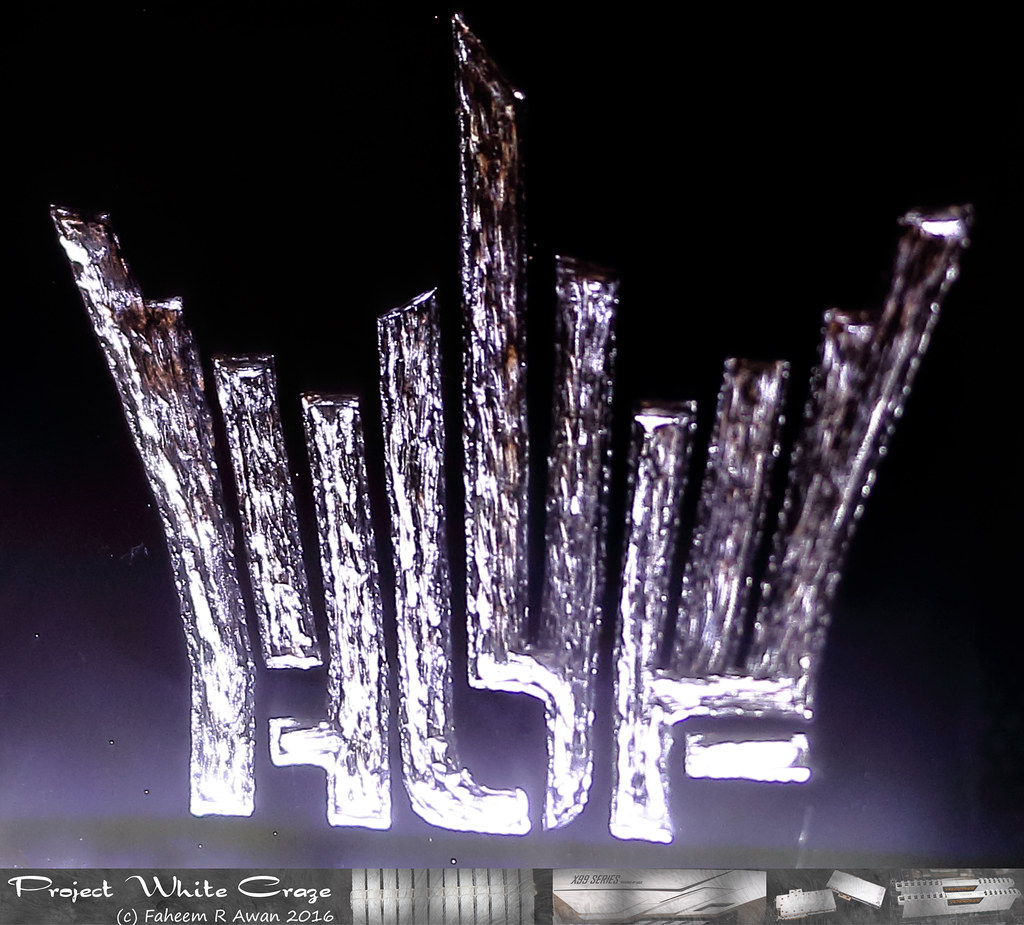
The two rectangular cuts in front are for the temperature display. There is an opening for the gpu cables on the top. It is made out of the 5mm thick clear acrylic sheet; which was bent, cut, painted and etched for lighting up the text and the design.

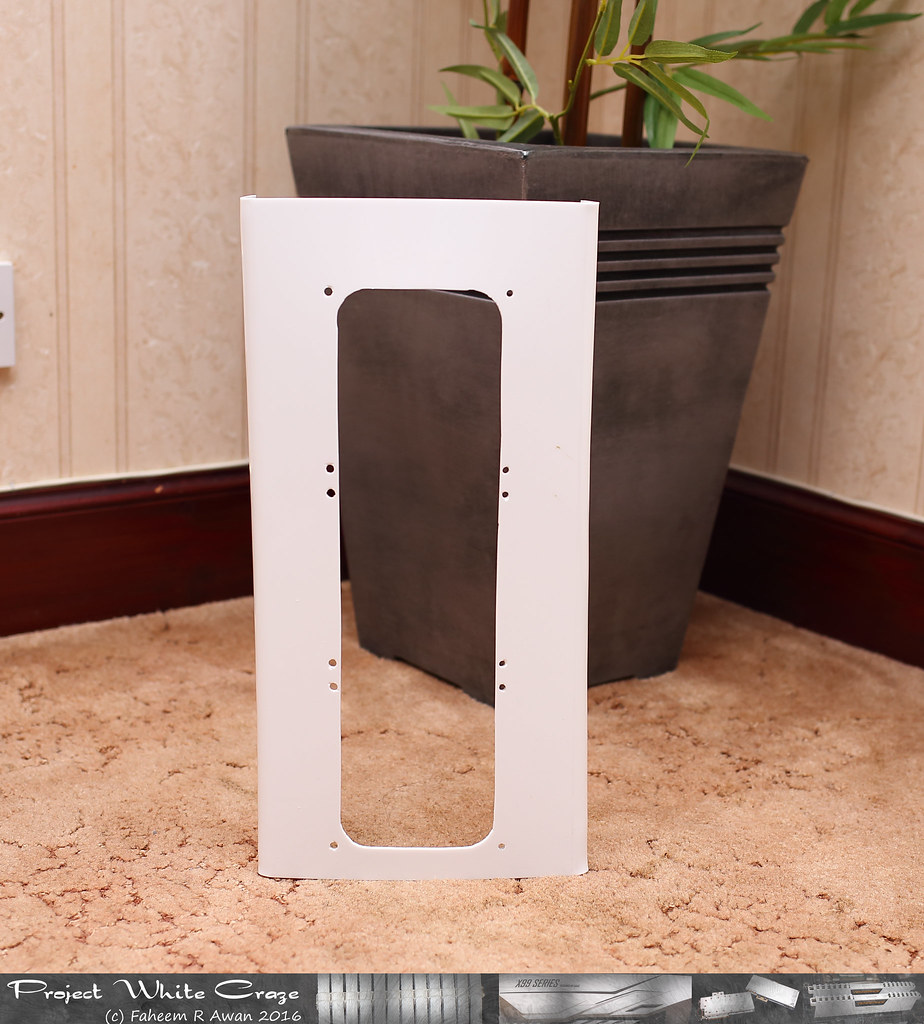
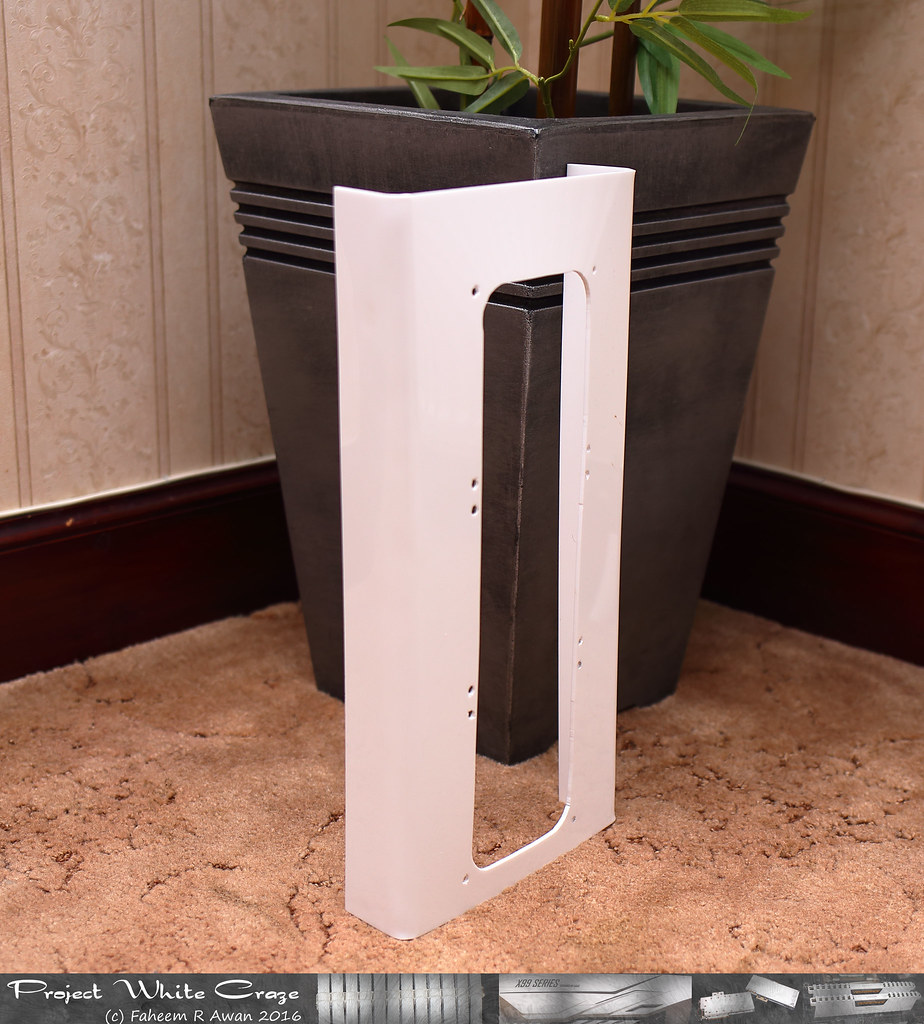
I will be using RGB strip under this and control it by Asus Motherboard RGB header.
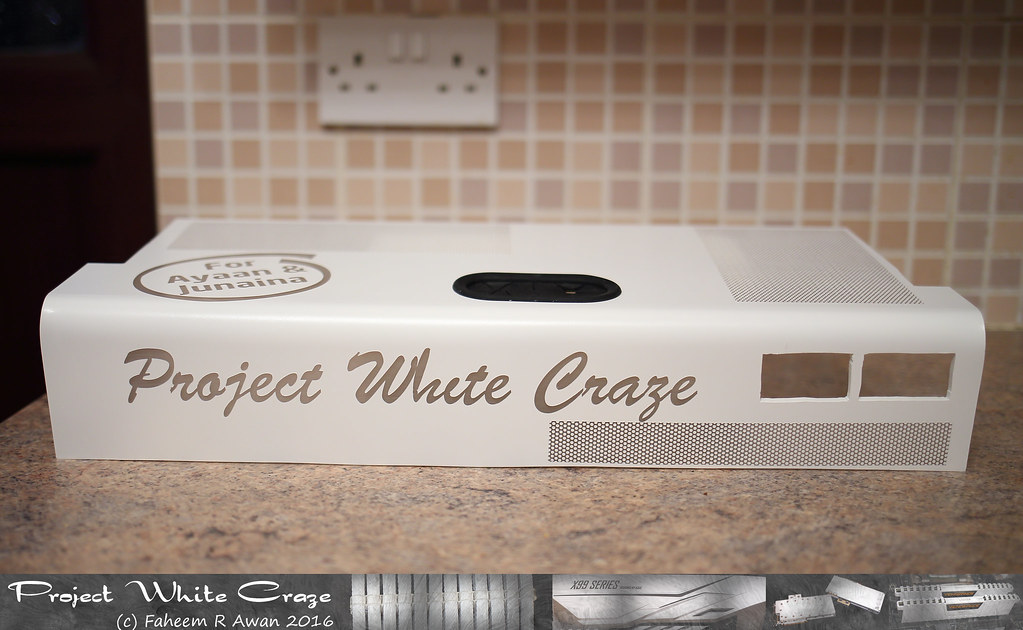
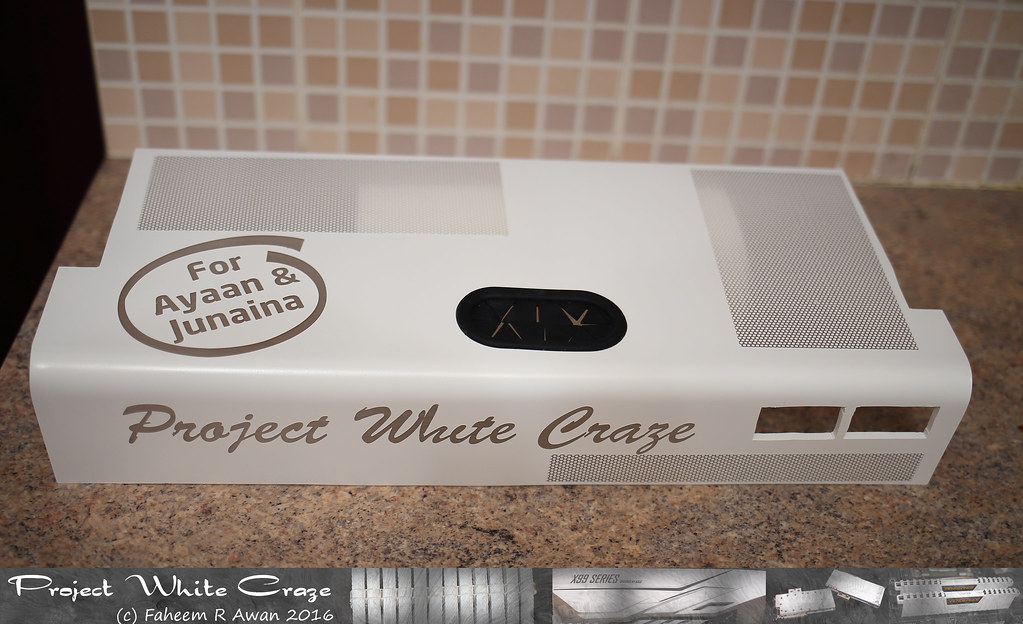
29807859756_2d7a009f80_b.jpg


29550577770_c9cb62e682_b.jpg
 
Last edited:
Nice. I like the way you've started with a clear sheet so you can have light shine through some of it.

Yes that was the only reason to do that. Otherwise a white sheet was easier to use with Decals left on instead of etching out the surface with the text to reflect light properly.
 
Looking good, class touch having the kids names on the PSU shroud :)

Can I ask what paint you used on the acrylic? I'm planning on putting a design onto a piece of backlit frosted acrylic but am undecided whether to use black vinyl or to spray it...
 
Looking good, class touch having the kids names on the PSU shroud :)

Can I ask what paint you used on the acrylic? I'm planning on putting a design onto a piece of backlit frosted acrylic but am undecided whether to use black vinyl or to spray it...

Thanks mate.

Nothing fancy. Plasti-kote Gloss White multi purpose paint.
 
Cracking, looks like I'll be ordering some of that in black then! Did you have any problems pulling the tape off? I did look at Plati-dip & Plasti-kote before but was worried it would lift when the stencil was removed...
 
Cracking, looks like I'll be ordering some of that in black then! Did you have any problems pulling the tape off? I did look at Plati-dip & Plasti-kote before but was worried it would lift when the stencil was removed...

no issues at all as you can see the finish of the end item. just be patient and take your time. ;)
 
The loop is ready and filled. But rest of the rig is no where close to the finish line.

- Top and front covers are off. Both of them will be painted white. Also I need to cut out front cover to make enough space for 360mm radiator, which is mounted towards the outside.

- Making out an extension on the front cover as the original cover is not big enough to hide the thick 360mm rad.

- The PSU and bottom rad shroud is ready. Pics in previous post.

- White mesh to cover inside of top and front rads.

29881735456_1fef863c96_b.jpg
 
I have spent some time preparing this 'Edge Lit' Galax Hall of Fame logo. This will go in front of the pump and will be one of the center piece of this build. It is hand engraved on a clear acrylic sheet and back of it is painted black to add some contrast. Used white led's at the bottom to light it up.

30190712045_600c7df976_b.jpg


30190710875_1cf52b78c5_b.jpg


30190711085_52354ed60c_b.jpg
 
Last edited:
Looks really good. Probably just the picture but if you're not getting as much brightness at the top, you're supposed to be able to improve it by engraving deeper so the light isn't occluded bt the engraving closer to the light.
 
Looks really good. Probably just the picture but if you're not getting as much brightness at the top, you're supposed to be able to improve it by engraving deeper so the light isn't occluded bt the engraving closer to the light.

that's a good point. I think pictures make it look worse than how it looks in real :D
 
I completed this project quite a long time ago but unfortunately didn't manage to post the final build photos. Here they are. I hope you will like it :)

Finished Build Photos:

34868434951_f83a9e16ec_b.jpg


34189763623_dfc3ed9020_b.jpg


34868439831_b3b5250623_b.jpg


34868438601_12e213bf9e_b.jpg


34189765023_99ece2372d_b.jpg


34868434461_bf65bdf6a5_b.jpg


34868433811_3830631d72_b.jpg


34868432801_bb629335c0_b.jpg


34868430711_12c2e8df8c_b.jpg


34868429421_23d9f66aae_b.jpg


34868432171_42c15da35f_b.jpg


34868431481_d72ea560aa_b.jpg


34868428311_7192c4758d_b.jpg


34868427671_0061bde536_b.jpg


34868426701_de88f27c92_b.jpg

 
Looking nice. Vertical dual monitor stack....there's something you don't see very often. Will have to think of going vertical next time I argue with my wife....build the wall a little higher ;)
 
Looking nice. Vertical dual monitor stack....there's something you don't see very often. Will have to think of going vertical next time I argue with my wife....build the wall a little higher ;)
Thanks mate. Vertical monitor mount saves a lot of space; at-least in one dimension. You just need to get the monitor tilt right to avoid straining your neck :)
 
Back
Top Bottom