

Caporegime
First of all, I’d like to thank Overclockers UK for giving me the opportunity to review the Raijintek Asterion Classic. Secondly, I’d like to confess that I’ve not built into this case what I originally planned, I’ve been put off jumping on the Ryzen bandwagon for two reasons 1) unresolved platform issues, and 2) the impending release of the X299 platform (which feels more of a logical step up from my current X99 build, and the X79 build I’ve put into this case).
To that end, I’m re-homing my Asus P9X79 PRO, I7 3820, 32GB of Hyper-X and my GTX970 into the Asterion, swapping from flexible tubing to a hardline loop in the process. The kit is coming out of a BitFenix Shinobi XL, which I’ve wanted to downsize from for a while now.
The hardline tubing I’m using is the Monsoon PETG 16mm clear tubing that I have left over from my NZXT H440 X99 build, and whilst I’m on the subject I’d like to say, hardline bending, certainly with PETG is nowhere near as difficult as people tend to make it out to be. So far during two builds I’ve had no leaks and no wasted tubing (with the exception of a few offcuts that are now uselessly short). I’m re-using my EK Supreme HF CPU waterblock, and EK pump, along with a new Primochill CTR Tube reservoir, monsoon EV2 fittings, and a selection of EK angled rotary fittings. I also use the Monsoon mandrel bending kit, but won’t go into detail of how to use, as Monsoon’s how-to videos are more than adequate.
So, the case. It’s been a while since I’ve built into an Aluminium styled case (not full aluminium for the Raijintek, but then for the price-point you could hardly expect tempered glass AND full alu), and first impressions are that the Asterion is a beautifully styled, elegant and simplistic case. It’s also worth pointing out that the three bundled 120mm fans are lovely, quiet and the glow they give from their halo-ring effect lighting sure beats the focussed light you get from equidistant spaced 5mm LEDs that a lot of manufacturers use on their fans.
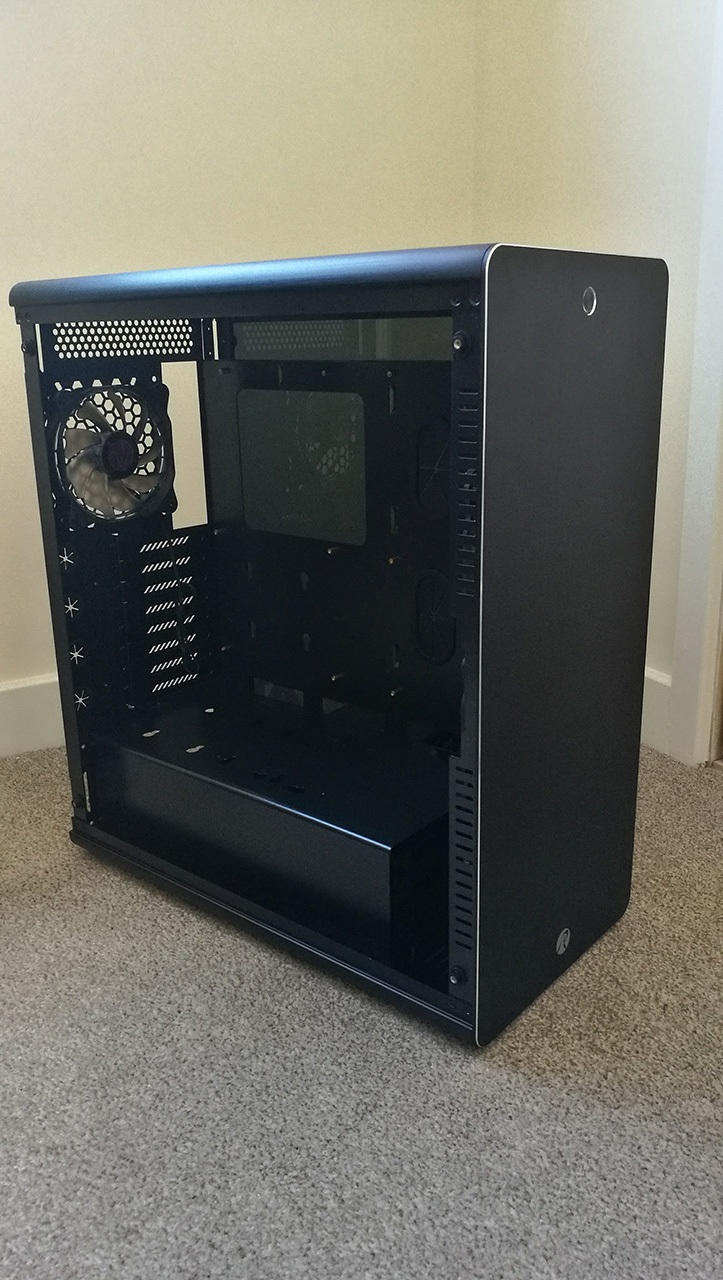
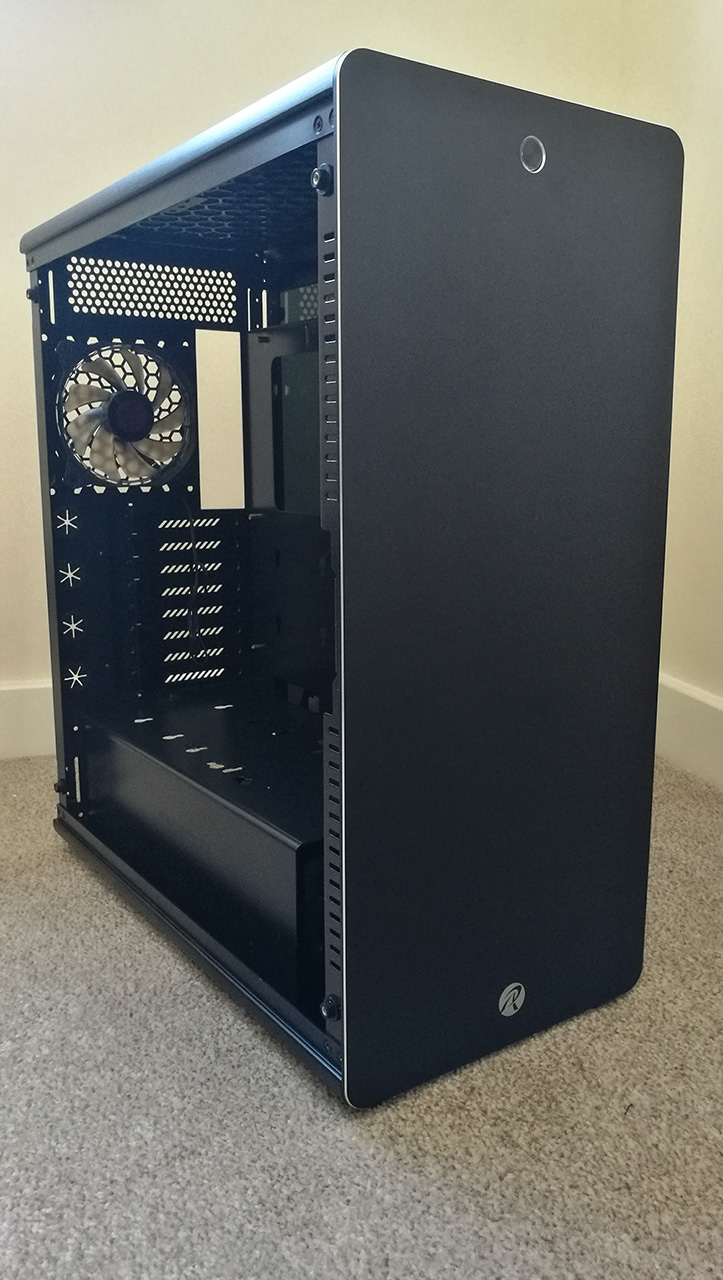
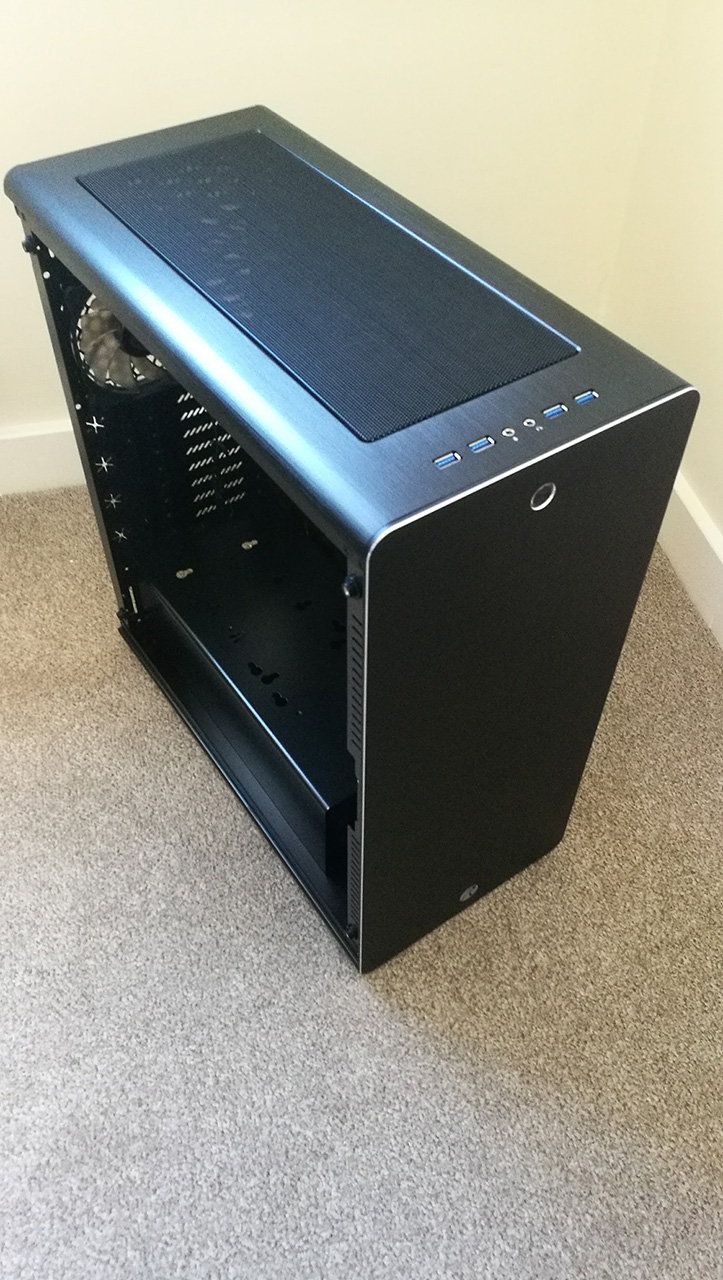
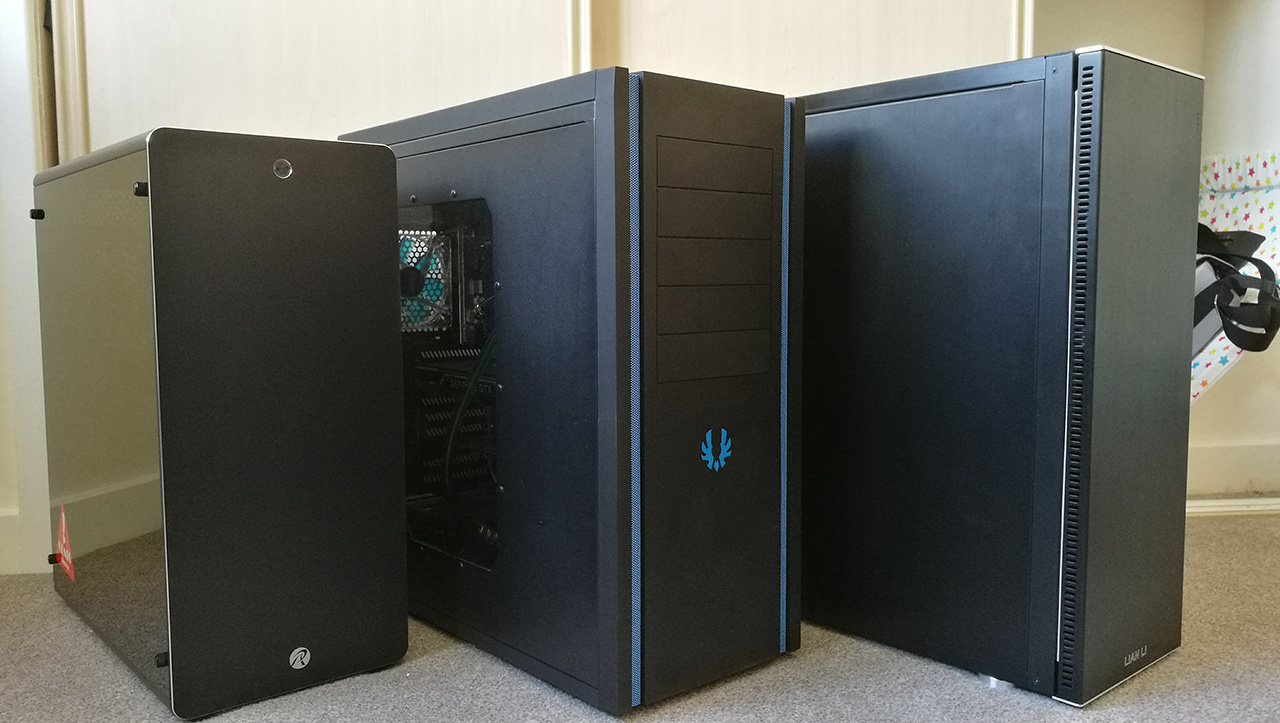
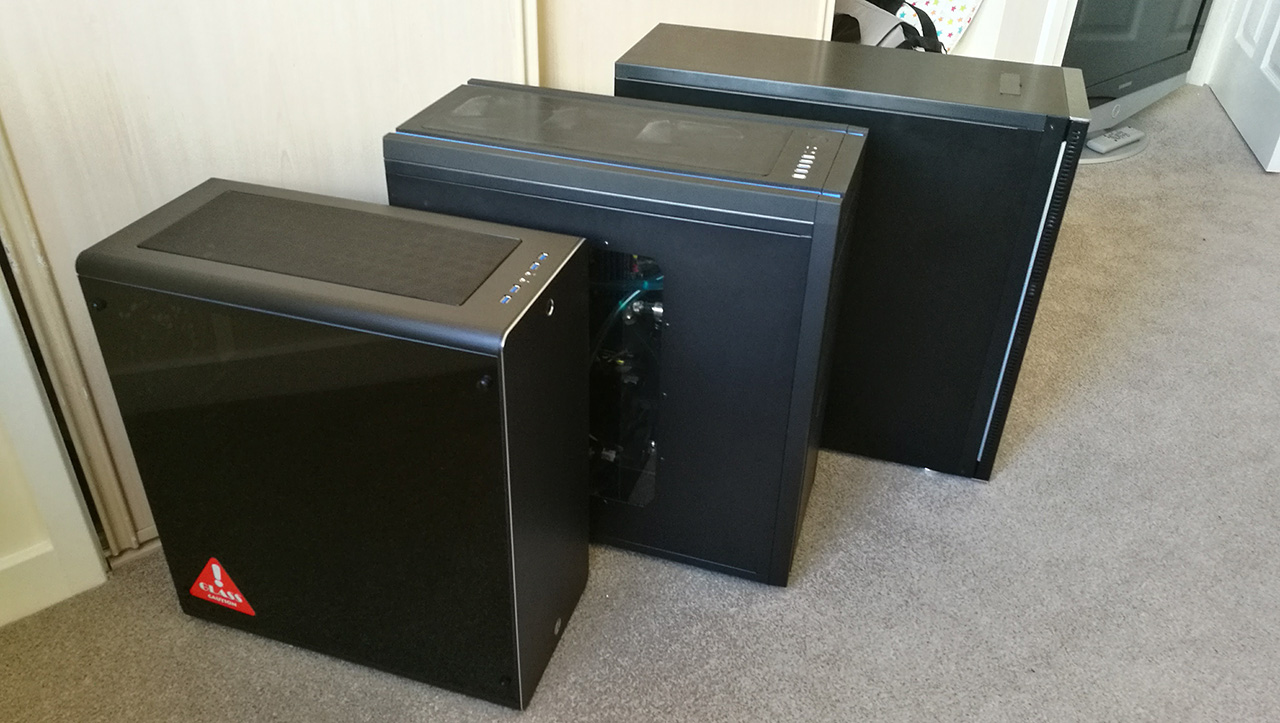
It's also got a decently compact footprint for a mid-tower (something I have to be particularly careful about due to the depth of my desk), but has a bit of extra width over a number of cases, which makes it easier to hide cabling behind the motherboard tray. Here’s a few shots comparing it to my large BitFenix Shinobi XL, and my gigantic Lian-Li PC-A71F!
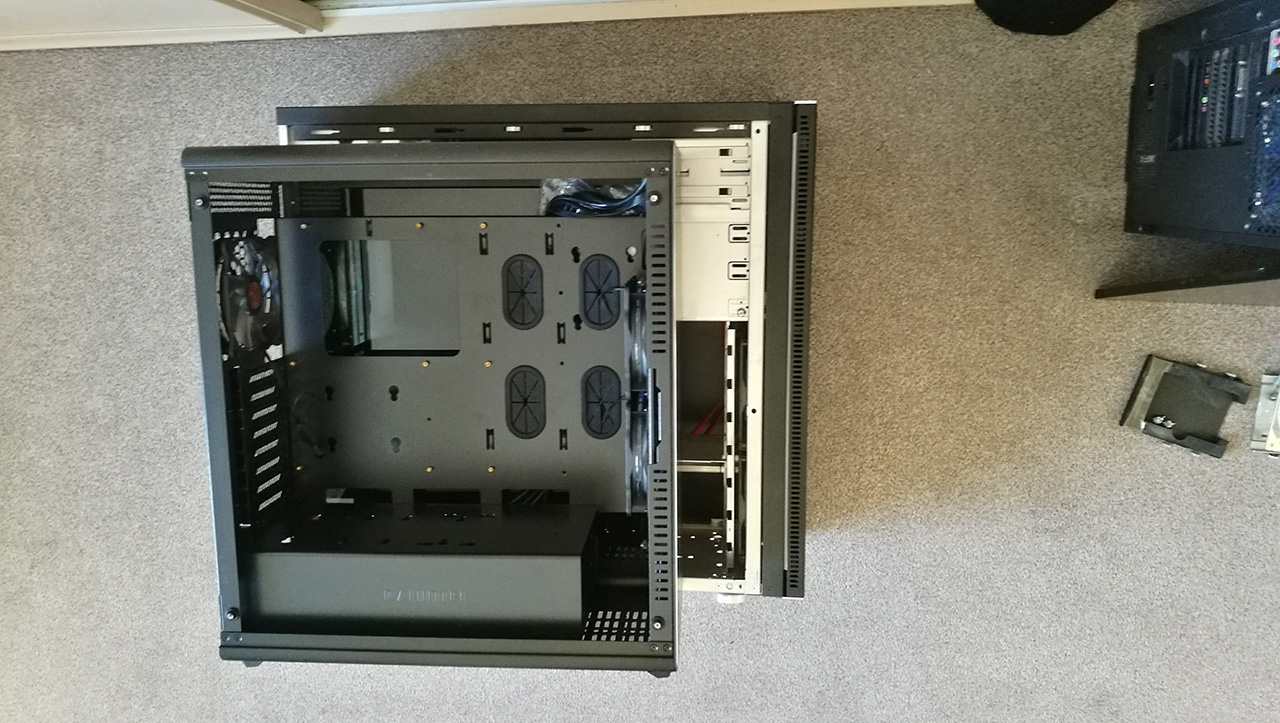
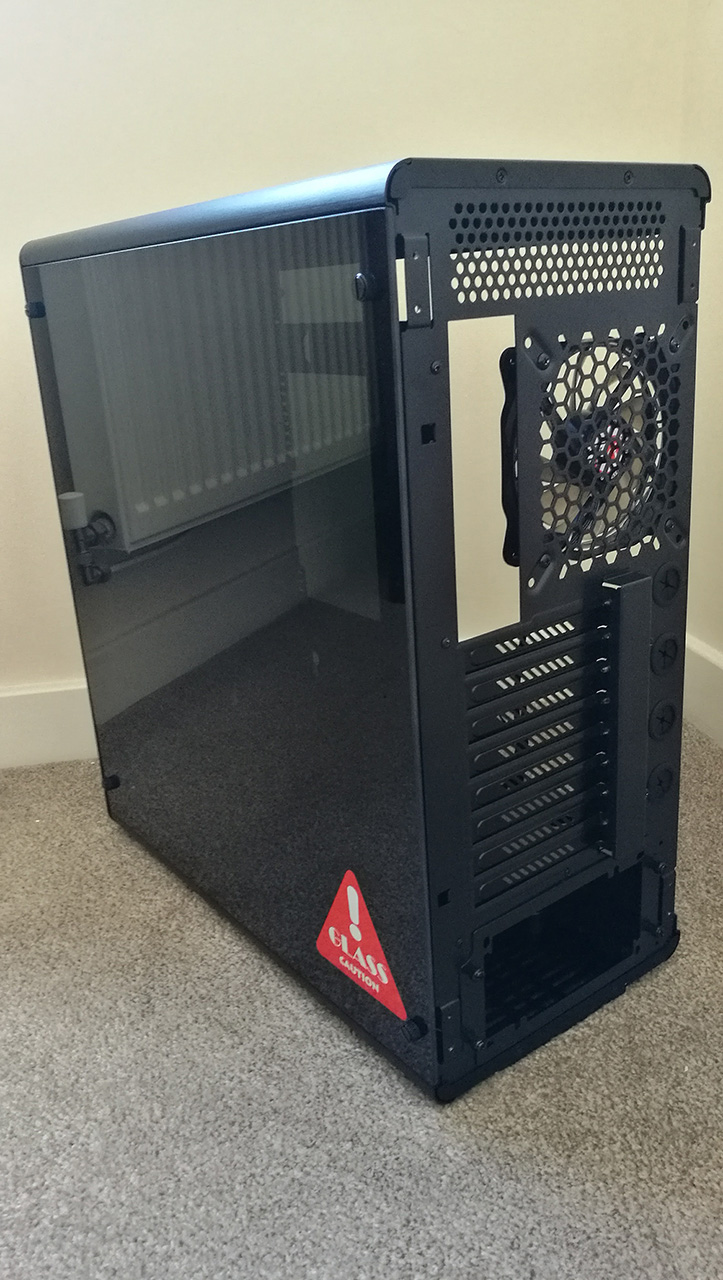
So, onto the internal layout. The Asterion has a number of options for disk layout, though most are for 2.5” drives rather than 3.5” drives (which actually meant that I couldn’t house my 2TB storage drive in the case due to where I had to mount the pump – which was a shame). There are two 2.5” mounts on the PSU shroud, and two on the back of the motherboard tray, which is nice for hiding both SATA and power cables.
The motherboard tray also has a good number of cable routing holes around the board, as well as a few anchor points on the back of the tray for tidying cables with ties. It’s quite easy to make a “tidy” build happen in the Asterion, which is good for me as I hate messy builds
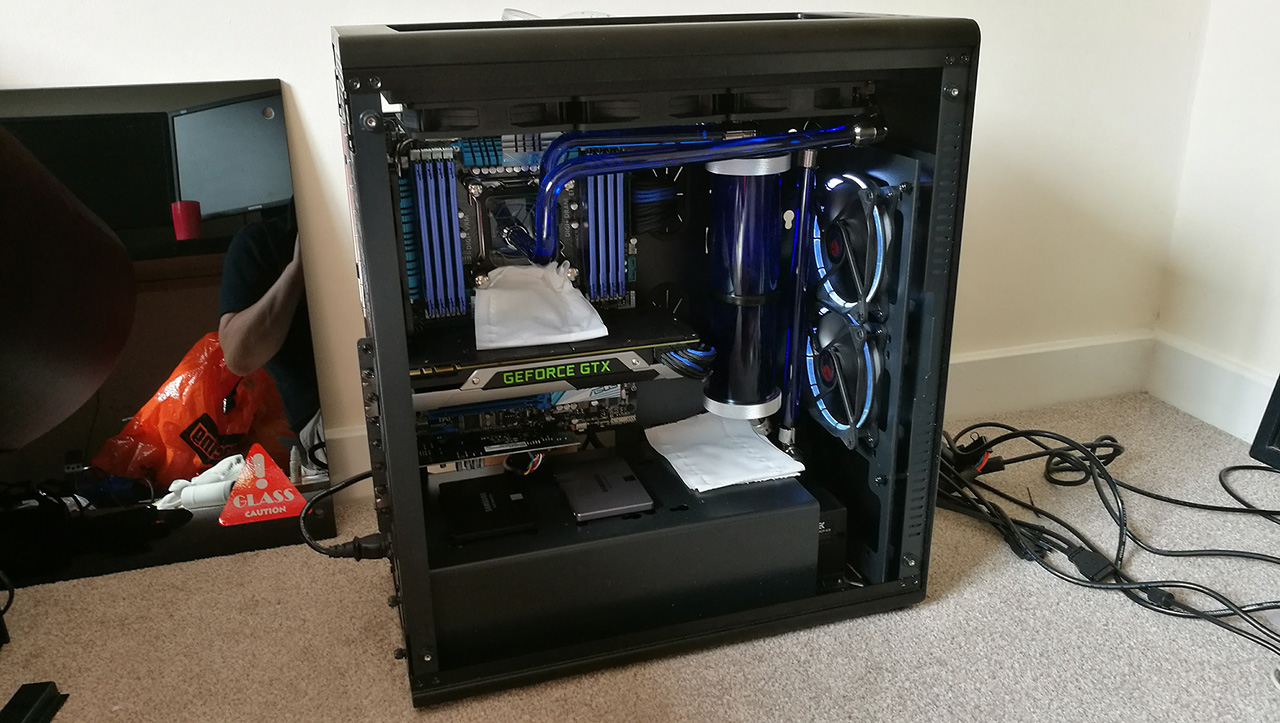
There are a few negatives that reared themselves during the build though, certainly if you are using a top mount radiator (in this case an EK Coolstream PE 360, which is hardly a deep radiator). With the EPS 12V at the top edge of the board next to the I/O ports, getting the cable through between the board and the fans on the radiator was an INCREDIBLY tight fit, took a bit of cajoling to get the cabling to sit in a position to not foul the fan blades. Had the case been a mere 5mm taller this would be a non-issue, but forget completely about trying to put a thick radiator in the top panel.
If putting a radiator in the front, you’ve got more room to play with, but this wasn’t an option for me unfortunately, as the layout of the loop required me to have room at the front (had I been using a reservoir mounted pump this problem would have been none-existent).
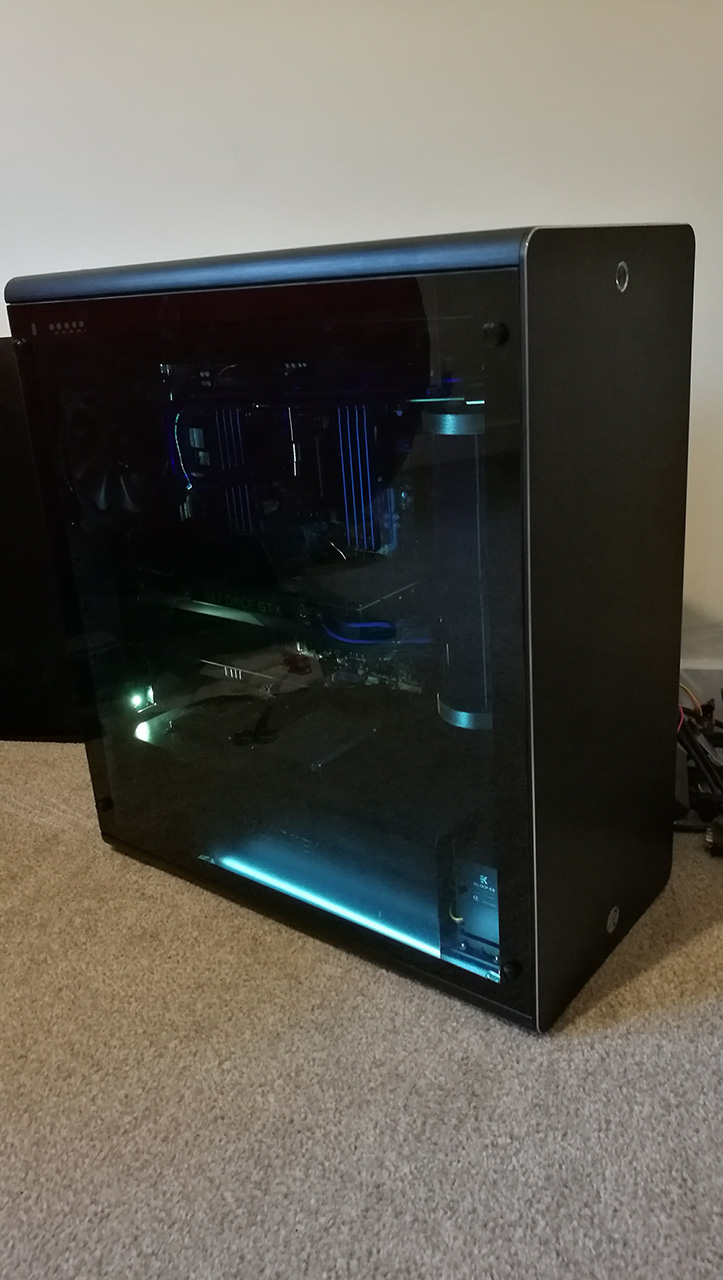
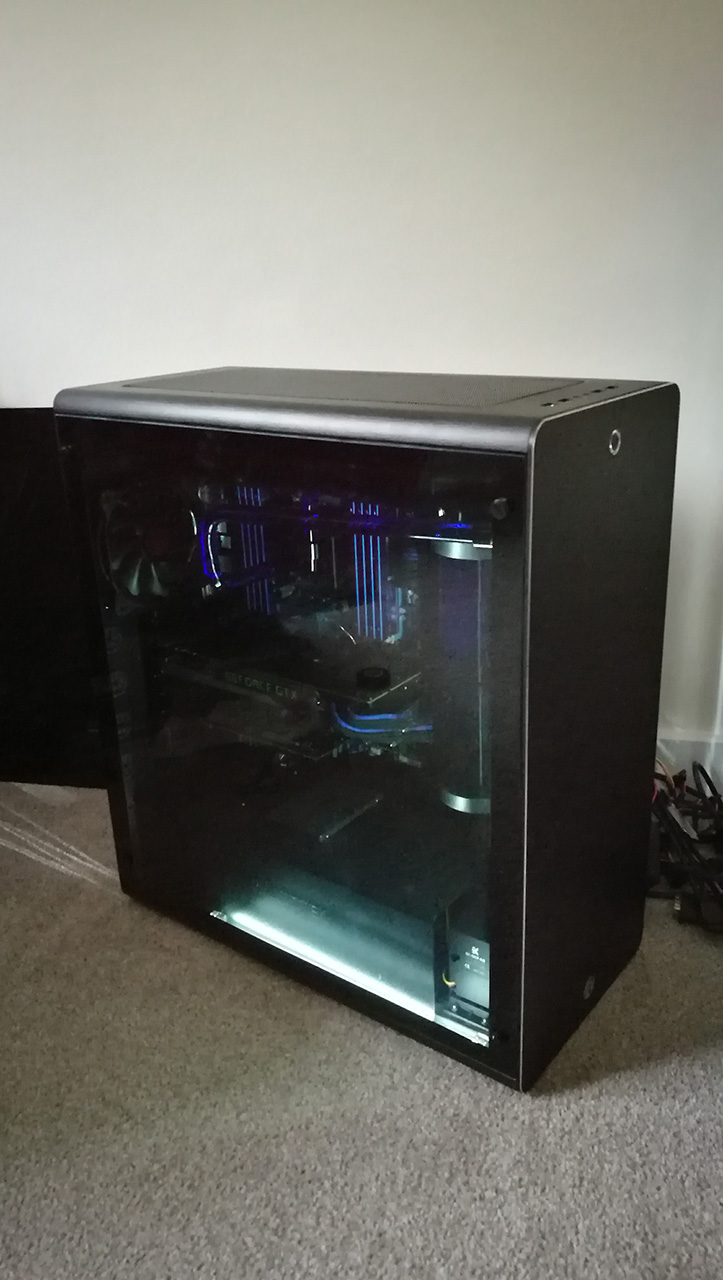
So with the kit in, the tubing shaped and the loop filled, I left the pump running for the usual 8 hours or so to check for potential leaks.

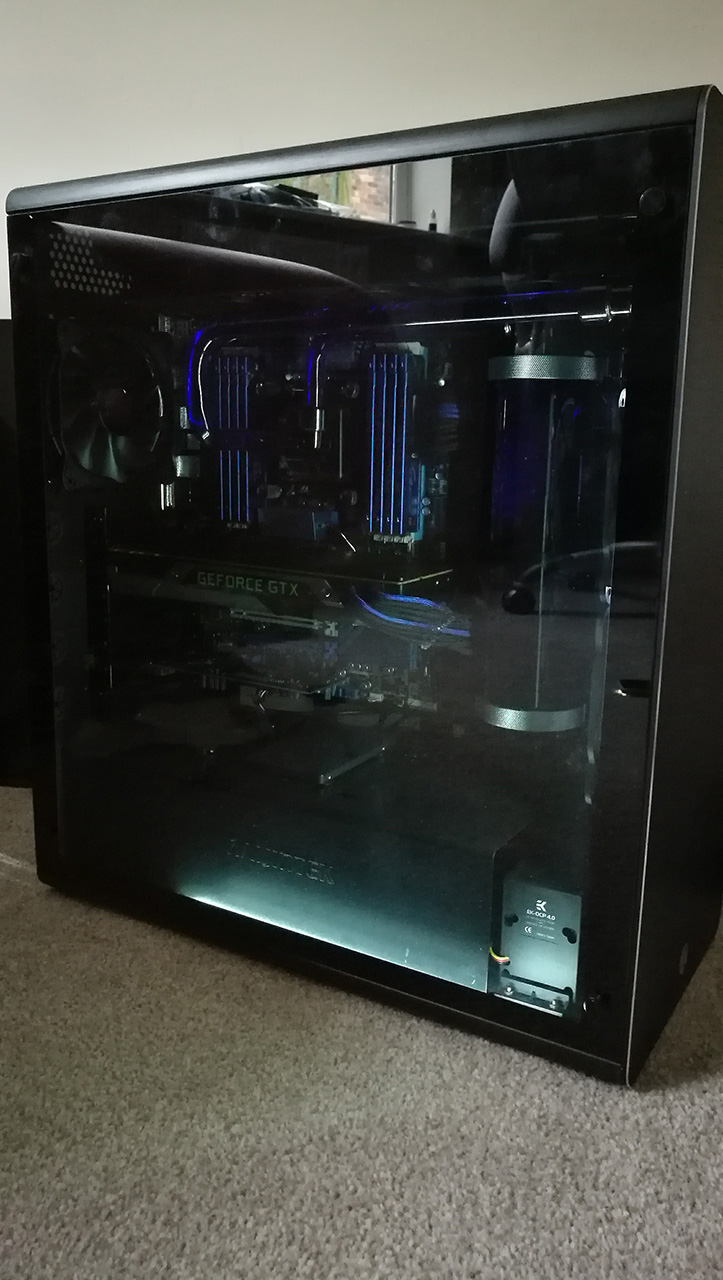
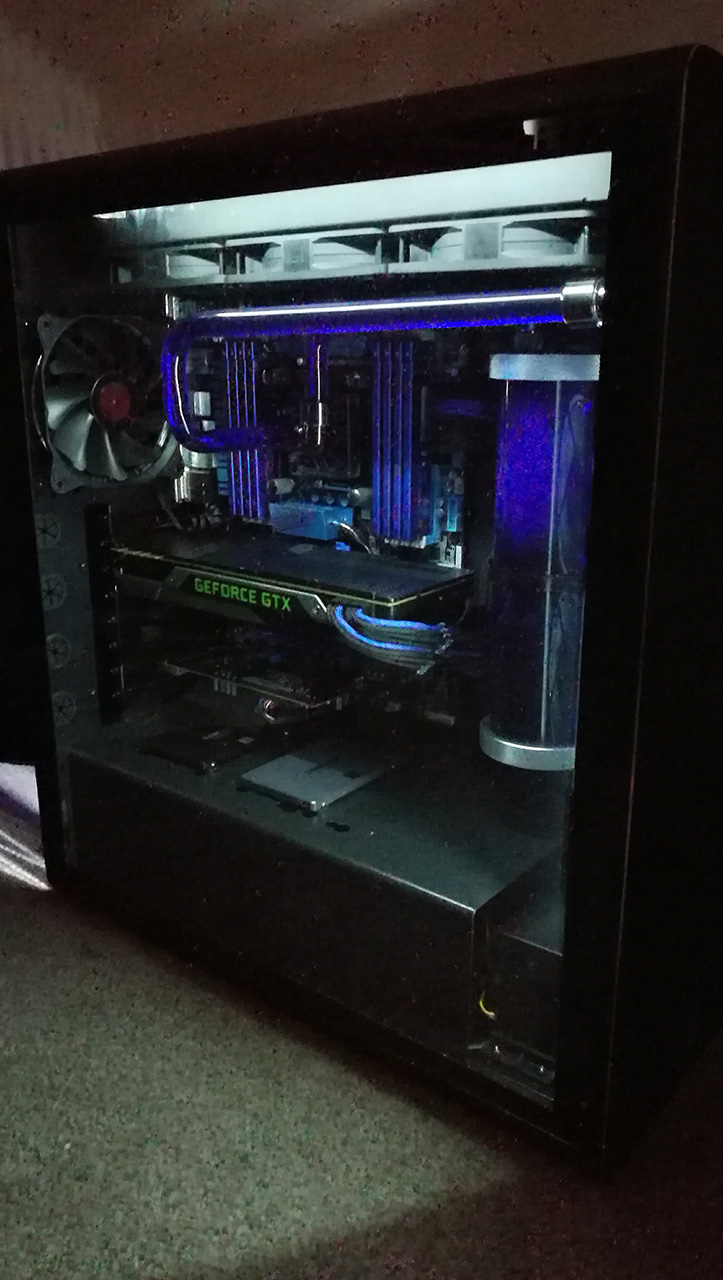
After this I played with lighting to try and get a good view of the build through the tinted tempered glass, which so far I’m unhappy with. I might revisit this with LED strips as the two white 12” cathodes I had recycled from the old build didn’t cast enough light in my opinion, the case still looked very dark, and in anything but a pitch-black room, I couldn’t really see much of the build through the glass, which again was a shame.
Overall, it’s an aesthetically stunning case (though that is subjective), with some lovely quality on the aluminium and glass pieces, a very good internal layout (though not perfect due to the lack of space in the top when using a radiator), and has ample room for a decent amount of watercooling equipment (pumps, reservoirs, tubing, etc). I’m not the biggest fan of the cover for the PCI bracket screwplate either, the thumbscrews are unusable by hand, and getting the cover back on without it being too loose (and thus rattling) took a few attempts, but it’s not the end of the world, I’ve changed out to normal case screws for this, rather than the thumbscrews which seemed easier to tighten up to eliminate the rattle.
I’d definitely recommend it for anyone in the market for a tempered glass mid-tower, and even go as far as to recommend it for a custom-loop watercooling build, just to take care with where the PSU cables need to route to your motherboard!
To that end, I’m re-homing my Asus P9X79 PRO, I7 3820, 32GB of Hyper-X and my GTX970 into the Asterion, swapping from flexible tubing to a hardline loop in the process. The kit is coming out of a BitFenix Shinobi XL, which I’ve wanted to downsize from for a while now.
The hardline tubing I’m using is the Monsoon PETG 16mm clear tubing that I have left over from my NZXT H440 X99 build, and whilst I’m on the subject I’d like to say, hardline bending, certainly with PETG is nowhere near as difficult as people tend to make it out to be. So far during two builds I’ve had no leaks and no wasted tubing (with the exception of a few offcuts that are now uselessly short). I’m re-using my EK Supreme HF CPU waterblock, and EK pump, along with a new Primochill CTR Tube reservoir, monsoon EV2 fittings, and a selection of EK angled rotary fittings. I also use the Monsoon mandrel bending kit, but won’t go into detail of how to use, as Monsoon’s how-to videos are more than adequate.
So, the case. It’s been a while since I’ve built into an Aluminium styled case (not full aluminium for the Raijintek, but then for the price-point you could hardly expect tempered glass AND full alu), and first impressions are that the Asterion is a beautifully styled, elegant and simplistic case. It’s also worth pointing out that the three bundled 120mm fans are lovely, quiet and the glow they give from their halo-ring effect lighting sure beats the focussed light you get from equidistant spaced 5mm LEDs that a lot of manufacturers use on their fans.
It's also got a decently compact footprint for a mid-tower (something I have to be particularly careful about due to the depth of my desk), but has a bit of extra width over a number of cases, which makes it easier to hide cabling behind the motherboard tray. Here’s a few shots comparing it to my large BitFenix Shinobi XL, and my gigantic Lian-Li PC-A71F!
So, onto the internal layout. The Asterion has a number of options for disk layout, though most are for 2.5” drives rather than 3.5” drives (which actually meant that I couldn’t house my 2TB storage drive in the case due to where I had to mount the pump – which was a shame). There are two 2.5” mounts on the PSU shroud, and two on the back of the motherboard tray, which is nice for hiding both SATA and power cables.
The motherboard tray also has a good number of cable routing holes around the board, as well as a few anchor points on the back of the tray for tidying cables with ties. It’s quite easy to make a “tidy” build happen in the Asterion, which is good for me as I hate messy builds
There are a few negatives that reared themselves during the build though, certainly if you are using a top mount radiator (in this case an EK Coolstream PE 360, which is hardly a deep radiator). With the EPS 12V at the top edge of the board next to the I/O ports, getting the cable through between the board and the fans on the radiator was an INCREDIBLY tight fit, took a bit of cajoling to get the cabling to sit in a position to not foul the fan blades. Had the case been a mere 5mm taller this would be a non-issue, but forget completely about trying to put a thick radiator in the top panel.
If putting a radiator in the front, you’ve got more room to play with, but this wasn’t an option for me unfortunately, as the layout of the loop required me to have room at the front (had I been using a reservoir mounted pump this problem would have been none-existent).
So with the kit in, the tubing shaped and the loop filled, I left the pump running for the usual 8 hours or so to check for potential leaks.
After this I played with lighting to try and get a good view of the build through the tinted tempered glass, which so far I’m unhappy with. I might revisit this with LED strips as the two white 12” cathodes I had recycled from the old build didn’t cast enough light in my opinion, the case still looked very dark, and in anything but a pitch-black room, I couldn’t really see much of the build through the glass, which again was a shame.
Overall, it’s an aesthetically stunning case (though that is subjective), with some lovely quality on the aluminium and glass pieces, a very good internal layout (though not perfect due to the lack of space in the top when using a radiator), and has ample room for a decent amount of watercooling equipment (pumps, reservoirs, tubing, etc). I’m not the biggest fan of the cover for the PCI bracket screwplate either, the thumbscrews are unusable by hand, and getting the cover back on without it being too loose (and thus rattling) took a few attempts, but it’s not the end of the world, I’ve changed out to normal case screws for this, rather than the thumbscrews which seemed easier to tighten up to eliminate the rattle.
I’d definitely recommend it for anyone in the market for a tempered glass mid-tower, and even go as far as to recommend it for a custom-loop watercooling build, just to take care with where the PSU cables need to route to your motherboard!