OcUK Staff
- Joined
- 23 Feb 2015
- Posts
- 2,518
- Location
- Overclockers UK HQ
Hi all,
Beginnings
With the upcoming release of Total War: Warhammer 2 I have been thinking it is time to build a new PC from the ground up as my current rig is nearing 4 years of age. Being a massive fan of Total war and Warhammer I want to hang it around the hook of Total War: Warhammer 2.
Before starting I want to add the disclaimer that there is no agreement between Creative Assembly, Games Workshop and OcUK. I am merely a fan of Total war and Warhammer Games, and coincidentally an employee at OcUK. I am choosing parts that I think deserve showcasing and as you'd expect from a member of the OcUK team I won't be skimping on performance or quality.
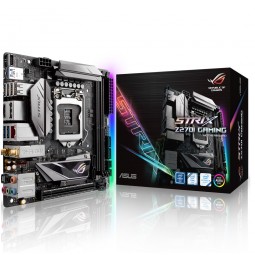
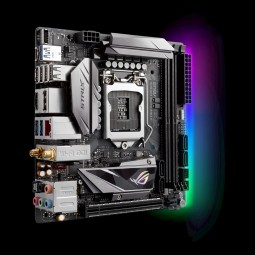
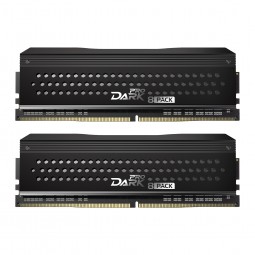
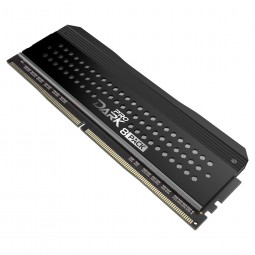
So far I have the Case, Motherboard and RAM picked out. The Motherboard chooses itself because of the case I have chosen and the case lends itself to the idea I had when i began the project.
A brief insight into the inner working of my mind
Teasing myself one evening with videos of the upcoming Total War: Warhammer 2 game, and being heavily intoxicated on fine German Beer (no Dwarven brews were available), I noticed an image from the campaign intro trailer:

The lettering and colouring on the face of this pillar drew my attention and I decided that would make an excellent colour scheme and design for etchings on a glass side panel. Lit from behind with an eery warpstone glow I began thinking of cases I would use in such a build. I began to think of cases with water cooling options, but also it had to be monolithic. After all I would only be able to fit the etchings on a side panel of the case, and as it would be a fairly subtle nod to a Skaven Warpstone Monolith, it would require a uniquely shaped case to emphasise the point and ensure the aesthetic emphasised the inspiration.
Thinking about it and how perfect it could be (such inspiration for design rarely comes to me), I became aware that maybe it was not myself designing this build, perhaps the Great Horned Rat himself was guiding my hand!!

Case
The first cases that leapt to mind, and really the second point of inspiration for the build, were:
Phanteks Enthoo Evolv Shift Mini-ITX Tempered Glass Case - Black @ £104.99 inc VAT
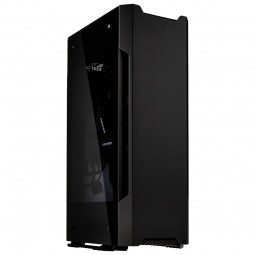
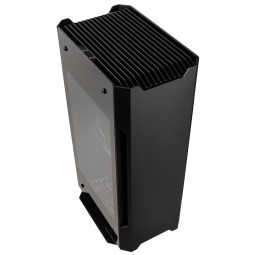
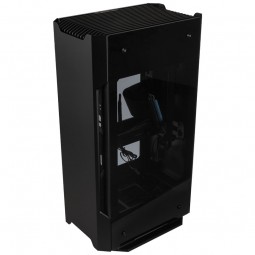
Premium Mini-ITX Enthoo Evolve Shift in Black, Aluminium panels & tempered glass, Space for 35 cm long graphics cards.
Only £104.99 inc VAT.
ORDER NOW
Phanteks Enthoo Evolv Shift X Mini-ITX Tempered Glass Case - Black @ £149.99 inc VAT
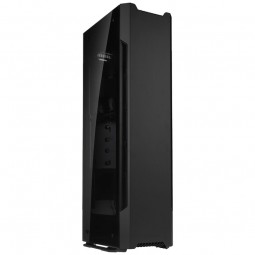
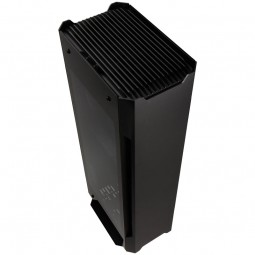
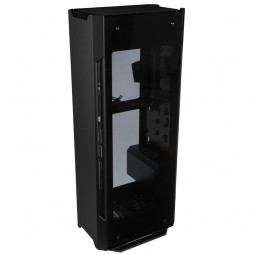
Premium Mini-ITX Enthoo Evolv Shift X in Black, Aluminium panels & tempered glass, Good watercooling support & 2 pre-installed fans, Space for 52 cm long graphics card & 280 mm radiator.
Only £149.99 inc VAT.
ORDER NOW
At the moment I am currently keeping my options open to the final choice as it depends on whether or not I go for a custom loop, an AIO or air cooling. If I go for the custom loop option then I would go for the Shift X. Availability may also be a deciding factor as I want to complete the build in time for a release date of 28th September. There is some leeway in this as it is not imperative but it provides a nice target to aim for.
Both cases are gorgeous and have the requisite tempered glass side panel for etching. My current case is an Evolv ATX which I transplanted my machine into over a year ago. I built dozens if not hundreds of PC's in my time in the Tech Department, with their chassis', and I cannot think of a chassis I would want to go into this build more. Not only does it look monolithic but I know they are made solidly and the finish is top notch. While the case limits me to Mini-ITX motherboards, there are plenty of quality Mini-ITX boards out there with all the features needed for the high ended gaming rig that will be the innards of this edifice of Skaven iconography and modern clean lines! The RGB controllers which are compatible with all the big boys in the field,:
"For the best view of the RGB-LEDs in the installed hardware the integrated LED lighting is compatible with Aura Sync from ASUS, RGB Fusion from Gigabyte as well as MSI's Mystic Light Sync, all of which can be controlled at the push of a button."
will also give me the best shot of syncing all the RGB up on case, motherboard etc, to the same shade of Warpstone Glow.
Next Update: Motherboard
**disclaimer - build is in the concept stages and thus may not reach completion. The capability to fund the build depends upon receiving the right price for my current PC. Thus follow the build log if you must, but it may all come to naught...
Beginnings
With the upcoming release of Total War: Warhammer 2 I have been thinking it is time to build a new PC from the ground up as my current rig is nearing 4 years of age. Being a massive fan of Total war and Warhammer I want to hang it around the hook of Total War: Warhammer 2.
Before starting I want to add the disclaimer that there is no agreement between Creative Assembly, Games Workshop and OcUK. I am merely a fan of Total war and Warhammer Games, and coincidentally an employee at OcUK. I am choosing parts that I think deserve showcasing and as you'd expect from a member of the OcUK team I won't be skimping on performance or quality.
So far I have the Case, Motherboard and RAM picked out. The Motherboard chooses itself because of the case I have chosen and the case lends itself to the idea I had when i began the project.
A brief insight into the inner working of my mind
Teasing myself one evening with videos of the upcoming Total War: Warhammer 2 game, and being heavily intoxicated on fine German Beer (no Dwarven brews were available), I noticed an image from the campaign intro trailer:
The lettering and colouring on the face of this pillar drew my attention and I decided that would make an excellent colour scheme and design for etchings on a glass side panel. Lit from behind with an eery warpstone glow I began thinking of cases I would use in such a build. I began to think of cases with water cooling options, but also it had to be monolithic. After all I would only be able to fit the etchings on a side panel of the case, and as it would be a fairly subtle nod to a Skaven Warpstone Monolith, it would require a uniquely shaped case to emphasise the point and ensure the aesthetic emphasised the inspiration.
Thinking about it and how perfect it could be (such inspiration for design rarely comes to me), I became aware that maybe it was not myself designing this build, perhaps the Great Horned Rat himself was guiding my hand!!

Case
The first cases that leapt to mind, and really the second point of inspiration for the build, were:
Phanteks Enthoo Evolv Shift Mini-ITX Tempered Glass Case - Black @ £104.99 inc VAT


Premium Mini-ITX Enthoo Evolve Shift in Black, Aluminium panels & tempered glass, Space for 35 cm long graphics cards.
Only £104.99 inc VAT.
ORDER NOW
Phanteks Enthoo Evolv Shift X Mini-ITX Tempered Glass Case - Black @ £149.99 inc VAT


Premium Mini-ITX Enthoo Evolv Shift X in Black, Aluminium panels & tempered glass, Good watercooling support & 2 pre-installed fans, Space for 52 cm long graphics card & 280 mm radiator.
Only £149.99 inc VAT.
ORDER NOW
At the moment I am currently keeping my options open to the final choice as it depends on whether or not I go for a custom loop, an AIO or air cooling. If I go for the custom loop option then I would go for the Shift X. Availability may also be a deciding factor as I want to complete the build in time for a release date of 28th September. There is some leeway in this as it is not imperative but it provides a nice target to aim for.
Both cases are gorgeous and have the requisite tempered glass side panel for etching. My current case is an Evolv ATX which I transplanted my machine into over a year ago. I built dozens if not hundreds of PC's in my time in the Tech Department, with their chassis', and I cannot think of a chassis I would want to go into this build more. Not only does it look monolithic but I know they are made solidly and the finish is top notch. While the case limits me to Mini-ITX motherboards, there are plenty of quality Mini-ITX boards out there with all the features needed for the high ended gaming rig that will be the innards of this edifice of Skaven iconography and modern clean lines! The RGB controllers which are compatible with all the big boys in the field,:
"For the best view of the RGB-LEDs in the installed hardware the integrated LED lighting is compatible with Aura Sync from ASUS, RGB Fusion from Gigabyte as well as MSI's Mystic Light Sync, all of which can be controlled at the push of a button."
will also give me the best shot of syncing all the RGB up on case, motherboard etc, to the same shade of Warpstone Glow.
Next Update: Motherboard
**disclaimer - build is in the concept stages and thus may not reach completion. The capability to fund the build depends upon receiving the right price for my current PC. Thus follow the build log if you must, but it may all come to naught...

Last edited:


