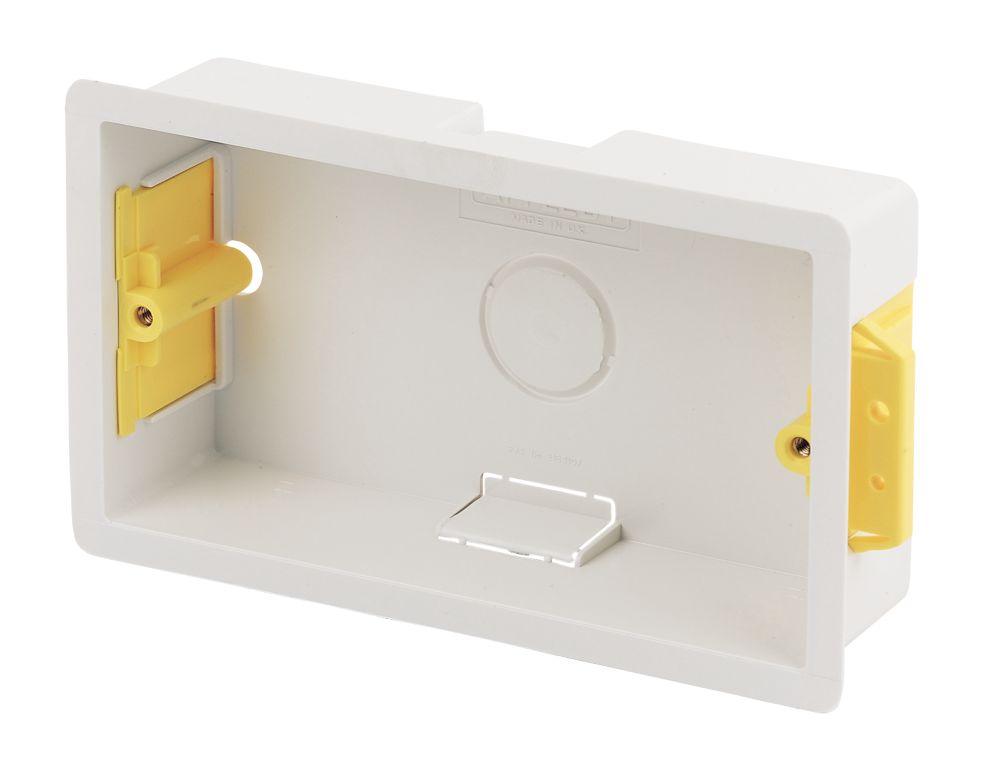
Sockets behind wardrobe, how to extend outwards?

Reminds me of my kitchen.
The main CU was installed on the back of a kitchen cupboard with the typical 3mm or so cupboard backing being the only only thing holding it on.
4 screws into 3mm hardboard for the main CU.

Was pretty stunned when I worked that out.
And we are supposed to believe that only "professional" electricians can be trusted to do certain jobs, well just because.
 
Sockets at the back of a wardrobe won’t be easy to access. You mention getting everything right first time, relocate the sockets to an adjacent wall?
That’s a no go , too much extra work but I may be able to link out 2 of the sockets and have just one with a fused spur off it for lighting , I’ll have to lift a few boards this morning and see where the cables run
 
I'm guessing the wardrobes will have the thinnest of thin backing board, which unless replaced with a decent thickness board, would make fitting an electrical socket a bit of a faff and not that safe.

Rather than overthinking it, it would/could be a lot easier to remove a large enough section of the thin backing board to enable safe use of sockets, or if the sockets are too low, then chase up the wall and put at a height that would work.

Finish off around the area with plasterboard and paint if you are worried about how it will look - at the back of a wardrobe.
They are thin yes , if this was an old wardrobe I wouldn’t care about cutting a big section out but as they’re new I want it all looking very neat and like I’ve actually tried heh
 
What are you realistically going to use these sockets for?

I would be tempted to just plug an extension into each. That you can pull out as and when you need a socket.

I assume just occasional use for eg hoover.

Realistically probably nothing or maybe the iron but it’s more because I didn’t want them inaccessible and hidden away but I’m starting to think now maybe I should just remove them all if practical and just have one socket above the wardrobe for lighting options in the future , I reckon I could fish a cable thru the dot and dab
 
They are thin yes , if this was an old wardrobe I wouldn’t care about cutting a big section out but as they’re new I want it all looking very neat and like I’ve actually tried heh

What will these/this socket be used for?
Will it be the occasional use?
Will it be for lighting?

Fitting an access panel (strengthen thin backing with batten) and placing wiring through cut outs if something that will be there all the time, or open access panel for use and shut when not being used.

 
Last edited:
Having read a little tonight I’m not sure this would be considered safe as the wood which is essentially creating part of the enclosure is a combustible material ?
My understanding is you shouldn’t use a metal back box in wood you need to use a plastic one like I linked to above. I’d say ask a sparky but you’ll get 100 different answers with plenty simply saying you can’t which isn’t true.
 
My understanding is you shouldn’t use a metal back box in wood you need to use a plastic one like I linked to above. I’d say ask a sparky but you’ll get 100 different answers with plenty simply saying you can’t which isn’t true.

The only thing you should try and avoid is having the edges of the wood forming part of the enclosure, I'd if you had a knockout box in the wall, and wanted wooden cladding on the wall and just the cladding around socket and screwed it back, thats not so good, you should try and get an extension box in under such circumstances, even worse if the hole is smaller than it should be, and the wood infringes into the socket, at least with the extension box, even if it does end up 5mm back, its at least forced the hole to be kept to the right size. Also like to see wallpaper trimmed nicely to the edge of the knockout box, rather than just big flaps pushed in (You also tend to find decorators that do this, also manage to leave an X scored on the accessory fronts!)

I'm not sure the plastic boxes are as non combustible as we would like them to be, well probably the thermosetting plastic plastic pattresses are, but the thermoplastic dry liners and conduit entry boxes, not so much. Very occasionly you do come across an old hardwood backbox, and not too uncommonly a fuseboard with a hardwood frame (Which are a lot more fire resistant than the plastic boards we were putting in ten years ago!)
The fire rated consumer unit thing is really funny, they banned metal ones due to the risk of the box being live and everyone installed plastic for years then suddenly the plastic ones are a fire risk and back to metal we go! It seems almost like change for changes sake and has given the inevitable minority of dodgy electricians an excuse to fail inspections because the cu isn’t metal even though the regs aren’t retrospective. I’d love to see the statistics for the number of fires caused by correctly fitted plastic CU’s! My current house still had a ceramic fuse board when we bought it which definitely wasn’t going to catch fire!
 
Last edited:
Half the problem sorted , due to having enough slack cable it was easier to remove the left and centre sockets from the ring and put a Wago box under the floor, they were the last 2 on the ring going back to the consumer unit , just have the right hand socket now which is the 1st on the ring , ideally I’d like to add a spur to this with socket above wardrobe but times ebbing away now as carpet coming soon and I’ve still a load of prep to do on the floor , ho hum
 
Half the problem sorted , due to having enough slack cable it was easier to remove the left and centre sockets from the ring and put a Wago box under the floor, they were the last 2 on the ring going back to the consumer unit , just have the right hand socket now which is the 1st on the ring , ideally I’d like to add a spur to this with socket above wardrobe but times ebbing away now as carpet coming soon and I’ve still a load of prep to do on the floor , ho hum
Just get 3 way wagos and leave a length of 30amp/2.5mm?
 
PS - a bit late :)

I have one double socket behind one wardrobe -Not being fussy I just cut a big enough hole so I could plug a plug in.

Having sockets in a wardrobe is a PITA so I just screwed two sockets onto the end of wardrobe and used extension wire to wire them to two plugs in wardrobe just plugged them in to sockets in wardrobe -These are purely for battery charging and when door is open it hides sockets..

If you can move them to the ends of wardrobe it will be handier and also if you leave a socket still in the wall make sure the hole to access it is big enough. I am not talking plugs but actually being able to unscrew faceplate in the future if you need to.
The lad I did part time work for had dressing room done out and fitters cut a hole the exact size if faceplate. Total idiots.

Another option is glue some thin ply to back of wardrobe panel then use the plaster backboxes- Very handy things.

 
Last edited:
Just get 3 way wagos and leave a length of 30amp/2.5mm?
I’m not sure what you mean , I’m not savvy with electrics, don’t get me wrong I’m competent enough to understand after reading up on things but I’ve never done 3 ways so I have to learn as I go heh
 
Last edited:
The fire rated consumer unit thing is really funny, they banned metal ones due to the risk of the box being live and everyone installed plastic for years then suddenly the plastic ones are a fire risk and back to metal we go! It seems almost like change for changes sake and has given the inevitable minority of dodgy electricians an excuse to fail inspections because the cu isn’t metal even though the regs aren’t retrospective. I’d love to see the statistics for the number of fires caused by correctly fitted plastic CU’s! My current house still had a ceramic fuse board when we bought it which definitely wasn’t going to catch fire!

It was a knee jerk reaction to an increase in consumer unit fires due to poor connections. It's also why components within CUs are meant to be tightened to a specific torque.

Trouble is the cowboys don't pay any attention. Biggest issue is builders, kitchen fitters and odd jobbers doing electrical work that they're simply not up to.
 
IMG20221231095429.jpg


Similarly there were / are sockets behind. We got the installer to cut out the back panel

IMG20221231095444.jpg


Never used it ....
 
IMG20221231095429.jpg


Similarly there were / are sockets behind. We got the installer to cut out the back panel

IMG20221231095444.jpg


Never used it ....

yep doubt we would ever use the one in the wardrobe either tbh but the idea to put inside is more because it protrudes a bit too close to the back of the wardrobe and I didn’t want to cover it

anyways new plan - left and centre sockets have been removed , missus wants a spur for a (future) wardrobe light , I’ll remove the right hand socket and spur from a 3 way wago under the floor then add a fused switch inside the wardrobe and a socket above the wardrobe

only problem is routing the cable as the dot and dab is random so I’ll probably have to knock a few holes in
 
All sorted , removed everything ,put 3 way wagos in box under floor to power a fused switched spur (to go inside wardrobe on patress) with double socket that will be above wardrobe

thanks for all the suggestions , it’s been a learning curve on the electrics side

id Have had the wardrobe fitted today but when starting to level the units I realised the floor was half an inch out in one corner of the room, not usually a problem but I’m not putting a plinth on the bottom so the bottom of the units and where the carpet would end up would cause The sliding door to touch the carpet, or if I raised the units up more I’d have a big gap under and it would look crap

ive lifted the floorboards and I‘m a bit perplexed , the corner that’s out has had 3 joists sistered over about a metre but they’ve put them half an inch higher than the originals which are perfectly level :confused: , I can’t remove the sistered joists as too many utilities go through them so I’ve had to hack them with a multitool
 
Back
Top Bottom