Steampunk inspired build

Associate
Joined
12 Feb 2016
Posts
30
I have finished my build so hope I'm putting this in the right place, this is my steampunk inspired build using a Corsair 750D chassis sprayed using rustoleum aged copper, cables are hand sleeved myself on my Corsair HX850, the pump is painted in the same rustoleum paint, fittings are barrow 16mm compression fittings, piping is standard copper 15mm pipe with the ends swaged to fit in the barrow fittings, CPU cooler is an ncore V1 direct to die cooler CPU is delidded under there, gpu cooler is a bykski cooler as they are the only company that makes a cooler for my gigabyte 3070.
Let me know what you think

 
Great idea though. As I like Function over form would have no problem doing something like this in the future. Not sure how much that copper costs these days I take it is more expensive than I recall it being? :D
About £12 for a 3 meter length, but I was lucky family had some stored away that just needed a clean, cost about £10 for the elbows, solder was £10, propane was £16 flux I already had so can't remember cost on that, overall it cost me about £100 to do the build, not including the water blocks, rads and fans are reused from the previous loop
 
Polish the copper! Looks great!
I was very tempted too but the other half was having withdrawals from her zoo planet so I had to get it built once it's run for a week or so I'm gonna flush the whole thing in case there's any debris because the copper aside from the elbows was old copper, so I may very well polish it then.
Don't suppose you have any tips for polishing? as the only tool I have with a polishing pad is a Dremmel style tool
 
i would just hand polish with a cotton cloth and metal polish such a Peek polish.

awkward with a machine and you cant see with the naked eye but machines tend to spit the polish all over the place as a very fine spray / dust. Not good in a PC case
No dramas with mess I would remove the pipe to polish it anyway and will likely do that outdoors, will hand polishing with a polish like that get the copper up to a mirror finish?
 
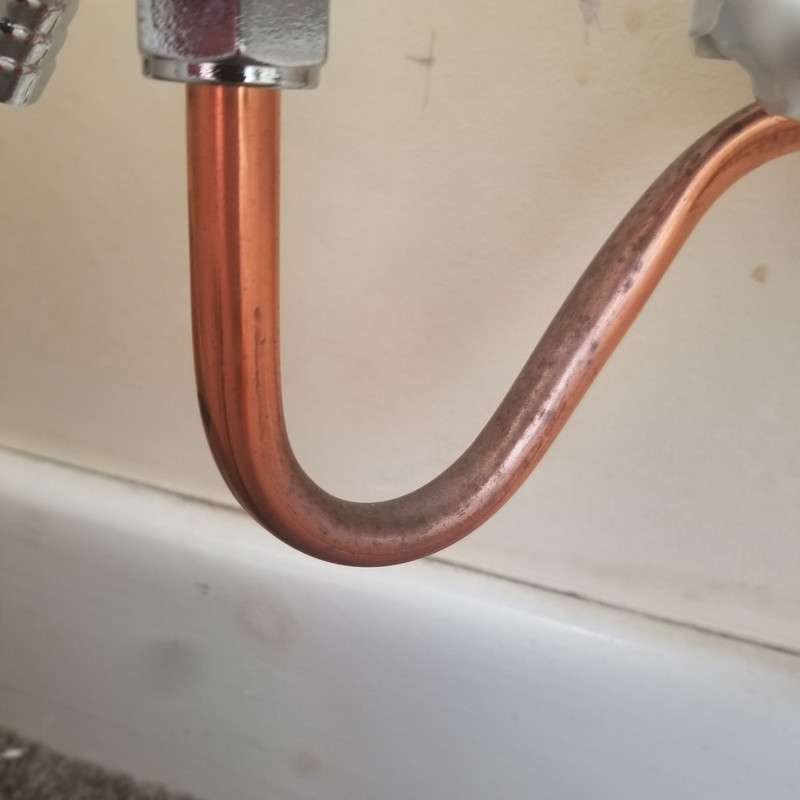
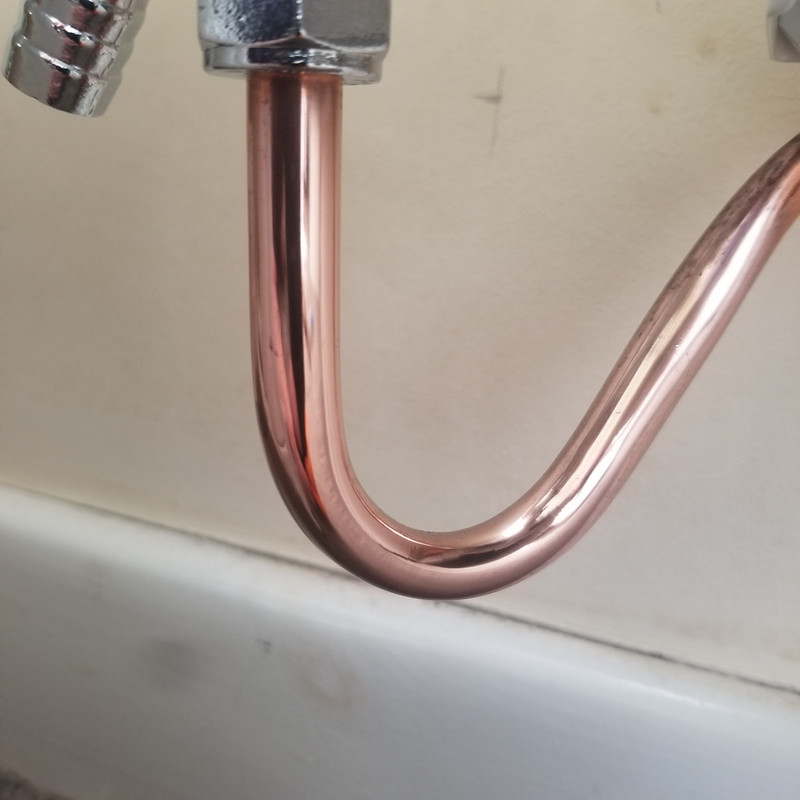
I just tried and i think you could with some elbow grease. This was getting better and better the more i polished it. This was in a couple of minutes with a metal polish and an old dish cloth.


20220719_134150.jpg

20220719-134612.jpg
For a couple minutes that came up pretty good, fair play and thanks for the info
 
Hand polish with microfibre clothes and brasso or silvo imo - if it's half-hard copper pipe with soldered joints you should be fine to flannel the pipes easily enough to polish and remove the polishing compound residue fairly easily


, or can get pre-soaked wadding packs of either. Alternatively use a polishing paste - I got one from Menzerna that's pretty good.
It is half hard and soldered throughout, I have a bunch of new microfibre cloths so flanneling the pipes is probably the way I'll go, I've not seen silvo on shelves anywhere but brasso is readily available, I'll pick some up, will post up some pics once it's nice and shiny, thanks for the info
 
The pipes are likely to oxidise from the water temp - I used incralac lacquer - it's an acrylic lacquer with a chemical called benzatriazole that chelates with the copper to stop oxidation. It's around £15-20/can for rattle cans, or available in tins for spray guns.
Definitely worth thinking about if I'm polishing the copper, would definitely help it keep its lustre once the job is done and yes it definitely does oxidise the copper, it has already changed colour since being built and I scrubbed those pipes well before I put it together to make sure there was no flux etc left on them, they are much darker now.
I do have some lacquers at home already so I will check through them first and see if any have benzatriazole in them, if not then I'll pick up a can or two of incralac as well.
 
The pipes are likely to oxidise from the water temp - I used incralac lacquer - it's an acrylic lacquer with a chemical called benzatriazole that chelates with the copper to stop oxidation. It's around £15-20/can for rattle cans, or available in tins for spray guns.
Can you post an image of the incralac you use please, I'm finding mixed results all claiming to be the stuff so would like to be sure it's the right stuff I'm ordering
Thanks
 

All of the incralac formulations are basically the same AFAIK and stabdardised formulation since it was developed in the 60s (paraloid b44 is the arylic in them, benzotriazole as the corrosion inhibitor, then just volatile organic solvents to evaporate off at different rates as it dries and a levelling agent (see eg https://www.google.com/url?q=https://www.icom-cc-publications-online.org/dlfile.aspx?file=docs/content/pdfs/2017/ICOM-CC_2017_Copenhagen_544.pdf&sa=U&ved=2ahUKEwi8gZTxyIX5AhUQSMAKHe-9COcQFnoECAIQAg&usg=AOvVaw2-aFwAcZIQFM09uHkwge-d ). 3-4 coats to give a dry film thickness of atound 20-25 micrometers is recommended
If that's the case then I think I may have found an equivalent for the same sort of price as you originally mentioned, will see if they have an MSDS for it and any other info on what it contains to be sure, if not then I'll just go with the rylards, thanks for the info it's very helpful and appreciated
 
Looks bloody good. Nice work. I’d be tempted to try some soft blue or maybe even green lighting rather than white, think it’d go well with the pipes. White just feels too ‘clean’ to me - if that makes sense.
But that’s obviously just my own worthless opinion :p
Cracking work all the same.
Thanks mate, It had green lighting with the build in it prior to the white, carried over from the previous build, it looked so odd, the previous build in there we called the Borg cube it was all green soft tube and worked pretty well but I wanted a change and with the green in there it still looked like a Borg cube lol
 
Looks great, i'd definitely add another pipe that goes through and puffs out some smoke every now and then (outside of the case) to give it more of a steampunk vibe. Love it
Thanks mate, honestly I think that's a great idea and you're not the first person to say that, not really sure how I'd implement that though, might put some thought into that
 
Ecigarette with USB passthrough cable to the battery for power, with large capacity tank atomiser, heating just vegetable glycerine liquid for the smoke, with the ecigarette power switch connected to a relay to activate for a few seconds say every 15 minutes and then a small ducted fan for exhaust coming on a few seconds after the ecigarette to exhaust the 'steam' - might be able to control from RGB controller ports?

Sounds like a lot of faff though, and would need upkeep to keep the eciagarette supplied with the vegetable glycerine as it gets used etc.
Thats not bad at all I would imagine that would work pretty well actually, although rather than the RGB port (I only have one and it's in use) I'd probably knock up a standalone timer circuit taking its power from the same usb used for the passthrough to power the ecig, in fact I've got an old raspberry pi sat in a drawer I imagine I could set that up to take care of the timing and switching the relay for the ecig.

Definitely would be faff and need upkeep but it would be pretty nifty and certainly fit in with the steampunk theme, gonna do some thinking and see if I can find a ducted fan small enough to fit inside a piece of copper pipe, I have some ideas brewing now lol
 
Been doing some thinking on it and I think what I'm gonna do is use an atomiser with a side fill if I can along with veg glycerine and a small air pump, pass the air up through the bottom of the atomiser so that it pushes the small clouds out through the exhaust pipe and control it with a raspberry pi so that I can run the pump for a little longer than the atomiser (to make sure the vapour is completely exhausted) and relays through a voltage correction circuit powered from a molex on the PC's PSU so that I have enough current.
Watch this space lol
 
I think when you're doing steampunk, faff is part of it - i've never seen a steampunk cosplay that didn't have a lot of faff to make / keep it going but they look hella awesome and the faff is part of what makes them unique!
Certainly a lot of faff gone into it so far lol a little more isn't gonna hurt especially considering I'm gonna be stripping it down soon and remaking one of the cooling system pipes anyway, not happy with the pipe that runs from the top rad into the CPU, it looks wonky in comparison to the others so need to lengthen the horizontal section slightly and shorten the vertical section slightly to straighten it up
 
Constant tweaking (not twerking as i wrote twice!) always comes with the territory, can't wait to see the 'final' (beta version 84 by now i assume? :p) product
Lol yeah something like that, I know they're never really finished, there is always something else to do or to add, I'm thinking maybe chuck a couple of good old fashioned toggle switches on the front panel too, to turn off the steam and LEDs if I so desire and possibly some little incandescent bulbs to indicate whether it's on or not
 
Back
Top Bottom