System build guide

Associate
Joined
2 Dec 2005
Posts
1,614
Just updating the guide over the coming days.

Disclaimer: The following is the method I use when building a PC. I am not personally responsible if in the unlikely event something goes wrong, gets broken, voids warranty or simply doesn’t work.


Step 1: Hardware Choices

In simple terms to build a basic PC the following parts are required.

1. Processor (CPU)
2. Motherboard (Mobo)
3. Memory (RAM)
4. Storage Drives (SSD and/ or HDD)
5. Graphics card(s) (GPU) (Unless using onboard graphics)
6. Power supply (PSU)
7. Case
8. CPU Heatsink & Fan
9. Case fans
10. CD/DVDRW drive(s)
11. Optional: Sound card (motherboards also have onboard sound)
12. Optional: Fan controller


Hardware Info

Processor: When building a new PC the two main parts to start with are the CPU and motherboard. The CPU will set what socket motherboard you require. For example a LGA1150 CPU will require a LGA1150 socket motherboard. OEM CPUs often are slightly cheaper, however, usually come with less warranty than the retail version and do not come with a stock heatsink/fan.

Motherboard: There are many factors which deem which motherboard you should buy, these include:
- That the motherboard socket matches that of the CPU
- The supported memory speed. If wanting to use over 1600 MHz memory, check the motherboard specification to see if higher frequencies are supported.
- If you want to use SLI or Crossfire make sure at least two PCI-e 2.0 x16 slots are available. Check to see if the slots can run at full x16, or if the other slots are x8 or x4 when run in SLI/ Crossfire. x1 is also available for other expansion cards.
- If using SLI or Crossfire check that the motherboard can support the one required.
- Double slot coolers on GPUs can cover the slot below, check that the slow below is not required by another device you wish to install. Different motherboards have the slots in different orders.
- Motherboards come in different sizes such as ATX, & microATX. Select the size which corresponds with the features you require and the size case you wish to use.
- What chipset the motherboard uses, for example z97. For each socket there are usually different motherboard chipsets available. Each chipset uses different controllers. Check reviews to see how each controller performs.
- The number and speed of SATA ports available. A 6Gb/s drive to run at full speed requires a SATA 6Gb/s port, although is backwards compatible at slower speeds.
- If requiring onboard graphics a motherboard with DVI/VGA/HDMI output via the back I/O panel.
- Number of PWR fan headers to plug case fans and CPU fan into. A fan controller can increase the number of fans supported and provide speed control.
- That the generational refresh of the processor is supported by the motherboard. Check that the CPU is compatible with the motherboard, even if the socket number is the same.

Memory: Check that the memory speed and type you wish to use are supported by the motherboard. Memory comes in a variety of frequency speeds and latency timings. Dual, triple and quad channel configurations are used by motherboards, however check which your motherboard supports. The memory sticks are used simultaneously in the specified configuration. For the greatest chance of working correctly the memory used in such configurations must be matched and of the same model, speed etc. The easiest way is by using a matched kit. Some CPU coolers are very large and can conflict with the memory slots on the motherboard. Check that the CPU cooler and memory can both fit.

Storage Drives: If using 6Gb/s drives make sure that the motherboard supports SATA 6Gb/s. SATA is backwards compatible, however will run at a slower speed.

Graphics card(s): When using SLI or Crossfire for best performance the PCI-e slots should be rated at x16 or x8 when in a SLI or Crossfire configuration. SLI configuration requires an SLI bridge (connector) which comes with the motherboard. Crossfire usually requires a Crossfire bridge; however the R9 290 series does not.

Power supply: Select a wattage which gives some head room and also allows for possible further expansion. As an approx rule 500w for one higher end GPU and 750w for a dual GPU setup. The PSU seems tempting to skimp on, however should never be over looked since this is what will be powering all of your expensive components. PSUs have an efficiency rating, these often include: 80 Plus Bronze, 80 Plus Silver, 80 Plus Gold, 80 Plus Platinum and 80 Plus Titanium. Check that the PSU can fit inside the case you have selected and that the PSU offers the required number of power connectors.


General Motherboard Layout
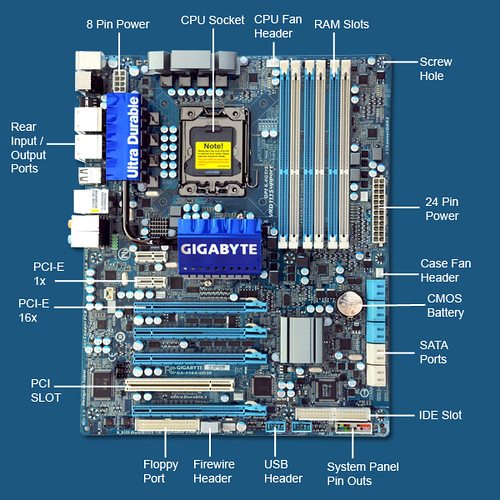
4397938551_1073988f9c.jpg


Tips:

1. Never touch the copper contact pads or pins.

2. Always handle the electrical components by the edges of the chip or board.

3. If its going to fit it will slot in easily, don't force components or cables into place.

4. Before any electrical components are touched make sure you are well grounded, this will help reduce the risk of static electrical damage to components. One method of grounding is once the PSU is fitted into the case plug the PSU into the wall socket, although not switched on. This allows the builder to ground themselves when touching a metal part of the case.
 
Last edited:
Step 2: Case work


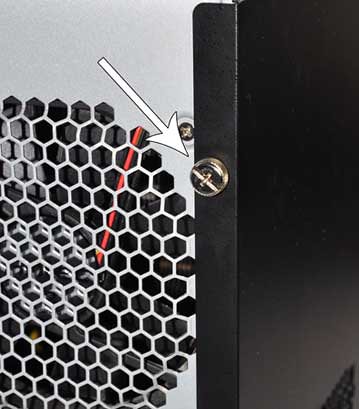
(A) To get started both sides of the case must be removed to gain access.

This is usually achieved by removing four screws on the rear of the case and then sliding the side panels backwards.

5389876985_fd3753ea70.jpg


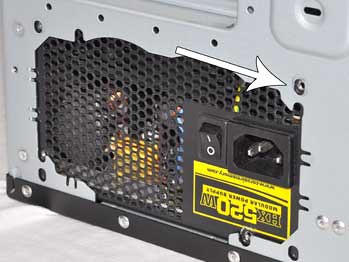
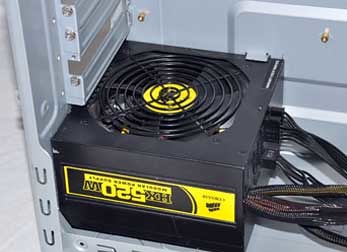
(B) The next job is to fit the power supply (PSU) into the case. Start by working out which way up the power supply goes. This is done by seeing which way the screw holes in the PSU align with the holes in the case. If the PSU can fit both ways up, fit it so that the fan in the PSU has access to most ventilation.

Using the screws supplied with the case, screw in the power supply. This is usually done with four screws.

5389877085_22211a918c.jpg


5389877045_6c76e19377.jpg


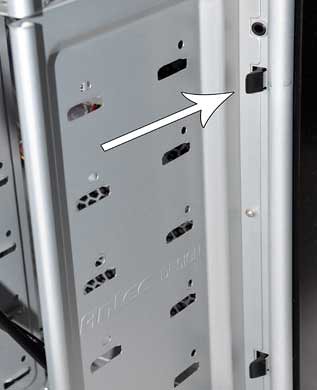
(C) Now that the PSU is fitted the next task is to fit the DVDRW drive. To do this the front panel of the case may need to be removed. Different cases have differed methods of removing the front panel. The front panel is usually held in place by either a few screws hidden on the inside of the case, or by plastic clips.

5389877119_b062ebaab7.jpg


(D) The blank on the front panel and inside the case will need to be removed to allow the drive to be fitted into the drive bay slot. Sometimes cases will come with the primary drive bay slot cover already removed such as with the Antec 300, which also does not require the front panel to be removed.

5389877161_a46099dec5.jpg


(E) The blank on the front panel and inside the case will need to be removed to allow the drive to be fitted into the drive bay slot. Sometimes cases will come with the primary drive bay slot cover already removed such as with the Antec 300, which also does not require the front panel to be removed.

5390485010_7ccd95d5ed.jpg


(F) Now that the CD/DVDRW drive is fitted the next step is to fit the case fans. Some cases will come with the fans pre installed. If so skip this step.

Most cases will have front intake fan(s), rear exhaust fan(s), and possibly a top exhaust and side fan. These can range in size but are usually around 120mm in size.

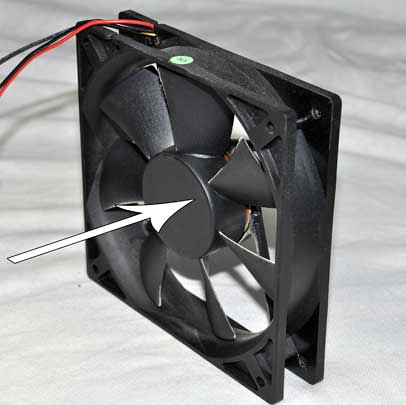
The photo below shows which way the air will blow so the fans are positioned the right way round. The case fan(s) should intake cool air at the front of the case and expel hot air at the back.

5389877299_a7f7138da0.jpg


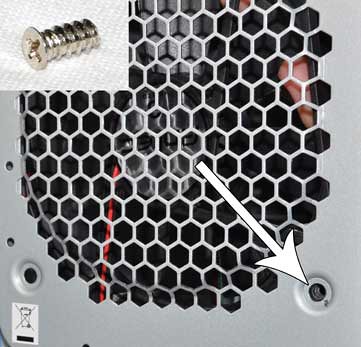
(G) Align the fan with the screw holes in the case and with the supplied case fan screws screw the fan to the case. This may take a bit of force as the screws have to tap into the plastic screw hole in the fan.

5390485172_078e202a8c.jpg


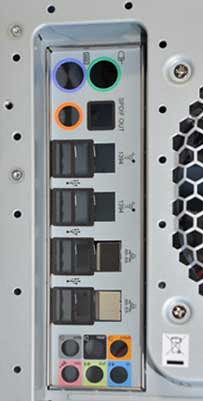
(H) Now that the case fans are installed the next step is to fit the I/O shield plate. This is the plate which coves around the holes where the rear motherboard input / output ports are.

Some cases come with an I/O shield plate already installed. This is pretty useless as it will not align with most motherboards as the ports will be in different places. Remove this one if it is there and in its place put the one that came with the motherboard. Make sure the plate is the correct way up so it will align with the motherboard ports. To attach the I/O shield to the case simply push it in the correct way up until it clicks into place.

5390485224_f8a81f81a2.jpg


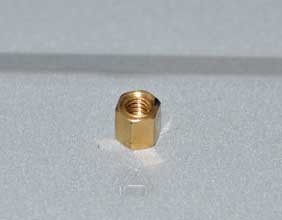
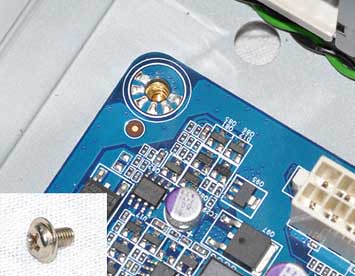
(I) The next step is to screw the motherboard standoffs into the motherboard tray part of the case. These are the standoffs which keep the motherboard from touching the back of case.

The motherboard will have a series of screw holes in it. Take the motherboard out of its anti-static wrapping and place it either on top of the motherboard box or onto an anti-static mat. The anti-static bag can also be cut open and the board placed down onto what would have been the inside of the bag which offers anti-static protection. The motherboard can be placed down onto the outside of the anti-static bag, although be warned that this does not offer anti-static protection.

Look at the motherboard and where there is a screw hole, screw a standoff into the case so when the motherboard is lowered into place the holes in the board will align with the standoffs underneath. Usually marked on the case next to the holes will be a letter or abbreviation which shows what size of motherboard that hole was indented to be used with. In this case the ATX sized motherboard screw holes are indicated with the letter A next to the holes. The standoffs will later be screwed into and so hold the motherboard in place.

5389877443_fe81a37fd7.jpg
 
Last edited:
Step 3: Kitting out the motherboard – Intel Route


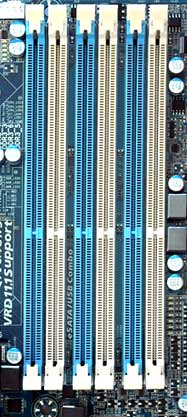
(A) Leave the motherboard on top of the box, folded out anti-static bag or anti-static mat if one has been used. Firstly the memory (RAM) is to be fitted, which fits into the slots shown below.

5389877481_cb6ffeb7ed.jpg


(B) If one stick of memory (RAM) is being used skip down to the memory fitting instructions, step (C).

For RAM to work in dual or triple channel (triple in this build guide) the RAM sticks will have to be matched triplets and also be put into the correct slots. Usually the slots are colour coded. E.g. three out of the six slots (number of slots will vary with different board specs) will be white and the other three will be blue. So the matched triplet would go into the white slots and if there is another matched triplet they would go into the three blue slots.

If the slots are not colour coded consult the motherboard manual to find out which slots match up. With the GA-X58A-UD3R reading from left to right it’s the 2nd, 4th and 6th slot and for the second set 1st, 3rd and 5th slots.

5389877537_d51d651b92.jpg


(C) To fit the RAM push away the clips at each end of the slot. Then take a RAM stick and align it so the notch in the slot aligns with the notch in the RAM stick. Then push the RAM down into the slot. Then as this is done, close the clips at both ends of the slot, thus locking the RAM into place.


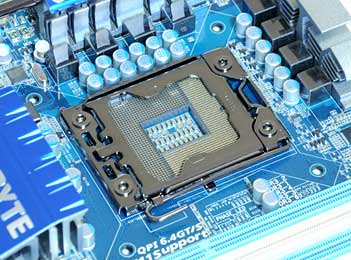
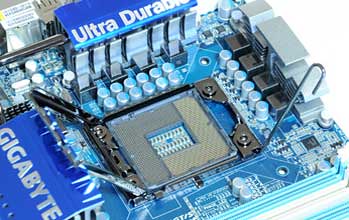
(D) The next step after the RAM is to fit the processor (CPU). Firstly undo the catch holding the socket hatch shut. To do this, push down on the catch leaver and then slightly sideways. This allows the hatch to open. If a new motherboard is being used a black socket protector will be fitted over the hatch, this should be removed and is no longer needed but keep it in the motherboard box in case the motherboard is to be sold on at a later date.

5390485416_be96a0cefa.jpg


5390485474_a17b3295c9.jpg


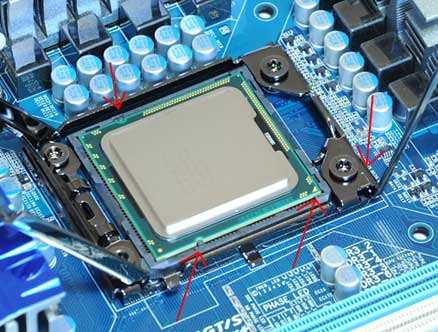
(E) Next take the CPU and look at how it aligns with the socket. There will be several notches which align only one way, and so stop the CPU from being put in the wrong way round. There will also be a triangle in one corner of the CPU and on the socket; these should be aligned as shown below.

Once the CPU has been aligned gently drop it into place. Then shut the hatch and secure by using the leaver as before. The hatch leaver can take a bit of force to close, so don’t worry if it feels too tight.

5389877707_5f3db293a1.jpg


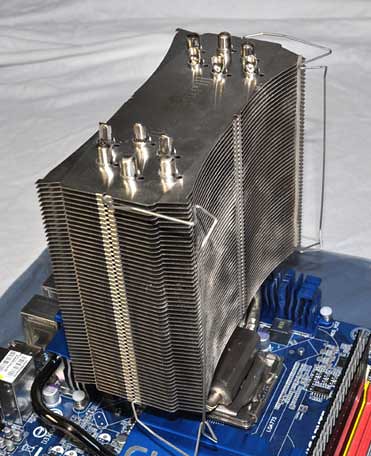
(F) Next up is the CPU cooler. There are many different methods for fitting CPU coolers depending on the model of CPU cooler. This guide will show how to fit the Thermalright Ultra-120 Extreme cooler. Although the general principles apply to all coolers, it is usually just the method of attaching the cooler to the board E.G. by bolts or push pins that changes.

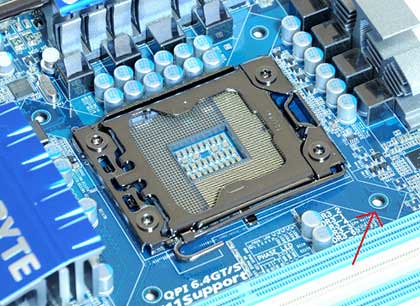
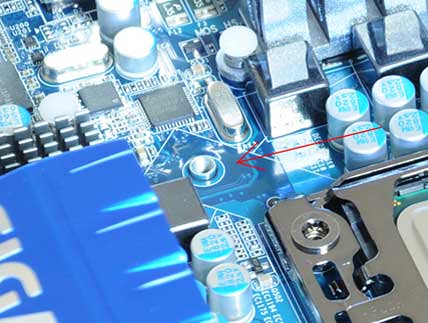
The CPU cooler will attach to the motherboard via four holes around the edge of CPU socket.

5389877759_62443a0a93.jpg


(G) If the cooler is a push pin method like the generic Intel cooler that comes with retail Intel CPUs, align the four plastic pins of the cooler with the holes in the motherboard and the push down on each corner pin to lock it into place. This may sound easy but as many have found the method is very frustrating and not as easy to do as it sounds. A bolt fitting cooler is much easier to attach into place.

Before a cooler is attached check if the cooler has thermal paste pre applied or not. Simply look at the underside of the cooler if there is a grey/white paste pre-applied which is unused then new or extra paste is not required.

If none is applied then new paste is required. Squirt out a piece of thermal paste the size of a grain of rice onto the middle of the CPU. This is all that is needed. When the cooler is attached it will squash down, filling any slight dips / scratches and so gives a good seal between the heatsink and CPU which will increase heat conductivity from the CPU to the cooler. If the thermal paste manufacturer recommends a different application method follow that instead.

Note: If the cooler is removed it will result in a break in the seal created and the thermal paste will need to be cleaned off both the CPU and cooler and re-applied in the above fashion.

5389877837_70eeaf6159.jpg


(H) The Thermalright Ultra-120 Extreme cooler is secured via bolts to a back plate behind the motherboard.

The back plate should be positioned so that the corners poke through the socket holes in the motherboard and so gives the bolts something to screw into.

5390485684_88eeaa7caf.jpg


(I) Next align the supplied side brackets with the back plate followed by screwing them into positing. Then screw the cross bar into the side brackets. Do so by turning each of the screws in regular intervals until they are unable to be tightened.

5389877963_dff2c5cbe1.jpg
 
Last edited:
Step 4: Into the case - Motherboard & Hard drive

(A) Lower the motherboard down on to the motherboard standoffs that were previously attached to the case. Making sure that the motherboard aligns with the standoffs and with the I/O shield. With the supplied screws, screw the motherboard into place. Do not over tighten these screws.

5389878021_3786bffaec.jpg


(B) A little forward thinking is required here. Ideally the hard drive(s) do not want to be mounted into the case so that the drive(s) are on the same level as where the graphics card will fit. This can get a bit cramped in smaller cases especially when trying to plug in the power into each of them.

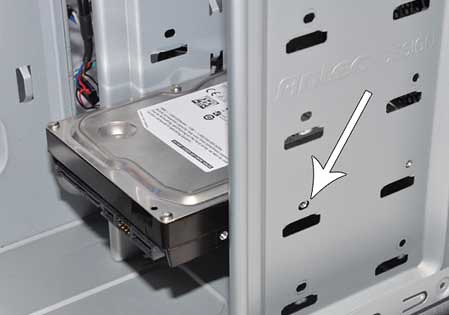
Slide the hard drive in to a 3.5 bay and align the holes in the hard drive with the holes in the case, making sure the power and SATA ports are facing the correct way so you can gain access to them. Then with the supplied screws, screw the drive into the case. As with the CD/DVDRW drive the hard drive will require screwing in from both sides.

5390485856_6362898d38.jpg


Step 5: Front panel headers - USB / Audio / Firewire


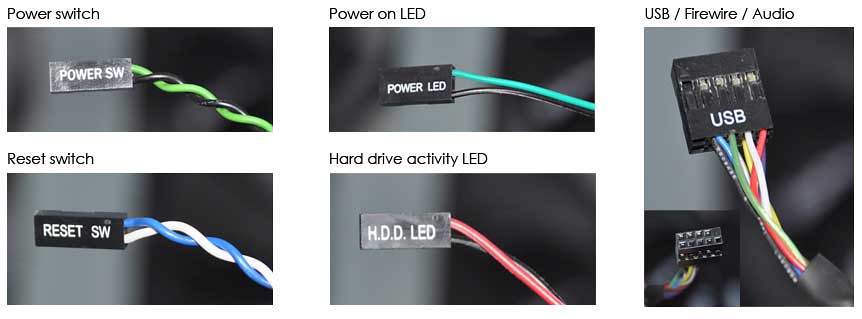
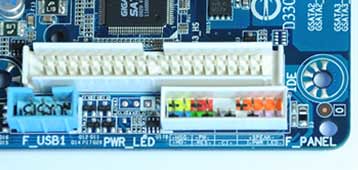
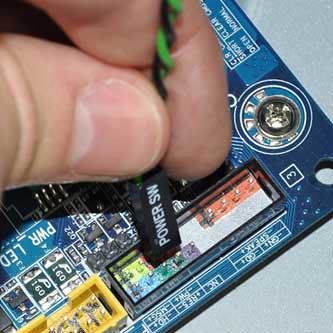
(A) So that the computer is able to be turned on and reset etc the front panel headers need to be plugged in. These usually consist of the power switch, reset switch, activity LED and power LED, followed by the USB / Audio / Firewire headers. To get the + and - round the right way on the reverse side of the writing there will be an arrow pointing to the positive pin. The headers are normally labelled as the following.

5390485904_e84fcb4ef3_b.jpg


(B) The front panel headers plug into the front panel pin out on the motherboard which is usually located on the bottom right of the motherboard. The front panel pin out vary in layout on each motherboard, sometimes they are labelled on the board and other times only listed in the manual but the method of simply pushing the header over the pins remains the same.

The front panel pin out vary in layout on each motherboard, sometimes they are labelled on the board and other times only listed in the manual but the method of simply pushing the header over the pins remains the same.

5389878167_cfd8c757e4.jpg


5390486004_d8fba69469.jpg


Step 6: Fitting cables - CD/DVD-RW, hard drive & fans


(A) In this step the fans, CD/DVDRW drive and hard drive will be connect to the motherboard.

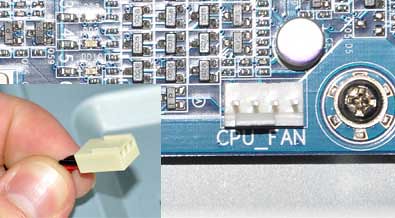
The first fan to be connected is the CPU cooling fan. This is connected to the motherboard by a 3 pin plug / socket, which usually labelled on the motherboard as “CPU fan” or similar to this. If it is not then it will be listed in the motherboard manual. As a tip it will be situated near to the CPU cooler. The plug can only fit one way round due to the guide lines.

5389878261_5ab8ba0804.jpg


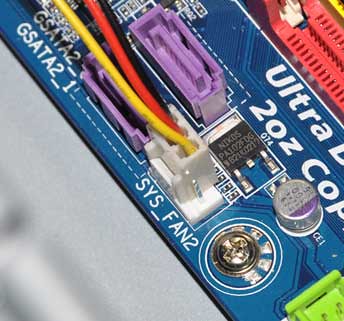
(B) The next to plug in is the case fans. These either attach via a 3 pin plug / socket such as the CPU fan or via a 4 pin molex plug. If connecting via the four pin, skip this step for now. To connect the 3 pin fans plug them into the motherboard as was done with the CPU fan. The sockets are usually labelled on the motherboard as “case fan” or “Sys fan”. If not, its time to consult the motherboard manual again.

Note: Some fans have both 3 pin and 4 pin molex connectors. Only one of these needs to be plugged in for the fan to work.

5390486108_bb21a09d26.jpg


(C) Next up is the CD/DVDRW drive. This connects to the motherboard via a SATA cable, although older drives connect via an IDE cable. SATA and IDE cable ends are shown below. They are usually both included with the motherboard.

With SATA cables it does not matter which end you connect to the motherboard and which to the drive. Also the SATA cable can only connect one way due to the L shaped connector, so no worry of getting it the wrong way round.

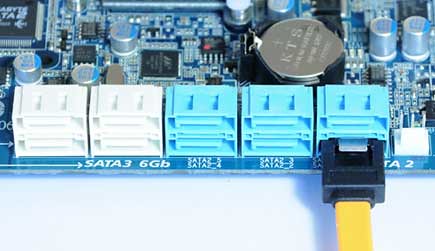
Plug one end into the drive and the other into a SATA port on the motherboard. Plug the SATA cable into any SATA port but usually its done so that "SATA0" is used first and so on. Each port should be numbered next to it on the motherboard if not check the motherboard manual.

5390486152_c8556dd013.jpg


(D) Next to connect up is the hard drive. This is exactly the same as the CD/DVDRW drive. Again it does not matter which SATA port number, apart from keeping things neat and knowing which port the hard drive is in.

Do not worry about plugging in the power cables to the CD/DVD-RW or hard drive yet. This is done in a later stage.
 
Last edited:
Step 7: Fitting the graphics card - Optional sound card

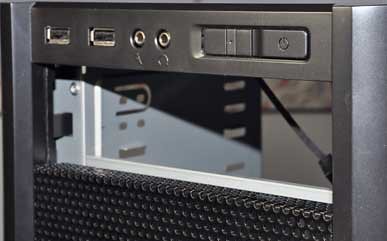
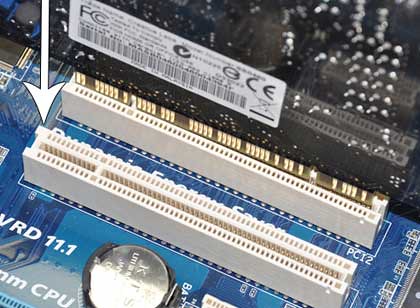
(A) Select the top compatible PCI-E 16x slot and remove the backing plate from the case for that slot so that access is available to the rear ports on the card. On most cases the plates unscrew or on cheaper cases they push out.

Once the plate is removed align the card with the slot and gently push the card down into the slot. The bracket on the card should now be inline with the case and be ready to be screwed down.

With the screw from the backing plate, screw the card into place.

Note: Most graphics cards require extra power to work, remember to attach the power to the card on the PSU connecting up step.

Note: Usually the PCI-E 16x has a catch on it which will need to be released if you want to remove the card.

5389878431_8c3e342ec5.jpg


(B) Optional sound card. Find out if the sound card is either PCI or PCI-e, and then select a compatible slot on the motherboard. Once a compatible slot has been selected remove the backing plate as was done with the graphics card.

Note: Some sound cards require extra power to work, if it does remember to attach the power to the card on the PSU connecting up step which will follow soon.

5389878493_7266bbc1f2.jpg


(C) Before the next step quick check is a good idea.

1. Motherboard fully screwed down?
2. PSU fully screwed in?
3. RAM seated in the slots correctly and clipped in?
4. Graphics and sound card seated in the slots correctly and screwed in?
5. Fans all connected? (apart from any 4 pin ones)
6. CPU cooler attached firmly?
7. CPU cooler fan plugged in?
8. Hard drive and CD/DVDRW drive screwed in?
9. CD/DVDRW drive plugged in at both ends?
10. Hard drive plugged in at both ends?


Step 8: Connecting up the power cables

(A) This step involves connecting up the power cables from the PSU to the required hardware. To do so push the power plugs over the sockets, they will only fit one way round due to the shaping on the socket.

When selecting a PSU for your build check to make sure that the PSU offers all of the power connectors required. As a substitute splitter cables can be purchased which connect to a 4 pin molex and so can give you either two molex or a range of other power connectors such as SATA. If possible try to get all the connectors needed hardwired or modular with the PSU.

Connect the 24 pin cable to the 24 pin slot on the motherboard which clips into place.

5389878541_1570b29591.jpg


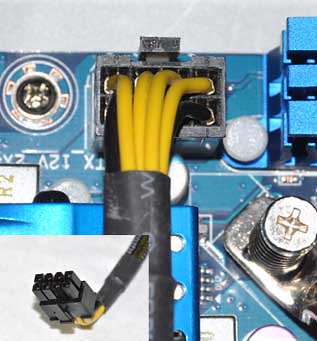
(B) Next connect the 8 pin cable to the motherboard which will clip into place. This is some times a 4 pin plug/socket or is absent.

5389878593_c407fa9b56.jpg


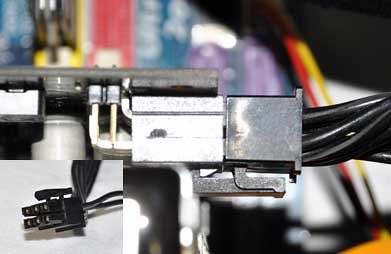
(C) Next connect a PCI-E 6 pin cable to the graphics card which will clip into place.

Note: Some graphics cards require two 6 pin PCI-E power cables.
Note: Some graphics cards require one or two 8 pin PCI-E power cables.

5389878643_8965d6957c.jpg


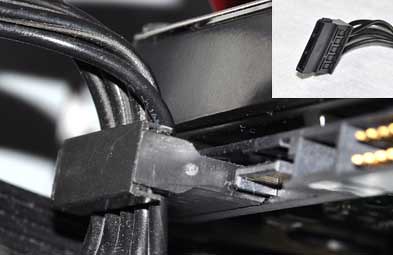
(D) Next connect a SATA power cable to the CD/DVDRW drive. Note: This is an L shape design, which only fits one way. Note: Some times a 4 pin molex is used.

5389878675_0cf73f38e7.jpg


(E) Next connect a SATA power plug to the hard drive.

5389878709_acdee3ab3e.jpg


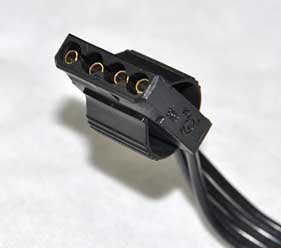
(F) Lastly connect any 4 pin Molex fans via a 4 pin Molex cable. Note: If the fan is already connected to the motherboard via the 3 pin you will not need to connect it to the 4 pin Molex as well.

5390486504_d2cbddb93d.jpg


This is now all of the hardware fully connected to the PSU. Any unused cables from the PSU can be tucked away. This being a benefit of a modular PSU where only the required cables are connected to the PSU.

All that’s required now is to screw the side panels back onto the case and the systems is ready for an operating system to be installed. Remember to go into the bios and change the boot priority to the DVD drive first if the OS is being installed via DVD.
 
Last edited:
Looks like you're done. If not I'll flag this to get a mod to remove it for you.

Epic post. Really good of you to make the effort. Naturally I'm posting to correct you, though I don't have much to take issue with at all :)

DVD drives use M3 screws, not quite the same as the psu/motherboard/hard drives which use 6-32. I believe M3 to be the same as 4-40, M3 is metric and 6-32 is imperial. Coincidence that 4-40 = M3 if it does. Floppy drives also use M3.

The cpu power cable is 4 pin, 8 pin or absent. It is never 6 pin.
The graphics power cable can be 6 pin, 8 pin, both, or two 6 pin depending on card.

Might be worth mentioning that you dont touch anything that looks like copper, dont force things into place, and should hold everything by the edges

I believe that is everything I can find at fault, legendary effort here. I vote for sticky.

Thanks Jon, I knew I must have made a few mistakes. I have now corrected using the above.
 
Nice guide mate..

Would you like to add that to my website?

Yeah that would be fine.

Not a good idea.. Only the inside of the bag has AS properties. The outside is completely opposite. Best open up the bag or place the board on the box or on an anti-static mat.

Been doing that for years with no problems, although I will adjust the guide to do what you have said, thanks for the correction.
 
Last edited:
Thanks for the guide.

I have a question, how do you remove thermal paste which is already applyed to the CPU Cooler when it's bought? And when you apply new thermal paste such as Arctic 5 Silver, I've seen on some guides you need to spread it yourself but you said not to?

You can buy arctic cleaner which is a citrus based cleaner and helps disolve the paste, then you wipe it off with a lint free cloth.

Some people spread the paste out. I personally don't bother and have had more success without spreading it out. The paste seems to find its own level and spread out edge to edge its self under the pressure of the cooler.
 
My build will almost certainly have two hard drives, one solid state one standard. How would this be connected. Is it as simple as plugging each in to different ports on the board?

The same question goes for other additional drives, Blue ray etc. is it simply plug and play?
Yes, just plug them into the SATA II ports. Then when installing the OS, windows will give you the option on to which hard drive you want the OS on.


How do you work out what size PSU you need

There a few psu calculator websites where you put in what you are getting and it gives you the wattage required. But for a single graphics card and a few drives, 500-600w is plenty. Its better to have say a 400w decent brand psu over a 500w cheapy. Im running a E8500, 4gb ram, SSD, 320gb normal HD, and a 8800gt 512mb and I only draw 150w max under load and 105w idle.

and does modular mean it will almost certainly have enough power slots for expansion (or does modular mean its a steady power supply)?

Not sure what you mean by the last bit but yes, modular will usually have enough power outs for different things. Just look at the spec of it and it will say what and how many cables types it comes with. Basically modular is the same as a normal PSU apart from you only connect to the PSU the power cables you will need.
 
Last edited:
Ah great your on:


1) I have two audio cables one labeled AC '97 and the other HD Audio then they have a load of single pin connectors coming off it. Which one do i connect? Also for the Power LED its quite a chunky one and cant see anywhere on the MOBO to put it.

2) Also have same problem with fan connectors. There are like 4 biggish pins. Noticed on my PSU there are connectors that will fit them, do i just slot the in here?

3) On the main power supply cable, (http://farm4.static.flickr.com/3534/...d8246338ef.jpg) i have 4 remaining pin slots, in that photo they are all full but on mine there are 4 left at the end. Do i just leave them?

4) Also, got one cable left coming from the PSU which has holes for 4 pins which must come from the mobo yet I dont know where they go.

I'm pretty stuck here :P

Thanks!

1) HD audio will be labled on the motherboard somewhere, usually the pin out is green, if not shown on the board it will be in the manual. I believe AC'97 is the older tech, and now used is the HD audio so only need to connect that if you are using a new board. Someone correct me if iam wrong.

The power LED will be in or around the front panel pin out, usually on the bottom right of the board. Look in the manual to see which pin is which. It will also be abbreviated on the board, with something like PWR_ LED, usually a 3 pin out.

2) The 4 pin big ish connectors will most likely be molex connector. So yes connect the fan(s) to a 4 pin molex.

3) Pic link does not work for me, but sounds like the board is a 20pin out and the PSU cable is a 24 pin out. Sometime the remaining 4 can be detached from the 24pin connector, depends on your PSU. If the board has four remaining holes then you need a 24 pin connected to it, like above the remaining 4 pins should be on the 20 +4 pin cable.

4) This sounds like a P4 cable and will not be needed, dependant on your motherboard. Is the power connected to the board in the top right as well?

It might help if you give me the motherboard name and PSU.

Hope this helps.
 
Hey ok, first one is sorted, yes the fans are molex (Googled) and yes the cable does have a 4 pin off the 20 but it has little notches on the side preventing me from pushing it in.

The cable has P6 wrote on it if that's any help?

Remove the 20 pin if its in the board and then u can clip or slide the 4 pin to it.

The P6 will be for the motherboard, not needed if you have already connected the power in the top left of the board ie a 8 pin.
 
Thanks for the guide. Extremely useful guide to refer to when you are soon to make your first ever build.

I've done months of extensive research on PC components, how they work, what they are compatible with etc etc Watched a lot of videos about how to build your system. Having something here is so useful though.

One question, I'm planning on using a Thermalright Venomous X in my build and I've seen in different builds, a fan attached to the side of it. Is that fan recommended? I won't be OC'ing the system at all and keeping clocks factory settings, so I'm not sure if it's really needed.

Cheers

Personally I would attach a low rpm fan to it, just to keep things cool. Although, it would probably be okay without, depending on the air circulation in the case and cpu used in the build.

Easiest thing to do is just try it with and without a fan whilst monitoring the temps.
 
Last edited:
I've updated the build guide and will update it with an AMD section once I get it done. Could a mod please delete around 10 posts on the first page that I no longer require. I have listed them as "No longer required".
 
Isn't the picture of the fan in post 2 reversed? The air should blow out the back usually where the sticker and wires are.

Yup you are right. I've drawn the arrow round the wrong way, not sure if I did this in the original guide or just this updated one. I will fix it now, well spotted ;)
 
Last edited:
I have a question, how do you remove thermal paste which is already applyed to the CPU Cooler when it's bought? And when you apply new thermal paste such as Arctic 5 Silver, I've seen on some guides you need to spread it yourself but you said not to?

You can remove thermal paste with abit of kitchen roll and water, although I use a citrus based cleaner which just removes it abit easier.

Some people seem to spread the paste around, others just leave it a dob in the middle and let the force of the cooler do the work. Not sure which is better if any. I just do the dob in the middle as its a lot easier and once ive removed the cooler it has shown to have spread out anyway.
 
An excellent guide indeed! :)

What would be really good though would be the ability to print off each 'page' as something like a PDF file in A4 format, so that I would end up with a number of nicely formatted 'hard copies', which I could then staple, or bind together into a sort of booklet.

I did start trying to do it myself but the pages seemed to be 'long and thin' so it didn't really look right. Also as each 'page' is in effect an image file, I couldn't really use MS Word or anything like that, and I certainly don't have the knowledge or experience to use Photoshop.

I would like to emphasise here that I only want to do this for my own personal use, and that I fully respect any copyright implications.

Edit: Just tried copying the Stage 2 image into Word, and resizing it, but although I would probably then be able to fit two onto one sheet, side by side, they are two small to read properly! :(

I am working on a printable version now :)
 
To answer EVH, I will be doing a final build photo, just waiting for my photography background stand to arrive.

Montala, there will be a printable version soon :)

May also do a build video step by step, will have to see.
 
Back
Top Bottom