(In Win 901) Asteria II: Rearmoured

Soldato
OP
Joined
26 Sep 2010
Posts
7,164
Location
Stoke-on-Trent
Quick little thing to share. The silver deluxe EK badges arrived yesterday thanks to the wonderfully generous ALXAndy.

ek-badge_base.jpg


Almost like glass, which is perfect for the aluminium and glass on the 901.

Added to the Supremacy EVO block too for consistency.
ek-badge_block-plate_1.jpg


ek-badge_block-plate_2.jpg


Looks mint, thanks very much dude!
 
Last edited:
Soldato
OP
Joined
26 Sep 2010
Posts
7,164
Location
Stoke-on-Trent
Teaser

...Looking forward to seeing it after tab A goes into slot B. :D

Well Cenedd, it's begun.
midplate_teaser.jpg


Bad, bad quick phone pic of the first of 3 super integral bends in this project. That's the start of the midplate with the 360 rad bolted to it.

I've trashed all my backup pieces for this with various bending issues, and now I have to literally throw out all the intricate measurements and drawings and remeasure this on the fly for bending. I have no tolerances to make this work.

Really scared :eek:
 
Last edited:
Soldato
OP
Joined
26 Sep 2010
Posts
7,164
Location
Stoke-on-Trent
Bend looks sharp and clean.

If only they were sharper :(

I did a bit of research on various aluminium grades for their cold forming and bending ability and I was reliably informed that 1050 aluminium at 1.5mm thick essentially didn't have an inner bend radius to worry about. So everything was drawn up based on that (with a tiny bit of leeway).

Oh no, of course not. The wider pieces, such as that midplate area, fold with a 1mm inner radius, any of the thinner bits will fold with a 0.5mm inner radius. That's quite a lot of difference when you need millimeter precision - if I'm out on the midplate then it won't fit in the case or the radiator is in the wrong place, if I'm out on the next 2 folds then the PSU won't fit.

So yeah, remeasuring on the fly now that I know what bend radius I have to deal with, and I have no spare midplates!
 
Soldato
OP
Joined
26 Sep 2010
Posts
7,164
Location
Stoke-on-Trent
Worst case I redraw everything to incorporate the bend radii (there are a few things I wouldn't mind changing in retrospect) and get it recut - Congleton Engineering were ridiculously good value.

Worse worst case scenario is I sack off the idea of matching the look and structure of a stock 901 and don't fold. Go down the modding cube or angle extrusion route.
 
Soldato
OP
Joined
26 Sep 2010
Posts
7,164
Location
Stoke-on-Trent
A little teaser...

structural-tease.jpg


My bend radii are larger than I expected, so it's thrown some measurements off between 1-2mm (some not an issue, some critical) but it's getting there. These are the 2 essential (and scary) pieces.

I'll present properly soon :D
 
Last edited:
Soldato
OP
Joined
26 Sep 2010
Posts
7,164
Location
Stoke-on-Trent
Well it's all looking very OEM so far....in a good way I mean :D

Cheers dude, that's been the plan all along :) almost a surprise when you take the glass off and see how things have changed inside.


Couldn't even begin to imagine the amount of work that has gone into that, it's taking 'custom build' to a whole new level! Looking very impressive so far though, can't wait to see it built up with components going in :D

Many thanks :)

I'll go into a bit more detail when I get all the structural stuff done and cleaned up and do a proper walkthrough, but we're looking at 6 months of measuring, Photoshop design, move to Illustrator for mm precision and then reworks after the fact.

It's a shame the advice on bending radius for this particular gauge of aluminium was incorrect because that lower "L" piece was designed to be 1mm accurate around the radiator, but the bend radius has shunted the verticals up by 1.5-2mm so now the rad + fans + gasket is too tall and I need to manually chop up lovely laser cuts :mad:

And I don't have a spare :eek:
 
Soldato
OP
Joined
26 Sep 2010
Posts
7,164
Location
Stoke-on-Trent
asteria2_banner.jpg


Quite a few pictures to share with you in my latest update, unfortunately my phone's on the blink so most of these aren't the greatest. Hopefully they'll still give a nice taste of how things are going.

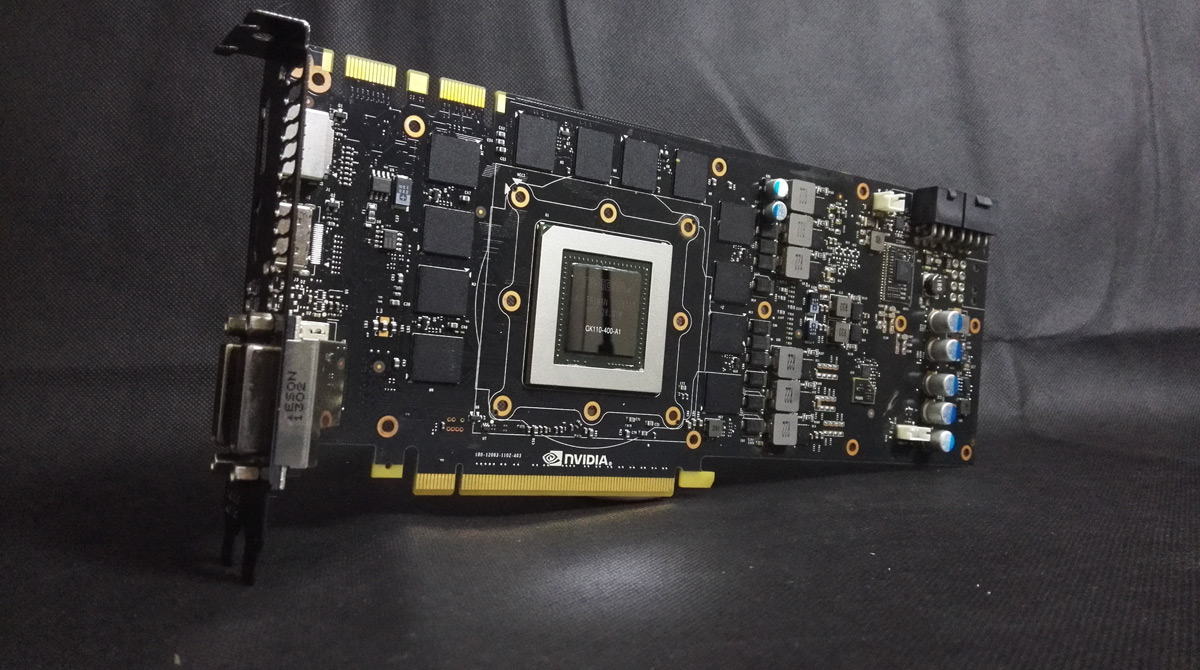
Although I'm rebuilding most of the 901's internals, there are a few holes and cuts needed on the bits I'm keeping, and some of them can only be done once the Titan is in place. So I thought I'd best get on with it and block up my very first GPU :D

She has to come out of her existing home first, so allow me to introduce you to Asteria:
sugo-side.jpg


sugo-top.jpg


My trusty Silverstone SG05 with a minor mod to fit a 10.5 inch GPU inside a 9.5 inch case, Corsair H60 cooler and 2 SSDs hidden underneath the PSU.


Here's the old girl, still going strong.
titan_pre-top.jpg


titan_pre-side.jpg


titan_pre-angle.jpg


Big deep breath, here we go...
titan_tim.jpg


The Nvidia TIM masters were rather sensible when they built Asteria, it seems. Nothing flooding everything, and still quite fluid too surprisingly.

Easy to clean up then :)
titan_clean-angle.jpg


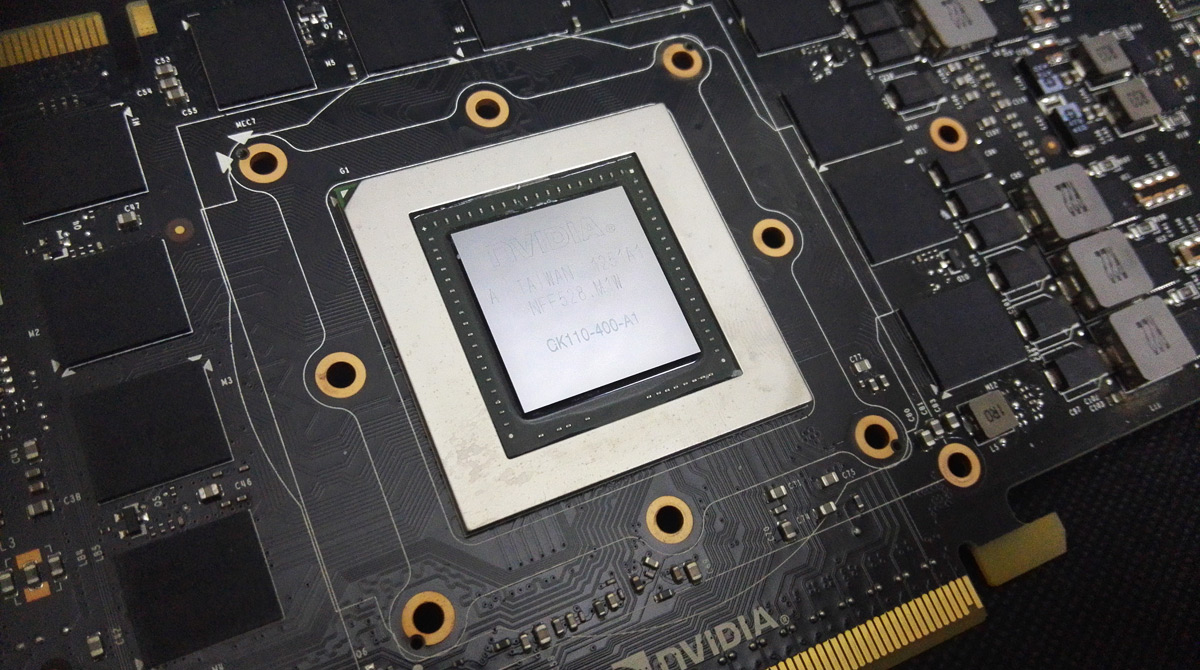
My very first obligatory naked board pr0n shots :D
titan_die-1.jpg


titan_die-2.jpg


titan_die-3.jpg


(between little space and a dodgy phone, I couldn't do anything arty with the super-shiny die, so that's just me giving the thumbs up :p )


Time to block up then!
titan_components.jpg


I was expecting mating a Watercool GPU block to an EK backplate to be a nightmare, and my planning and cosmetic work to be all for naught. But it was bang on first time.

I couldn't get any decent pictures, but essentially it's just screws anyway so hardly exciting. The planning stages were working out which screws were unique to the GPU block and which were shared with the backplate, and in turn what the screw lengths would be given Watercool and EK do things differently.

So we ended up with 7 M3x8mm dome head screws to fix the block around the GPU, which were shallow enough in head size not to interfere with the spacing on the backplate. We then had 4 M3x12mm countersunk screws to mate the backplate with the remaining 4 holes in the block. Add 2 M3x5mm at the very edge of the PCB to secure the backplate and we're all done.


And here we are!
titan_block.jpg


titan_backplate.jpg


Now that I know the mating works and is secure I'm going to polish up those backplate screws a little to try and match the brushed aluminium, but for now it looks magic I think.


Apologies again for most of the pics being shoddy, I'll be having a clean up soon so fingers-crossed I can get this DSLR working properly and get that damn backdrop free of creases :p
 
Last edited:
Soldato
OP
Joined
26 Sep 2010
Posts
7,164
Location
Stoke-on-Trent
Of course, I couldn't leave it there. I had to see what the completed motherboard would look like:

combine-top.jpg


combine-side.jpg


It's exactly what's been stuck in my head for 6 months. Some little touch-ups here and there to come later (polished backplate screws, removing the green PCB on the titan, slightly redesigned I/O shroud, etc.) but right now I'm really pleased with how it's turned out.

And still haven't actually measured the case bits for drilling :p
 
Last edited:
Soldato
OP
Joined
26 Sep 2010
Posts
7,164
Location
Stoke-on-Trent
Pics look very good for a phone.
The phone's bolstered by having proper studio lights, but the ISO range is artificial and limited so it's almost impossible to get decent results shooting black on black. Resisted temptation to cheat and clean them up in Photoshop though.

I hate to disagree, but it's more backplate pr0n than naked GPU pr0n! :D
To be honest, naked PCB shots felt almost obligatory because all the watercooling logs like to flash the GPU without her clothes on, but I agree with your disagree and that backplate has ended up pure sex!

Last set presumably are Asteria's [Emperor's] New Clothes!

Well, this is Asteria II: Rearmoured ;)


Glad you like dude!
 
Soldato
OP
Joined
26 Sep 2010
Posts
7,164
Location
Stoke-on-Trent
asteria2_banner.jpg


Hello my lovelies, it's been a while. I have a bit of time off work so I can crack on with the guts of this project. Now that I have tangible progress and photographic evidence of my sheer perfect execution and all the mistakes I never made, I am happy to say it's time for me to walk you through the actual case work :D

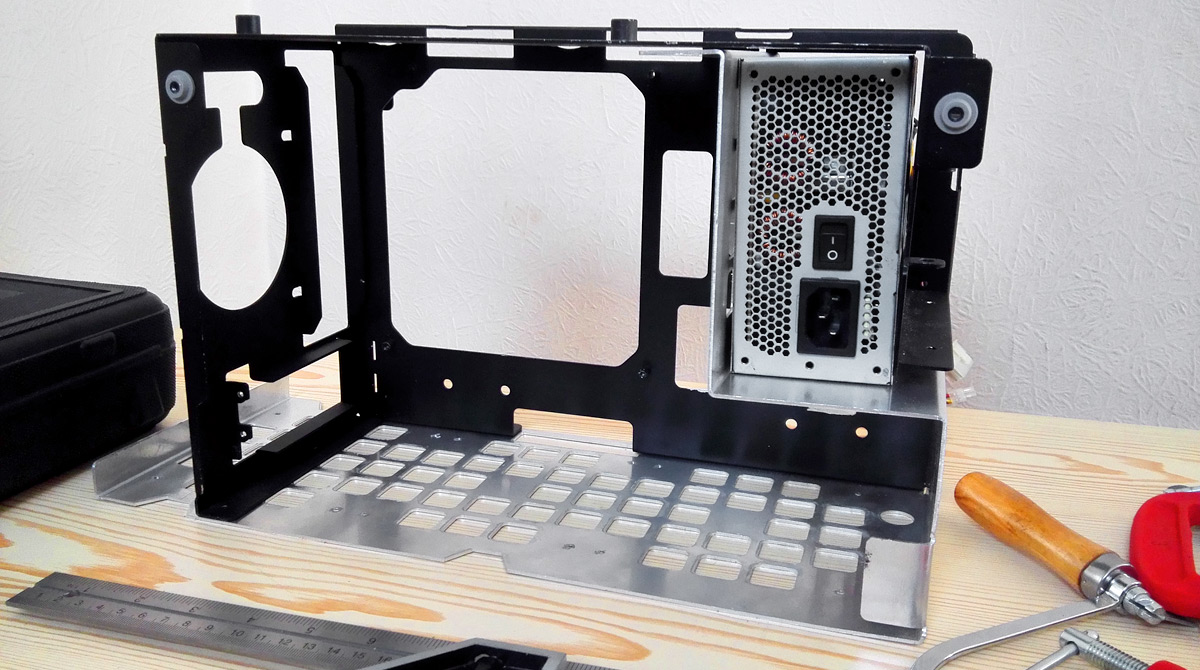
Quick shots of the 3 core structural pieces:
structural_full-2.jpg

structural_full-1.jpg


Laser cut 1.5mm aluminium and (eventually) folding into shape.

I've said before that a core design choice for this project was to retain as much of the stock look of the In Win 901 as possible, despite the extensive modifications made to the interior. Part of the way to achieve that is using the same thickness of aluminium and to form the structure through folding larger cut pieces just as in Win do. That's meant replicating fiddly tabs for using existing rivet holes, creating seemingly superfluous bits to accommodate mount points and support for the glass panels. Rough sketches to finished laser cut pieces was about 8 months in the end, with a lot of chopping, changing and procrastinating!

Bit of history
As I said at the very start of this log, Laine's "Clarity" project was an impressive piece of work fitting a full loop into the 901, but I wasn't enamoured with some aspects of how he achieved it, specifically the use of a pair of 120mm radiators in the bottom. Since he chopped up good chunks of the existing case, I couldn't understand why he just didn't punch through the bottom body and slide a 240mm rad in, and avoid the complications of lining them up to be level, tubing runs between the two and whatnot. After delusions of grandeur and a couple months staring at pictures and Photoshop measurements, I had a special offer land in my email for the 901 in silver at a good discount. It was my birthday too so I pulled the trigger to see what I could do with it.

Sure enough, there was plenty of space to fit a 240mm rad in the bottom and switch over to a SFX PSU down there too - having run a GTX Titan in a Sugo SG05 for a few years I really didn't see the point of full ATX PSUs in Mini ITX cases. All that was needed was to make a large cutout area above the optical drive and lose the 120mm fan intake area.

old-concept.jpg

(Credit to bit-tech for the original photo)

I had a bit of a revelation though which changed the scope of this project; rather than refining what Laine had done I was going to try to take it up another level. Conceptually of course :p there's no way I can touch that man's craftsmanship.


Main Body
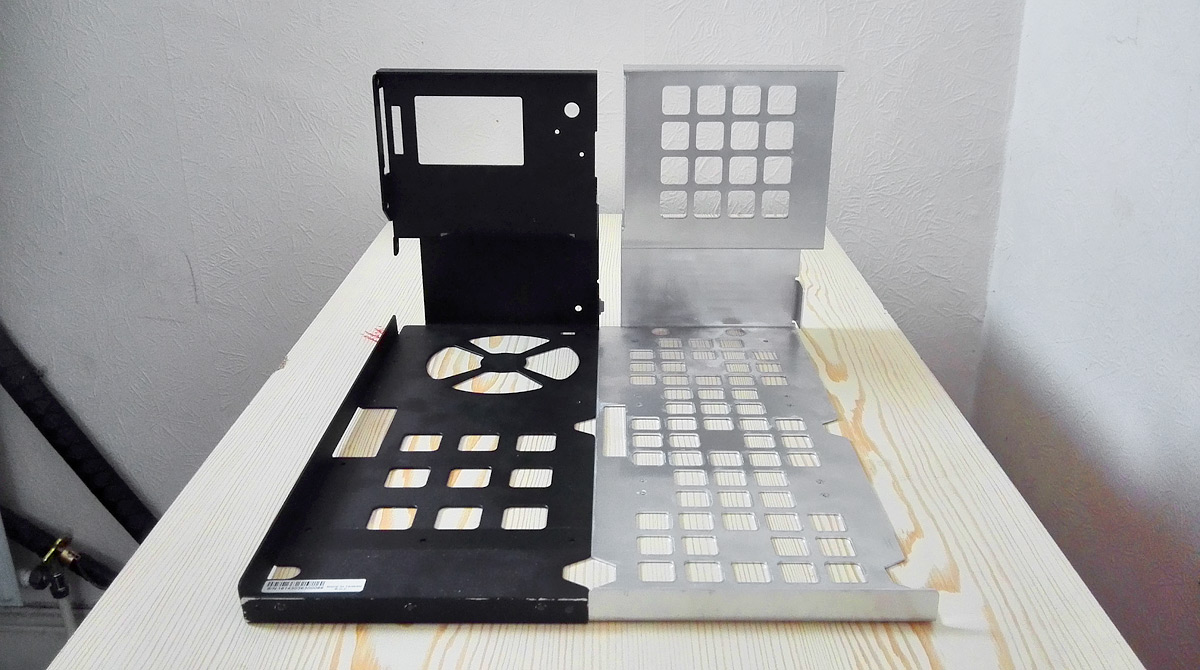
When I realised the existing 901 floor couldn't be re-purposed for decent radiator holes I had the idea of designing an entirely bespoke body. Still wanting to keep the same layout I measured up all the folds for the hard drive area and it struck me that the space In Win had created was pretty close to the size of a SFX PSU. I hadn't used 3.5" drives for a while, and moving the PSU up to the top-right would free up 100mm of space in the lower chamber.

Bam, there it was: let's raise the stakes and go 360mm radiator at the bottom. Took a while to find a rad that would work, but ultimately went for the Alphacool UT60 360 as it's the perfect width to not foul on the PSU cutout in the outer skin and has a plug on the back I could use as a drain port. Messing around with sealing the front ports with Fernox LSX is a story for another time ;) but with position confirmed I designed a new body to fit the UT60 and SFX PSU up top.

Old vs New
structural_body-perspective-1.jpg

structural_body-perspective-2.jpg


Replicated the tab on the upper section for extra support, and that damn fiddly tab on the bottom-right because the glass side panel has a mount there.

As you can see, there was no way I could re-purpose the existing fan and PSU holes for a radiator, especially as some of the actual screw positions wouldn't have any material above them.
structural_body-length.jpg


In Win do have a nice square grid design in parts of the case, so I kept that style going for the rad and PSU holes. Also copied the cutouts to get to mounting screws in other parts of the case. Trying to keep things looking stock, remember?

Old HDD vs New PSU
structural_body-psu-side.jpg

structural_body-psu-depth.jpg


Dropped down and pulled in but not a million miles away from the original.


Lower "L" portion
Might as well design a bespoke piece for the lower compartment too, rather than chopping up the stock case!
structural_lower-l-pair-1.jpg

structural_lower-l-front.jpg


Again, square hole pattern for some intakes. To be honest you couldn't chop enough out of the original piece and still look tidy, certainly not with a 60mm thick rad (could that be the reason Laine didn't bother himself? :p )

(although there was a time it wasn't going to be square holes :p )
hole-faces.png


The stock case has some wonderful construction going on down here with hiding a slimline optical drive underneath the PSU, all folded from a single piece. I don't need all of that, but it's a shame to dump something so impressive.
structural_lower-l-pair-2.jpg


I do need something for the glass side panels to attach to, and lo and behold there's 2 tabs needed.
structural_lower-l-tabs.jpg


Fan assembly
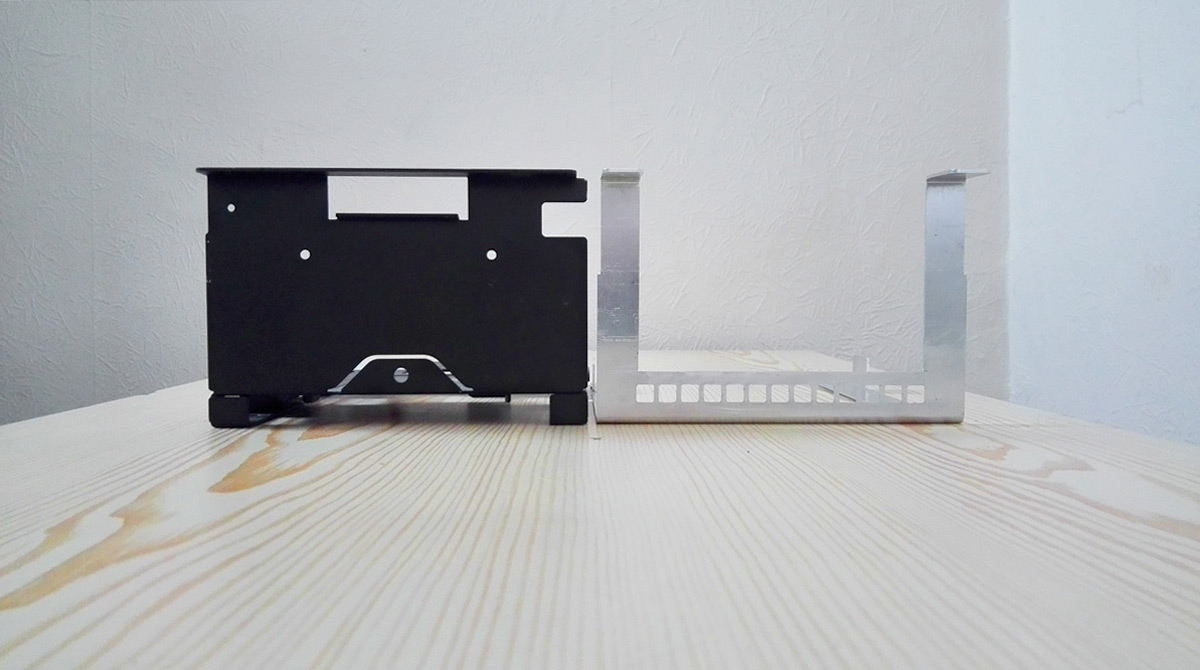
Well, I call it a fan assembly purely because that's where the front 120mm intake would go. For me it's just a couple of strips! Crazy comparison time
structural_fan-front.jpg

structural_fan-side.jpg


It's a purely functional piece to be fair. Power switch and activity LEDs will be strapped to it, but unfortunately there's not enough space between the edge of the case and the radiator to fit any sockets and cables to keep the I/O, so a pair of blanking plates will get bolted on to cover the space.

The stock power button is actually a nice tongue of springy aluminium that just rests on a tactile switch. I have a blanking plate variation cut which will hopefully replicate that look.


So there you go, a first proper post talking about the actual case work and design motivations for the project, and hopefully a slightly clearer picture of how the loop is going in.

Next step is to get everything trued up a bit as a lot of the 90 degree angles have slipped a touch and to map out and drill all the holes I need to rivet and screw this thing together. There's still some chopping required on the case parts I'm keeping to ensure all this goes together correctly (which has already started), so hopefully I can sort that soon and give you another update.

Hope you enjoyed the read, back soon!
 
Last edited:
Soldato
OP
Joined
26 Sep 2010
Posts
7,164
Location
Stoke-on-Trent
I've not gone mental just yet, but it's be incredibly trying getting to this point. I was under no illusions that it would be simple, especially given the scale of my very first project, but I never expected some of the problems I've encountered. Fortunately I've been able to correct or conceal everything that's gone wrong.

The biggie was the Lower L piece given that it was designed to be form fitting around the radiator and all nice and symmetrical, but the bend radius that I was assured wouldn't be there threw all vertical measurements up by about 3mm meaning the rad and fans wouldn't even fit any more. Having already junked the back-ups I had to take a hacksaw to my remaining piece that had already been folded incorrectly twice and was fragile. It's turned out fine, but I have a sneaky feeling I may need to trim off even more. It may look fine to the 3rd person, but knowing it's wildly off what I intended and designed is going to bug me big time.

Still have to true all the bends so I can be accurate with the bazillion holes I need to map and drill. I am enjoying it but I'll be very glad when the structural stuff is done!
 
Soldato
OP
Joined
26 Sep 2010
Posts
7,164
Location
Stoke-on-Trent
I believe this is how murdermods started out :)

need to batch produce this plate after your build :D

But did Charles start out as ridiculously gammy-handed as me? If he did then there's hope for me yet! :D

Had I not burned through all of my spare pieces, I was very tempted to ask In Win for a black version and build a twin. I may still do so and tweak a few bits to allow for the bend radius this time.
 
Back
Top Bottom