Project: Deuterium

Soldato
Joined
4 Jun 2007
Posts
2,623
Location
Watford, UK
Of the two, on paper the first looks better as everything is neatly parallel. Whether that translates in practice, I'm not sure without seeing it, holding pipes up and swearing at it :D

I know that Bitspower do fittings that will join tube together - not that they are limited budget-friendly but it might get you out of a spot. EK also do some HD (push-in rather than the HDC compression) fittings with a female thread so you could back to back a female HD and a male HDC to join pipe - only on a push-fit basis though so it couldn't hang off the joint. Otherwise, EK HDC - female to female - HDC but it's getting bulky. If it's going to be hidden behind bulkhead though... Alphacool do some cheap female to female 90°s too and you wouldn't need the rotary for hardline.
 
Associate
OP
Joined
29 Dec 2014
Posts
2,333
Location
The "North"
Of the two, on paper the first looks better as everything is neatly parallel. Whether that translates in practice, I'm not sure without seeing it, holding pipes up and swearing at it :D
I know that Bitspower do fittings that will join tube together - not that they are limited budget-friendly but it might get you out of a spot. EK also do some HD (push-in rather than the HDC compression) fittings with a female thread so you could back to back a female HD and a male HDC to join pipe - only on a push-fit basis though so it couldn't hang off the joint. Otherwise, EK HDC - female to female - HDC but it's getting bulky. If it's going to be hidden behind bulkhead though... Alphacool do some cheap female to female 90°s too and you wouldn't need the rotary for hardline.
To be honest the bottom one is more likely to be parallel than the first drawing. I've had a look at the alphacool fittings as they would be the ones used in the build as I can still use the secure HDC fittings. Although regardless of the design I'm sure pain and profanities will ensue :D
 
Associate
OP
Joined
29 Dec 2014
Posts
2,333
Location
The "North"
x0hnnRj.png
So a short update today, I have been playing around with the colour scheme and component colours and I've settled on the idea of black RAM. I'm not sure if I will choose the Corsair Vengeance DDR4 or Kingston Fury DDR4 or some other brand with EK blocks. However after messing with the colours I think the system may look good if I did the following wiring scheme with purple/blue purple coolant in the piping and reservoir as it should set up a nice pair :)
hCVwxgE.png

Also, I'm not sure on whether plexi blocks or Acetal blocks would look best in the system and I'm open to as much advice as I can take on this build as it's all new territory. So that's the progress point at the moment :)
 
Last edited:
Associate
Joined
24 Jan 2016
Posts
527
Location
Sheffield
Nice parts list, its gonna be a nice build once done but being called project Deuterium I expected a black and yellow colour scheme likened to the radiation symbol :)
 
Associate
OP
Joined
29 Dec 2014
Posts
2,333
Location
The "North"
looking good so far
Thanks :)
Nice parts list, its gonna be a nice build once done but being called project Deuterium I expected a black and yellow colour scheme likened to the radiation symbol :)
To be honest I was toying with yellow but I decided against as I wanted a blue/purple look to it as it just caught my eye as a colour scheme :D
 
Associate
OP
Joined
29 Dec 2014
Posts
2,333
Location
The "North"
x0hnnRj.png
So a smaller update today, I have made progress with acquiring the parts for the project. I have purchased the GPU, RAM and fans for the system. The GPU will be a KFA2 GTX 1080 "Clown card", the RAM is some Corsair Vengeance DDR4 2400MHz 32GB kit and the fans are six EK Vardar F1-120 fans which will be fitted with some XSPC gaskets to help dissipate and absorb any vibrations.

More to follow as and when the parts arrive (GPU could be as late as July :()
 
Last edited:
Soldato
Joined
4 Jun 2007
Posts
2,623
Location
Watford, UK
Also, I'm not sure on whether plexi blocks or Acetal blocks would look best in the system and I'm open to as much advice as I can take on this build as it's all new territory.

Personally I'd got for acrylic (clear) over Acetal/delrin (black, opaque). There is the argument that acetal is harder wearing and less susceptible to cracking if you tighten the fitting too much (just don't do this :D ) but the flip side is that with a clear top, you can see if it's full of either loop-crud or air bubbles. Also, you can light it by shoving an LED in it if you want pretty.
 
Associate
OP
Joined
29 Dec 2014
Posts
2,333
Location
The "North"
Personally I'd got for acrylic (clear) over Acetal/delrin (black, opaque). There is the argument that acetal is harder wearing and less susceptible to cracking if you tighten the fitting too much (just don't do this :D ) but the flip side is that with a clear top, you can see if it's full of either loop-crud or air bubbles. Also, you can light it by shoving an LED in it if you want pretty.
I must admit I am siding towards the acrylic/plexi blocks as I think you're right that it will look better as it shows off the coolant and I can see if any gunk develops. I suppose the worst case scenario is staining and cleaning the blocks :)
And yes, I could get LED's in the block (May as well stick RGB ones in as that's what everyone seems to be doing at the moment hehe :D)
 
Soldato
Joined
4 Jun 2007
Posts
2,623
Location
Watford, UK
The only thing you'll find is that RGB LEDs are all 5mm and the pre-drilled holes in acrylic blocks (at least the CPU and GPU blocks) are all 3mm. Now there's an obvious solution to this :D
 
Soldato
Joined
4 Jun 2007
Posts
2,623
Location
Watford, UK
Special round chisel, yes. The better ones have spiraling to remove the debris rather than blowing it and getting in your eyes ;)
I've drilled a 3mm hole for this in my mono block but will probably increase it to 5mm to go RGB - width permitting. It drills fine at slow speed - just don't go for it at high speed as it could melt rather than drill. The hole is frosted rather than clear (which I'm guessing are moulded) but it helps diffuse the light better.
 
Associate
OP
Joined
29 Dec 2014
Posts
2,333
Location
The "North"
Special round chisel, yes. The better ones have spiraling to remove the debris rather than blowing it and getting in your eyes ;)
I've drilled a 3mm hole for this in my mono block but will probably increase it to 5mm to go RGB - width permitting. It drills fine at slow speed - just don't go for it at high speed as it could melt rather than drill. The hole is frosted rather than clear (which I'm guessing are moulded) but it helps diffuse the light better.
If I were to stick lights in the blocks I'd probably just go with with LEDs as knowing my luck if I were to drill/chisel into the block I'd crack it open :D
 
Soldato
Joined
4 Jun 2007
Posts
2,623
Location
Watford, UK
Unless you're going to stick flat ones on the edge you're going to need a mounting hole. The ones that are predrilled tend to be 3mm - which is fine if you use non-RGB LEDs in a 3mm flavour but for the RGB variety I could only find them in 5mm. There were some colour changing 3mm ones but I think they were a fixed pattern and not controllable.
 
Associate
OP
Joined
29 Dec 2014
Posts
2,333
Location
The "North"
x0hnnRj.png
Yesterday I took part in a joint investment for a blade saw, so I thought it would be silly not to have a go and what better way to cut out my mid-plate :)

This require some assistance in configuring the blade saw and cutting out the panel but I'm rather impressed. In order to give it a finished look I'm going to sand blast the panel and round the edges to install some u-channel so there's less risk of scratching the radiator when fitting the panel and to give a more refined look :)
zfevSIL.png

Speaking of sand blasting I had a go with the shot blaster on a spare piece of acrylic to see how I could take the glossy edge of the panel. I think the long shot blast looks the best as opposed the shorter blast on the line below.
sSzzSQI.png

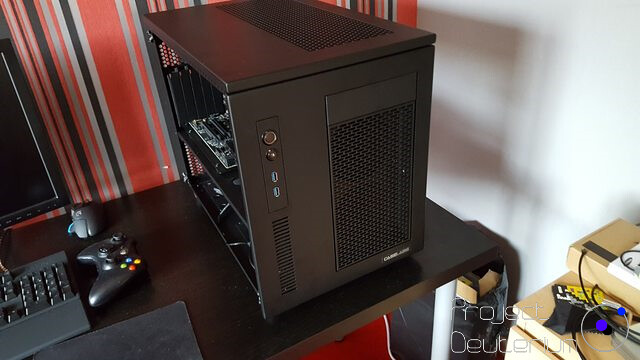
Also I assembled the case with the new USB panel, 240mm radiator mount and the blanking plate.
27230204244_5127d4a135_z.jpg


I also had installed the motherboard and D5 to help plan out the loop. Unfortunately the EK D5 pump top has a line of action of weight which acts outside it's base and the pump decoupler it is fitted to keeps being detached as it overcomes the double sided sticky tape. Hopefully when the tube is fitted it should help fix the pump in position, I hope :(
Bk56eNm.png

Another bit of progress is that I finished the D5 pump sleeving (after the third time) and I'm rather impressed. The sleeving is tighter on the cable now so they are easier to train for when I do the cable management later.
ZBE181s.png

After setting up the case I began to plan out the pipe runs which has led to another dilemma. Unfortunately my original plan to run the 360mm radiator connection down can't happen as it would hit the 240 radiator which leaves using two 45° fittings to take it across the system or a combination of drilling into the case and 90° fittings.

So another big update for the time being, unfortunately now I have a long wait as my fans were supposed to be dispatched this weekend which didn't happen and the GPU is not set to arrive until July 1st :(
 
Last edited:
Associate
OP
Joined
29 Dec 2014
Posts
2,333
Location
The "North"
x0hnnRj.png
Another update, today I went to get the glass cut at my local store. Unfortunately I had to have 6mm holes drilled as opposed to 3mm so I'll need to use some sort of padding to protect the glass. Luckily I'll have a week to find something to do this :)

Onto the good stuff now though, I cut out some more acrylic for the mid panel to get flusher finish with the front and I bought some u-channel to give a a finished look. It's not fitted yet as I just wanted to get the size right as I need to drill the holes and shotblast it first. :D
Q9bLmcP.png

I have also ordered some soft tubing and acrylic for under neath the connections underneath the midplate and to get the sizes I need when I cut the glass tubing. :)
 
Last edited:
Soldato
Joined
4 Jun 2007
Posts
2,623
Location
Watford, UK
Sounds good. Would something like wire wool (I've recently been introduced to something called zero wool which is very fine) take off the sheen without making it go grey? Could just be the photos but where the shot blast hits it, it goes white and the effect seems to be greying rather than than just de-glossing.
 
Associate
OP
Joined
29 Dec 2014
Posts
2,333
Location
The "North"
Sounds good. Would something like wire wool (I've recently been introduced to something called zero wool which is very fine) take off the sheen without making it go grey? Could just be the photos but where the shot blast hits it, it goes white and the effect seems to be greying rather than than just de-glossing.
It does go slightly grey from the shot-blasting (I assume it's due to how the light refracts) so the wool might be a good alternative as long as I can still get the uniform finish. I don't suppose you have a link to or know where I can get this zero wool from? :)
 
Back
Top Bottom