

You are using an out of date browser. It may not display this or other websites correctly.
You should upgrade or use an alternative browser.
You should upgrade or use an alternative browser.
[Project Log] "Blue Morpho"
- Thread starter DeuS1
- Start date
More options
Thread starter's postsAssociate
Like the res, look forward to seeing more. ")
Nice to see the attn to detail here. Looks great so far and a very interesting design
Thank you very much, stay tuned for some more sexiness tomorrow
Like the res, look forward to seeing more.
thank you very much, more to come tomorrow!!
Last edited:
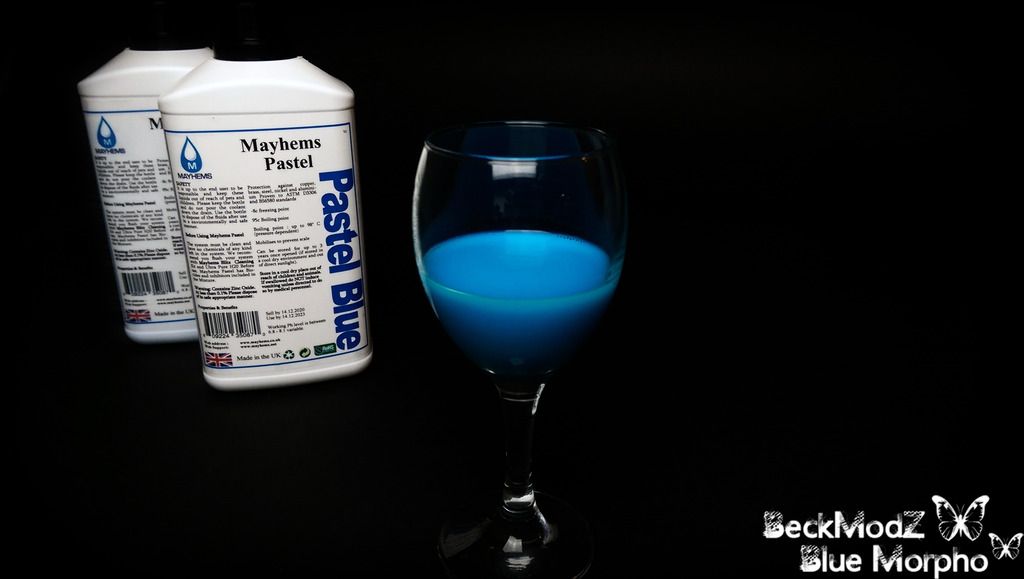
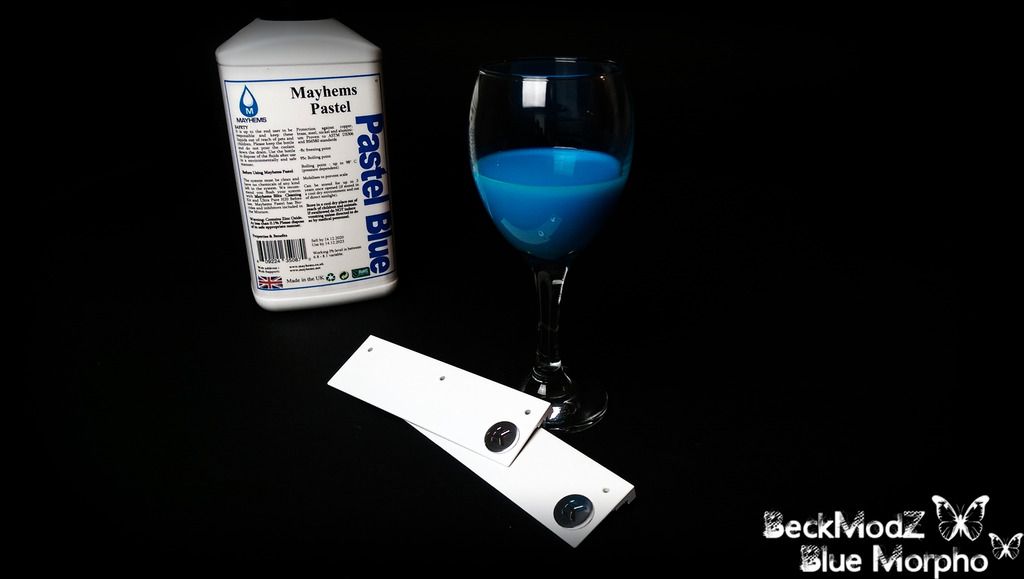
Mayhems Pastel Blue
The fluids finally came in from Mayhems.co.uk .
My choice of fluid was the mayhems pastel blue, because i think it was close to the blue color on the wings of the butterfly "blue morpho" hence the name of the build
I just couldn't help myself, i had to see how it looked in the GPU block from EKWB.com, and also the freshly painted Ek-Supremacy Evo..
And WOW, looks amazing! the combination of blue and white is just beautiful!
Enjoy
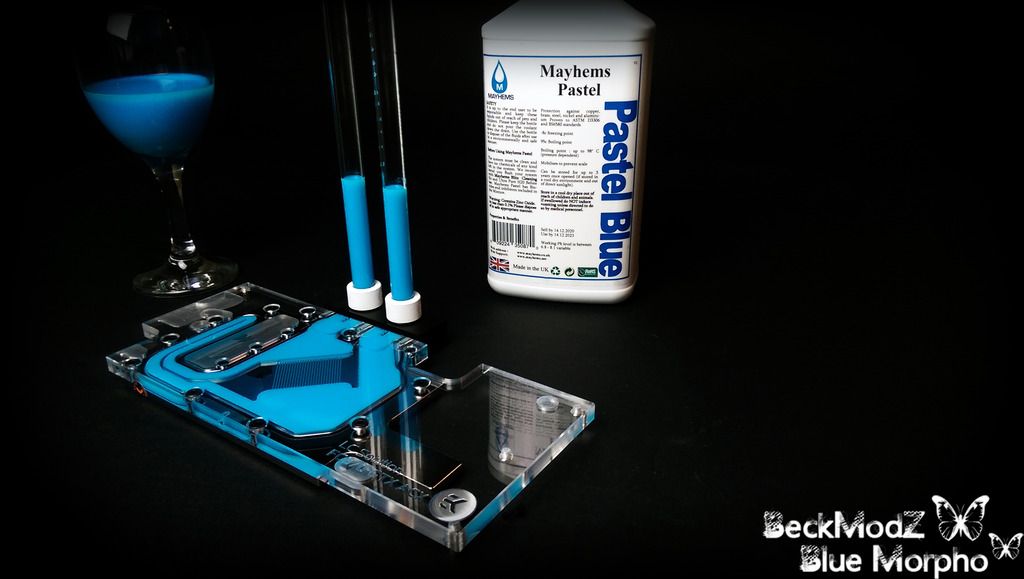
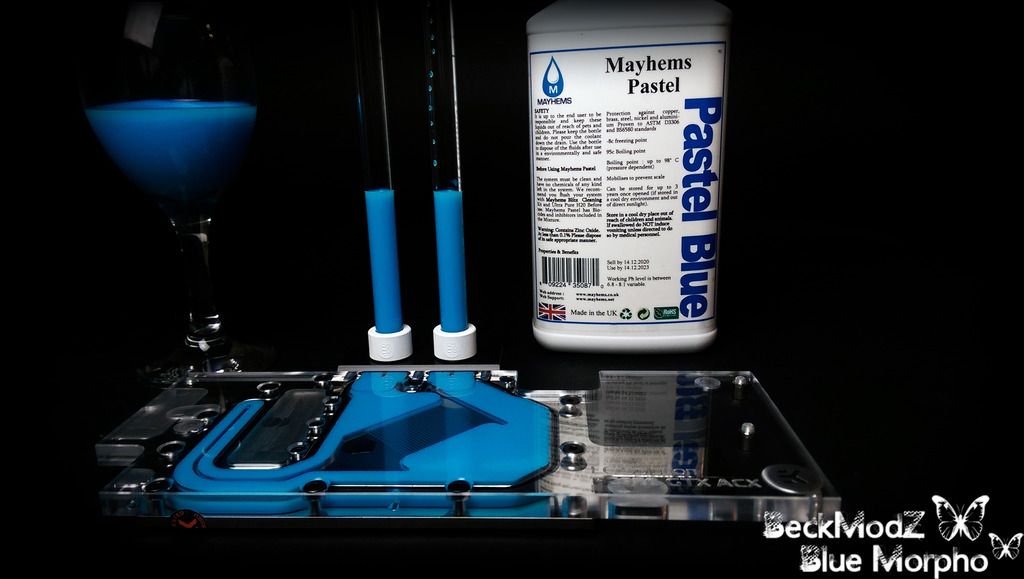
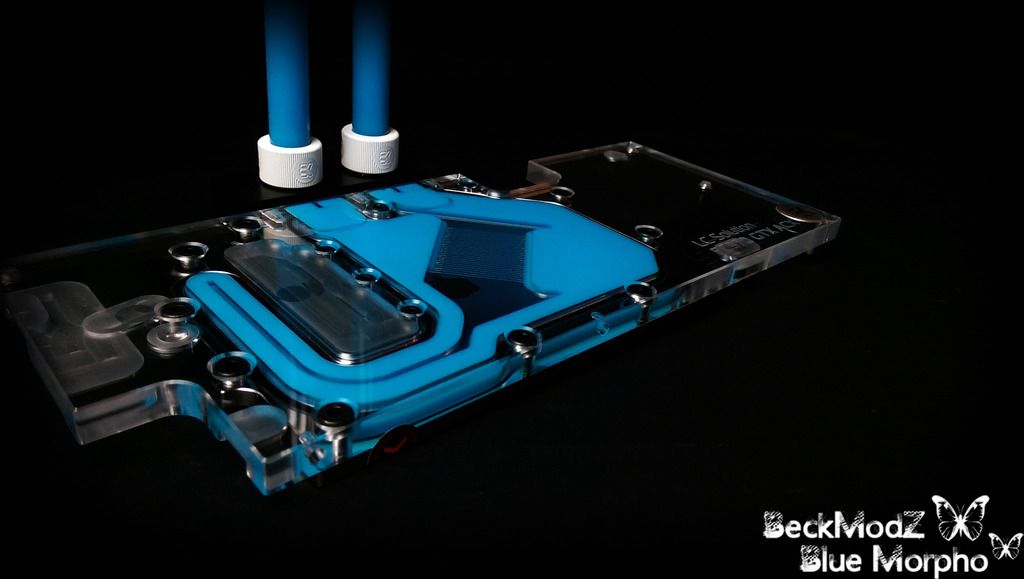

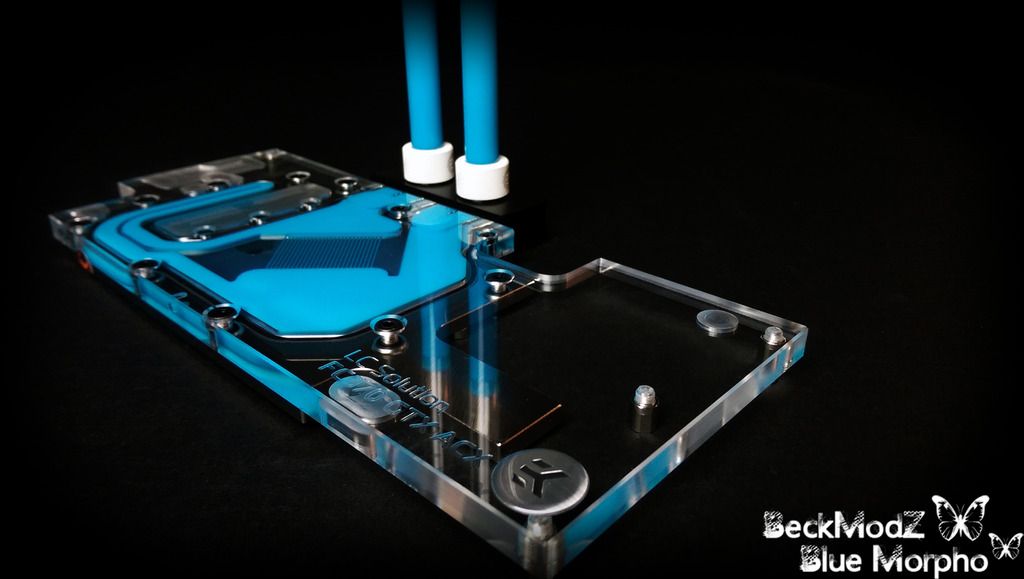
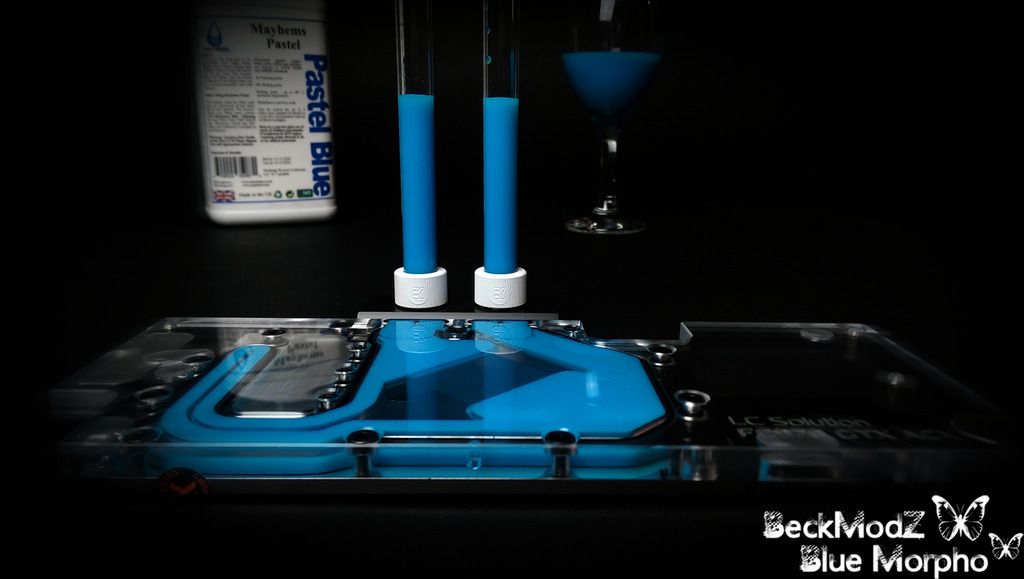
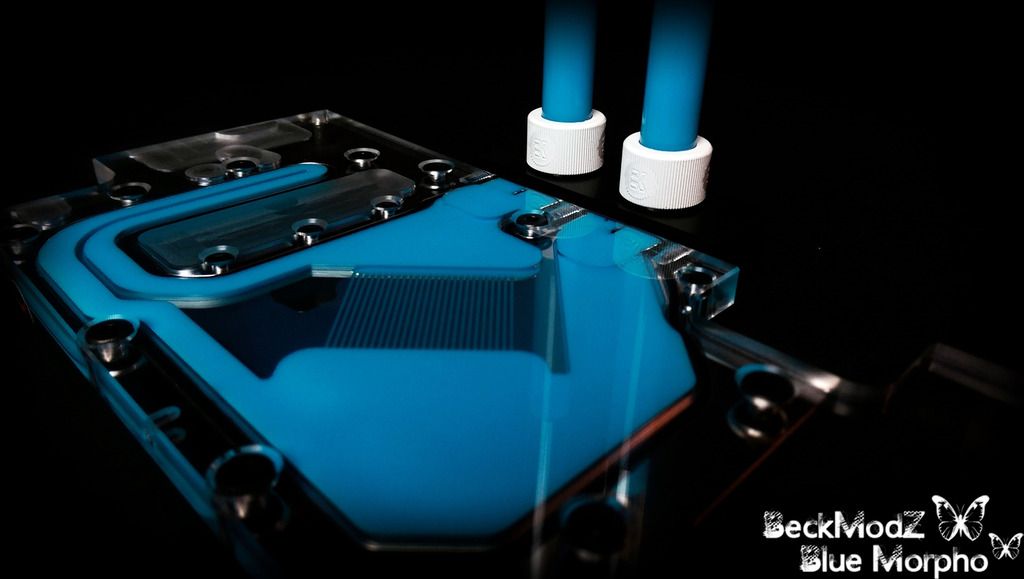
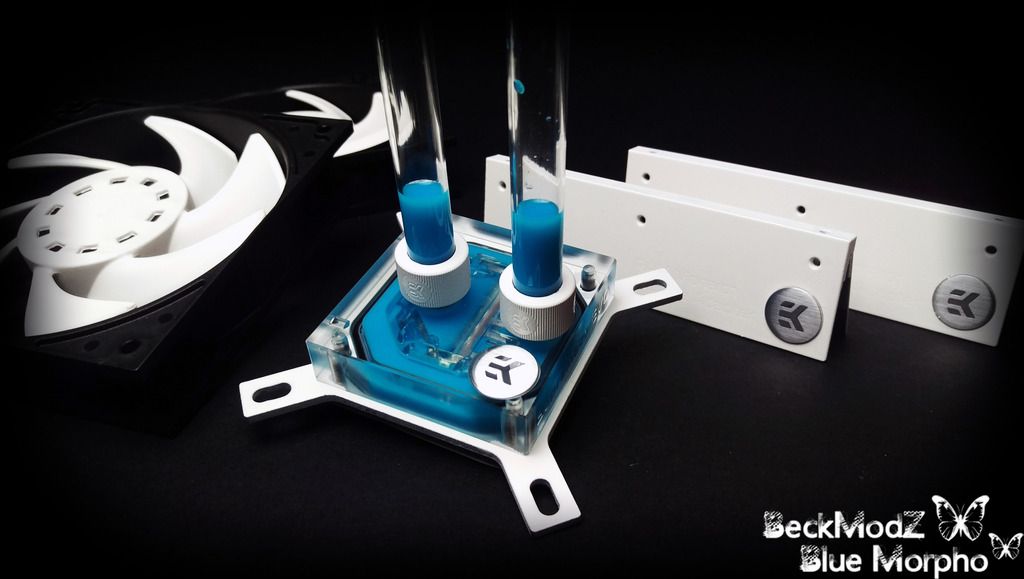
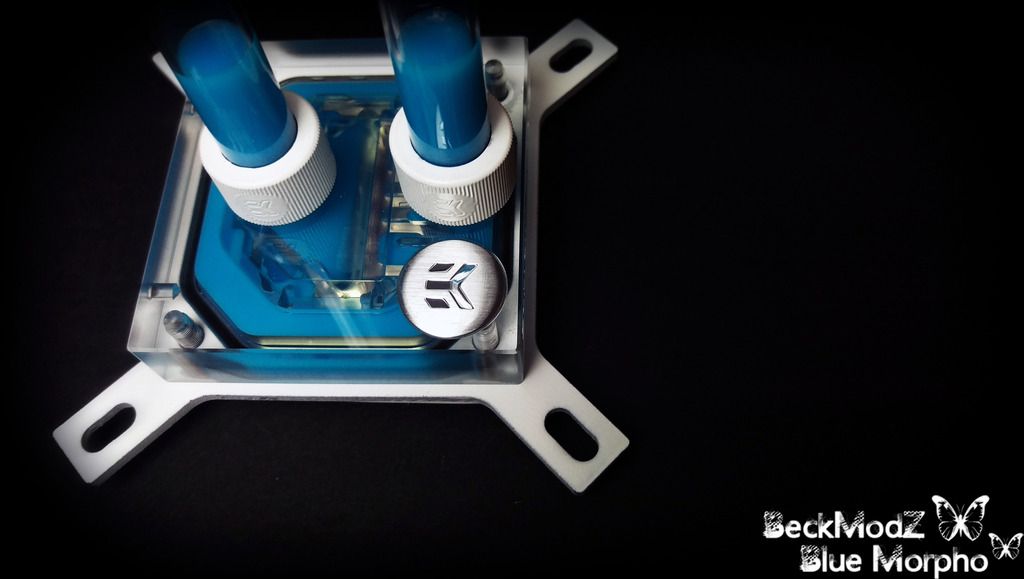
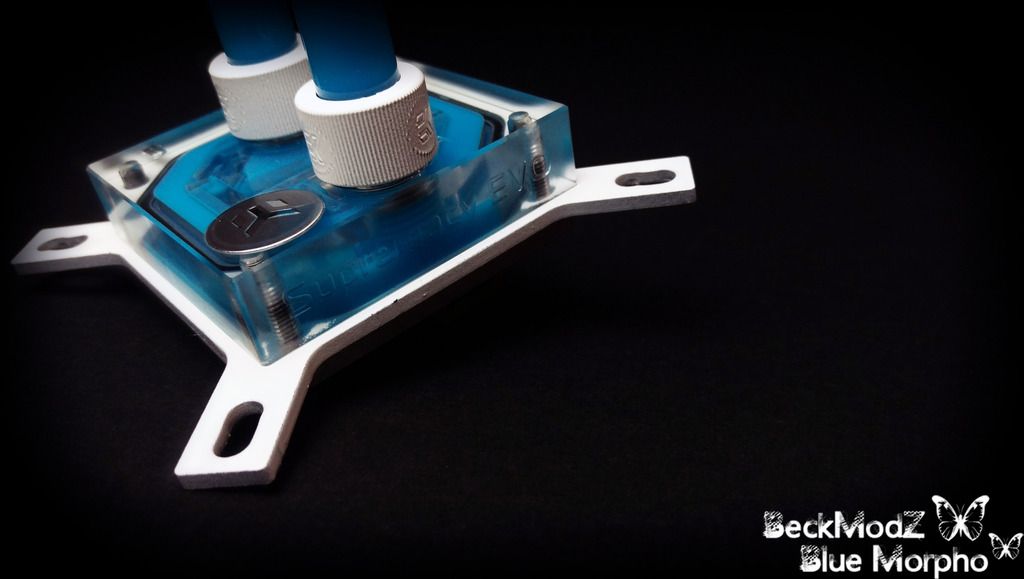
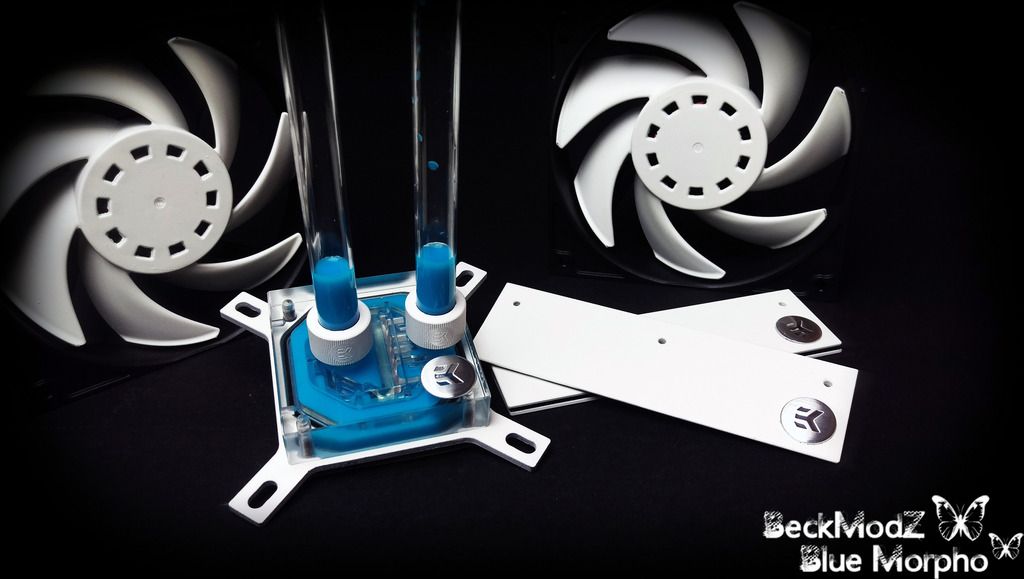
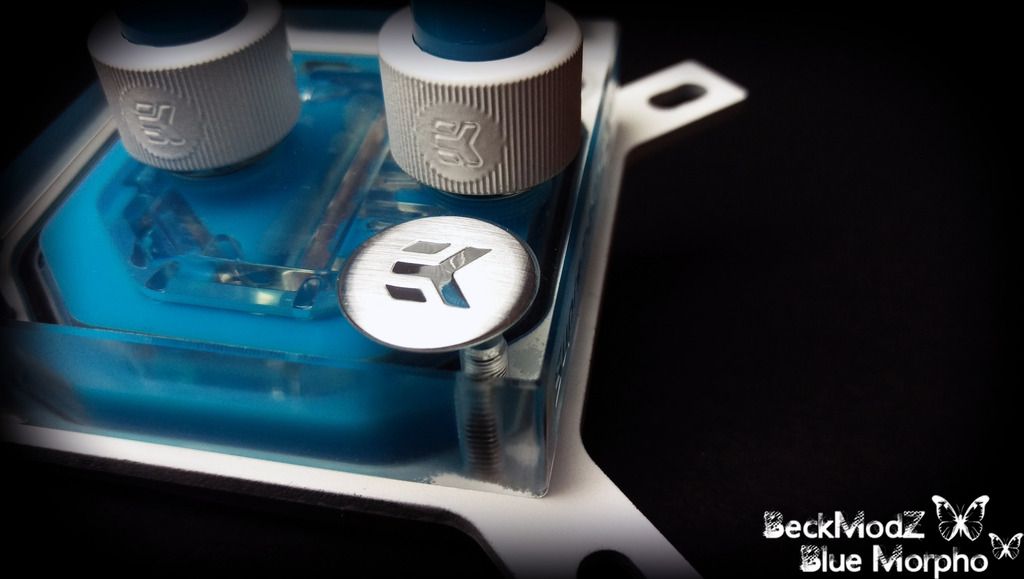
Stay Tuned For More Great Images Soon <3 !!
The fluids finally came in from Mayhems.co.uk .
My choice of fluid was the mayhems pastel blue, because i think it was close to the blue color on the wings of the butterfly "blue morpho" hence the name of the build
I just couldn't help myself, i had to see how it looked in the GPU block from EKWB.com, and also the freshly painted Ek-Supremacy Evo..
And WOW, looks amazing! the combination of blue and white is just beautiful!
Enjoy
Stay Tuned For More Great Images Soon <3 !!
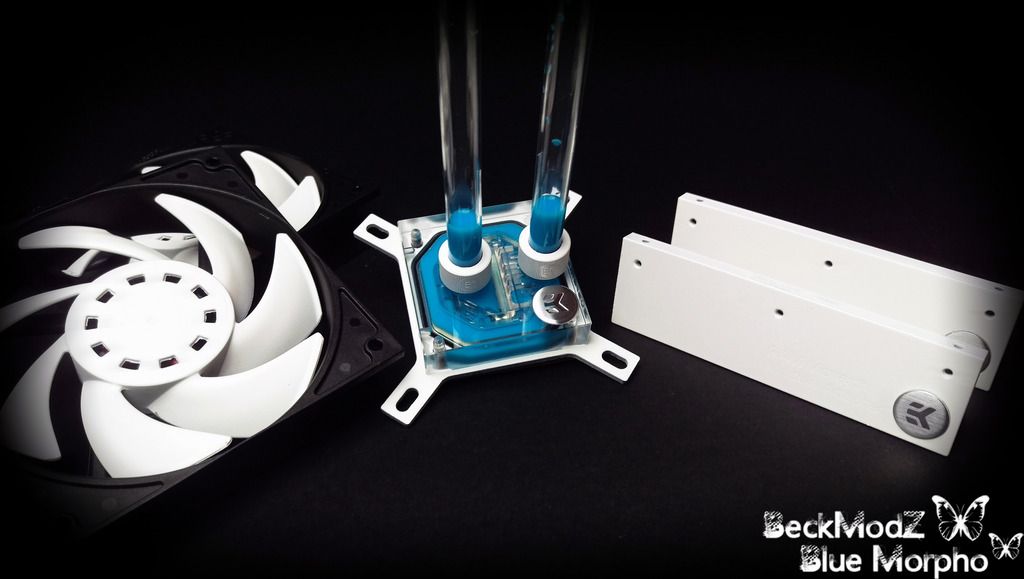
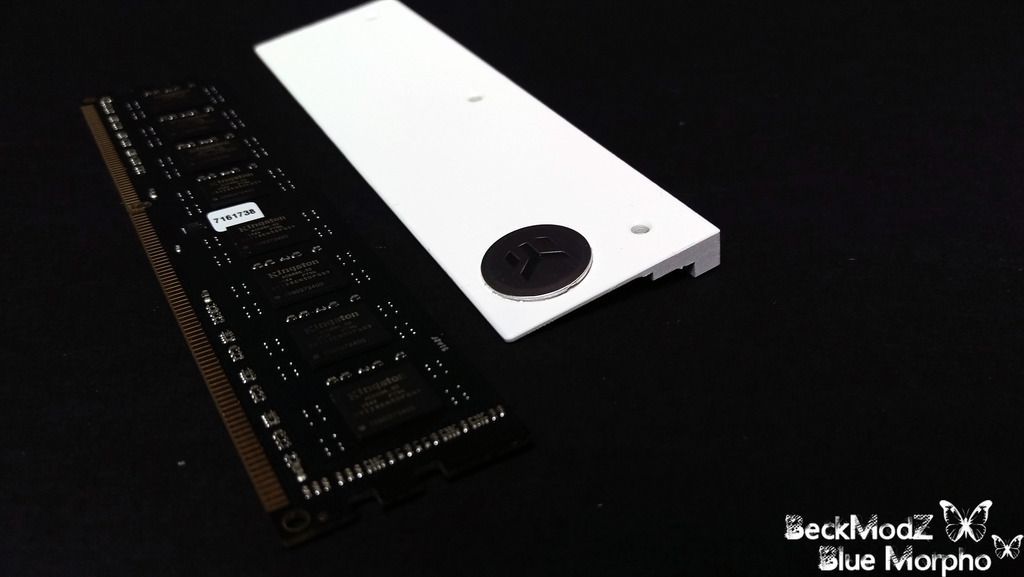
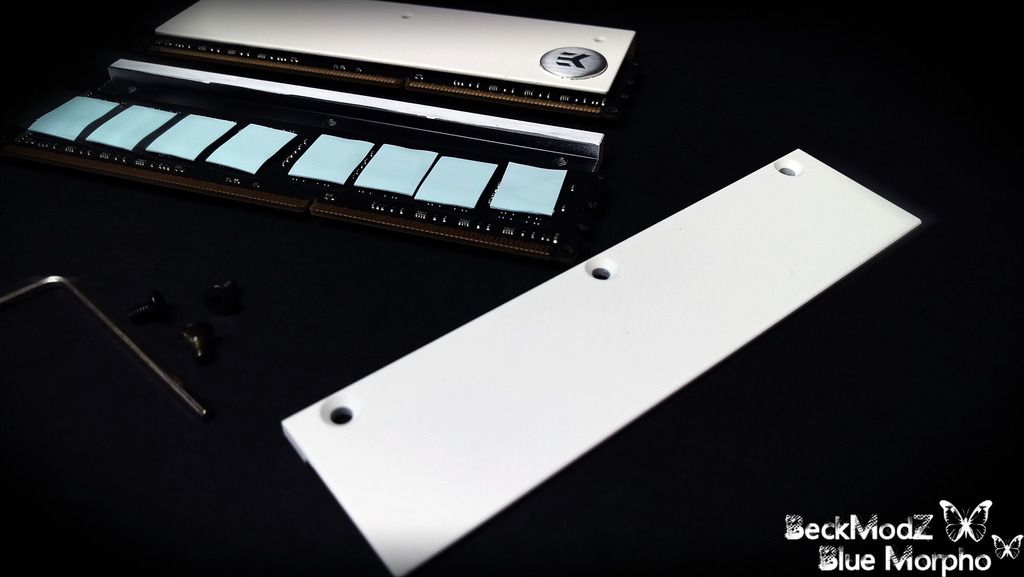
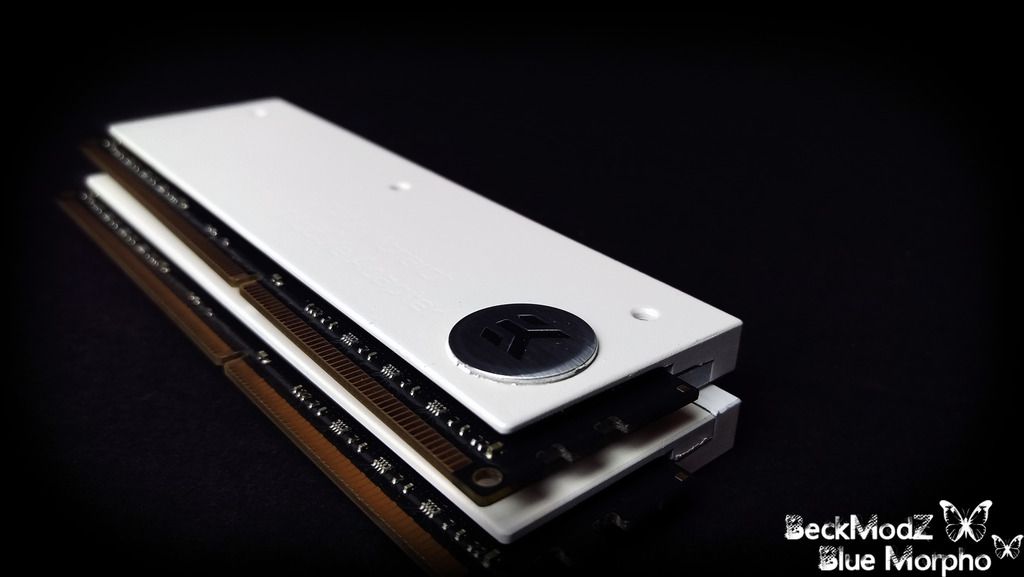
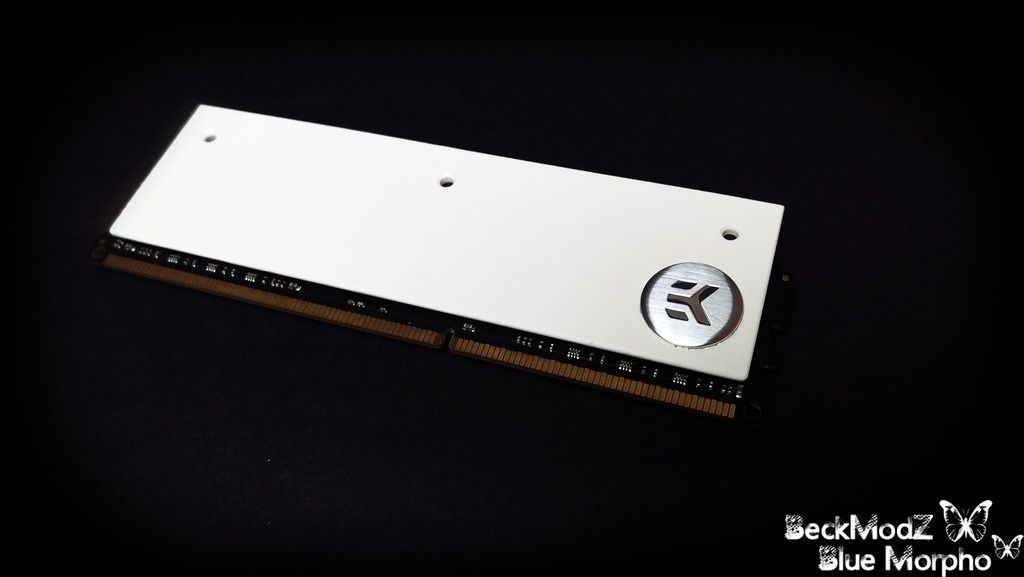
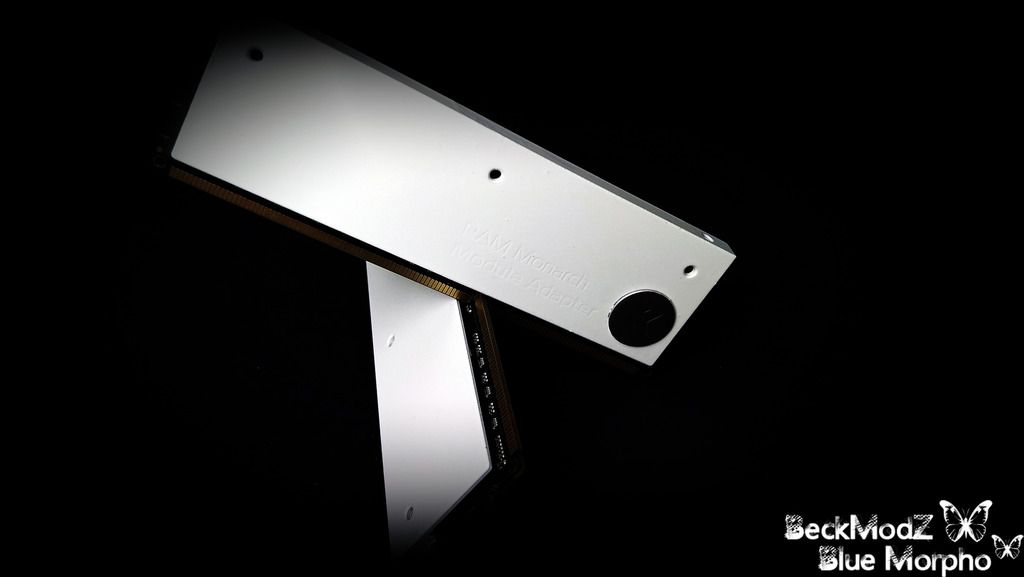
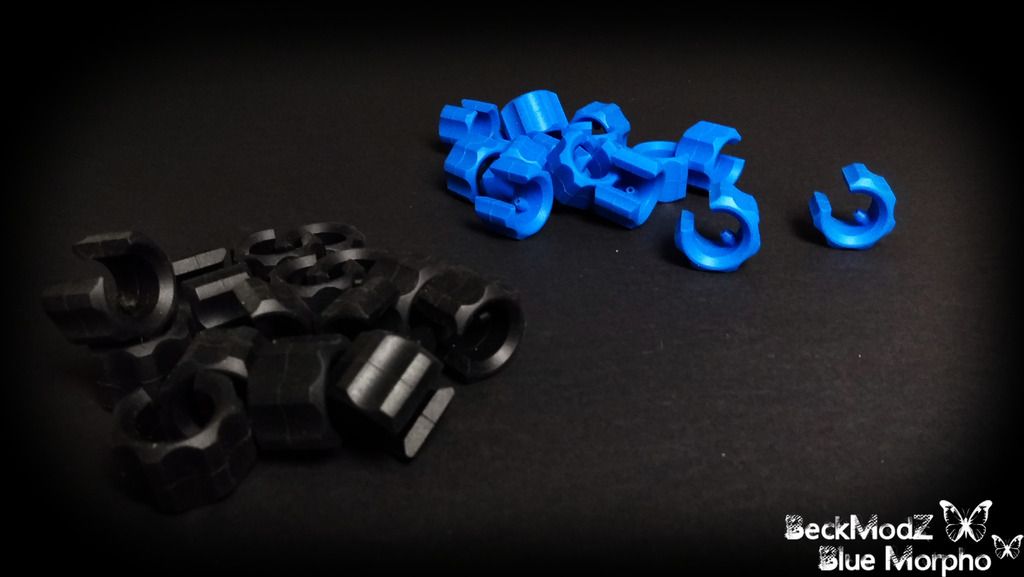
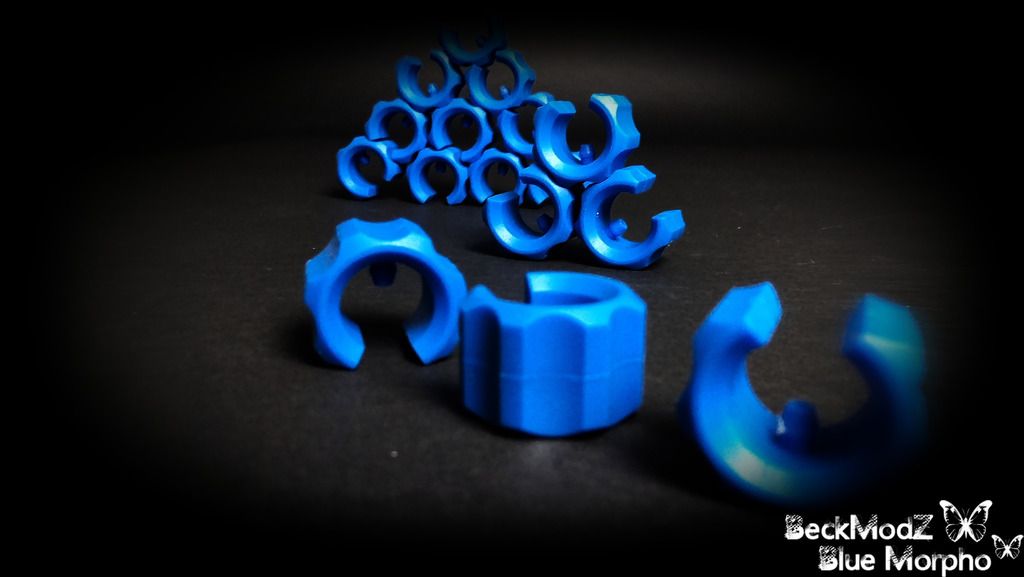
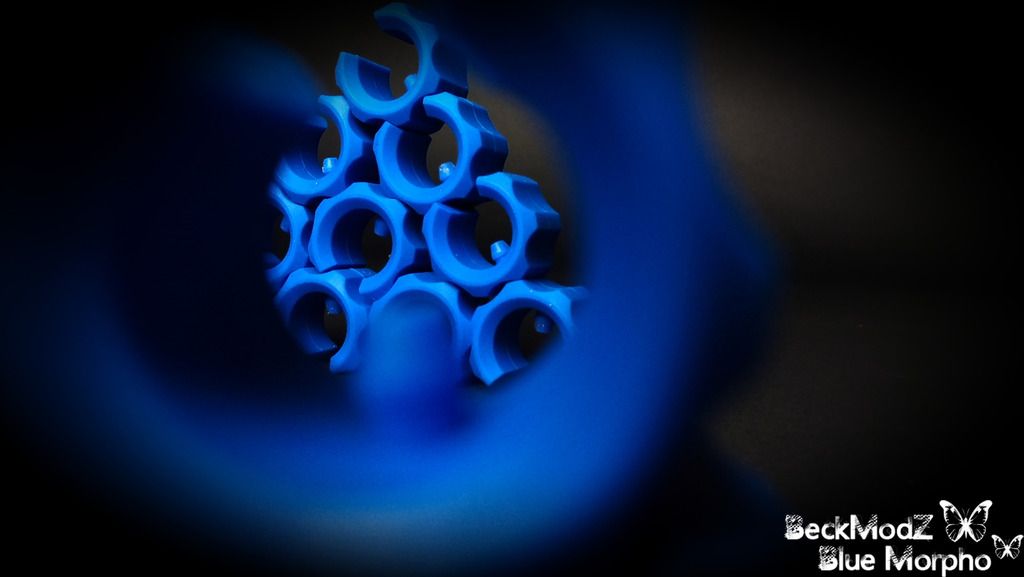
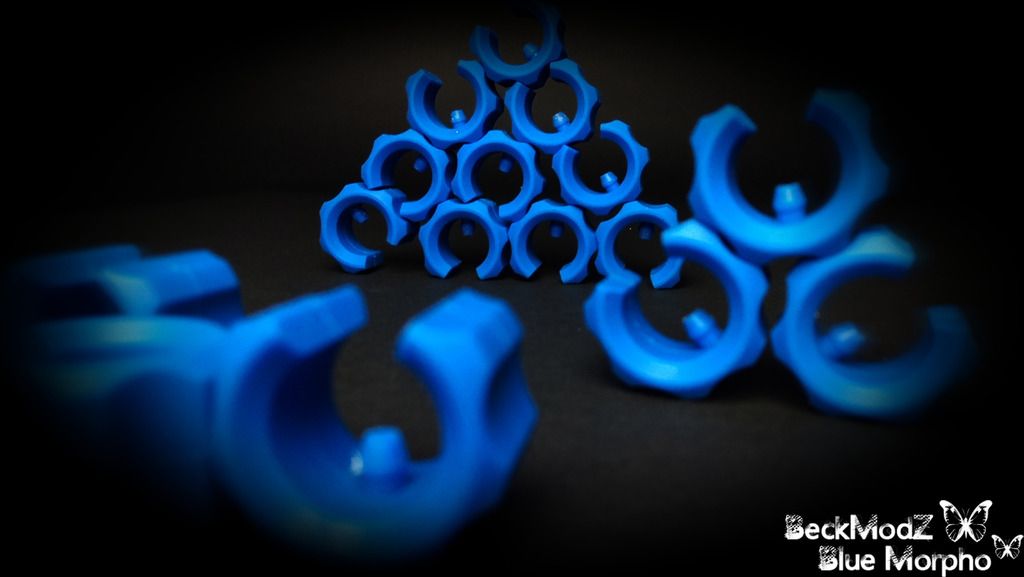
Installing the EK-Ram modules, and the EK-Ram Monarch x2
So today i took my time to remove the heat spreaders on my 2 x 8GB HyperX ram sticks,
and installed the EK-Ram Monarch adapter modules instead.
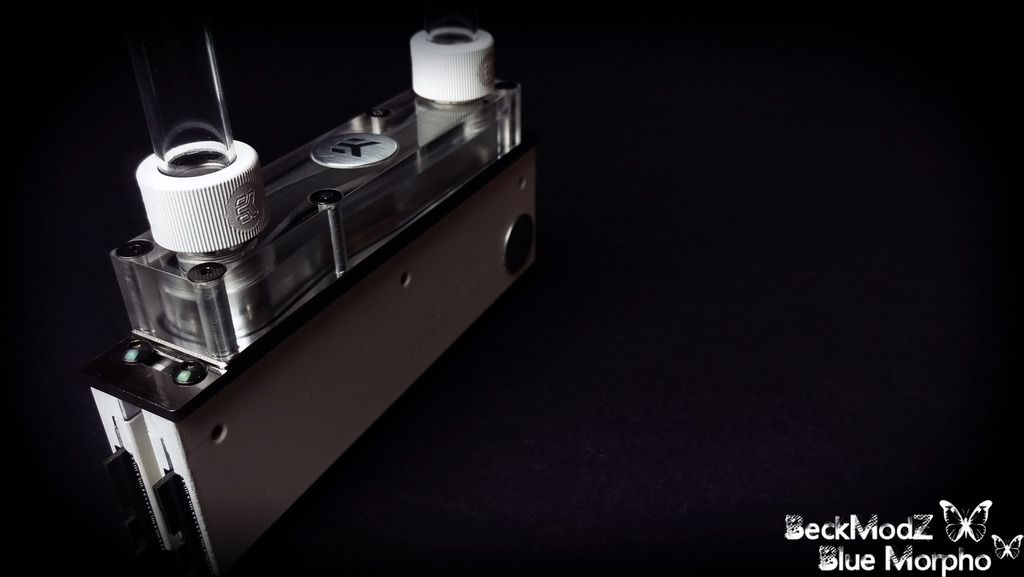
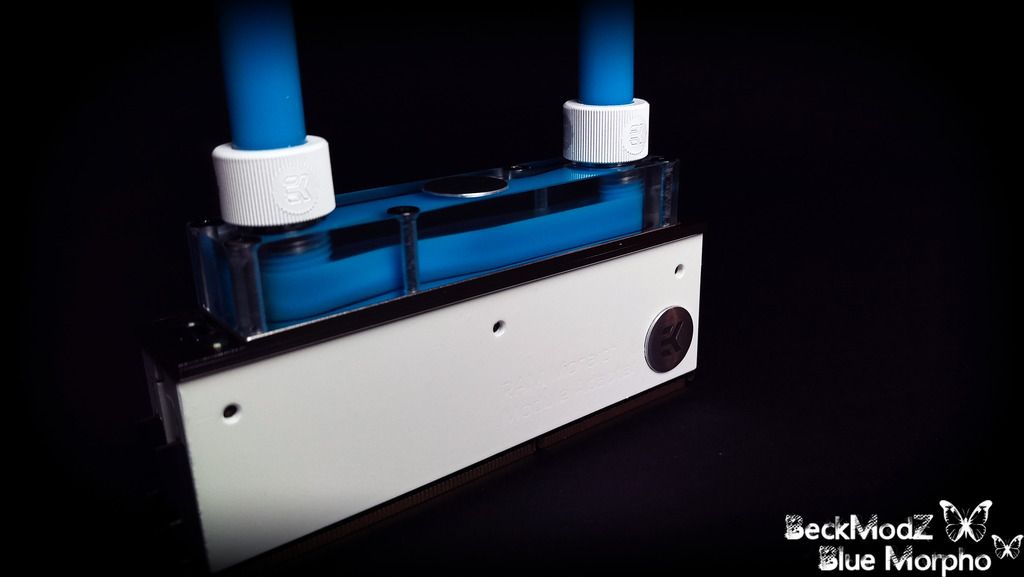
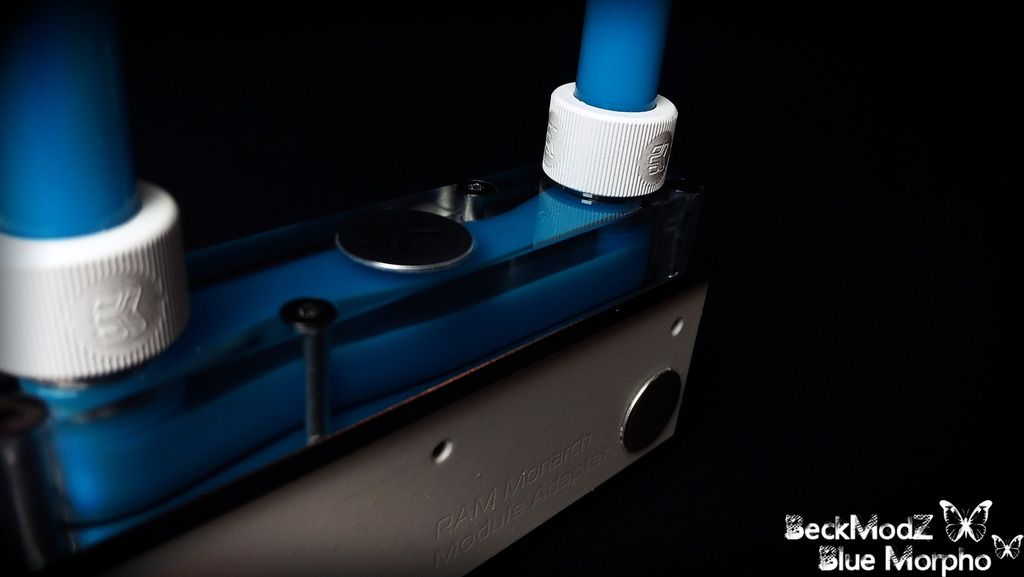
After installing the new heat spreaders, i decided to install the EK-Ram Monarch x 2 waterblock as well,
and obviously i just couldn't help myself, and had to fill it up with some of that beautiful looking Mayhems Pastel Blue.
Amazing!! the blue and white colors just look so good together!,,
Seriously can't wait untill everything is installed in the frame, and it's time to fill that bad boy up!.
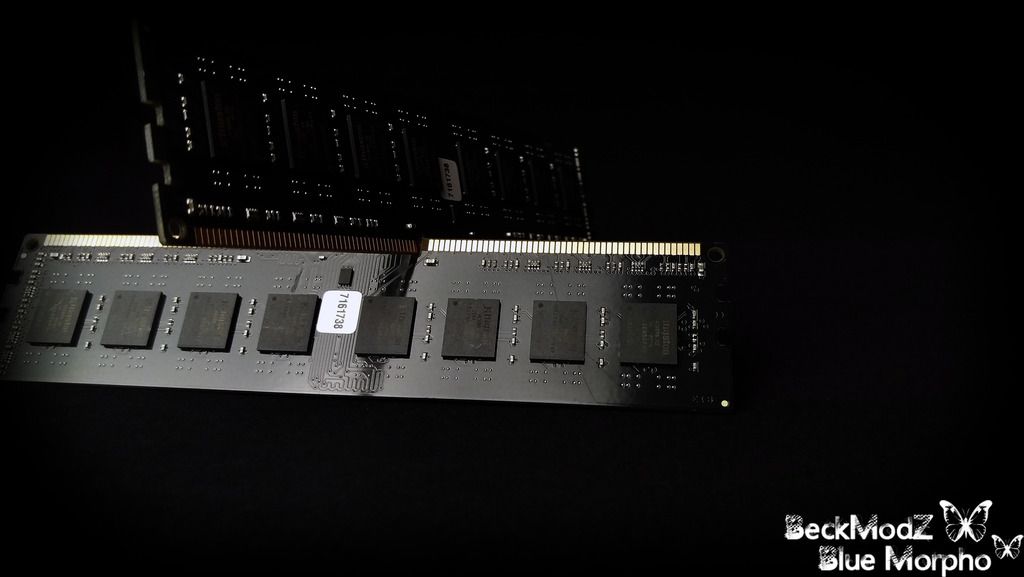
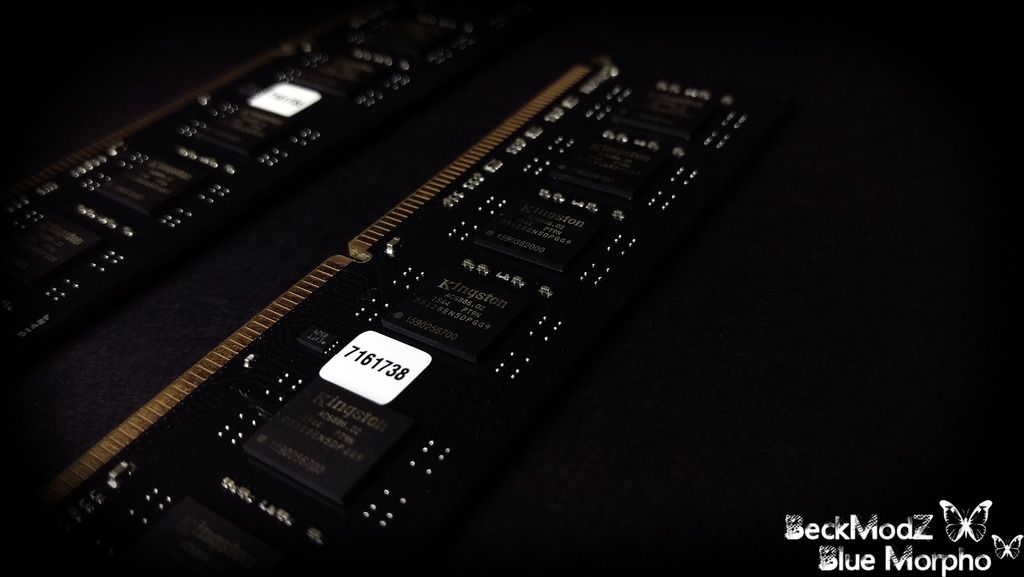

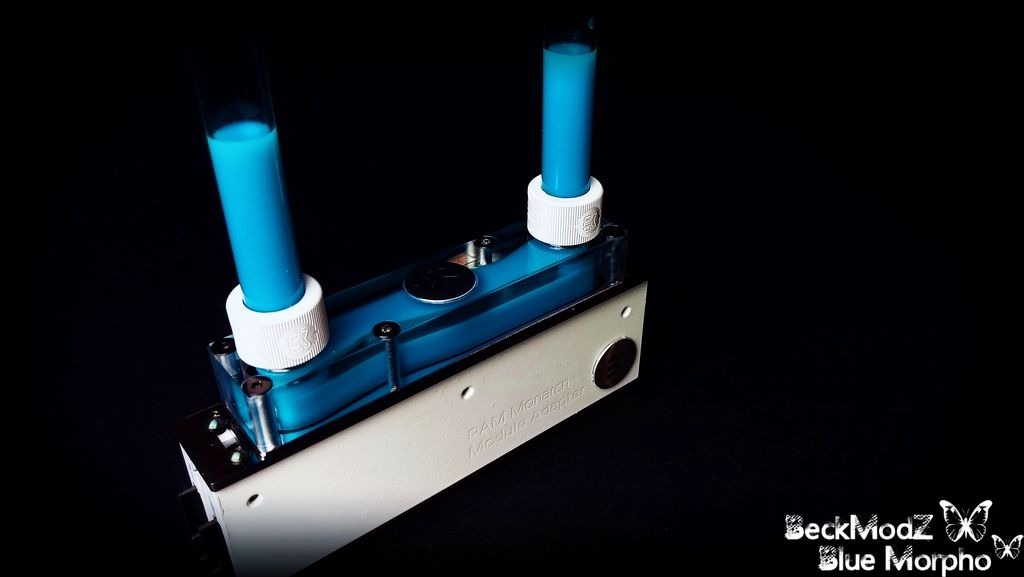
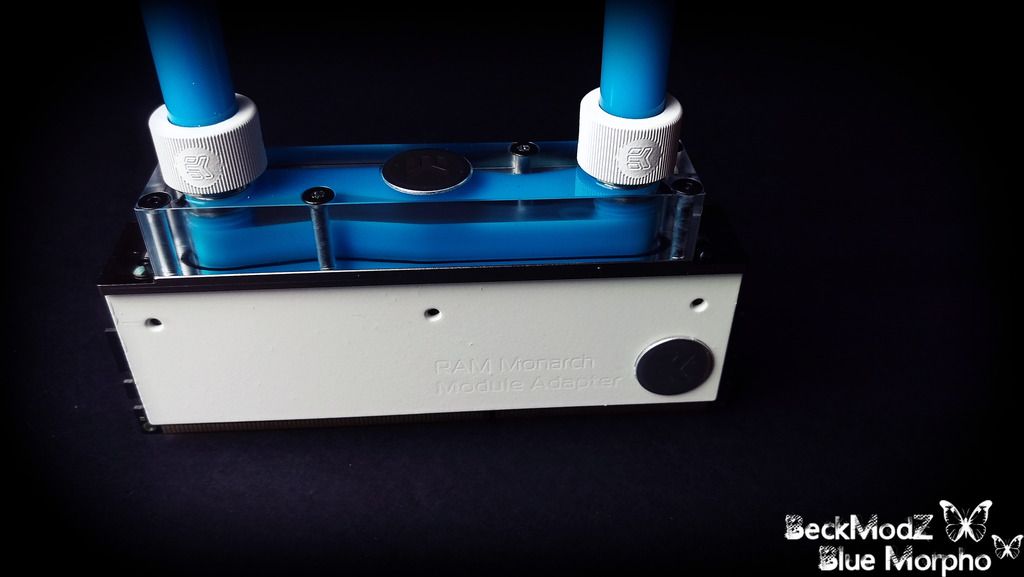
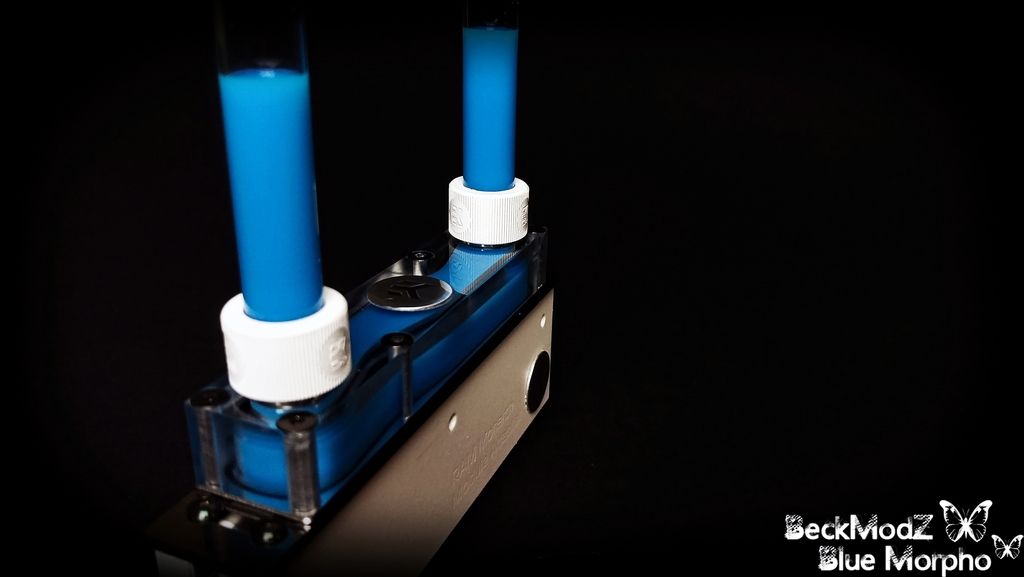
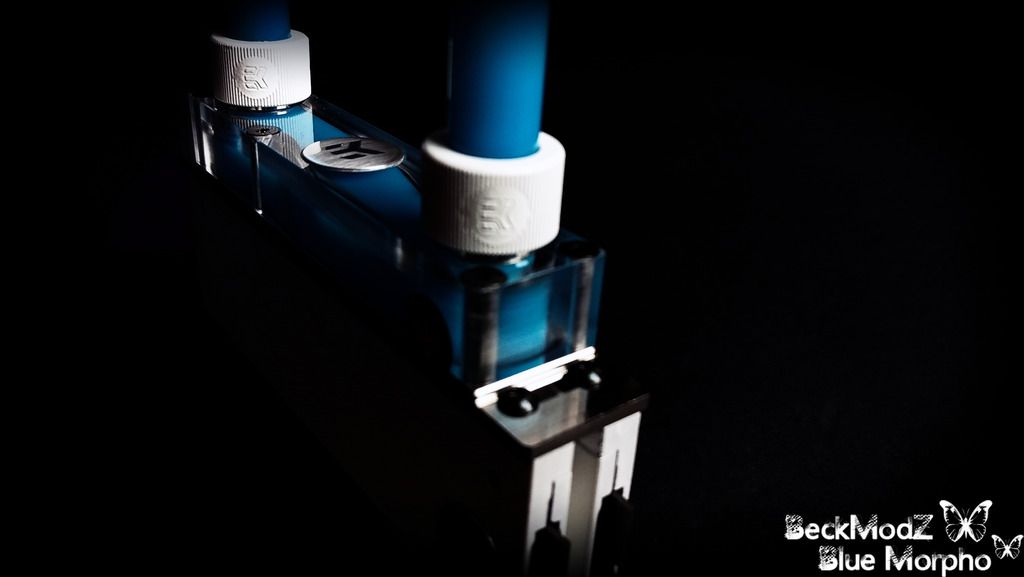
picking up the frame from paint on monday, and then new images heading your way!!
So today i took my time to remove the heat spreaders on my 2 x 8GB HyperX ram sticks,
and installed the EK-Ram Monarch adapter modules instead.
After installing the new heat spreaders, i decided to install the EK-Ram Monarch x 2 waterblock as well,
and obviously i just couldn't help myself, and had to fill it up with some of that beautiful looking Mayhems Pastel Blue.
Amazing!! the blue and white colors just look so good together!,,
Seriously can't wait untill everything is installed in the frame, and it's time to fill that bad boy up!.
picking up the frame from paint on monday, and then new images heading your way!!
Last edited:
Good grief those are some stunning pictures. That is definitely the nicest blue I've ever seen.
Thank you very much, it's nice to get compliments on the photos when i spend so much time on them
And yes, that Mayhems Pastel Blue is absolutely amazing to look at..
Looks so tasty !
Some Goodies On The Way
So i have some goodies on the way from my friends at E22.Biz
Some engraved parts, SSD covers, Psu side covers, Radiator Grill and some other great stuff.
Will obviously take a lot more pictures when the goodies arrive and are being installed.
This post is just a small teaser, and sorry for the image quality, i didn't take the photos,
and was poor light in the work shop.
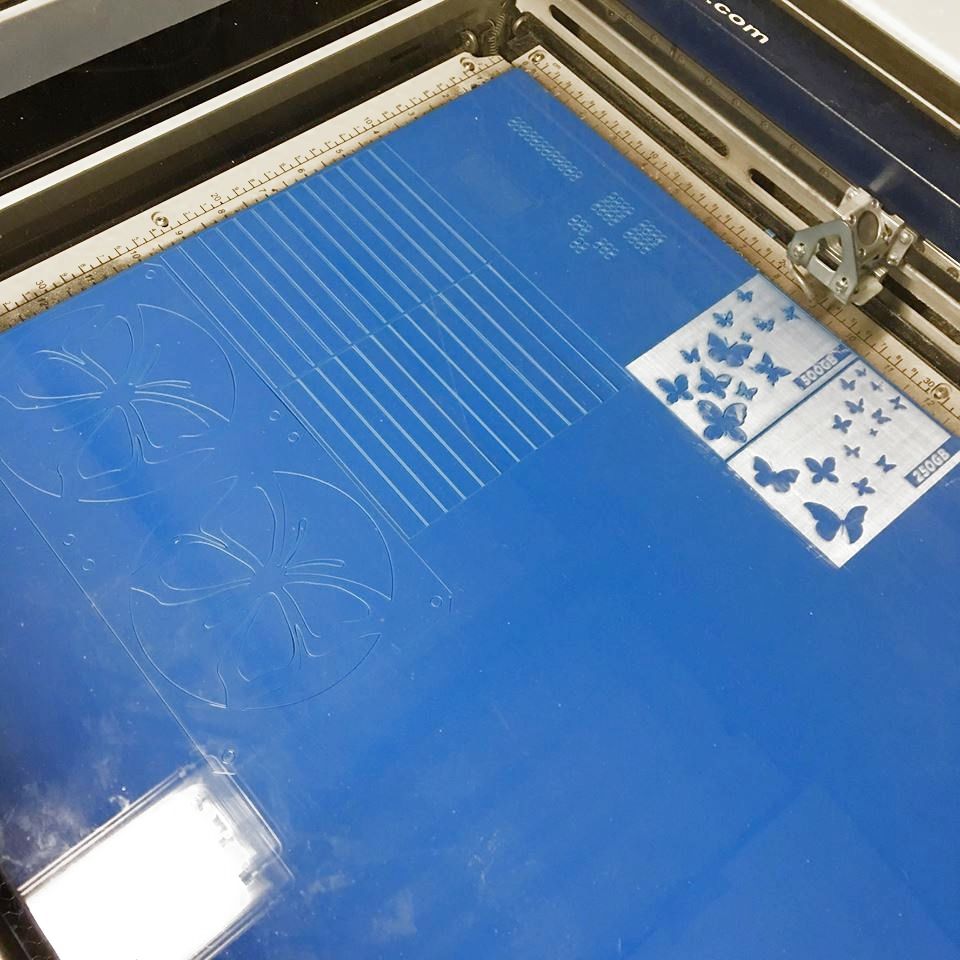
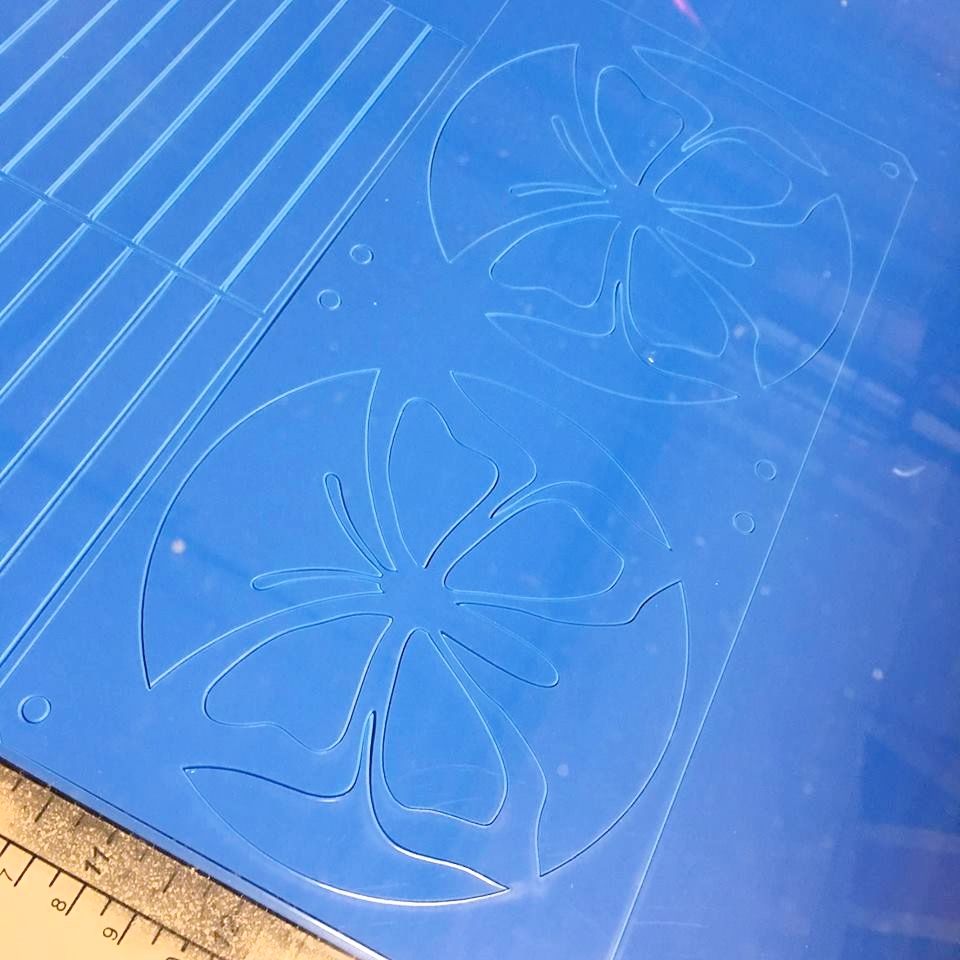
Stay tuned for better photos once the parts are here.
So i have some goodies on the way from my friends at E22.Biz
Some engraved parts, SSD covers, Psu side covers, Radiator Grill and some other great stuff.
Will obviously take a lot more pictures when the goodies arrive and are being installed.
This post is just a small teaser, and sorry for the image quality, i didn't take the photos,
and was poor light in the work shop.
Stay tuned for better photos once the parts are here.
One of the most stunning Project logs I've seen laid out in a long time. Looks incredible, kudos to you...
Thank you very much for the kindness! Much appreciated !
Associate
- Joined
- 5 Oct 2007
- Posts
- 353
Really looking forward to seeing how this pans out. Loving the colour.
Really looking forward to seeing how this pans out. Loving the colour.
Thank you
.. blue white and black never fails This will be stunning...
Clearly you have a penchant for photography too!
i do indeed, love photography
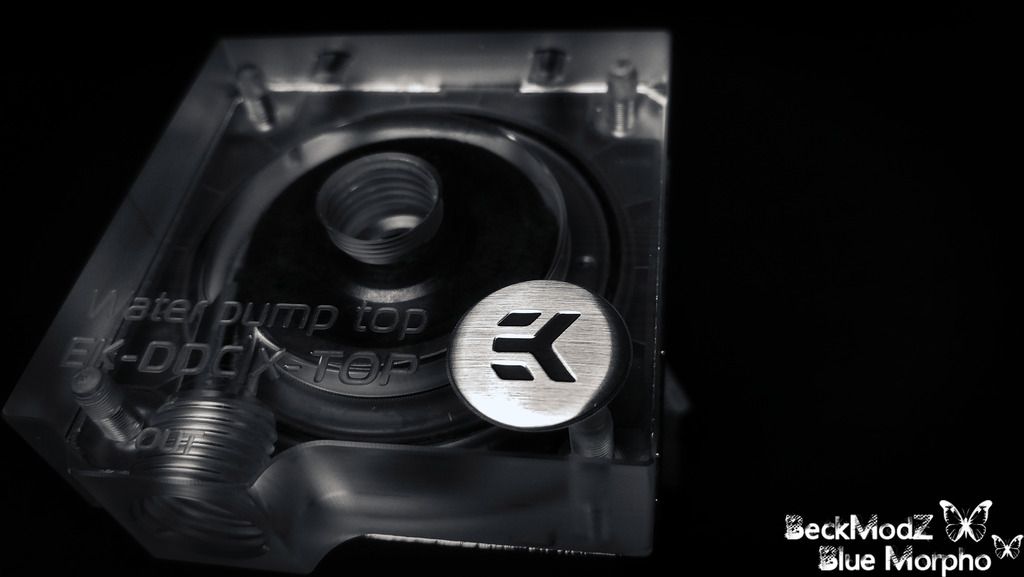
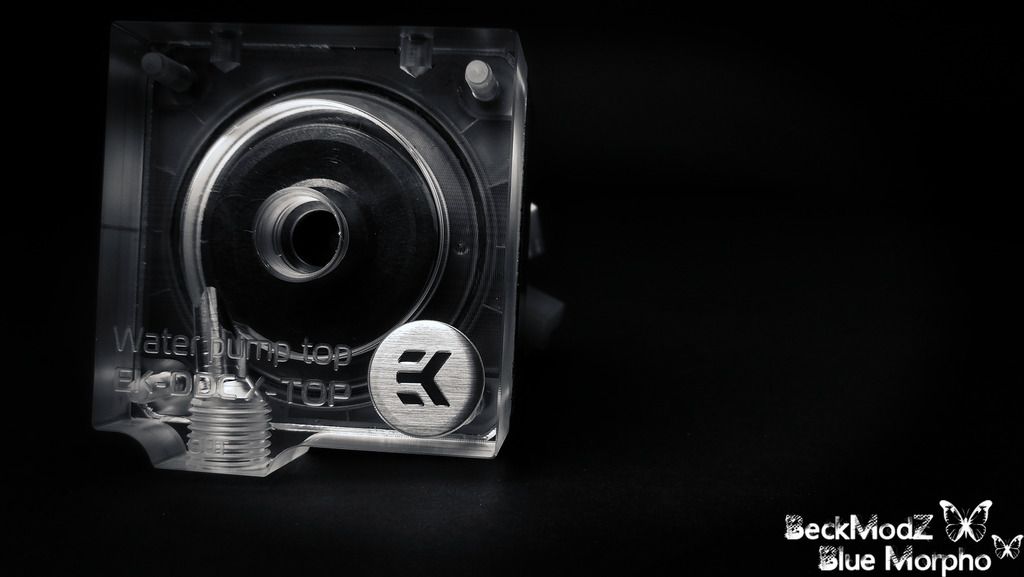
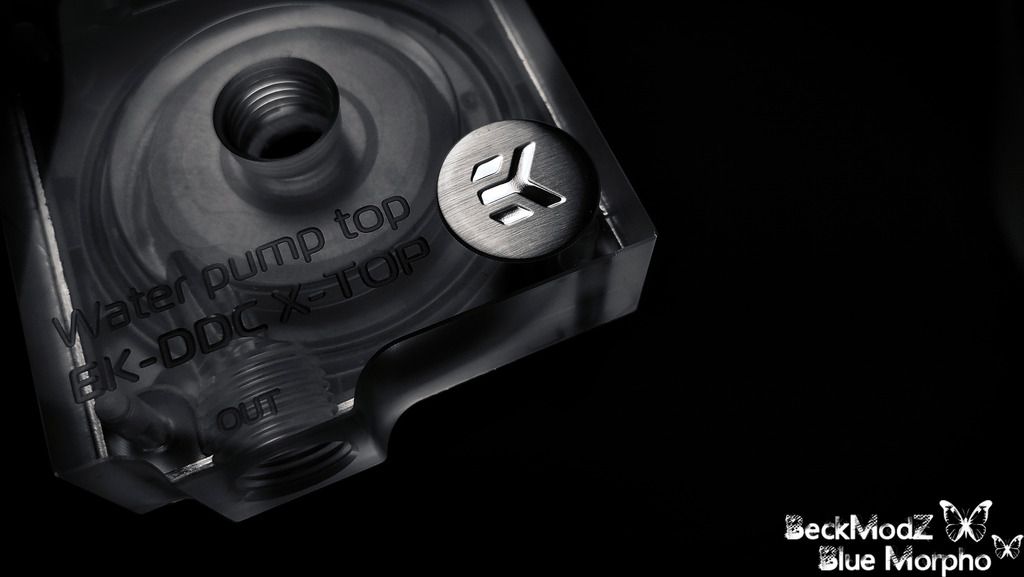
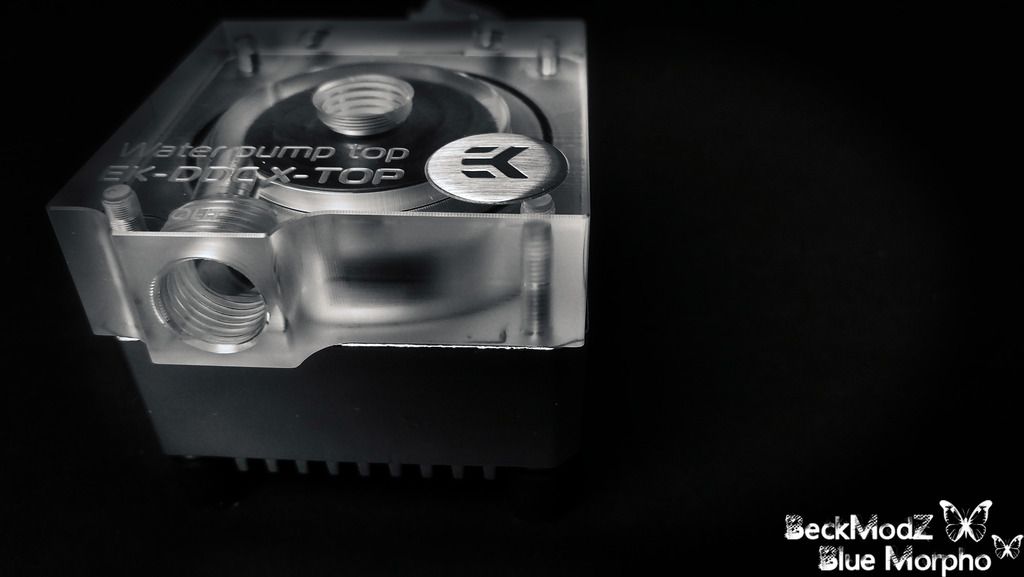
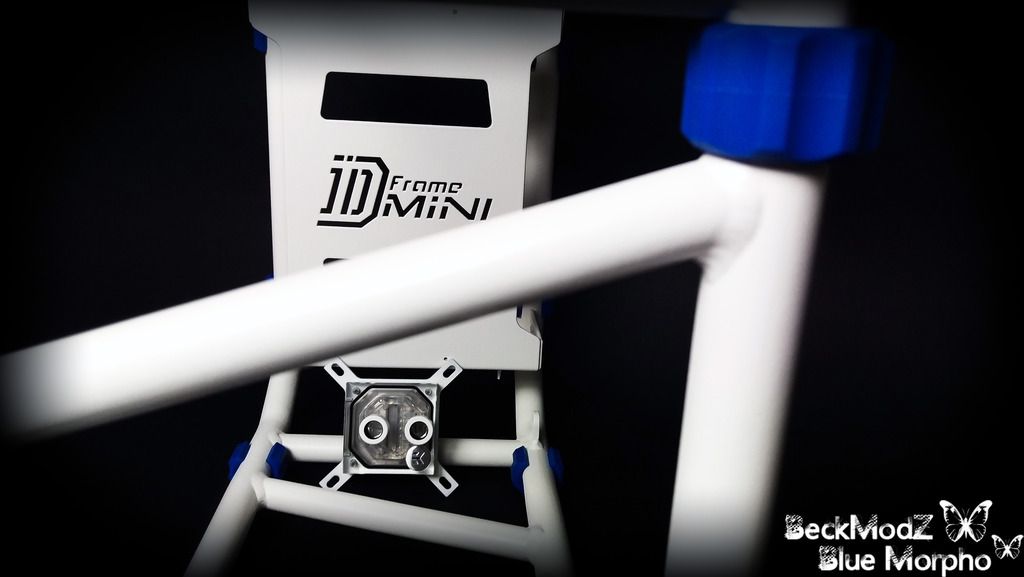
..The DDC Pump, And New Footstands From In Win
So today i recieved the EK-XTOP DDC 3.2 PWM Elite Pump from EKWB, and also IN WIN sent me Blue rubber Footstands for the D-Frame Mini,
replacing the Black ones that came stock with the red frame when i bought it.
I will add a few images of them mounted on the white frame before i gave it the final 2 layers of paint earlier today. So just to see how it looked.
I am debating on what to do with the nickel plated housing for the pump, and thought about painting it white, but also thought on using white vinyl wrap instead.
Will see what i decide on tomorrow. Have some more vinyl things to do for the build as well, but update will follow on that later.
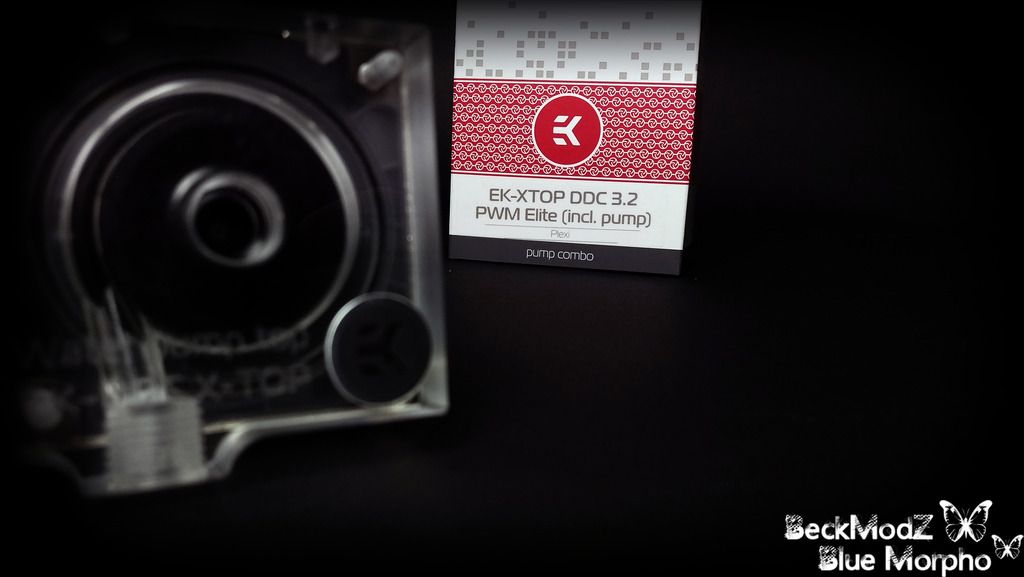

Stay tuned for tomorrows updates! finished painting the frame today, and it's drying over night.
Will put up images of it tomorrow.
So today i recieved the EK-XTOP DDC 3.2 PWM Elite Pump from EKWB, and also IN WIN sent me Blue rubber Footstands for the D-Frame Mini,
replacing the Black ones that came stock with the red frame when i bought it.
I will add a few images of them mounted on the white frame before i gave it the final 2 layers of paint earlier today. So just to see how it looked.
I am debating on what to do with the nickel plated housing for the pump, and thought about painting it white, but also thought on using white vinyl wrap instead.
Will see what i decide on tomorrow. Have some more vinyl things to do for the build as well, but update will follow on that later.
Stay tuned for tomorrows updates! finished painting the frame today, and it's drying over night.
Will put up images of it tomorrow.
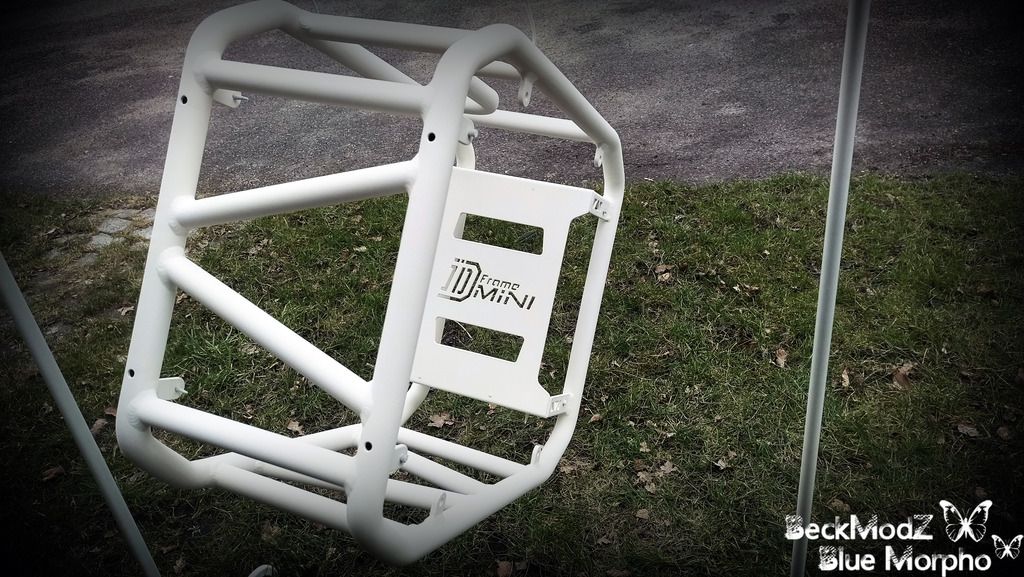
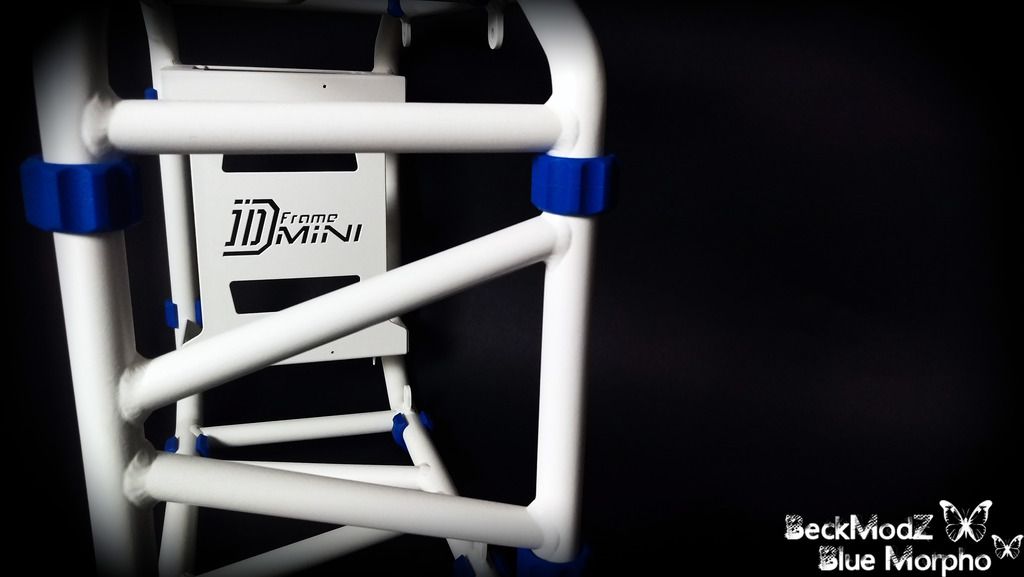
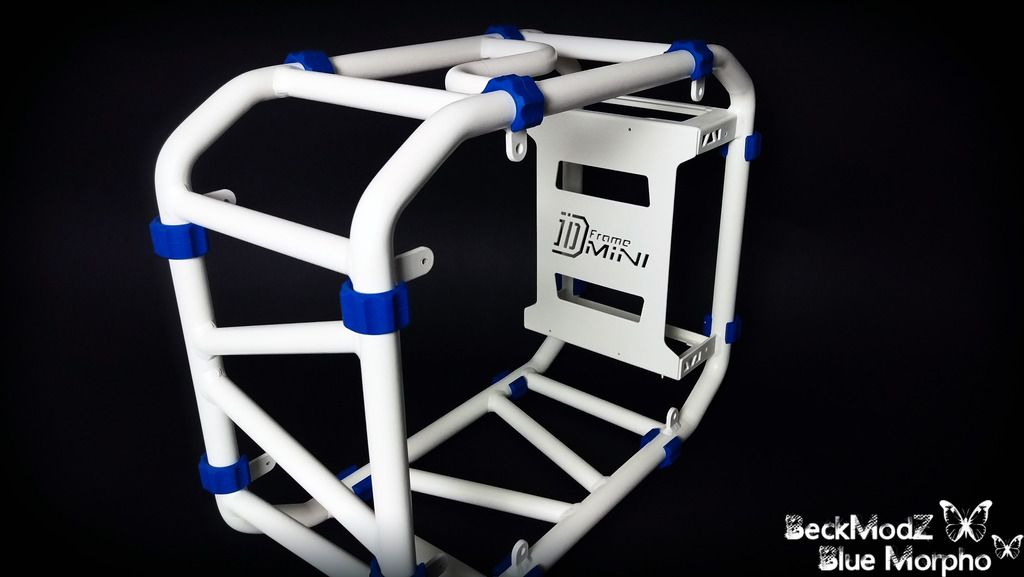
Painting The IN WIN D-Frame Mini
So at first i had the frame sent to Powder Coating, but when i came to pick it up it was looking white cream with pink spots all over the place!
Obviously i was very unsatisfied with their result, so i went out and bought some spray paint and re painted the whole thing.
Took me a long time to sand it down, gave it a layer of primer, and 4 layers of the Glossy White spray paint, before i had covered up all the pink and was satisfied with the result.
The IN WIN D-Frame Mini is now hanging over night for drying, and I will see tomorrow morning if it needs an extra layer or not.
Anyways here's a few images of the paint process, and my cool paint setup
Had some fun with one of the photos, obviously i did not spray inside while taking a picture, just had a little fun in photoshop and threw some fake spray in the image hehe.

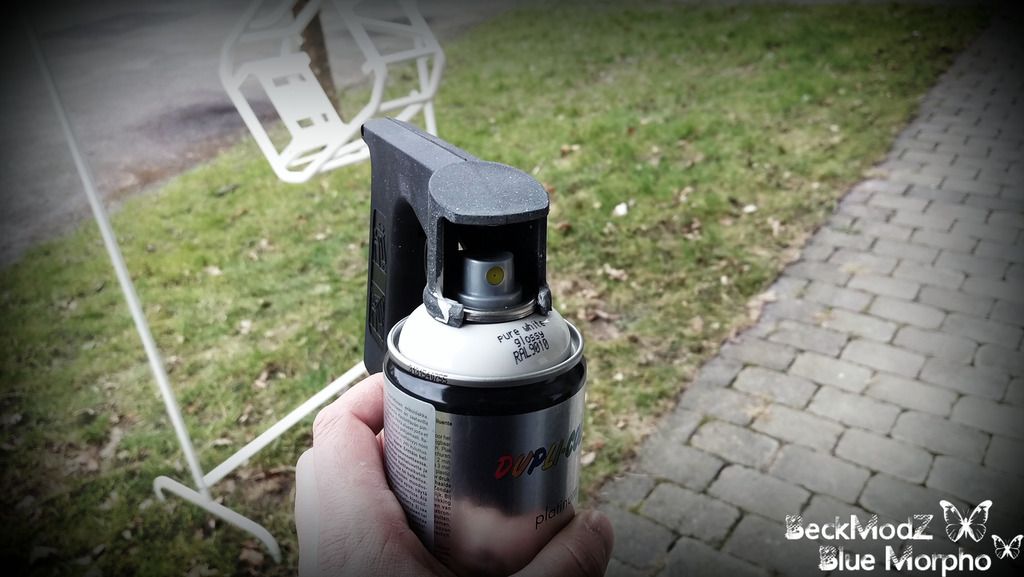
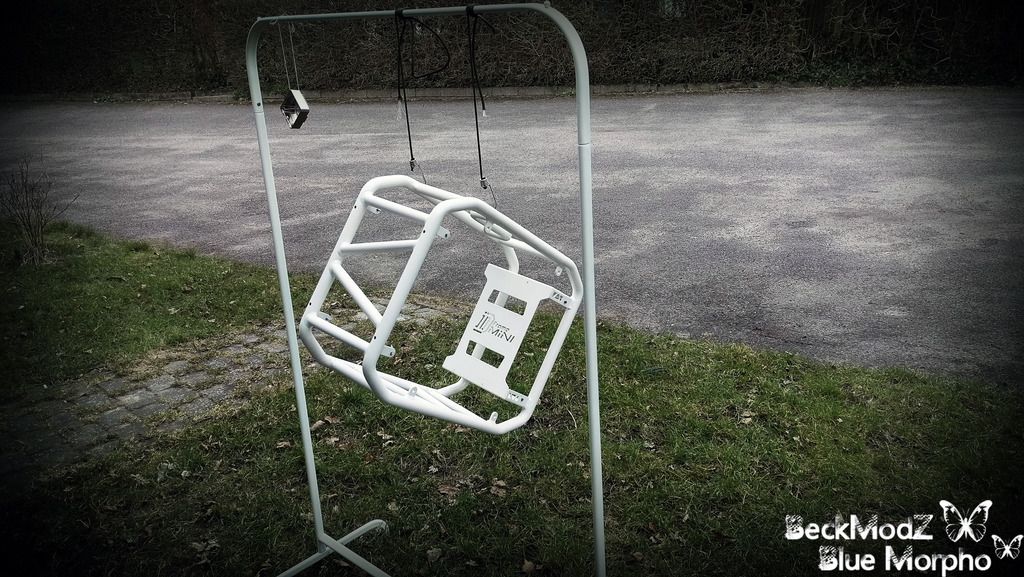

What do you think of my paint setup? Used an old frame for hangin clothes on, tied up some 550 paracord and i had my self a great workstation for the paint job!!
Will upload images tomorrow of the finished paint job.
Obviously i was very unsatisfied with their result, so i went out and bought some spray paint and re painted the whole thing.
Took me a long time to sand it down, gave it a layer of primer, and 4 layers of the Glossy White spray paint, before i had covered up all the pink and was satisfied with the result.
The IN WIN D-Frame Mini is now hanging over night for drying, and I will see tomorrow morning if it needs an extra layer or not.
Anyways here's a few images of the paint process, and my cool paint setup
Had some fun with one of the photos, obviously i did not spray inside while taking a picture, just had a little fun in photoshop and threw some fake spray in the image hehe.
What do you think of my paint setup? Used an old frame for hangin clothes on, tied up some 550 paracord and i had my self a great workstation for the paint job!!
Will upload images tomorrow of the finished paint job.
Last edited:
Associate
So i dont often post, i'm more of a reader. But holy guacamole i had to say something about this build.
It is one of the best builds I've seen. to the extent that i check this thread as part of my "9:00 o clock get to work quick check of the news and other internet things" every day.
I havent built a PC for over 5 years now but i'm saving up some of that stuff people use to buy things and will be using this as inspiration.
I am intrigued to see how your cable management will go with this case! Are the case tubes hollow? perhaps they could be threaded through the tubing and have them come out at certain points...although that would mean drilling holes i guess and you would have to thread the cables and re-attach the connectors once threaded, which would be painful....
I guess if the cables look great like yours then they are part of the build anyway and you wouldn't need to hide them right!
Anyway cant wait to see it finished. Would also like to know how it goes with dust, id love this case but dont think i could be bothered to blast it with compressed air every other day...
oh and like everyone else says, great photography.
So i dont often post, i'm more of a reader. But holy guacamole i had to say something about this build.
It is one of the best builds I've seen. to the extent that i check this thread as part of my "9:00 o clock get to work quick check of the news and other internet things" every day.
I havent built a PC for over 5 years now but i'm saving up some of that stuff people use to buy things and will be using this as inspiration.
I am intrigued to see how your cable management will go with this case! Are the case tubes hollow? perhaps they could be threaded through the tubing and have them come out at certain points...although that would mean drilling holes i guess and you would have to thread the cables and re-attach the connectors once threaded, which would be painful....
I guess if the cables look great like yours then they are part of the build anyway and you wouldn't need to hide them right!
Anyway cant wait to see it finished. Would also like to know how it goes with dust, id love this case but dont think i could be bothered to blast it with compressed air every other day...
oh and like everyone else says, great photography.
Thank you very much! That's just great to hear, really nice to know that you look forward to every post made..
The plan is that the cables will go through the reservoir/mainboard tray, into the back, where there will be channels drilled out to fit them perfect, and that way route them to the PSU.
That way they are neatly organized and visible as part of the build.
But let's see how it looks once i receive the custom tray.
Was actually brainstorming a lot about whether or not i should route some of the cables in the frame tubes it self, because they are hollow.
But as for now i think that i might only do it for the pwn button, should i decide that i wanted to go with a custom one, placed into the frame instead of the stock ones.
As for dust, i am not quite sure yet since it's not done. But i could imagine dust not being a problem since it's an open frame, but i am not sure.
Will let you know when it's done
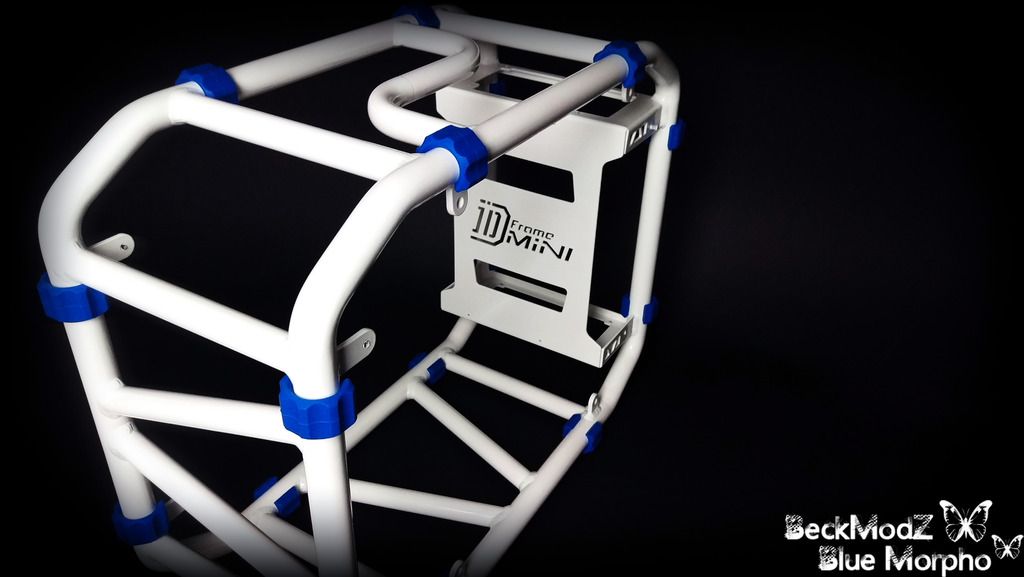
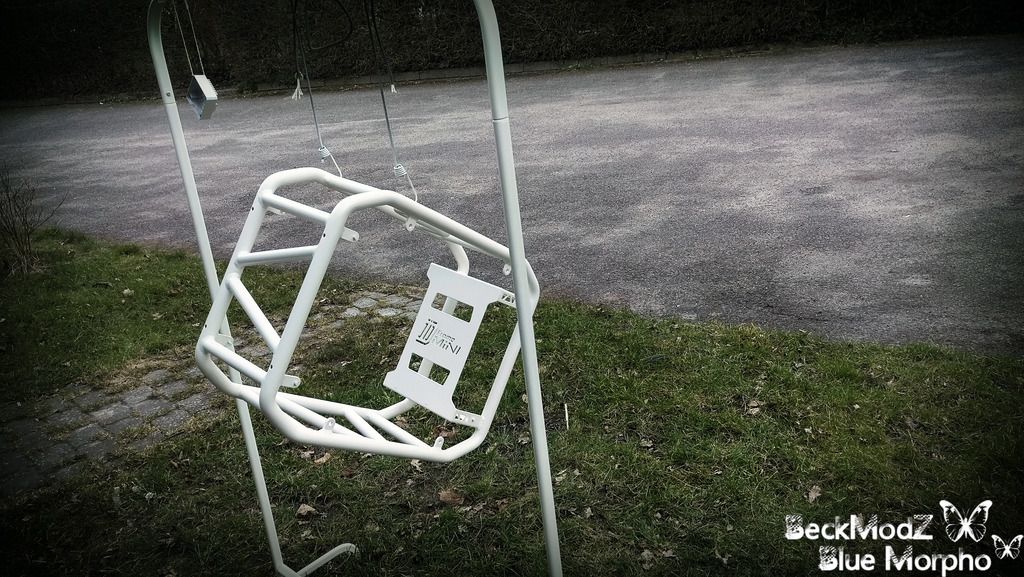
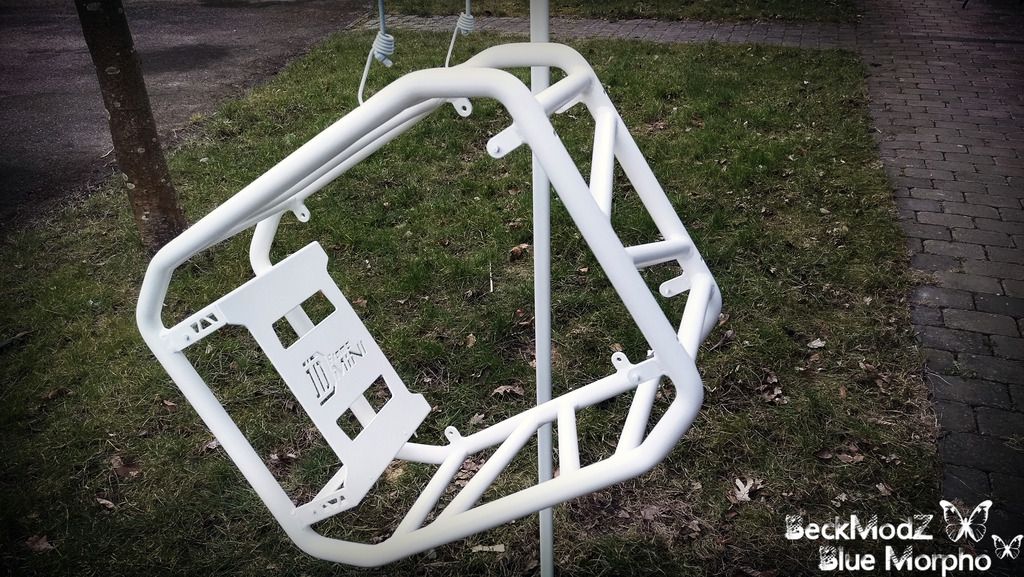
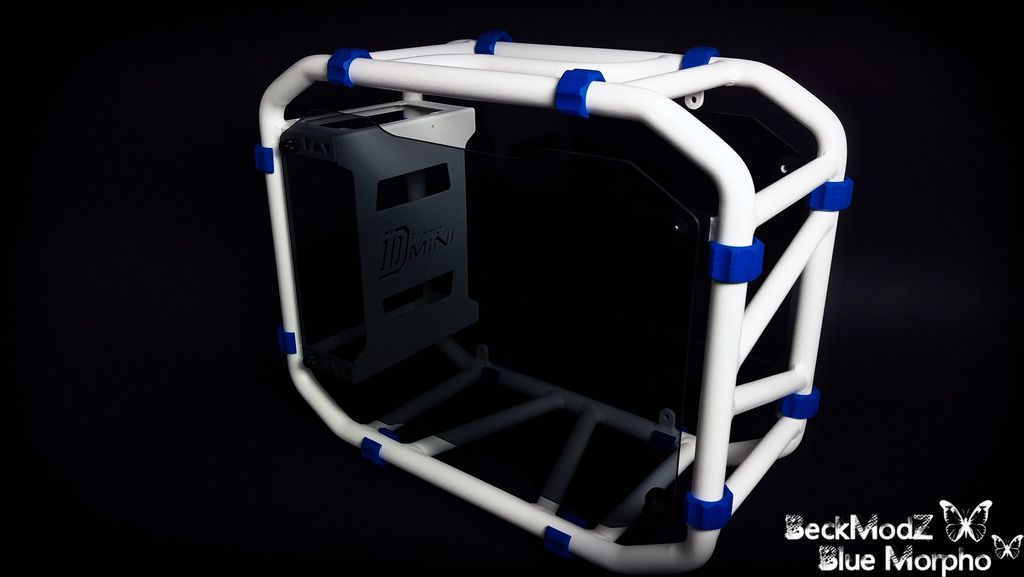
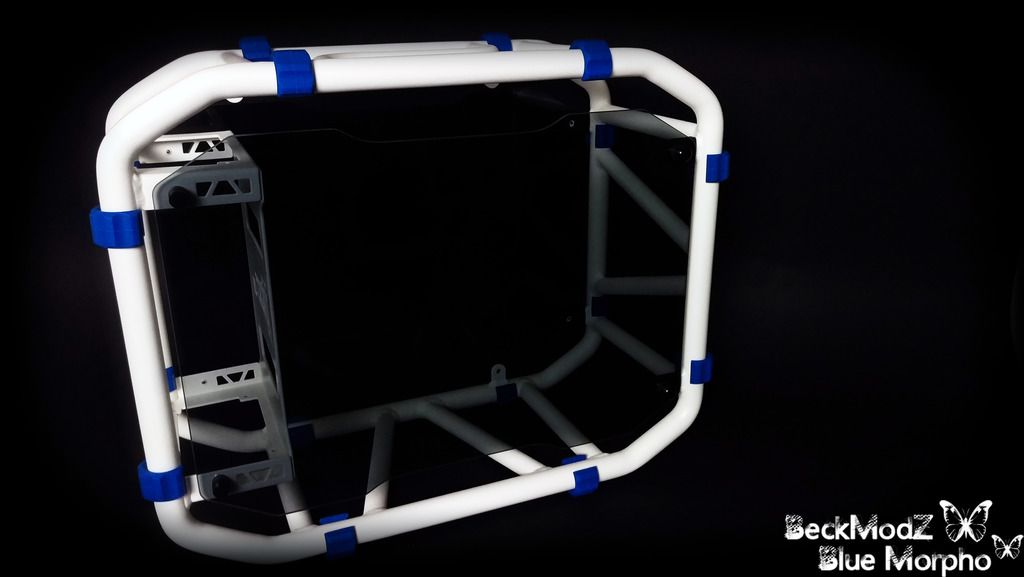
IN WIN D-Frame Mini After Paint
So yesterday i gave the frame the last layers of paint, and let it hang to dry over night.
This morning i took it down, put on the new Blue Rubber Foot Stands that i recieved from the nice guys at In Win, and took some images.
I must say that i absolutely love the new paint job! Cant wait to see what it looks like with the custom reservoir and the new GPU mount location.
Also nate at E22.biz just finished some laser engraved parts that are on the way. More updates will follow soon.

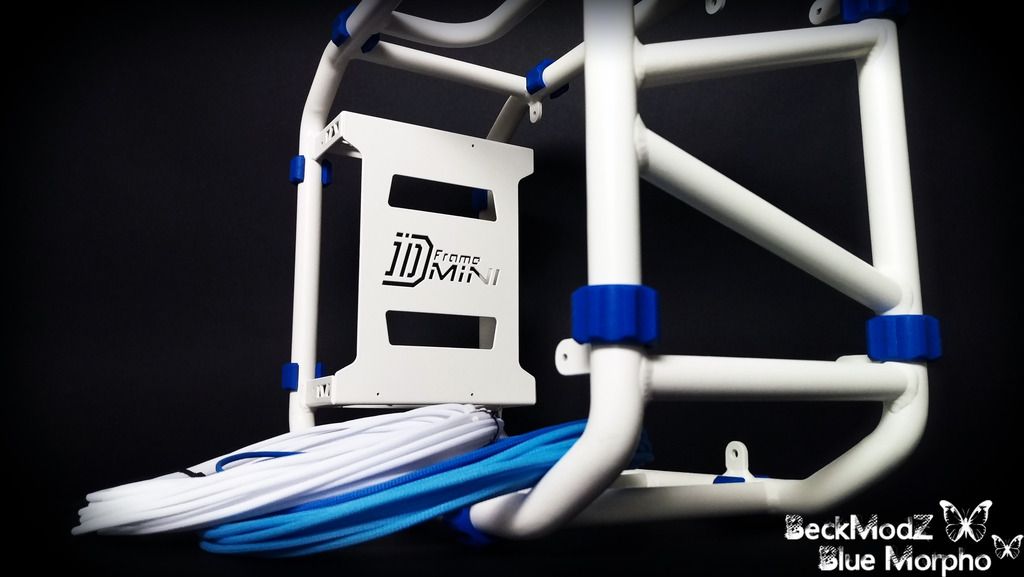
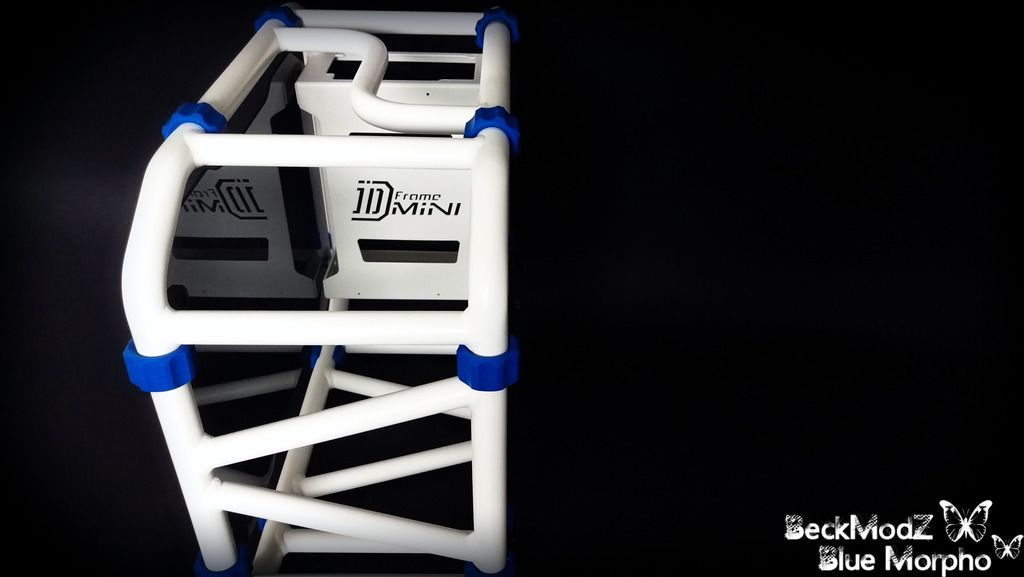
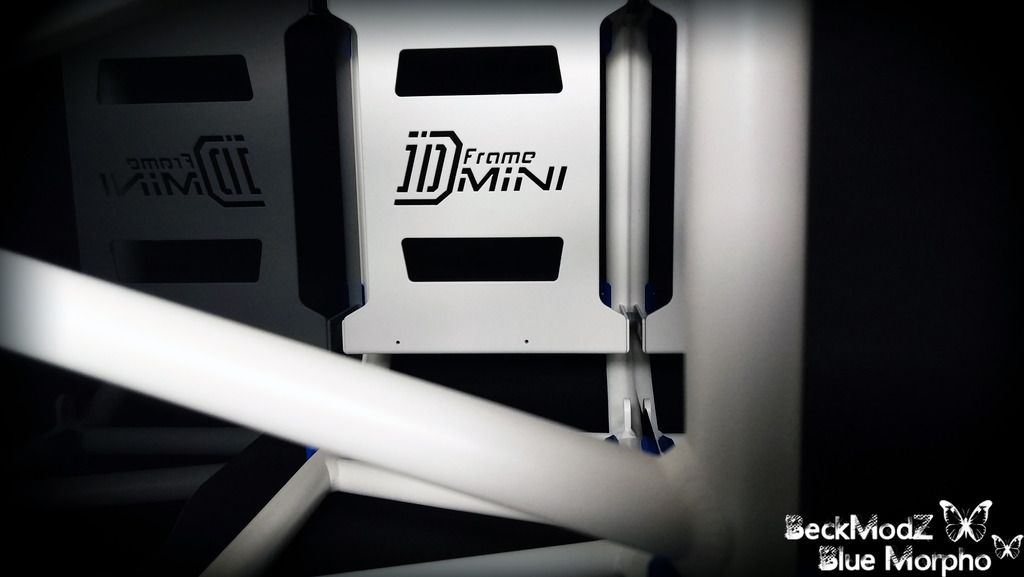
Hope you like it !!
So yesterday i gave the frame the last layers of paint, and let it hang to dry over night.
This morning i took it down, put on the new Blue Rubber Foot Stands that i recieved from the nice guys at In Win, and took some images.
I must say that i absolutely love the new paint job! Cant wait to see what it looks like with the custom reservoir and the new GPU mount location.
Also nate at E22.biz just finished some laser engraved parts that are on the way. More updates will follow soon.
Hope you like it !!