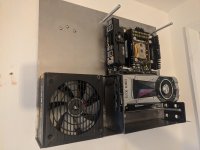
Associate
Hey everyone, it's been a few years since I last posted anything to these forums as I've been out of the custom pc game due to money shortage but I'm making a comeback slowly now.
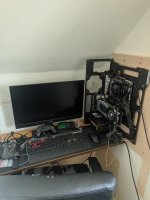
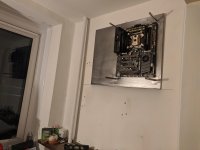
My new build has been inspired by the fact I moved into a house with my partner and the only room I can have my pc in is the cupboard under the stairs so having a tower is out of the question. Especially seeing as the case I was using for my system was the phanteks enthoo primo. As you can see, this was never going to work!
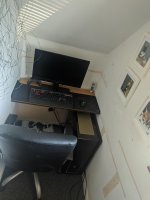
That lead me to look into a SFFPC and eventually wall mounted pc's as desktop space is minimal.
My goal is to make a wall mounted pc which is under 10cm thick. My project began with using my current system hardware to test how working with a wall mounted system would go. I used the motherboard tray and gpu bracket parts from my old haf932 case.
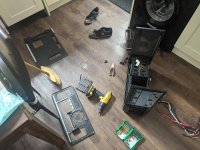
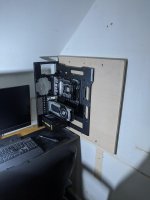
I assembled everything and mounted it to the wooden backboard...
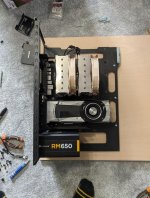

Thanks to having small hands, I could only just about fit my hand under the psu while holding the mouse...
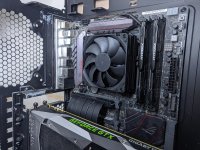
As this was going to be a slim build, as much as I love the performance of the noctua nh-d15, I had to swap it out for the Noctua nh-l9i chromax which fits in perfectly with this build...
With everything plugged in, it was like an octopus had found its way from the ocean to my pc! It was such a mess & the excess metal was getting in the way!...
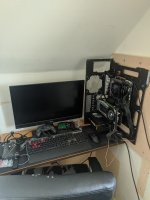
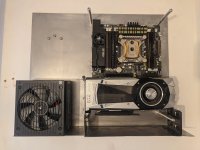
To remedy that, I trimmed any unnecessary metal away and moved the psu up to the top out of the way of the mouse. I'd recently made a metal brake and using an unused metal ruler I made a couple of brackets to hold the psu up high...
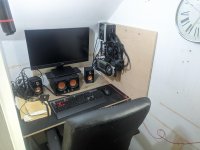
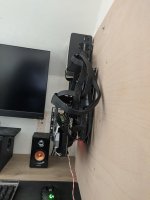
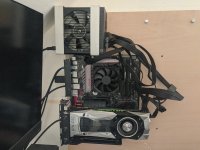
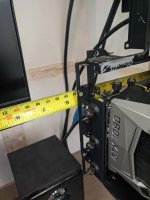
I've been running this setup for a few months now & I'm happy with how it works. I've been slowly designing my creation on sketch up, this is how my idea looks so far (not finished)...
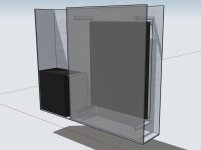
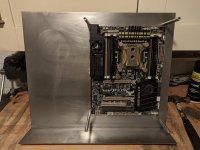
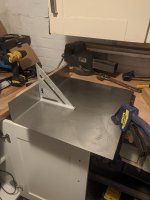
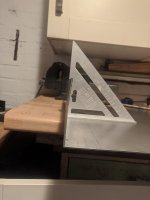
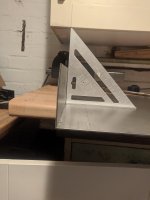
The main 'frame' of the case is made from 2mm thick steel. Using an angle grinder I cut a groove across the width of the steel where I wanted to bend it 90°. This was my first time bending such thick metal so I learned a few things and also my first time using an angle grinder. The bend wasn't perfect (a good few lumps with a hammer got that corner bend out) but I'll refine the bend another time but it's close enough for now and I'm happy with how it came out...
Also testing out sanding & polishing metal, I may or may not be aiming for a mirror finish. This is the effect I've got so far, slowly getting there but still needs lots more work...
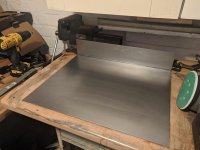
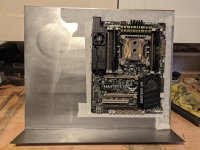
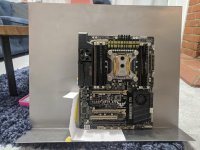
I'm using an old motherboard for layout testing before any holes get drilled. The bent paper represents where I plan another couple of bends for the gpu to be mounted...
Progress pictures will be posted when more progress is made. Enjoy...!
My new build has been inspired by the fact I moved into a house with my partner and the only room I can have my pc in is the cupboard under the stairs so having a tower is out of the question. Especially seeing as the case I was using for my system was the phanteks enthoo primo. As you can see, this was never going to work!

That lead me to look into a SFFPC and eventually wall mounted pc's as desktop space is minimal.
My goal is to make a wall mounted pc which is under 10cm thick. My project began with using my current system hardware to test how working with a wall mounted system would go. I used the motherboard tray and gpu bracket parts from my old haf932 case.

I assembled everything and mounted it to the wooden backboard...


Thanks to having small hands, I could only just about fit my hand under the psu while holding the mouse...

As this was going to be a slim build, as much as I love the performance of the noctua nh-d15, I had to swap it out for the Noctua nh-l9i chromax which fits in perfectly with this build...

With everything plugged in, it was like an octopus had found its way from the ocean to my pc! It was such a mess & the excess metal was getting in the way!...

To remedy that, I trimmed any unnecessary metal away and moved the psu up to the top out of the way of the mouse. I'd recently made a metal brake and using an unused metal ruler I made a couple of brackets to hold the psu up high...


I've been running this setup for a few months now & I'm happy with how it works. I've been slowly designing my creation on sketch up, this is how my idea looks so far (not finished)...

The main 'frame' of the case is made from 2mm thick steel. Using an angle grinder I cut a groove across the width of the steel where I wanted to bend it 90°. This was my first time bending such thick metal so I learned a few things and also my first time using an angle grinder. The bend wasn't perfect (a good few lumps with a hammer got that corner bend out) but I'll refine the bend another time but it's close enough for now and I'm happy with how it came out...


Also testing out sanding & polishing metal, I may or may not be aiming for a mirror finish. This is the effect I've got so far, slowly getting there but still needs lots more work...

I'm using an old motherboard for layout testing before any holes get drilled. The bent paper represents where I plan another couple of bends for the gpu to be mounted...

Progress pictures will be posted when more progress is made. Enjoy...!
Last edited:


