Amateur DIY Resin Pour Coffee Table

Ot3rPoI.jpg

What is this rug? Got to say man, it doesn't go with the table!
 
What is this rug? Got to say man, it doesn't go with the table!
Table isn't going there, so it's OK :cry: I will have black, brown and blue running through the place, but lounge area where this coffee table will be actually has a cow hide rug. Will show you when it's together. I'm not wed to it but it'll do for now.

not sure why it's norwegian but that's the site I got it from

Rug weaving is his next project...:D
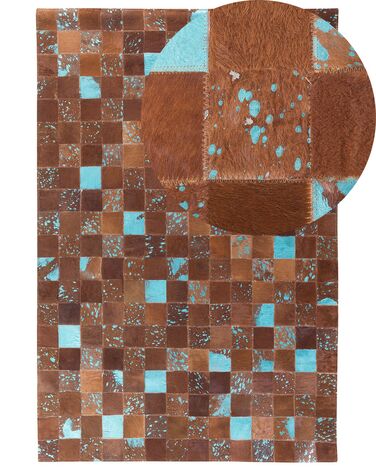
Well, I was kept up until about 3am this morning because I really want rid of this bookcase and I now have a really cool idea for a bookcase, but it's pretty mega... I'll need to design it on paper, then solidworks, then 3d print a test scaled piece to make sure it'll work. It'll be concrete, metal and wood :eek: my head is such a dick

But I'll also need to make my dining table next. That's for sure coming very soon. Jesus ****.

I think I'm going to make one of my garages into a better workshop space though, so that's also on my list :cry::cry::cry:
 

That's looking much better.

You should try weaving next:
Get comfortable and put one arm down and rest the other on it, just above the wrist and arch up in the fillet and watch the metal turn to liquid (this will be quick) and start to move your welding hand as though you were moving around the bottom of a wine glass (white) and weave the weld.
With the hand that is underneath, use this to be the steady platform and also to allow the arm above to move along the object being welded.

This will produce a very strong and good looking weld.

Don't forget your anti spatter spray :)
 
Ground it all down today and fitted the legs and pretty much all other things.

- Grind down welds, make prettier
- Weld all 3 frame pieces together
- Grind those then down
- Weld on 4 legs to sides, with mesh behind

- Grind those welds down
- Paint Hammerite Black smooth
- epoxy in all 3d printed caps
- install bottom shelves

- Attach hardware (hinge/ fitting) for doors
- Attach top to base

It's all pretty much done. Just needs flapper wheels to arrive tomorrow to do final grind down, then install bottom shelf brackets, paint the whole frame, epoxy in the end caps, fix the top to the base. Enjoy!

But, it looks pretty complete now, as those things you can't massively tell from a distance and I am beyond pleased with it. I am so so so glad I did it and threw away that IKEA crap!

Now sat with a beer and a rest.

From this massively detailed technical sketch ;)

C0HP1ti.jpg


MccJ7pX.jpg


s5KILvz.jpg


Now need to do some massive cable management at the same time! I might put some of the mesh on the back top open panels, but might just leave it as is. Either way, last little bit and I'm beat for today, but pleased
 
Just a suggestion but next time you weld box section, mitre the ends so you don't need blanking caps. Also if you chamfer the edges that are going to be welded so that you are welding in a "V" it saves a lot of grinding to neaten the weld.
 
Well done. I’m impressed that you finish it. I normally give up at about 75%
I won't list all of the projects in various states... :D I was determined to see it through and will finish that stuff off tomorrow. As soon as I get the bits I'll finish the coffee table too. The stain arrived for it today, just need the router bit now. I will make it all how I want!!

I think I beat myself up so much for unfinished things, that I am just being totally bloodyminded about a lot of completion things at the moment.

Now I have a welder I can weld a bracket on to my go kart for the new brake caliper... so that'll be running then, too! :D Another thing I can tick off :D
 
Just a suggestion but next time you weld box section, mitre the ends so you don't need blanking caps. Also if you chamfer the edges that are going to be welded so that you are welding in a "V" it saves a lot of grinding to neaten the weld.
Yea, I totallllllly thought this half way through. I also then thought I should have one of those saws that does it for you and you can set the angle? Like a mitre saw but for metal? Either way, I think I still need one :D And a table saw... all of the tools!
 
Yea, I totallllllly thought this half way through. I also then thought I should have one of those saws that does it for you and you can set the angle? Like a mitre saw but for metal? Either way, I think I still need one :D And a table saw... all of the tools!
Yeah a mitre saw... Just a mitre saw! Mine came with a wood and metal blade.
 
The Evolution mitre saws have blades that cut through just about anything. I would get a sliding mitre saw as they come in really handy for cutting wider pieces. I had a fixed one before and found it too limiting so sold it for a sliding one and it's much better.
 
If you buy an Evolution mitre saw, take photos of the box as you unpack it all. Mine blew up first time I turned it on and it was like a 3D jigsaw packing it back in the box for a return :D
 
This was on offer. It's a cheap one, but useful for a lot of quick cutting! I have also decided my bike garage has enough space for me to make it a workshop, too... so that's the plan! Rather than my living room...


14MSrLV.jpg


At lunch yesterday I started building my router sled:

eh9IhVn.jpg


Going to use that alu on the underside to act as a guide on the inside of the wood there. Everything is straight and level on those saw horses at the moment, but need to do something to raise the slab I think....

SxIOTQw.jpg


Just so the router doesn't need to extend so far down. I can use a couple of offcuts and stick them to the slab and the saw horse to save it moving, too and keep it totally level. Then, just drill with a hole saw and jigsaw the hole in the sled and I can give it a go flattening it... I am pretty nervous, not going to lie!!
 
Finished my router sled. Was happy with it. All secure, tight, slidy. Wicked.

7F8F9zP.jpg


EWHwR0w.jpg


Went to start. Was ******** it. All went wrong :cry:

AE012n3.jpg


Don't think it's supposed to be at that angle...


FML!!

To be fair, it's my fault. The router bit was on offer, 20EUR and was like ah that's OK, but didn't look up reviews or anything to see if it would work with hard woods like oak, which couldn't get much ******* harder.

No, the answer to that is, no. It doesn't.

eFq4D9R.jpg


Bit of a mark, but not at all deep enough to be a problem. More needs to come off anyway to level the surface, so whatever.

Just can't do the task I wanted to now and spent the rest of the last hour googling router surfacing bits for hard wood. Ordered one for like 80 EUR and hoping it's a beast that will do what I need it to without ******* up the whole thing.

Buy cheap, regret it. Always the way. Always.

Should be here Monday. I don't have the kids this coming week, so should be able to get through it and hopefully just have it all done is my goal! He says... ever hopeful.

Hopefully this next bit will be great and I can reuse it on other ones, too. I have been asked by someone else to make them one after this, completely different colour and design, so kinda want to be able to show them a non ****** finished product here :cry::cry::cry:

Live and learn
 
Back
Top Bottom