You are using an out of date browser. It may not display this or other websites correctly.
You should upgrade or use an alternative browser.
You should upgrade or use an alternative browser.
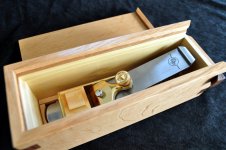
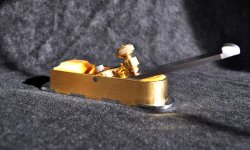
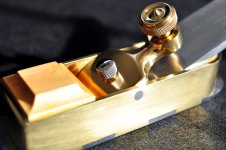
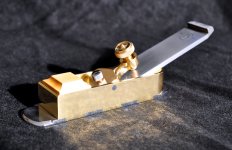
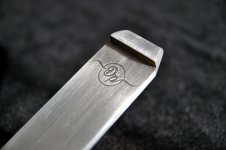
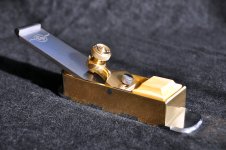
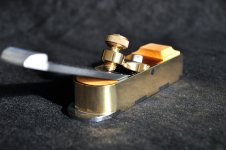
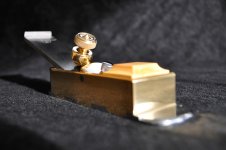
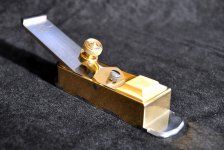
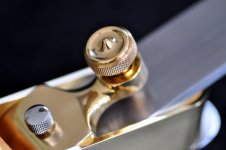
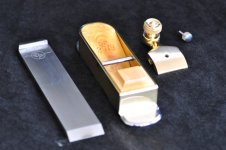
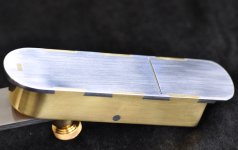
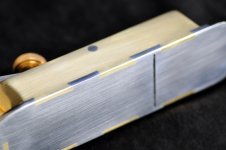
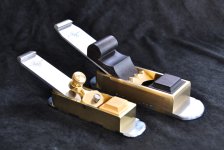
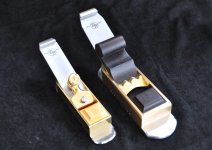
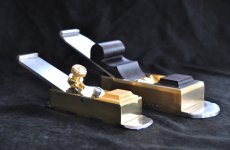
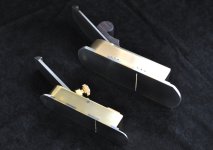
Hand made Infill plane (woodwork)
- Thread starter famas
- Start date
More options
Thread starter's postsSoldato


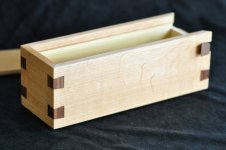
 Absolutely incredible work! They are works of art, along with the box. Just wow.
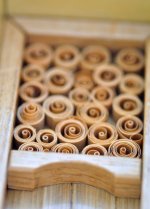
Also love the little touches like the locking mechanism and adding cedar curls. I made a TV cabinet in college and used cedar of lebanon for the drawer bottom and it still smells amazing when you open it after a long time being left closed. Machining that stuff is a joy.
Soldato
I definitely think you should post that video to reddit or somewhere as your videos deserve so much more views than the crappy algorithm is getting. If you'd have made the box with pocket holes etc it would probably be trending  .
.
 .
.Soldato
Our local auction rooms had a Plane collection going last week. One sold for £3500. After seeing the work involved im not surprised.
They were made by Karl Hotley. (no idea who that is)
https://auctions.goldingyoung.com/m/view-auctions/catalog/id/557
Might be of interest
They were made by Karl Hotley. (no idea who that is)
https://auctions.goldingyoung.com/m/view-auctions/catalog/id/557
Might be of interest
Caporegime
Incredible work, very nice indeed!
Yours are every bit as good if not better than those linked above selling for £500 - £3500...
Might want to consider persuing it further.
Yours are every bit as good if not better than those linked above selling for £500 - £3500...
Might want to consider persuing it further.

Thanks for all the comments guys I really appreciate it and it's giving me confidence to carry on and make some more.
Karl Holtey is one of if not the finest bespoke plane makers today and was one of the makers that inspired me to make my own.
While my planes may look similar to one of his stood side by the side the difference would be night and day.
While he says his planes are "hand made" he uses a lot of modern machinery to create his planes and while certainly not mass produced I believe he makes them in batches using modern machining techniques.
Some people would argue that the charm of a bespoke hand crafted tool lies in the traditional methods used while making it, Bill Carter for instance makes all of his planes in a shed in his garden only using hand tools and a small selection of bench top power tools (pillar drill, grinders, etc)
He purposely ages his planes to make them look traditional and they have a beautiful charm about them because they have blemishes.
At the other end of the scale Holtey strives for precision and his planes are as near to perfection as you could possibly get and it's only really achievable with modern machinery and techniques.
Both makers are at the pinnacle of their careers and both are well past retirement age, each makers planes are beautiful in there own way.
Holtey also makes every single part of his planes in house while on some of Caters earlier planes he commissioned Holtey to make his lever caps, though only for 4 or 5 planes I believe before carter went back to using the more traditional bridge and wedge design.
I'd say my planes are more in line with carters but I try to strive for perfection like Holtey with the tools I have available, the majority being hand.
I would still class myself as a total amateur to metal work though. Like Holtey I try to make my next plane better than the last and am improving every time.
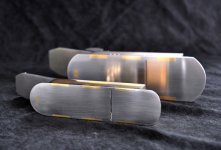
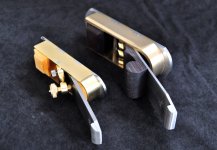
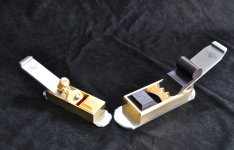
For a comparison these are some of Holtey' mitre planes.
Much more contemporary in design and made to an impeccably high standard
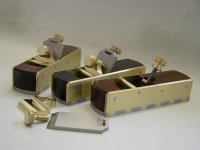
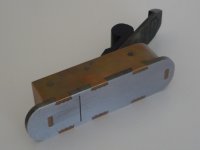
And one of Carters early "cupid bow" mitre planes. I believe Carter was one of the first current makers to add cupid bows to his dovetails.
Carter also reclaims the blades for his planes from older Sheffield planes.
While I have enjoyed every minute of making my planes and would love to make a career of it I think I have a long way to go and a lot more to learn yet.
On another note the next project has started.
I'm very lucky and been given a small amount of Rosewood so I've made a start on the marking gauge.
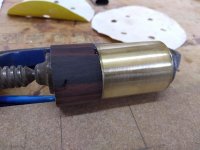
Working on the main body on the engineering lathe.
Karl Holtey is one of if not the finest bespoke plane makers today and was one of the makers that inspired me to make my own.
While my planes may look similar to one of his stood side by the side the difference would be night and day.
While he says his planes are "hand made" he uses a lot of modern machinery to create his planes and while certainly not mass produced I believe he makes them in batches using modern machining techniques.
Some people would argue that the charm of a bespoke hand crafted tool lies in the traditional methods used while making it, Bill Carter for instance makes all of his planes in a shed in his garden only using hand tools and a small selection of bench top power tools (pillar drill, grinders, etc)
He purposely ages his planes to make them look traditional and they have a beautiful charm about them because they have blemishes.
At the other end of the scale Holtey strives for precision and his planes are as near to perfection as you could possibly get and it's only really achievable with modern machinery and techniques.
Both makers are at the pinnacle of their careers and both are well past retirement age, each makers planes are beautiful in there own way.
Holtey also makes every single part of his planes in house while on some of Caters earlier planes he commissioned Holtey to make his lever caps, though only for 4 or 5 planes I believe before carter went back to using the more traditional bridge and wedge design.
I'd say my planes are more in line with carters but I try to strive for perfection like Holtey with the tools I have available, the majority being hand.
I would still class myself as a total amateur to metal work though. Like Holtey I try to make my next plane better than the last and am improving every time.
For a comparison these are some of Holtey' mitre planes.
Much more contemporary in design and made to an impeccably high standard

And one of Carters early "cupid bow" mitre planes. I believe Carter was one of the first current makers to add cupid bows to his dovetails.
Carter also reclaims the blades for his planes from older Sheffield planes.

While I have enjoyed every minute of making my planes and would love to make a career of it I think I have a long way to go and a lot more to learn yet.
On another note the next project has started.
I'm very lucky and been given a small amount of Rosewood so I've made a start on the marking gauge.

Working on the main body on the engineering lathe.

Continuing on with the marking gauge I made a start on the end brass collar for the head section.
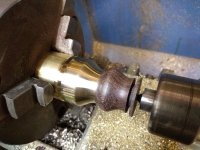
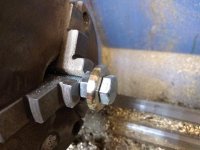
I parted off a small section of brass and then fixed it between two nuts on a bolt and secured that into the lathe.
I needed to round both sides of the brass collar.
I'm sure this isn't the ideal way of doing this but I have limited tools and it seemed to work okay.
I needed a way to secure the brass head and collar to the wood as the glue was only temporary while I machined the initial shape and not sufficient to hold the pieces together permanently.
I carefully marked hole positions on the collar and drilled the holes, I then used a bolt to align the two parts and drilled the first hole through the collar into the wood. After the first hole was drilled i inserted a spare drill bit into the hole to keep it aligned and then drilled the second hole.
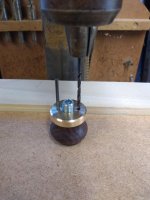
With the brass collar and Rosewood drilled I then repeated the process to drill the head of the gauge.
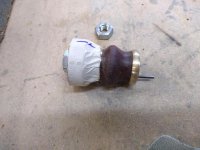
I've ordered some m3 stainless bolts that will run through the holes securing it all together, just waiting for them to arrive.
Once its all fixed together i'll mount it back on the lathe and final finish it.
In the meantime I drilled and tapped an m8 hole into the side of the brass head.
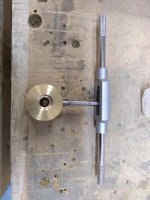
and then made the locking thumb screw.
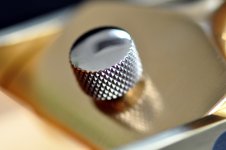
Most of the thumb screws I've seen for marking gauges are short with a larger diameter but I wanted a longer sleeker looking one.
While doing so I found out I could knurl longer pieces of material, I always thought you needed an automatic feed on the lathe to knurl longer pieces but I hand fed this knurl and it turned out great
I still can't get my head round how this works and how manually moving the knurling tool doesn't just leave a mashed up mess but I'm pleased i can do it.
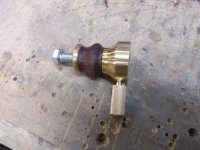
And finally machined a recess in the head for the cutter to sit into when not in use.
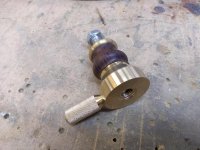
That was all for today.
Just waiting for the bolts and the steel rod to come in the post and I can make a start on the shaft of the gauge.....it's not going to be a simple shaft though.
I parted off a small section of brass and then fixed it between two nuts on a bolt and secured that into the lathe.
I needed to round both sides of the brass collar.
I'm sure this isn't the ideal way of doing this but I have limited tools and it seemed to work okay.

I needed a way to secure the brass head and collar to the wood as the glue was only temporary while I machined the initial shape and not sufficient to hold the pieces together permanently.
I carefully marked hole positions on the collar and drilled the holes, I then used a bolt to align the two parts and drilled the first hole through the collar into the wood. After the first hole was drilled i inserted a spare drill bit into the hole to keep it aligned and then drilled the second hole.

With the brass collar and Rosewood drilled I then repeated the process to drill the head of the gauge.

I've ordered some m3 stainless bolts that will run through the holes securing it all together, just waiting for them to arrive.
Once its all fixed together i'll mount it back on the lathe and final finish it.
In the meantime I drilled and tapped an m8 hole into the side of the brass head.

and then made the locking thumb screw.
Most of the thumb screws I've seen for marking gauges are short with a larger diameter but I wanted a longer sleeker looking one.
While doing so I found out I could knurl longer pieces of material, I always thought you needed an automatic feed on the lathe to knurl longer pieces but I hand fed this knurl and it turned out great
I still can't get my head round how this works and how manually moving the knurling tool doesn't just leave a mashed up mess but I'm pleased i can do it.

And finally machined a recess in the head for the cutter to sit into when not in use.

That was all for today.
Just waiting for the bolts and the steel rod to come in the post and I can make a start on the shaft of the gauge.....it's not going to be a simple shaft though.
Finally got the stainless steel tube and rod in the post so I could continue with the marking gauge.
I started by threading one end of the steel tube.
Quickly realised Stainless steel is a bugger to work with, it's very hard and can't be rushed.
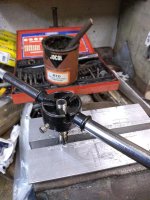
After that I started on the micro adjuster which I'm making from brass, much nicer to work with!
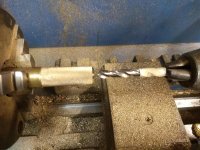
I knurl a short section and drill out the centre to thread onto the stainless tube.
Then add some chamfers and part them in two ready to work on some more later.
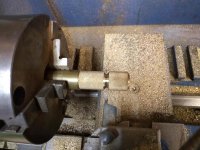
I also made a start on the cutting wheel again from stainless steel.
I bevel the rod and then square off the end to a sharp edge.
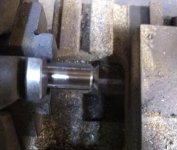
And finally drill and counter sink the head to accept a bolt before parting off completely from the rest of the rod.
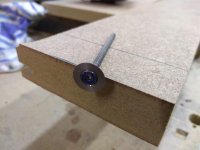
Going to try and harden the cutting wheel with my map gas torch and quench it in oil, like I do my plane blades but I'm not sure how well this with work with stainless?
I've still got to work on the inner shaft and the main head of the gauge but its getting there.
I started by threading one end of the steel tube.
Quickly realised Stainless steel is a bugger to work with, it's very hard and can't be rushed.

After that I started on the micro adjuster which I'm making from brass, much nicer to work with!

I knurl a short section and drill out the centre to thread onto the stainless tube.
Then add some chamfers and part them in two ready to work on some more later.

I also made a start on the cutting wheel again from stainless steel.
I bevel the rod and then square off the end to a sharp edge.

And finally drill and counter sink the head to accept a bolt before parting off completely from the rest of the rod.

Going to try and harden the cutting wheel with my map gas torch and quench it in oil, like I do my plane blades but I'm not sure how well this with work with stainless?
I've still got to work on the inner shaft and the main head of the gauge but its getting there.
Last edited:
Soldato
From the knife making videos I have seen, they always say stainless steel is harder to heat treat than tool steels. I think the temperature is far more critical than with o1 and you need to soak the steel for a certain length of time. If you know what stainless steel it is you should be able to find directions for heat treating.
Cheers for the info Mark.
Not entirely sure what type of stainless it is.
I did have a quick look into it and it seems a lot of the knife makers cool stainless between aluminium plates and don't oil quench it.
I do have a couple of bits of aluminium plate that I could try but its such a small part it might be tricky.
Hopefully it's not too critical to get it to a perfect hardness and if it fails miserably I can make another.
Don
Beautiful workmanship. I'd never want to use those planes. I'd just put them on my mantelpiece and look at them.
Slowly working my way through the marking gauge build, it's almost done and I've turned my attention to a box for it.
Totally over the top for a marking gauge but I'm keeping a theme going
Using some American black walnut I Put a 15 degree bevel on some strips then glued it together to make a dodecagon.
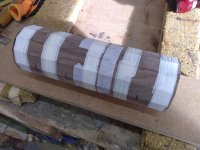
Masking tape makes for an excellent clamp to hold it all together while the glue sets.
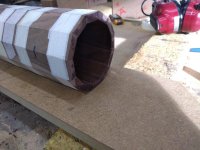
I glued all but 4 edges so I didn't have to split the box afterwards. I also added some ends to the box which I'm thinking of reinforcing later with some brass fixings, though not totally decided yet.
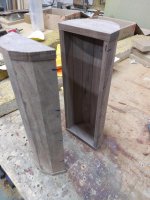
Next I made some liners for the box out of some lovely birds eye maple veneer.
Using some make shift weights to hold it in position while the glue dries.
And a test fit held in place with some quick cramps to see how it will work.
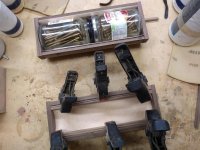
Once the glue has dried it holds the shape well, Next I'll fit it into the box using some bead to hold it in place.
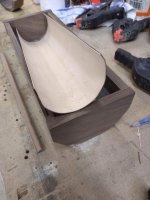
That's it so far.
I've got to work out a base for it to sit on and a latch to keep it closed but I've got a few ideas on that.
Totally over the top for a marking gauge but I'm keeping a theme going

Using some American black walnut I Put a 15 degree bevel on some strips then glued it together to make a dodecagon.

Masking tape makes for an excellent clamp to hold it all together while the glue sets.

I glued all but 4 edges so I didn't have to split the box afterwards. I also added some ends to the box which I'm thinking of reinforcing later with some brass fixings, though not totally decided yet.

Next I made some liners for the box out of some lovely birds eye maple veneer.
Using some make shift weights to hold it in position while the glue dries.
And a test fit held in place with some quick cramps to see how it will work.

Once the glue has dried it holds the shape well, Next I'll fit it into the box using some bead to hold it in place.

That's it so far.
I've got to work out a base for it to sit on and a latch to keep it closed but I've got a few ideas on that.
Slowly progressing with box.
I made some inlay for the ends of the birds eye liners. I wrapped it around a circle of MDF so it holds the same diameter as the liner.
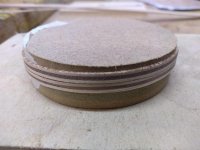
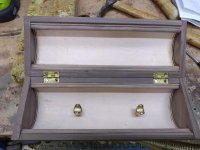
I've also made the brass clasps that the marking gauge will sit on inside the box.
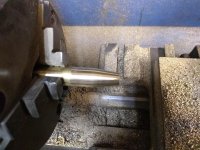
Started with some brass round bar that I tapered at both ends.
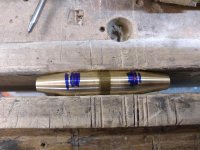
Then drilled through to make the half rounds that will hold the marking gauge.
After some more shaping with hand files they are nearly finished.
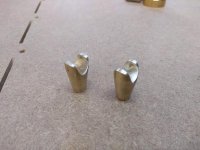
Lastly I drilled and taped the bottoms to accept a bolt and polished them up.
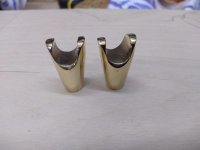
Here they are test fitted to the inside of the box. I still have a lot of work to do sanding and cleaning up the box.
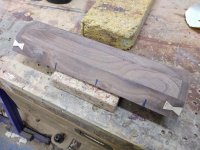
Finally I made a start on adding some decorative dovetail bows to the out side of the box, they will also aid in securing the ends of the box in place.
That's it for now.
I made some inlay for the ends of the birds eye liners. I wrapped it around a circle of MDF so it holds the same diameter as the liner.

I've also made the brass clasps that the marking gauge will sit on inside the box.
Started with some brass round bar that I tapered at both ends.

Then drilled through to make the half rounds that will hold the marking gauge.

After some more shaping with hand files they are nearly finished.

Lastly I drilled and taped the bottoms to accept a bolt and polished them up.

Here they are test fitted to the inside of the box. I still have a lot of work to do sanding and cleaning up the box.

Finally I made a start on adding some decorative dovetail bows to the out side of the box, they will also aid in securing the ends of the box in place.

That's it for now.
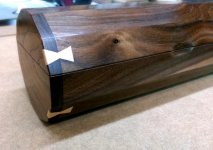
Finally got the box finished tonight, I think in the end the box took longer to make than the marking gauge.
Spent the past couple of days polishing and waxing it.
I've got a few more bits to tidy up and I've got to strip the marking gauge down to degrease it all then I'll take some photos of the entire piece which I'm hoping to do over the weekend.
Here's a quick snap I took on my phone.
I've also been working on a short video of the build process. I didn't have time to go into as much detail with this project so it jumps about a bit but hopefully I'll get that finished with the photos.
Spent the past couple of days polishing and waxing it.
I've got a few more bits to tidy up and I've got to strip the marking gauge down to degrease it all then I'll take some photos of the entire piece which I'm hoping to do over the weekend.
Here's a quick snap I took on my phone.

I've also been working on a short video of the build process. I didn't have time to go into as much detail with this project so it jumps about a bit but hopefully I'll get that finished with the photos.


