[OcUK Staff Builds] rjkoneill's TJ07

rjk

rjk

Caporegime
OP
Joined
8 Aug 2007
Posts
25,381
Modding my Fan Controller

The past few weeks I have spent hours trawling the internet to find a fan controller.

whilst the prospect of spending £100+ on a smart controller such as the fantastic Aquaero or Tbalancer was quite appealing, the fact that neither of them look particularly great or match anything in my current build is a bit offputting.

whilst the lure of a usb interface and smart cooling options would suit my new '6 fans only' setup, it is not ideal from an aesthetics point of view.

i went back to the idea of an analoge fan controller as it was the simplest idea.

i used to have the old plain ZALMAN ZM MFC1 Plus controller and it worked well but i noticed Ace Modder managed to get some of the Lamptron models in at work
Lamptron Fan Controllers
these are regarded as a great brand specific to fan controllers so i thought i would try one.

everyone who knows me or has read one of my build logs knows that i hate flash lights and that subtle is the key.

i went for the Lamptron FC2 - this is the cheapest in our range but only by a few pounds. the reason it is close to the next model up [the FC5] is because the FC2 sacrifices led screens and all that rubbish for raw power

the FC2 is a rheobus controller that is capable of 45w per channel
this means you can run Delta fans on it. not that i will, but the capability is there. the controller is well made and whilst it is supposed to cause some fans to hum when they are at really low speeds [from what i have read in reviews], i have only used decent fans with it so far and had no issues whatsoever.

the cool addition to this controller is that every channel can be switched off which my previous controller [ZALMAN ZM MFC1 Plus] was incapable of.
this means that i can switch off my 240 radiators fans and run my system off a 480 radiator on low speed if i want. the flexability is there which is what i wanted.


however. whilst the controller itself is a very well made piece of kit, the reason i went for this controller was for its features. i wanted to make the controller fit into my build and heres how i did it...

first i took the controller apart, this was fairly easy as i had to remove 4 screws and pull the knobs off the controller.
DSC02142.jpg


after removing the face plate from the controller, i prepared the bezel that i would be using for the mod. in this case, a vented bezel from lian li. the entire front of my TJ07 will soon be filled with these bezels so it will make the controller blend in really well.
DSC02143.jpg


i used the dremel to cut off the tabs on the side to be left with a front plate that resembled the stock one that lamptron fitted. i used the lamptron plate to create small drill holes in the bezel for each knob on the controller. i then used a larger drill bit to widen the holes. i wanted to keep the original face plate in good condition as this mod is totally reversable which means you can customise the controller then put it back to stock if you ever sell the controller on.
DSC02146.jpg


the lamptron controller has a row of LEDs that light up the area around each knob on the controller. LEDs are not required for me as subtle is the key, if you do this with a blank face plate then they will be covered anyway.
i found some foam that comes in the bezels of the antec 902 at work which i thought would do the trick. but i guess you could cut your own. the foam helped to bulk out the bezel to the same depth as the solid stock face plate on the controller so it is fairly required. [i can get these foam strips easily so message my trust if you need one] i poked holed through with scissors to match the bezel.
DSC02144.jpg


the bezels i am using have a mesh dust filter behind them so i put this inbetween the foam so that you couldnt see it through the little holes. it makes it look a little more stealth and it blends in with the other bezels that way.
DSC02145.jpg


after putting all three layers together then it is ready to go straight on to the controller and have the dials replaced. the pressure of the controller dials keeps the new face plate in shape.

DSC02147.jpg


DSC02150.jpg


DSC02151.jpg


DSC02152.jpg


DSC02157.jpg


I think it is a case of 'Mission Accomplished'

this mod took me 15 minutes, cost £25 and is fully reversable. give it a go, if you are looking for a new fan controller but are looking for something to match your case, this may be it.

"before you mention that i scratched the top left corner of the bezel, i know i did, i dropped it because i am clumsy. a new bezel has been made and it has been replaced already :D]
 

rjk

rjk

Caporegime
OP
Joined
8 Aug 2007
Posts
25,381
EK Stealth Mount

Heres a small guide about how I am mounting my block.

the EK supreme series has all come with the same standard mounting hardware for as long as I can remember.

this series of springs and nuts works well but is a bit unsightly.

moving on, i obtained a backplate for 1366 from a damaged CoolIT domino at work. now some 1366 coolers have suitable backplates [megahalem and venom spring to mind]

the Watercool 1366 backplate from the heatkiller range would work too but that uses M4 screws [im going to use M3 as it fits the backplate i will be using]

df586560.jpg


the backplate is run of the mill but it contains its own screw threads on the mounting holes, ideal for my requirements.

it fits to the back of the board [i used a small piece of double sided tape to hold it in place]
6be372e3.jpg


decided to remove the stock black mounting plate from my Supreme HF and replace it with the new Nickel Plated one from EK

33622a33.jpg


its so shiny, its essentially the same as looking at the sun.

b6be10d1.jpg


then using the screws you mount the block into place.
[i used M3 X30 here as an example but have ordered some stainless button head screws of the same size] i will probably be using some small washers to protect the mounting plate a bit. more pics when i have the screws i will use in the final build.

IMG_0142.jpg


IMG_0143.jpg


and heres what the blocks on the board are going to look like

DSC02158.jpg


DSC02160.jpg
 
Soldato
Joined
6 Dec 2008
Posts
2,692
Location
Burghead, Elgin
Like the fan controller mod mate, looks really nice.

I've recently upgraded my controller from my borked Scythe Kaze Master Ace to the Lamptron FC5, though unluckily for me I got the rev 1 version that has the poor LCD screen so it doesn't look very good when I use certain colours for the display.

Wish I'd held off buying it until the rev 2 came out, but I needed to replace the Scythe controller ASAP as 3 channels died on me so I had no fans spinning on my rads!!!!
 

rjk

rjk

Caporegime
OP
Joined
8 Aug 2007
Posts
25,381
awesome build
Thanks for the comments :)

You got any ideas on how tight you can go on the screws?

i have gone as tight as it will go to hold it still then a full turn on each screw in a cross shape. this ensures that the pressure is spread evenly.
its given me a great mount on every occasion i have tried it :)

why are you getting rid of the XSPC tubing?

because every man and his dog has white tubing.
when i first started this log there was little to no projects around the internet with white tubing. simply because nobody made it and it was difficult to obtain in anything other than 3/8.
then when i first found out that xpsc were doing it, fantastic.

I cant stand seeing builds with white tubing now. That boat has set sail, crashed on some rocks, spilled oil everywhere, ruined the coastline and killed everybody.
 

rjk

rjk

Caporegime
OP
Joined
8 Aug 2007
Posts
25,381
finally, after months of planning and setbacks I have finally manged to get the new hardware and parts fitted to my system.

10am this morning and I finished at 7pm. :D

really pleased with the outcome this time and I think that I will be drawing the line under this project now.

I will let the pics do most of the talking but will cherp in with explinations if need be.
also please check the video at the end, its not great quality as it was a last minute idea and was shot with an iPhone. but it should give you all an understanding of just how quiet the system is now.
Seriously, I cant even tell its on!

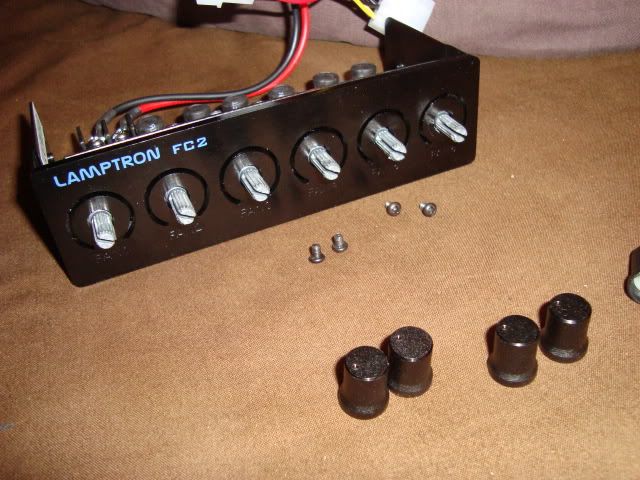
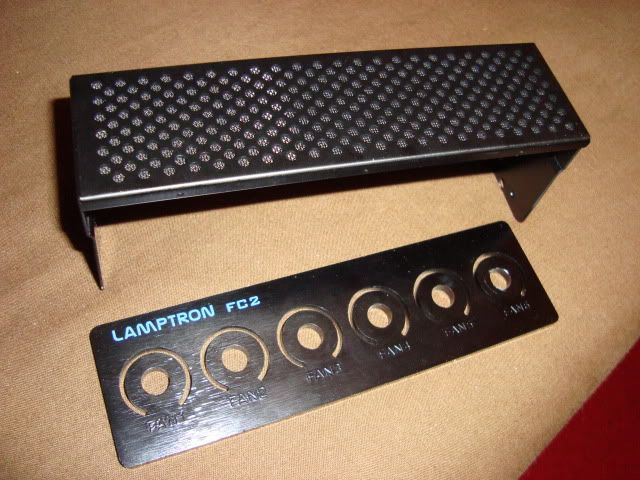
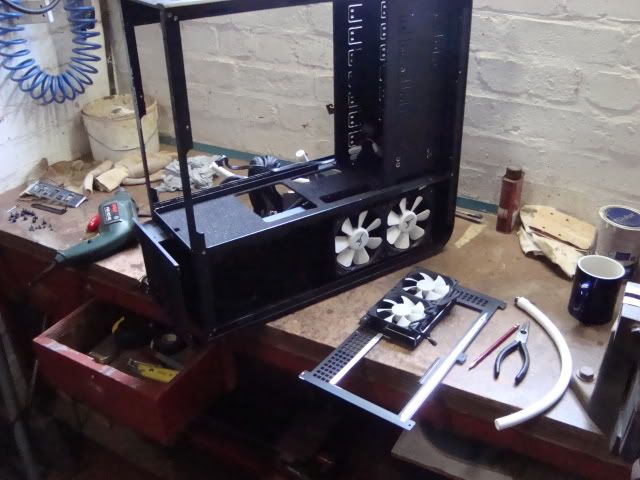
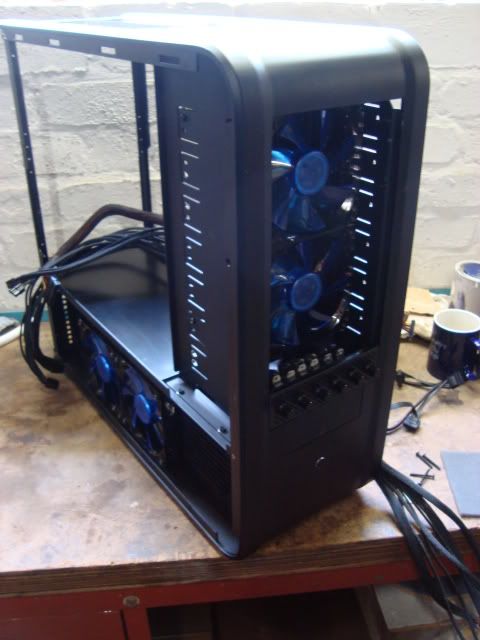
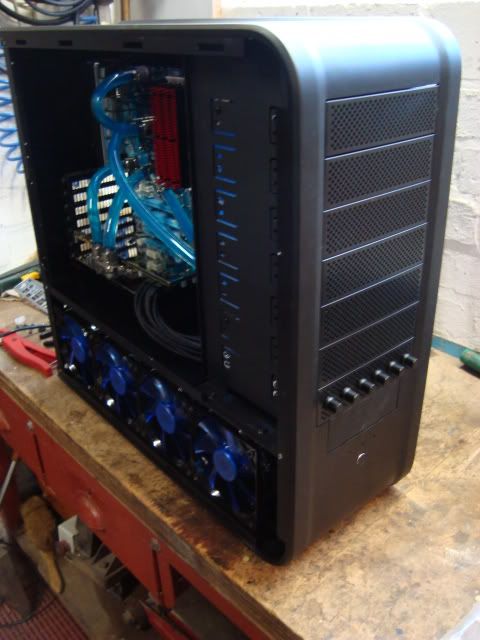
Ripped everything apart and started again...
DSC02161.jpg


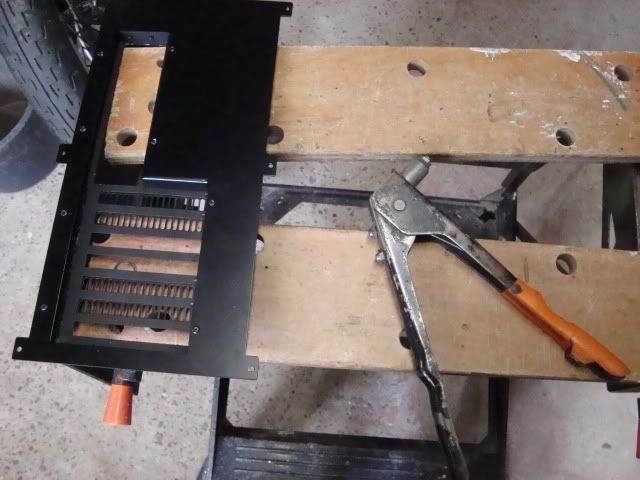
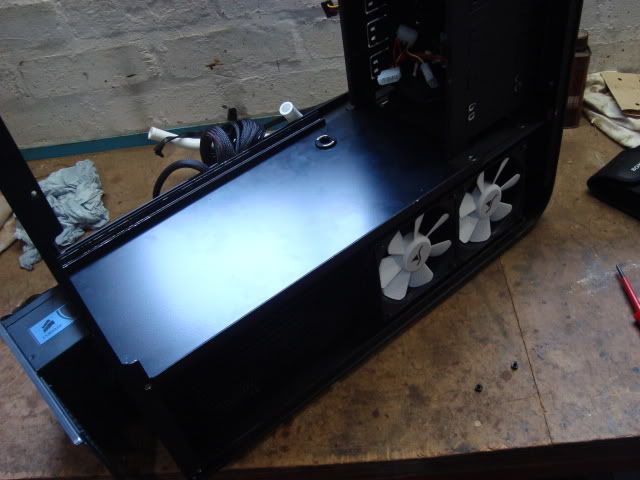
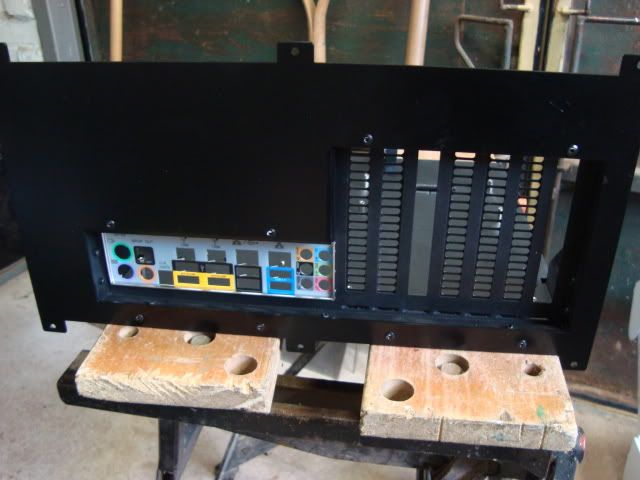
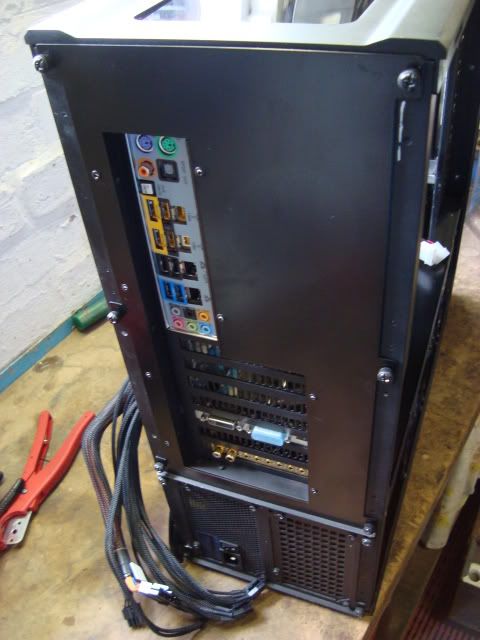
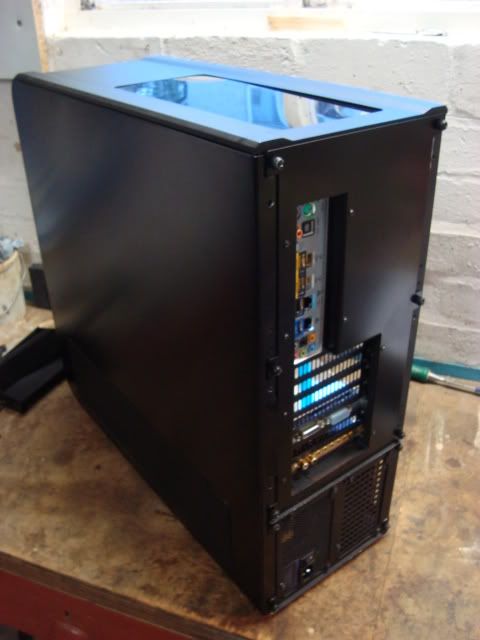
Riveted the custom rear panel in place
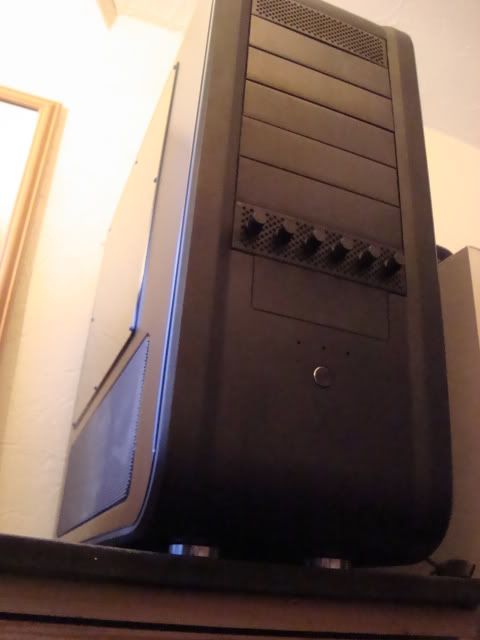
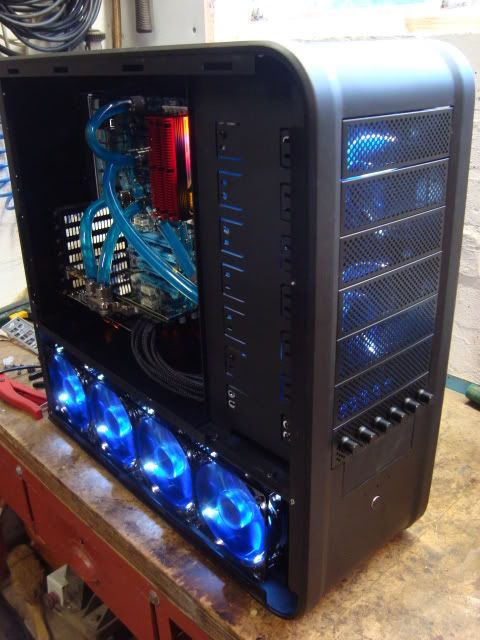
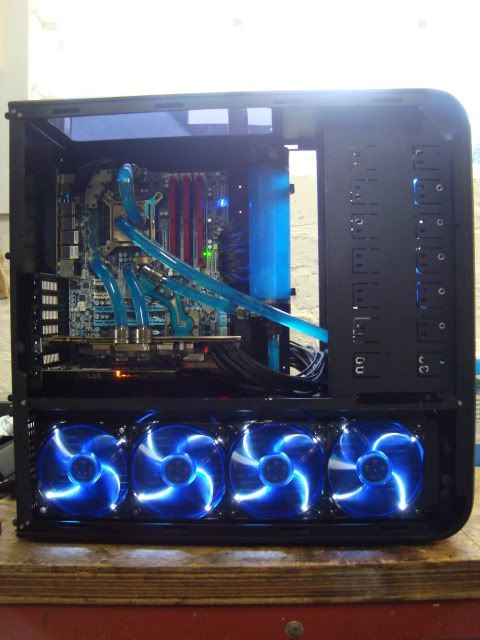
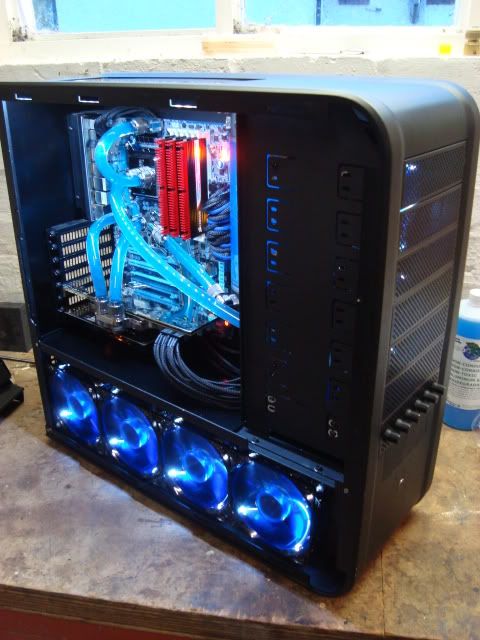
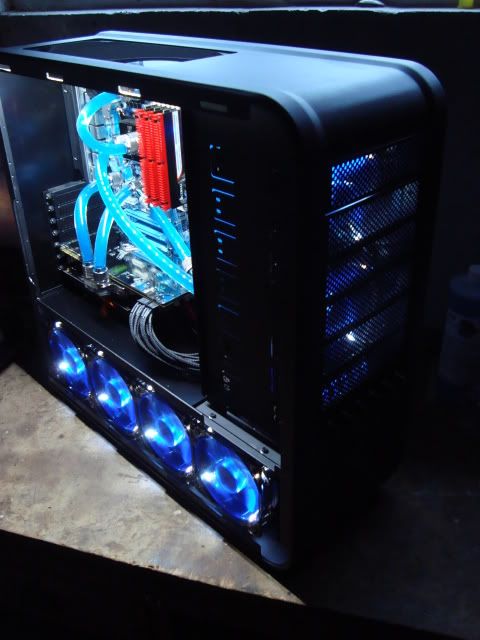
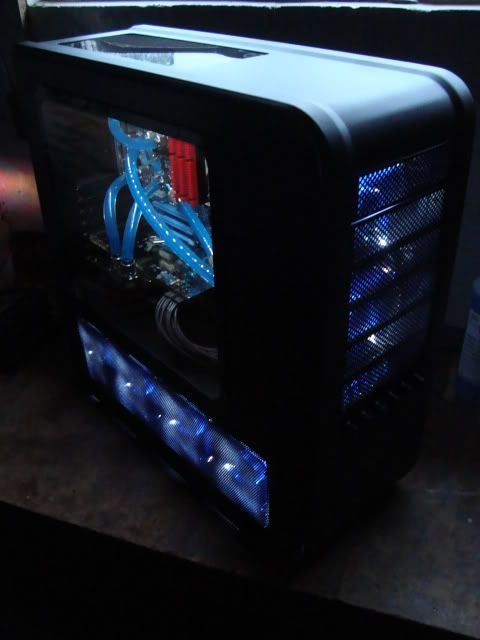
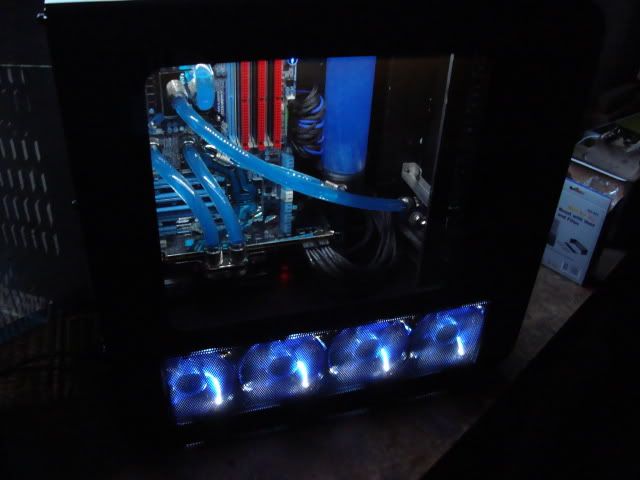
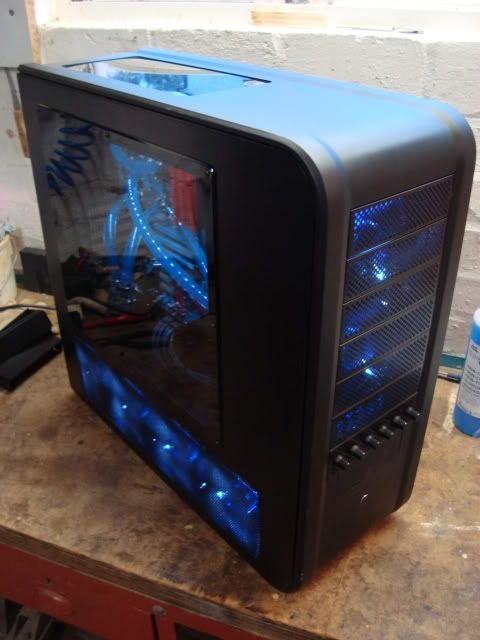
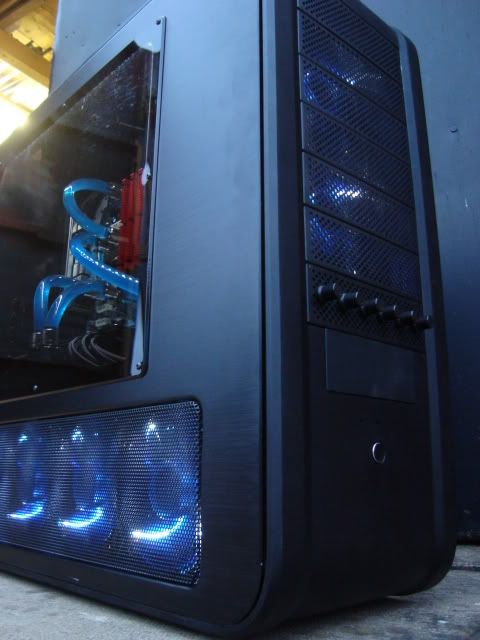
DSC02162.jpg


looking sleek
DSC02164.jpg


hello old friend...
DSC02165.jpg


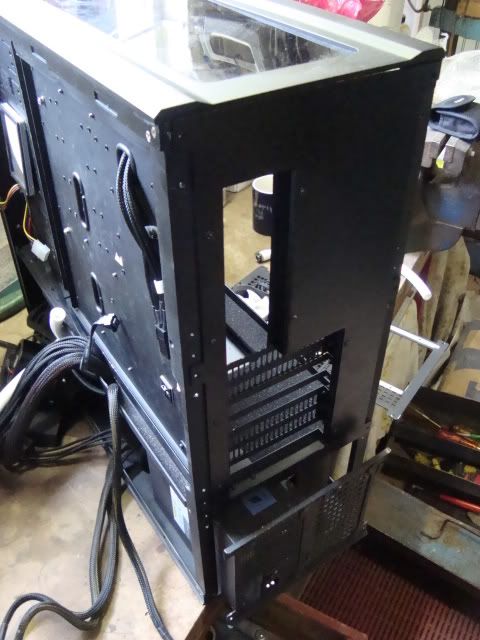
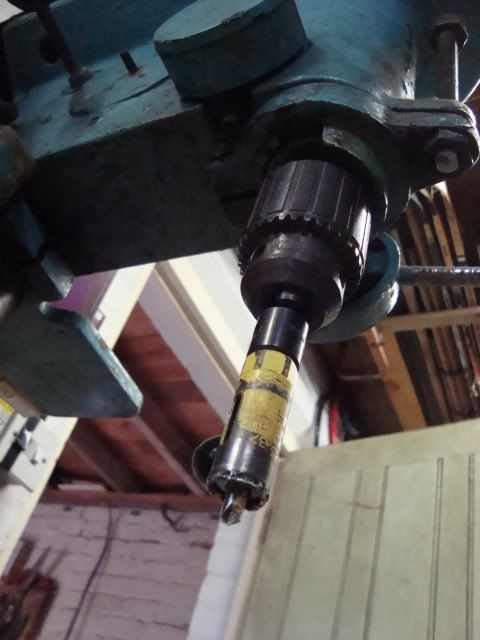
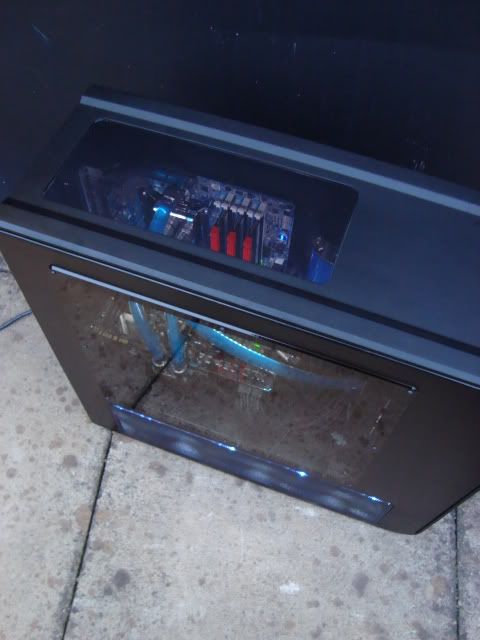
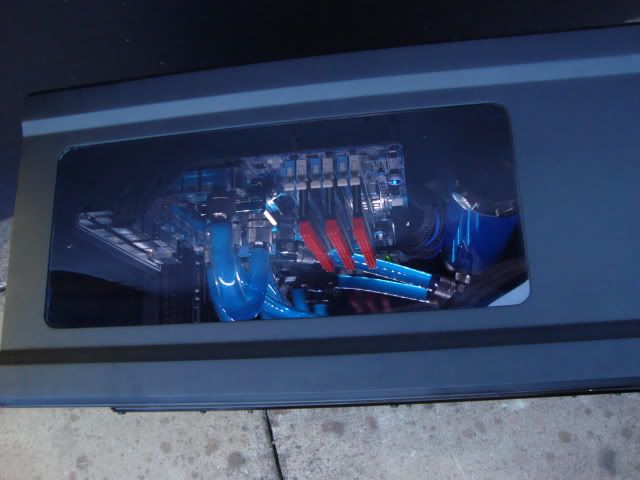
midplate cut, filed, de-burred and bulkhead in place :)
DSC02166.jpg


DSC02172.jpg


DSC02173.jpg


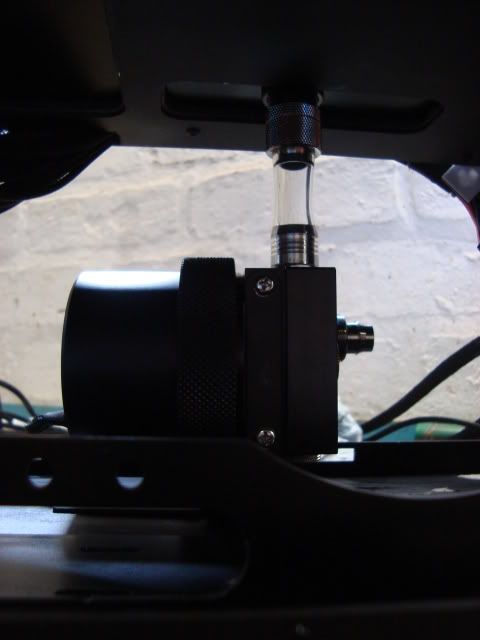
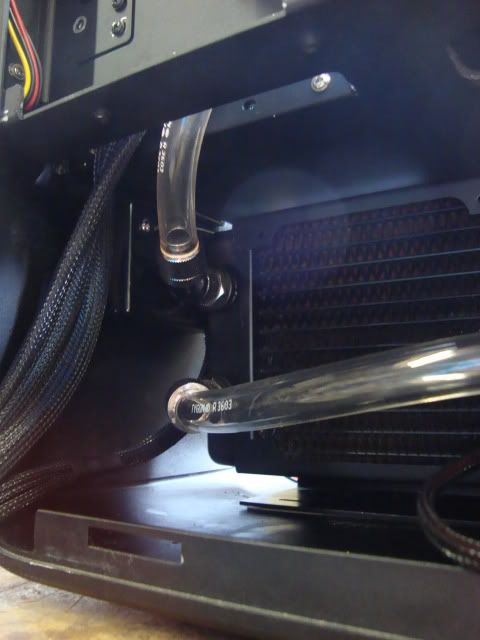
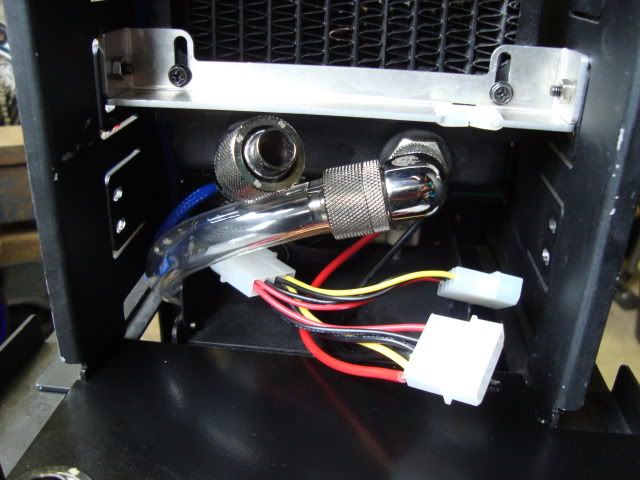
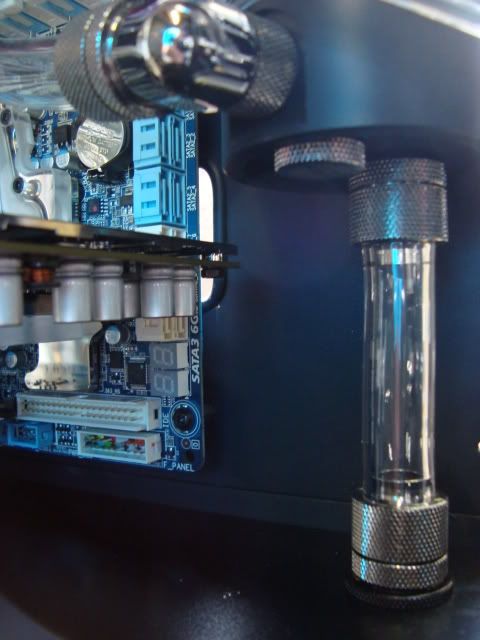
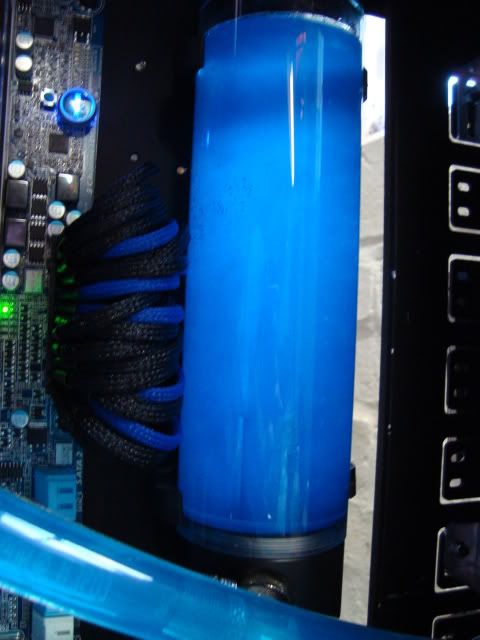
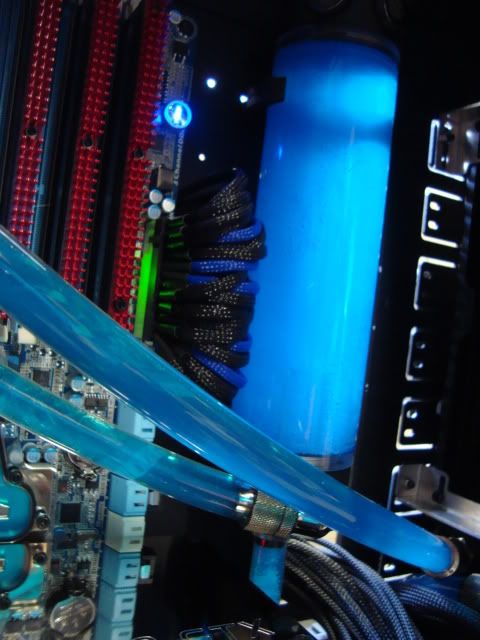
straight down into the D5
DSC02174.jpg


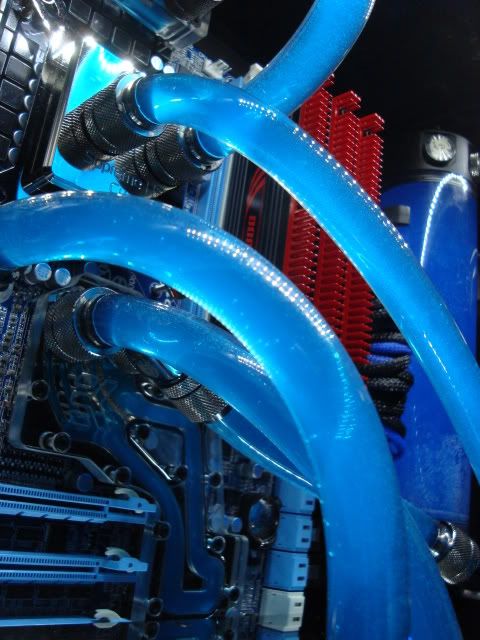
and into the Quad, Tygon Goodness ;)
DSC02175.jpg


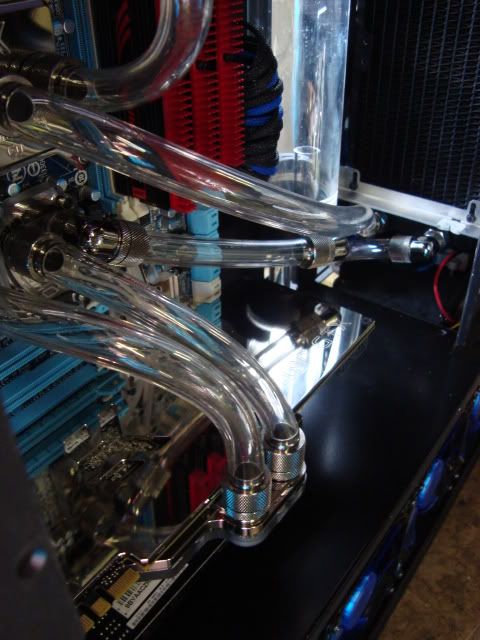
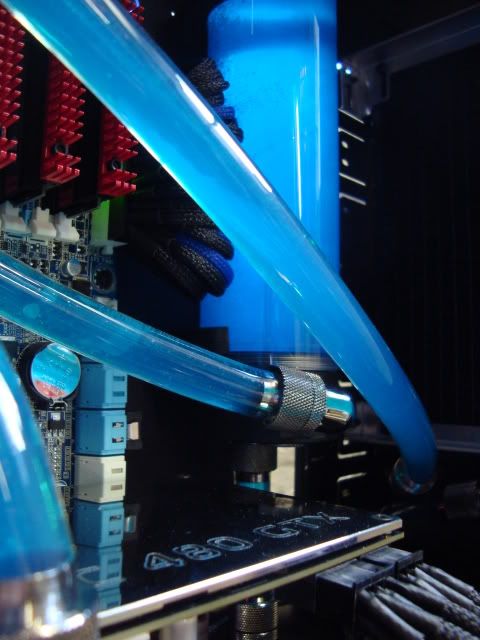
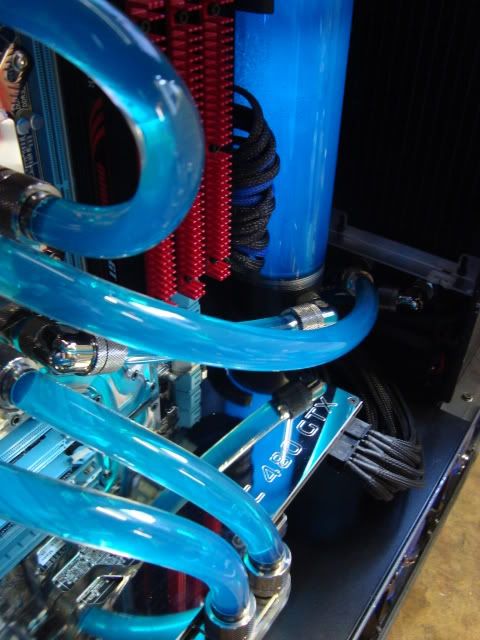
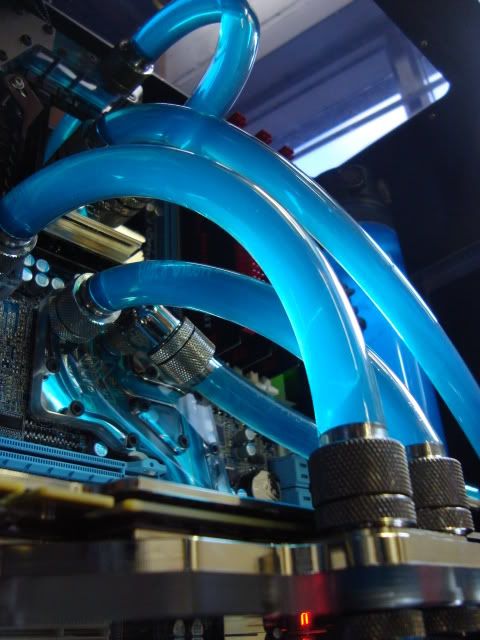
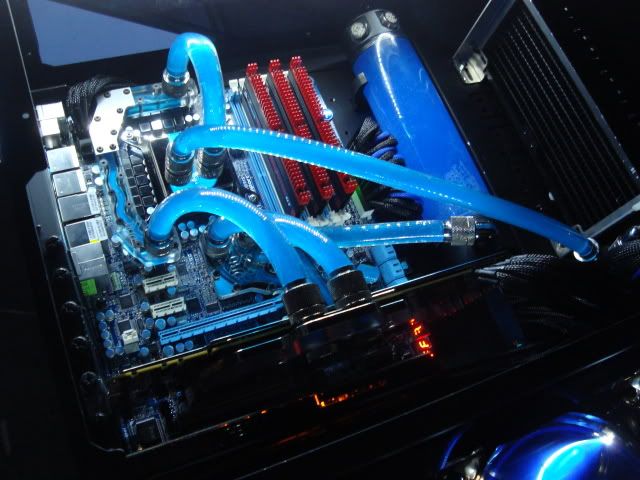
the tubing route i had planned in my head for months worked brilliantly
DSC02177.jpg


facepalm
DSC02180.jpg


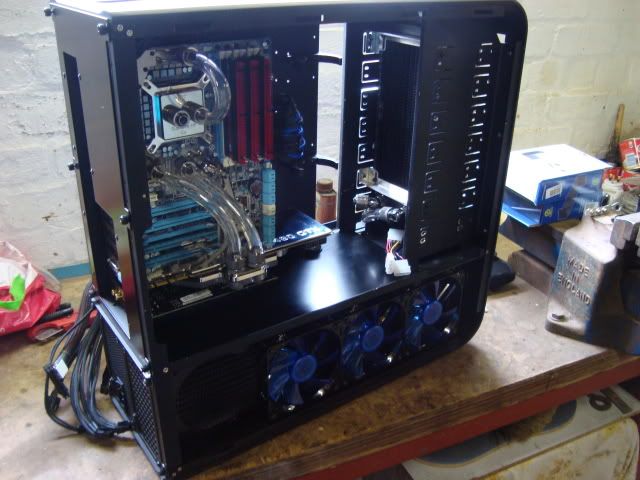
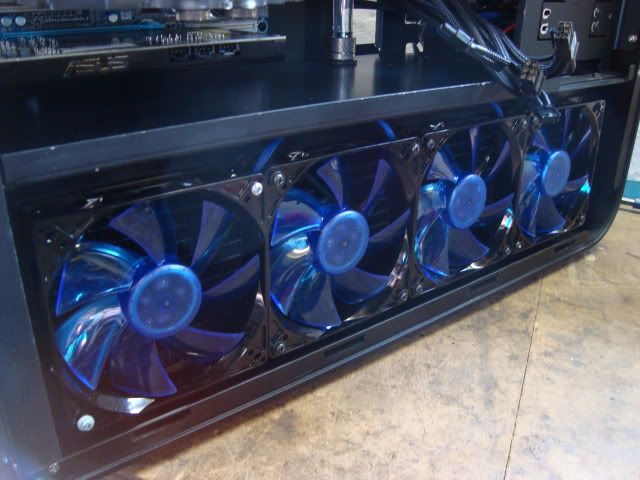
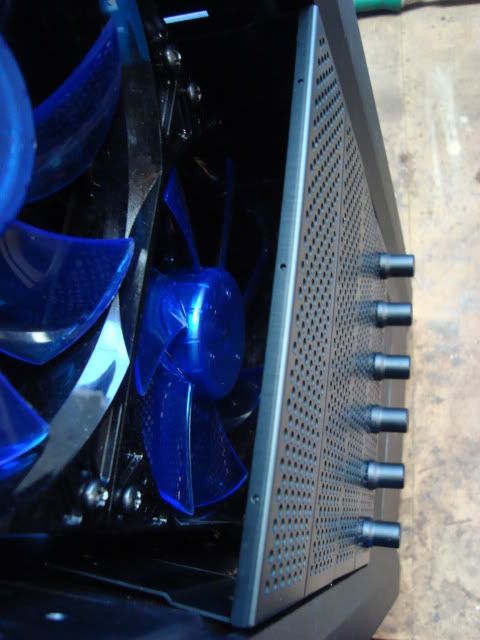
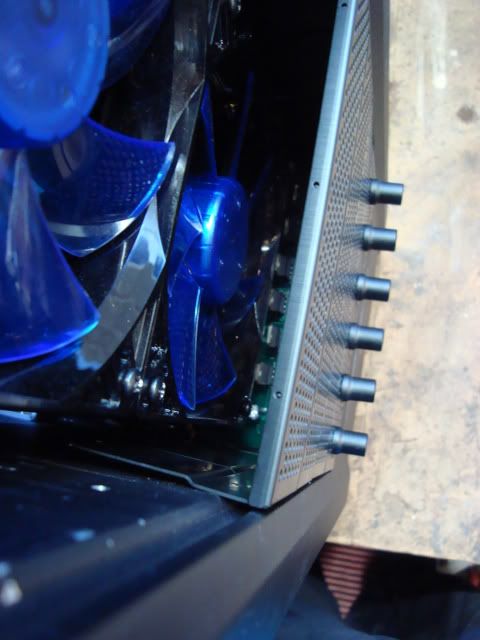
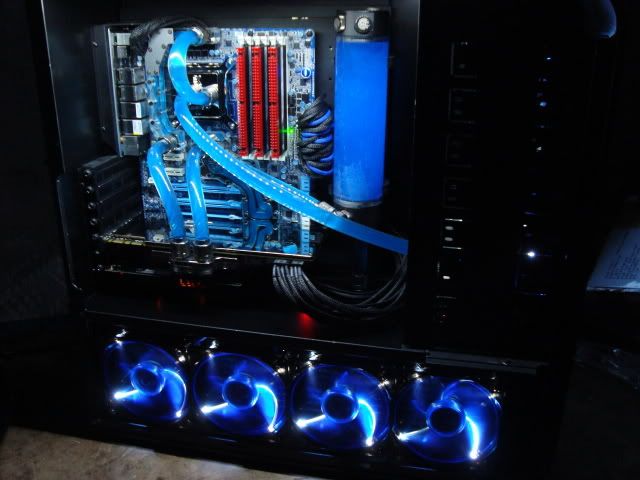
PA 240 mounted in the drive bays
DSC02181.jpg


things are going to be tight. i moved it back so that it had a bit of space to suck air and wasnt right next to the mesh
DSC02182.jpg


had to get creative with fittings to make this work
DSC02185.jpg


Gigabyte with their 'not so' stealth backplate :rolleyes:
DSC02187.jpg


ssds on velcro :p
DSC02188.jpg


very tight squeeze :eek:
DSC02189.jpg


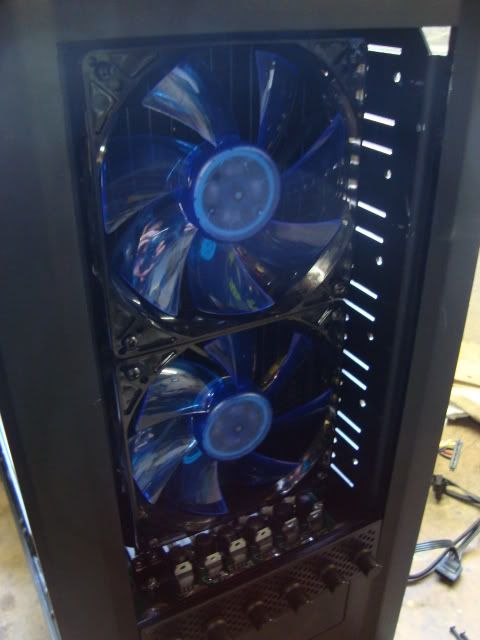
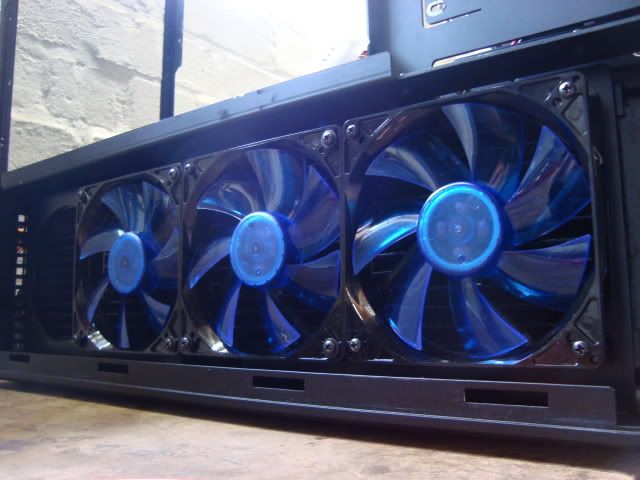
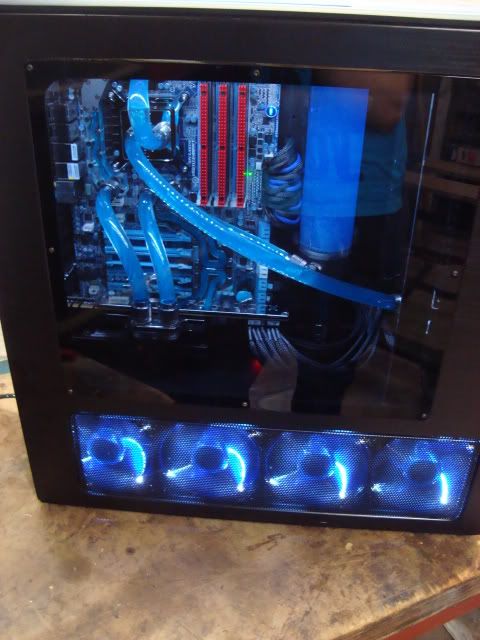
Xigmatek blueline XLF fans looking pretty sweet
DSC02190.jpg


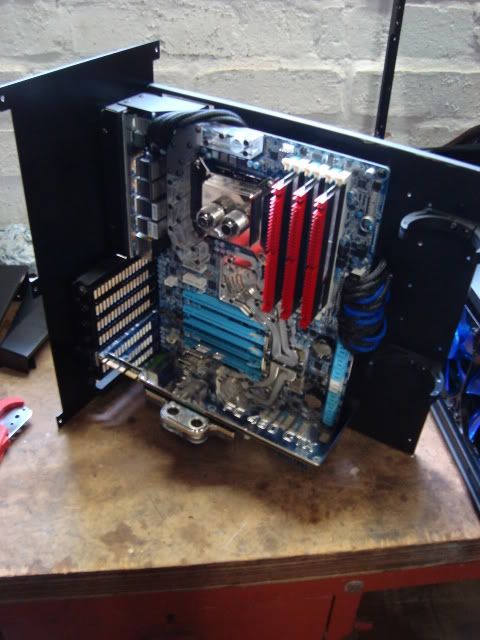
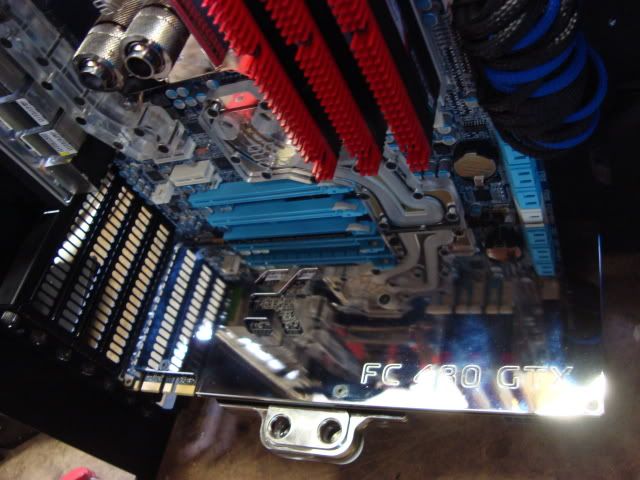
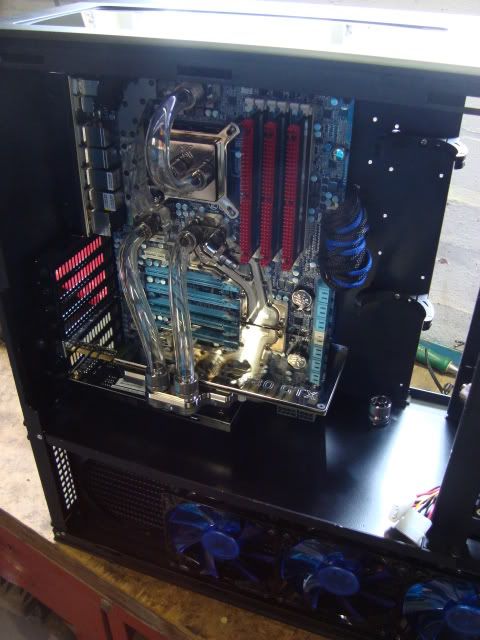
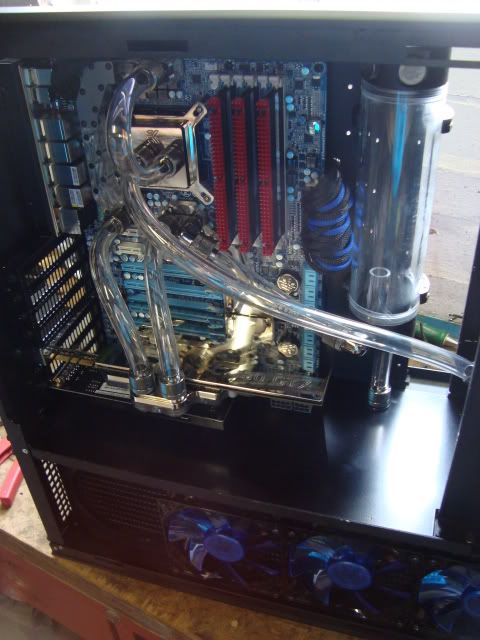
starting work on the board...
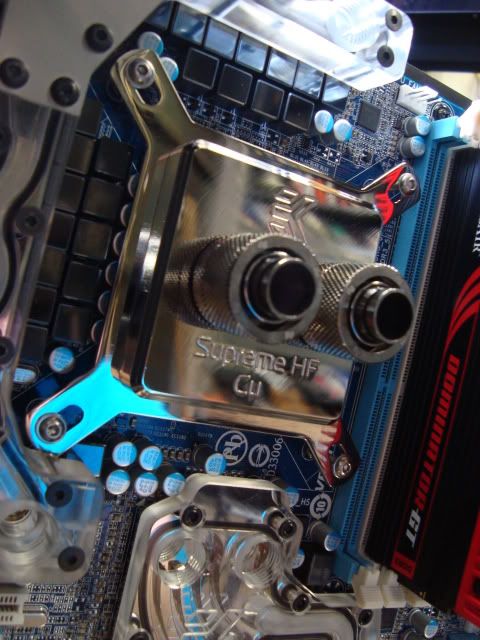
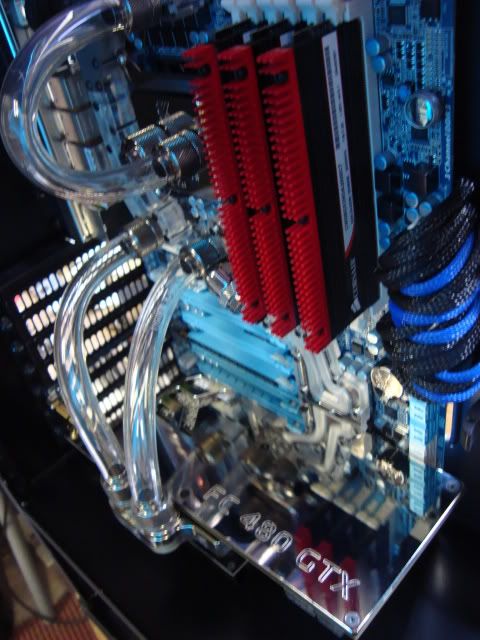
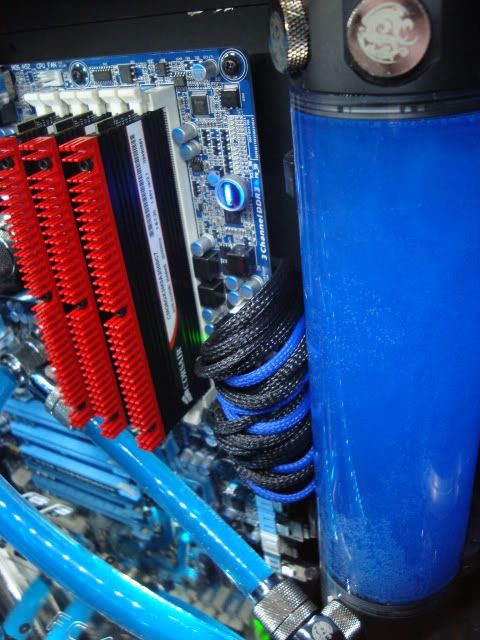
The Dominator GT will have new heatsinks soon, i plan on getting some of the extended fins but more of that later ;)
DSC02193.jpg


DSC02194.jpg


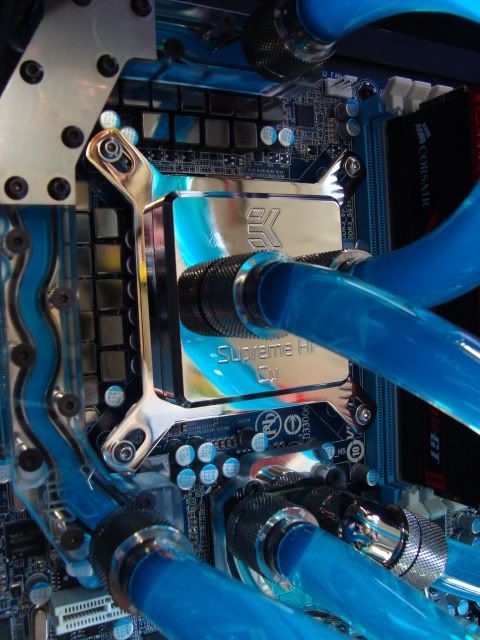
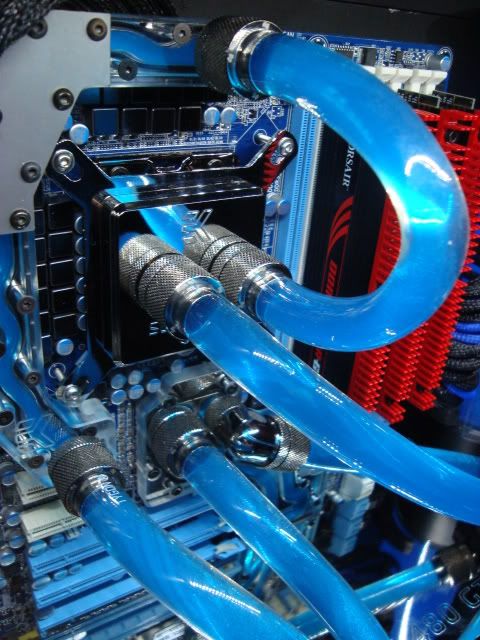
got some matching screws for my CPU Block
wanted this to be the primary focus of the build
DSC02195.jpg


DSC02196.jpg


DSC02197.jpg


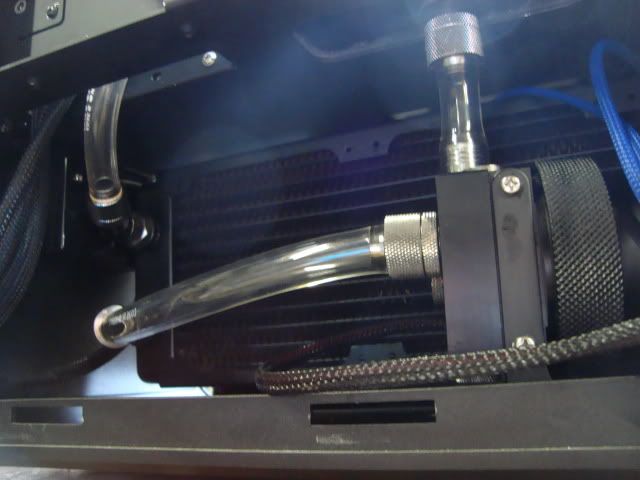
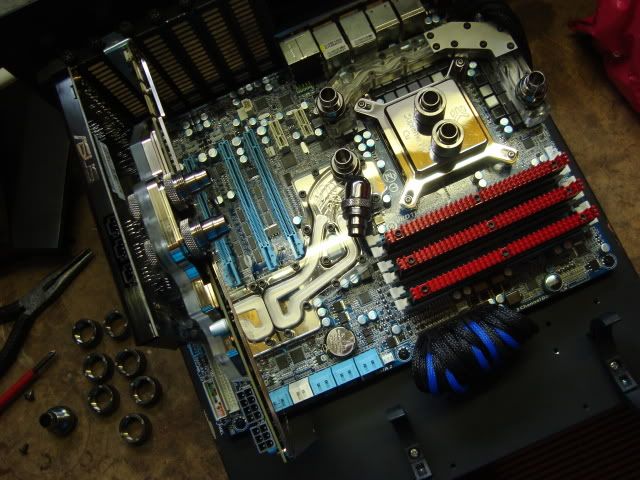
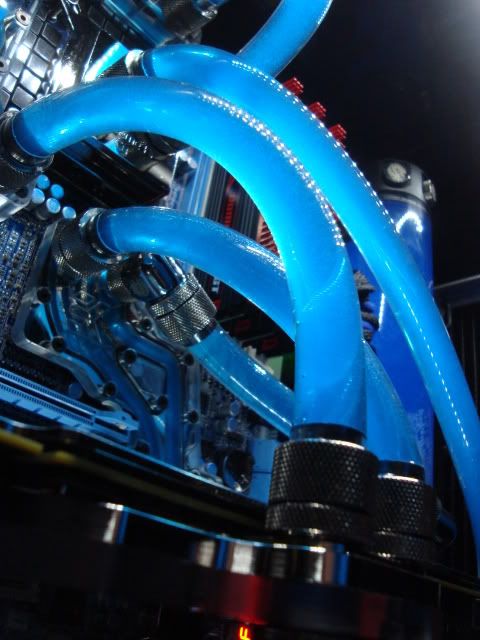
Start of the tubing routes
DSC02198.jpg


DSC02199.jpg


DSC02201.jpg


DSC02202.jpg


DSC02204.jpg


tubing finished
DSC02205.jpg


really pleased with how this turned out. really neat.
DSC02207.jpg


fitted the last fan and ran out of black screws :rolleyes:. will pick some up at work on Monday. also had to use three of the fan extention cables from the fan controller. of course they werent braided so an emergency braiding job was required and completed on all three cables in 20 minutes.
speed braiding is my new speciality :D
DSC02208.jpg


the coolant I used is very good. Mayhem Pre-Mix X1 UV Blue, supplied by the brilliant Mayhems Dye. it looks incredible in the system, the pictures really dont do it any justice at all.
DSC02209.jpg


DSC02210.jpg


DSC02211.jpg


DSC02212.jpg


Hello Pretty
DSC02213.jpg


DSC02214.jpg


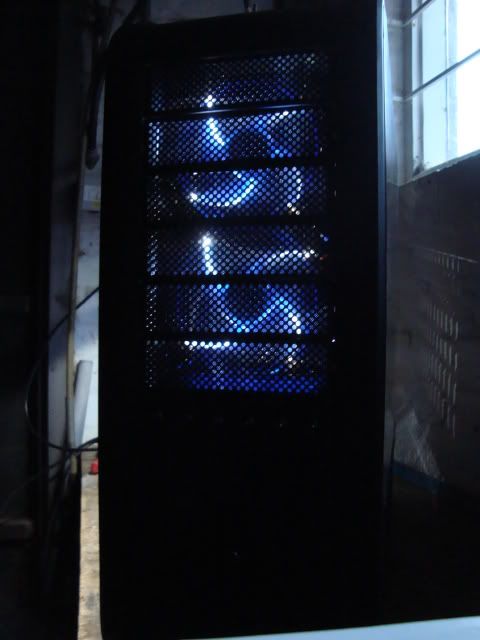
fitting the front bezels
DSC02215.jpg


DSC02216.jpg


totally transforms the look of the case, i prefer this to the stock bezels.
DSC02217.jpg


DSC02219.jpg


DSC02220.jpg


DSC02221.jpg


shoddy SSD mounting at the moment. i plan on sorting this out soon :o
DSC02225.jpg


DSC02226.jpg


DSC02227.jpg


then i installed the final component.
after all the faffing with MurderMod I gave up any hope of ever seeing a luminous panel.
instead i chose a lian li LED strip. took 5 seconds to fit. good times.
DSC02228.jpg


Lights off...
DSC02229.jpg


DSC02230.jpg


DSC02231.jpg


DSC02232.jpg


DSC02233.jpg


DSC02234.jpg


DSC02236.jpg


DSC02238.jpg


DSC02239.jpg


DSC02240.jpg


makes the tinted windows look incredible
DSC02241.jpg


DSC02242.jpg


DSC02243.jpg


DSC02244.jpg


DSC02248.jpg


DSC02249.jpg


DSC02250.jpg


heres the system at half fan speed folding away happily at 100% load on the cpu and gpu


thats it for now.

thanks for checking it out

rjk
 
Back
Top Bottom