Show me the insides of your P180!

Soldato
Joined
12 Mar 2003
Posts
8,179
Location
Arlington, VA
Hey,

I'm interested to see how people have laid out the insides of their P180... here's mine to kick off!

DSC02403small.jpg


I'm planning on doing a rebuild tomorrow. Moving all the HDD's in to the bottom section and putting a fan back into the bottom compartment (NOT the fat noisy 120mm, I got hold of a skinny tri-cool ;)). Will post back here when it's done!

Cheers,

Suman
 
I will try and get a hold of a digital camera once i get my window done, then i will post a picture of the inside of mine. Its very messy at the moment. If i can get a camera ill try and tidy up then ill post a picture.


Thats a lot tidyier than mine, i have wires all over the place, and fans.
 
Nice and tidy sumanji

I have a bit more kit in mine so fitting everything in was a task in itself nevermind tidying the cables!

Mine :

small1.jpg
 
Wow all those cases are really tidy. Mine is a complete bombsite.

I got the 2 fans at the back and top going at medium and moved the bigger 38mm fan from near the PSU to the middle of the front. Had to remove the hard drive cage rails but it fits. Have that one on low speed.

Ill take some pics with my camera phone as soon as I have credit to email them to myself.. :)
 
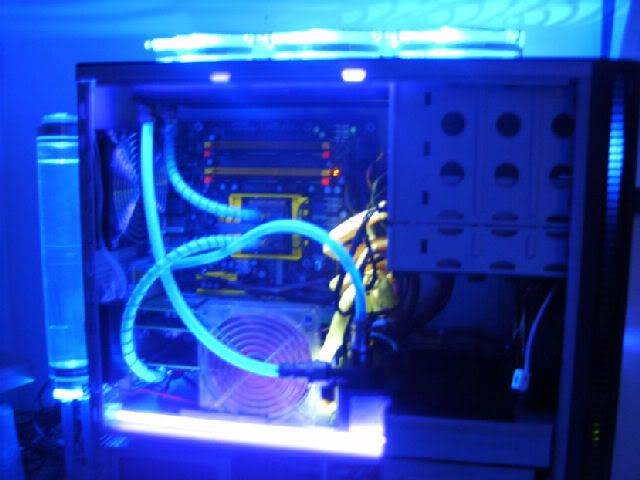
Oooh, Ill post piccies of mine, I watercooled it and it's a mess lol.

I'll edit the pics in when I get back.


MC_Bob


EDIT - Pics


1003821dd6.jpg


A couple of neons which make the slots on the sides and bottom light up nicely :)

1003818pn7.jpg


Res and Pump squashed up nicely into my Ati card :D

1003817ju5.jpg


Done
 
Last edited:
Dumping the top HDD cage means you can get another 120mm fan in there.

I've got that as the intake fan, at medium, and the other two (top blowhole and back exhaust) set to low, pumping the air out. Works great.

As for my case being tidy... Are you serious? I've not been in there in a while, so there's probably some dust bunnies taking residence there, too.
 
2006-07-23_P180Inside.jpg


Redoing it at the moment, trimming bits, painting the insides, window etc... Should look very good when done. Torn between dark green leather, cream leather or carbon fibre for the insides :D (I have all 3 from various projects.. Dark green is swaying me at the moment.)

**EDIT - No excuse for a messy case peeps, having lots of kit in it doesnt cut it... I am running 1xdvdrw, 1xfloppy and 4xharddisks and its tidy ;)

Sam C
 
Last edited:
Jimbo said:
A right mess lol, thinking of shifting the HDs to the bottom. I took the bottom chamber fan and put it at the top and the top fan is in the front....


I originally put my hard disks at the bottom thinking it would be tidier... Was a PAIN to wire them tidily down there (not enough room to work).
Mine are up top now (2 in 5.25 bays, 2 in upper caddy), along with floppy and DVD-RW and fan controller.
I think braiding your wires would go a long way towards tidying the wiring up, then just pull it all neatly together using tie-wraps.
The rest can be achieved by carefully planning where the wires need to go to be out of sight ;)

Sam C
 
No,
The sort of braiding I am on about requires removal of molex's, braiding slid on, heatshrink slid on, molex's reattached, tiewraps around braiding right at each end, heatshrink moved over tiewrap then shrunk...

OCuK sell the kits here:
http://www.overclockers.co.uk/acatalog/Cable_Kits.html
vantec_sleevingkit.jpg


You can use the stuff you have pictured, but I have used it a few times in the past and the end result is never as good as the job done with proper braiding... But would be better than nothing :)

Do you have a soldering iron? Know how to use it? You can go a long way to a tidier case by extending leads that are too short, and shortening ones that are too long.. Use heatshrink over the join to protect against shorts..

Hotglue gun is very useful for getting fan wires out of the way...

Cya,
Sam C
 
Last edited:
Learn to use the soldering iron.. They are dead easy to use to join cable together and thats a very useful skill when working with PC's. There are a million other projects you can take on once you can solder :D

Joining cable allows you to cut existing cable and either add extra cable in, or remove a section of cable.. Longer or shorter.

Go to halffrauds or somewhere like that and buy some cable and have a practice.. Its really easy to do and if your doing it on spare wire theres nothing to ruin :D

There are plenty of guides on soldering... Just did a google and here are two that look good:

http://www.extremeoverclocking.com/articles/guides/Soldering_Guide_1.html

http://www.epemag.wimborne.co.uk/solderfaq.htm

Cya,
Sam C
 
Thanks for those links Sam, I have an Creative Zen mp3 player that needs soldered So I will read up. I bought a Electric one the other day and it was pap, need something better.
 
Sumanji said:
Samcat that would nob up the PSU warranty though? Easier to just hide the excess wires tbh :p

Yes if its done to the psu's wiring.. There are other options though, like extending items after a molex join, just hide the bulk of the psu's wiring and extend after connectors. Fan wires are usually the ones that look really messy in a pc, and they are an easy victim, and hard to get wrong.

I tend to invalidate warranty on kit after its been running for 2-3 months anyway...

Cya,
Sam C
 
FosterK said:
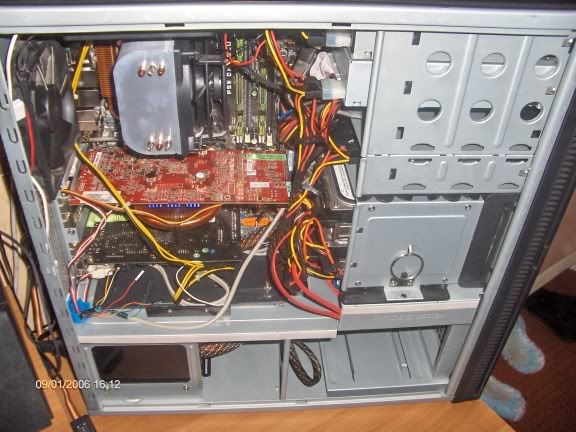
Fear my mastery of packaging ties:

gubbinsva6.jpg


Wheee! Needs a bit of a tidy. It's not that bad, though. That's just a crap angle.

Is there a reason for mounting the 9500 in the opposite direction to the rear case fan? You should turn it 180 degrees. At the moment that case fan is competing against your 9500 for air.
 
Back
Top Bottom