1930s Semi Refurb - Part 9 of ... (Edition: WC)

Caporegime
Joined
21 Jan 2010
Posts
25,406
Hi folks, me again - seems I was accidentally suspended from the forum (lols) so had some time over the weekend to leave all the other jobs half finished and start another. Edition, water closet! I had held off of this one due to Part 7 Wall Knock Through clogging up brain cells and one option would mean the WC would be knocked down. Anyways, interest rates has killed that idea - so onto a quick refurb.

1. Super tight hard-lined sink. Spent about 45 seconds trying to get to the water connection.
Kev6pFN.jpeg

2. Used a hammer instead
ssLB1CZ.jpeg

3. Toilet was a pain too:
5NB9DEe.jpeg

4. So used a hammer:
wWuKytD.jpeg

5. Full bore and PTFE because that's how I roll, regardless of modern advice on compression fittings:
Is9WNhN.jpeg

6. First fix:
wYBwxxz.jpeg

Toilet and sink get delivered Tuesday. The radiator will likely stay in place but just get painted. Just trying to work out what concoction of waste fitting pipes I need. Luckily I have a bunch thanks to past endeavours. This worked but was obviously ridiculous:

gpmQ954.jpeg

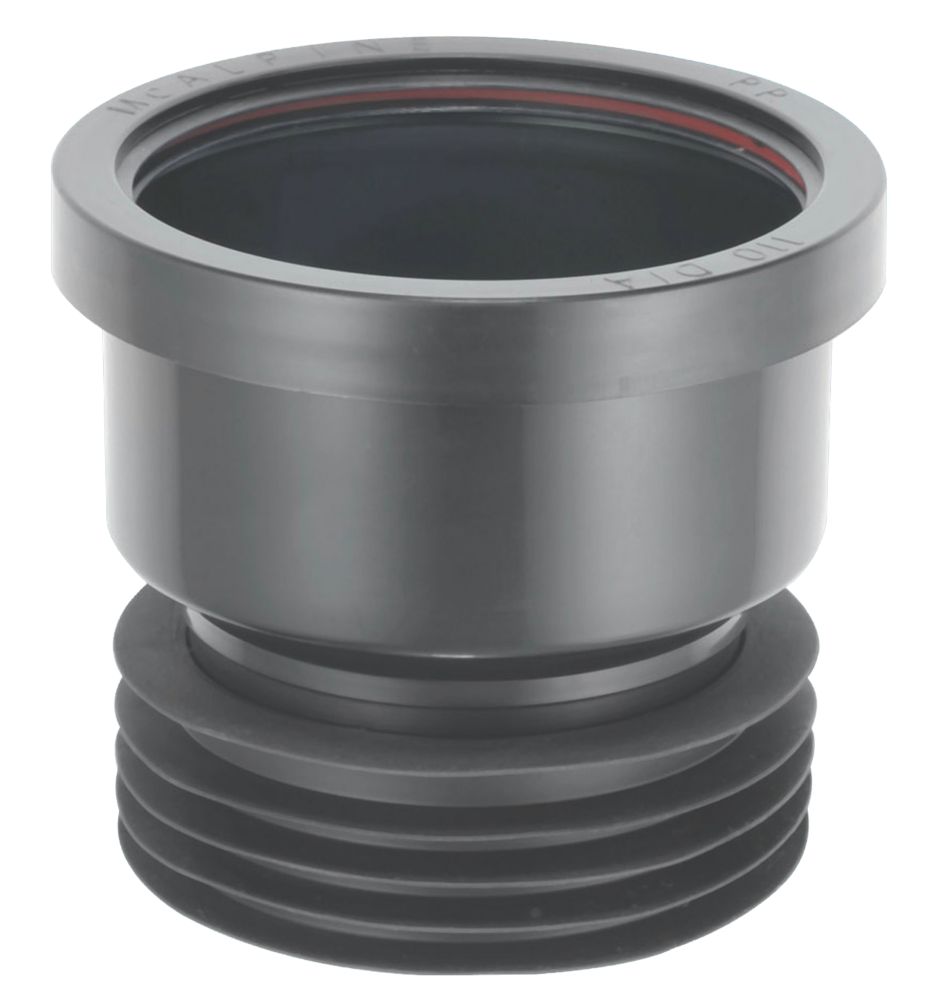
I think I'll grab one of these:
(The floor is concrete/it fits into clay).

And then use the Grohe 110 to 90 converter.

OCUK: Should I yolo and drill the 10mm hole in the floor and pray I don't hit any water or clay pipes?
 
Ummmm youve put PTFE tape on the wrong section (the thread). If you do want PTFE tape you put it on the pipe with the olive but personally I just use fernox jointing compound with it.

I would fix that before you go any further.
Went into autopilot from taping up radiator tails lol. It shouldn't need any PTFE anyway so I'll leave it be.
 
Surely the ones in the floor only stop it from from sliding forwards backwards? Are there other connections further up against the wall?
Yeah two into the wall. Wall hung toilets seem a bit black magic to me anyway (big fat ass + 600mm from the wall and made out of crockery, what?) so wasn't going to chance it. If most of the load is elsewhere I'll stick to shallower fittings.

I have ordered a Bosch pipe detector which I have very little faith in so I'll give that a go and boomerang it back to Amazon if its no-good.
 
Last edited:
Just ct1 it to the floor :D.

I’d just drill and plug… use browns. Yolo. Does the soil pipe go out of the wall after going under ground? Is that an external wall? Is it easy to see or at least deduce where it goes?
Waste goes straight down, it is the cold feed I am stressing about, as it either goes down, around and over -- or diagonal from corner sink. It looks like it is wrapped as it emerges from the concrete, so it seems they've done it properly --- however the heat from the radiator pipes can be felt beneath the floor in the hall so they can't be all that deep.
 
I can definitely get away with one big ass bolt on the left hand side; so maybe I'll CT1 + one big bolt, and then decide how lucky I am feeling on the right hand side fixing.
 
The problem with CT1 is that if you need to get that toilet up for any reason, you need to get a blade under to cut the CT1. If you fix toilet, then do flooring you won’t be able to cut the CT1 without lifting your flooring. Obviously with just bolts you could.

I have no doubt CT1 would probably hold it better than the screws. It’s just a maintainability factor that goes out the window.

Just food for thought, you’d have to be much more destructive if you ever needed to remove the bowl.
We are just talking the frame here - not the toilet bowl itself. I hear you though.
 
Kind of obvious but "confirmed" ->

NofU6Of.jpg

Tested it where I can feel the heating pipes under the concrete:


3CMkZyX.jpg

So 1 bolt on the left hand side and some CT1 I think!
 
Last edited:
Right, can confirm the McAlpine adapter was spot on for the clay pipe. This gave me a 110mm fitting and the Grohe included a 110mm to 90mm adaptor. Glorious.

LpSrFFp.jpg
n.b. the wetness around the cold feed is causing me some concern. I'm about 60% certain its just residual moisture from when I put the compression fitting on; and the compression fitting down is 100% dry. When I drilled the sole plate it seemed a bit....moist...about 2 inches down. I'm not about to start tearing concrete up so will keep an eye on it as the 'boxing in' won't be a fully permanent solution anyway (mdf cupboard).

7wgBQiR.jpg
@ci_newman to the rescue as I still haven't patriated my socket set from home-home to where I live. This worked great for the sole plate bolts.

I did add a 3rd bolt in to the floor - and then was going spare trying to find some decent wood screws to attach the frame with. I ended up recovering 4 flat head (lol) screws that were super chunky and did the job perfectly. I then put in 2 pozis with some washers which is over kill.

b0ZV53C.jpg
Solid as a rock.
 
Nice. I vouch for spax screws if you want good quality. Also go Torx over Posi. Much nicer.
Yeah I went Torx Pozi (someone on here recommended) for the floor. I just needed 4 chunky boys for this though and couldn't spot any so ended up with decades old flat heads I must have rescued. Seems to work!
 
Right, tried to tackle the plumbing but
1) don't like the idea of plastic in compression (probably fine)
2) can't remember whether the gear I have is hep2o or JG SpeedFit
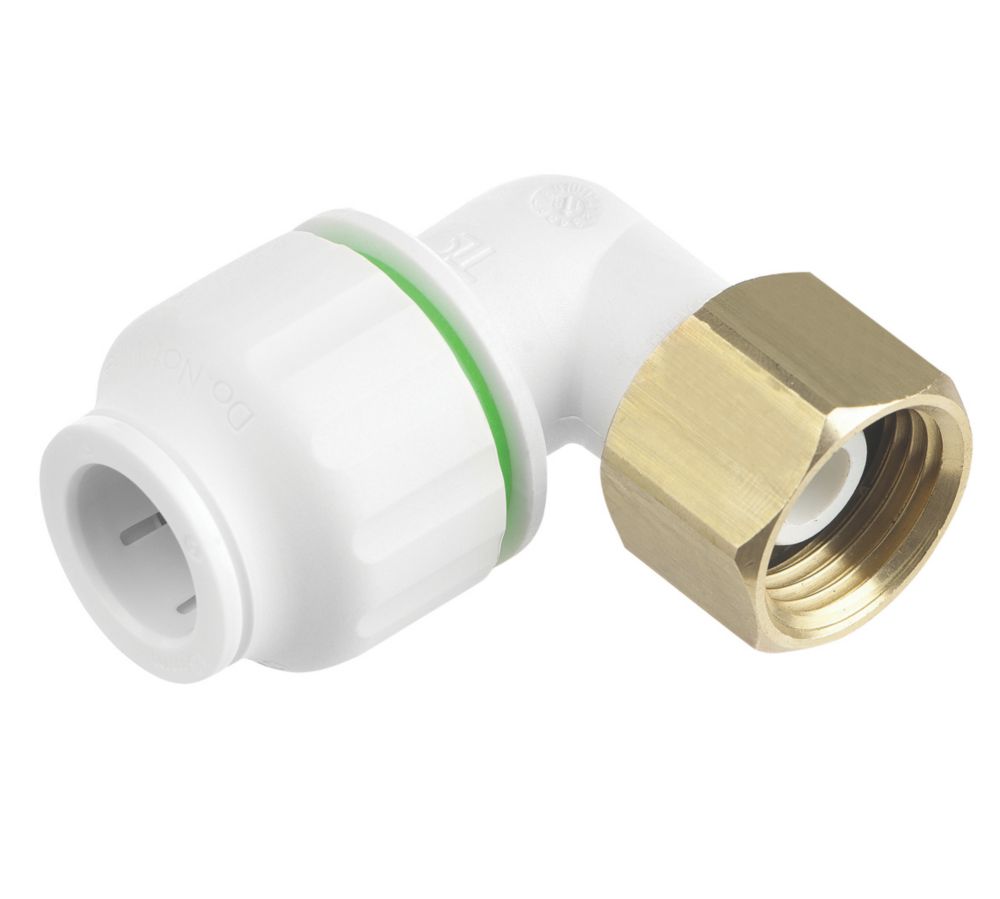
3) the Grohe toilet is expecting a tap connector rather than a compression fitting I think.

Token insert picture:
TpX7OT7.jpg

I was desperate to get this out of 1 cut of MDF and then use the inner bit as the cupboard door, given it'd be a precise fit.
DF0BHfX.jpg

Unfortunately physics (geometry?) got in the way and a full board wouldn't fit through the door, so I chopped it and test fitted it.
2xVBMSx.jpg

And the top bit:
kEtUECR.jpg

All good, just need to have a think about the fittings for the Grohe adaptor and what bits I need to grab from Wickes/SF/TS.

Annoyingly I forgot the track saw works "up to" the line and not "on the line" depending on which way you cut, so I am 5mm less tight than I wanted to be; but nothing some caulk won't fix.

Edit: I've just PVA'ed all the edges of the MDF for some kind of minor insurance policy if it gets wet.
 
Last edited:
For the inlet on the grohe cistern I used one of these

Thanks for this - it expedited my thinking on the tap connector. I went Hep2o and swapped out the compression fitting that was giving me grief, too:

xkwWpK4.jpg

Toilet bolted and plumbed, working great.

VpmaPef.jpg

Have since decided to leave a shelf space, and then a cupboard - so watch this space!
 
Went downstairs this morning and the WC stinks of sewage. No visible issues on plumbing or waste connection....FFS...

It has been smell free with no toilet/open waste pipe for 5 days now...super odd.

Edit: maybe a side effect of not having any flushing going on for a while and the caked on stuff has been activated?
 
Last edited:
Could have been a gas build up in the pipes and now you have flushed it its released back

Is the pan full of water? Or has it dropped at all.
Did you use the old loo or was it in effect out of action
Used it lots as the one upstairs is pretty broken (lols at my priorities). Pan was full, flush is great. I haven't christened it yet but am guessing it was gas build up. It's on its own branch of the poo pipe so it would have gone dry for the first time in 30 odd years.
 
Brief update:

I did the light; a Hue unit with warmth settings:

KEic8s7.jpg

And then papered the top half:

HzkhALO.jpg

Got the mitres done on the dado and painted them:

kUUg1sA.jpg

Primed the cupboard:

5utxSEZ.jpg

---

Annoyingly I trimmed the cupboard door from the top not the bottom.... and now the cupboard door is way out of true. Annoying as it was the door I perfectly cut out of the large sheet material to avoid this issue.

It is also 18mm MDF and way too heavy for those regular brackets. So I think I'll grab some 9mm MDF and cut a door a more apt thickness.

I also filled the holes from the previous fixtures so hoping I am only 5 mins from painting -- just need to remove the radiator and replace/paint.
 
Back
Top Bottom