Don
- Joined
- 20 Oct 2002
- Posts
- 17,258
- Location
- In a house
I inherited a 1973 MGB GT from my dad a few years ago now.

He Bought it new(ish) in the mid 70's. He kept it for about 5-6 years. He then sold it (so, early 80's) My Brother was born 81, so it went before him I think!
It was sold to a local lady who wanted a small car to drive her young kids to school, and for driving at weekends.
It stayed in her ownership probably up untill the early 90's when my Father spotted the number plate whilst working, and followed the lady home. He then offered to buy the car back from her. She recognised him, and agreed to sell him back the car")
He had it on the road every other summer for a few years, till it was laid up for almost 10 years. I always had a hankering for working on the car, and he agreed to transfer ownership to me as he struggles with steering it, and getting down into it comfortably. So it was not going to get used again by him.
Initially, I just serviced it, and put it through the MOT, which is passed first time!. I think I added an MP3 headunit to replace the tape-deck, and I drove it for the following summer, only when there was no chance of rain, and didnt do much else to it. Its main job was driving me to cricket matches!
However, things started to go a bit wrong. The clutch slave cyclinder blew, and I had to drive it back home without the clutch, which was an interesting experience
I decided to tackle the job myself, and after a few days of getting the parts together, I tackled my first ever clutch job. It took me a weekend, as I was very methodical and had to bend the copper piping (the old one rounded off when it was removed!) without a pipe bender and work out a route. I fired it up after refilling the system, and voila! The thing only went and worked, and the previously notchy clutch was as smooth as silk. Although there was a slight airlock that caused me to have to pump the clutch after a few miles (which I since fixed).
Bouyed by this success and because I was also noticing some niggles that were annoying me, so I decided to start on doing some smaller jobs to try and tidy it up.
I wrote a list of these things
Drivers Door - Not closing/opening correctly
Drivers Door - Dropped, poorly aligned
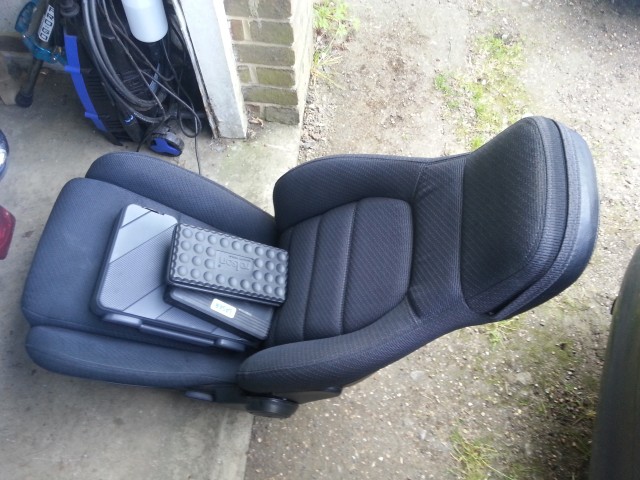
Front Seats - Spongy, uncomfortable, loose, and BROWN
Door cards - Worn, loose and BROWN
Carpet - Smelly, worn, BROWN
Rear seats - in great nick, but BROWN
Interior in general - BROWN and smelly
Wheels - Original Rostyles - very old and ugly
Horn - Barely working
Spotlights - Not working, looked like they were wired up by a blind man wearing mittens.
Engine - Needs a lot of choke to run.
Battery - ancient and crap
Paintwork/body - Fairly straight, but paint is old, cracked in places, and some rust showing on seams
Some of these are being addressed at the moment, some are already done, and a lot of the list have yet to be started.
I will flesh this out with some more pics as I go along, I have a fairly good collection of photos from the various jobs along the way.
He Bought it new(ish) in the mid 70's. He kept it for about 5-6 years. He then sold it (so, early 80's) My Brother was born 81, so it went before him I think!
It was sold to a local lady who wanted a small car to drive her young kids to school, and for driving at weekends.
It stayed in her ownership probably up untill the early 90's when my Father spotted the number plate whilst working, and followed the lady home. He then offered to buy the car back from her. She recognised him, and agreed to sell him back the car
He had it on the road every other summer for a few years, till it was laid up for almost 10 years. I always had a hankering for working on the car, and he agreed to transfer ownership to me as he struggles with steering it, and getting down into it comfortably. So it was not going to get used again by him.
Initially, I just serviced it, and put it through the MOT, which is passed first time!. I think I added an MP3 headunit to replace the tape-deck, and I drove it for the following summer, only when there was no chance of rain, and didnt do much else to it. Its main job was driving me to cricket matches!
However, things started to go a bit wrong. The clutch slave cyclinder blew, and I had to drive it back home without the clutch, which was an interesting experience
I decided to tackle the job myself, and after a few days of getting the parts together, I tackled my first ever clutch job. It took me a weekend, as I was very methodical and had to bend the copper piping (the old one rounded off when it was removed!) without a pipe bender and work out a route. I fired it up after refilling the system, and voila! The thing only went and worked, and the previously notchy clutch was as smooth as silk. Although there was a slight airlock that caused me to have to pump the clutch after a few miles (which I since fixed).
Bouyed by this success and because I was also noticing some niggles that were annoying me, so I decided to start on doing some smaller jobs to try and tidy it up.
I wrote a list of these things
Drivers Door - Not closing/opening correctly
Drivers Door - Dropped, poorly aligned
Front Seats - Spongy, uncomfortable, loose, and BROWN
Door cards - Worn, loose and BROWN
Carpet - Smelly, worn, BROWN
Rear seats - in great nick, but BROWN
Interior in general - BROWN and smelly
Wheels - Original Rostyles - very old and ugly
Horn - Barely working
Spotlights - Not working, looked like they were wired up by a blind man wearing mittens.
Engine - Needs a lot of choke to run.
Battery - ancient and crap
Paintwork/body - Fairly straight, but paint is old, cracked in places, and some rust showing on seams
Some of these are being addressed at the moment, some are already done, and a lot of the list have yet to be started.
I will flesh this out with some more pics as I go along, I have a fairly good collection of photos from the various jobs along the way.
Last edited: