

You are using an out of date browser. It may not display this or other websites correctly.
You should upgrade or use an alternative browser.
You should upgrade or use an alternative browser.
Another Silverstone Fortress Build
- Thread starter Diggsy
- Start date
More options
Thread starter's posts@ LukeTW - I have no idea if it's making any difference or not, as I installed it from the start of the build. I am considering removing it though, as the fans are barely turning. I think that's probably partly to do with my wiring though, as I needed 2 extension cables to get it to my fan controller. I might bypass the controller 1st and see what happens.
Whether you have it as an intake or exhaust will depend on your setup. What I noticed is that my PSU below gives out very little heat, so the BS-08B should be able to draw in relatively cool air from outside and blow it onto the GTX, which IMHO is better than it competing against the GTX for airflow. If it sat higher than the GTX in the case, then I would say exhaust every time, but with it sitting below I can't help but think it is better suited as an intake. The problem I have with it though, as I said is it seems to be putting out very little air. Time to bypass the fan controller and see what happens before I ditch it.
Thanks, i have one fan as an exhaust and one blowing cool air on it (well trying
 )
)A little bit of an update. The HDD noise was really starting to bug me, and I haven't even started to use the system as my main one yet!
So I decided to attempt to bungee the drive and see what would happen. There is just enough room to bungee it, yet keep it in the proper enclosure, which is perfect. The difference in seek noise is just unbelievable!
So, I have it bodged in for now with white elastic, but I am currently looking at either getting good quality black elastic, or I have some old black blocks of foam lying around which I might be able to use to hold the drive in.
Will update with some new pics once I have this sorted.
Soldato
- Joined
- 17 Sep 2007
- Posts
- 11,117
- Location
- West Yorkshire / Market Bosworth
That looks awesome mate, well done. Looks like a really nice case to build in.
Good Job
Good Job
Soldato
- Joined
- 18 Oct 2002
- Posts
- 12,311
- Location
- England
Simply stunning I can only imagine something like that must have taken u the entire day of just cable tieing and managing alone !
Even after ive spent a whole day and night managing and hiding my wires I could never get it ever as neat/tidy as you have done !
Even after ive spent a whole day and night managing and hiding my wires I could never get it ever as neat/tidy as you have done !
Simply stunning I can only imagine something like that must have taken u the entire day of just cable tieing and managing alone !
Even after ive spent a whole day and night managing and hiding my wires I could never get it ever as neat/tidy as you have done !
Thanks. I actually built it over a couple of weeks, making some slight changes and carefully planning the cabling as I went. It's still not finished just yet as I have to finish the HDD's, but it was well worth the time and effort spent. It's by far and away the best build I have done yet.
I am also considering removing the Lian Li BS08-B as it doesn't seem to make any difference to GFX temps. Probably as much to do with the excellent airflow in the case already to be fair though. I might give it one last go with a more powerful fan before removing it though just to see if it helps any.
Look out for some updates over the next week or so and with any luck fully finished pics too.
Last edited:
")
Associate
- Joined
- 4 Dec 2008
- Posts
- 2,063
Very nice mate.I like you cable managment.
A few changes incoming. Finally got around to returning my Zalman PSU for RMA. That was dealt with very quickly I have to say.
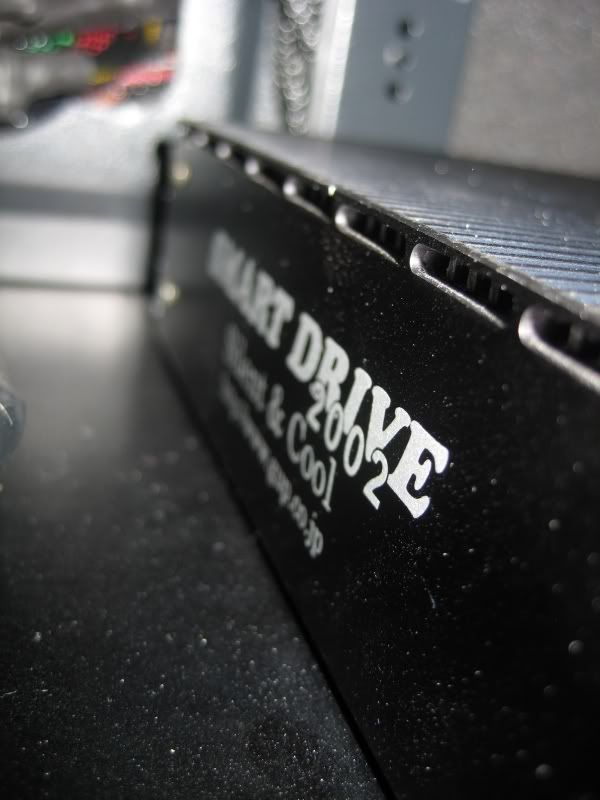
Also I got fed up with the noise from my Samsung F1, so it's now wrapped up in a GUP Smart Drive 2002C.
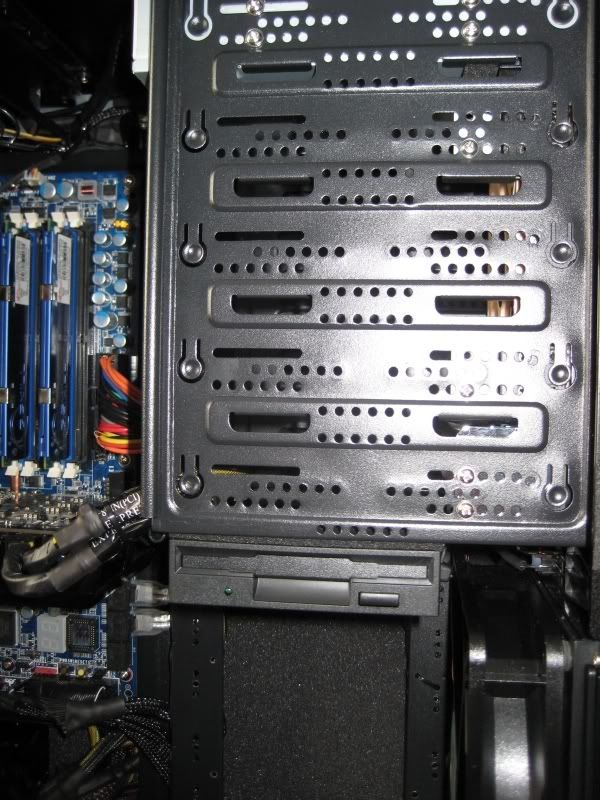
All the HDD bays have been removed and the floppy drive relocated.
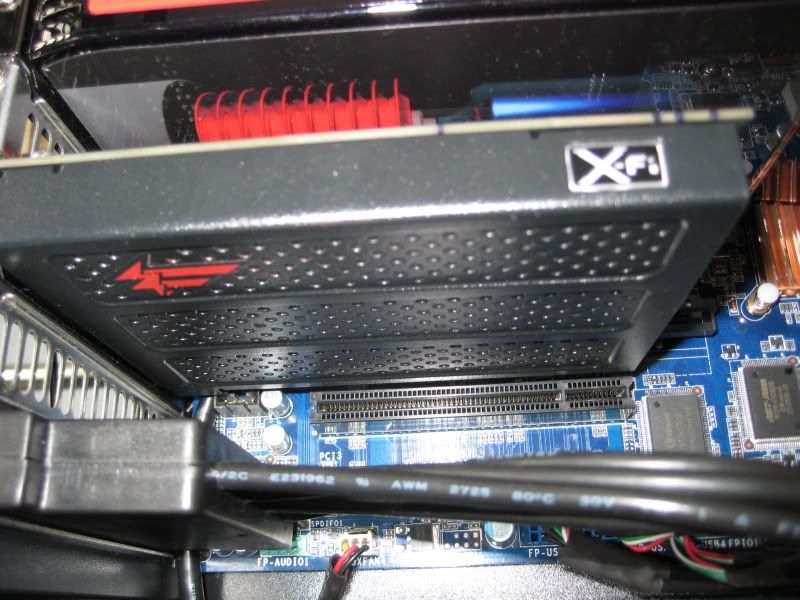
I will soon have a X-Fi Fatal1ty to go in as well.
Pics to follow once it's all sorted, but who knows when that will be, especially given that it's now almost June and I still haven't transferred my system across to the new rig. What a complete waste of cash that was! I could've got so much more for my money had I waited, but ah well.
Also I got fed up with the noise from my Samsung F1, so it's now wrapped up in a GUP Smart Drive 2002C.
All the HDD bays have been removed and the floppy drive relocated.
I will soon have a X-Fi Fatal1ty to go in as well.
Pics to follow once it's all sorted, but who knows when that will be, especially given that it's now almost June and I still haven't transferred my system across to the new rig. What a complete waste of cash that was! I could've got so much more for my money had I waited, but ah well.
Soldato
- Joined
- 12 Feb 2009
- Posts
- 4,401
- Location
- UK
Totally agreed very tidy.
Thanks a lot guys.
To answer some of the questions, the cable braid I used was purchased off the bay. The shop specialises in heatshrink and the quality was very good.
Regarding the PCI cooler, yes it made little to no difference, so it now sits gathering dust just like a lot of other trial and error purchases I have made over the years
Associate
- Joined
- 15 Jun 2009
- Posts
- 8
Could you message me with the details of the ebay shop?
Well, I have finally got the X-Fi Fatal1ty installed. Got some of the Akasa SATA cables too. They look much better quality than the cheap black cables I was using previously. Yes they are silver, but you can barely see any of the cable anyway, so it doesn't really matter. I may also give the 120mm below the 5.25" bays a go (ala magicroundabout).
I have still not ported everything across from my old system though, so the Fortress still sits unused in the middle of the room. I am so lazy at the mo
Will post some updated pics soon.
I have still not ported everything across from my old system though, so the Fortress still sits unused in the middle of the room. I am so lazy at the mo
Will post some updated pics soon.
Last edited:
Okay pics as promised...
Floppy Drive repositioned...
Installation method I had to cut a little square out of the rear in order for it to sit flush at the front...

X-Fi installed...
F1 wrapped up in the GUP Smart Drive...
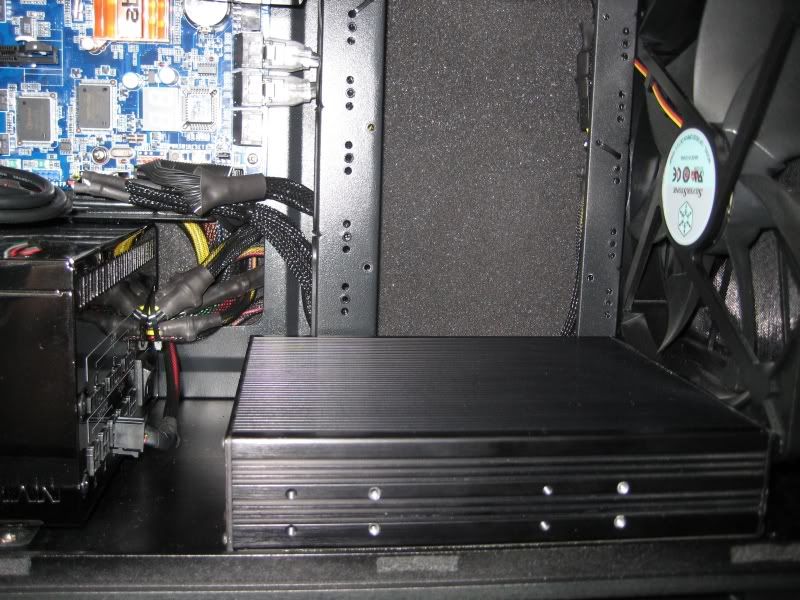
That is just about it all finished. I was going to install another internal HDD, but could'nt locate another GUP Smart Drive at the right price, so changed plans and have decided on a 2nd external drive, this time through eSATA.
Floppy Drive repositioned...
Installation method
I had to cut a little square out of the rear in order for it to sit flush at the front...
X-Fi installed...
F1 wrapped up in the GUP Smart Drive...
That is just about it all finished. I was going to install another internal HDD, but could'nt locate another GUP Smart Drive at the right price, so changed plans and have decided on a 2nd external drive, this time through eSATA.