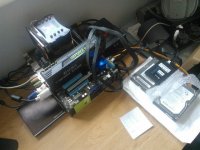
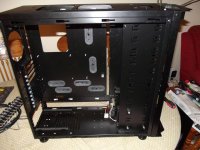
Armorsuit up

Ever considered getting the internals powder coated?

Looks like you're making good progress though :)

kd

TBH I really like the silver aluminum look inside and black externals its not like its lame steel.

And ya was a long build and enjoyed it and couldn't help myself now i have another £200 of stuff to go inside, nothing fancy but will be fun.
 
How about adding another loop in to w/c the gpu's.

At this moment in time my GTX460s are hitting 60 on top card and 50 on lower card at 99% usage in bf3 so its not too bad. The thought of throwing £100 of waterblocks onto something I intend to replace in a few months isnt what i want to do and the resale value of watercooled 460s I dont think is so high.

I am also going to be using just a single loop with 2 radiators there just isnt the space for 2 loops and a clean(ish) look.
 
Got a delivery this morning first of many I hope.

Well here is my new XSPC EX480 very nice.

I decided that buying pre-sleeved psu cable would be better for now until i decide upon colour scheme and source a window, I now have the cable installed and really does tidy it up a bit.

And lastly a sealed adapter so I can add in a drain tube onto my reservoir just to make it a little bit easier. TBH I would have preferred a quick lock valve which i could attach a pipe to for draining but I didn't look hard enough.

imgp0922o.jpg
 
Last edited:
Its all good as 3 of them will be hidden anyway and the other one I got is mounted at the back of my case with a grill which takes away the whole look at me im grey look about it.

imgp0924.jpg

All fans on and yes its intentional its only got 3 on it :P time will tell.
 
Last edited:
Ty OCUK, these came today so could put in my EX480.

imgp0927.jpg


So now I got my angled fittings I mounted my Rad nice and secure now using some EK UNI Holder 50-70s.

imgp0929e.jpg


Inside shots and i added some Mayhems Deep Blue dye its a good match to the rest of my system.

Had to do a funny pipe formation but its all good.

imgp0930.jpg


Leak tests are complete and not many bubbles this time only a few tiny tiny ones to go.

imgp0932g.jpg


imgp0940f.jpg


I added in a drain pipe looks funny but will make life so much easier. (may eventually change this into a quick lock instead of a threaded stop.

imgp0938d.jpg


Ill say again im really happy with the coloured dye looks great in this image.

imgp0937.jpg


Well these are probably going to be my final shots for a long time I think (unless I source me a window panel then ill add some LEDs), any comments or feedback would be great.
 
Last edited:
Before and after and after

Titan Fenrir EVO
Idle 40 degrees
Load 56 degrees

Magicool 280 slim(2x140mm pull)
Idle 30 degrees
Load 42 degrees

Magicool 280 slim(2x140mm pull) + XSPC 480 (3x140mm push + 3x120mm pull).
Idle 23 degrees
Load 35 degrees.
 
:eek:
Love the neatness of everything :D

Ya so do I a massive improvement from my v1000.

The motherboard fan headers are only temporary until I decide upon a fan controller or if the Akasa FLEXA FP5 I just bought works.

Also thanks for all the help and advice Cleeecooo been really helpful.
 
Last edited:
Glad to help :D

you going to spray the fans at all?

I'm thinking of modding them with some clear plastic and LED's to make the look like apollishes...

Maybe the rear fan but at this stage no as there is no window etc so cosmetics are not top priority.

I finally got a fan controller the nzxt Sentry LXE, its alright as it keeps it nice and quiet.
Shame the battery that came with it doesn't work which means it doesnt keep my manual settings but AUTO is fine. I need to get another battery or complain see if I can get it free.

I got a few ideas of where I want to go next.

  • Mod HDD power cable to reduce cable clutter in case by putting 5 connectors onto 1 power strip. Ive read this is ok and easy to do.
  • Create a window and or design for side panel. I've found a laser cutting place near where I live so looking into that once I get round to a design or theme.
  • Adding in yet another radiator behind the front radiator because I can (which is why Im asking about fittings etc)
  • Cable sleeving.
  • Moving pump to base of case as i cannot adjust the speed atm as its behind a radiator. I left it on 5 as the noise was less my fans but once I got them controlled I can hear the pump over the 800rpm GTs.

I think ill do the side panel or 3rd radiator first as the others are mostly cosmetic and are all linked.
 
Window options

Getting drawn into doing something with my case/build again but all comes down to sorting out a window.

I cant decide what to do as its impossible to get the official side panel it looks like i'll have to get one made or make myself.

I like the design on the official one so its quite possible that it will end up similar.
W-LF2AB-10-02.jpg


Anyone got any tips of where to get started and I don't have a dremel or intend to get one but I do have access to things like band saws jigsaws etc or can do by hand.

Is getting it laser cut an option or would they not do something like this?

I've seen a video or 2 of how to make but I don't like the rubber seal that they put on most of them so any tips or guides on how to make a window.

Ive seen a few different placements of the window.
  1. Stuck behind cut panel + rubber seal
  2. Screwed behind cut panel no rubber seal
  3. Screwed infront of cut panel with screws no rubber seal
 
Sent you a place that would CNC cut whatever design you wanted at a good price. Imo the rubber edging looks crap now. Either inside stuck with no seal or go for a thicker piece of acrylic and bolt it to the outside with a polished edge. I run that offcial window panel on my old P60 armoursuit. But theres nothing like having a one off.

Thanks does just what I need.

Got some time off coming up so might have to get them to cut for me.

To make it unique might just make a large window and put in a cover inside over the psu and cable with a design on.

Edit: just seen how good a custom cut design looks... I'm torn.
 
Small update. Pics to come later.

Just got me yet another radiator lol because i can.
Went with the XSPC EX240 and glad I did, matches my EX480 and is also hidden well.

Added in loads of new fittings to arrange loop much better which has turned out very well as its much tidier and is 100% ready for when new GPU(s) are added with waterblocks.

Pump has been relocated + extra padding so now its a bit quiter and i can now adjust the speed instead of 5 constant.

Modded some spare SATA power cables so running off the one now with less excess cable.

Just need to grab the camera when its finished charging then can add some new images.

Would you be able to pass info about this place? I'm looking to order plain side panel for me 800d and do some custom cut design.
Enable your trust then I can send you the link
 
Well here are some pics.

Before
imgp1015d.jpg

imgp1016.jpg


My attempt at a cable mod.
imgp1019l.jpg


After
imgp1021z.jpg

imgp1054a.jpg

imgp1047q.jpg

imgp1055x.jpg


Much better I think.
Next step get cables sorted just need some cable ties with mounts.
Also get windowed side panel sorted.

Well thats it for 2011.
 
Last edited:
Hey bud could you take measurements and a photo of the the rear lip of the side panal as I will have a look at mine and see if you will be able to fit the older p80 b side window on your case as I'm sure there are windwos still available to buy now.

imgp1064.jpg


Panel size = 56cm across and 55cm high

the panel is symmetrical with approx measurements to middle.
(1.5cm - 3.3cm small slot) (3.5cm - 4cm hole) (15cm - 16.5cm gap) (19.2cm - 20.5cm small slot) (21.8cm - 22.3cm hole) (23cm - 32cm handle) and so on, hope that is what you wanted.

Tbh I'm probably going to get it laser cut with a custom design on it when I finalised any ideas, but if you know where I can get one that fits that will work too thanks.

Edit: Just took a quick look at the side panel for these cases (PC-A70 / PC-A70F / PC-A71 / PC-A71F / PC-P80 / PC-A77) it doesnt look like enough holes line up nvm ill go with the custom panel.
 
Last edited:
Finally fitted and leak tested for an hour or two. (Just a quick not on the torx screwdriver that you get with the block it is not good, had to get into town very quickly and grab a new one from Halfords with 1 min to spare before closing. BTW its a TX6 size or 1/4")

I have added a few things and tidied up the cables on the back I also added a drain pipe as I had a few bits spare.

8GB Ram (wanted another 4GB or 8GB of Dominator but its a lot more expensive)
Aquaero 5 LT.
EVGA GTX680.
AquagraFX 680.
2 Inline Temp sensors + 2 Contact Sensors.

I only got 2 Inline sensors as they are not that cheap so I placed 1 on the CPU Inlet and the other on the Inlet of the Res. Hopefully I'll get readings of before and after the hot parts.

I would like to polish up all the metal as Its still covered in finger prints but as I keep it closed with no window I just cba. (unless I ever get round to sending off the panel to get it cut.)
Also been really tempted to get the internals painted but this might have to be left for when I do a chipset change.

Finally some pictures (sorry for the quality).

Bare GTX680 + EVGA High Flow Bracket (free)
imgp1097e.jpg


Fitted Block
imgp1101p.jpg


Leak Testing
imgp1102b.jpg


Inside Shots.
imgp1108m.jpg


imgp1110.jpg


imgp1112r.jpg
 
Back
Top Bottom