Distribution plates/reservoirs

Soldato
Joined
28 Dec 2017
Posts
8,923
Location
Beds
Right, as a chronic tinkerer and DIYer I have a new conundrum and I need YOUR help to scratch the itch.

I really think I need to develop and make a custom distribution plate. I love the idea of putting my fittings exactly where they're needed. It opens up options like fill and drain ports, parallel routes (if wanted), and can just tidy up the entire case.

I have access to a laser cutter. I'm familiar with working with acrylic, mechanical assembly etc. Here are my expected challenges:

- I need to make sure it's watertight. This is easy if I glue the parts together, but will be visible if using clear acrylic. I'd love to find a good adhesive process that can look OK. If not...

- I'll need to make rubber gasket seals. This will involve cutting a channel in the acrylic and using gasket strip. I'll experiment with this in the near future to see if a decent channel can be made using the tools I have.

- It needs to be useful! No point making a plain old reservoir unless it looks awesome, so I want to design something that serves a need in a particular case or project.

I'm open to input from everyone as to what I need to consider and how to go about it. If you have a build coming up and you'd like to collaborate, and test my prototypes, even better. I won't be happy until I've given this a go and I intend to learn a lot through the process. I'm ordering clear perspex in 6mm and 10mm thicknesses, let me know if you think I ought to order black or some other solid/transparent colours!

So what do you think? Am I barking up the wrong tree, or are you excited to see the results?

N.B. Mods, if this would be better suited to the Project Logs forum please go ahead and move it :)
 
Thanks fornowagain :)

I've used IPA on acrylic loads, always seemed fine. Acetone on the other hand is evil and for emergencies only. That said, I don't recall using IPA on clear acrylic yet...
 
Thanks chaps, tons of good advice there especially about different types of acrylic @LePhuronn. I'm by no means an expert with the laser yet (it's largely for my girlfriend's jewellery business) but happy to help get your stuff cut, I've done a few projects for mates including one fan shroud on here.

Regarding gluing, it would be that OR gaskets rather than both. I have some ideas about roughing out a curved channel using multiple laser passes but it's true, it might be too rough. That might allow slow ingress of water through capillary action, so not good. I'll have to do some experiments! Also trying different glue - solvent cement, a more goopy one like E6000, and proper capillary solvent stuff are all on the menu.

I also remembered a friend/colleague has a small CNC and wants to use my laser, so hopefully we'll do some skill exchange soon!

For now, perspex arrived! Just need to settle on a design which has a purpose - not much point just going "tank with inlet and outlet". Unless getting the most basic concept working and adding features seems like the safest bet?

Sg65L1Kl.jpg

zeTTum0l.jpg

9XSZWahl.jpg
 
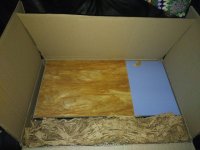
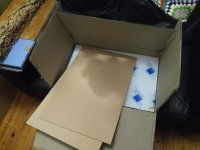
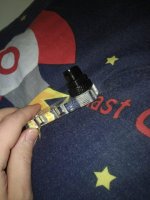
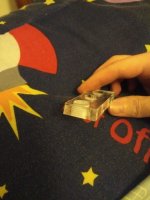
Right, cut some test pieces to compare gluing methods. Peeled the backing off and I'd gone and used half-frosted Perspex :mad: Cut a few spares out of proper clear for the second stage of testing, in the second picture. Excuse potato photos, my phone died on 26% battery as I sat down at the laser.
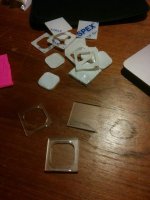
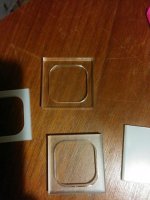
l5Y9j43l.jpg
NkyGHt9l.jpg

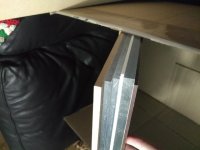
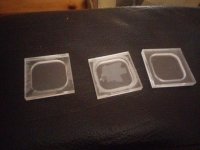
I tried using plastic weld solvent stuff, didn't seem to work that well I assume because the laser deforms the surface of the plastic slightly. Along the cut tends to be a slight lip or raised edge. So I tried sanding the sheet flat just to see how that improved the joint - much better penetration but still not all the way through. Then I tried cyanoacrylate (super glue) as it's something I'm very familiar with. This worked really nicely as it filled the gap neatly by just having a small continuous bead and not squeezing too hard. The picture shows the three test pieces in this order, left to right. Any other suggestions for glue?

AbZBiAbl.jpg

I also had some fun trying to figure out how to cut through 10mm Perspex - experimented with increasing laser power, and slowing down the feed speed. Out of 8 test cuts only the one that was both slowest and highest power even reached the back of the plastic. So I added some moar powah and halved the speed and cut some test squares! Definitely a little more learning to be done here.

My friend has offered to lend me his simple CNC - I will try and make a few files and if his cuts don't work out well, I'll take him up on the offer!
 
Yup, which is a bitch because I wanted to do my lighting rings in Opal 030, and it's been a pain to cut the thinner bits.

Still, I've changed plans now so going back to clear extruded, sanding it up with some 1200 grit paper and then wrapping in 2-way mirror film ;)
You been watching ALXandy's build thread then? That mirror was lush... ;)
 
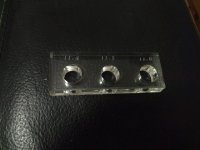
Cut myself some test holes to try tapping. The 11.5mm drill goes right through the front and is a loose match even on the smallest hole. Hopefully that's perfect to drill out to 11.8mm before tapping.

IF1eFcwl.jpg

In other news, the test sample I superglued has now got quite cracked and cloudy. Back to the drawing board...


Enable english subs.

Some info here that specifically addresses using a laser to create channels for the grommet and why they didn't do it as well as some useful info on the glue they used and what worked or didn't.

I haven't watched it all yet but by 4mins they were talking about using the laser which seems relevant given the discussion so far.
Ah that's really interesting, I'll have to check that glue out. Also surprised Roman doesn't use the traditional tapping method.

Learned one useful thing from that video: don't dig my tap handle out from my mum's house, just laser cut one! :D
 
Have you bought a cnc mill yet? :p:D
Ooh you absolute git, I spent all afternoon shopping for machines :D

I finished a project with a friend over Christmas and we're thinking about spending our earnings on a CNC or other tools.

I'll definitely be progressing the laser designs too though! It's building my skills up. @String, fancy planning out a simple design you'd like to try out? Anyone else itching for a rough prototype?
 
Me me me me me!! :p

I got some stuff 180x180mm in 5mm acrylic and some stuff 168x168mm in 3mm acrylic I need doing. Essentially just some glorified lighting rings with some internal mounts, but there are some tight tolerances.

How much? Posting to me from London is the worry though, they might be a bit fragile and I don't know how much my local guy is charging me yet.
Trust me some details and i can have a look at size, complexity etc. Have you got CAD files fairly ready? I have 6mm clear Perspex, if that'd do it :)

Won't be that expensive as I still consider most tasks good for practise!
 
I've figured you can use acetal for black or white parts. That apparently lasers and mills well, so I'll look into getting some.

@LuckyBenski the ultimate goal for me would be something to simplify my ITX setup, but I can test anything you like. I've got enough spare kit to test on a bench for weeks if necessary.

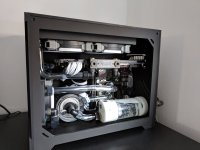
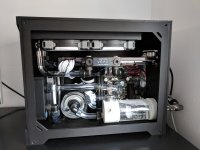
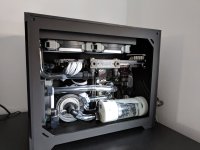
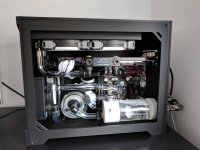
Does this build give you any inspiration?

gpjoOhF.jpg

tht6f03.jpg
I wonder if a plate could be fitted into the lower half of that window? Direct joins to the radiator and CPU outlet with a channel, another channel directly joined to the pump and CPU inlet. And a third joining the pump inlet and the external port. Are you still hooking it up to the external radiator setup?

We'd have to figure out how to do up fittings behind the plate with zero hand space... Maybe impossible?

Just an idea :)
 
You'll need a fibre laser to cut metal, although CO2 lasers about 150W can cut 1mm steel with serious oxygen assist.
Yep just read up on it and learned this. Thanks :)
I’ve got a number of designs, too big for A4 but if you want you can knock up a basic res in CAD smaller in no time.

Can your laser cut aluminium? (Thin) in need of some discs for fans which I was just going to get done with a new board tray for a few quid extra but since you owe me £4 and a coffee :D
You drive a hard bargain :D I'm looking into adhesive sheets of foil type stuff... Main supplier requires account activation before showing prices so that's 24 hours to wait!

My laser does 300x600mm but the CNC mills I'm looking at are closer to A4. I'm gonna try at least one or two laser cut ones before I'm ready for milling.
 
Last edited:
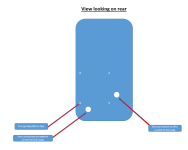
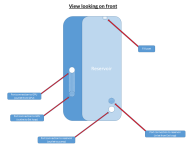
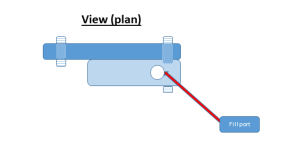
Satin black would be fine, although the reservoir section would have to be clear acrylic in order to monitor water level. The actual volume of water isn't too important, as long as the pump has a gravity fed supply for initial filling. The filling of the current system is a real PITA.
I figured something like a clear piece sandwiched between black could allow checking of fill levels. Worried it might need an LED to see it though. Will mock up some pieces. In the meantime can you sketch up the dimensions of the 3/4 fittings and main plate sizes? I also feel like you've got the inside and outside reservoir ports' heights mixed up, maybe I've misunderstood.

@Smffy all the maker spaces seem to be in zone 2/3 like Hackney and Willesden sort of way :( 4D Model Shop and Cut Laser Cut are zone 1 but services rather than workshops. Yep, like a vinyl type thing but obviously needs to look good.
 
Back
Top Bottom