Dripping with style or floody disaster?

Given your location, you're going with..... an Italian flag colour-scheme? :p

Silly question for you: I'm looking at an Enthoo Evolv ATX....but I want to stick a honking great rad on the off-side panel. I'm thinking a Mo-Ra 420 with 4x320mm fans...cos the only thing that beats overkill is absurd overkill :D
The thing that worries me is that the side panel (the cable-spaghetti side, not the window side) seems to be held on with only a couple of pins at the back and some friction clips to hold it closed. Is it stronger than it looks in the pics or if I hang about 8Kg of rad on it is it just going to fall off? :eek:

Yep, going for a pasta & meatballs based paint job, with a few slices of pizza thrown in :p

Well there's overkill, and then there's... Erm... Yes absurd overkill! :D

The side is a lot stronger than it looks, but the only thing that would worry me is whether the weight of the rad would be enough to keep un-clipping the top pins and pinging the door open. I just tried opening the door and putting a bit of downward pressure & twisting it and it's definitely sturdier than it looks so I personally reckon it could take the weight, just as long as it doesn't keep opening the door... You could easily add a tiny screw to the top and bottom of the panel at the front edge though to solve that, and also add a bit more strength to it.

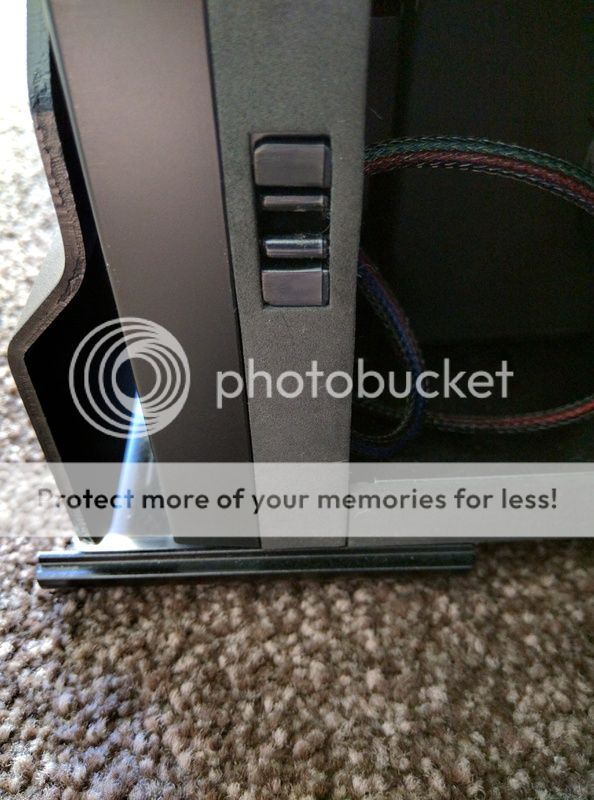
The pins holding the door closed, a lot stronger than they look

IMG_20160225_091358.jpg


IMG_20160225_091425.jpg


These feel a bit 'loose' as you hang the door, but seem to be able to take a fair amount of force without any give
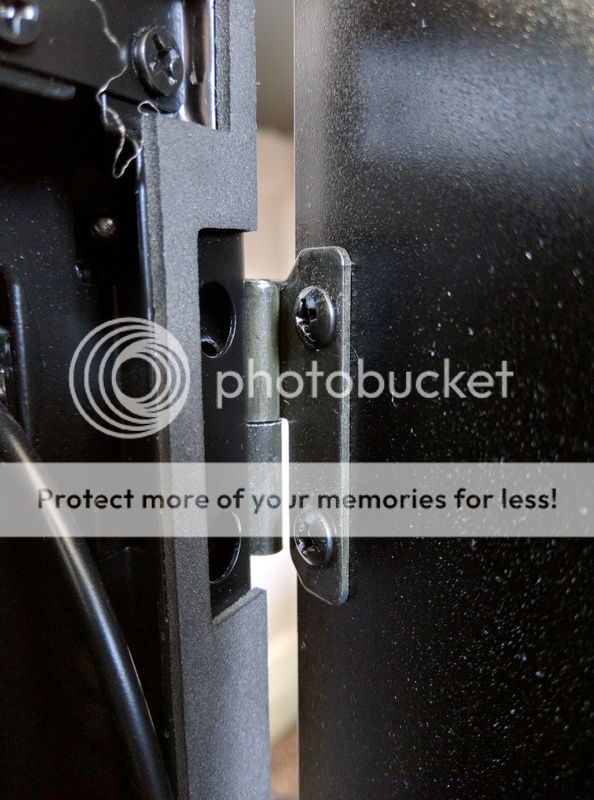
IMG_20160225_091549.jpg


Door also sits on a fairly long ledge on the feet, which should help take the radiator weight

IMG_20160225_091214.jpg


Could also add a screw into this panel to keep it closed :)
IMG_20160225_091414.jpg


Hope that was of some help, now I really want to see if it works!! :D
 
Thanks OJ those photos are really helpful. The ledge should, as you say, take some of the weight when it's closed. Looking at the sockets for the ball-clips, it looks like if they were over-loaded weight-wise it might actually keep it shut as the ball might catch the metal...or perhaps could be made to. The other option would be to ditch the door completely and hinge the entire rad on in its place...which would be great but I'm not sure I could make it look neat. I think I'll have to get a case and a rad ordered and see what happens. Just have to work out how to set up the QDCs so the door can be opened once the rad is mounted....otherwise it's the watercooling equivalent of painting yourself into a corner! It's bad enough that my current res mounting point means I can't install/remove and PCI-E cards without removing the res!
A dual DDC is a legitimate business expense, right?! :D
As I should be able to do most of the work as I have time and without instantly trashing my working rig, I might even build-log it! :eek:
 
...and with hard tubing....

Now there's an idea that's been nagging at me for a while! I would be able to pretend that it's more durable for the external runs....but I'm hoping to keep the tubing internal if possible. Maybe I can blame it on being 'forced' to make it neater since the new case has a window! :D
Oh, we do like to make life complicated for ourselves!
 
There's definitely got to be a build log, even if it's just to show off the mental cooling :D

That's another good option ditching the panel and mounting the radiator direct, although could be a hell of a lot of work to make it look right... Try mounting it on the panel first then go direct if it all goes **** up? :p Pretty sure anything is a legitimate business expense as long as you get away with it!

Be rude to go through all that trouble of mounting the rad and then not use hard tubing... <- excuse made ;)
 
Sooooo, very small update once again to project Went Better Than Expected But Still Tinkering: New fans for the front rad! Crazy I know...

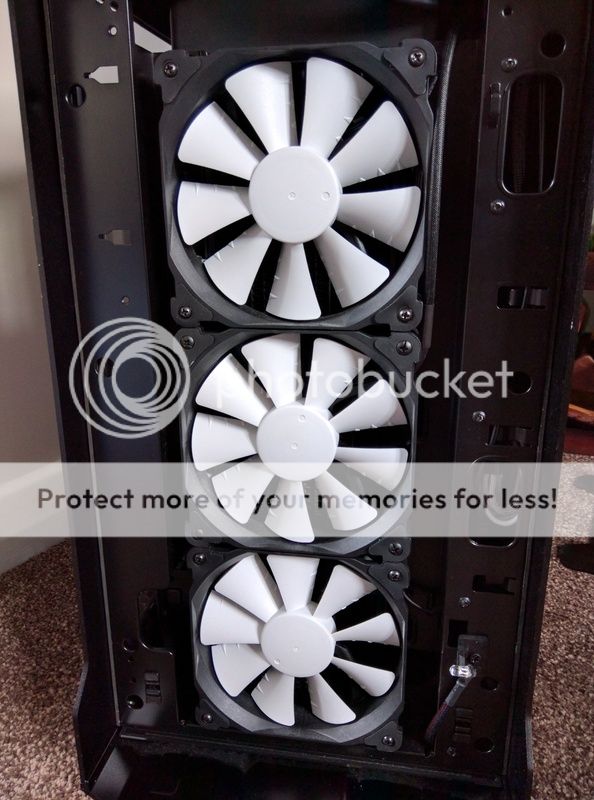
These fairly decent fans coming out:

My basket at Overclockers UK:


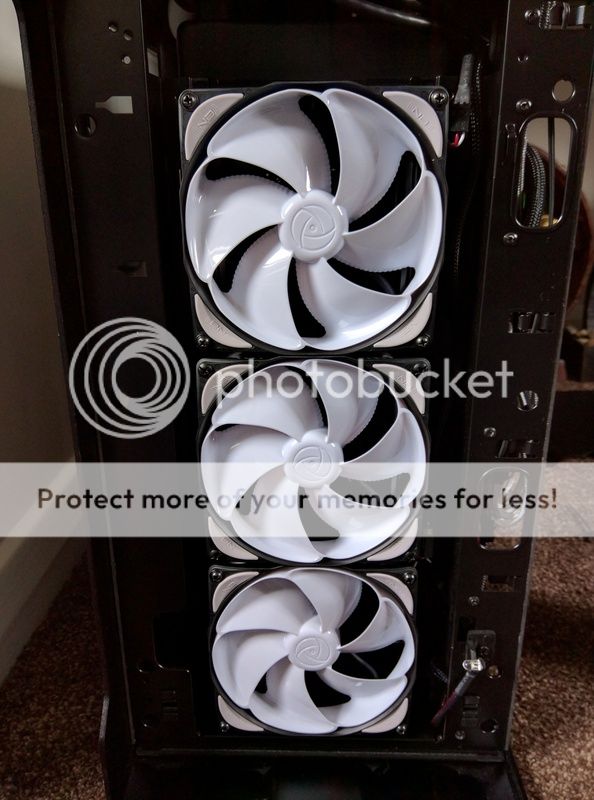
And these going in to take their place:

My basket at Overclockers UK:


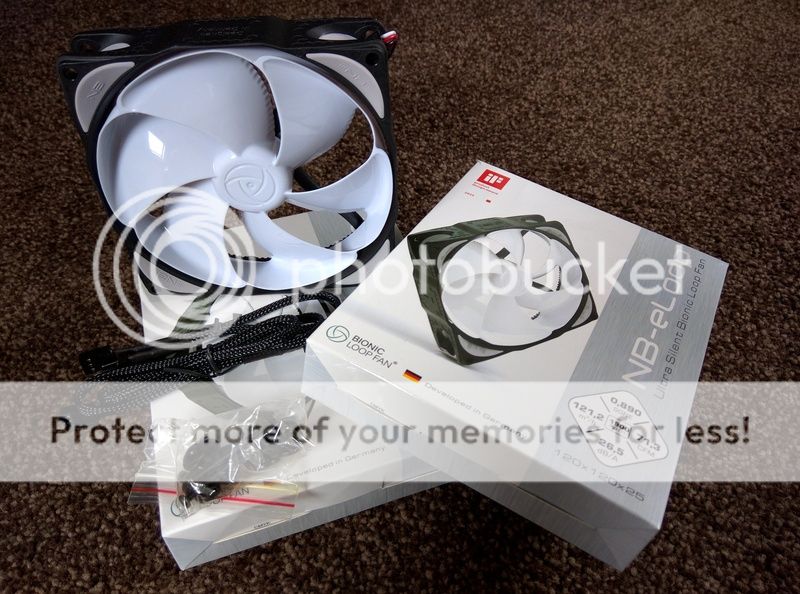
First impressions of the Noiseblockers is very good, especially liking the different length cables supplied. Makes no difference in this build but in a smaller case it's good to have the option.

IMG_20160421_141143.jpg


Time to switch em over :D

OLD
IMG_20160421_141303.jpg


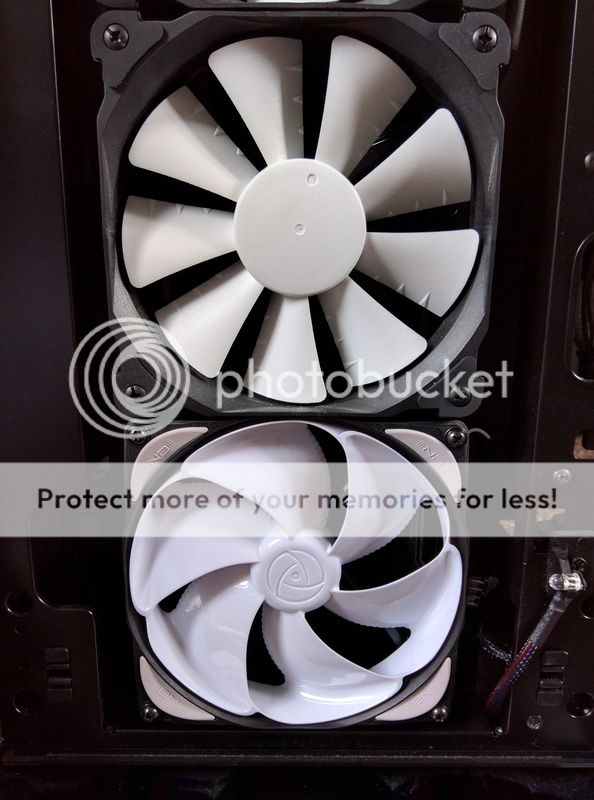
COMPARISON
IMG_20160421_142032.jpg


NEW
IMG_20160421_143641.jpg


So the million dollar question: What are they like?!

Well, with the fan curve set slightly lower to keep noise levels approximately the same as before, they push out A LOT more air. Yes they're still running a bit faster so they should, but the air / noise ratio is massively improved. Good times! :)

Maximum Temps

Temps measured after properly hammering it on Project Cars in a thunderstorm, the one game / setting I've got that absolutely smashes the temps up.

Water 41°C+ > 35°C
CPU 60°C > 54°C
GPU 40°C > 36°C

Also had the benefit of knocking a few °C off both the motherboard temps and the M.2, so can't complain at that!

The only slight problem? They do ramp the ol' Aquaero up to a not too insignificant 75°C! Oh well, I'll take punishing the Aquaero a bit more if it means the CPU, GPU, MoBo, M.2, my ears etc all benefit :D
 
Toasty opamps!

Aquaero 5 & 6 manual said:
In case an output amplifier temperature rises to ca. 95 °C, the output is set to 100 % power. After cooling down to ca. 70 °C, normal operation will resume. If the temperature rises to ca. 100 °C, the output will be permanently disabled. To reactivate the output, the aquaero (or the complete PC) has to be disconnected from power for a short period of time.

Loads of headroom :rolleyes: :D
*cough* heatsink *cough*

You'll be amused to know that my Evolv is currently in more pieces than I care to count. It's in process of being SketchUp'd so I can design some acrylic porn to replace the PSU shroud and build pump-top and pipes into it :D
 
Haha no worries at all mate, still a good 20°C to play with yet :cool:

I would LIKE to put a heatsink on it, but knowing where it's hidden I just know it's going to be an afternoon of hassle trying to get to the bloody thing to do it, then an hour of trying to cram all the cables in again!

Can't beat a bit of acrylic porn, just wish you'd hurry up with it so we can see how the computer attached to the radiator performs :p Haha that will look proper tidy though. If you're replacing the whole PSU shroud / floor have you thought about putting an EL panel underneath to glow through the built in pipes as well? Could make quite a cool light box... *Gives you more headaches* :D
 
Good ideas BEFORE the design has been cut aren't a headache; it's the "if only"s after the fact that cause grief!

Hadn't thought of an EL panel to be honest but I was planning to light it from below with LEDs if there is enough depth. Plan at the moment is to have only the 'active' parts of the block visible with the rest hidden by a black frosted acrylic shield. So you'd see a clear acrylic channel set into the black surface and lit from below. Also pump top would be visible and lit - probably edge lit.

From the end of the channel some straight hardline (I *WILL* get some bent in this build now I've bought the heat gun!) will rise and connect to the graphics card. I should be able to light that vertical riser from below which I hope will look good. Toying up whether to go 12/10 acrylic or 16/11 glass for that riser....being as it's straight.

Have currently got all the panels modelled except the backplate (motherboard mounting) and I'm most of the way through the PSU shroud. Once I've got that done, I can start modelling the new stuff :D
 
I've always liked the idea of using EL panels as they're stupidly thin and can also be cut to shape, so just look stupidly easy to work with. Got to be worth picking up a cheapo one off eBay just to test it out, only cost couple of quid if you end up binning it and going LED :)

Damn, is there anything you're planning on keeping? Sounds like a proper 'lob it all out and start again' project! Liking the sound of those plans so far though, just trying to visualise it in my head whilst gormlessly looking at mine :D
 
I'll definitely have a look at those EL panels. Like you say, worth a go. Plans are somewhat fluid at the moment - and 'plan' is probably an inaccurate term for anything on this project! For example, I've bought the pump top, installed it on the pumps and now plan to replace it with acrylic. I've gone to the effort of cutting out the Aquaero shape and now plan to replace the metal that it's mounted in. I'd like to build the filter into the block somehow but if I do, I don't think I could realistically keep the taps that let you stop the flow either side to clean the filter - not without some fairly serious 3D milling to very fine tolerances and tapping too.

I'm thinking the Aqualis res might be at least mounted through the block too. Keep the electronics (fill level sensor and temp sensor) hidden underneath and have the lit glass bit above. Something to work out once I have a better idea of layout and the amount of space I have to work with.

The Aquaero split is going somewhere....not sure where, but it's going! 2mm pitch pins are really hard to get hold of. Have some from Taiwan but not sure they're good enough. Also managed to order some 2.54mm stuff accidentally. Who puts a listing of an identical looking lot of 40 x 2.54mm pins right next to the lot of 20x 2mm pins and doesn't list it in the title *sigh* May also have found a source in Hong Kong as it turns out that 2mm pitch is what USB3 internal headers are.....albeit 2x10 rather than 2x12. The pictures look like better pins though so we'll see what turns up.
 
Haha you're going to end up with enough spare parts to build him a little brother at this rate! Still, if you're going to go through the effort to get the acrylic custom made with pump tops etc built in then I guess every other little detail has to be bang on, otherwise it could let down the block of acrylic awesomeness!

Never bothered with taps on my filter as I guessed I'd just clean it when the fluid is changed, but after seeing some of the issues others are having on here it may get checked a bit sooner than that...

It's seriously annoying isn't it when something as daft as some 2mm pins can cause so many issues. Easier to get complicated parts custom made than get some simple 2mm pitch pins :D

Still, once it's finished you'll be happy you took the extra time to get it right :)
 
The filter I've got is the Aqua Computer one that you can see the mesh (and underlight it if you can find a G1/8 led module!) and the taps are part of it. May abandon taps and keep the mesh.

Little brother? What, like an itx version? :D
Just need to find someone with an Evolv who wants to buy a copy to finance the block! ;)
 
Indeed, can't have all those spare parts and not be tempted to build a mini me :D

Oh dear, are they THAT expensive to have made? Would love to do a few proper custom bits myself next time but have always been put off by price, even though I have no idea how much these things actually cost! If you have to ask etc :p
 
To be honest I'd got it in my head I wanted to build something as a project...rather than just needing something to work/game on. It's the only time I've been building something for myself that has overlapped (mostly) a fully functioning PC that I'm (mostly) happy with - at least performance wise.

Cost wise, I don't know exactly yet but I have ball park figures and the suggestion that building in the pump top will add to the cost. It's enough to proceed with designing it without thinking I'm wasting my time. I'm not averse to sharing my design (once tested) if someone wants to clone/adapt it though.

Edit: ok, that's in danger of sounding like I've disappeared up myself. I mean that if someone wants to use my model as a known good (hopefully!) starting point, they'd be welcome.
 
Last edited:
Same here regarding having a working PC, usually build a new one in a massive hurry when the old one packs up. Until now I've always needed it for work (this is my first gaming only one) so usually faster / easier / cheaper to build a new one ASAP than spend days troubleshooting the old one whilst losing all potential wages.

If I had the cash to build another I'd happily steal some of your plans as a starting point, obviously have to make a few alterations though just to keep the guys at Parvum on their toes :D

I know you should never ask about money, but on a scale of 'pleasantly surprised' to 'holy ******* **** ****' just how bad is the custom acrylic? Bearing in mind I'm happy to buy a 6700k and 980Ti but moan about the price of water cooling fittings (it's value, not price!) :p
 
Closer to the former from initial enquiries. Part of me is obviously thinking "ouch" but looking at it in terms of their time, experience and materials, it's more than fair. It's always going to be the case that a one - off is more expensive (both in time and cash) than repeating a previous effort. If I were to claim that my plan will be perfect, need no checking, and just be a case of loading it onto the CNC, I'm fairly sure I would be....wrong. There's likely to be an amount of checking and probably remodeling required - if nothing else, the tool-path needs to be calculated from the model. Loom at me talking like I've half a clue what I'm talking about! :D
Anyway, long and short of it is that I want something special but I realise there's going to be a price tag. For the amount of work involved I suspect it's a bargain.

When I've finished the 'spares' will likely go towards my wife's PC (we both largely work from home) as it's noise drives me a little crazy! :eek: :mad: ;)
 
That's the way I've always looked at it tbh. I originally thought the watercooling fluid was a complete rip off, but once you've seen the amount of work guys like Mayhems put into developing it and the amount of extremely expensive kit required for the research it suddenly looks a lot more reasonably priced. Some of the Bitspower fittings on the other hand... OUCH! May have to give Parvum a shout when I finally scrape together some more funds for the next build :D

Nothing worse than a noisy PC, especially when it's idle. Personally don't mind it cranking up a bit when I'm gaming as the speakers are up loud anyway so drowns it out, but bloody annoying when web browsing!
 
Back
Top Bottom