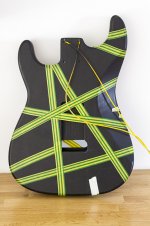
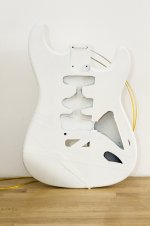
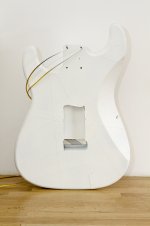
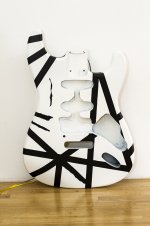
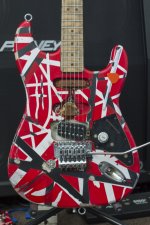
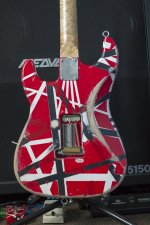
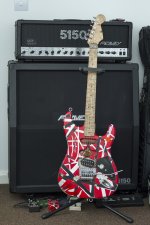
*** EVH's guitar building thread - Frankenstrat ***

  • Thread starter Thread starter Deleted member 651465
  • Start date Start date

Deleted member 651465

D

Deleted member 651465

Hey all,

I'm back with another custom build guitar thread. This one is a bit more involved :D

For those who didn't see the last one, here's a link to the thread

This time, the aim is to build an exact replica of one of the most famous guitars in rock history. The black, white and red "Frankenstrat" famously created and used by Eddie Van Halen.

CyLy9.jpg

I shall post more pictures and possibly a how-to as I go.

There are many replicas and copies of this iconic guitar, most notably the Fender official replica, retailing for a cool $25,000. Most come close, however most (including the official replica) are not 100% accurate in some way. There are some amazing builds on halen.com, where I've been trawling for inspiration and I have a massive library of official shots as reference.

I don't have a budget for this build, and I want to get the best parts, which might mean it takes longer to complete, but then, I'm in no rush and I want to get it as close to the original as possible without spending stupid money.
 
Last edited by a moderator:
CoM5D.jpg

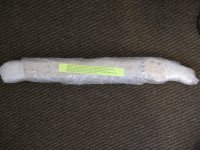
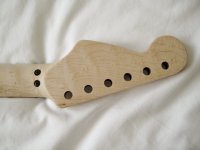
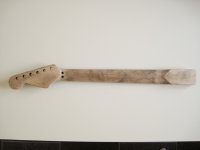
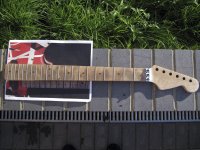
I only currently have the neck. It's taken 4 weeks to get here from the USA :(

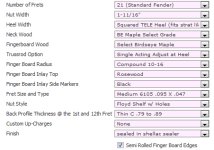
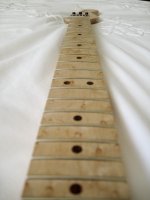
Bought on musikraft.com for $320, it's made to the exact specification of the original Boogie Bodies neck used on the current Frankenstrat. 2 piece birdseye maple neck with no finish (ignore the bit in the pic that says shellac finish, I ordered it unsealed because I want to relic it).

It is considered the most accurate neck for this type of replica, however there are a few other alternatives if you search around. Most notably you can order a neck from Warmouth, divebombinc and K&Eguitars, which are all American suppliers.

Here is the spec for those interested..

9Wsvc.jpg

Update: When I ordered this neck there was no option for the mounting holes to be drilled, although they've since added this feature. Bit of a challenge, as now I have to drill and thread the neck which could go horribly wrong :p
 
Last edited by a moderator:
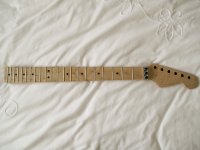
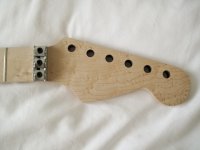
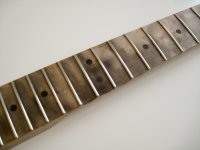
Here's some more shots of the neck, now it's unbagged!

omhvA.jpg

t9uNn.jpg

GZoaK.jpg

I am not a luthier, so I opted for a floyd nut to be pre-installed.

Below, you can see how pristine the neck looks without a finish. Almost a shame that I'll have to relic it, there's a good grain on it.

oJWPd.jpg
 
Last edited by a moderator:
V2MzG.jpg

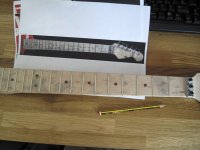
This step isn't exactly in the manual, but I've heard people use graphite powder to dirty up the fretboard.. I don't have that, but I do have a pencil! :D

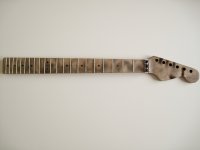
Using a printout of the original, I carefully shaded the areas I wanted to dirty up, then smudged them in to the wood with a damp cloth. This is only a preliminary step. What follows can only be described as "original".

P7rwu.jpg

I took the neck in to the garden and rubbed it full of mud to try and embed as much dirt as possible. The idea behind this was to emulate the natural accumulation of muck that would gather on an unfinished neck.

It is worth noting that the mud looks a lot darker here as I just applied it and the wood is damp. When it dried, it looked much lighter and I was able to wipe the excess off with a wet wipe, to get the wear just like the picture :)
 
Last edited by a moderator:
TuMg3.jpg

Ladies and gentlemen.. the first packet of cigarettes I've ever bought.

siWXl.jpg

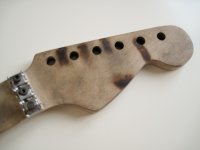
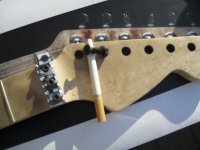
Eddie had a habit of lighting cigarettes during a show, then leaving them in the headstock, which meant that from time to time they burnt the wood. To re-create these burn marks, there's really only 1 way! :eek: I used a small bolt to stop the cigarette from blowing away / moving.

I will say, trying to keep the cigarette alive was harder than I had anticipated. It may be due to the cheap cigarettes used, but they kept extinguishing themselves on the wood.
 
Last edited by a moderator:
VZN08.jpg

Here you can see the results of the cigarette burns.

I actually used a red pencil to colour the wood, as some areas just went black, but 60% of the red is actual scorch.

sC9Kf.jpg

IydOr.jpg

0Nt62.jpg

Bare in mind, some of the dirt will rub off when applying a finish to the neck, hence why it appears I've layered it on. I also banged and dragged the neck around the patio, to try and re-create some of the years of wear that the original guitar would have endured. I still have more of that later, once the sealer is on.

rRbhd.jpg

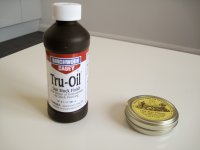
Speaking of which.. I've gone for the tried-and-tester gunstock Tru-oil. I intend on waxing the rear of the neck, so it plays fast, if you're wondering why I have wax / polish. I'm just waiting for the first coat to dry, then I will buff it with steel wool (0000 grade) and apply a second coat to get any bits I missed.

As I said above, most of the grime wipes off when you apply the finish, so you really only end up with the worst of the muck left on the neck. I suppose if you sanding the neck lightly you could fine tune the appearance, but I'm happy with the finish on this.
 
Last edited by a moderator:
Sorry for the lack of updates guys, but I'm hoping to update the thread with more progress as things are back on track.

Essentially, in August 2011 I ordered a custom guitar body for this project from a website, http://www.divebombinc.com based on the good words from members of the halen.com fan forum.

Around 2 months later (roughly when I started the thread) I was expecting the body.. which never arrived. Turned out the guy behind the website, Kyle went AWOL with mine and several members money and disappeared from the face of the earth :mad:

As the 28 day period had elapsed since I'd placed the order PayPal wanted nothing to do with it and that was the end of it, as far as they were concerned.

Approx 12 months later (August 2012) I had an email from Kyle stating that he'd fallen under the amount of work and had no funds to fulfil my order, but he was hoping he could get back on track and eventually fulfil my order. To say I was annoyed is an understatement, but I remained polite and told him I'd rather a refund and I'd go elsewhere.

He never replied. Several emails to his account and through his website also went unanswered.

Then, Christmas 2012 he emailed me out of the blue to say the body was ready and that he would be shipping it via UPS for delivery "soon". He'd promised this to several members of the fan page too with limited success, so by this point I'd lost faith and thought "if it turns up.. it turns up" and resigned myself to the fact that I was scammed and I'd just go elsewhere.

Anyway.. 1 and a half years after I originally ordered, a body DID arrive.

hETXo95.jpg

mlpo9l4.jpg

4Jr1Yq3.jpg

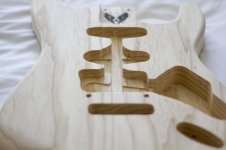
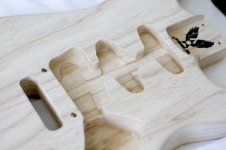
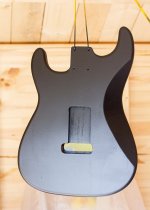
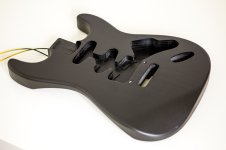
As you can see, it's been routed to follow the chilsed / butchered nature of Eddie's original, and has the "ghost routing" for the original pickups.

You can also see where I've pre-drilled for the pickguard around the tone control chamber.

I know it was late, but Kyle did a great job! The body is 2 piece Northern Ash (like the original) and the flame is incredible. Such a shame I have to make it look so bad. The rear is routed for a big block original floyd rose. The eagle eyes will have spotted that the neck pocket is not squared like the neck, and this is deliberate.

Kez96QI.jpg

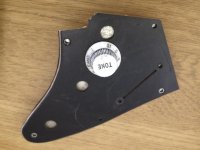
Also, here is a picture of the pickguard that I had made up in the time between ordering the guitar body and it actually arriving!

It's a 500k volume pot, installed in a cut down black pickguard, and scratched to hell and back. I cut the pickguard down with a junior hacksaw and finished the edges with some wet and dry.

For the grubby nature of the tone control, I simply rubbed the knob in some dirt (ooo eer!) and wiped the excess off. I then used a sharp craft knife to do some squiggles on the pickguard and covered the back with some aluminium shielding tape.

6eya7SA.jpg

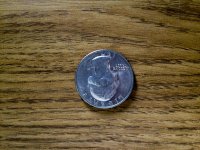
Suprisingly, this original 1971 american quarter was easy to find on ebay. I will need to drill this for mounting on the body, but it's also one of those essential pieces, if you're building this replica.
 
Last edited by a moderator:
On to the paint!

PTMXlyX.jpg

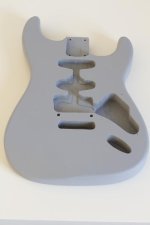
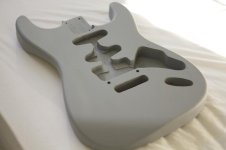
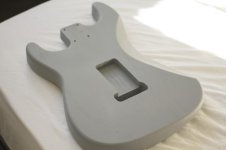
I prepped the body with some Plastikote primer spray can, just to seal the body. I rubbed it down once or twice to remove the excess grain and re-sprayed to truly get a uniform finish.

My father has access to some proper spray guns, but I deliberately chose to use the spray cans as that's what Eddie did. See the pattern here? ;)

lHdhqiV.jpg

LHoipgw.jpg

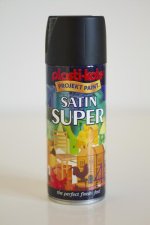
In doing my research I couldn't find a clear answer.. Gloss or satin paint. All I could find out was that the original guitar was never finished with a clear coat, so I erred on the side of caution and went for satin paint. I can always coat it later if the finish looks off.

Below is a shot of the can of black I'm using. If this turns out alright ill get the red and white too.

euWBQ1v.jpg
 
Last edited by a moderator:
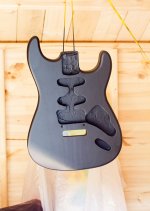
Time for more updates. The weather has been kind so I've been back spray painting again.

KYpLFNI.jpg

BBkXvNG.jpg

The satin finish is actually really nice. I'm happy with how it turned out, so I've now bought the white and red.

Here are some links to the paint:


The only part not sprayed black was the neck pocket, and I stuffed some paper down the floyd rose mounting holes, as it will inevitably bugger about with the mounting/fitment of the bridge.

FdpqnVn.jpg

This part took so long, I almost decided to wait until it was finished and keep all the paint updates together.

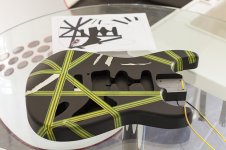
I found a brilliant template on halen.com, by someone more dedicated than I! Essentially, he has photoshopped a picture of the original guitar, used the lasso tool to map out the lines and done this for the white, black and red layers! All I did was print it off for reference.

That said, it was ideal when trying to position the tape, but my original plan of measuring the original template and going 1-at-a-time to get the positioning on the real thing was cooking my head.

So, plan B.... To make sure some of the unique taping was accurate I lay masking tape on the screen of the laptop, zoomed the template so that the tape was the same size and traced each unique piece on to it.

I didn't want to use masking tape for the main stripes as when I first began there was a lot of trial and error and it loses stickyness very quickly. All the electrical tape was 1 continuous strip.

ivTTGts.jpg

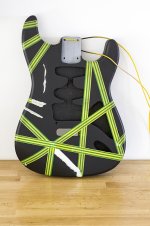
A closer look at the stripes for the first phase.

dVTHF6G.jpg

ynegyZl.jpg

Sorry no shots of my ghetto spray booth this time!

I would say, if anyone is attempting to spray white on black, be prepared for the long haul. I lost track of the coats, and it took the better part of a week to get a full coverage :(

DHYN2hv.jpg

7hrzT8g.jpg

Once that was dry (approx 36hrs after the final coat), I peeled the tape off.

I knew there would be places where I'd have to touch up, but it didn't turn out too bad really. I think what I will do, is use a trick I saw a modeler use - fill the spray cap with black paint and use a small brush to touch up.

Wl6QapK.jpg

xW7NioH.jpg

..and that's as far as I've gotten.
 
Last edited by a moderator:
Sorry for the lack of updates, life gets in the way.. Namely I found a new job, graduated from my distance learning PgC (distinction w00t!) and generally been busy..

Anyway, I finally got round to sanding down the gradient between the stripes, then "relicing" the body. I warn those with a nervous disposition to look away now :eek::D

23mprao.jpg


1zny98z.jpg


bebtz6.jpg


2629x1h.jpg


A lot of the wear and tear will be covered with the red paint, and there will be additional relicing to do after the red paint, but I'm trying to maintain an authentic process. The history of the original guitar meant EVH used it in the black and white scheme for a while, and it got ruined through gigging, plus when guitar manufacturers started copying the stripes he just taped it up as-was and sprayed over the existing damaged.

All the marks and scuffs were achieved by using a metal file and some rough sandpaper. In hindsight I shouldn't have used an undercoat, as you can see it where I've not gone far enough. As I said, this is more a preliminary process, so I aim to finalise the relicing after the red paint coat.

I also filled the humbucker pocket with dirt, as that will remain white whilst the other cavities are red, so I didn't see the point in dirtying those up, just to spray over. Plus I didn't want issues with paint adhesion for the red.

23jr8qt.jpg
 
Last edited by a moderator:
It's been a while since I did anything with the project because of a few personal issues, so I thought I would update the thread with some pictures of what I've done since the last update :cool:

First off, I started with a masking template. I also have one for the rear, and about 200 reference images to compare to :eek:

XNlYaDf.jpg

Then begins the slow process of cutting, sticking and swearing! All the tape was positioned using my eye which is probably half the issue :o

I used blue electrical tape to mark out the thickest lines, and I also used 3mm and 6mm detailing / pinstripe tape. The craft knife and cutting matt are essential.. a few beers optional!

2s1b291.jpg


I used an iPad as my reference material so I could zoom and scroll quickly between reference pictures. To get the odd shapes, I free-handed pieces of tape and layered them on top of each other, to build up the shapes I wanted.

2hx2gzp.jpg


9sgrx0.jpg


You may wonder why I bothered relicing areas that I intend to spray over... these areas will needed to be re-reliced and masking all the worn areas was scrambling my brain!

zxjzvk.jpg


I'm just spraying the final coat of red, so I shall update with the finished article soon!
 
Last edited by a moderator:
Ok, so the paint phase is complete!

I have been using the same branded spray paint cans mentioned earlier, and I couldn't be happier with the colour match :)

Using light coats and large passes with the can, I was able to completely cover and spray the red coat in about two hours. I gave each coat about 10-15 minutes to dry.

28typ3q.jpg


I got a bit excited and started peeling the tape off the back, before I took a picture, oops! A trick I've been using throughout the build is to peel the tape off when the paint is still slightly tacky, so that you have a bit of play. Sometimes if you leave the paint dry completely it can flake or actually make the tape harder to remove.

The pinstripe tape is razor sharp, although there are 1 or 2 blemishes near the neck pickup cavity that I will need to tidy up with the craft knife and some light sandpaper.

2mni3gw.jpg


Here he is.. as I said.. very happy with the final result.

Notice how the black lines still show through under the red. It's subtle, but it makes it.

azbgq1.jpg


j7ycud.jpg


2myrgvc.jpg


xn4swp.jpg


I still need to relic the body one more time, and add the hardware.

I'm thinking of installing a push-pull pot in the volume knob and having an active neck pickup (unlike the original one EVH had). Still undecided, but it will open the door to a variety of sounds, and ultimately make the guitar more usable.
 
Last edited by a moderator:
Great thread, keep up the good work.

It makes my cry when I catch on of my guitars, id be a nervous wreck doing that to one :)

It's for the faint of heart. I've been relicing the red coat today and at one point I thought I'd ruined it :eek:

This is epic! What a journey, can't wait to see it continuing progressing into the future (hopefully not another 2.5+ years till the finish line!). Anyway looking great so far :D

Thanks! I've got a load of the parts waiting here, but I need the Floyd Rose Original locking tremolo and a neck pickup.

The guy that makes the neck pickups is having eye surgery, so he's quoted July as the earliest I could get one (import from USA), but I should be able to make good progress on the rest of the build until then.

The most annoying thing about the build is that nothing is straight forward. You can't just buy a humbucker and whack it in.. you need a long legged baseplate (well for the pickup I've bought, anyway), the input jack and hardware needs to be reliced and there's a load of faffing with the tuners. Not to mention the neck I've got has no mounting holes, so that will need to be drilled before it can go on :o

I'm seriously considering getting the guitar professionally set up when it's all up and running. Since the last update in 2013 my 5150 MkII amp broke and by luck I ended up finding a guy locally that repaired it, for a tidy fee. He had so many awesome guitars and was in to weird and wonderful setups with sustainers, kill switches etc. We got discussing the build and he was interested in getting involved; in fact he was the one that suggested a push-pull pot so I could utilise a working neck pickup.
 
Last edited by a moderator:
Thanks for the kind words guys, some minor updates :)

This is the current state of the body. There isn't much work on the front face of the body in terms of relicing, but there's some nonetheless.

The biggest change here was that I've smeared dirt in the pickup cavities. Basically, I went out the garden with a cup, scooped up some dirt and painted it in to the cavity with a small paint brush. Left it to dry and BOOM!

2ih1b36.jpg


The rear on the other hand.. This required quite a bit of work. I may have taken too much off the bottom edge (the top when you're looking at the picture in this orientation), but honestly, there's so many different "stages" of wear in the reference pictures I'd say you can't really be too picky.

2hqaudy.jpg


This is the extent of the relicing on the edges. I'm happy with this because from my reference shots, this seems to be pretty accurate. The paintwork was utterly destroyed before the red paint went on and I do wonder how it got so bad.. EVH must have dragged it behind the tour bus or had some seriously questionable guitar techs! :eek:

15wgv9k.jpg


smt5og.jpg
 
This is the volume control and what's left of the scratchguard. Notice the signature "Tone" knob. A bit of dremel action, some wet and dry sandpaper and some boot polish and you've got yourself some aged hardware.

For anyone wondering, the volume pot is a 500k.

kaqn1s.jpg


Other hardware has begun arriving this week, such as the Shaller mini m6 inline tuners. So shiny! It's a shame they're going to have to be aged too!

24xmnhv.jpg


The guitar was infamous for having only 1 working pickup (in the bridge position). To throw copy=cat builders and manufacturers out, EVH put some weird hardware on show. A 5-way CRL switch is present in the middle pickup position.

I picked up this switch from eBay.

k0r96f.jpg


Of course, I couldn't have a shiny switch in the guitar. I dunked the switch in a cup of bleach for 10hrs and left salt on it whilst I went to work. This basically rusts the switch beyond all recognition.

I will still need to remove the salt and paint the circuit board part of the switch, but the metalwork has aged well. Sorry no pictures of the "finished" switch, as I need to solder some wires on.

1113vrb.jpg


I decided to go with the official EVH humbucker because, by all accounts, it's a pretty awesome pickup. I also considered the Bareknuckles VHII pickup but I am after an early VH1 tone.

smplpf.jpg


Of course, I also aged this. The story behind the wear marks is that the Gibson PAF pickup EVH installed sat so close to the strings they actually worn away the pickup cover.

I can't stress how scary this was to do to a new pickup. Somewhere a baby kitten died as I did this!

im2x6f.jpg


The final piece of hardware to arrive (and to suffer the wrath of the sandpaper) was this Original Floyd Rose tremolo.

28h3pkj.jpg


Look how pretty it is...

2qa8v9k.jpg


10 years wear in 10 minutes. Also a very scary process destroying a brand new Floyd Rose. Possibly more dead kittens.

30xbpxl.jpg
 
Just in case I missed it, but was this ever finally completed? I can't finished pictures of t he finished article.

Holy thread necro Batman!

In a word, no... it was not finished... until now ;)

Mainly because I sat waiting for parts, but also because of Customs losing items and the dispute over the lovely fees that Royal Mail decided to add on.

f3oMEVz.jpg

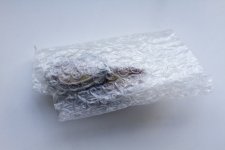
So here we go, 4 years in the making and I can finally reveal a lovely padded envelope. But what is inside?.... bubble wrap?

4kpzJIj.jpg

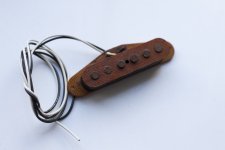
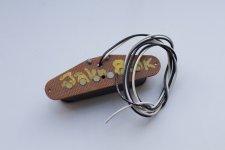
A custom single coil pickup with red Phenolic cover. Not something you can buy readily on the internet, but it showed up on eBay and I bought it. It's a working pickup but I won't be using it.

INmSC3L.jpg

pAh1B78.jpg

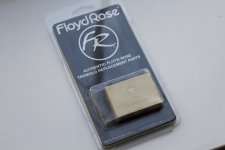
I also bought a large (37mm) brass block for the Floyd Rose. Obviously the original black and white variation migrated from a fender tremolo bridge to a prototype Floyd Rose so even EVH had to add this at a later date. It helps with sustain, but as you'll find out later you can't just whack it on without some body modification.

WjfJkCz.jpg
 
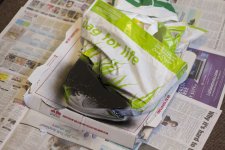
It is finished, I'm just tidying up the paint on one piece. In particular the area near the coin, here it is complete with Asda bag for life masking :D

irIocOw.jpg

To make sure the neck and bridge were all straight was a bit of a nightmare. You'd assume that the pre-drilled Floyd Rose post holes would be straight but actually the bridge is off-set, to the point where you can see a gap at the right edge.

To make sure I wasn't going mad, I took it to a local chap to check the alignment. Here's 2 photos of the semi-final build, but I'll have to wait until tomorrow to explain this anomily in detail. Even though it only had 2 strings on at this stage, it sounded immense.. I even decided to route the neck pickup wires in to the input cavity area, just in case I change my mind and want to use the neck pickup.

RMltK4wh.jpg
 
Cheers for the comments guys :cool:

I know what you're saying OspreyO, I don't normally gravitate toward relic'd guitars and prefer to have pristine stuff but if any project is begging for an authentic or road worn guitar, it's frankenstrat!

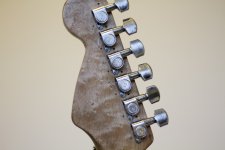
Anyway, here is a shot of the rear of the headstock. I drilled holes for normal tuning posts, then fitted the Schaller ones. It's the little details like this, which make it closer to the original. Not sure anyone else would notice...

azqLOJ1.jpg

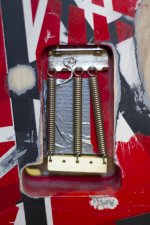
For the spring retention, I've seen photographs with 2 springs or 3 springs offset. I chose to go with the latter as it seems to be the way the later Frankenstrat was put together. It's also this way on the Fender replicas.

...and yes, he really did use duct tape to stop the ground wire from rattling against the springs!

HTQX6ps.jpg

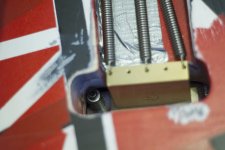
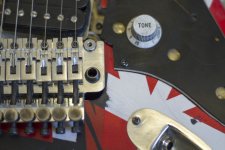
Now the bridge is a funny one. As I described earlier, it actually sits at an angle on the body. In order to get it to fit I had to get creative and route out a tiny section for the post. Not sure how well this comes across on the photo, but it's the tiniest of modifications.

jX319Gz.jpg

There is also a small gap between the body and the Floyd Rose toward the right. It was at this stage that I thought maybe I was going crazy and I had to take it to a local chap for setup. We both spent ages considering all options... including one where he wanted to move the posts back and fill the holes (which would require re-painting :eek:).

In the end I found a closer / hi-res shot of the original and it's the same. It's MEANT to be like that. Phew!

YiLvW48.jpg

It also meant that I had to use a tiny shim of hard wood to get the neck at the exact angle. It's barely noticeable but it's worth pointing out.

AMvdhwN.jpg

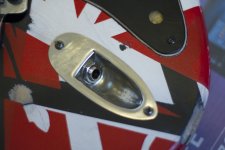
The input jack also got the standard sandpaper treatment, to make it look worn.

vf55wk9.jpg

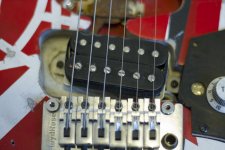
I will say that the pickup position also caused a lot of debate. Mounting it accurate to the original the pickup pole for the low E string was aligned but the high E wasn't which meant the top end was noticeably quieter. I moved it so the high E was aligned.. my priority here it how it sounds.

IJ2xllM.jpg

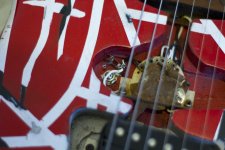
The 5 way switch wires were also added. Still not 100% happy with these, so may play around with it later on :/

w3gEZsK.jpg
 
Final update :cool:

I repainted the black line around the coin, but for the life of me could not sand the worn area around the coin like the original, without it looking rubbish. In the end I just went for a generic pattern of wear like a few other replicas that I've seen. In hindsight, I should have done this before the white paint went on.

I also repositioned the pickup (again), so that the pole piece for the low E and the high E are both aligned. This required me to angle the pickup more, which is actually closer to the original.. not sure how I missed that but at this stage even the reference photos begin to contradict each other!

Here's the final shots of the body. I don't have the reflectors (yet) and I'm not in the mood to pay £30 for them to be imported from the USA.

fjRc05J.jpg

AOMzqtY.jpg

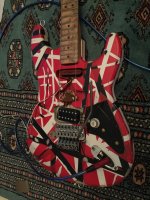
....and here it is in front of the amp.

qku0XvP.jpg
 
Back
Top Bottom