First Home - Renovation Project

Are you going with any sort of underfloor heating for your kitchen? The tiles you have chosen look stunning but I'd be a little worried how cold it could get underfoot.

Very interested to hear more about your kitchen and why you chose the brand you did - I'm thinking along almost identical lines as you when it comes to aesthetics!

No, we considered it but I don't like electric underfloor heating and it would have been too much steps if we retrofitted the whole house with water underfloor heating - Maybe on the next renovation :p

Stay tuned, I'll write a detailed kitchen post soon.
 
Leveling

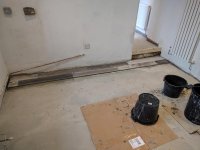
I used two 30L Plasterers buckets for mixing, these were perfect as they were large enough to compensate for splashes when pouring in the powder + a narrow base which makes it easier to mix with a mixing paddle.

I used a 2L paint kettle to measure the water (4.25L per 25kg bag of Ultraplan).

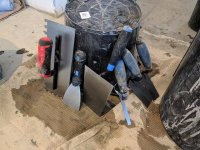
The only tools I used was a Forged Steel Plastering Trowel to help spread the leveler into the corners etc and a cheap bucket trowel to clean the buckets between mixes.

9061b7.jpg


I went with Mapei Ultraplan Renovation Screed 3240 and Mapei Primer G - It was a good value self leveling compound that was fibre reinforced so it could go up to 40mm thick in a single application. Please note: Ultraplan suggests priming the floor with Mapei Eco Prim T but their technical department confirmed that Primer G was fine (both are acrylic based primers).

16ab6tf.jpg


2nv9sfk.jpg


I started by patching any large gaps in both rooms using a small tub of Cementone Rapid Setting Cement 10KG, this was to limit wasting the leveler + repaired a damp spot by the back door, I couldn't find a leak so I'm not sure if it was a cold spot or the DPM was damaged. Mapei was confident it would be fine and would only be a problem with vinyl tiled as it would trap the moisture but I didn't want to risk it.

2dc9us5.jpg


wtyb1y.jpg


Fitted timber on the steps, keeping them flush and level to the edge - this will make it much easier when tiling to it (neat edge finish).

301dpvr.jpg


I cemented the gaps to seal them, this will prevent any leveling compound from leaking.

o60ion.jpg


9a49c0.jpg


Primed the old floor, 1:1 ratio of Primer G and water as recommended. Please note: This drops to 1:3 between layers of leveler.

2wn1oj6.jpg


t53yc8.jpg
 
Mixing - Self Leveling Compound

I'll be honest with you, my first attempt was a disaster... I started off with a 14L bucket and a small paint mixing paddle which overfilled. I had to quickly transfer the mix to a large gorilla bucket - Mixing 25KG of leveler with a small paint paddle and a wide based gorilla bucket was hard work and it showed in the mix - luckily it was forgiving, although it looked light and dusty, it managed to pass the finger nail test (It set solid and I couldn't mark it with my finger nail). So this is why I recommend the 30L plasterer buckets :p

Here was my first layer, my first attempt was the light mix towards the back of the room - you can see the second darker mix that I poured from the step and back door.

2exvris.jpg


20a47e1.jpg


Once dried:

6s8geb.jpg


But after this small trial run, I got the larger buckets + mixing paddle and started to perfect the mix to the best of my drills ability haha, more on this below.

33c7n85.jpg


I've only got a old 700W and 800W drill with 10mm chuck (suitable for the mixing paddles I bought), the large paddle burns out the drill - so I start the mix with the small paddle, adding half a bag first, then slowly add the rest. Once it's almost mixed, I'll use the large paddle to catch any large lumps that I might have missed.

Baby paddle
333jszp.jpg


Large paddle (140mm), see the difference!
2n1xc2w.jpg


I later bought a Paddle Mixer Adapter for my SDS drill which didn't flinch, highly recommended :D

Some tips when mixing:
  • Start off with about 1/2 bag and slowly add whilst mixing - this was the quickest way for me to get a nice lump free mix.
  • ALWAYS keep the paddle submerged in the mix to prevent trapping air and causing foamy bubbles
  • Once lump free, leave the mix to slacken for 3 minutes before giving it a stir and pouring
 
Last edited:
Once dry, you can prime (1:3 ratio) if another layer of leveler is needed.

2q07n7d.jpg


Here is my second layer, a far more consistent mix.

30xk7qx.jpg


2iaa73o.jpg


Result - level and flat in most places but 3-5mm gap towards the back where I must have been too reserved.

5kezrm.jpg


1zwizro.jpg


Although I could have gotten away with this, I couldn't resist but to try tapering it flat - I might have pushed my luck too far and will find out tomorrow if it's flat or caused a hump haha.

I primed the area, and marked a line on the deepest point - then poured and tapered out with a trowel.

20jkzfs.jpg


20udde8.jpg
 
Last edited:
Kitchen Floor

The first layer in the kitchen went on well, the hardest part was getting the mixing done quick enough after each pour. The mix starts to dry after 20 minutes and goes tacky, so it was important to get each pour infusing and settling as one.

Primed (1:1)

28jw4u8.jpg


7 bags poured:

2q2dzwy.jpg


357lmvt.jpg


2hrpk0g.jpg


coztz.jpg


Note: Ultraplan takes 1-3 days to dry depending on the thickness and temperature, I kept the heating on low throughout the night to keep the chill away - Mapei warns not to go below 5 degrees celsius. I found it fine to walk on within 24 hours (my layers were 20mm thick).

Todays layer and hopefully last.

Primed (1:3)

2n67k9l.jpg


5 bags poured:

2iatxye.jpg


6tftjl.jpg
 
Last edited:
good work, cheers for sharing..

looking good.
its not a thing I have ever attempted but then Ive got a good mate that does flooring for a living and Ive seen him do stuff like this and hes good at what he does.
We are planning on redoing our kitchen later in the year and I think this will be one of the jobs needing done. but as said.. Ill get my mate Jim in to do it.

Just finished thread, epic story :) glad you bought hicvision, about to buy myself :)

Wow what an epic build! Get moved in soon though man!!

Amazing build, will be epic once complete I'm sure. Bet you can't wait to move in

Thanks all! Yeah very eager to sort it out and move in now :)

Nice work on the leveling, well rated stuff.

Ive nearly finished my kitchen (13sqm) I used a bag to raise a really low spot before 30mm marmox went down and E UFH in the adhesive (i didnt want to pay another £120 on SLC). Much slower than just using SLC to cover it but i was worried about adding too much height.

How much did you raise the floor? I think E UFH would have been nice just to take cold off the floor. My 200W/m warmup, only 3mm wires, takes 7 mins to feel warm underfoot, probably due to the overkill insulation.

Obviously budget is a limiting factor though!

I've raised it 30mm and it needs another layer to be perfect.

Which system did you go with and how much £££? I've only got around 15mm to play with, probably too late to consider now :p
 
Despite my last pour, I was still out quite a bit out the centre - as we've gone for large format plank tiles I needed to floor to be as flat as possible and wouldn't risk building it up with adhesive (more on this later).

2lvbpkm.jpg


Started pouring from the centre of the room and worked my way out.

5fmasj.jpg


I ran out of compound just before I got to the end!

ao12dv.jpg


Used a small bag of Cempolay by Bostik to finish off, it's only a 10KG bag and can be trowelled to feather edge (0-5mm) - This stuff was lovely to work with and ideal to patch the top where I ran out :)

24mc32s.jpg


29lh72w.jpg


Perfect now :)

qrcdjq.jpg
 
Nice work, when levelling might have been an idea to use a p r i c k roller. This will help even out the areas and remove trapped air bubbles.

From my experience, prevention is the best cure when it comes to trapped air bubbles - keeping the drill paddle immersed and not whisking too rapidly prevents air from driving into the mix. You'll know if you made this error as you'll get 100s of tiny bumbles rise to the top whilst you wait for it to 'slacken'. I didn't bother using a spiked roller because the floor was out in large areas, I thought the roller would have just followed the curve and spread the compound out instead of filling it.

Good work, wish the guy who did my flooring was not a moron, I can touch the ceiling at one end of the kitchen but not the other :\

I also never want to remove lath and plaster again in my life, grim job.

LOL! Still better than what mine would have done if I allowed him to continue...
 
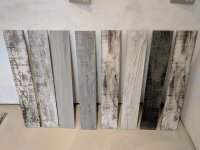
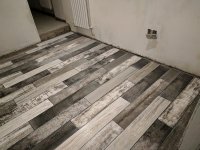
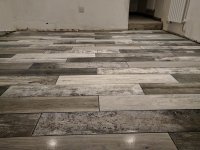
So we decided to go for large format plank tiles in multiple colours, an ideal choice for beginners no doubt :rolleyes:

qS1hpAv.jpg

Lippage Advice
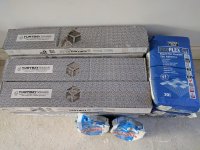
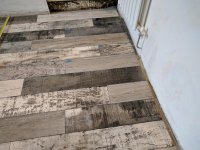
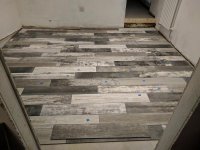
We went with 15x90cm Multi Wood effect tiled by Yurtbay. They are lovely quality but as with all large format plank tiles they suffer from warpage and bow in the middle, you can see this by turning one upside down and rocking it slightly each end. This is where floor flatness is really important and all my leveling pays off, tile manufacturers say the floor must have a maximum allowable variation of 1/8″ in 10ft for LFTs - which basically means it must be flat. From personal experience I know the tiles were hard enough to lay without worrying about the subfloor too. To counter lippage further we went with a third off-set pattern which really complimented the design, if you go past 33% offset your dipped edge will be too close to the bow in the middle.

Dry Run
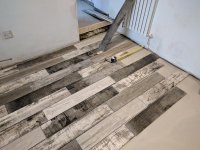
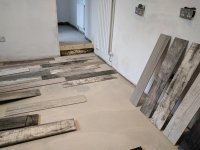
I started by squaring up the room with a large folding square and laser, this give me a line to work off and will help me when it comes to fitting the kitchen as I want the tile rows and kitchen to be symmetric. From there we laid out the tiles, played with colour variations and got most of the cuts out the way using a cheap wet tile cutter. As sad as it sounds I think getting the colour combinations right was the hardest part :p

2RxdFV8.jpg

hPx26RE.jpg

9v9F8QD.jpg

Some of the designs - we laid them out like a colour pallet:

adp3rmr.jpg

fqRuYVS.jpg

Once we finally finished the layout, all the tiles were labelled and stacked in rows. This was a late shift...

LROkZaq.jpg
 
Sorry but i hate that flooring! Sorry, not 'my' taste but may look nicer when units fitted.

Not as much as I hated laying it haha, but yeah it's very much a hate it or love it design.

Finally, updates!

I'm not totally sold on the floor either, but given your track record on the renovation as a whole I'm willing to bet the end result will be worth it.

What is bugging me about it is that I can't unsee the various optical effects of the different styles of tile - it looks really uneven in places where certain colours/patterns meet. Of the eight styles, there looks to be three distinct groupings that would work but the eight as a whole just don't seem to sit right.

Curiouser and curiouser...

I hope so, the kitchen should tone them down once installed...

The colours/patterns have been the hardest part to get right - we really had to cherry pick through all the packs to get the right balance. I wouldn't say any look uneven in real life, although it could just be my tiling? :p
 
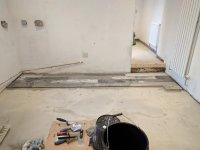
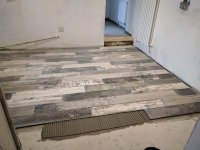
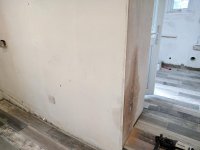
I started off using UltraTile Proflex SP adhesive with a 10mm notch trowel and back buttered each tile - this method does use more adhesive but it ensures maximum coverage and no hollow spots. The only issue I had was I ordered rapidset which only has a two hour pot live and the anti-slump property was quite harsh to the point I struggled collapsing the ridges - maybe a 20mm round trowel would have helped but I really weren't fussed on the product. It is advised to lay two rows and allow it to set for half hour, this will create a foundation to work from and prevented the tiles moving away from the line when I continued pushing new tiles up to them.
wJt6IAj.jpg

JEFzzDn.jpg

I was happy with my first attempt at tiling but I hated the rapid-set adhesive and reached out to Mapei technical for advice again :D I was looking for a slow-set adhesive that supported large format tiles, they introduced me to Keraflex Maxi S1 - such a good product, really nice to work with, 8 hour pot life and overall ideal for my needs.

hMB2auI.jpg

The 8 hour pot life give me plenty of time to work with any lippage issues or cuts without rushing, it's also worth noting that I ran the ridges against the tiles to make it easier to collapse them.
ZvWjKZF.jpg

I marked out the rows to minimise mess, it's surprisingly easy to miss judge the sizes when spreading the adhesive.

mxqcMdB.jpg

Tools of the trade:

naggJYJ.jpg

y47QD9D.jpg

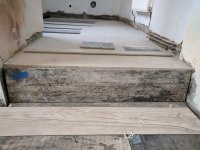
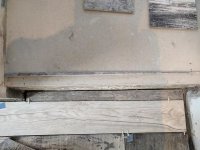
The step

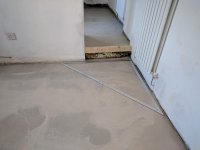
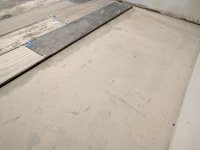
The floor by the step was slightly uneven as I never leveled that far up.

sPCyiTq.jpg

I tapered a small piece using the wet cutter and it actually worked:

UEV124F.jpg

Perfectly level

tGuy9TU.jpg

lLHvSb4.jpg

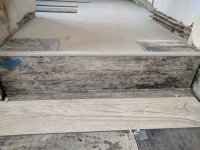
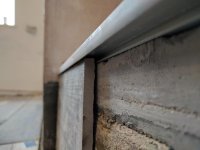
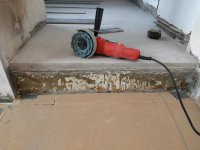
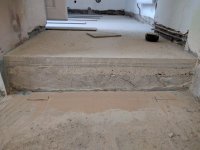
Then grinded the step face down in preparation as it wasn't flat - this is now ready for when I start tiling the step + utility room.

MdhZxbF.jpg

wrFapeA.jpg

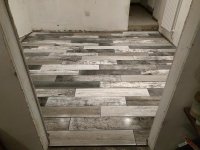
Finished kitchen (pre-grout)

fCIQxOj.jpg

jcmp2Di.jpg

N2r73dz.jpg
 
Edited, here is the rest of the tiling work - Utility room and grouting:

kbymox.jpg


dyrd7a.jpg


1ytgt0.jpg


21j2k1z.jpg


s5by1z.jpg


73mb5s.jpg


33p6hx1.jpg


Just read through this thread and all I can say is wow!
That's quite some project you took on, it makes my current extension look like a weekend project!
Keep up the good work and hope you'll be finished and sitting back enjoying all your hard work soon.
Thanks for sharing reminds me of when we did our house a few years back. I don't envy you! lol :p

Thanks both :) It's getting there slowly.

Still cant get used to the floor

Haa, I'll roll out some cheap vinyl to protect your eyes when you visit :rolleyes:

Any update on how this is coming along?

It's been over a month - we want kitchen pictures... please?!

Sorry for the delay, it's been a busy few months with the work/house and possibly a new job soon to add to the chaos :p

Kitchen Update

Before I can start fitting the kitchen, there are a few niggling jobs that need to be sorted.

We've had an issue with damp around an old fireplace since it was plastered, the chimney stack has been removed and there's no sign of penetrating water so I'm hoping it's just the salts that have leaked in the wall from burning coal. For now, I've just installed an air vent to allow the area to breathe and air out.

qocasx6.jpg
aBVrbIF.jpg

I wired up the extractor fan, I went with a Greenwood Airvac Elite 150HTR which has some nice features like automatic shutters for the draft and a built-in humidistat - It works well and passed the kettle test. I also chased out a spur for the sink's waste disposal unit.

XQ6SXG4.jpg

TBC - More to post
 
Last edited:
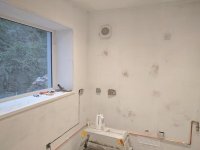
Before I could start fitting the kitchen, I had to sort out the shoddy 1st fix plumbing and chase the pipework in the wall.

2ui8wuw.jpg


15ocej5.jpg


e6f51z.jpg


sno1op.jpg


2rf9dg1.jpg


I rebuilt the corner using bonding compound (dot + dab), it was in a very awkward area and took quite a lot of compound for the plasterboard to grip around the pipes and stone wall. I was conscious that there will be a fair amount of vibration once the worktop has been installed, so I decided to tape and joint the repair to minimise chances of cracking over time.

2akg4ki.jpg


14akhoz.jpg


dhafqw.jpg


Straight tape and reinforced corner tape:

ny8yut.jpg


In an ideal world, you should use tapered edge plasterboard if you are going tape and joint, this will allow space for the joint adhesive without it adding too much bulk - the thicker the layer, the more layers and feathering it will take to smooth out. It took me 3 layers (sand by hand between each layer) and an overall layer to finish (known as a level 5 finish).

35i4mtj.jpg


m7e6hh.jpg


33lmqyo.jpg


2hq9f1f.jpg


Very happy with the finish, all ready to fit the kitchen now :)

29zpp4x.jpg


We used Kair anti-mould additive in the paint to prevent any mould behind the units or in cold spots, an issue that is quite common in old houses with condensation. This may be unnecessary with the extractor fan and ventilation but we didn't want to take the risk.

2nu4ysw.jpg


2z3ovup.jpg


j09z68.jpg


34imo9g.jpg
 
Last edited:
Back
Top Bottom