

Associate
- Joined
- 28 Jul 2018
- Posts
- 10
Hey guys,
So first post on here, have been following for years but never actually posted, so thought I'd make a start by showing my build.
I used to be hugely into PC gaming and modding, up until the GeForce 660Ti era, but with work and general life I kind of drifted away slightly, casually tweaking and upgrading the odd part here and there.
It's a medium-spec build, nothing fancy, but there's the odd cosmetic/performance tweak or two. For the gaming that I do on it (No Man's Sky, PUBG, etc), it's exactly what I need.
Specs
CPU: Intel® Core™ i5-3570K Processor
CPU Cooler: Corsair Hydro Series™ H75 Liquid CPU Cooler
CPU Cooler Fan: Scythe Gentle Typhoon 120mm 1850rpm Fan
Mobo: Gigabyte GA-Z77X-D3H - Rev 1.1 ATX - LGA1155 Socket
GPU: ASUS GeForce® GTX 1060 Turbo 6GB GDDR5
RAM: Corsair Dominator® Platinum Series 16GB (4 x 4GB) DDR3 DRAM 1600MHz C9
Case: Corsair Carbide Series™ Clear 400C Compact Mid-Tower Case
PSU: Corsair CS Series™ Modular CS550M 550 Watt 80 PLUS® Gold Certified PSU
SSD: Western Digital Caviar Blue 1TB 7200rpm 3.5" Drive
HDD: SanDisk Extreme 120GB SSD 2.5" Drive
Case Fans: 3x upHere 120mm 46CFM Case Fans
Monitors: 2x Dell S2400L 1920x1080 LED Monitor
Speakers: Harmon Kardon Soundsticks II
Keyboard: Apple Keyboard Full Size UK
Mouse: Tecknet 2,000dpi Gaming Mouse
Overclocks
CPU: 4.4Ghz (3.8Ghz standard)
RAM: 1866Mhz (1600Mhz standard)
GPU Core: 2100Mhz (1708Mhz standard)
GPU Memory: 9000Mhz (8008Mhz standard)
Unigine Heaven Standard: FPS 56.0, Score 1409, Min FPS 11.6, Max FPS 101.6
Unigine Heaven Overclock: FPS 70.4, Score 1774, Min FPS 27.1, Max FPS 144.0
Was quite surprised how much overclocking had improved performance here...
Build Photos
I built this PC quite a while ago, but I recently tore it to bits to upgrade a few things and to tidy it up in general, so here's what I did.
First things first, everything was laid out ready to go.

Anything not matt black needed to be resprayed. The key was for a black build, with RGB lights to give any colour I fancied if I wanted a change, rather than being stuck to a single colour scheme.


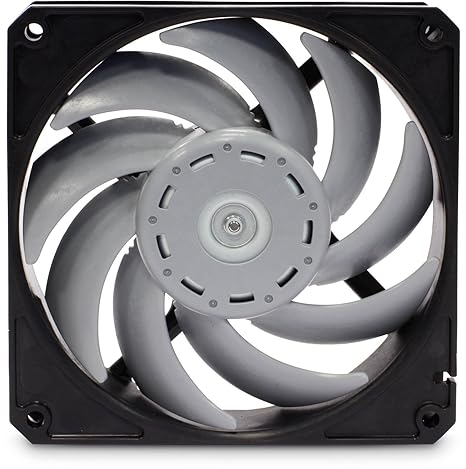
This also includes the Scythe Gentle Typhoon fans that I have, which were grey in colour.
Before:
After:

The most annoying part was the motherboard, as the input casings were reflective and heatsinks were bright blue. So they had to go.
Before:
]https://tweakers.net/i/U3jTg25ivJLADd_l3DFZzwSf7n8=/i/1333548770.jpeg
After:


Much better!
The standard fan in the CS500M power supply was cut out and swapped for a Gentle Typhoon

Annoyingly, the upHere RGB 120mm fans have 4-pin Molex connectors, so are full-on, making them louder than I'd like. After some testing, it seemed the left two (5v) pins in the connector were powering the LED's, and the right two (12v) pins were powering the fans. Knowing this, I soldered up a connector that split the fan's power into a 3-pin type, so I can run them from the motherboard and set the BIOS fan speeds to Silent. It worked a charm, making these £25 (for three!) fans well worth the money.

The acrylic transparent panel of the 400c was scratched over time. I used my car detailing machine polisher along side Meguiars PlastX (used to restore headlights), which made the panel look new again.

Cable management

Almost done

And here's the finished product


All I need now is some cable combs for the 24-pin plug, and I'm good to go!
So there we have it guys. Some components are quite old now (5+years), but it's a clean build, overclocked nicely, and serves me well for what I need. Though I'm sure in the near future I'll be upgrading that mobo, CPU and ram at some point.
Cheers for looking!
So first post on here, have been following for years but never actually posted, so thought I'd make a start by showing my build.
I used to be hugely into PC gaming and modding, up until the GeForce 660Ti era, but with work and general life I kind of drifted away slightly, casually tweaking and upgrading the odd part here and there.
It's a medium-spec build, nothing fancy, but there's the odd cosmetic/performance tweak or two. For the gaming that I do on it (No Man's Sky, PUBG, etc), it's exactly what I need.
Specs
CPU: Intel® Core™ i5-3570K Processor
CPU Cooler: Corsair Hydro Series™ H75 Liquid CPU Cooler
CPU Cooler Fan: Scythe Gentle Typhoon 120mm 1850rpm Fan
Mobo: Gigabyte GA-Z77X-D3H - Rev 1.1 ATX - LGA1155 Socket
GPU: ASUS GeForce® GTX 1060 Turbo 6GB GDDR5
RAM: Corsair Dominator® Platinum Series 16GB (4 x 4GB) DDR3 DRAM 1600MHz C9
Case: Corsair Carbide Series™ Clear 400C Compact Mid-Tower Case
PSU: Corsair CS Series™ Modular CS550M 550 Watt 80 PLUS® Gold Certified PSU
SSD: Western Digital Caviar Blue 1TB 7200rpm 3.5" Drive
HDD: SanDisk Extreme 120GB SSD 2.5" Drive
Case Fans: 3x upHere 120mm 46CFM Case Fans
Monitors: 2x Dell S2400L 1920x1080 LED Monitor
Speakers: Harmon Kardon Soundsticks II
Keyboard: Apple Keyboard Full Size UK
Mouse: Tecknet 2,000dpi Gaming Mouse
Overclocks
CPU: 4.4Ghz (3.8Ghz standard)
RAM: 1866Mhz (1600Mhz standard)
GPU Core: 2100Mhz (1708Mhz standard)
GPU Memory: 9000Mhz (8008Mhz standard)
Unigine Heaven Standard: FPS 56.0, Score 1409, Min FPS 11.6, Max FPS 101.6
Unigine Heaven Overclock: FPS 70.4, Score 1774, Min FPS 27.1, Max FPS 144.0
Was quite surprised how much overclocking had improved performance here...
Build Photos
I built this PC quite a while ago, but I recently tore it to bits to upgrade a few things and to tidy it up in general, so here's what I did.
First things first, everything was laid out ready to go.
Anything not matt black needed to be resprayed. The key was for a black build, with RGB lights to give any colour I fancied if I wanted a change, rather than being stuck to a single colour scheme.
This also includes the Scythe Gentle Typhoon fans that I have, which were grey in colour.
Before:
After:
The most annoying part was the motherboard, as the input casings were reflective and heatsinks were bright blue. So they had to go.
Before:
]https://tweakers.net/i/U3jTg25ivJLADd_l3DFZzwSf7n8=/i/1333548770.jpeg
After:
Much better!
The standard fan in the CS500M power supply was cut out and swapped for a Gentle Typhoon
Annoyingly, the upHere RGB 120mm fans have 4-pin Molex connectors, so are full-on, making them louder than I'd like. After some testing, it seemed the left two (5v) pins in the connector were powering the LED's, and the right two (12v) pins were powering the fans. Knowing this, I soldered up a connector that split the fan's power into a 3-pin type, so I can run them from the motherboard and set the BIOS fan speeds to Silent. It worked a charm, making these £25 (for three!) fans well worth the money.
The acrylic transparent panel of the 400c was scratched over time. I used my car detailing machine polisher along side Meguiars PlastX (used to restore headlights), which made the panel look new again.
Cable management
Almost done
And here's the finished product
All I need now is some cable combs for the 24-pin plug, and I'm good to go!
So there we have it guys. Some components are quite old now (5+years), but it's a clean build, overclocked nicely, and serves me well for what I need. Though I'm sure in the near future I'll be upgrading that mobo, CPU and ram at some point.
Cheers for looking!
Last edited by a moderator:
")
 , by scratch-less do you mean that it doesn't have any scratches yet....