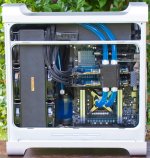
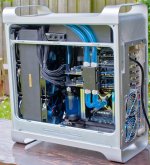
G5ive

I'm glad you guys like it. :D

A little setback on the photos - I was cutting the USB plugs off of my fan controller so it would fit inside the case and I shorted 2 of the channels when testing it (I didn't put the PCB back in the aluminium case and the pins were exposed to the case) so now I only have 2 fans working. :(
Temps are still under control - I'm starting to think I could just use the Monsta rad completely passive, it's ridiculous. Anyway, I wont be able to finish everything until tuesday now.
 
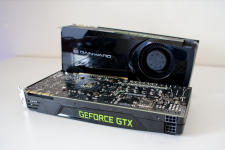
Just when I thought my rig was finished, I went ahead and bought a pair of 680s..

htipxUy.png

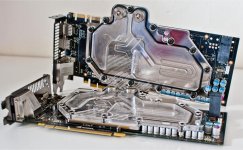
Just waiting on some nice new blocks for them now.
 
Great work, looks lovely :)

Hope you don't have any issues with all the heat from the rad.

Looks awesome

Great work there mate! Really nice G5 mod!

Terrific mod! Really impressed with the finish and spec ;)

Thanks guys! No issues with heat at all, the Alphacool Monsta rad is amazing at keeping temps down and my new fan controller has been installed.

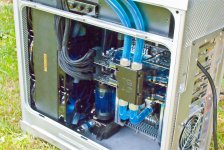
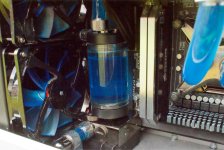
It appears that I made a slight oversight with the new 680s. They're 25mm longer than my current 560Ti's which are already squashed in place by the reservoir. Unless I can manage to push everything forward a tad, I'm going to have to use a shorter reservoir which fits underneath the cards.. :confused:
 
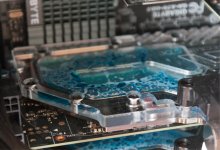
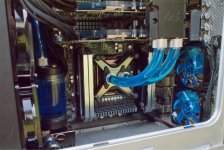
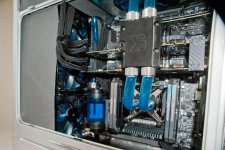
The joys of a 3-way parallel loop. Bleeding this thing is an absolute nightmare. It makes me wonder how bad it was before my plexi waterblocks.

4HYEiBy.jpg
 
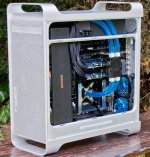
So she's finally finished... again..!!
Overall I'm pretty happy with how everything turned out. I would've liked the larger res but the 680s wouldn't allow it. I'd also like to have the cards installed in 16x 16x rather than 16x 8x - but I needed to use the EK bridge to bring the tubing out so it fits around the PSU and couldn't find a triple parallel in stock anywhere. :(
I'm also not 100% happy with the 6pin cables from the graphics cards. Ideally I'd have moved the radiator back to allow a little more room for cables but it's too late now, and at least they're out of the way.

Other than that, I just need a window cut into the side panel, but I'm in no rush for that - I'd rather wait and have it cut perfectly than rush it and regret it.

I'll be able to get some better pictures when I move back home next week, but these will do for now:

OsjIylE.jpg

OzOq1Y0.jpg

yVjCJ2Q.jpg

1utN2gG.jpg

laeZC2q.jpg

e8y33b1.jpg

op58qzB.jpg

pYdF40A.jpg

Stay tuned for benchmarks and temps.
 
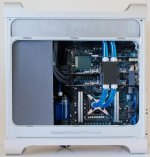
I've been working on tidying the build up a little and here's the progress:

I definitely wanted to cover up the top section as it was a complete mess, I was also contemplating covering the rad and fans - mainly due to the copper logo on the radiator not fitting in (either cover it up or paint it silver).
AunN0w0.jpg

I salvaged a piece of steel originally used in the G5 to separate the CPU section from the graphics cards to cover up the top section.
q8zuHb0.jpg

I also sorted out the squashed cables, they cover the airflow slightly but nothing major, and looks a lot cleaner.
zsfv1K9.jpg
 
Yeah, that paint isn't the toughest...
I managed to peel a bit of it off when I removed a foam gasket.

Personally, I think it looks better with the rad on show and the copper sticker looks fine :)

Also, if you're going to put a window in anyway, you could just start it where the rad ends.

I'm still struggling to find somewhere to cut the door for me, and I really don't want a crappy dremel job staring back at me when I look at the case.
I'm thinking of maybe replacing the side panel with an acrylic sheet - kinda like the modded Corsair doors. The only problem is working out how to mount the locking mechanism to the acrylic, as currently it's screwed into the aluminium.
 
How were you planning to mount the plexi?
Behind the panel with u-channel, flush, bolted on the outside or something else?

That's one of the reasons I haven't sorted the side panel out yet. Ideally I'd have it sit flush with the outside, but for that everything would need to be machine cut and millimeter perfect. If it wasn't flush I'd have it glued from the inside, but then it would sit 3mm behide the outside of the case.
 
Mmm! It's nearly Apple styling build quality. The little gap top right on the curve is killing it a little but I love it!

Its come out really well. Nice work dude!

Thanks! I was hoping for a kind of Apple-inspired interior to go with the case itself.
Sadly there's not much I can do about the gap, without removing the only part of the case which is riveted in place. The steel I used as cover has a much smaller gap than the foam I used as mock up though at least.
 
Some benchmarks for those interested:

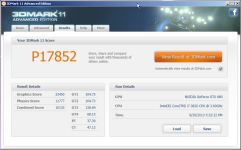
3Dmark 11
  • P Score: 17,852
  • X Score: 6,972
yILjUJl.png
1bztD8T.png

Latest 3Dmark:
  • Ice Storm 185,874
  • Cloud Gate 30,535
  • Fire Strike 11,4181
I6DNIoe.png

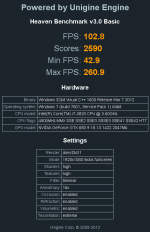
Heaven:
  • FPS 102.8
  • Scores 2590
  • Min FPS 42.9
  • Max FPS 260.9
Zzx40qu.png

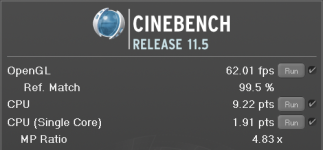
Cinebench:
  • CPU 9.22
  • CPU (Single Core) 1.91
  • OpenGL 62.01 FPS
xM2lm9a.png

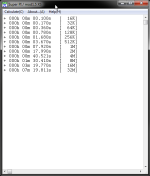
Super Pi:
  • 16K 0.100s
  • 32K 0.170s
  • 64K 0.360s
  • 128K 0.780s
  • 256K 1.680s
  • 512K 3.670s
  • 1M 7.920s
  • 2M 17.990s
  • 4M 40.521s
  • 8M 1m 30.410s
  • 16M 3m 17.770s
  • 32M 7m 19.811s
XGjnDBc.png

CPU temperatures under IBT is range from 52°C to 60°C (~30°C idle 22°C ambient)
GPU temperatures under Furmark reach 45-49°C (~30°C idle 22°C ambient)

All in all I'm really happy with the temps. I knocked the CPU down from 4.75GHz to 4.625GHz just because of the voltage, the temperatures were well under control.
 
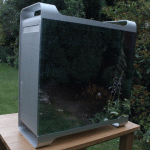
I know I've said this build was finished.. BUT.. It finally is! I had a little trouble with the acrylic window but I'm happy to say that everything is now sorted!

I'm just going to leave this little gif here for now, more pics should follow soon...
wyN4FNM.gif

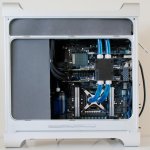
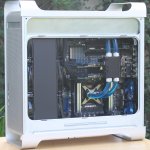
And a still of the cleaned up insides - removed Alphacool logo (and ended up vinyl wrapping the radiator after the paint chipped off), made a cover for the top compartment, and fixed the GPU cables:
li2HZaV.jpg
 
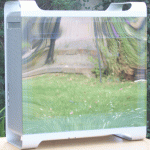
And here's a little gif showing how the 2 way mirror works:
4MpU4XM.gif

If it's lighter outside the case, the acrylic is mirrored, if it's lighter inside the case then the acrylic is transparent. It looks amazing in the dark, the exposure in the gif doesn't really do it justice.
 
Back
Top Bottom