Gigabyte homepage - http://uk.gigabyte.com/products/product-page.aspx?pid=4519#ov
OcUK product page - http://www.overclockers.co.uk/showproduct.php?prodid=mb-437-gi&groupid=701&catid=5&subcat=2574
z87 chipset motherboards are designed for use with intel haswell cpu's, as well as the new chipset intel has also moved to a different socket design with 1150 contact pins whereas before with sandybridge and ivybridge using p67/z68 and z77 chipset board the socket used 1155 pins, this means you can not drop a haswell cpu into previous boards.
the biggest feature haswell brings is a much stronger integrated graphics processor and also a move away from having voltage regulators on the motherboards power stage to now having in integrated into the cpu itself. memory speed support is also improved.
gigabyte has taken the z87 chipset and set out to make another mainstream board which will hopefully take on the precedent set by the z77-d3h which is considered one of the best budget z77 boards on the market.
ultra durable 5 plus.
this feature adds a few enhancements over ultra durable 5 that was used before on the x79, a85 and z77 up range of boards.
enhancements include,
• custom made solid capacitors with minimum 10k hour life - http://www.chemi-con.co.jp/e/tech_topics/pdf/new_cp_201304.pdf
• on/off charge revision 2.0 (it now supports non-apple devices)
• gold plated cpu socket.
packaging and accessories.

a refresh of the box artwork and colour.

on the rear you find the selling points and overview of the main features.

Installation manual, user guide, I/O shield, four SATAIII cables (two with 90 degree heads) and a installation disk.
The motherboard.
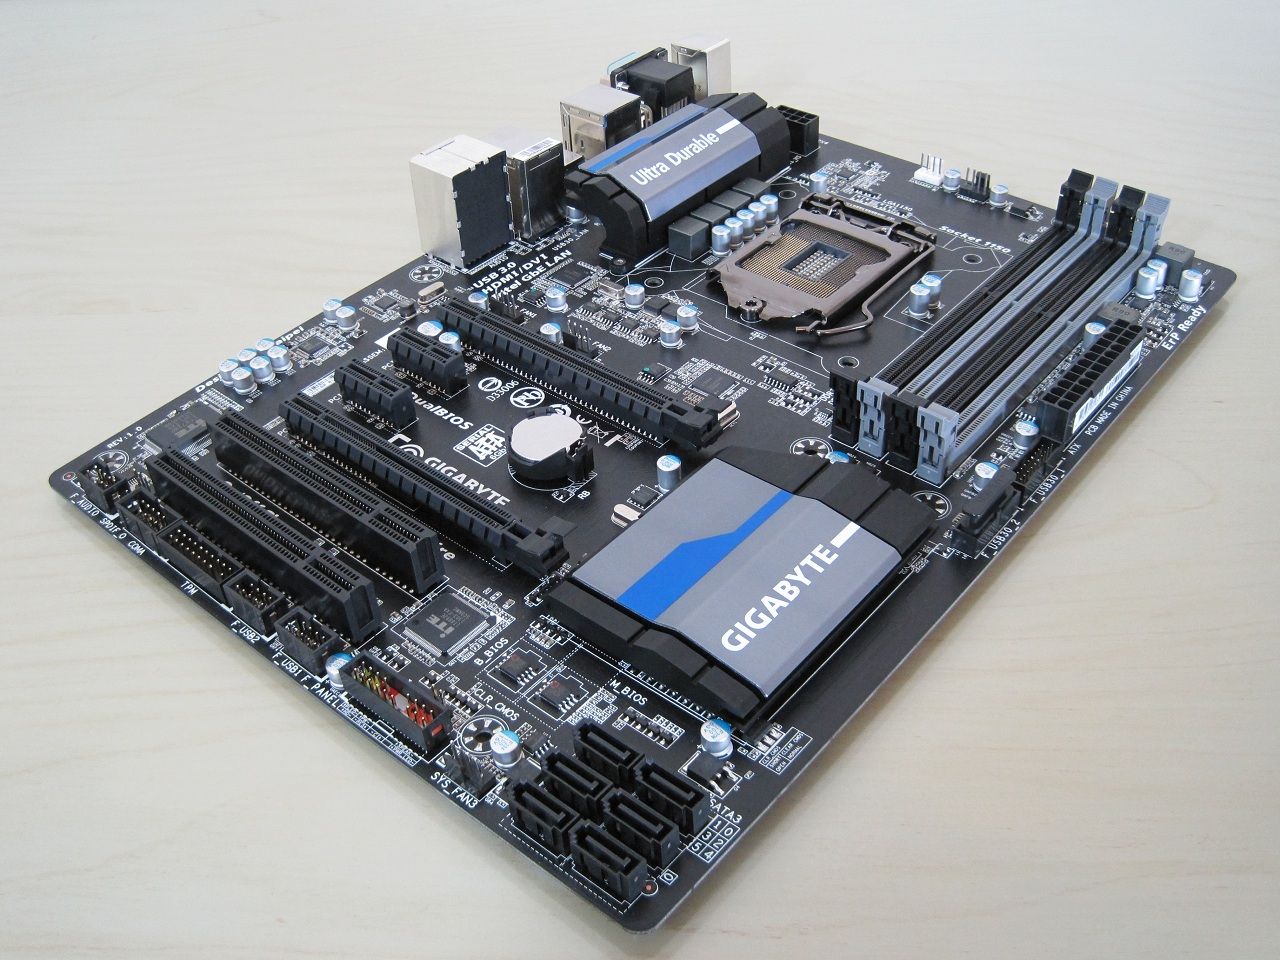
Finally a move away from blue to a nice matt black PCB.
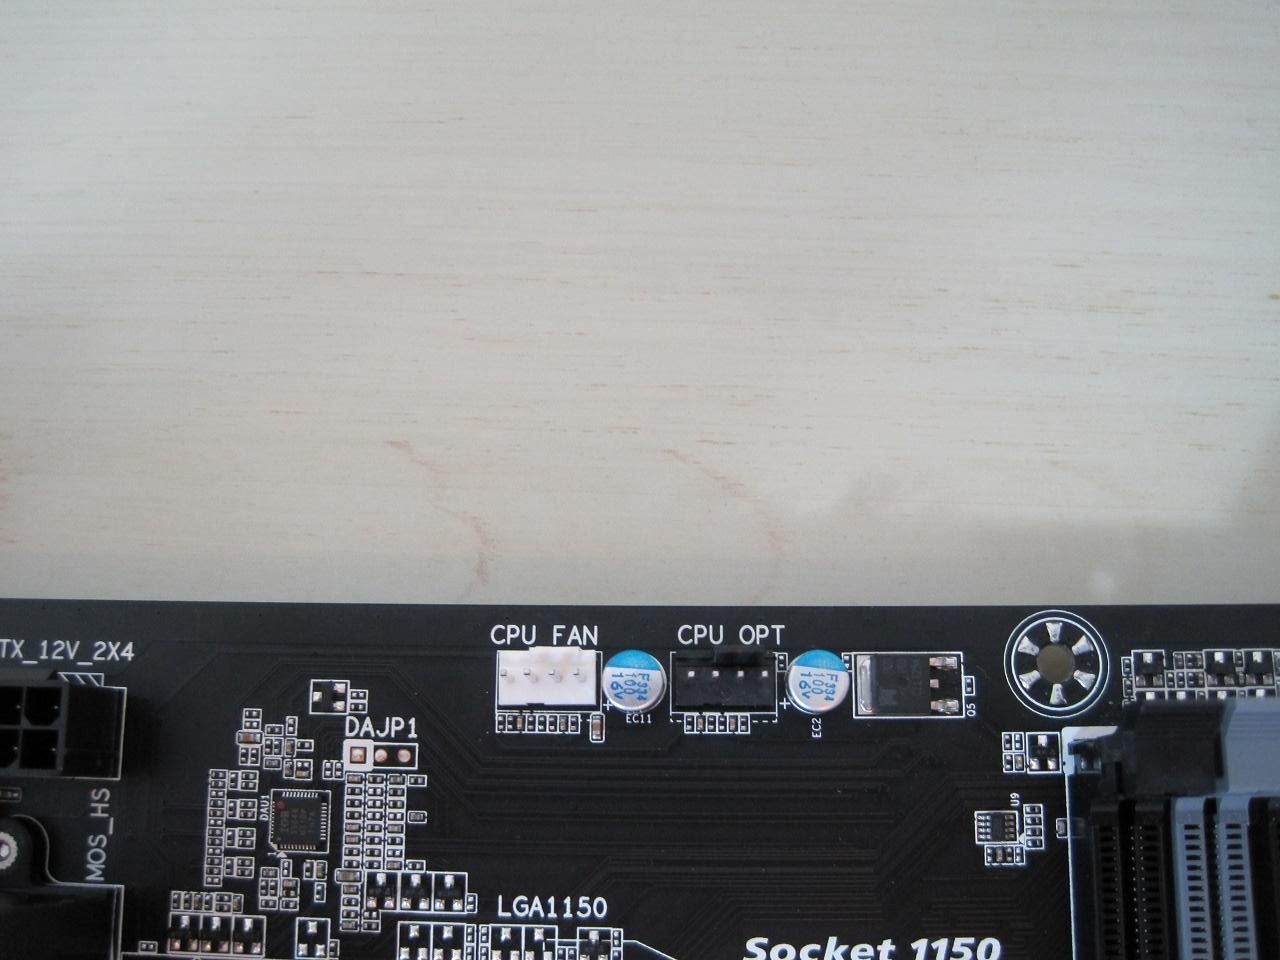
Dual CPU fan headers for the larger heatsinks that have twin fans is a welcome improvement.

• Two internal USB3.0 headers.

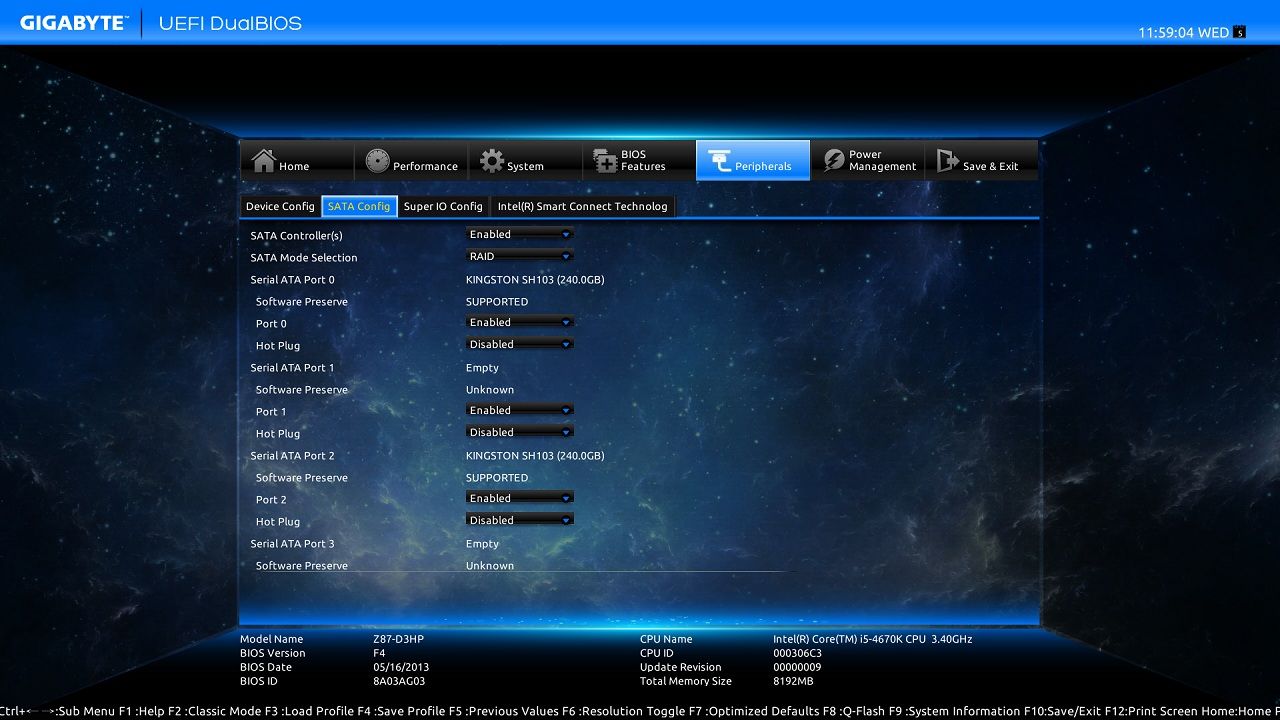
• Six native SATAIII ports from the PCH, you can also do RAID 0, RAID 1, RAID 5 and RAID 10 from these.
• 4pin PWM system fan header.
• Front panel connector which also has the clearCMOS pins above it.
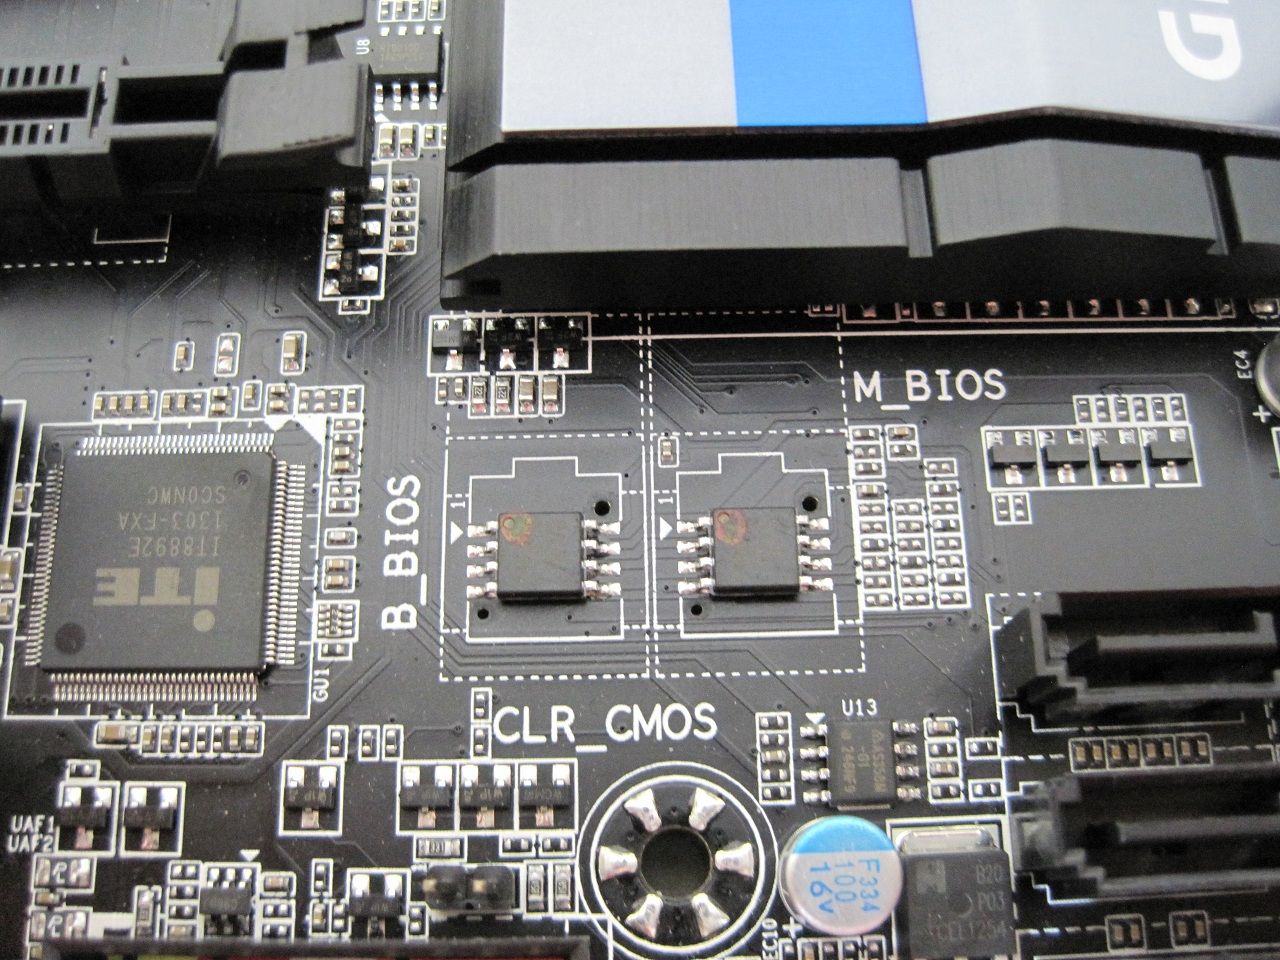
The Dual BIOS chips which are a great safety feature should you have a bad BIOS flash (please use Qflash to update the BIOS not @BIOS).
• Two USB2.0 internal headers.
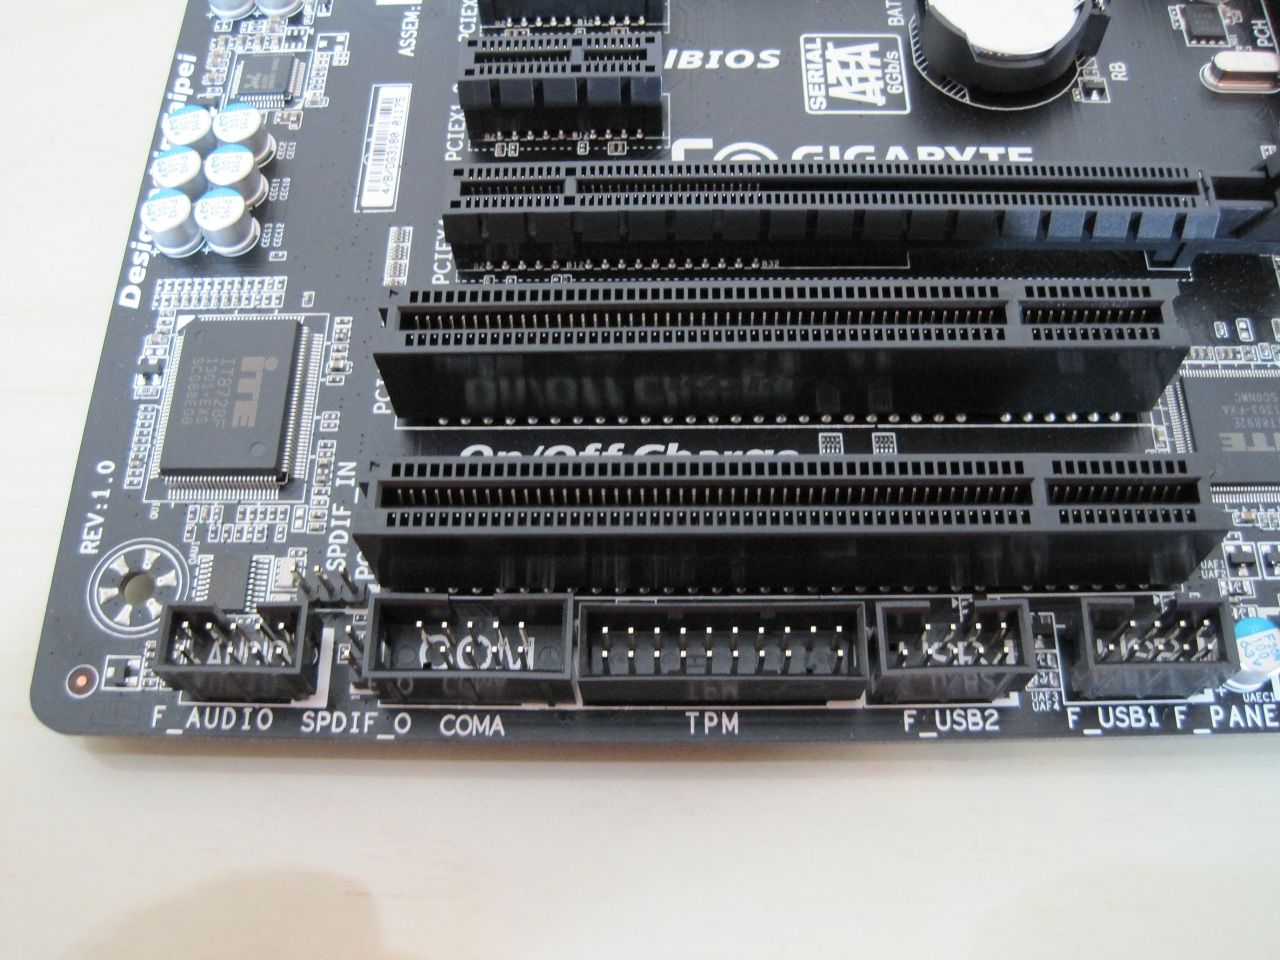
• TPM (trusted platform module) header.
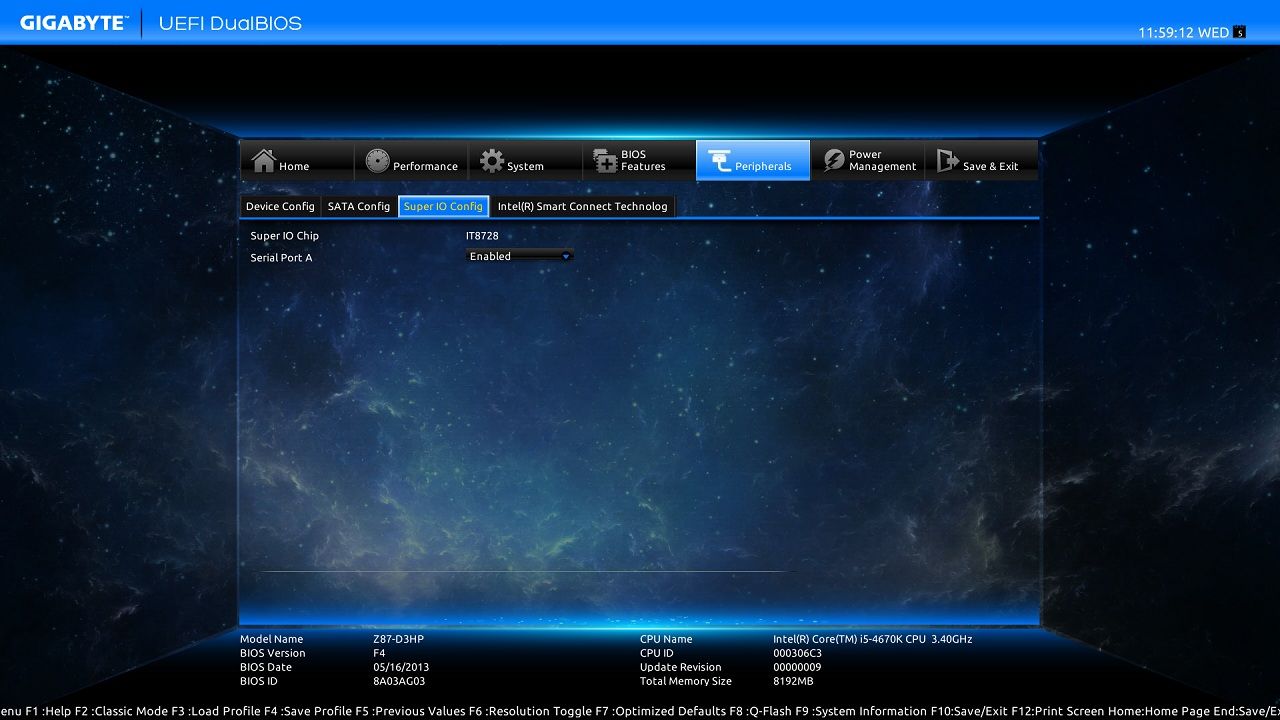
• COM (serial port) header
• Front audio connector
• SPDIF in and out
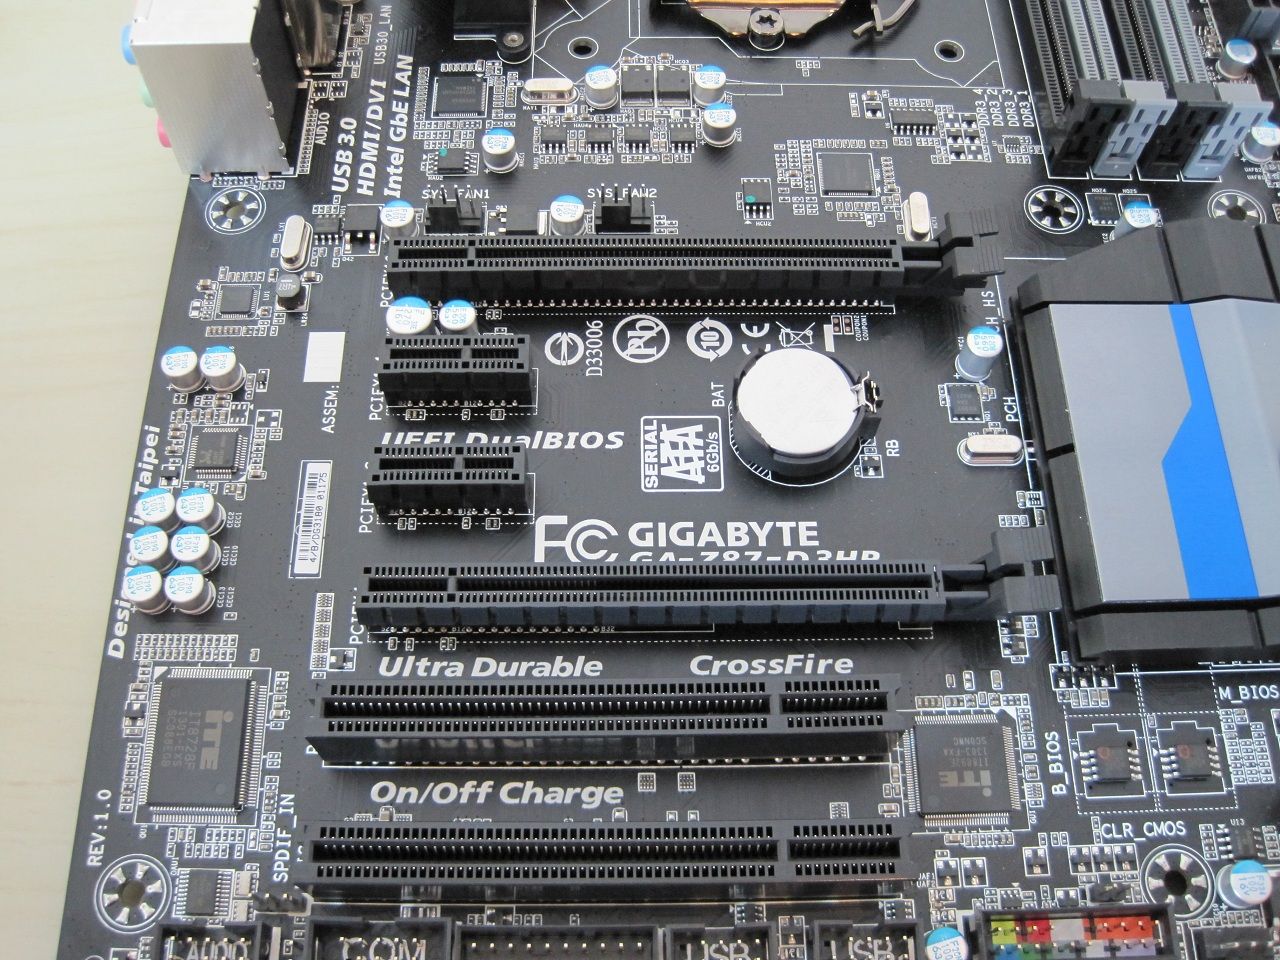
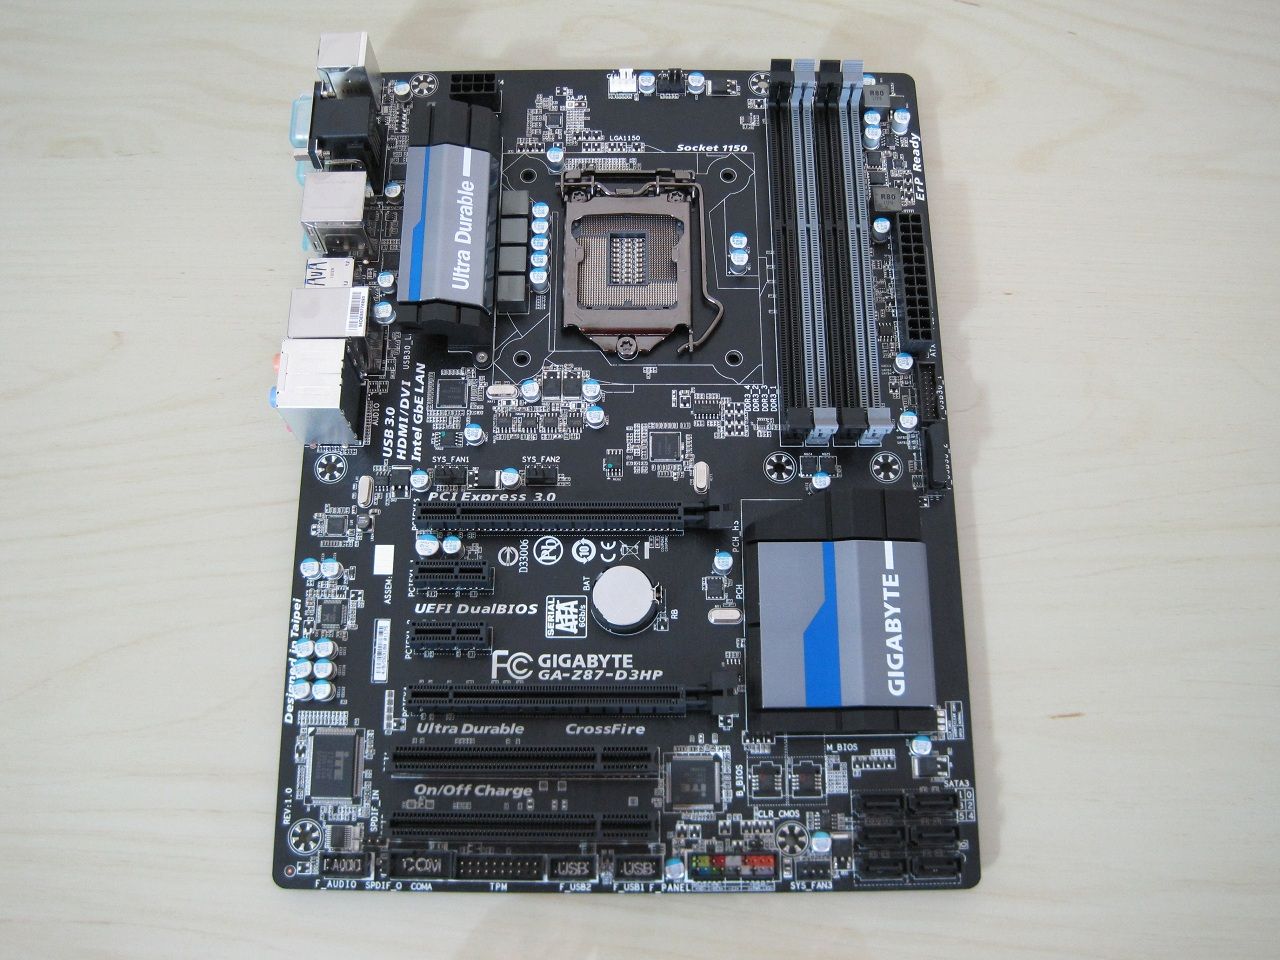
• PCI-E 16X slot (electrically wired at 16X).
• PCI-E 1X slot.
• PCI-E 1X slot.
• PCI-E 16X slot (electrically wired at 4X).
• 2 X PCI legacy slots.
Now I can understand having one PCI slot on this board with its price range as you may still have a PCI sound card etc, but two I feel is too many. Maybe the first 1X PCI-E slot could have been moved down here so it's not blocked if you use a dual slot GFX card?
SLI is not supported on this board as Nvidia do not certify boards that use a electrically connected 4X for SLI, Crossfire is supported.
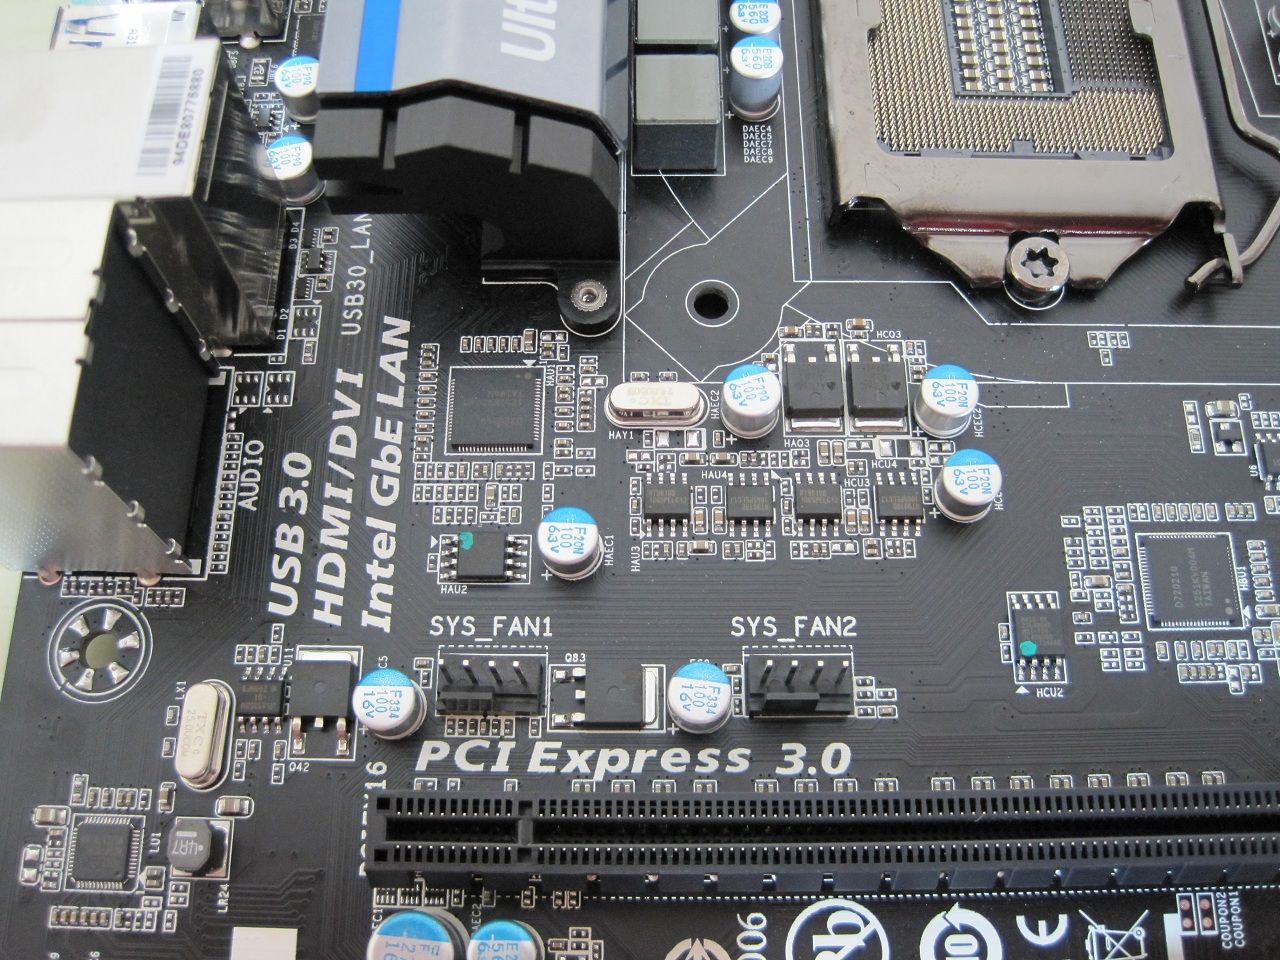
• Two 4pin PWM system fan headers.
The two larger chips in the picture (one beneath the heatsink and the other to the far right) are Renesas USB3.0 hubs, these run an internal USB3.0 header and six USB3.0 ports at the rear, there is no resume from sleep USB drive disappearing issue when using these ports.
The front USB3.0 header named F_USB30_2 is from the Z87 chipset (with the plastic cap), all other USB ports (front and rear) are from Renesas uPD720210 hubs.[/B]

• Realtek ALC892 audio offers up to 7.1 channels.

• Two USB2.0 and PS/2.
• Dsub and DVI-D.
• Two USB3.0 and HDMI.
• Two USB3.0.
• Gigabit LAN and Two USB3.0.
• Five audio jacks and optical out.
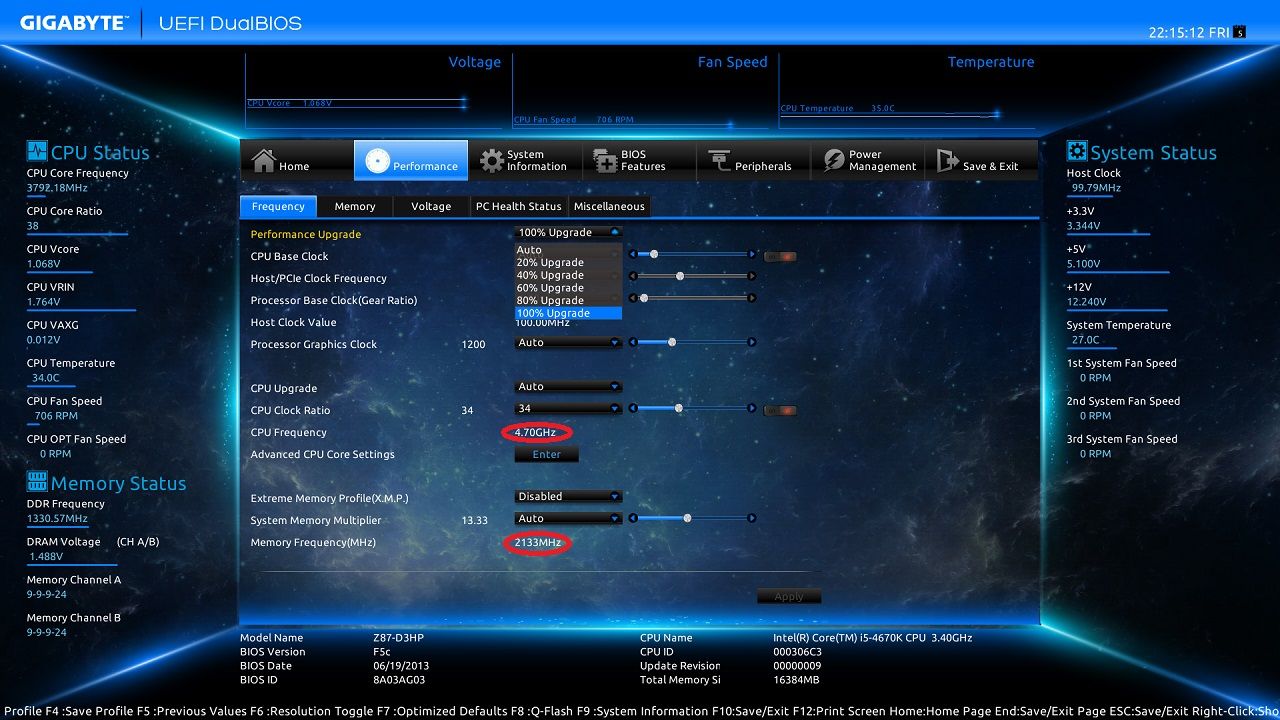
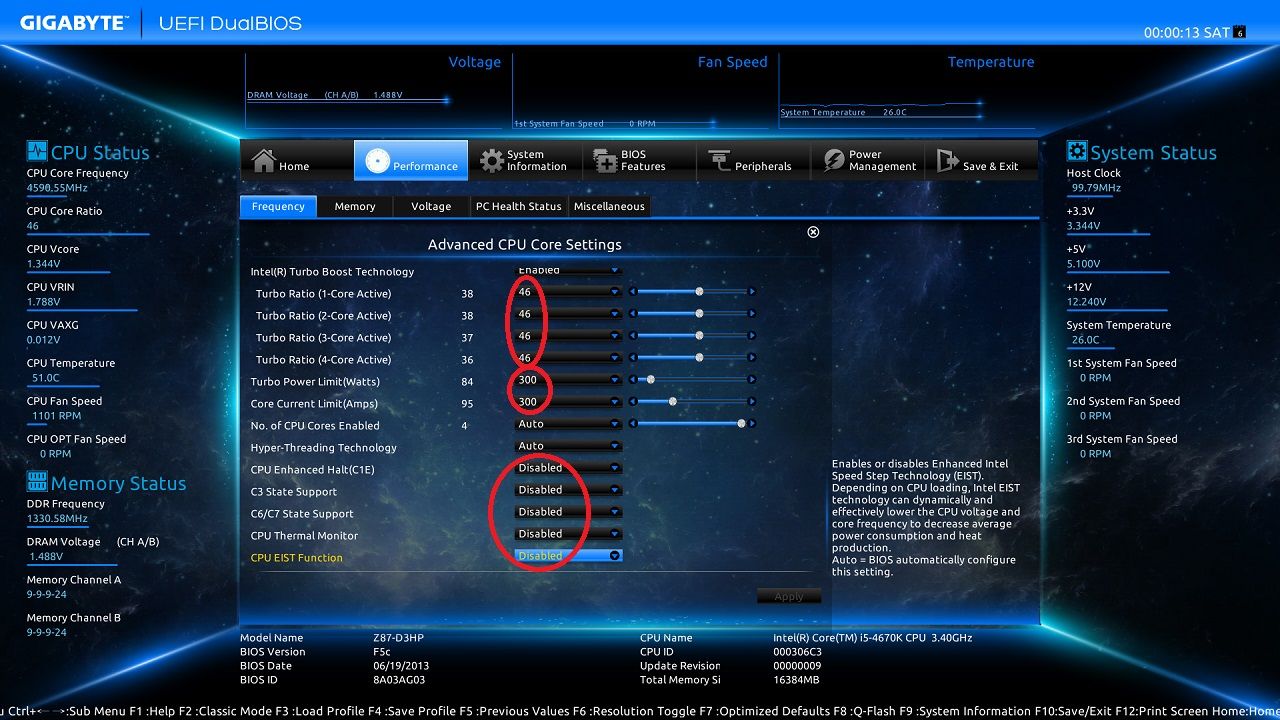
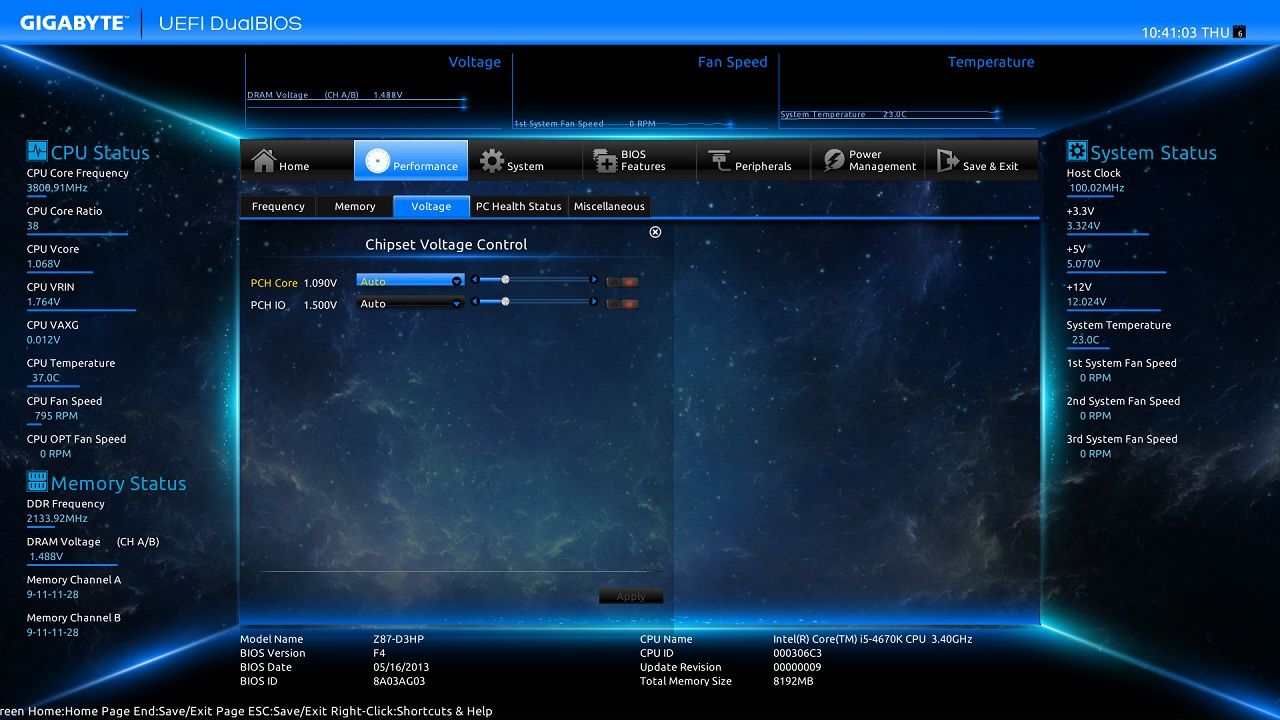
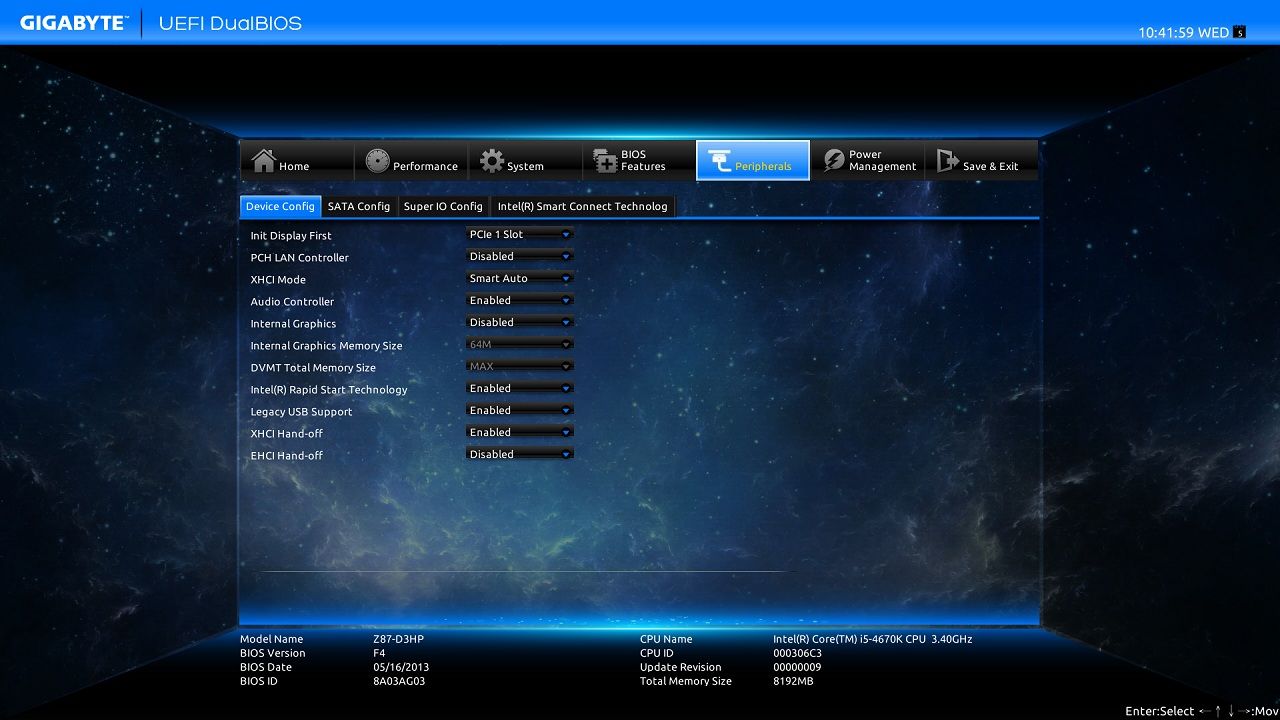
The UEFI BIOS.
Well this is a pleasant surprise, gone is the 3d mode (that I don't think anyone used) and "in" is an all new "window" mode.
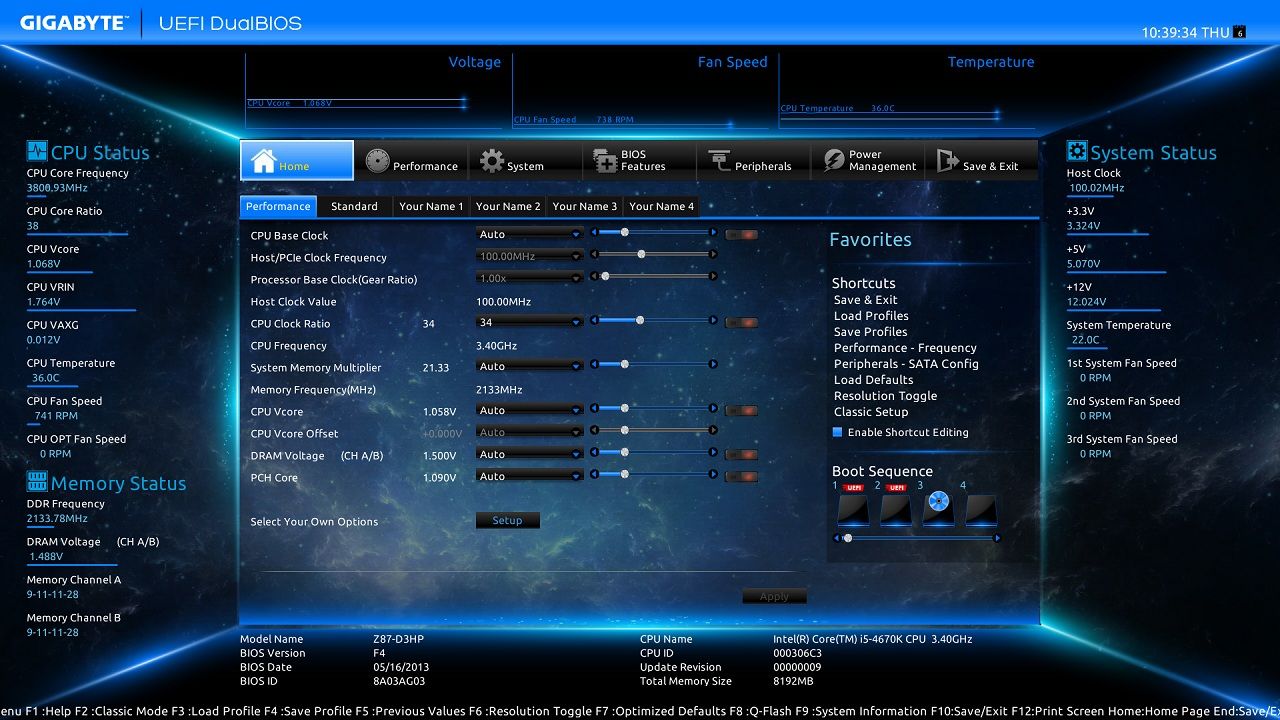
This is the default screen.

With the four user definable tabs, you can customise how you want a each to look.
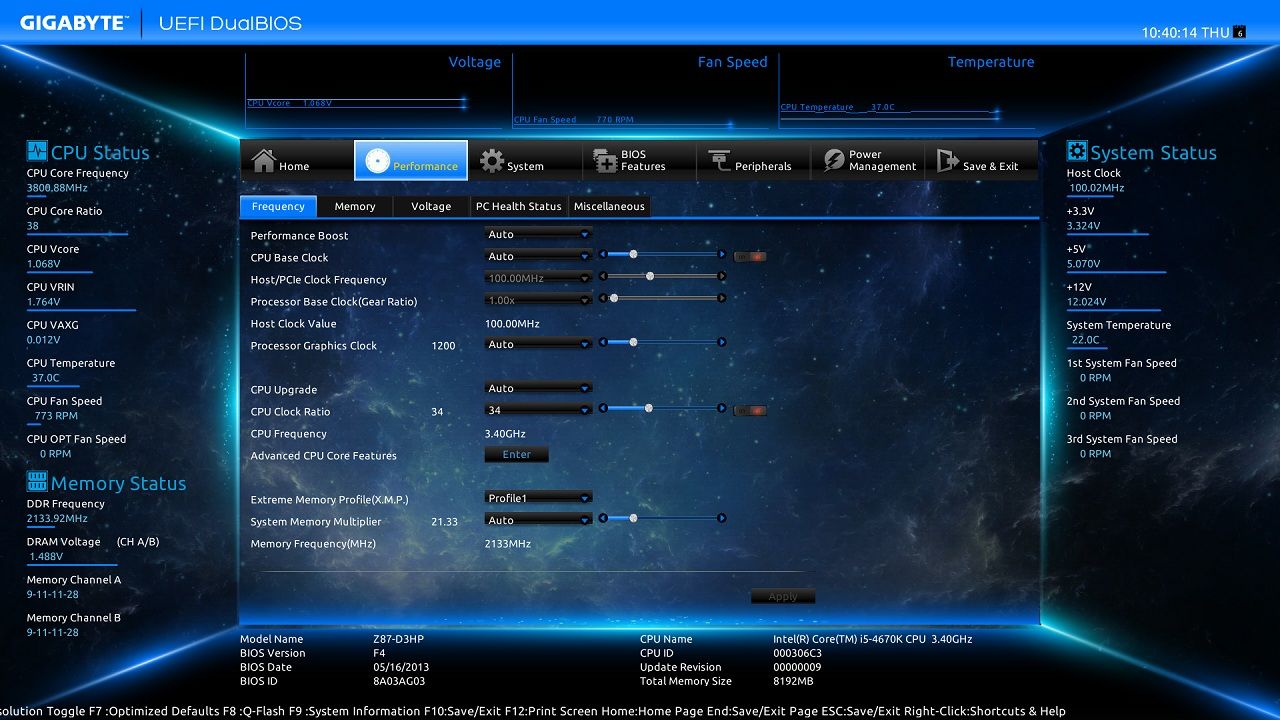
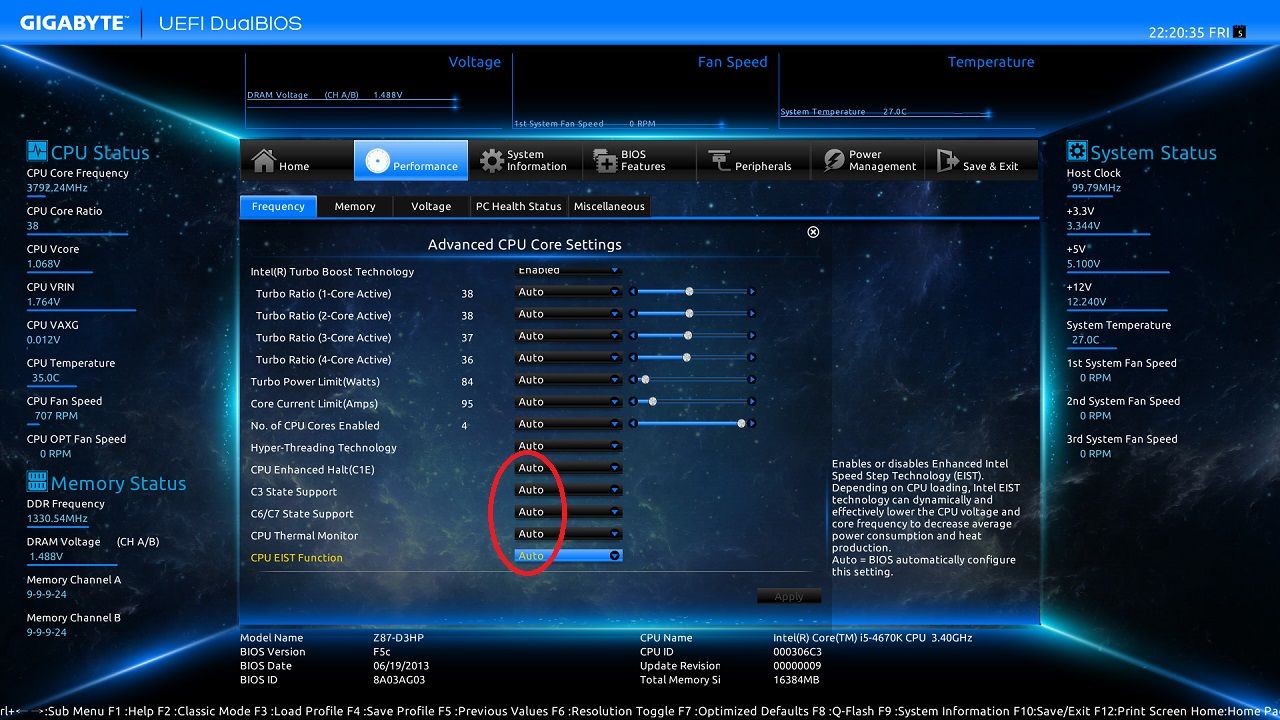
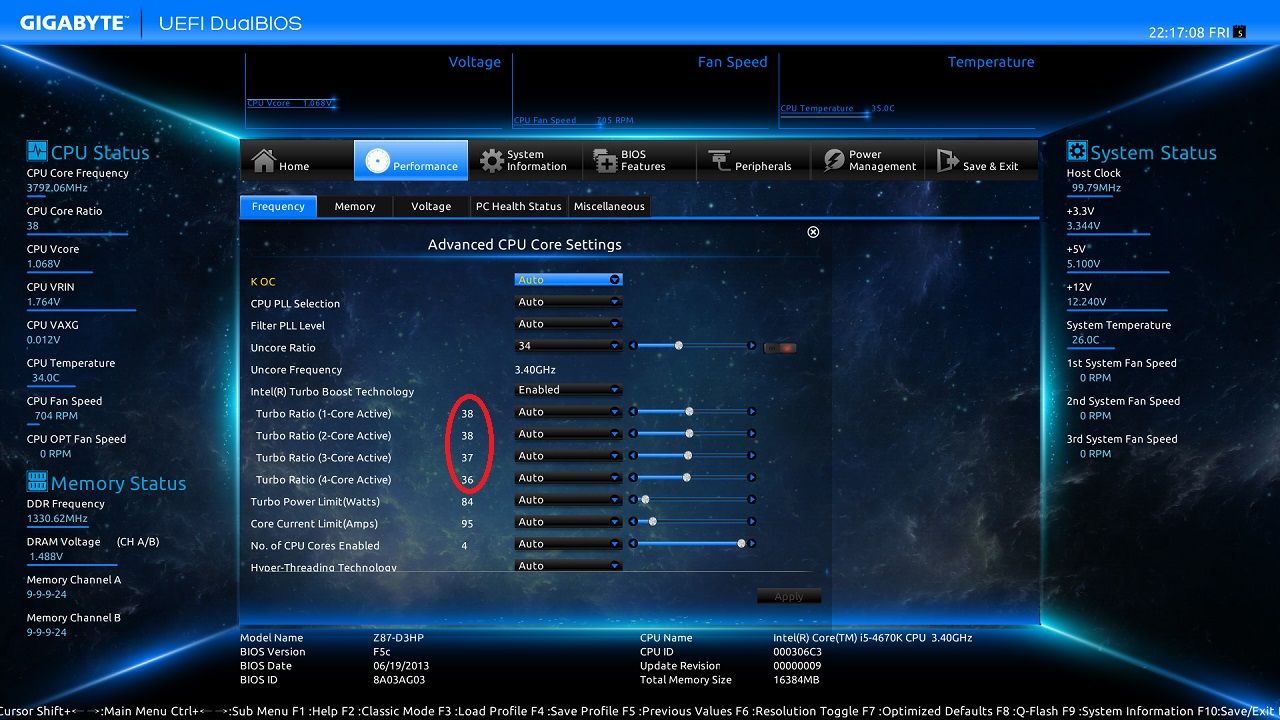
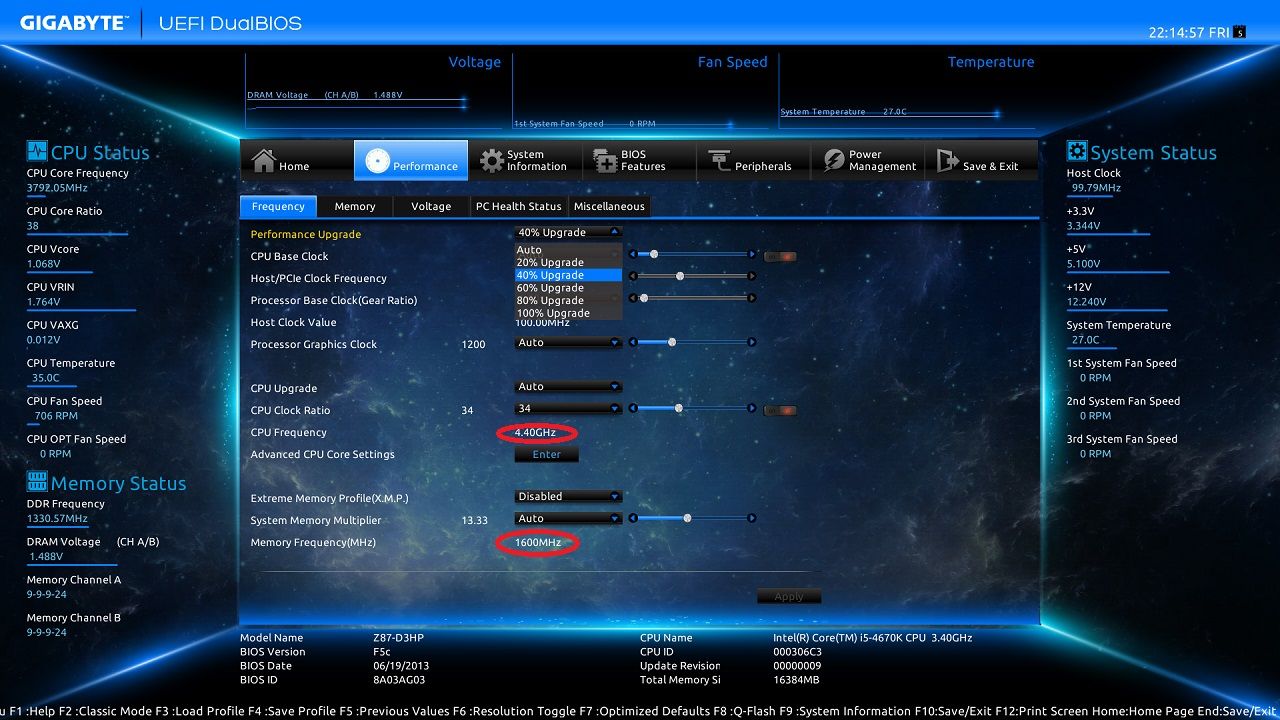
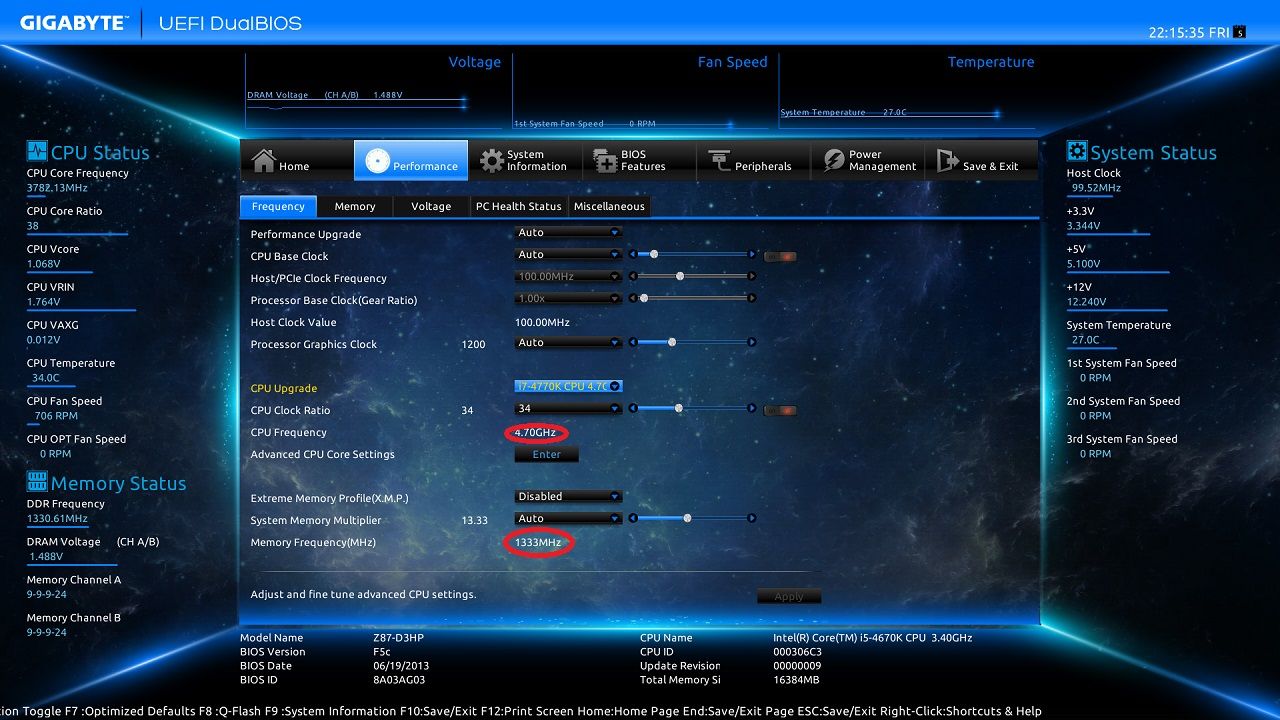
This tab controls the basic frequencies, the CPU upgrade option gives you four preset overclocks.
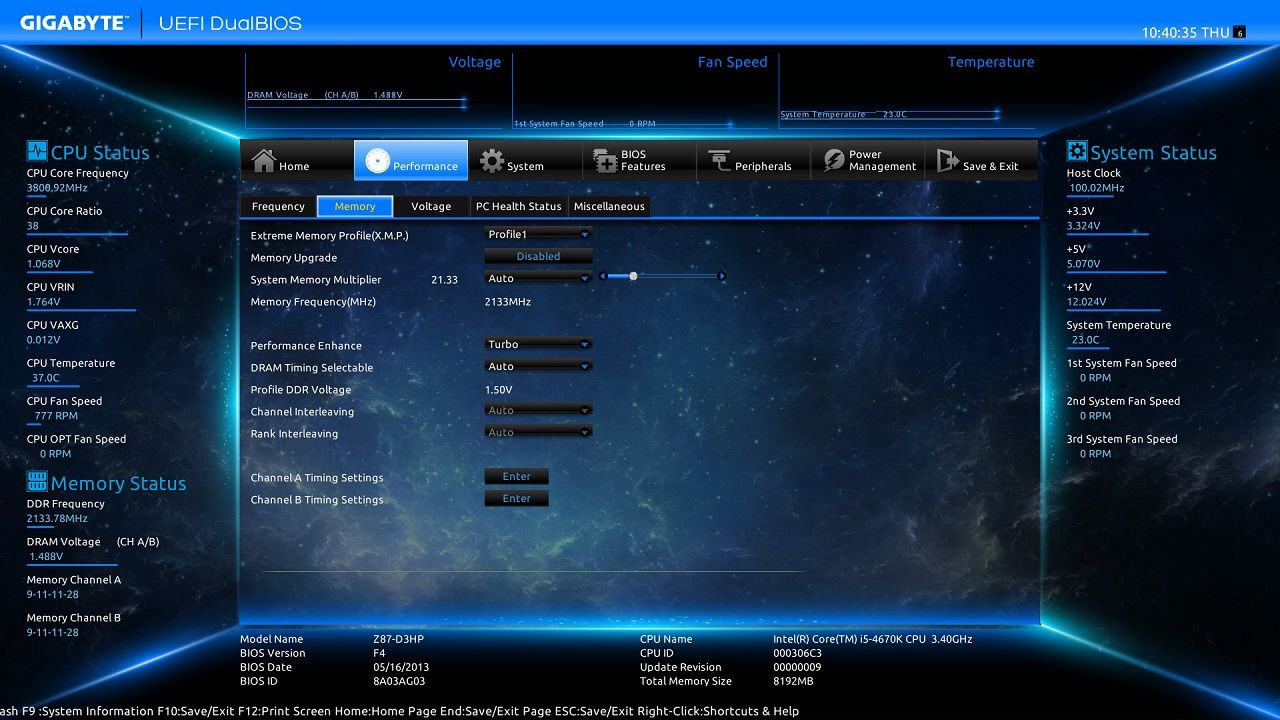
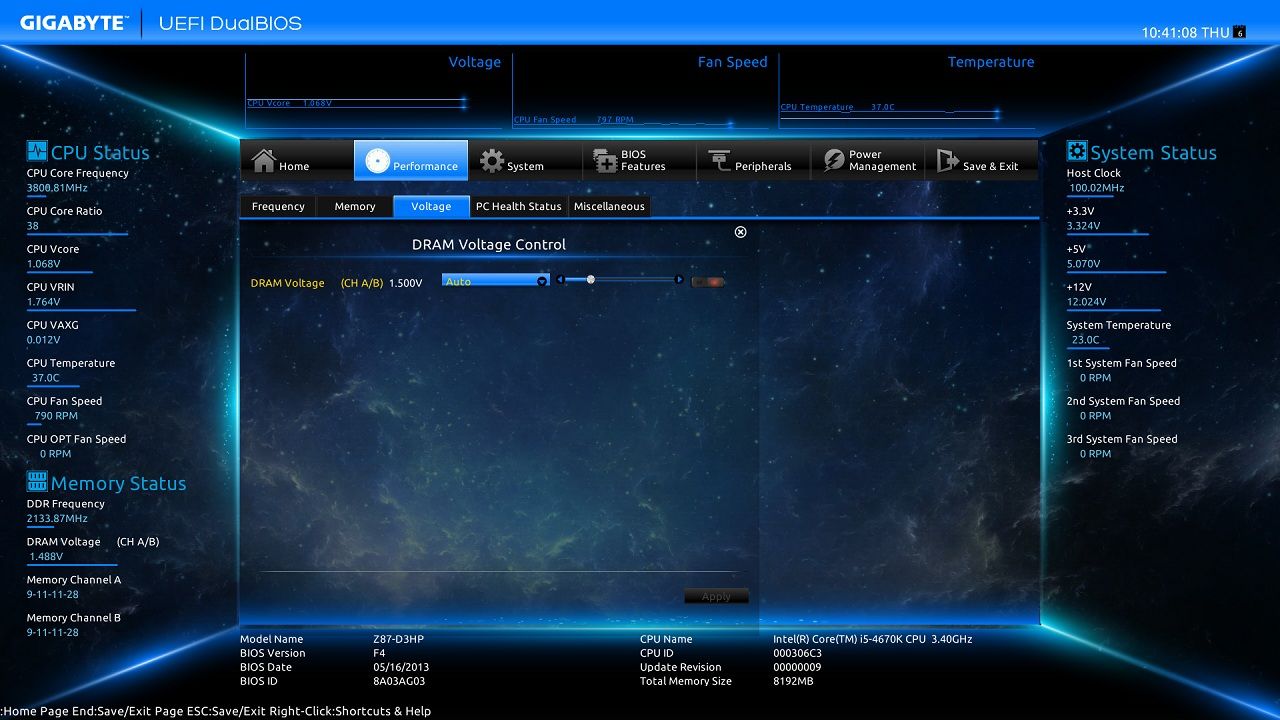
Memory control including timings.
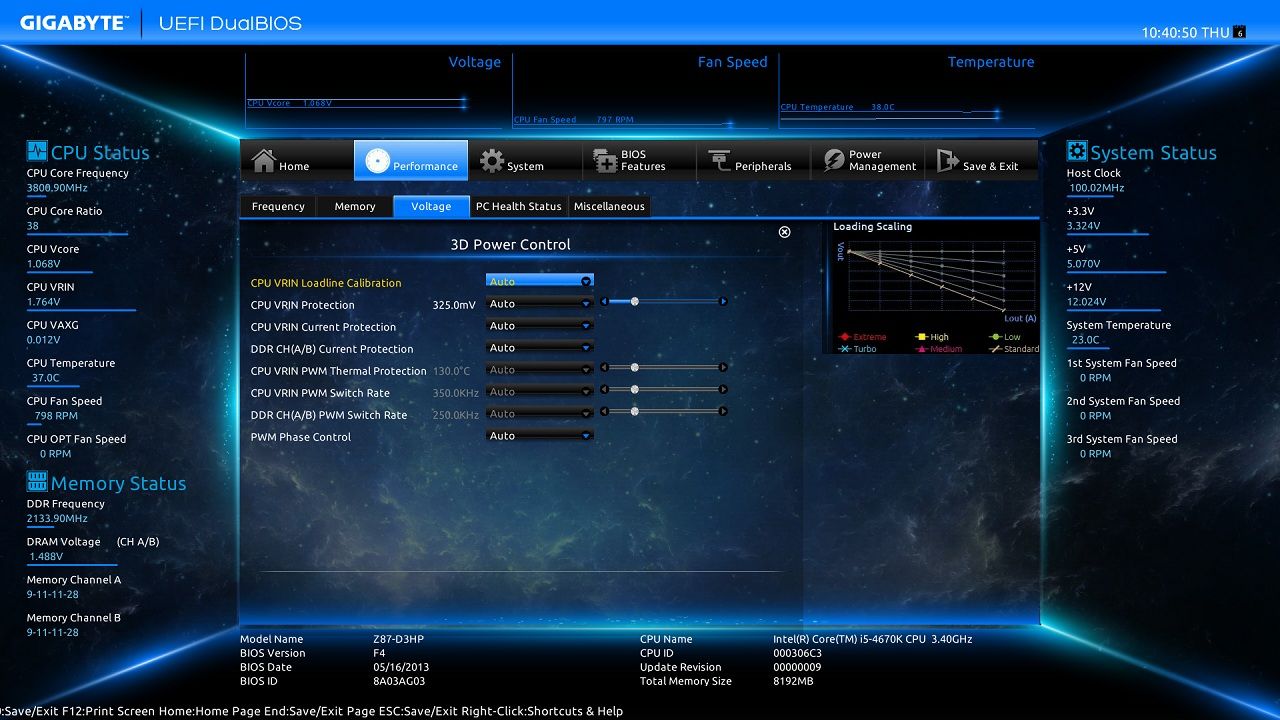
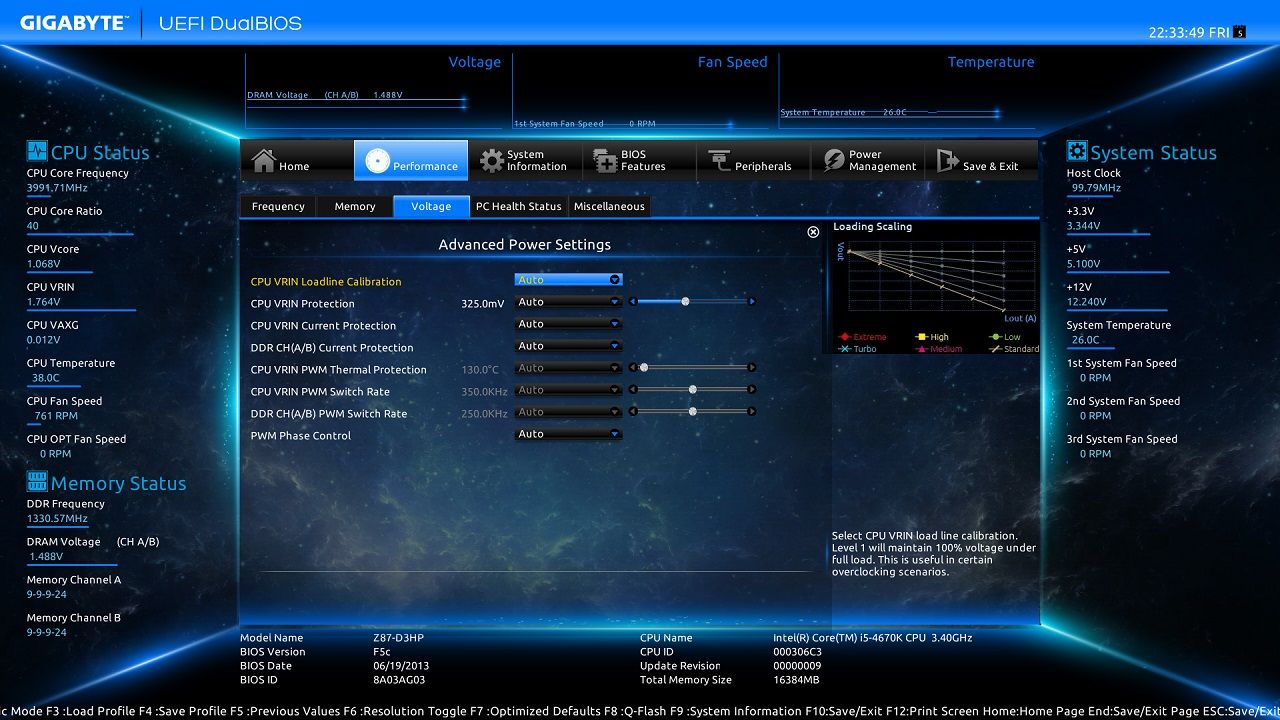
Load Line Calibration goes up to Extreme, Phase control goes up to extreme performance.
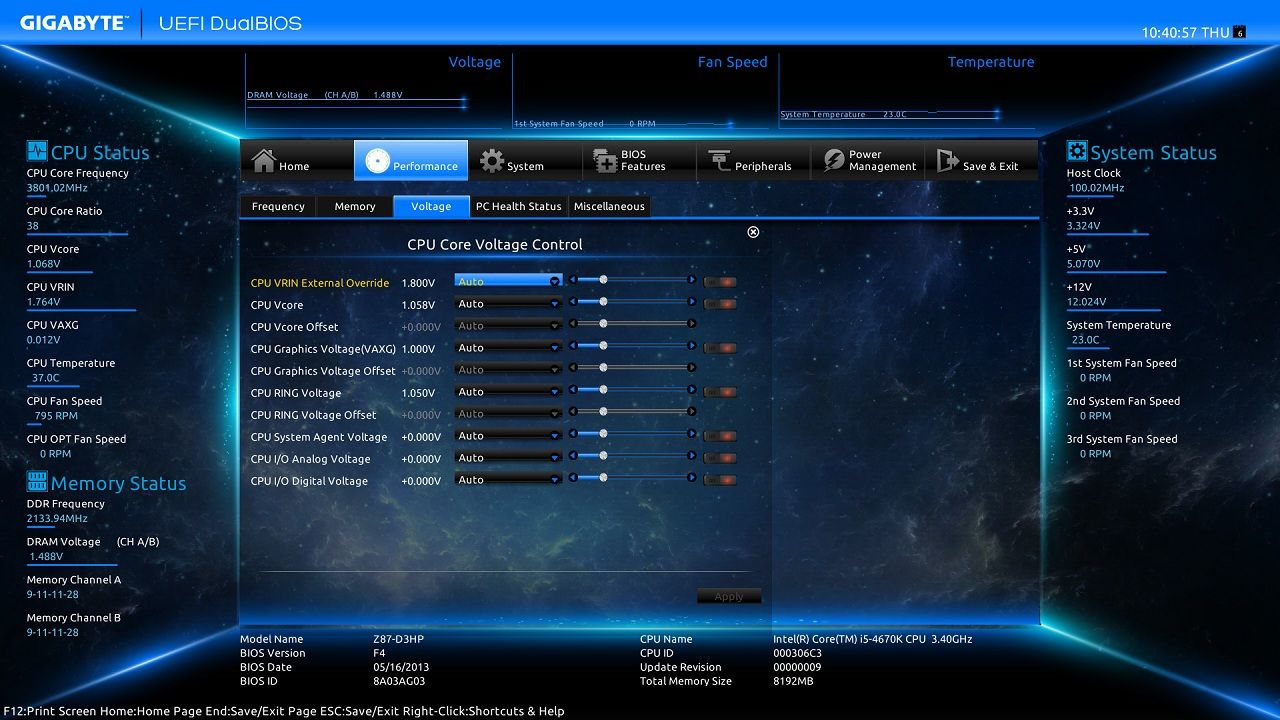
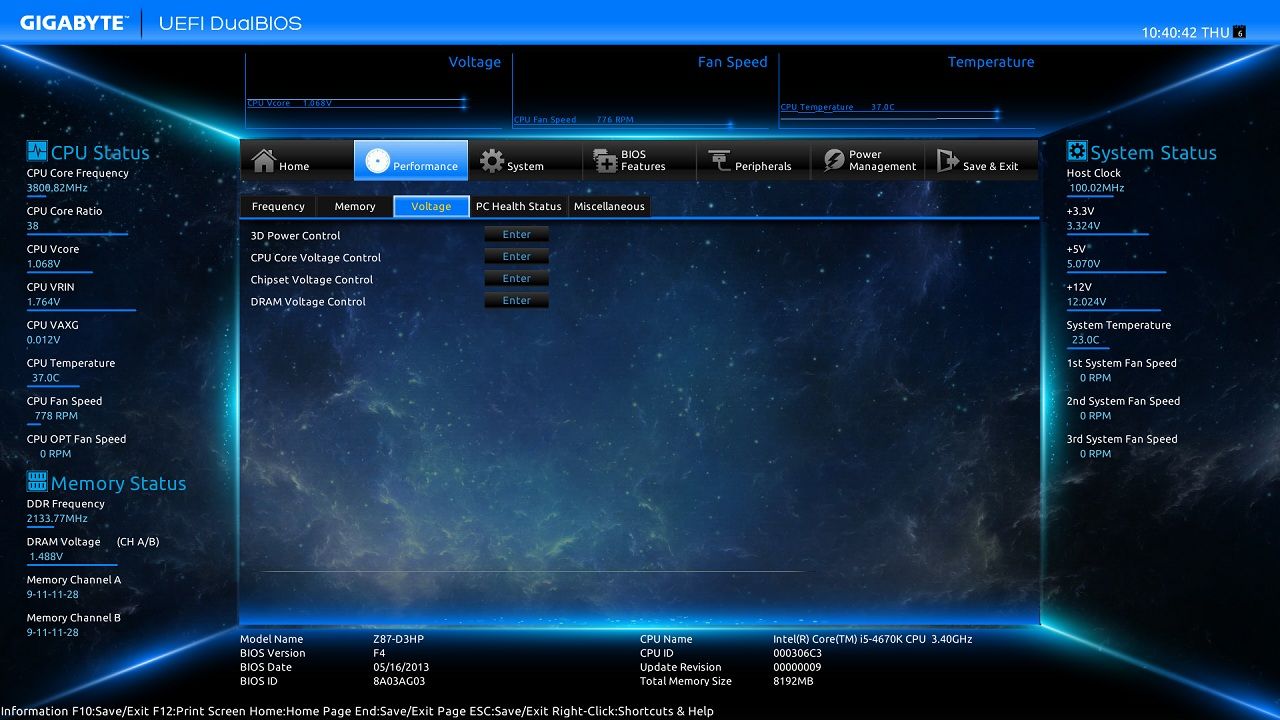
Voltage options for every aspect of the CPU.
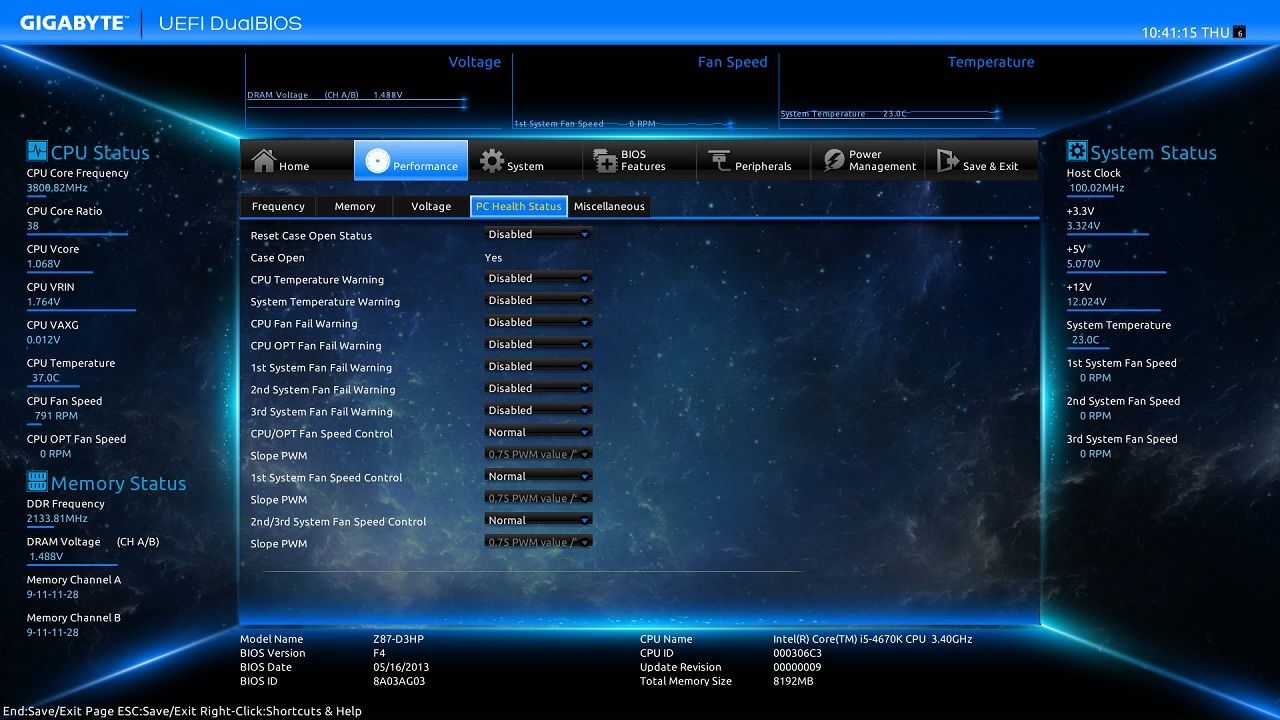
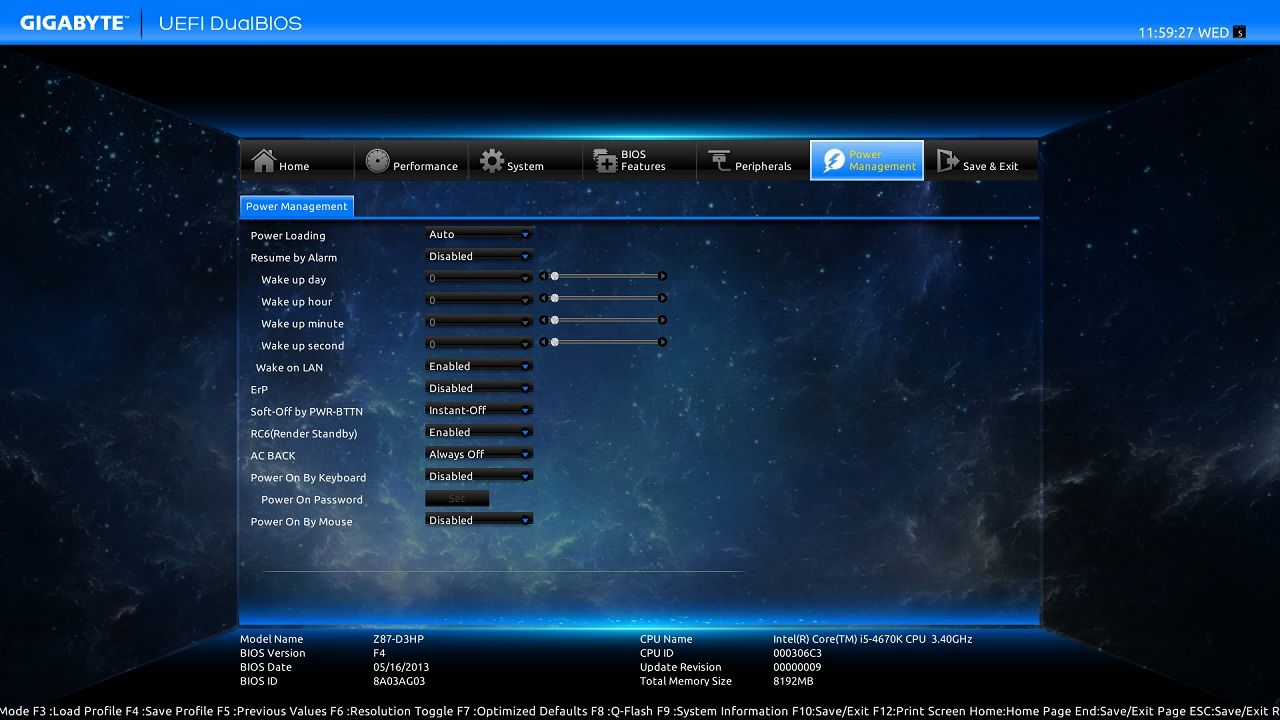
You have control of the system fan headers as two sets, system fan 1 is separate to system fan 3+4.
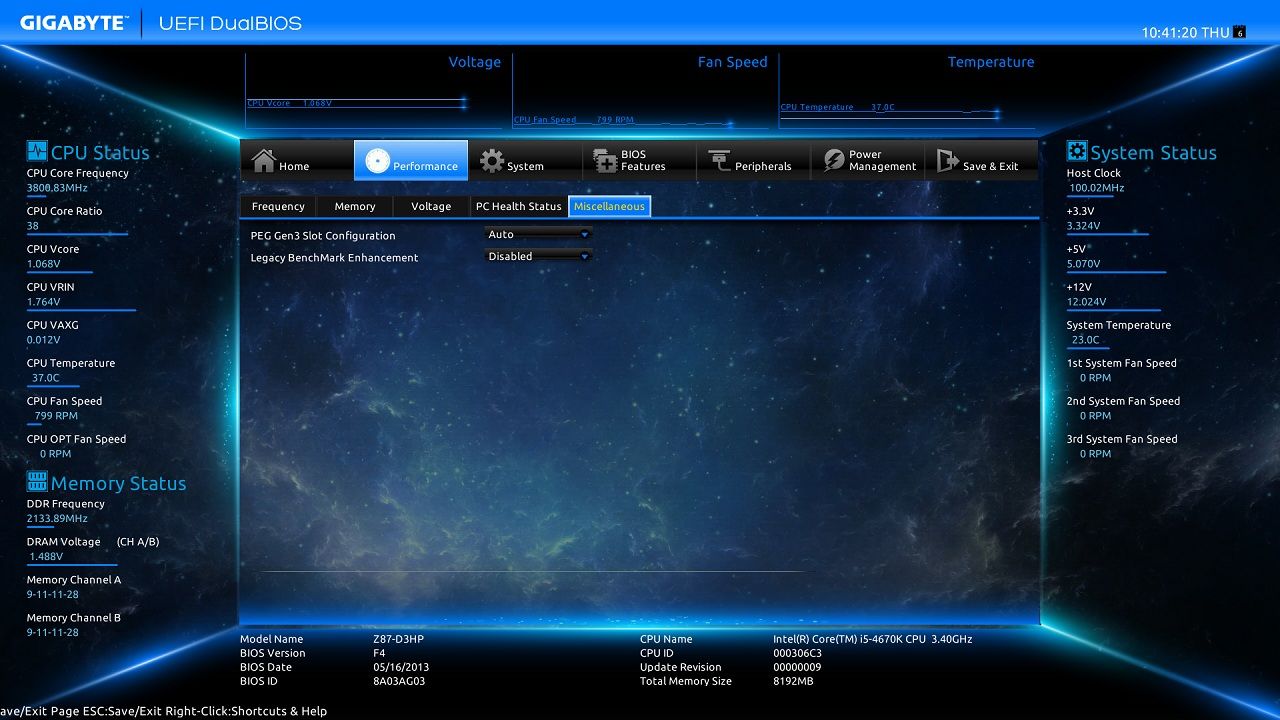
Here you are able to switch the PCI-E 16X slot between gen 3.0 or 2.0.
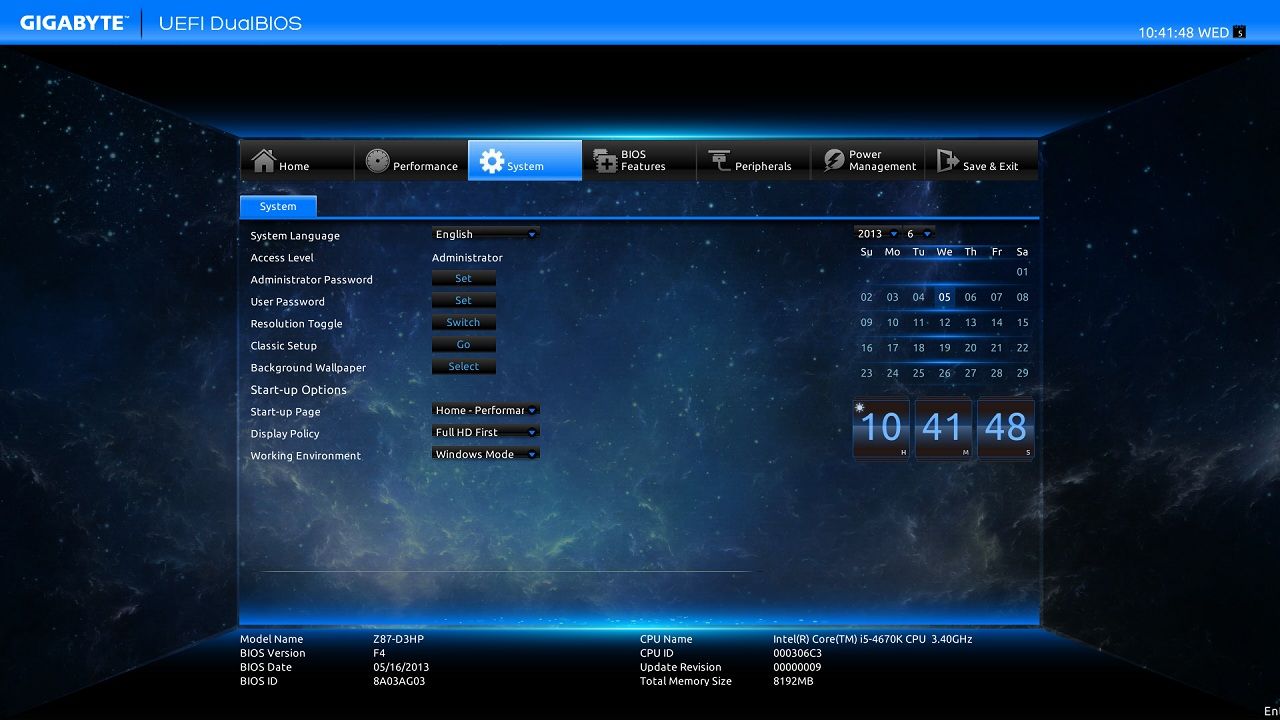
You can pick which page of the UEFI you want it to go to first after pressing the "DEL" key to enter.
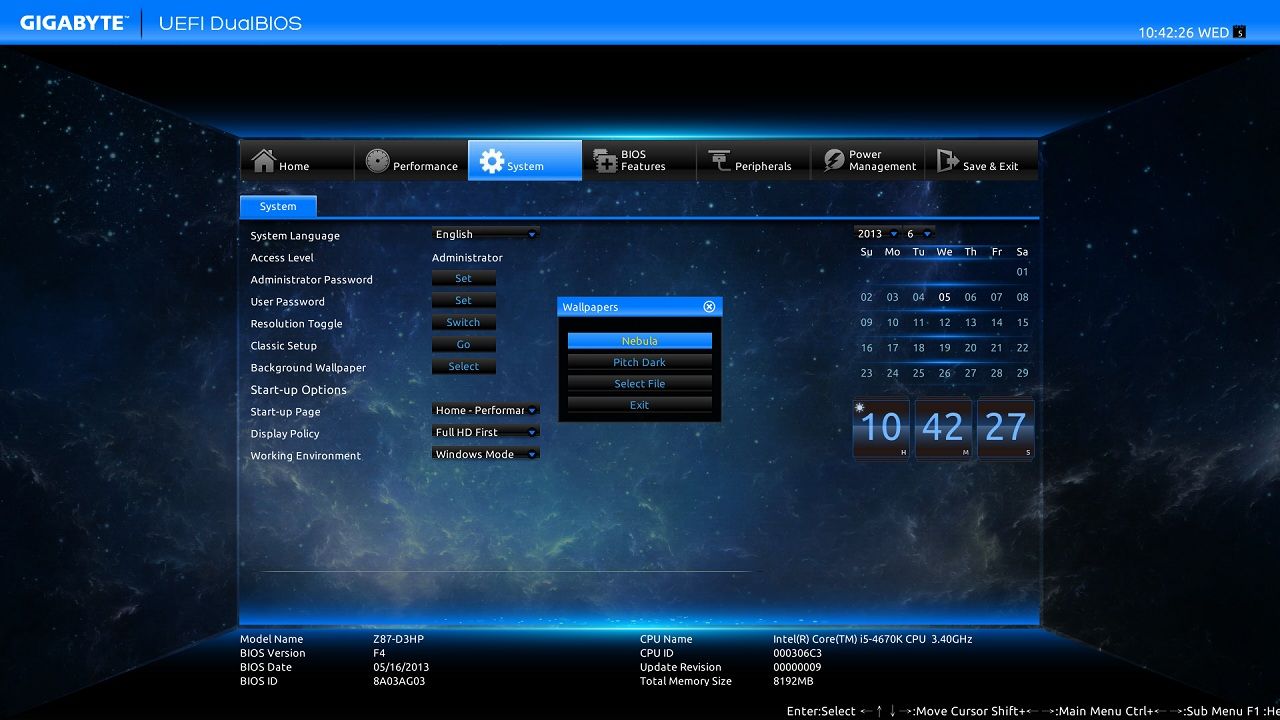
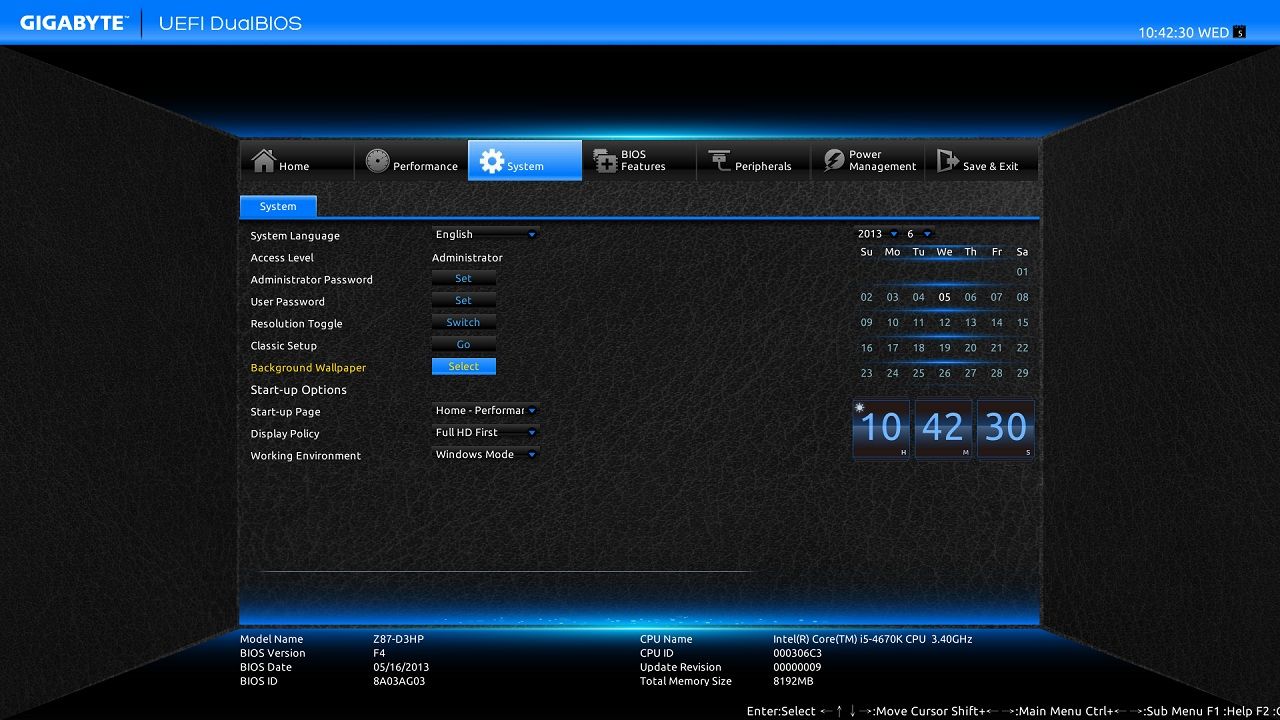
Two preset background images are available or you can upload your own from disk.
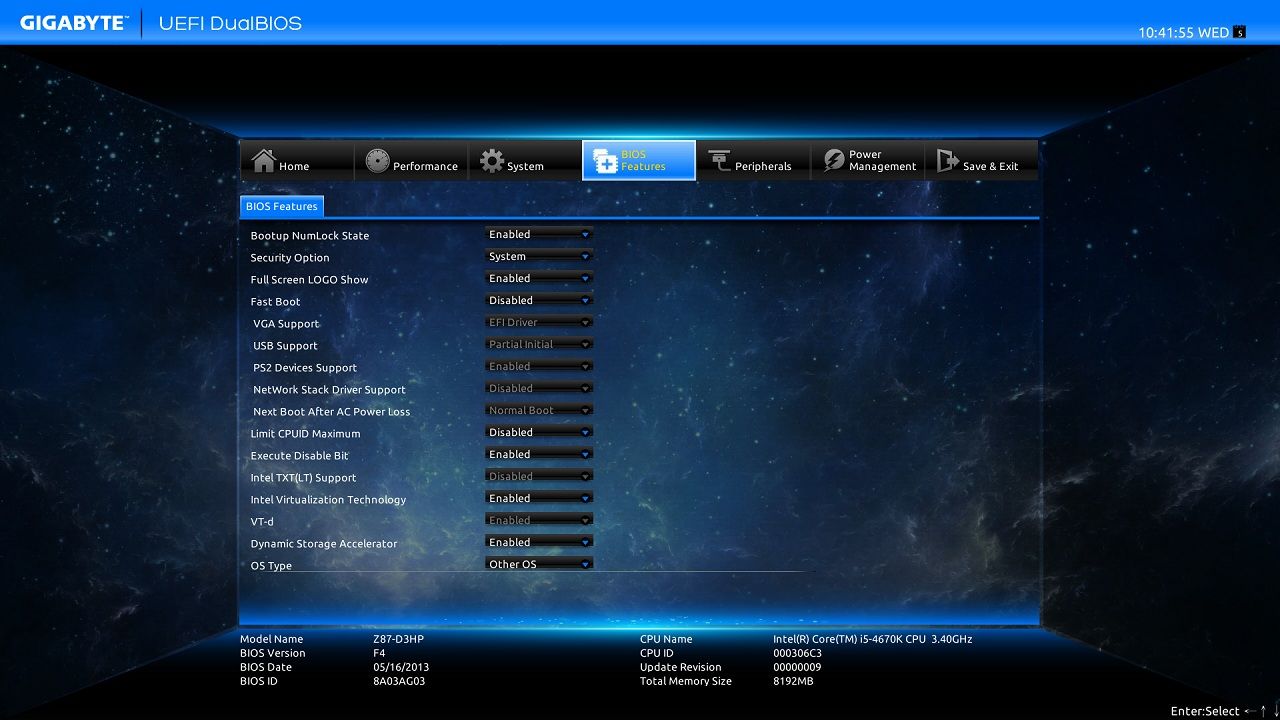
Fast boot!! two settings with a varying amount of drivers allowed to load when the OS starts.
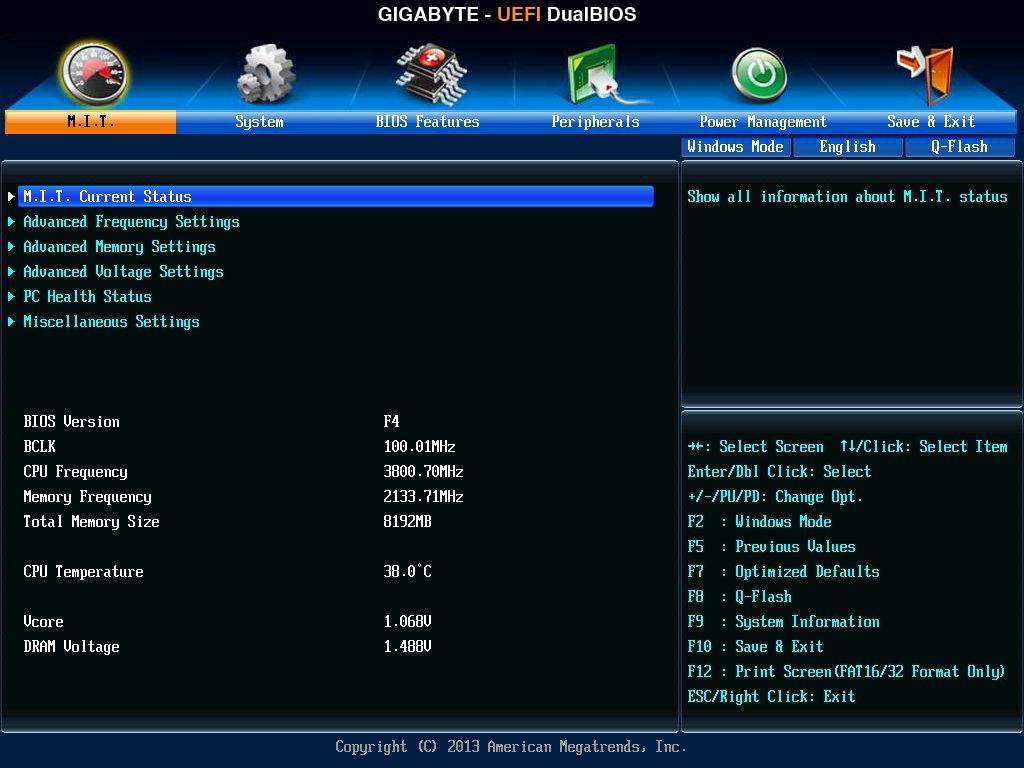
And if you still want it, the classic look is still an option.
Application software.
The installation disk includes a number of software/applications such as,
• Google drive, Google chrome and Google search bar for IE.
• Norton Internet Security.
• Download links to Cyberlink PowerDVD 12, PowerDirector 11, Power2Go 8, PhotoDirector 4, YouCam 5.
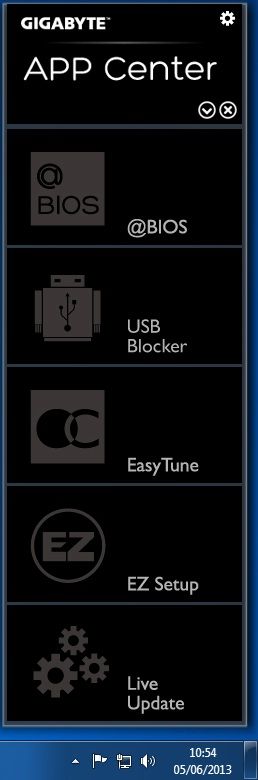
But the biggest news is a new Gigabyte App Center which gives you a expandable tray icon and redesigned/rewritten applications.
You can select which of the above applications you wish to install along side it.
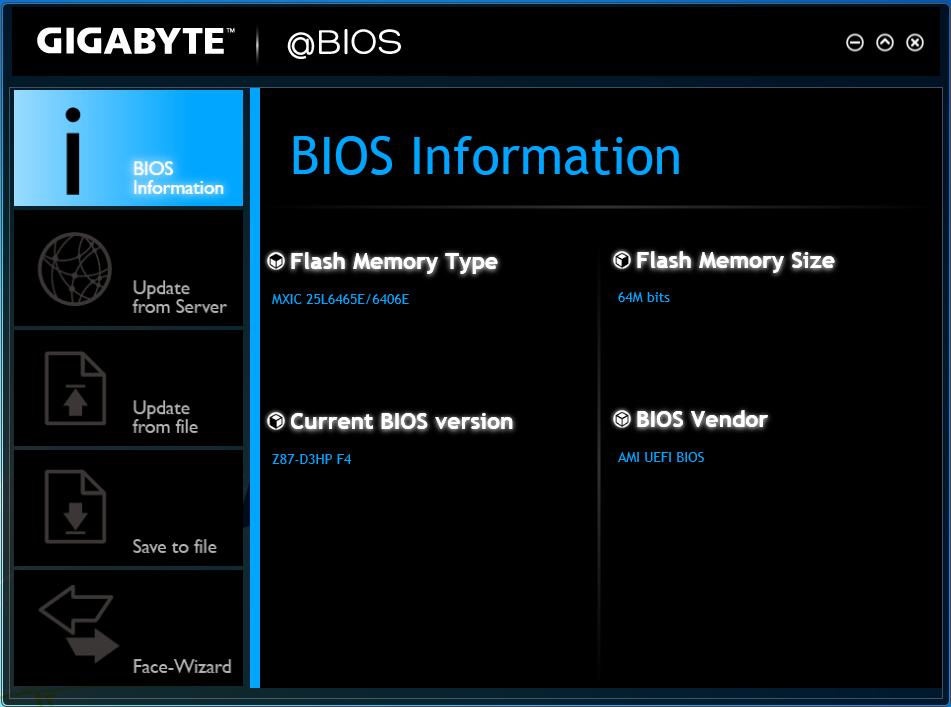
This is @BIOS, you can use it to flash your BIOS either via the Internet or from file , but it is strongly recommended to use QFlash found within the BIOS instead.
Face wizard allows you to change the boot-up logo and picture.
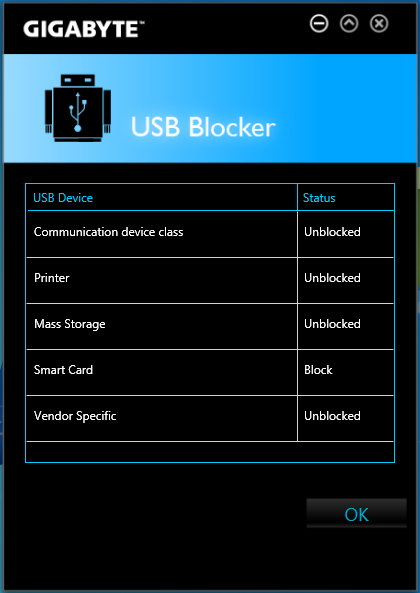
USB blocker does exactly what it suggest, you can stop certain class USB devices from working.
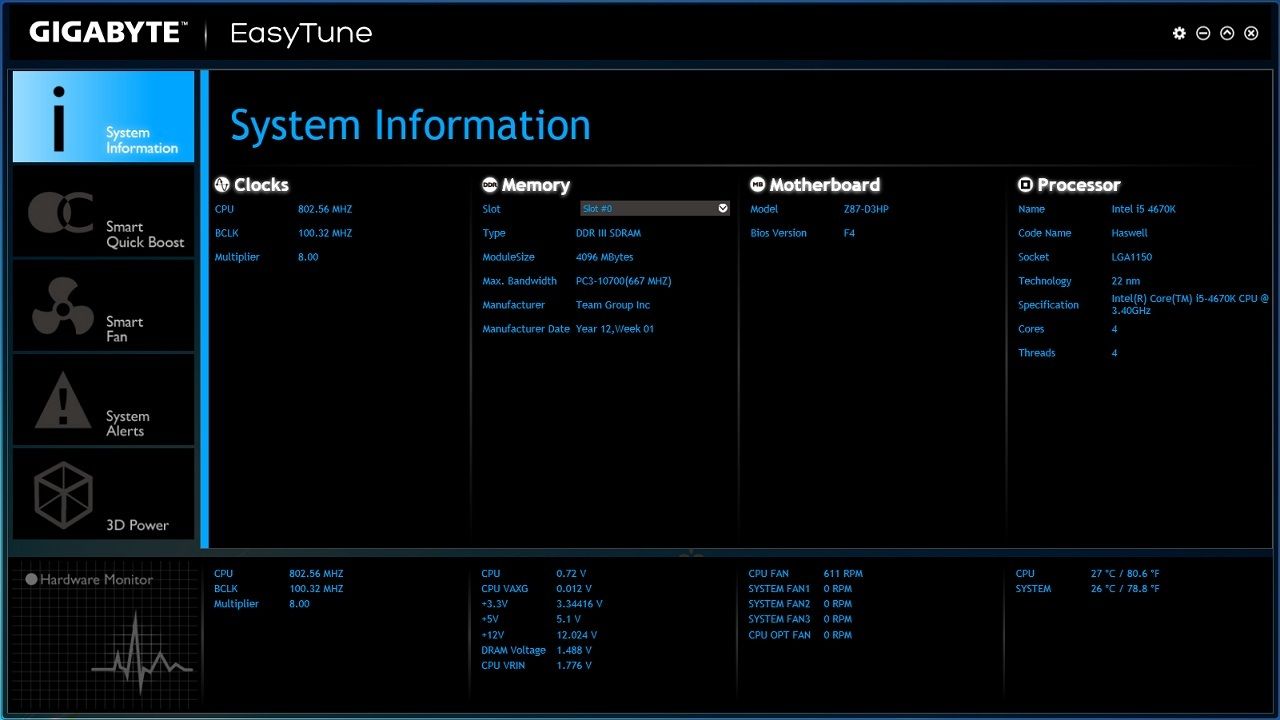
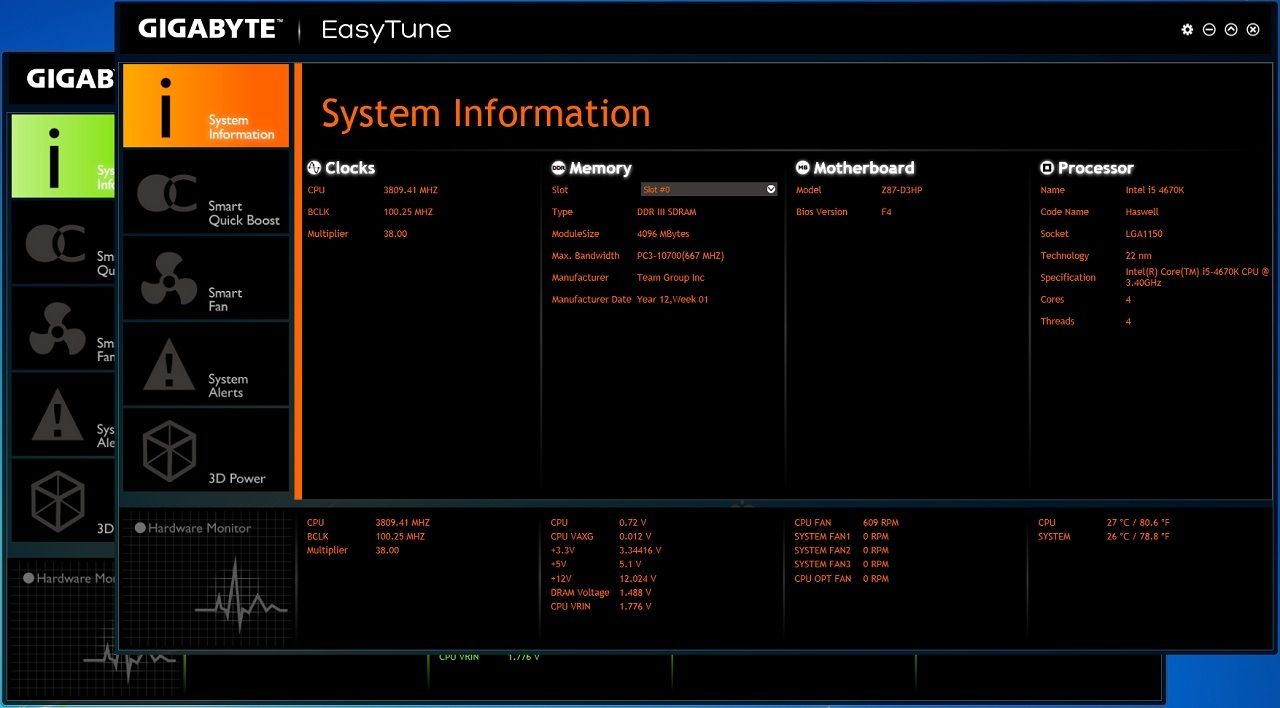
Finally! the previous Easytune6 has been chucked in the bin and now a all new Easytune is finally available.

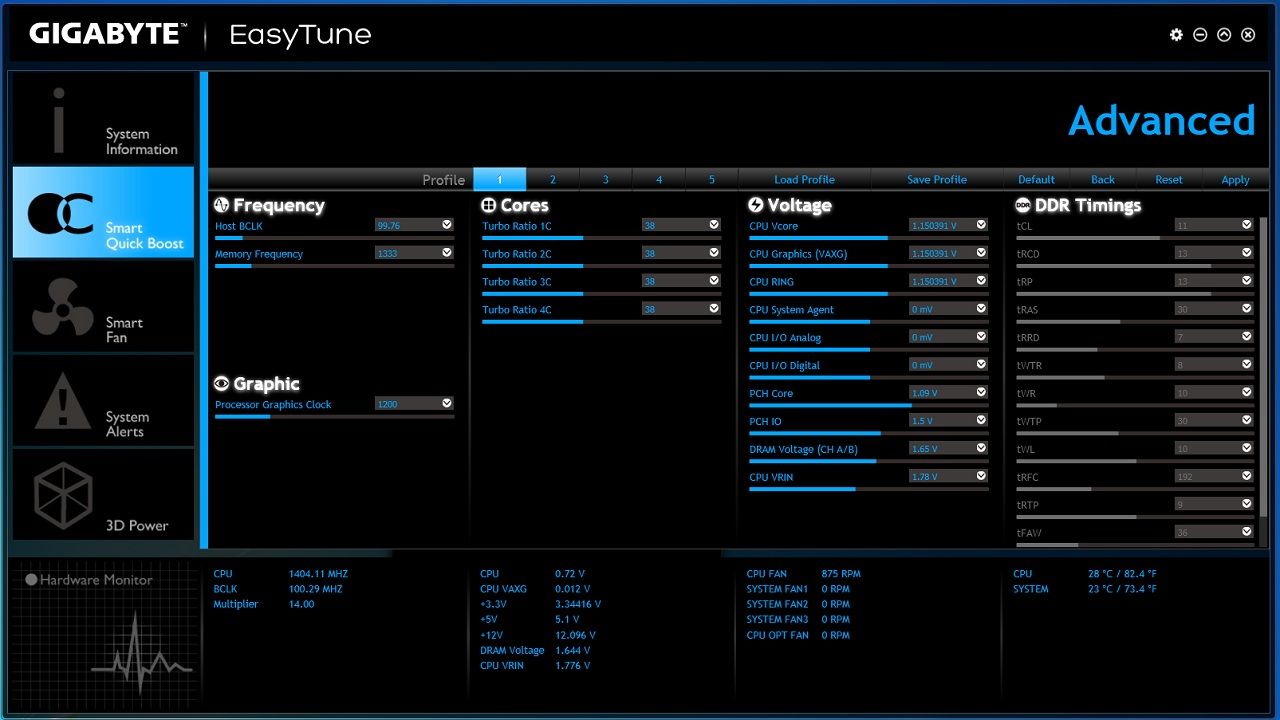
The three overclock presets all work perfectly (if a little bit too much Vcore compared to what my CPU needs to be stable at these speeds). This is good, as the previous Easytune6 on Z77 I never had much luck with it and found the two higher presets to be unstable and Autotune to also be unstable.
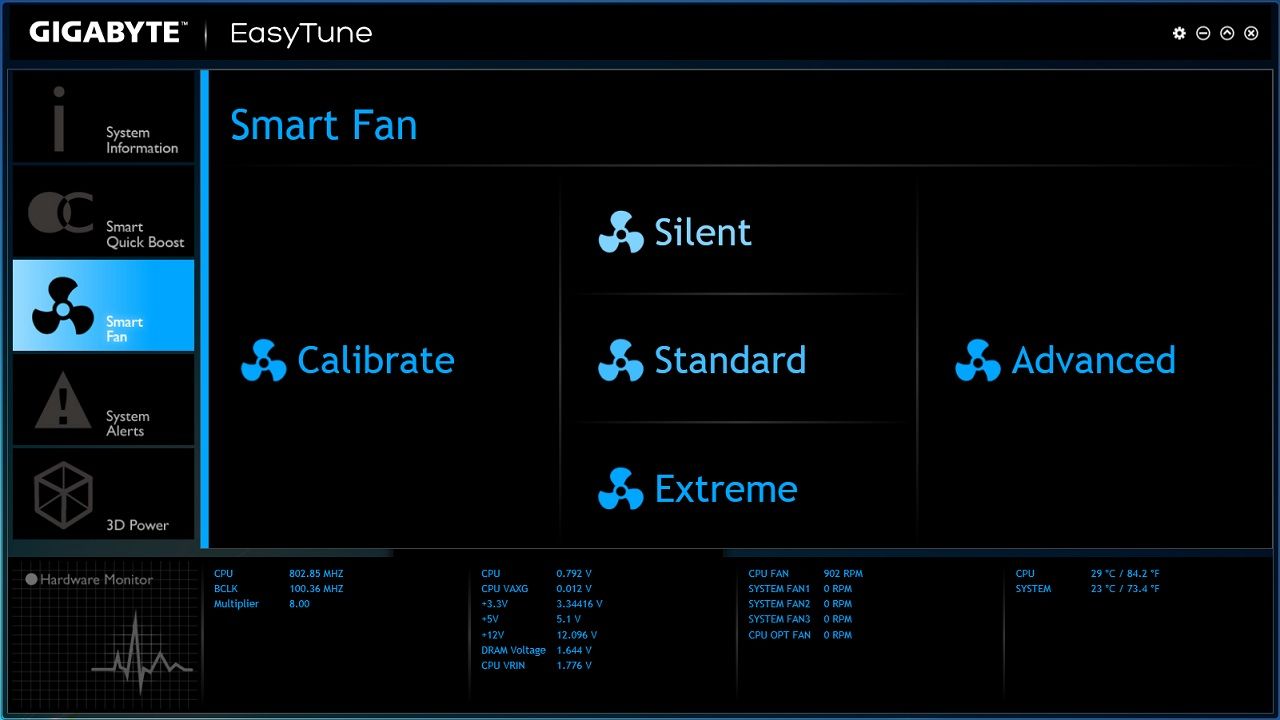
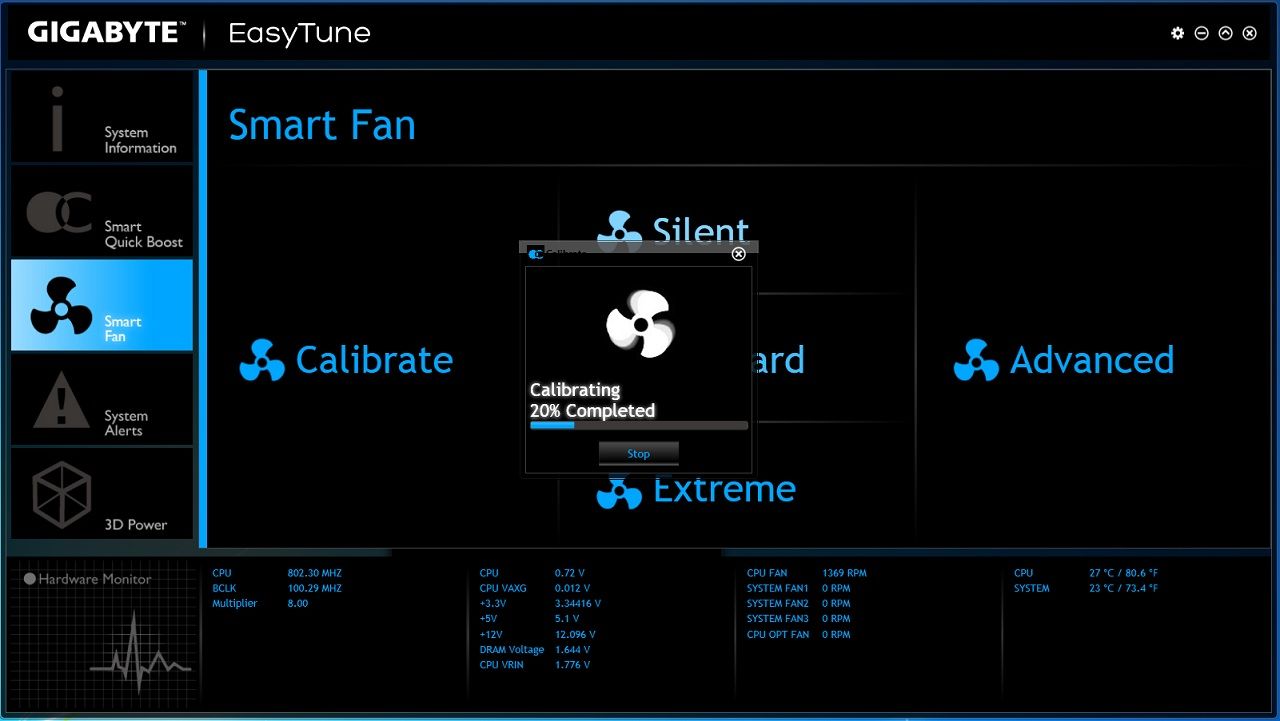
Smart fan, where you can let the software calibrate itself to your fans (dependant on what sort of individual fan control a particular board has) and it will find out where the fans will "stall" and reach "maximum" so it knows how much voltage to feed them to give you the three preset fan speeds.
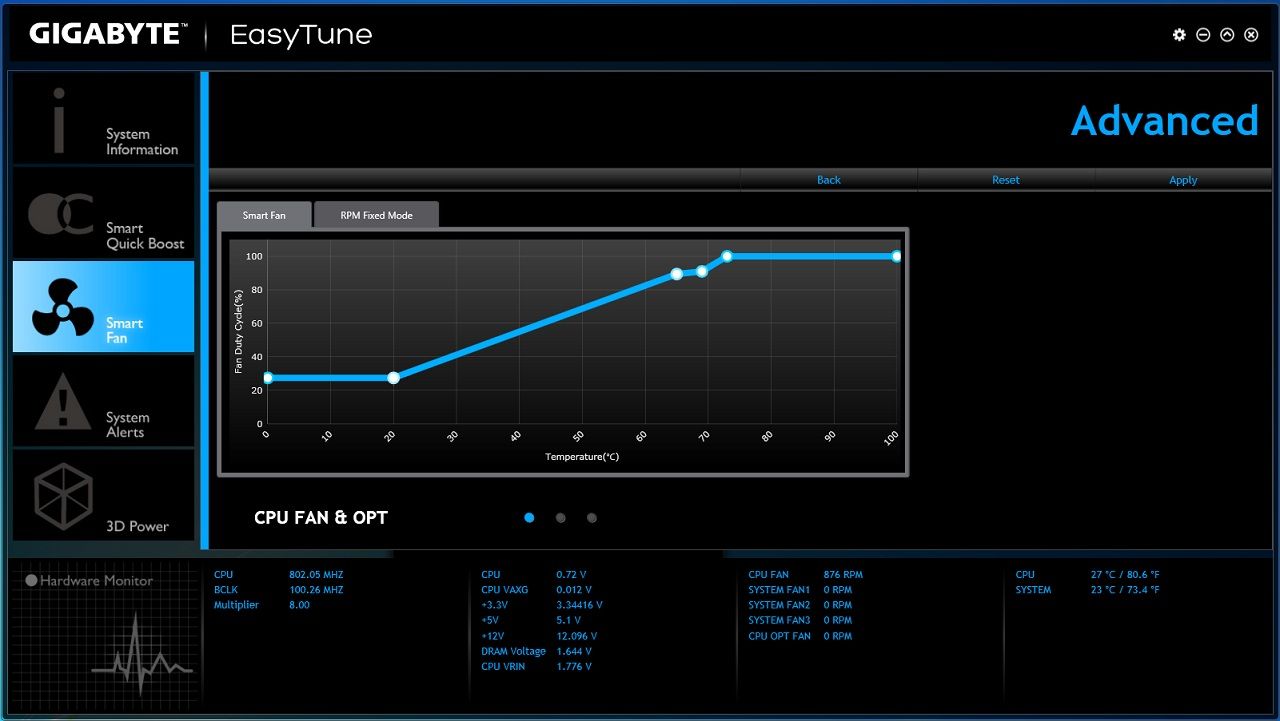
Or within the advanced section of Smart Fan you can define your own custom fan curve.
The above is self explanatory.
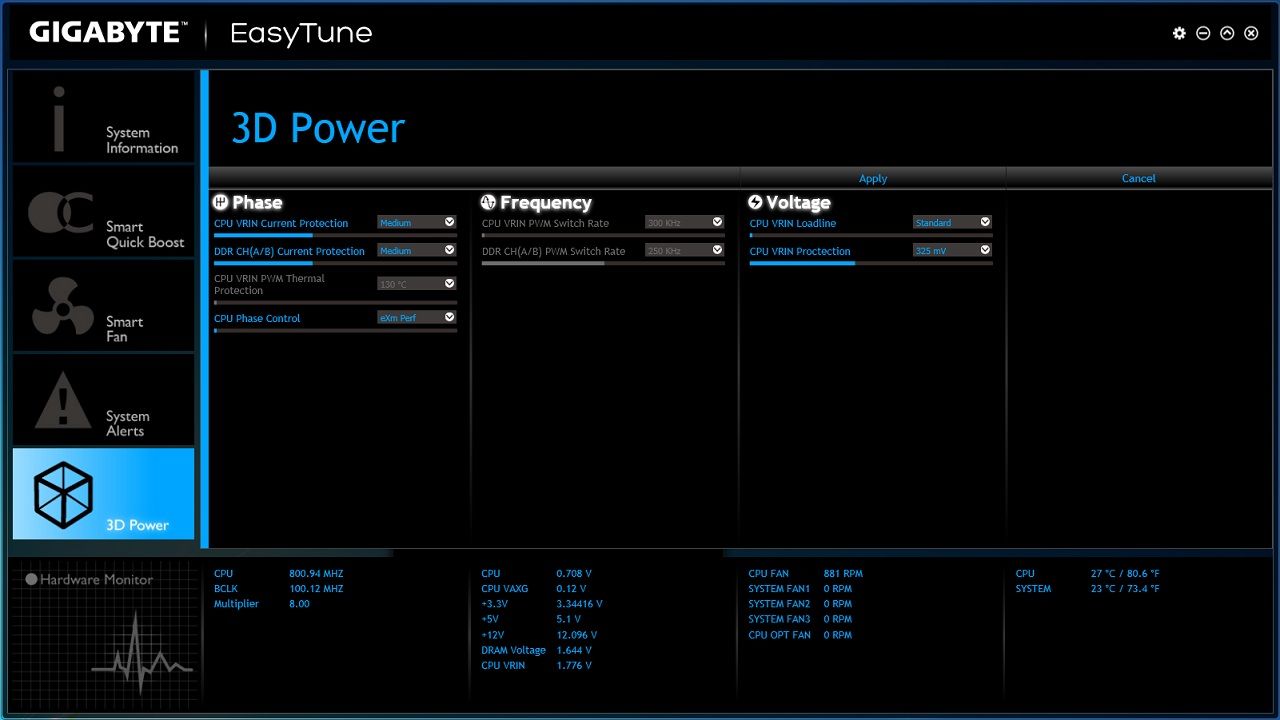
3DPower where you can adjust the amount of load Line Calibration or the speed at which the power phases switch, important options to get high clocks form your CPU.
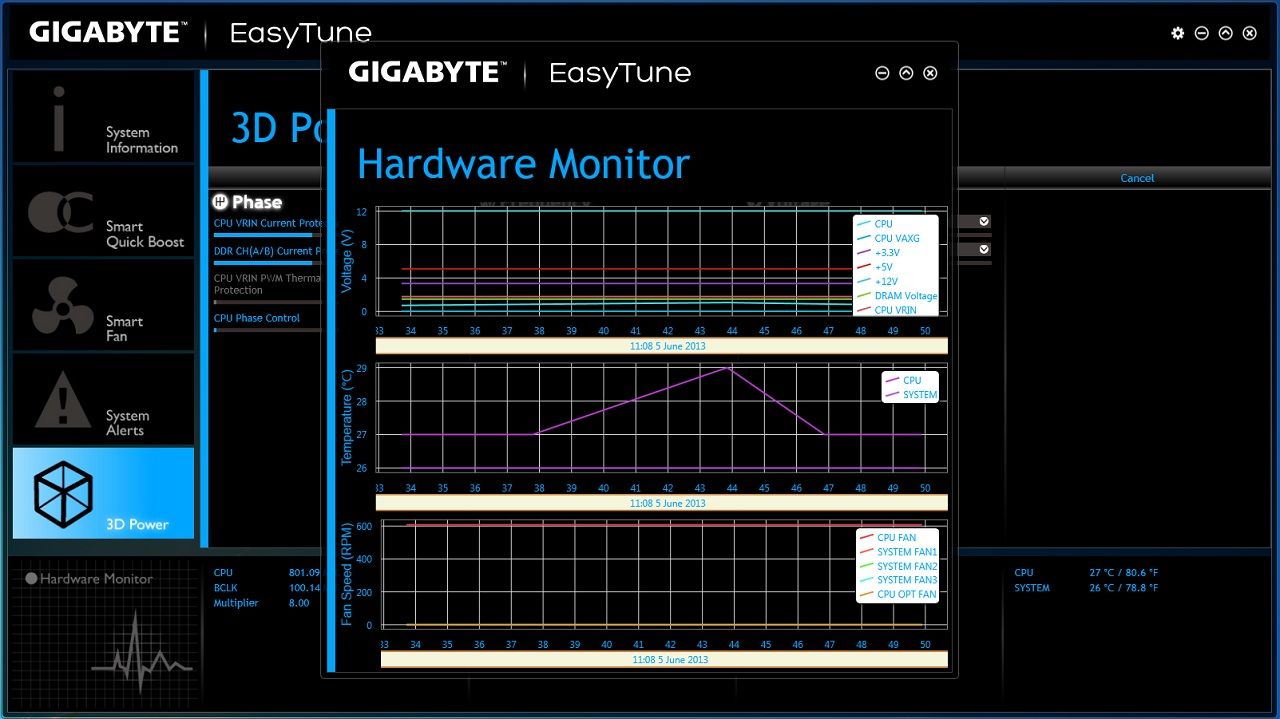
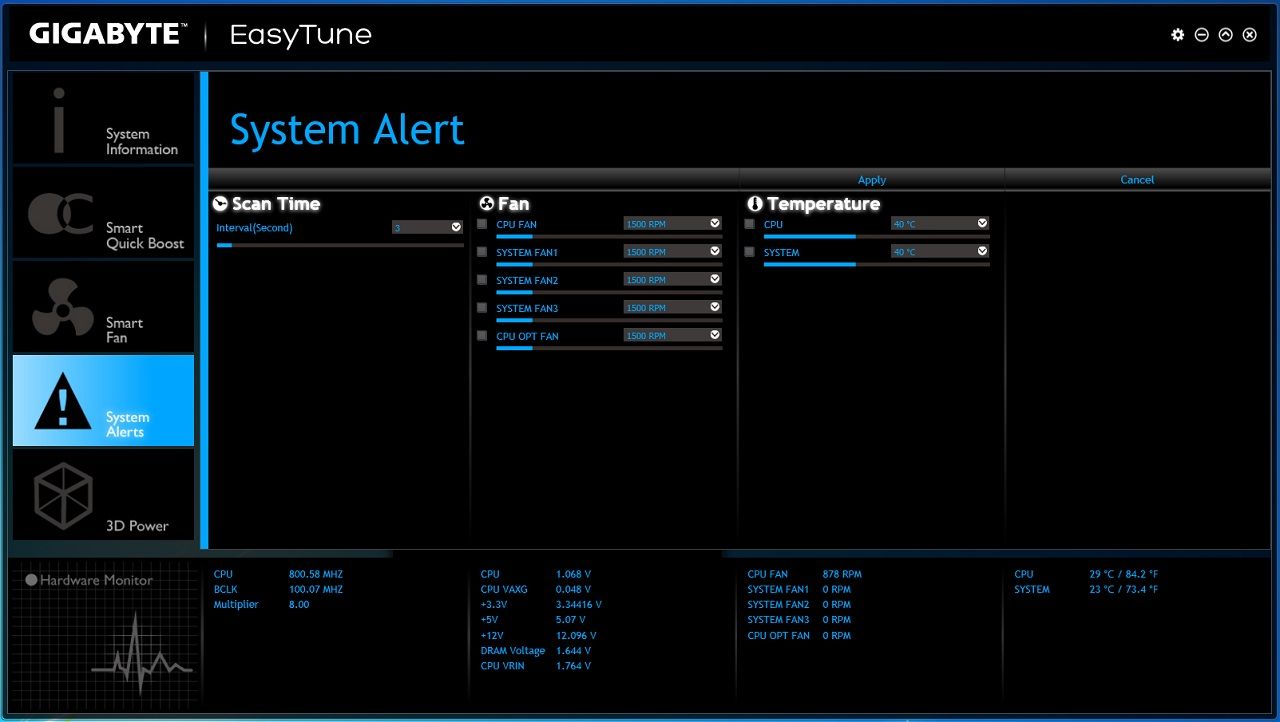
System monitor, does exactly what it says on the tin.
Well that wraps that up, hopefully you can see how much improved the new Easytune is compared to before and it really is a joy to use and most importantly it works. But to add a little more choice,
You can select between three different colours.
")
Overclocking.
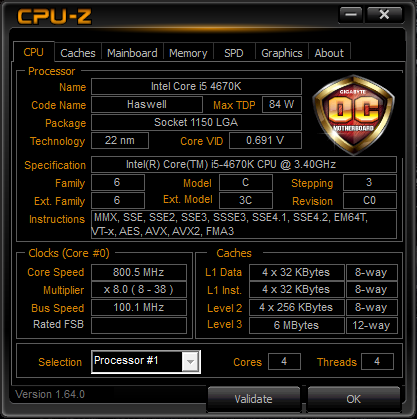
Test System.
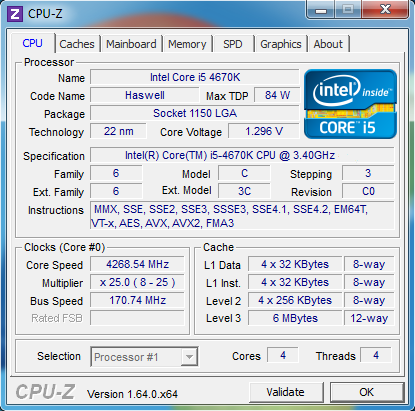
i5 4670K
Kingston HyperX Predator 2400MHz RAM
2 X Kingston HyperX 240GB SSD's in RAID0
Alpenfohn K2 cooler.
i5 3570K
Z77X-UP5 TH
BCLK overclocking.
BCLK overclocking has improved too and now like X79 there are BCLK multipliers available to use and try,
The above is with a 1.25X BCLK gear ratio.
And the above is with the BCLK increased from 100Mhz to 102.5MHz also with the 1.25X gear ratio.
Above is with the gear ratio increased to 1.66X with the extra 2.5MHz on the BCLK.
There is also a 2.5X ratio available to use but I was not able to boot into Windows with it applied, maybe more time spent could see it happen?
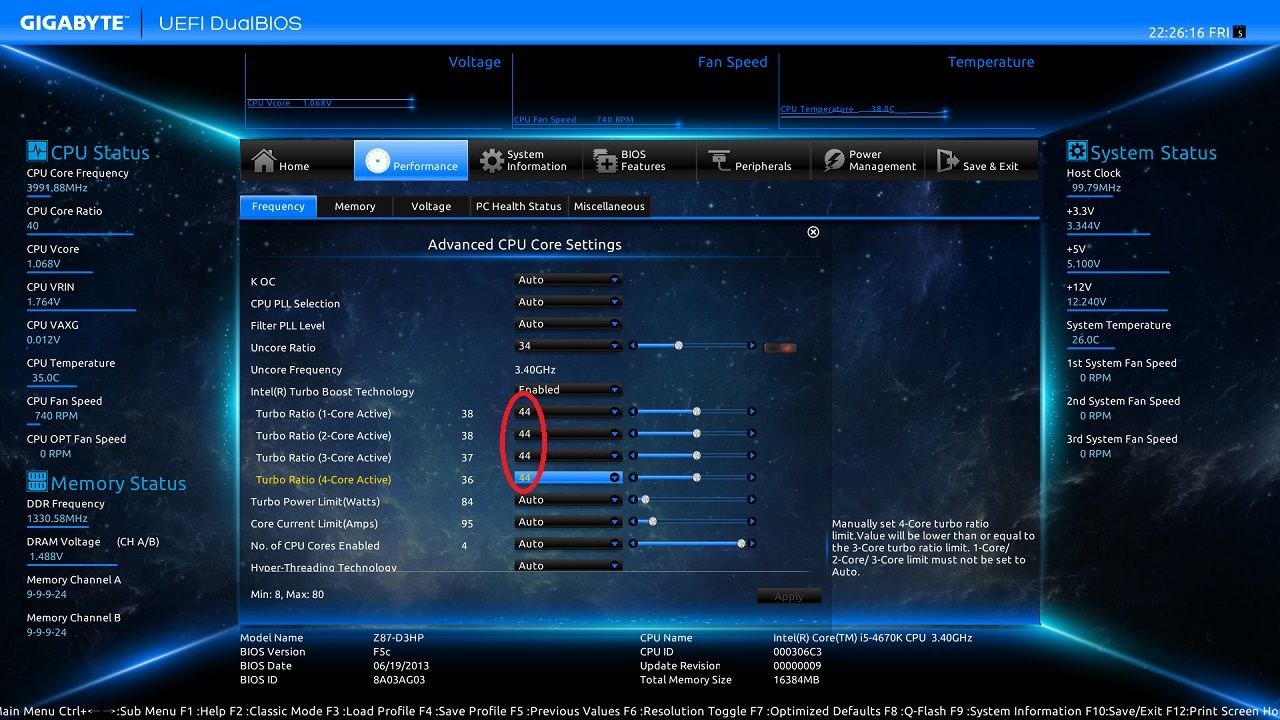
Multiplier overclocking.
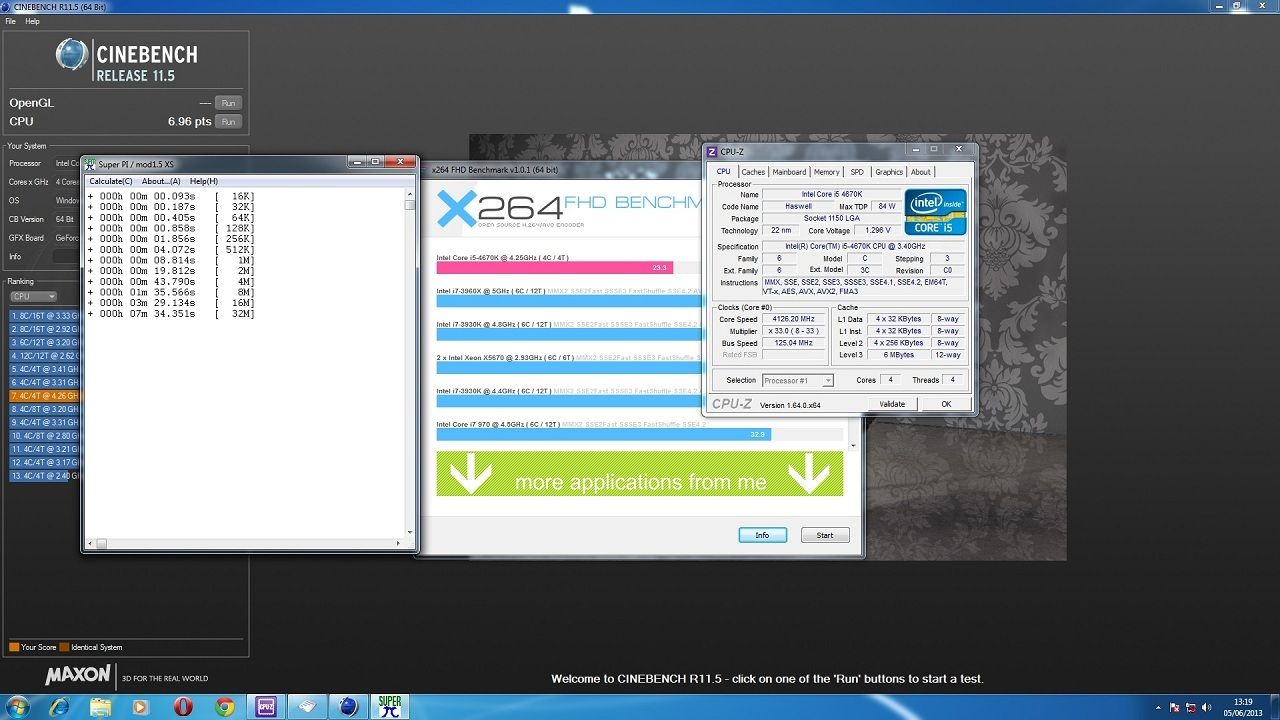
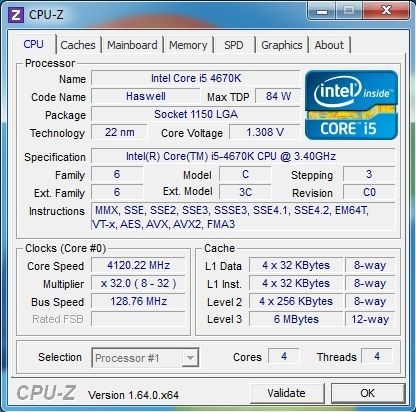
This is a mainstream board so you can expect some modest overclocking, but the D3HP surprised me by managing to do a stable 4.6GHz, but again as with all overclocking it also depends on the silicon lottery, so you may or may not get to this level.
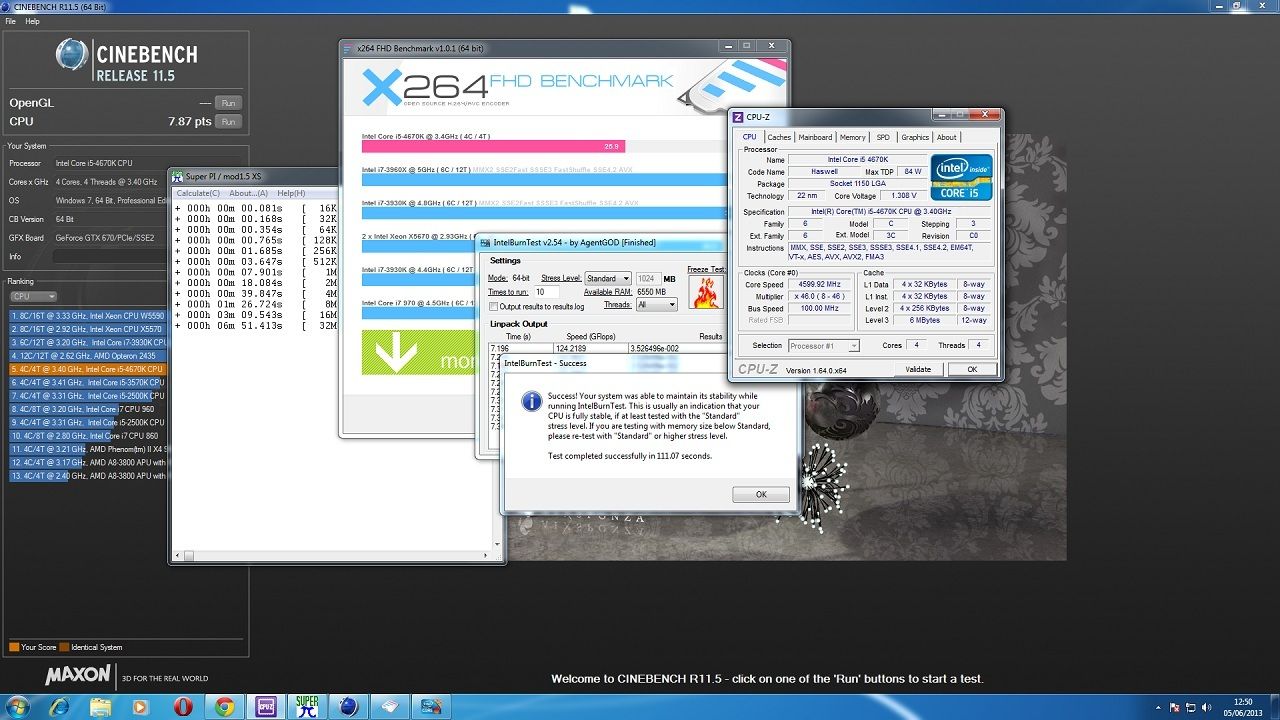
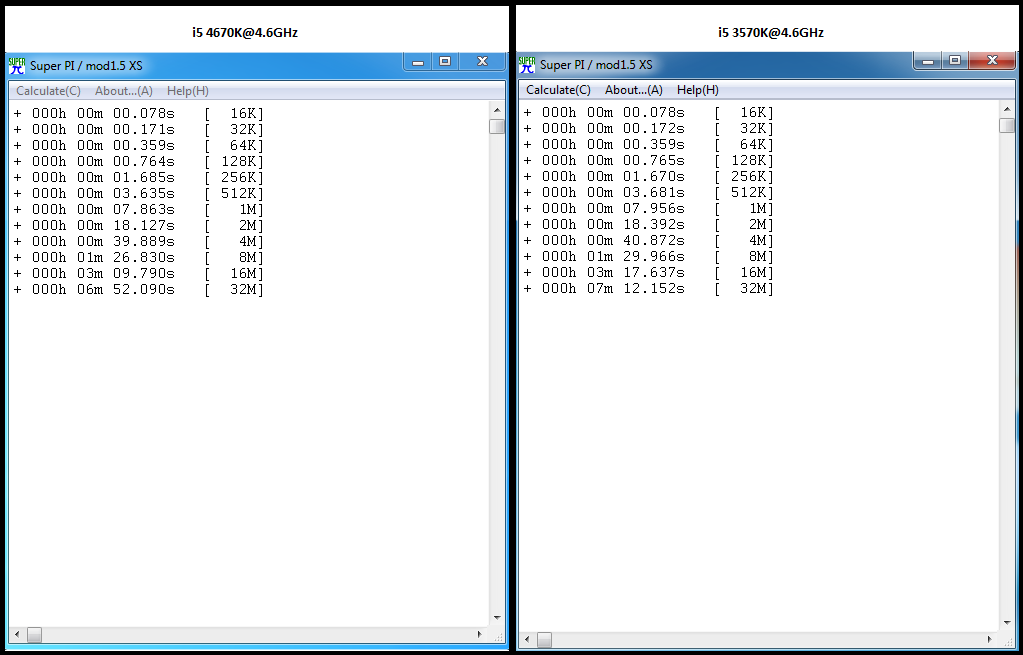
So overall it's looking very good indeed with this board, I was also able to get easily into Windows and run SuperPi and the new 3Dmark at 4.7Ghz but other tests like X264 FHD would freeze.
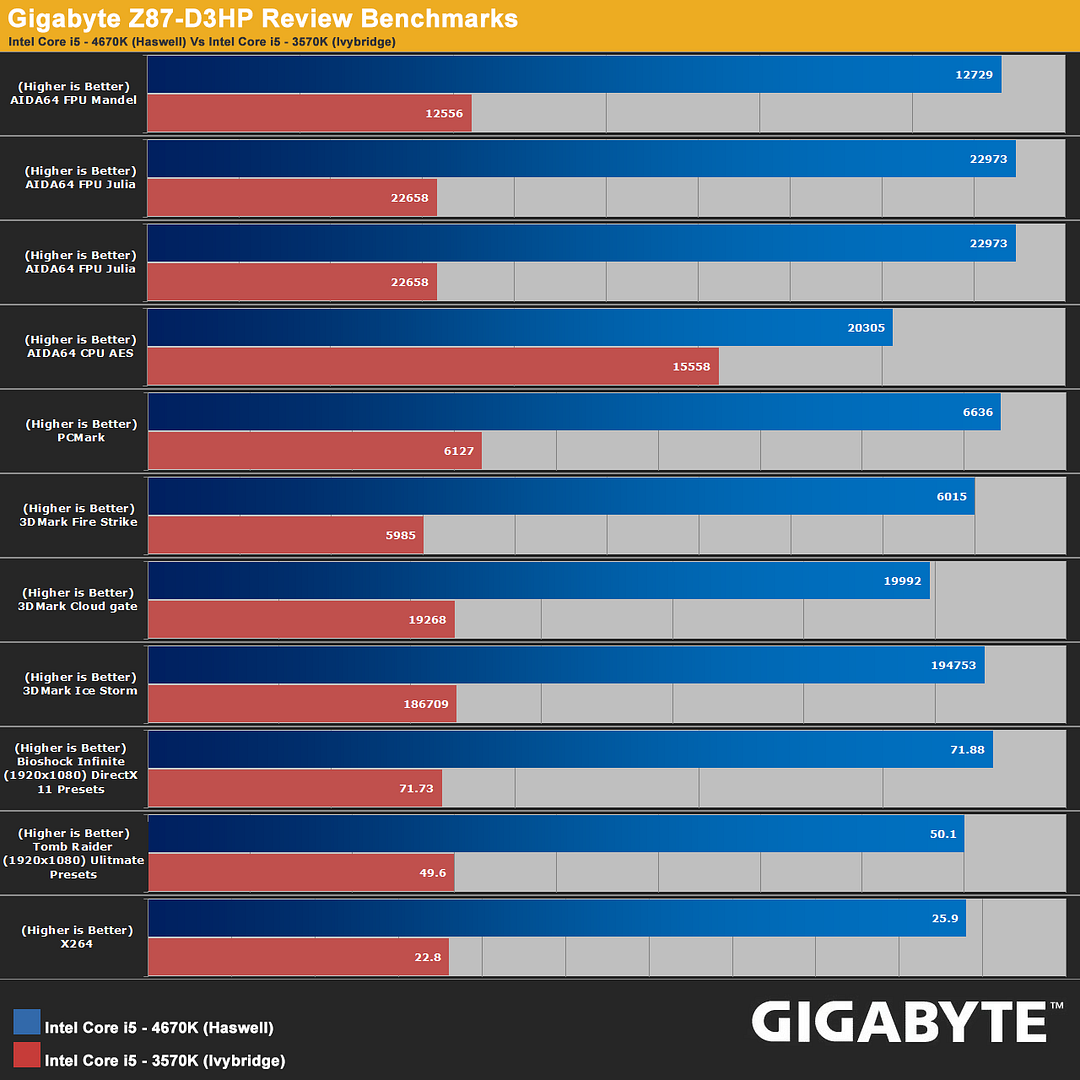
Game and synthetic testing results.
Below are some results I have got, I used the built-in Benchmarks for Tomb Raider and Bioshock Infinte.
Conclusion.
So this is my first Z87 experience and I have to say its been smooth, the motherboard has not faltered once, the new UEFI is sharp with the mouse cursor moving nicely within it.
Overclocking was a easy really either manually or by one of the UEFI presets options or even Easytune, speaking of Easytune its good to see it has had a complete overhaul as the previous EasyTune6 was pretty dire and didn't work properly for me.
I think there is one too many PCI legacy slots on this board and one would have been enough at this price point, but apart from that every thing is nicely positioned, right angle SATA ports would have topped it all of nicely.
Overall a sweet board with good enough overclocking abilities I reckon at a keen price.

Last edited: