HAF932 build log and custom filters

Associate
Joined
21 May 2009
Posts
789
Location
kent
I've got it :D:cool:
SS100471.jpg

SS100473.jpg

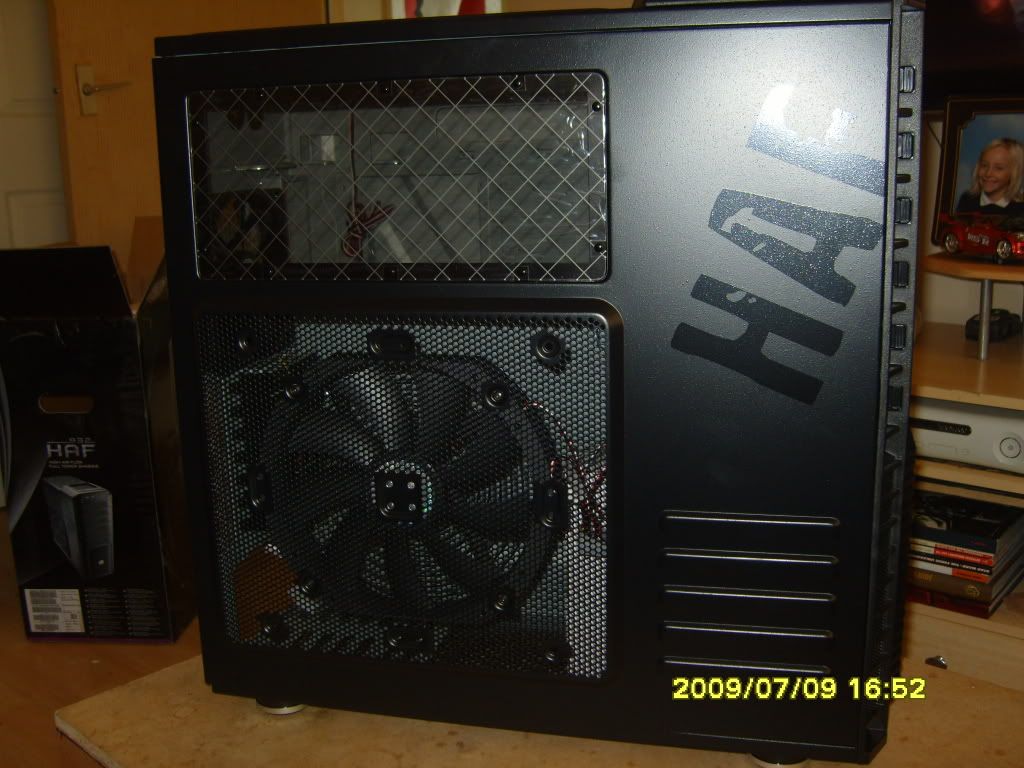
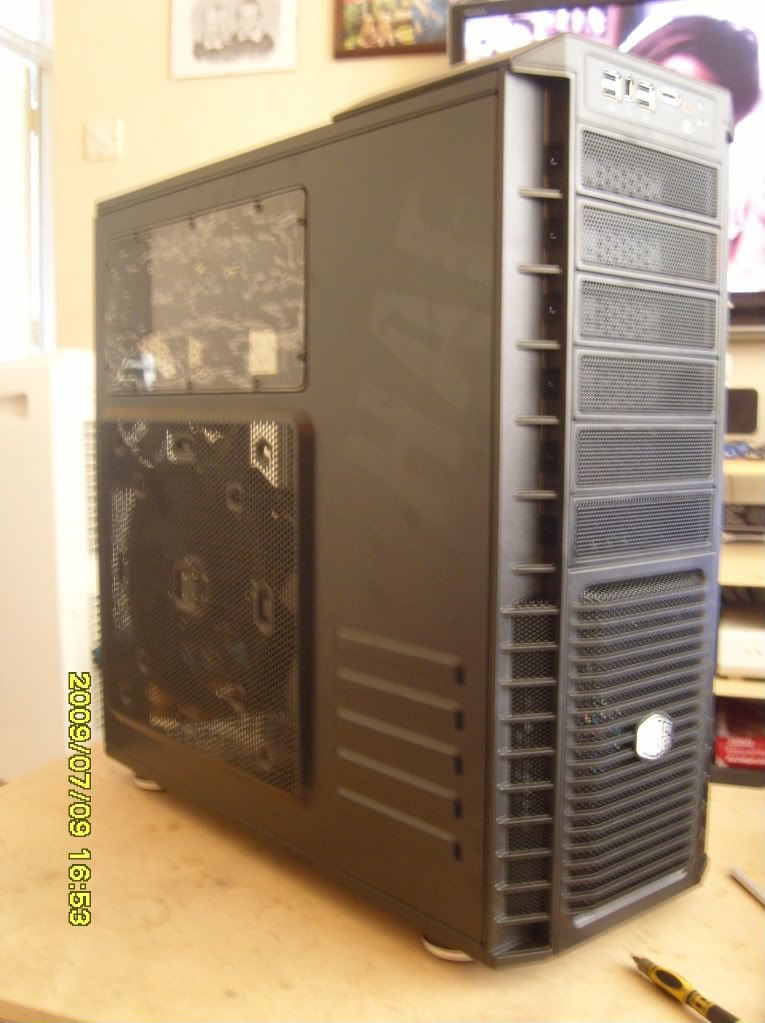
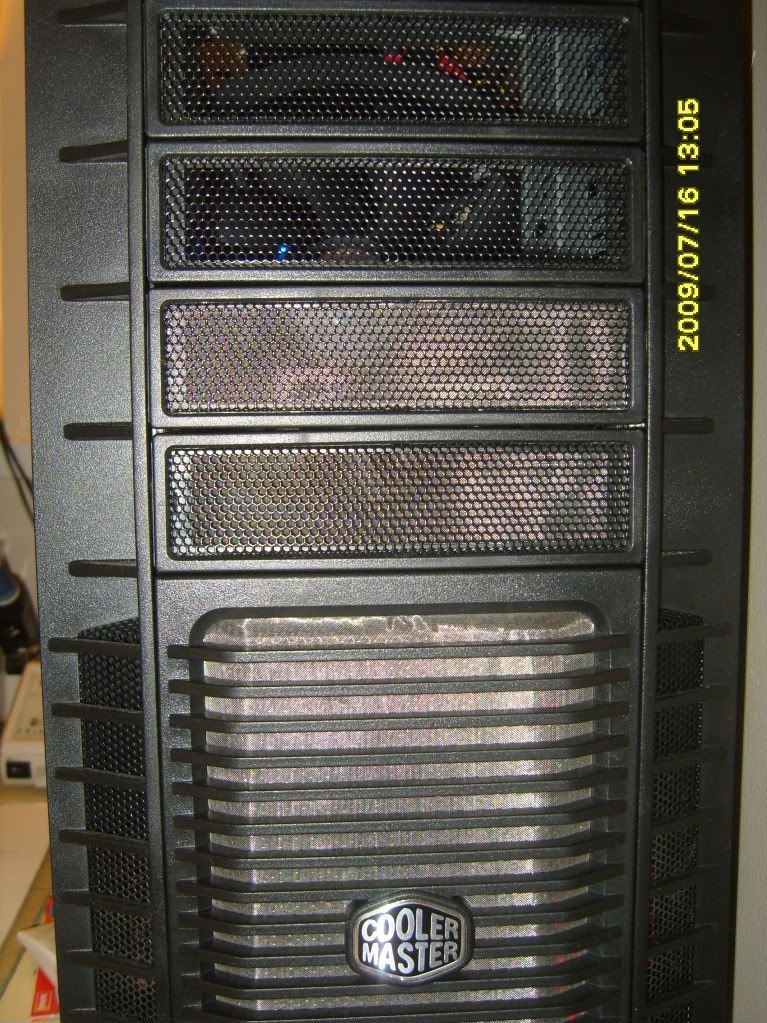
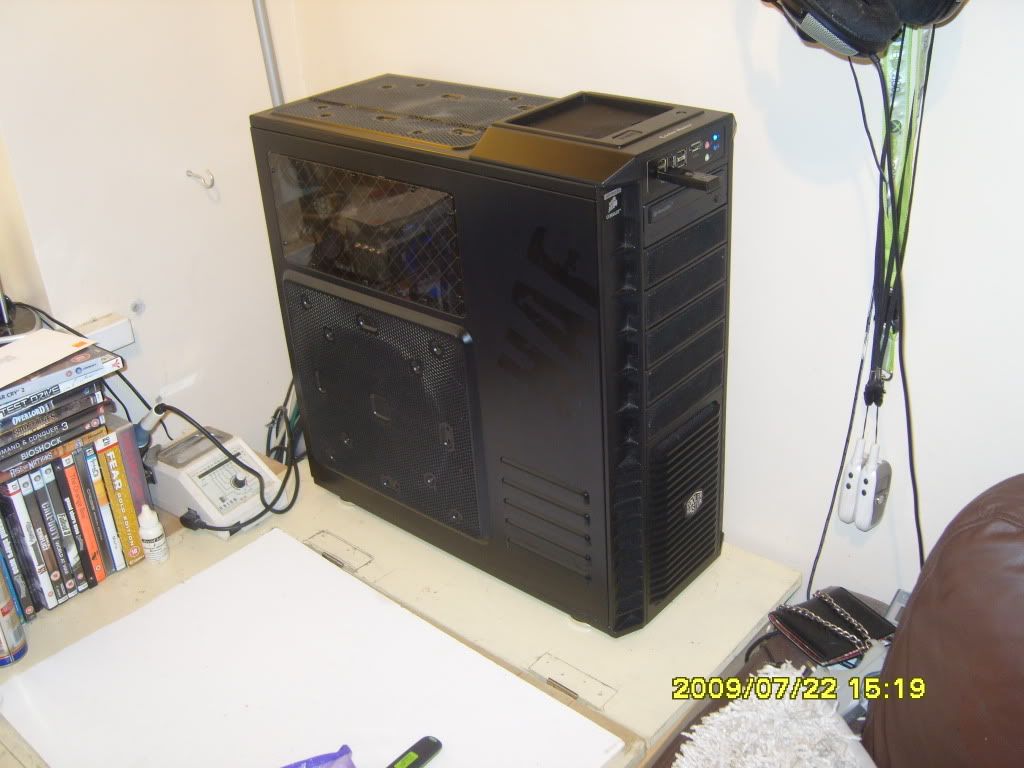
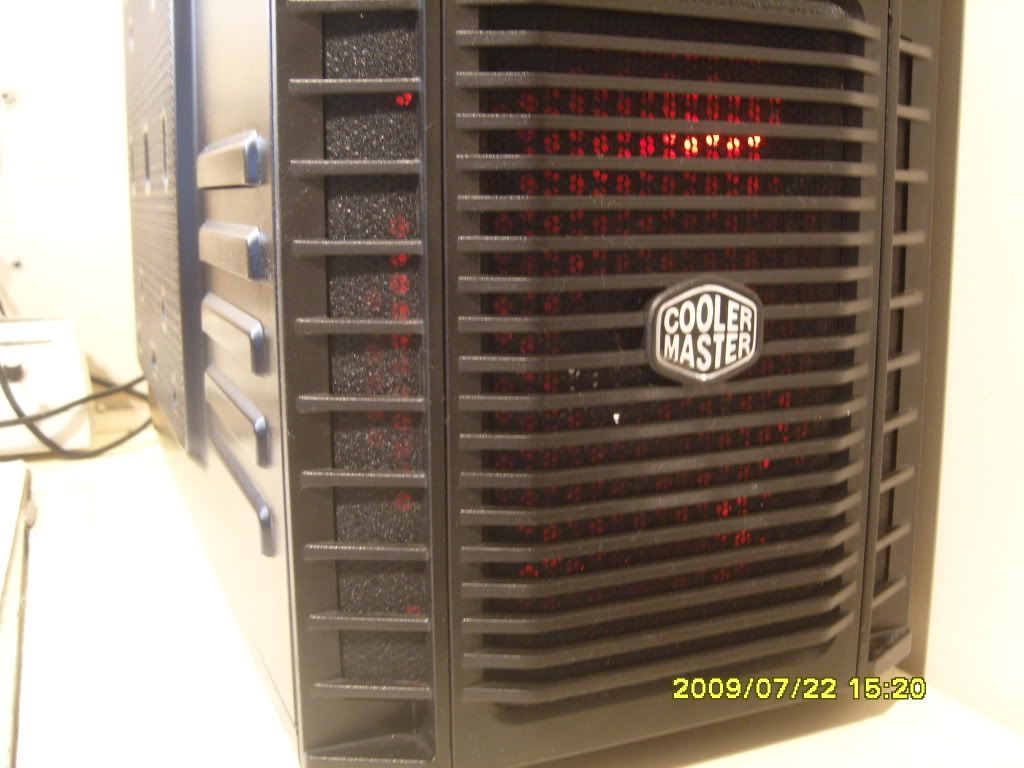
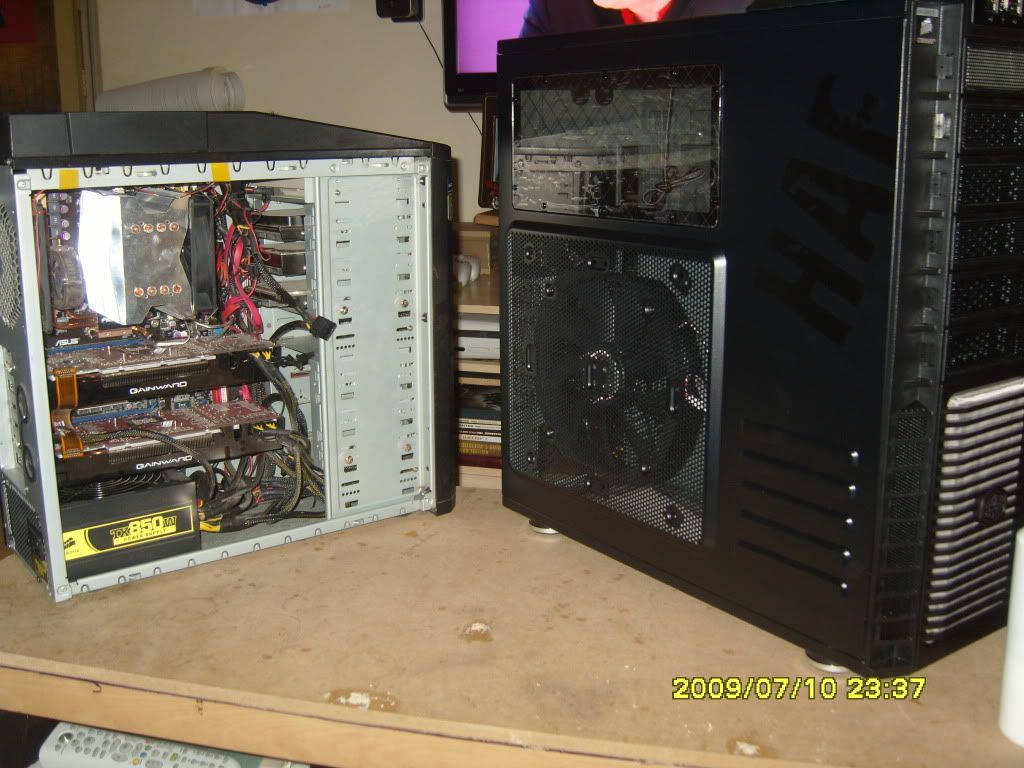
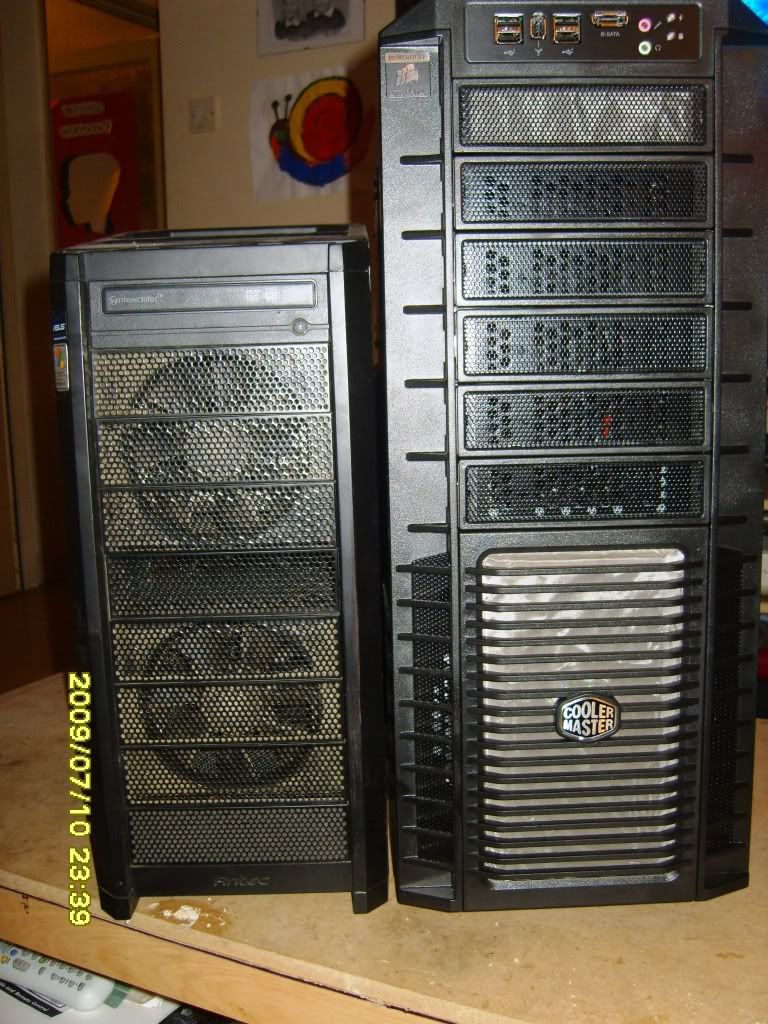
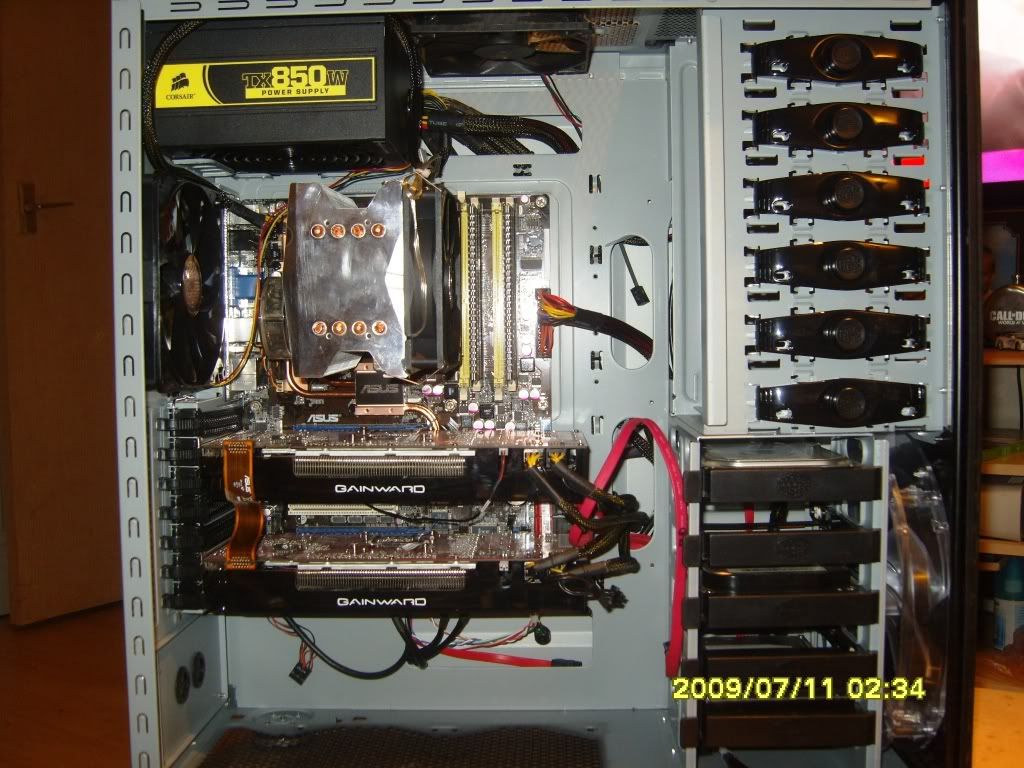
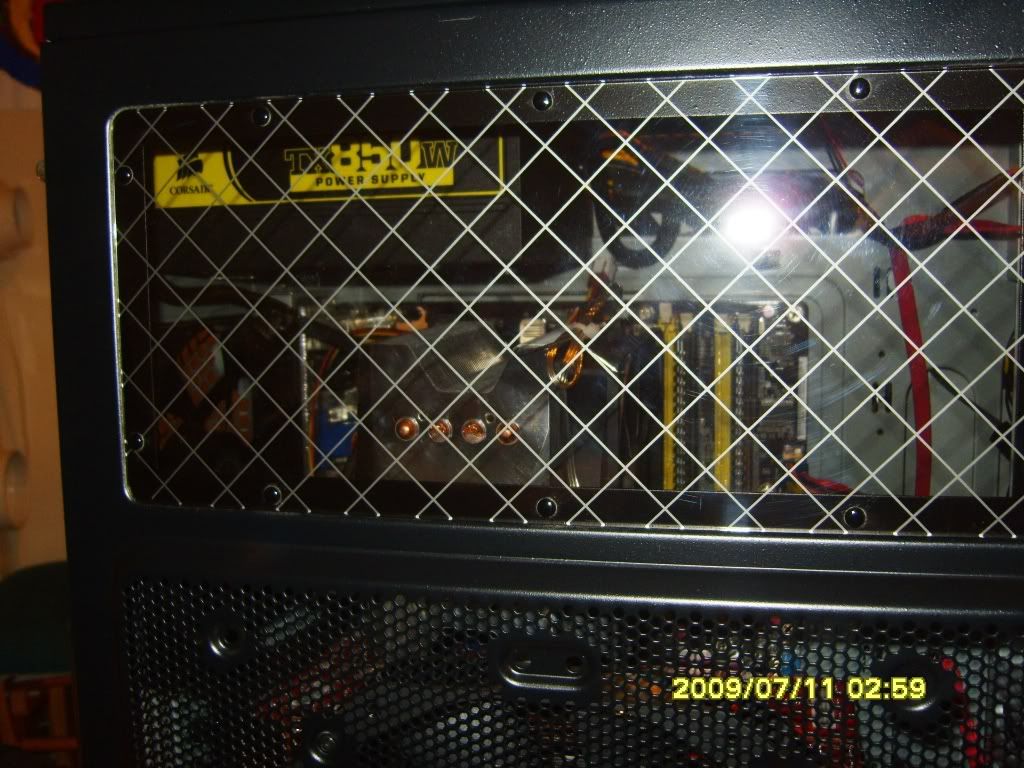
the pic's don't do it any justice, it's awesome i've had loads of case's over the year's but this is by far the best!

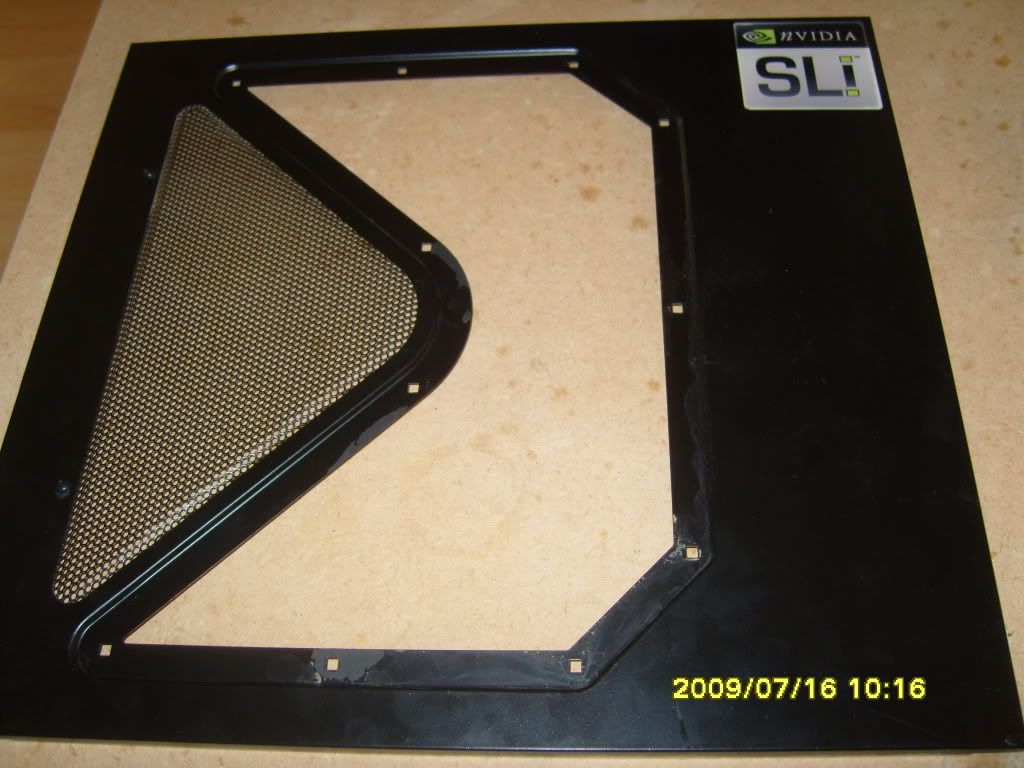
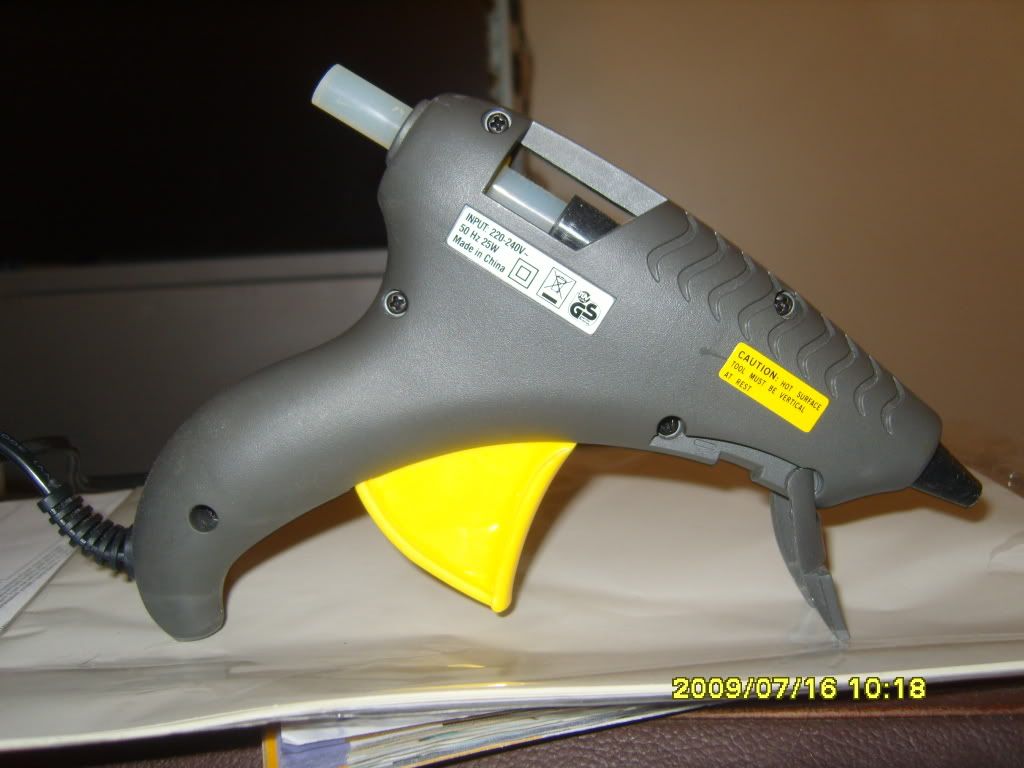
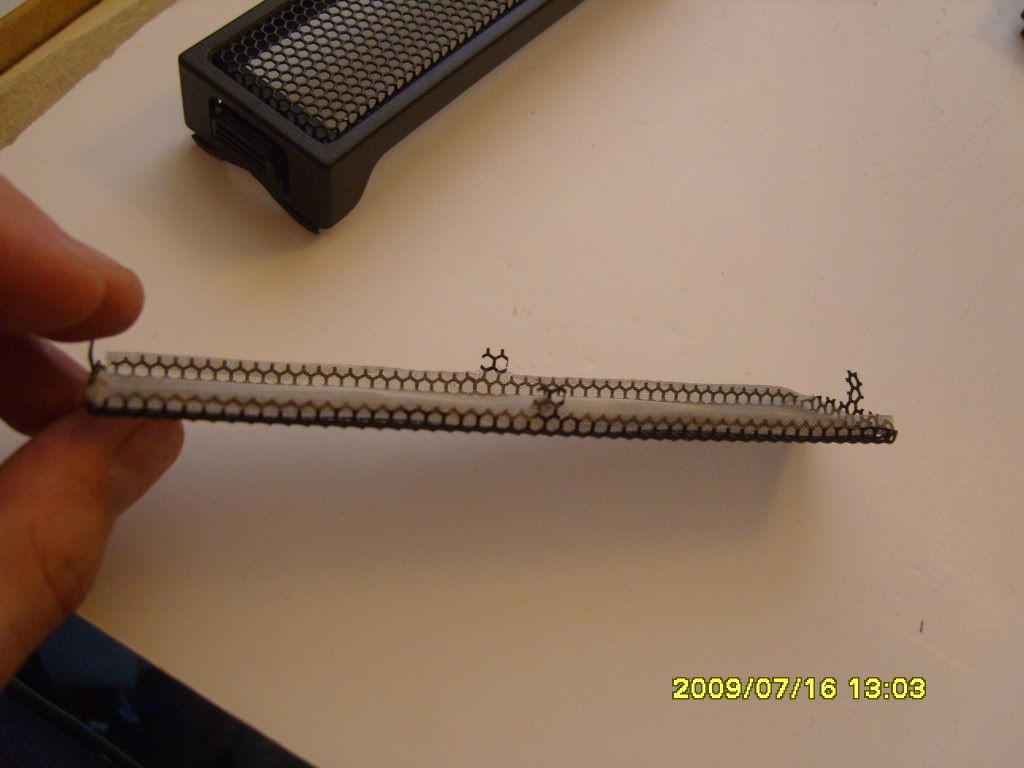
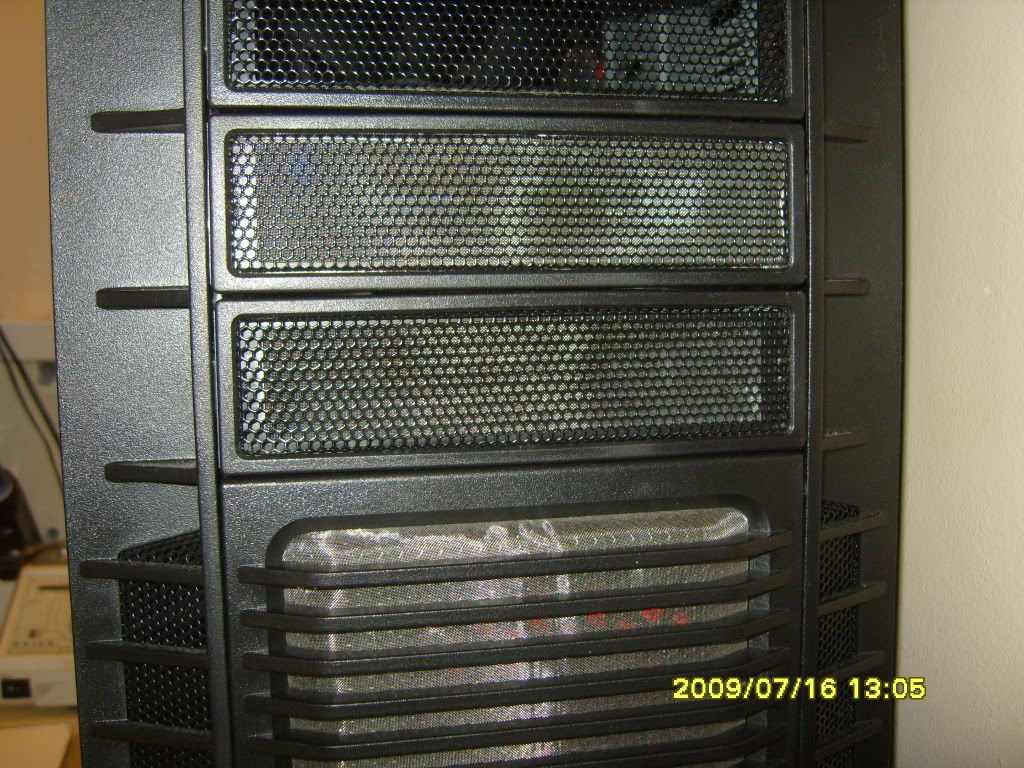
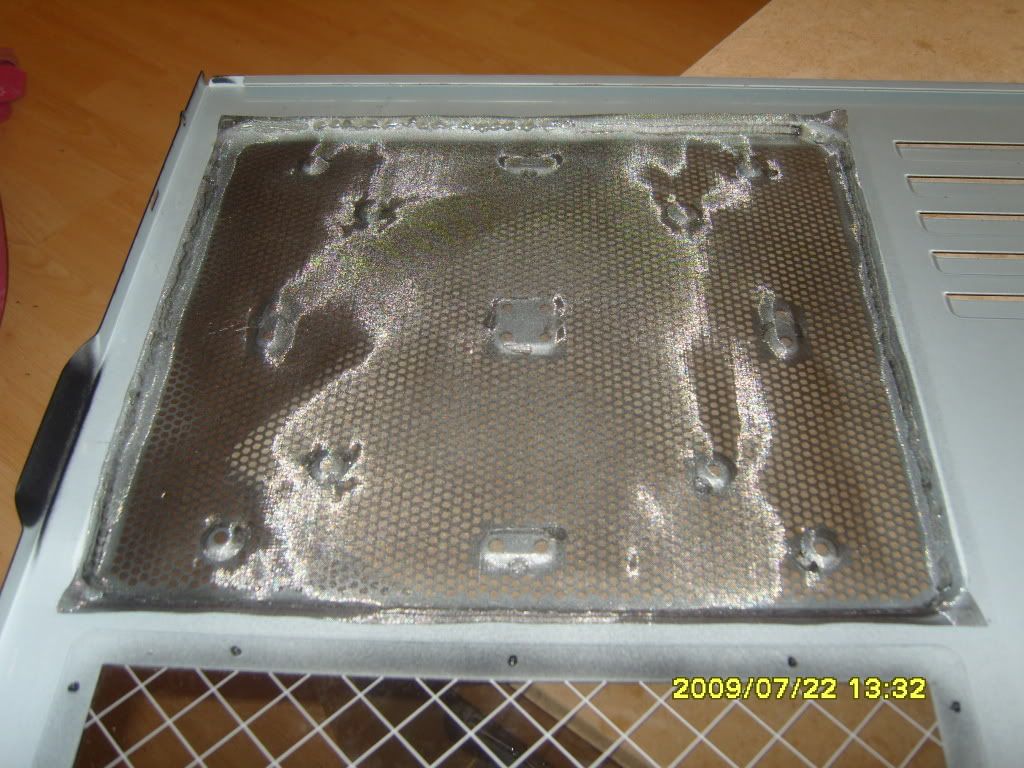
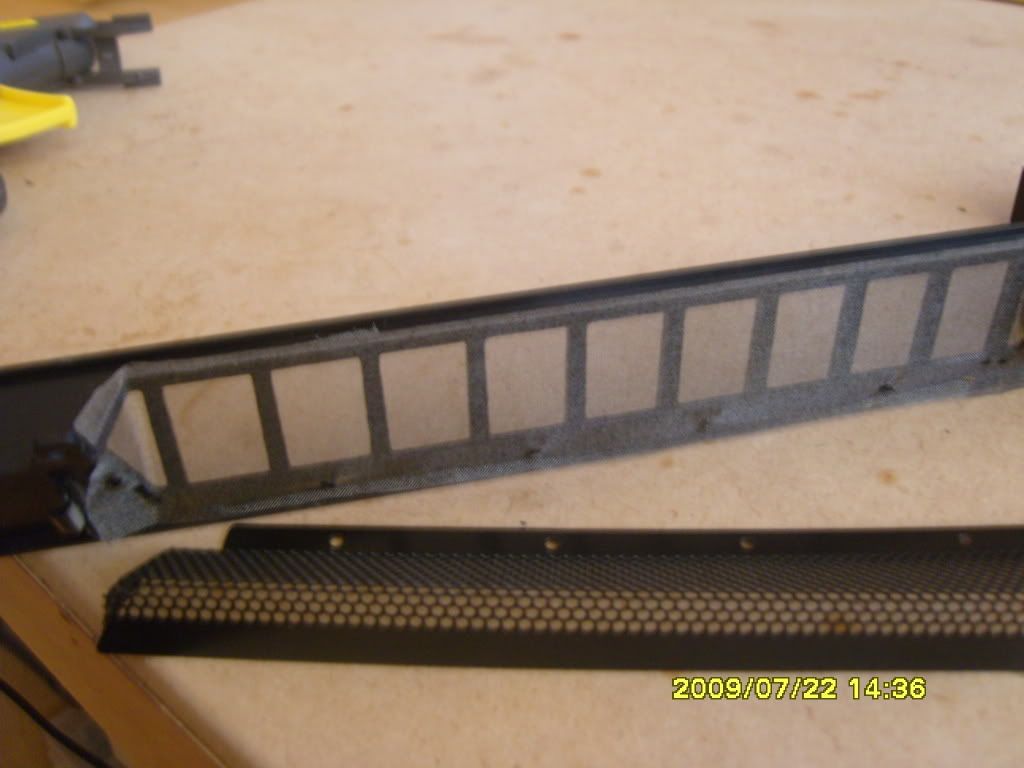
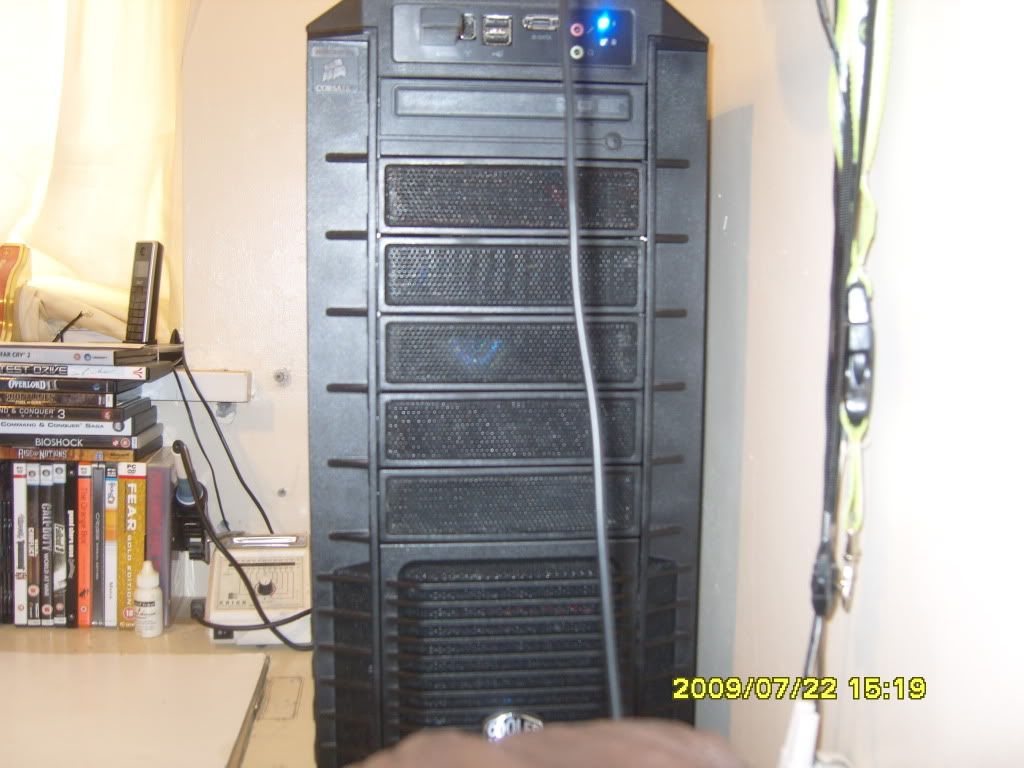
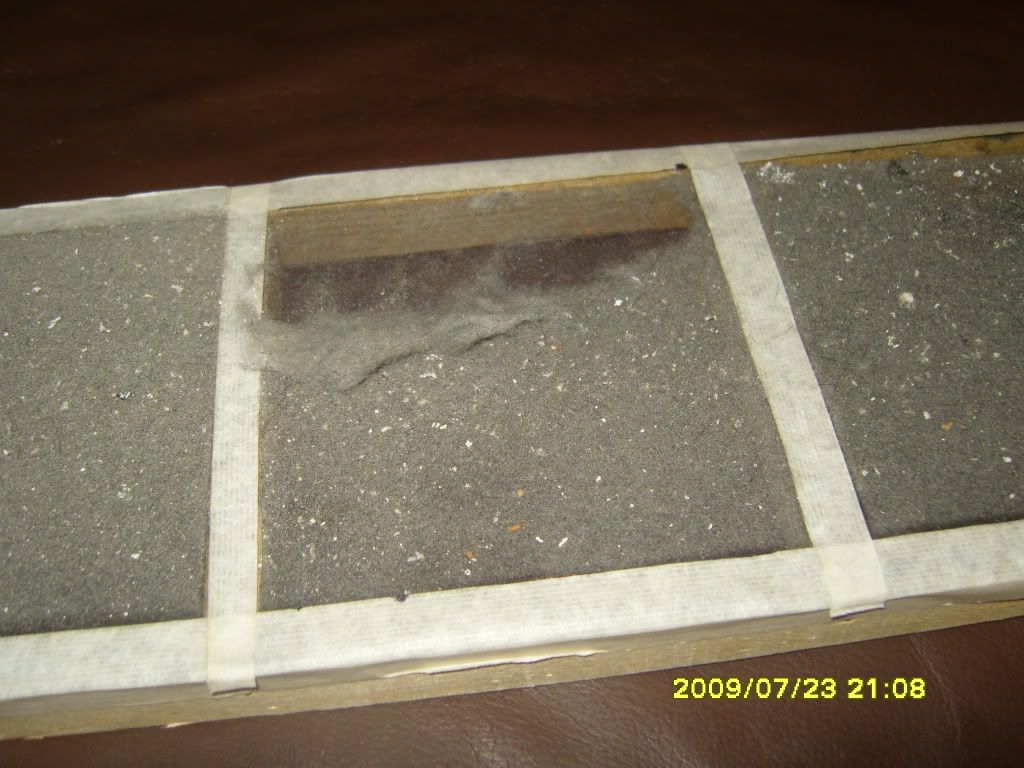
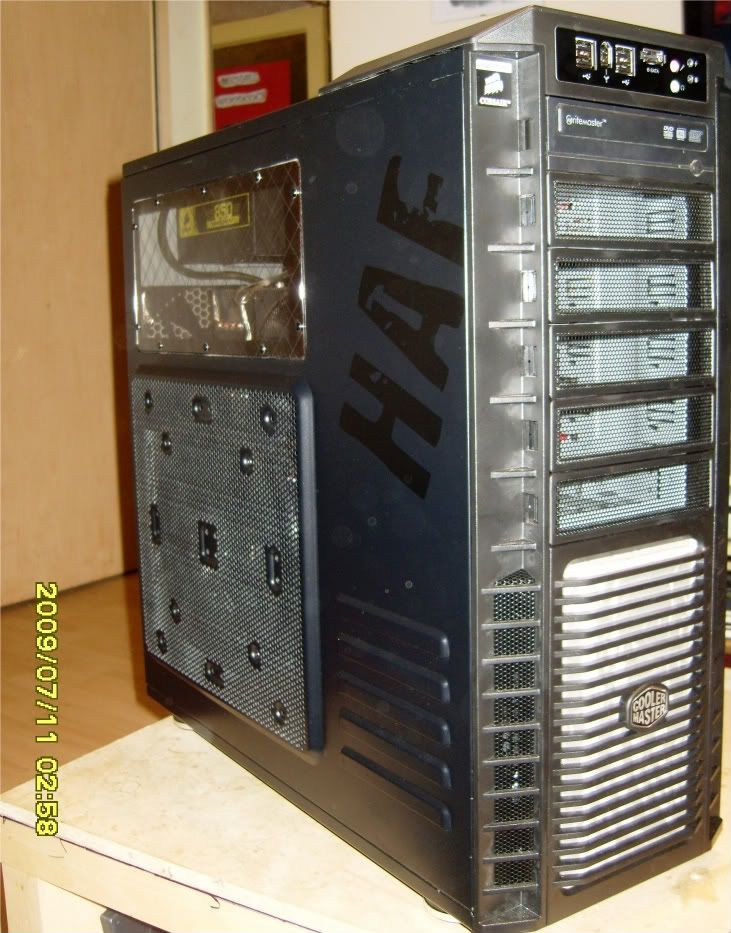
right so far i've unboxed it and started making filters, unfortunately my hot glue gun didn't turn up :( so can't start on the side and drive bay filters but i have done the main front filter but still need to do the front side one's

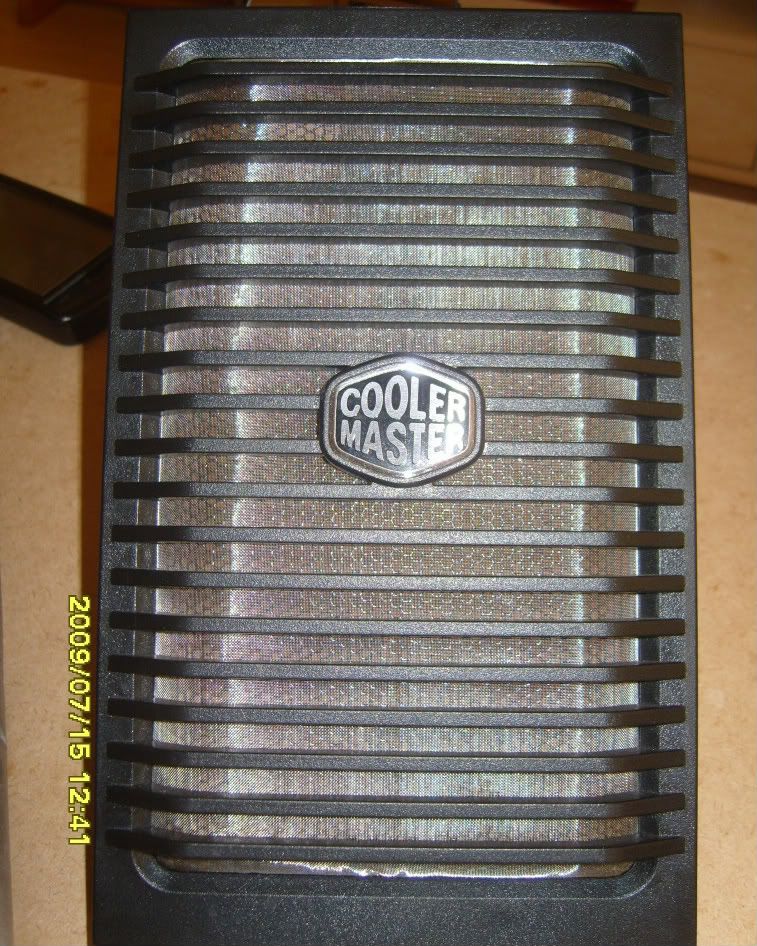
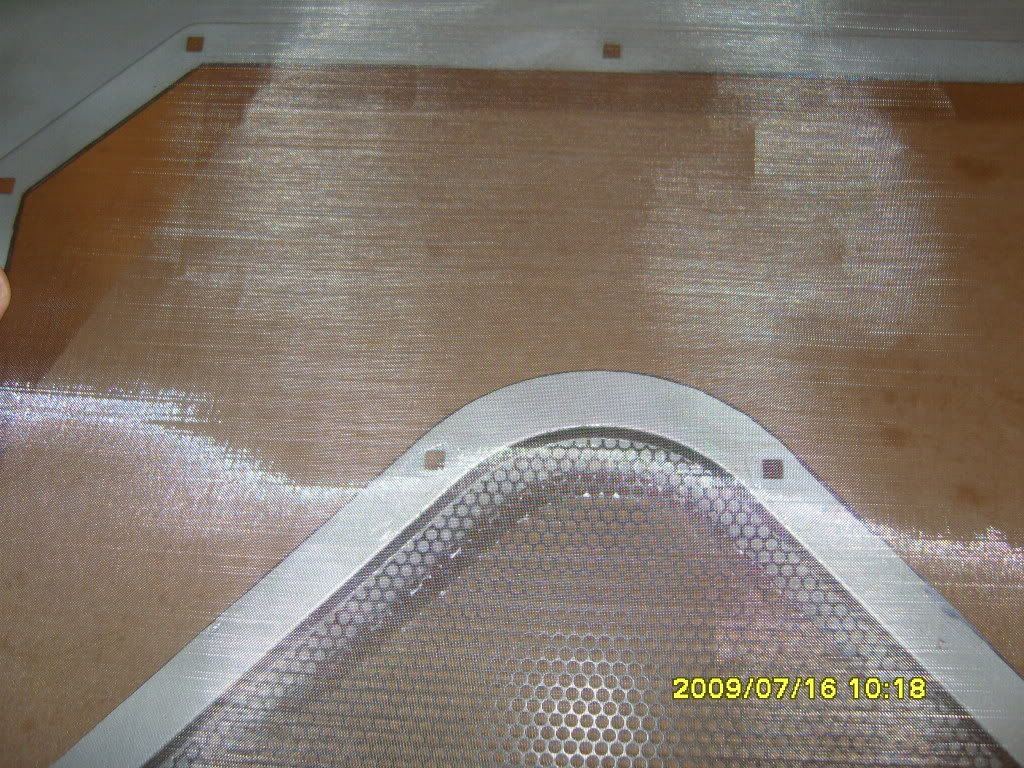
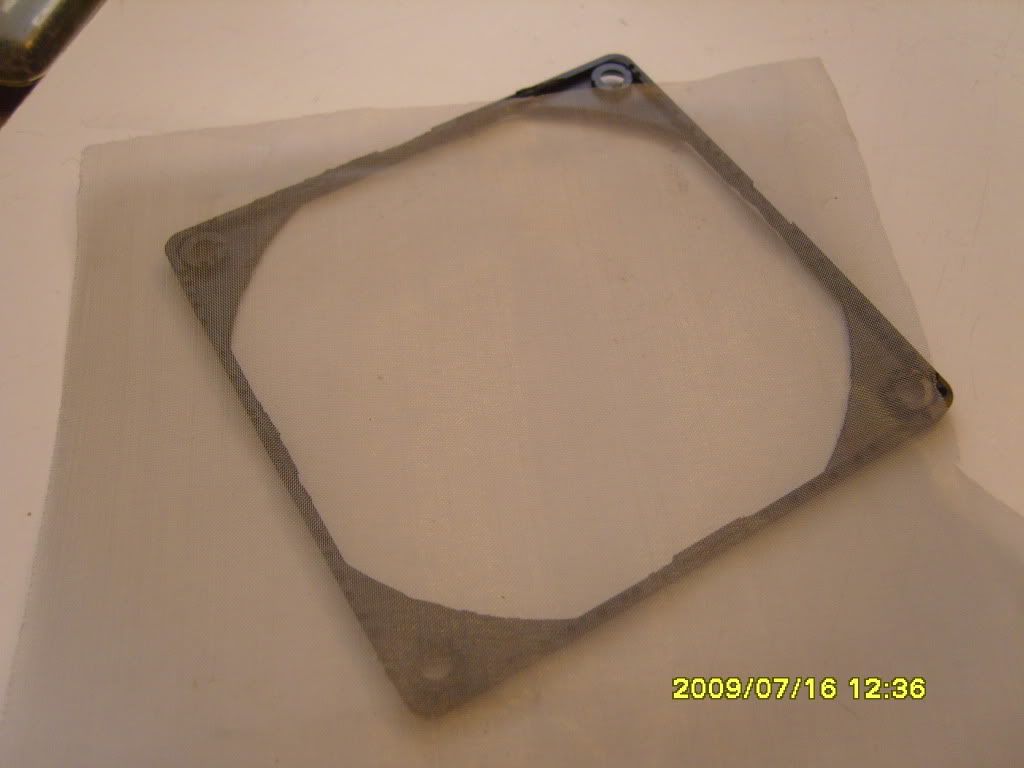
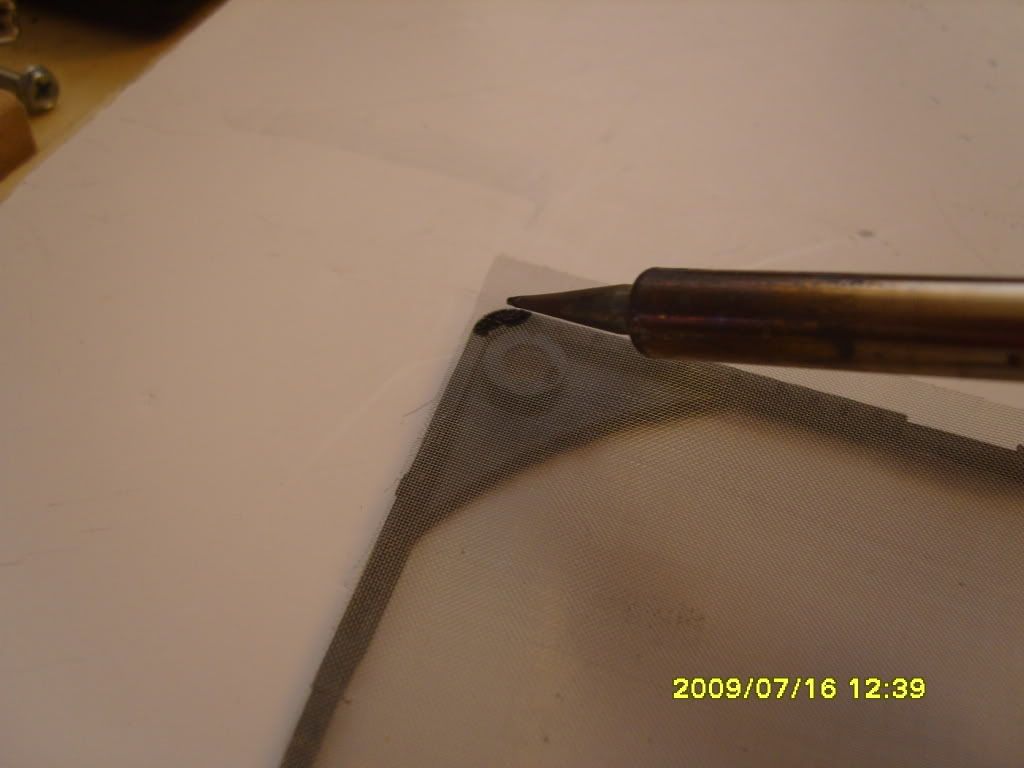
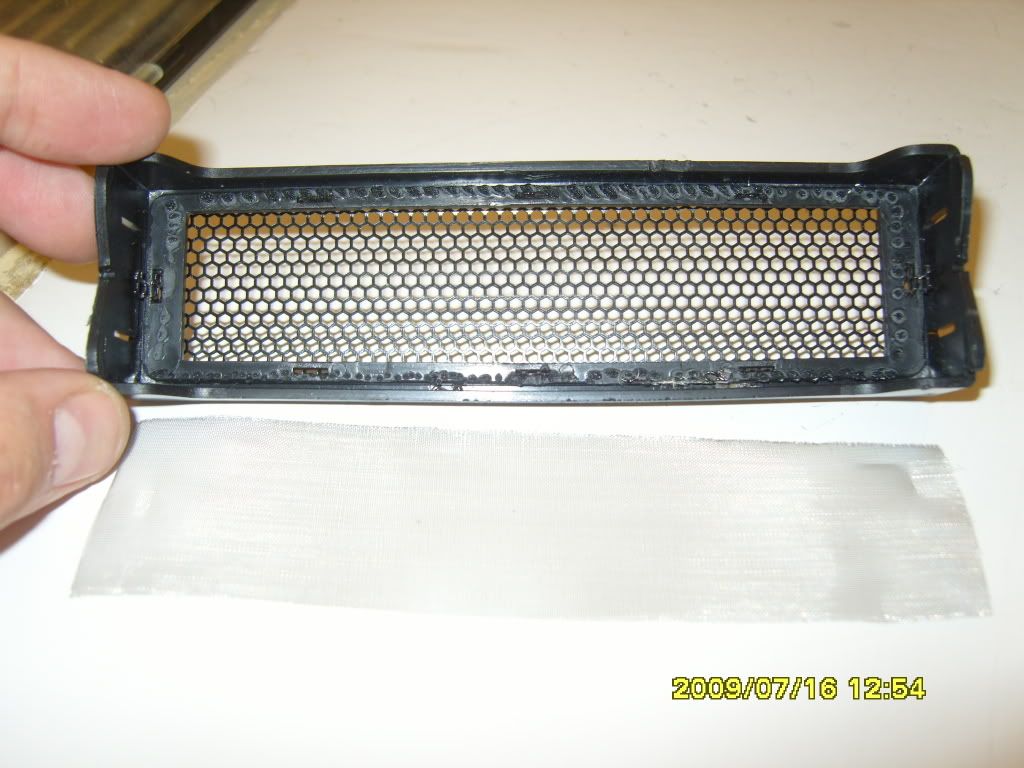
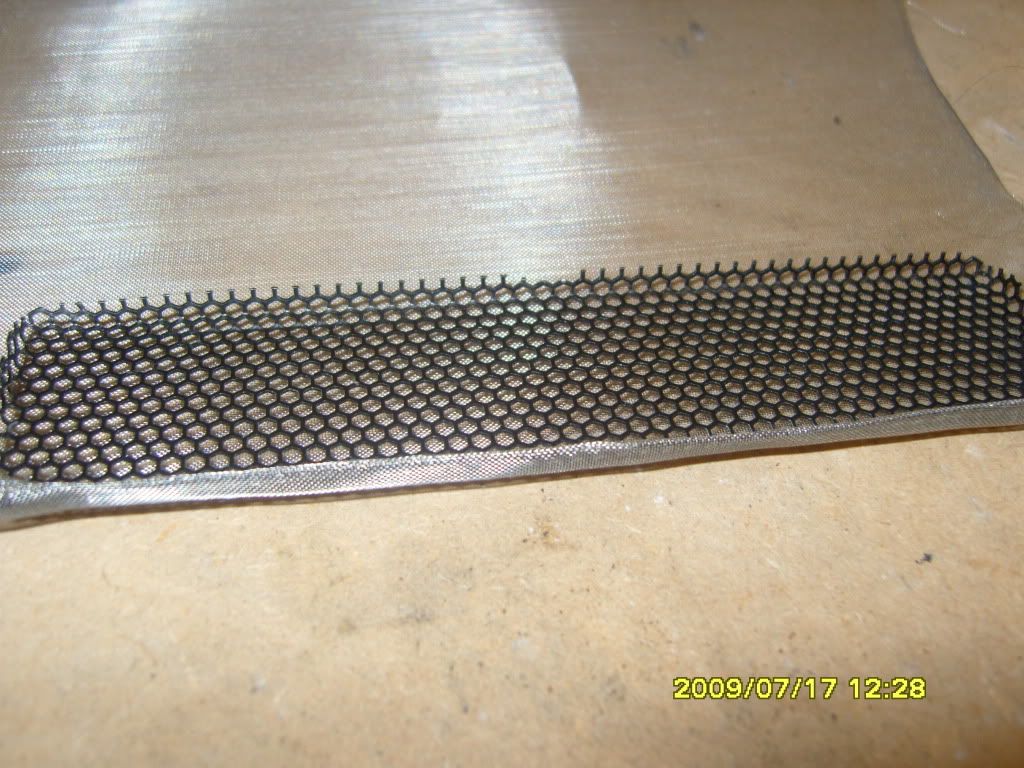
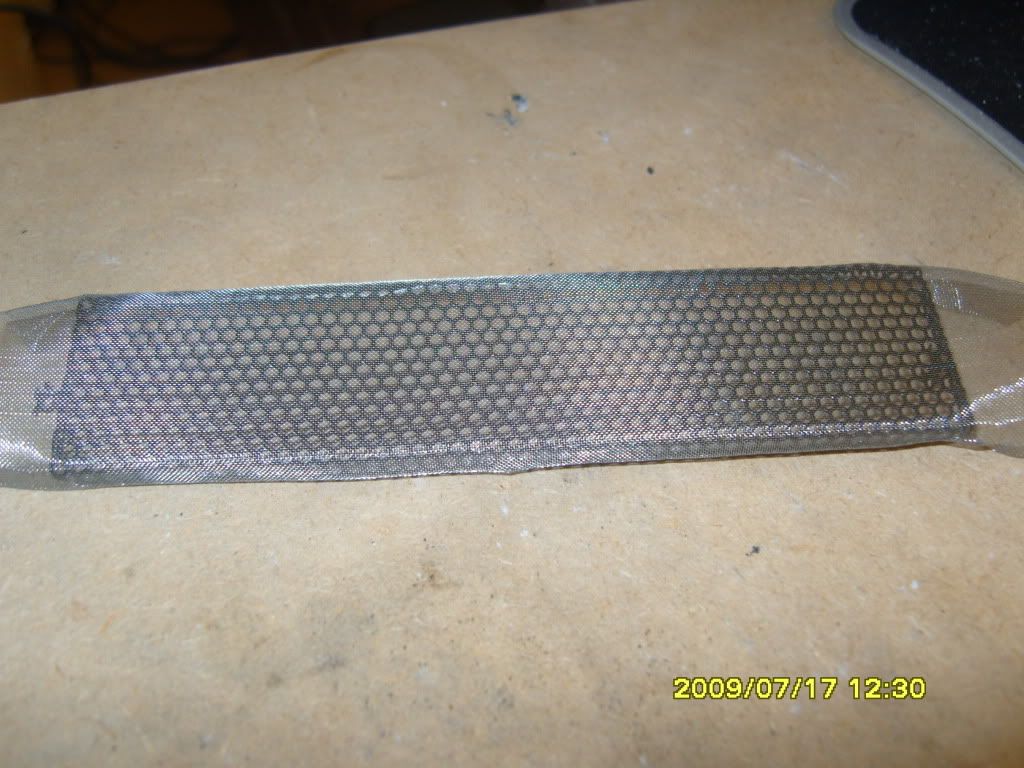
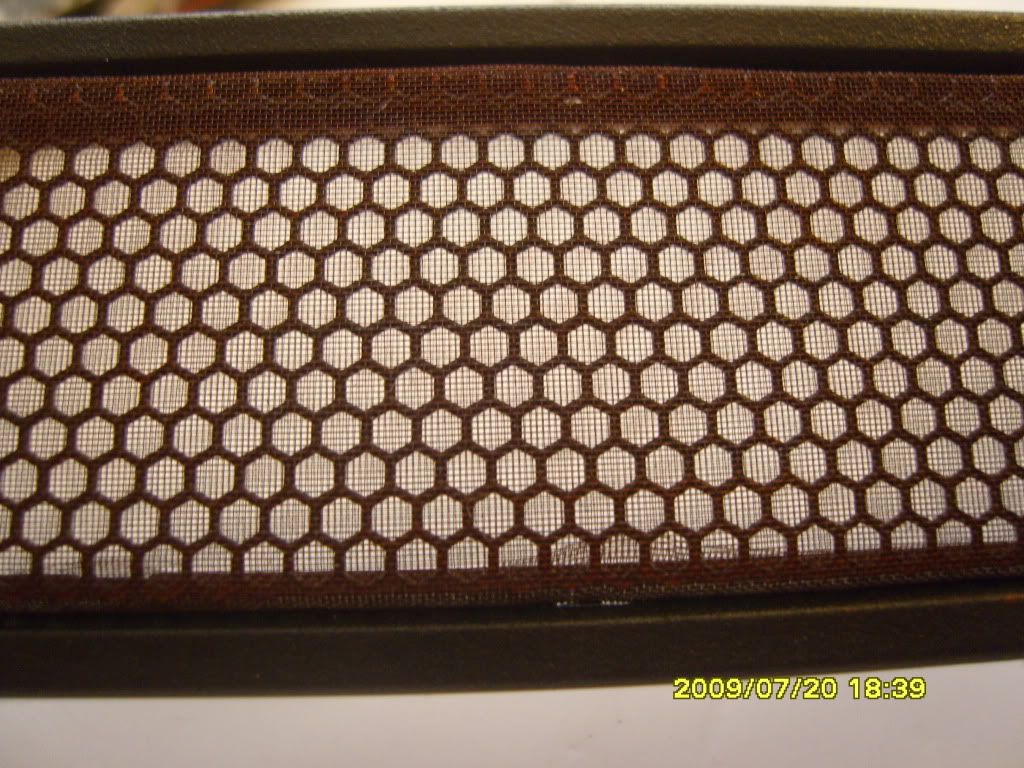
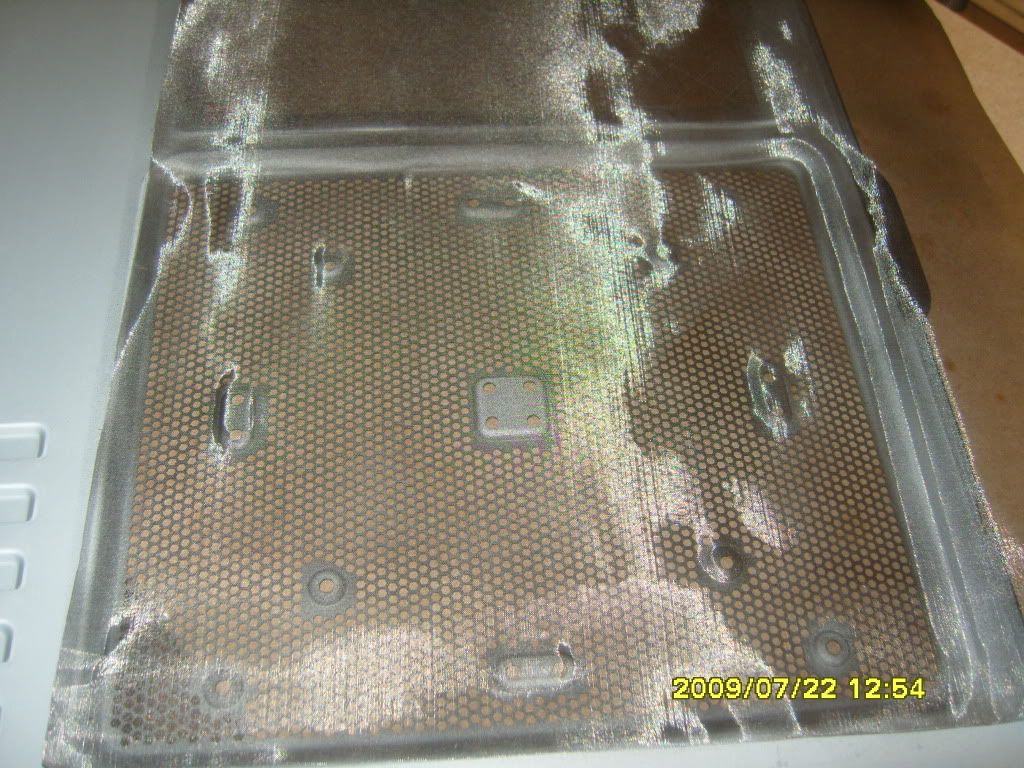
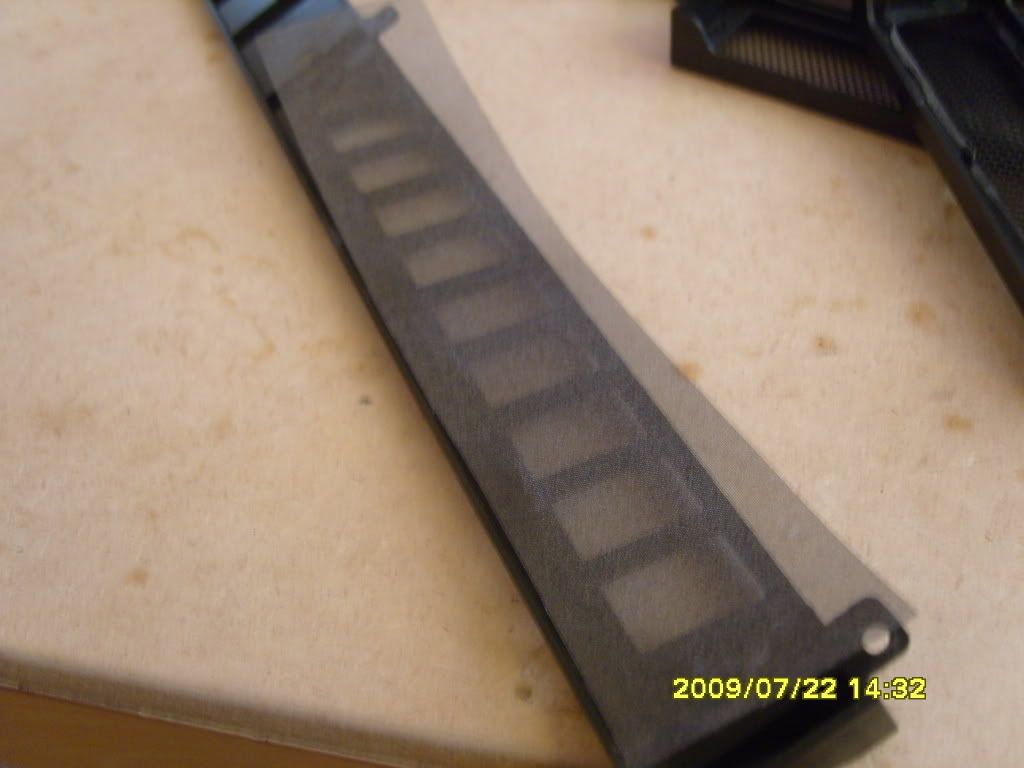
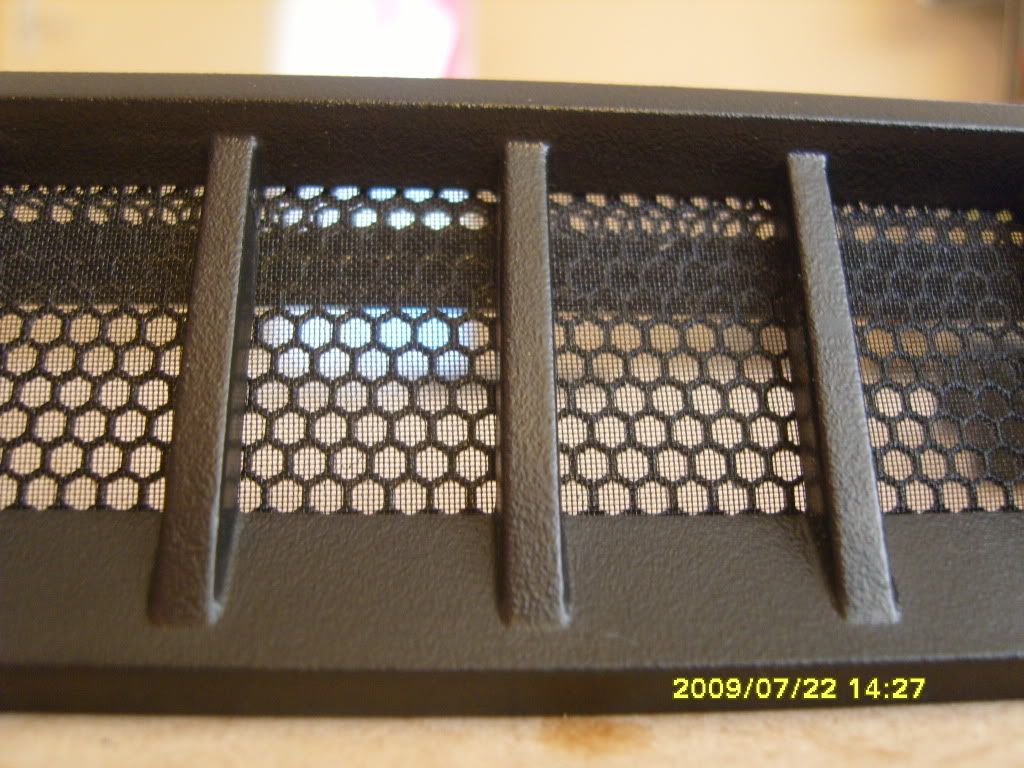
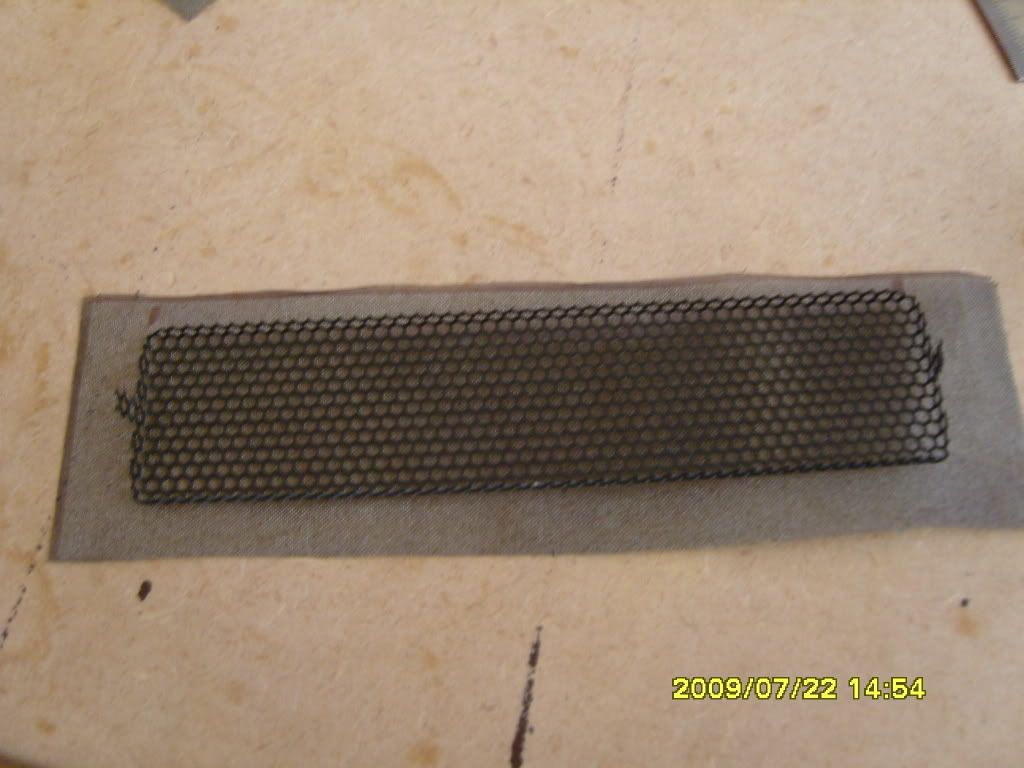
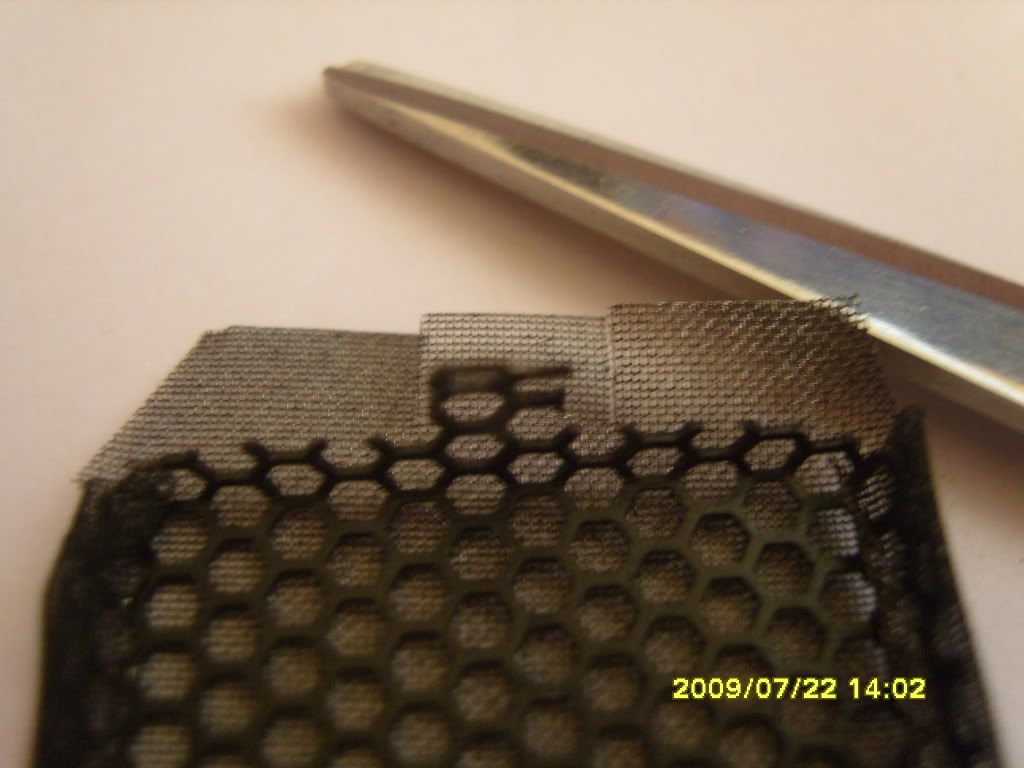
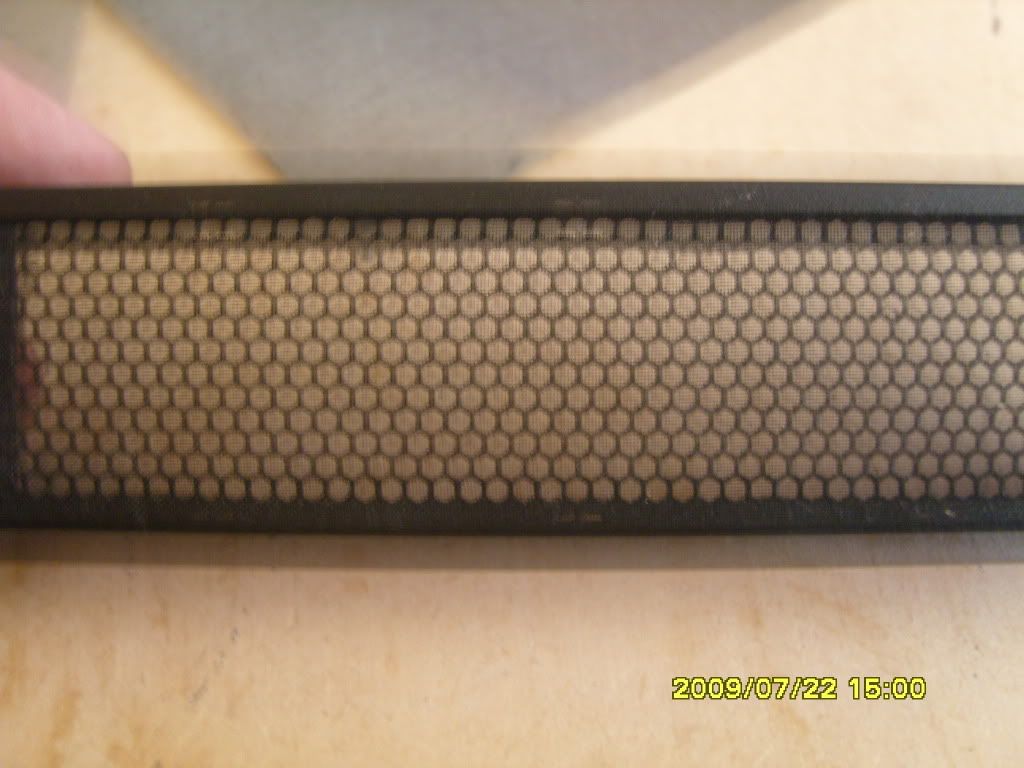
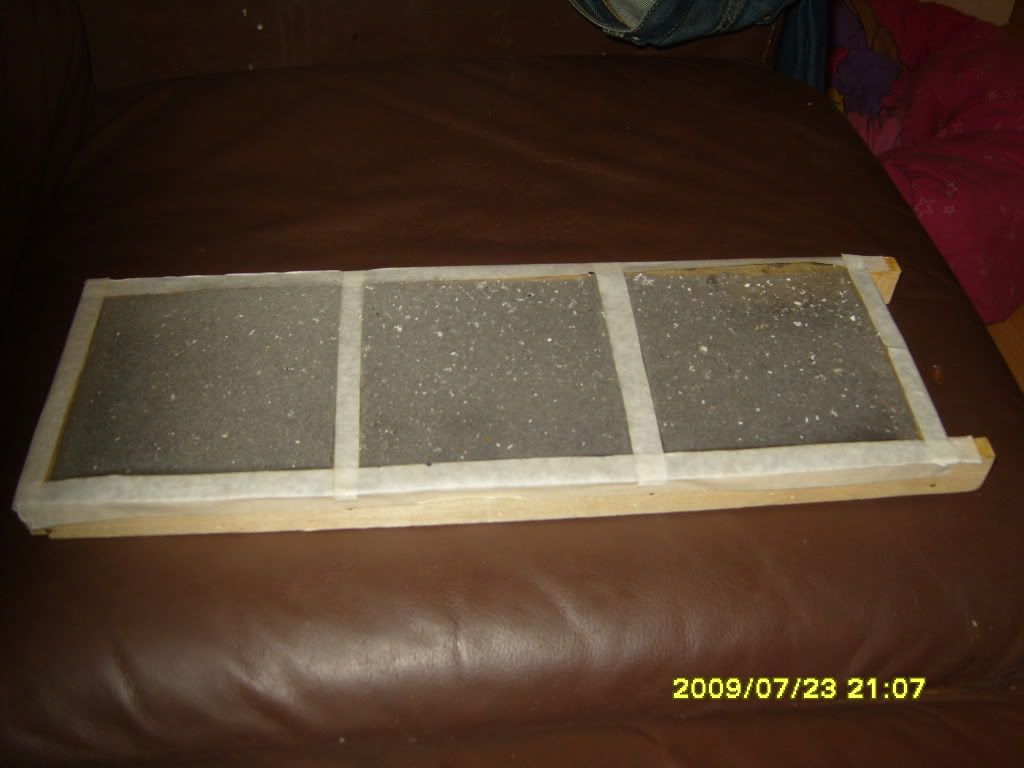
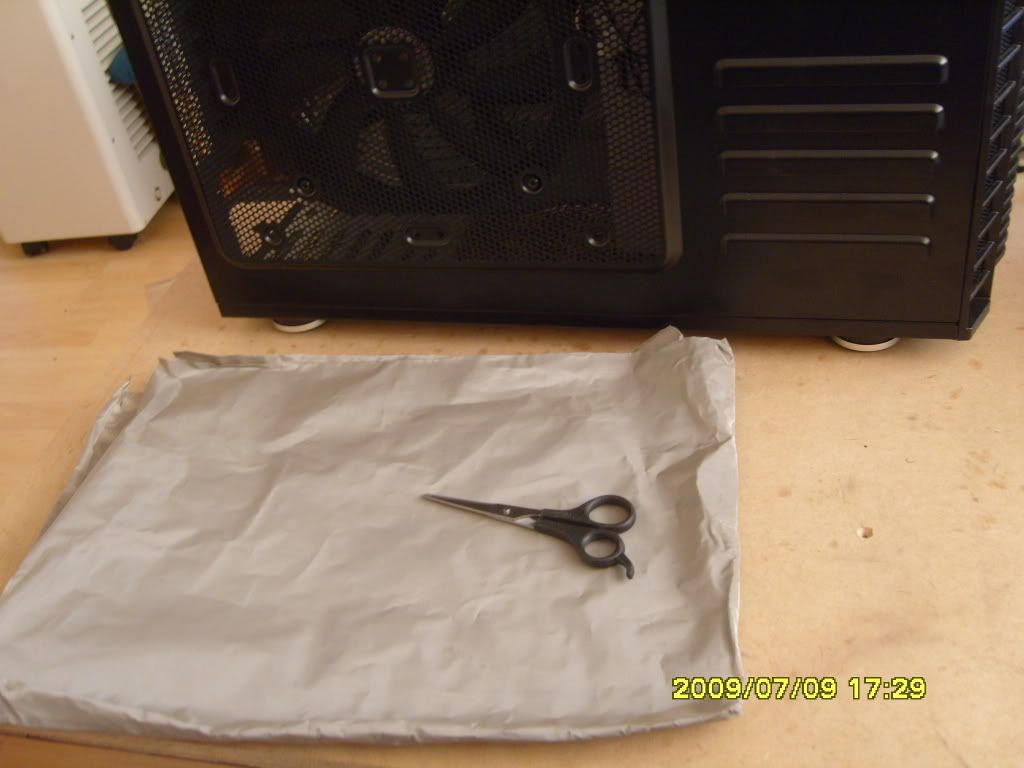
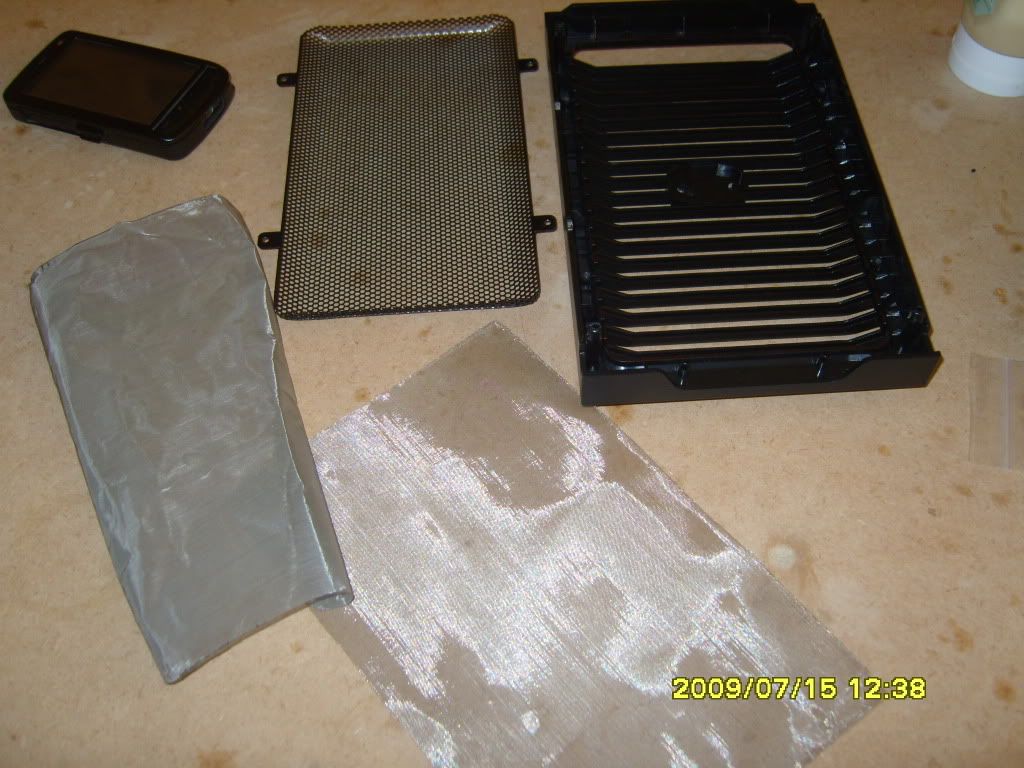
here's what i'm using, if you read my other thread clicky you will know all about it, basicly it's a super fine steel mesh that i found looking around a well known auction site and thought that could be useful :) and it was, if you look at the above link you will see how i made a couple of basic filters using it

anyway on with the show :)

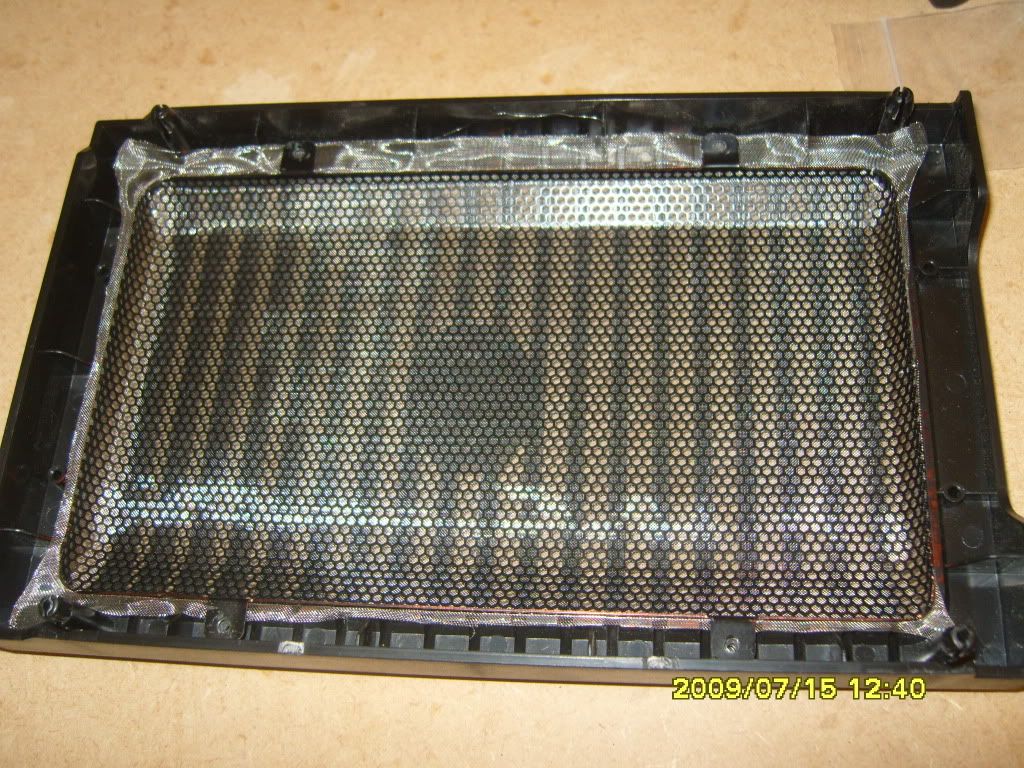
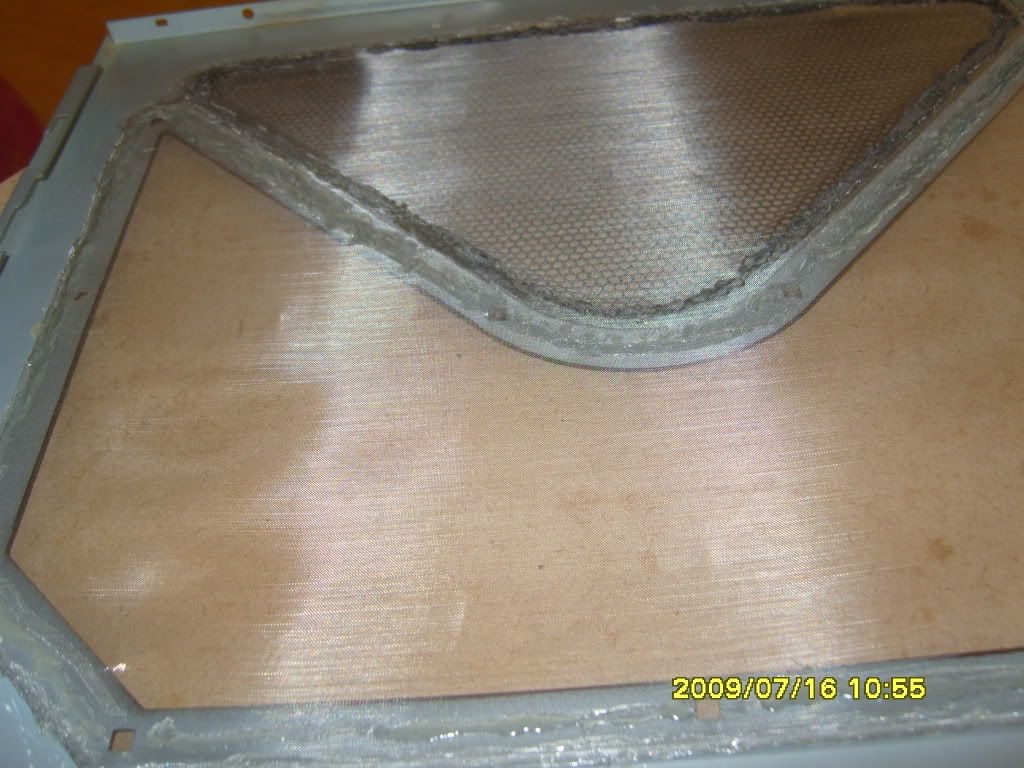
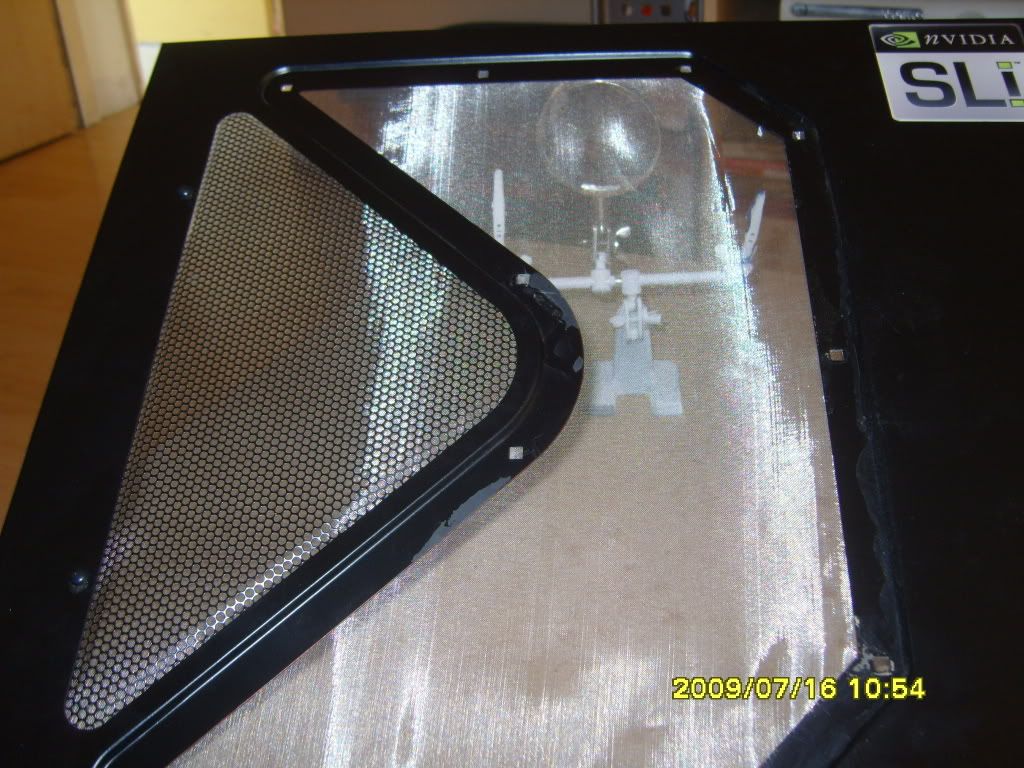
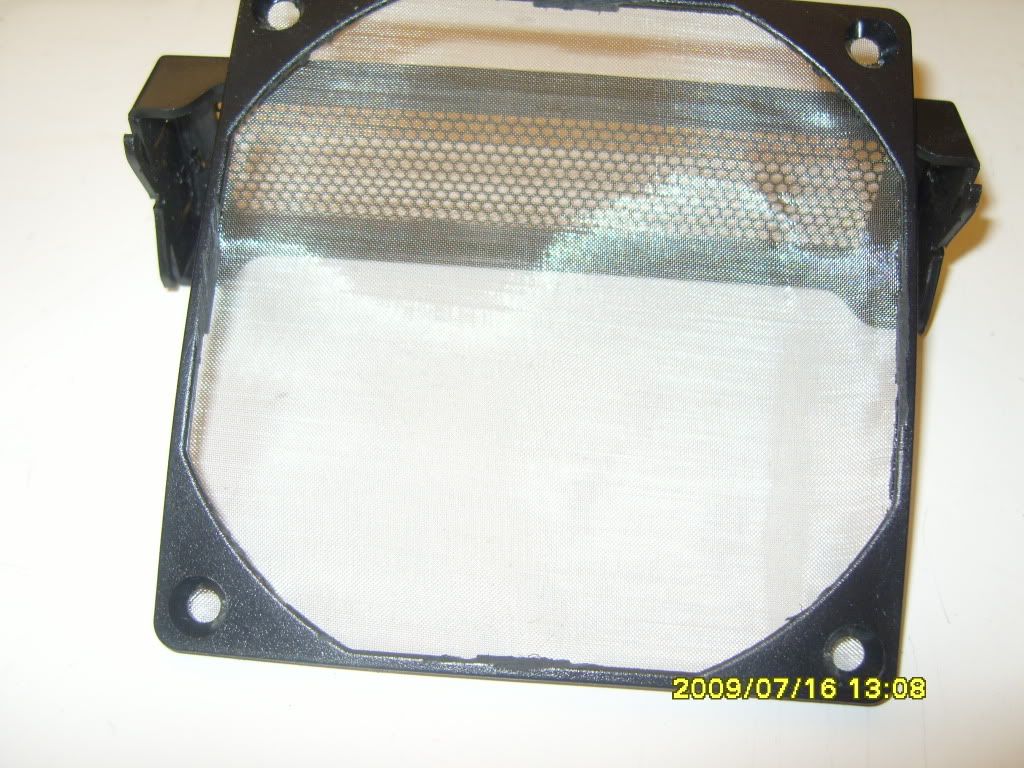
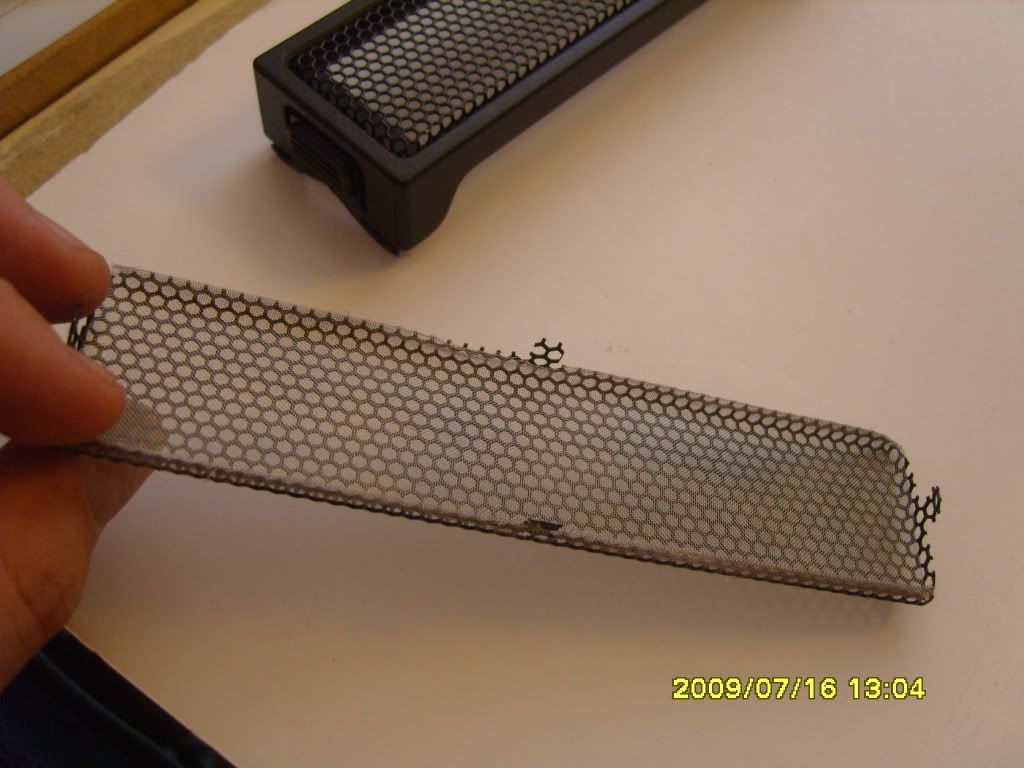
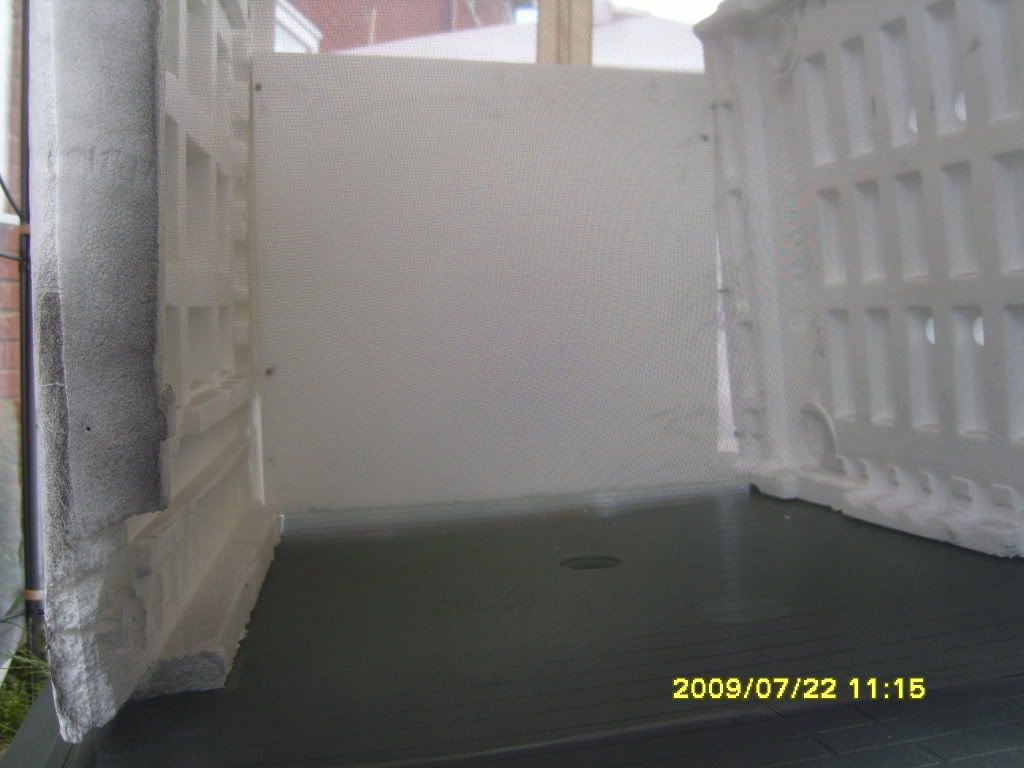
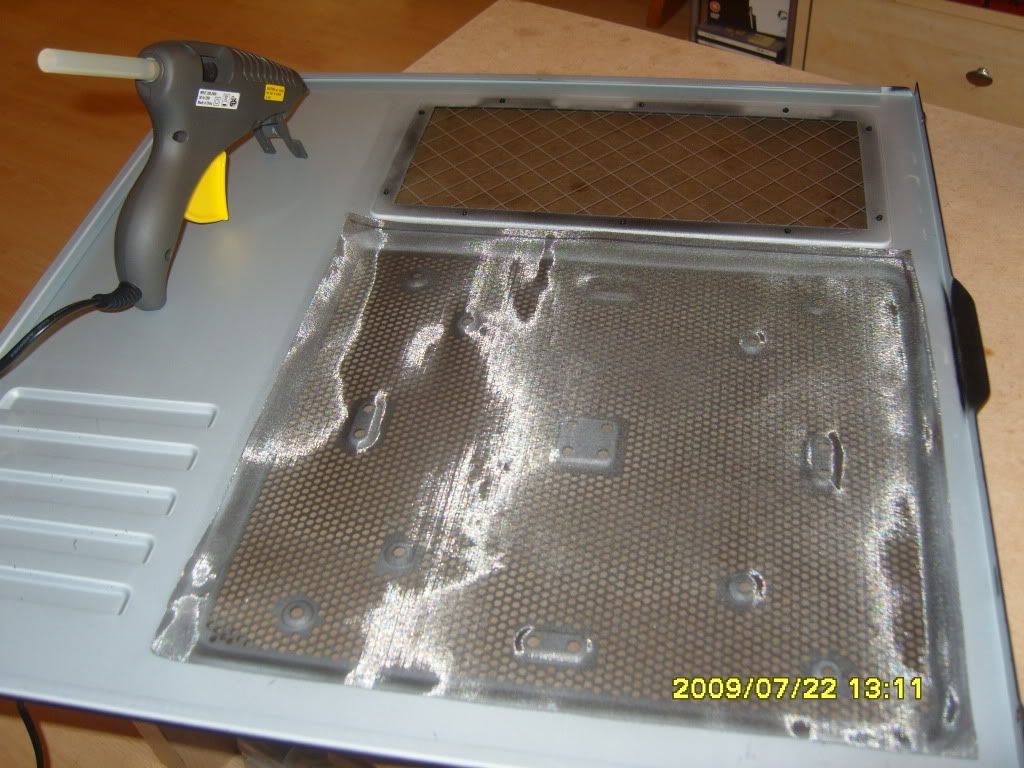
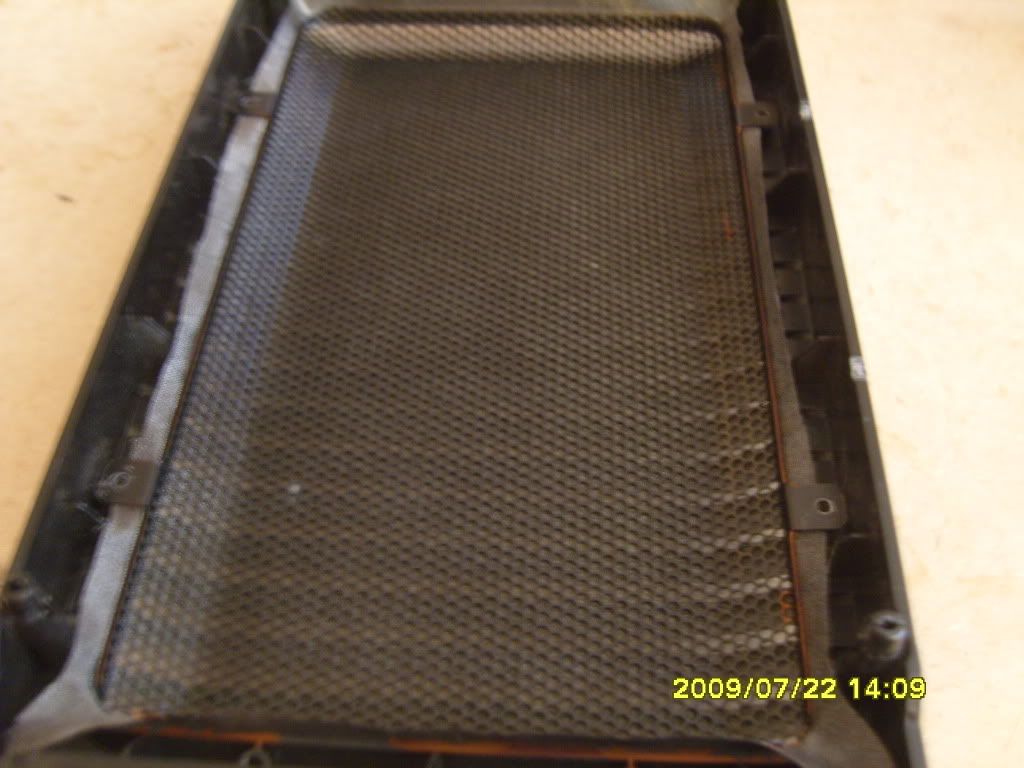
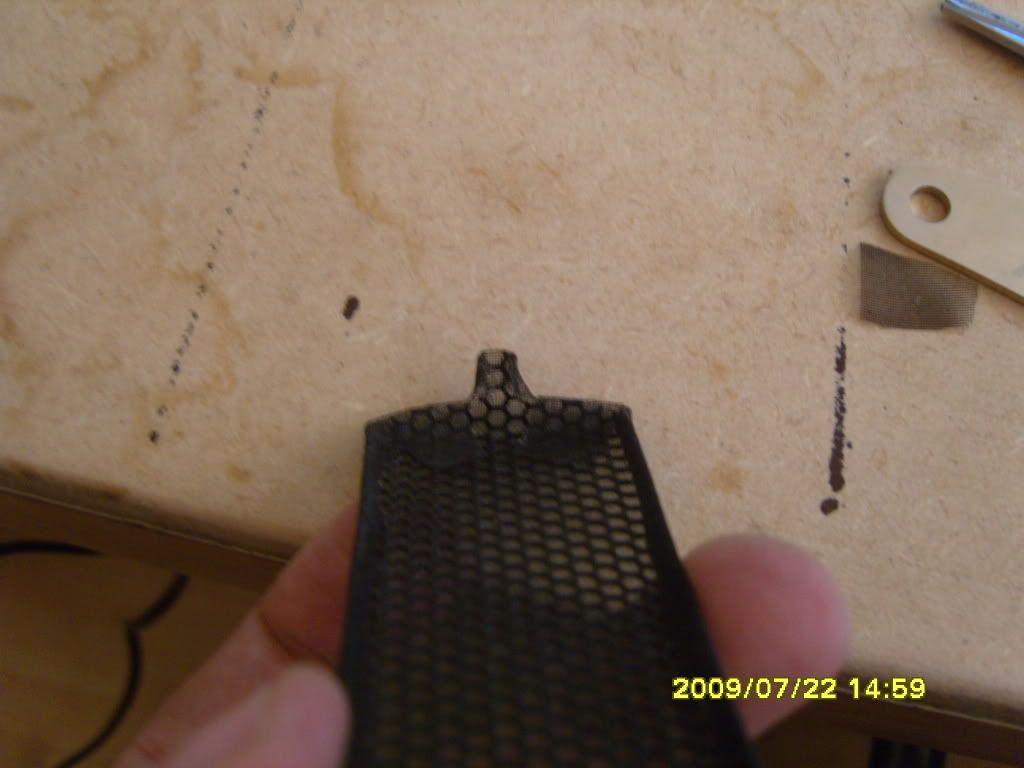
the only tools needed for the main front are scissors and a screwdriver
SS100474.jpg


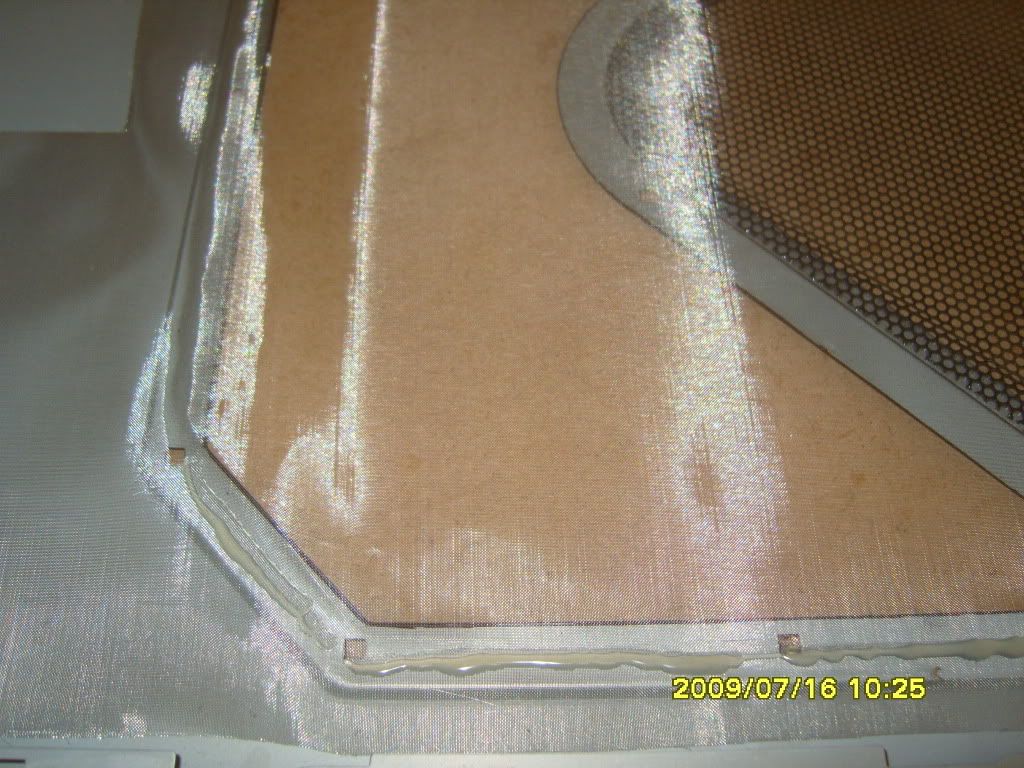
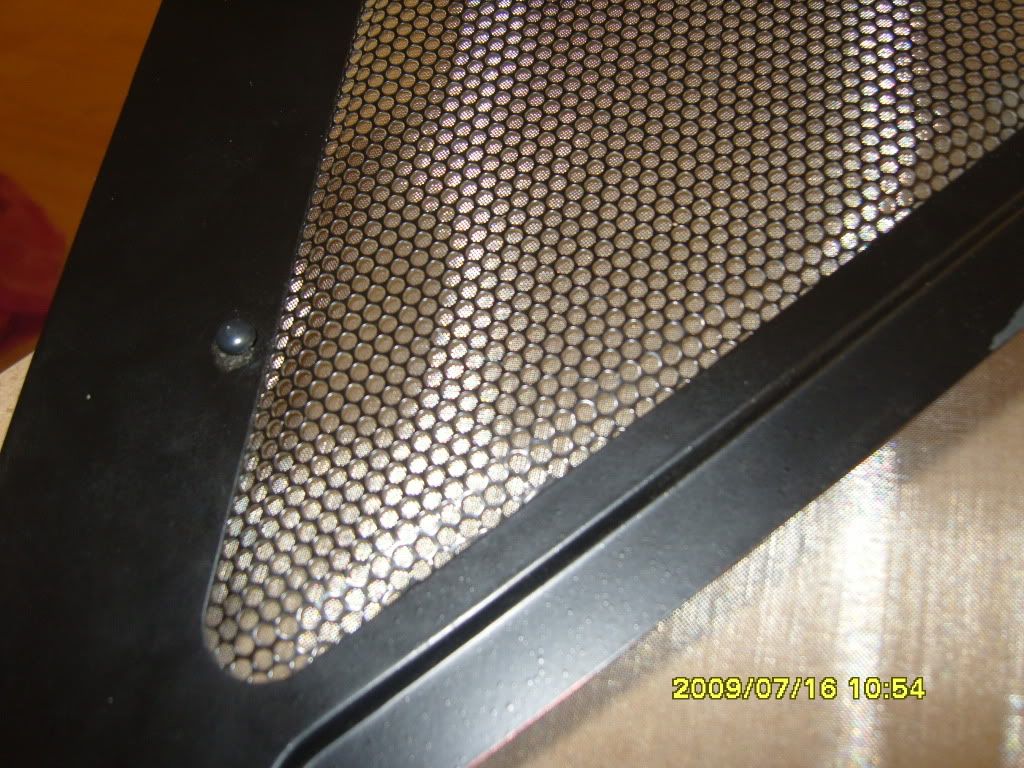
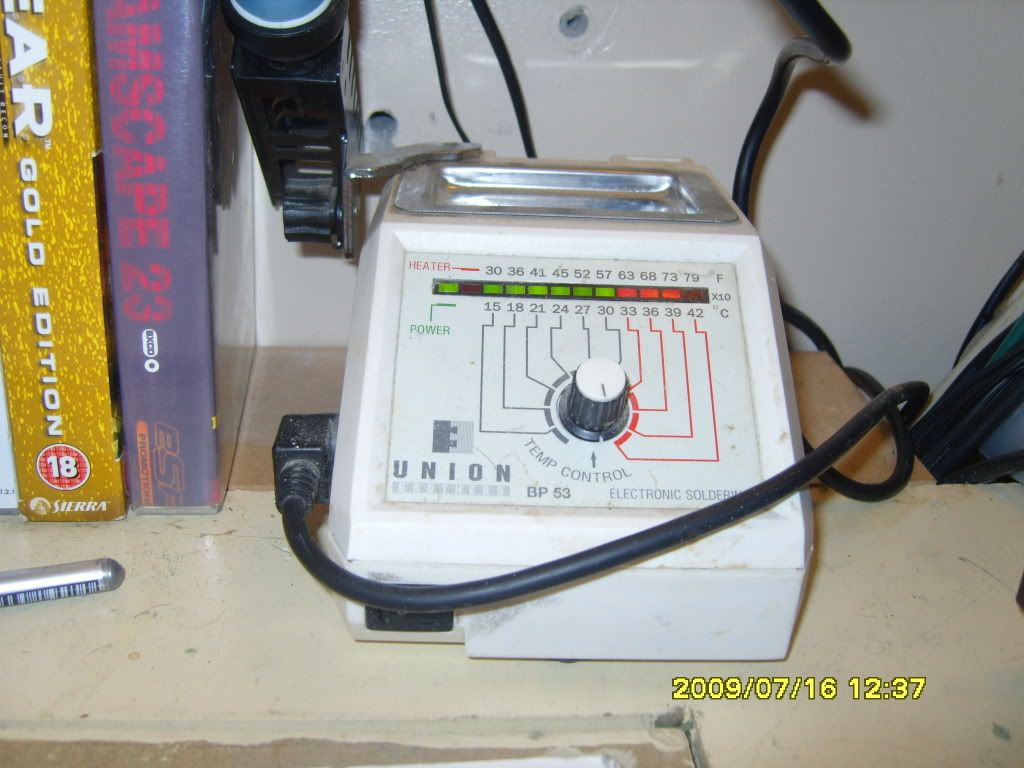
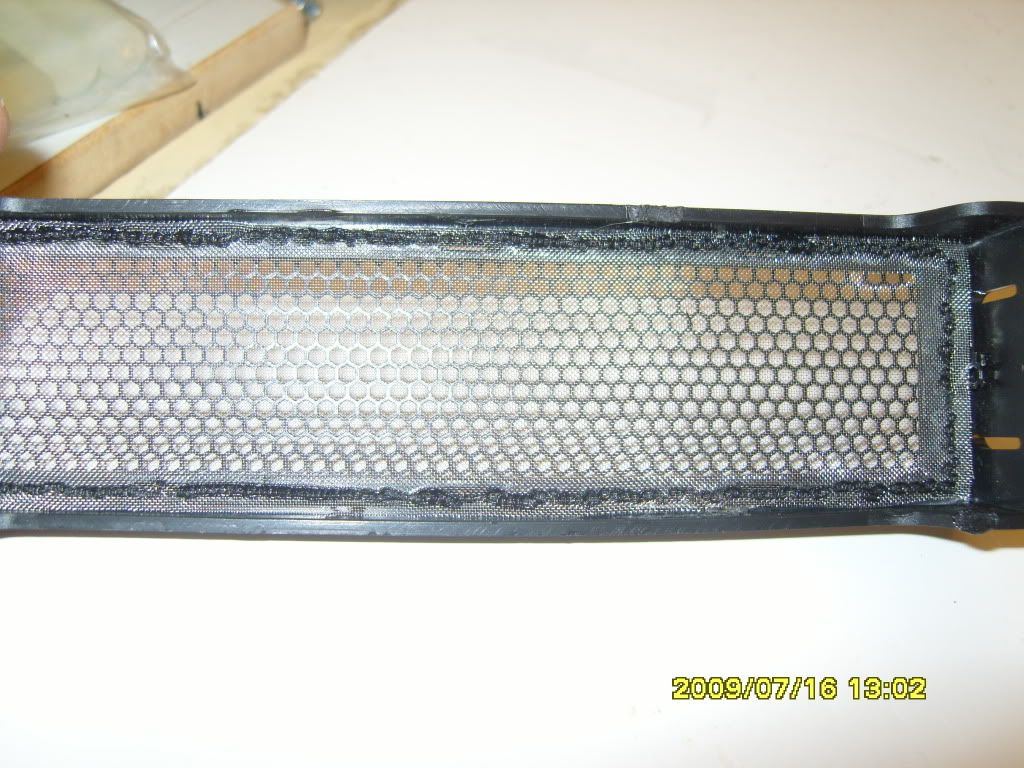
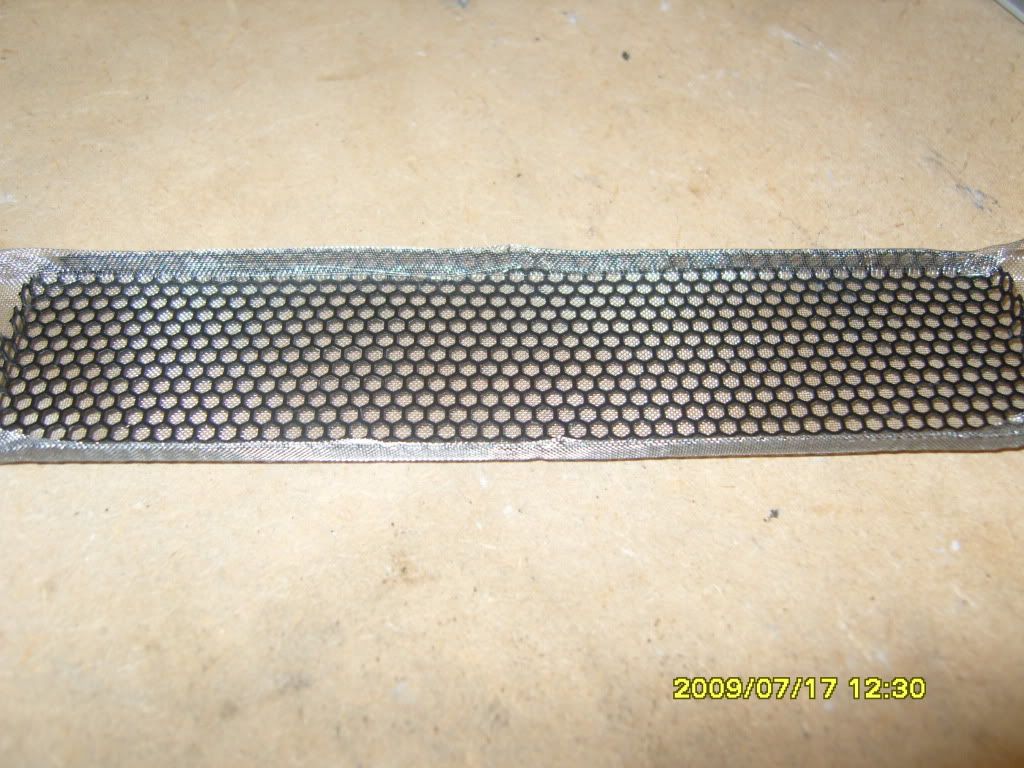
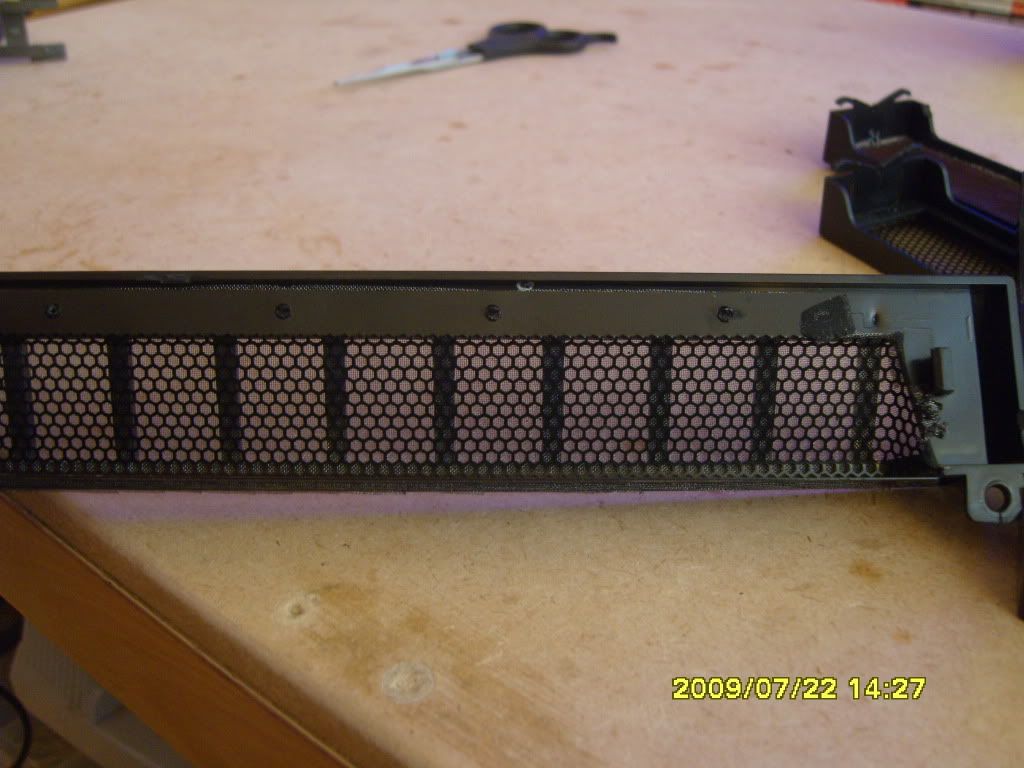
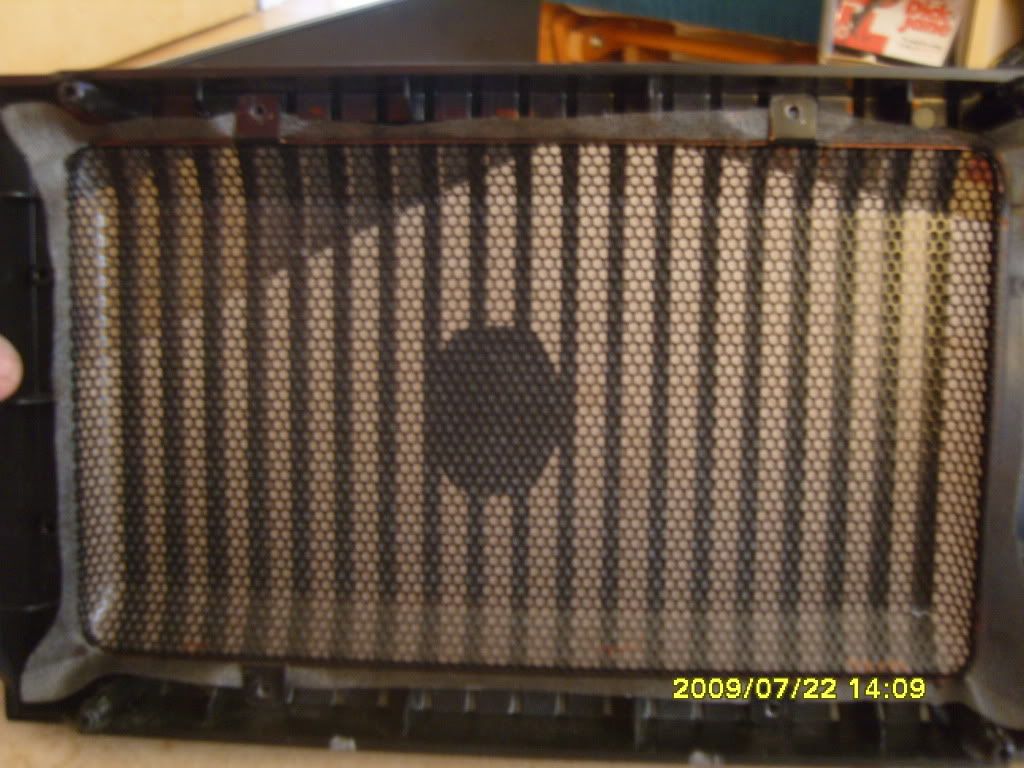
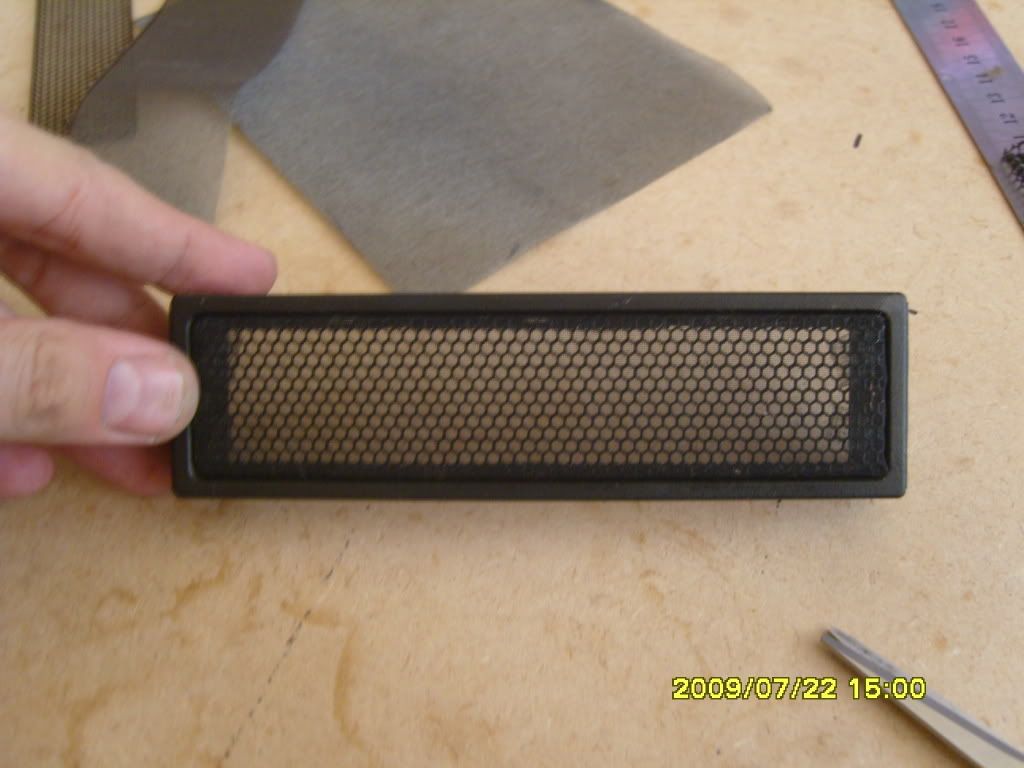
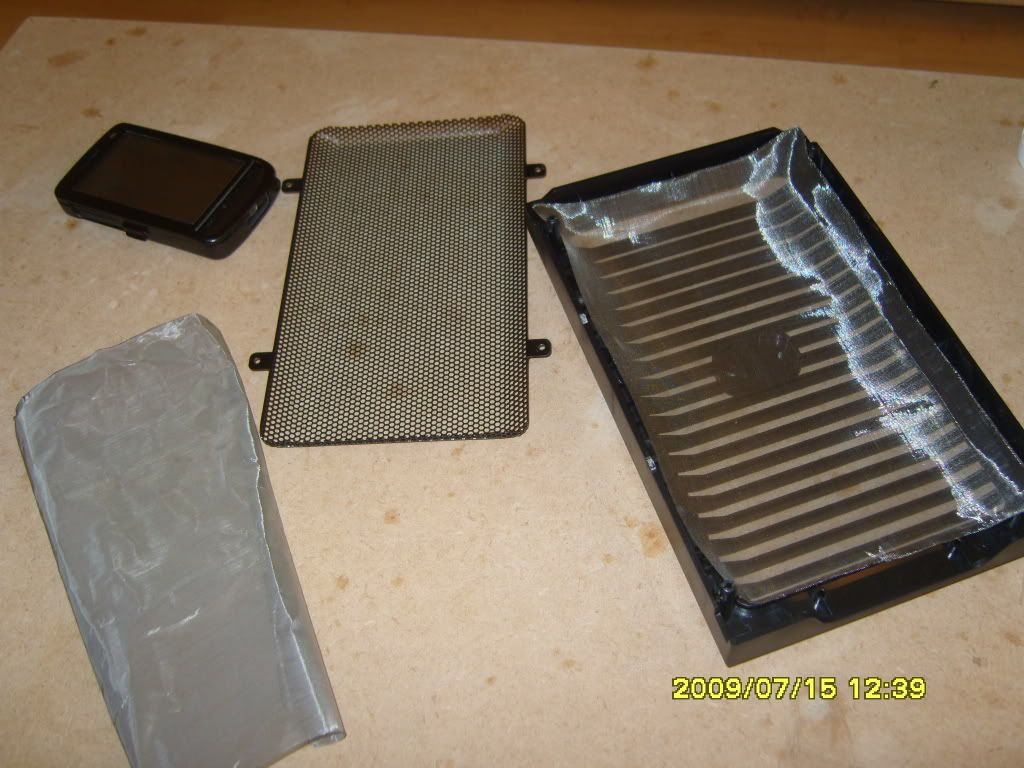
there was me thinking i was going to have to get my trusty soldering iron out again and all i had to do is unscrew the mesh panel and measure and cut the filter and re screw the mesh panel and job done :cool:
SS100475.jpg

SS100478.jpg


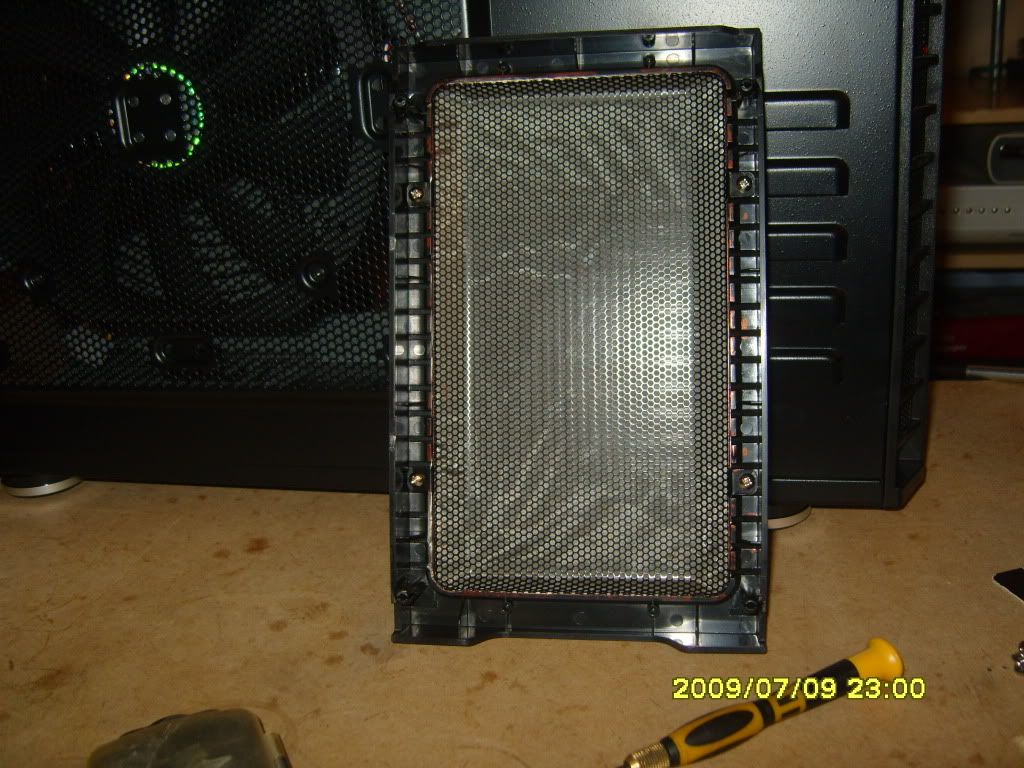
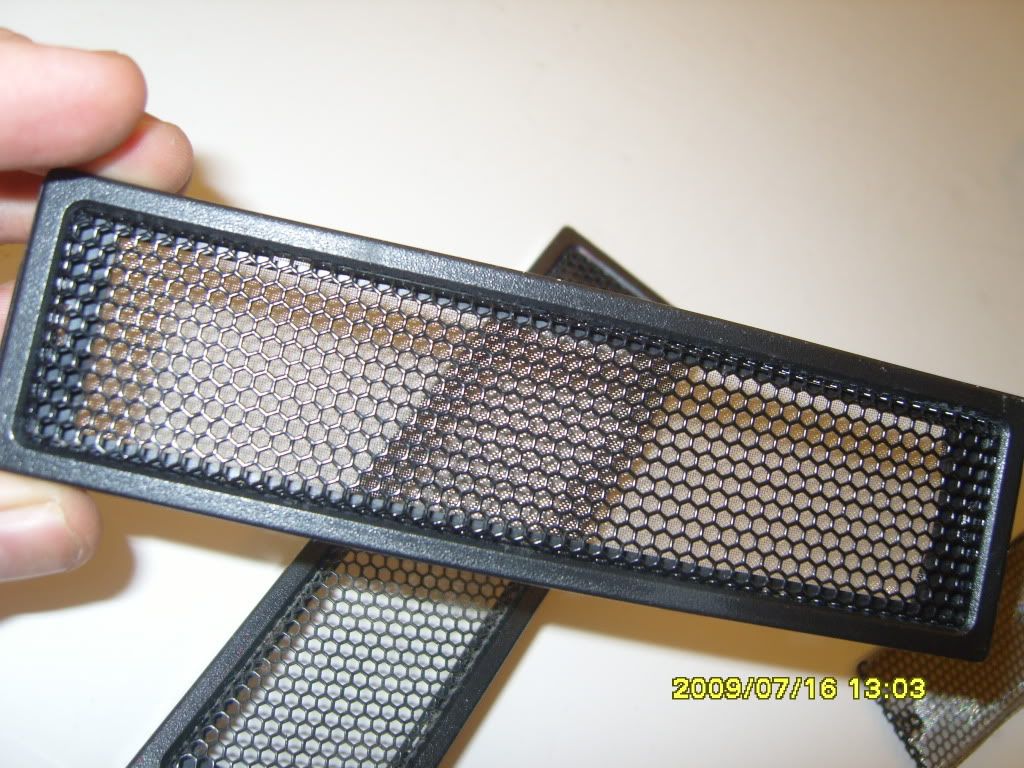
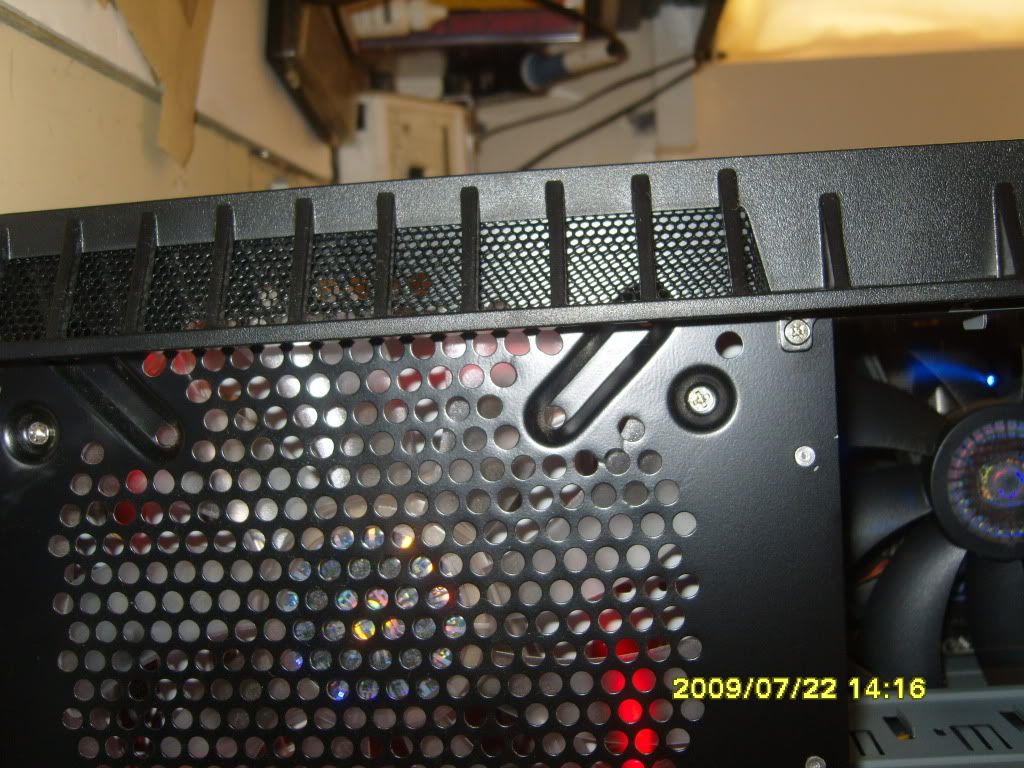
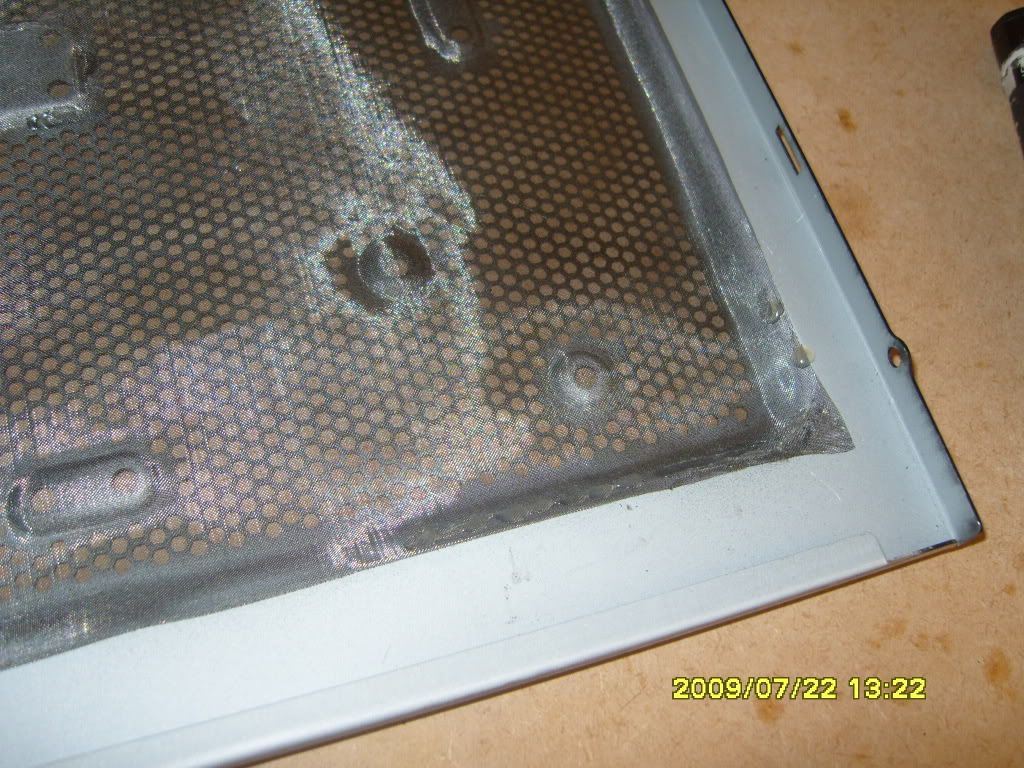
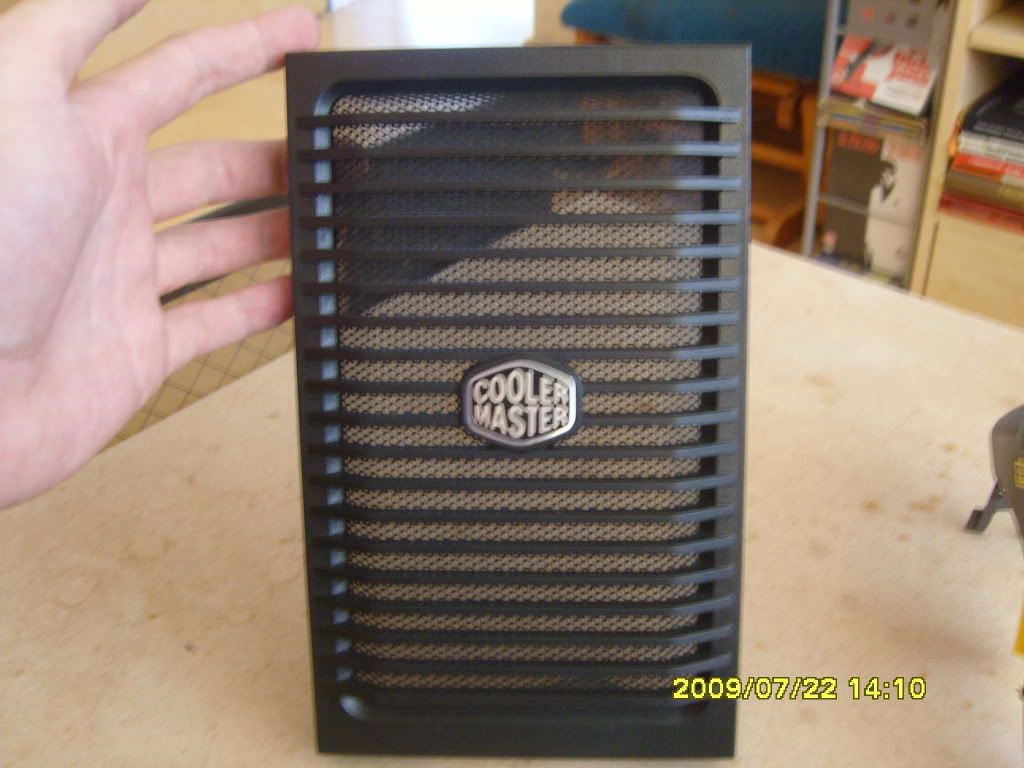
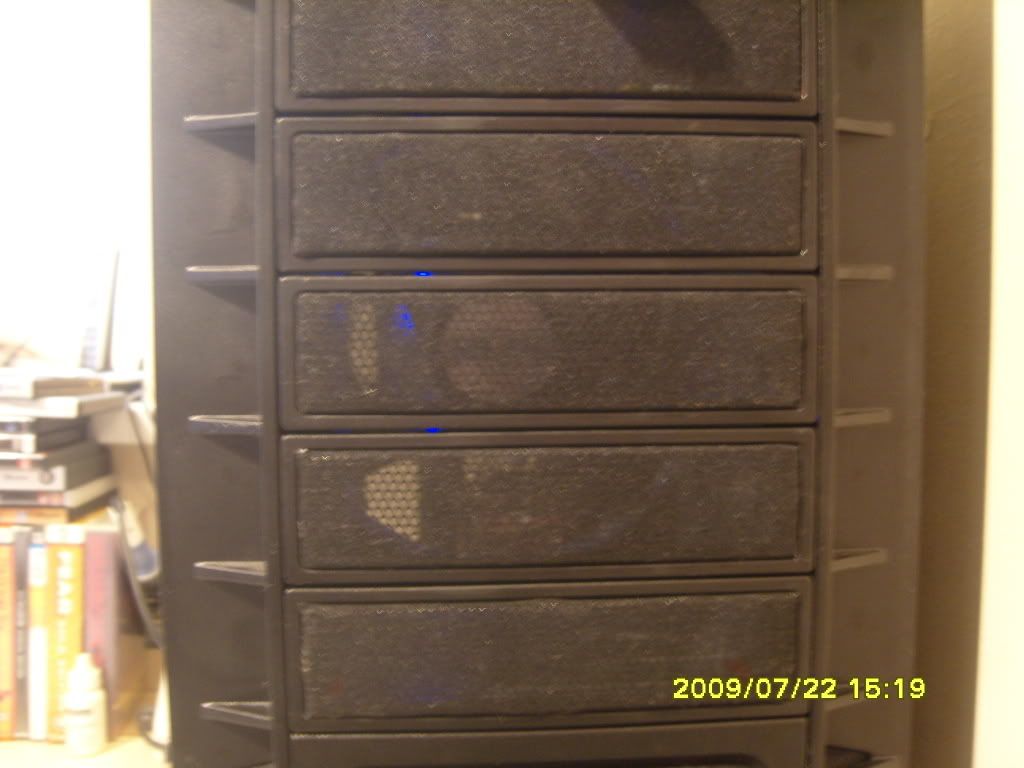
so there you go all done and very easy to do and easy to remove to do testing when all done :D

i will go into more detail on the other filters but if you have any questions post a message and i'll do my best to explain :)
 
Last edited:
finaly got round to doing the case swap late last night, first i thought i would show you all just how massive this case is
SS100480.jpg

SS100481.jpg

makes my old antec 900 look tiny lol

here's a loot inside the antec 900 to show how little space is left after the 2 gtx260's were installed

SS100482.jpg

SS100483.jpg


yes i know it's dusty, but to be honest it's loads better than it was before making the filter for the front of my computer cabinet in-between my sofas but the HAF won't fit in there so I'm having to move it on top of the cabinet but it's not a problem as i didn't spend £100 on a case just to have it sat in a cabinet out of sight

i decided to install the psu in the top of the case because of the second card being close to it if installed in the bottom, so i had to remove the top fan but i have plan's for that later :D

SS100486.jpg

as you can see much more room inside the HAF

SS100487.jpg

and here's the back all the cables out of sight :D

SS100488.jpg

here's a view of the cut out on the motherboard tray, as you can see it's almost in the right place for my board but should still be able to replace the cpu back plate when i move to water in a couple of months

SS100489.jpg

and there you go, I've never had a case with so much room inside :D :cool:

SS100490.jpg

SS100490.jpg

SS100491.jpg

SS100492.jpg

SS100494.jpg


over all it was a very easy case to build with, just wish i had waited till this morning to do the rebuild as i didn't get to bed till 5 this morning:eek:

temps are around the same as the antec 900, but that was with a lot of extra cooling and noise and i normally have the back door open but my hey fever is killing me today SO IT'S 32'C ambient temp :eek:, the HAF is much quieter and i am very happy with it anyway that's about it for this part of the thread, next up will be the filters as soon as the new mesh turns up, so stay tuned for more hopefully on Monday :D, I'm off to bed, I'm shattered lol:cool:
 
Last edited:
Nicely done thus far, although I wonder if you would have been better going for the slightly more open weave of this material? That looks a little too restrictive. Look forward to your testing results.

Do you think it would be possible to blacken the mesh somehow? I might consider this for my case, but only if it's possible to make it black.

Well the postman's been and gone and still no glue gun :( so I have decided to order some different mesh, I've gone for a medium version of the mesh as after reading your post got me thinking, I had made a large filter using the ultra fine mesh and worked very well but didn't get round to testing it on a smaller scale and after doing so found it made a +3'c difference to my cpu temp when i fitted it to my cpu cooler so using it on an even smaller scale like the drive bay filters would raise temps and reduce air flow too much :(, anyway i ordered the medium mesh this morning and opted for first class delivery so hopefully it will turn up with the glue gun tomorrow


about making it black i have an idea about that as well, i used to make and paint (badly :) ) warhammer 40,000 figures and i remembered they do an ink for shading ect so I'm going to get some and try, i will let you know who i get on, i'll be getting black and red to see what looks best:cool:

i'll keep you updated with the results
 
Thanks rick :), i got this stuff from a well known auction site, just google "super fine stainless steel mesh" and you should fine it ok, i've just ordered the medium version as the stuff i have at the mo is a little too restrictive for what i want but works well in larger filters.

as for coolermaster making filters for this case i read somewhere they were running a poll on there website so i think all the public out cry about the lack of filters on this and other cases in there range, but it will no doubt be that foam stuff and won't look that good, anyway making them your self is way more fun than just buying some standard ulgy filter :D

i'm hoping my new mesh will turn up monday so can't really do much more till it does

oh it costs £10.99 + p&p but when i ordered the first lot i ordered x2 and i still have ton's of it left and i have used loads trying different things and ways or fixing it to whatever, if i get time tomorrow i might have to play about with my old case and replace the window with the mesh, if it turns out ok i'll post some pic's :D
 
sorry guys, still waiting for the mesh i will update as soon as i have something to update :D
also waiting until the other mesh turns up to mod my 900 case, but on the up side i'm loving the case, the red fan at the front gives just the right effect, one of my mate's come round this morning and the first thing he commented on was the red light from the fans :D just need one for my cooler now :cool:
 
new mesh is here and front filter complete :D, this mesh is far better than the last for use as a filter, although still need to test it i have a very good feeling this will work well :cool:

anyway on with the pic's
SS100496.jpg

using my trusty touch HD as a light box type thing hopefully you can see the mesh is a lot more open and compared to the other mesh alows loads more air through while still (hopefully:D) keeping the dust at bay

SS100497.jpg

here's all you will need to make this filter (scissors and a screwdriver as above)

SS100498.jpg

cut the mesh to a little bigger than the front grill, push gently into shape and re-fit stock mesh plate and flatten the extra mesh sticking out and then cut out or leave (nobody's going to see it ;) )

SS100499.jpg


SS100500.jpg

SS100501.jpg

SS100503.jpg

front filter MK2 finished :D :cool:, i still plan on changing the colour or the mesh just a little poor at the mo :( so will update when it's done

other filters will be made tomorrow as the kids are at there mum's so will have much more time and no distractions
 
Mk2 looks really good, might have to order some of that

as for colour changing, I dont really know much about the process, but could it be anodised?

thanks guys, it's nice to know people are still interested after all the delays and revisions :D

i think only aluminium can be anodised, i was thinking about using a ink i used to paint my warhammer 40k figure's with but i sold the whole collection paint's and all a few months ago :(
 
That mesh stuff, could you not cut a patch to directly cover the fan instead? That way it would be backed off from the front grill and won't be as conspicuous.

it could be fitted anywhere you like really, i just thought doing it like that would make it easier to clean as all i have to do is run a paint brush over the front and job done :)

a little update on temps, there's very little difference between with and without the mesh but thats based on the front filter only will do some proper testing when the drive bay and side filters are made and fitted

does anyone know if there's a spray glue that will hold this??? i know normal spray glue is ok with paper and card but never tried it steel on steel before:confused:
 
Where'd you get that stuff from? It's exactly what I've been looking for.

just google "Medium Fine Stainless Steel Woven Wire Mesh Fat Quarter" and you should find the "auction site" (hopefully doing this within the rules, if not please let me know mods :) )
 
Antec 900 side filter

update time :), firstly i have ordered the ink stuff to colour the mesh and hopefully it won't take forever to turn up and as i plan to use hot glue to fix the mesh i want to wait till it's done, but i have been having a play and have fixed some to the side panel of my old 900

firstly i had already removed the window in the side due to the extra cooling i was using before so that was 1 less thing to do but it's only screwed on anyway with little black captive nut things
SS100509.jpg


today i will be using my hot glue gun set to hot and scissors
SS100510.jpg


first cut the mesh to just a little bigger than is needed to cover the area you want the mesh to be, in this case i want the whole side covered :)
SS100511.jpg


now lay the mesh in place and run the hot glue over the mesh making sure you keep the glue gun close to both so the glue gets to the side panel
SS100512.jpg


leave to set for a couple of mins then pull the mesh tight and then glue the other side, in this case i glued the bit in the middle and then the sides and finished by doing the black mesh part and that's about it
SS100515.jpg


SS100513.jpg


SS100514.jpg


great for them long hot summer days :D :cool:

still need to do something about where the window was so if anyone has any ideas i would be most grateful

anyway enjoy, i'm hoping the ink cone's tomorrow and it works so i can Finnish the filters for my HAF :D
 
thanks steve :) i will look at the rules again later but the place i got the ink from only do stuff like paint and miniatures so wouldn't think it would be a rule break but i will check to make sure

right time for a small update and at the end i would like you guys to help me decide something :D

first up i have redone the 120mm filter i made using the old ultra fine mesh
SS100516.jpg


again i will be using my trusty soldering iron set to 420'c
SS100517.jpg


i started off by cutting the mesh slightly bigger than the frame, luckily i had a bit left over from making the 900 side panel, and using the soldering iron gentley press into the mesh until plastic comes through the mesh, leave to set for a few seconds and it's nice and strong then you can streatch the mesh over so it's nice and tight and then do the same with the other corners and then go down the sides
SS100518.jpg


and the finished filter
SS100534.jpg


anyway on with the drive bay filters, i've made 2 prototypes :D 1 using the meathord above and one made by just cutting and folding the mesh in place

i will start with the folded one, basicly i just moulded the mesh behind the stock mesh front
SS100528.jpg


it has the advantage of being removable, but is slightly trickier to make
SS100530.jpg


now onto the other version, this one is very simple and quite quick to make as all you need is to cut out a straight piece of mesh with no folding ect :D
SS100521.jpg


and using a soldering iron do the same as above with the 120mm fan filter, starting at one end and moving upto the other making sure you keep it tight and then finishing by doing the sides
SS100524.jpg


and here's the finished ver2 :), much more hidden than the first one but could end up filling the void with dust :( and would need the removal of the black mesh at the front to clean out (not really hard but in time the tabs holding the mesh in place will snap)
SS100527.jpg


so now it's decision time :D what one do you like the look of best? keeping in mind that hopefully the mesh will be ether black or red when complete and i will be putting the mesh behind the side bits ether side of the main front filter

ver1 is the top one and ver2 is below
SS100531.jpg

SS100531.jpg

SS100532.jpg


so answer's on a post card....................... or just post on here :D also any questions feel free to ask
 
just a quick update for those still interested, been having a few problems finding a way to paint the mesh, i tried the ink i said about before but results were poor, the best way i've found so far is permanent marker but even that isn't perfect as it has a hue of reddish purple, so hopefully tomorrow will give spraying it a go, not to confident it will work my guess is it will clog up all the holes but fingers crossed :D

right here go's

i have decided to go with mesh over the stock to keep the look the same as the main front and sides when i get chance to do it ;)

start with placeing the stock mesh on top of the the filter mesh and folding over one side of the stock mesh panel as tight as possible
SS100542.jpg


then cut to size and repeat on the other side
SS100543.jpg


then fold the ends and cut where needed to keep things tidy
SS100544.jpg


and the end result, well until i find a way to paint the mesh
SS100545.jpg


and here's the mesh in black permanent marker
SS100556.jpg


anyway there you go until next time that is :D fingers crossed spraying it will sort the colour problem then i can crack on with the rest of the front and the side one
 
*** Finally Finished ***

A long time coming i know but it's finally finished

i thought i would re do the guide from scratch as i had to re make all the filters anyway, so first thing this morning (11am), i started by adding a second coat of paint to the mesh and striped off all the bit's that needed filters making

SS100558.jpg

SS100559.jpg

my little helper :D

i will be using scissors, a hot glue gun (set to hot), a soldering iron (set to very hot (420'c)) and a screwdriver (Philips no1) and plasti kote gloss super paint, and the medium fine mesh

the HAF is so easy to take apart with only 9 screws holding the front side rails and top port/switch panel in place, 4 of the screws are under the front main mesh panel, 3 screws are under the rubber tray insert and the other 2 are behind the top switch/port panel
SS100582.jpg

SS100584.jpg


here's the sizes i cut the mesh to fit each part, please note some trimming will be needed on some parts but will get to that later

main front 235mm x 145mm
drive bay 171mm x 50mm, 5 needed in total
side panel 330mm x 300mm
side front 240mm x 60mm, 2 needed in total

i'm going to start with the side panel, first i measured and cut the mesh to the size above
SS100562.jpg


then using my hot glue gun starting in one corner i pressed the end of the gun into the mesh and lightly pulled the trigger making sure not too much glue come out and so it didn't go everywhere
SS100563.jpg

SS100564.jpg


then keeping the mesh as close to the side panel as possible run glue all round the outside edge finishing by dotting glue around some of the fan mounting points
SS100566.jpg


here's the finished panel with fan fitted
SS100569.jpg


next up the front side panels, i removed the side rails as described above, then because the stock mesh is fixed to the side rail i had to cut off the melted plastic holding the 2 parts together

then cut the mesh to size and pressed into the side rail then replaced the stock mesh over the top and melted the plastic through the holes and top & bottom, sorry for the lack of pic's in this part i got distracted by the kids so there are none of taking apart ect but it's quite straight forward and if you get stuck i will do my best to help out
SS100591.jpg

SS100592.jpg


and the finished part
SS100588.jpg

SS100590.jpg


half done, now time for the main front filter, those who have read the rest of the thread will already know how to do this bit but i will go over it again just so it's easy to follow (i hope :D)

as before i cut the mesh to size, removed the stock mesh panel and placed the cut mesh in place pressing gently into shape then replaced the stock mesh panel
SS100577.jpg

SS100579.jpg


and here's the finished part
SS100580.jpg

i think it looks much better than it did in silver :cool:

last up it the drive bay covers, i have decided to go with mesh over the stock to keep the look the same

so as before cut the mesh to size above, and place the stock mesh panel in the centre
SS100598.jpg


then on one side fold the mesh over the stock stuff and then do the same the other side making sure it stays as flat as possible and cut as you see in the pic
SS100573.jpg


then you need to cut off the corners as seen in the pic then fold up and cut along the tab slightly bigger then the tab so you can fold the mesh round it so when you come to fit this back into the plastic drive bay cover
SS100574.jpg


and then fold round the end and tab keeping the corners as tidy as possible
SS100603.jpg


and then place back into the plastic frame remembering to make sure the mesh stays flat and don't get caught on the frame, and here it is the finished part
SS100604.jpg

SS100605.jpg


and here's the finished case, with the mesh being black it's hard to see from a distance but looks great that way, but i do plan in the future to make red filters to see how that will look
 
thanks guys :D,

and skyrunner i can't recommend this case enough it's quite, has loads of airflow and so many options for things like psu placement and water cooling options..... just get one you won't regret it:D
 
little update:

been doing testing about the temperature impact of adding filters to my case, here's what i have so far

this screeny is my system without any filters ambient temperature 29.9'c
frontunfiltered.jpg


and this one is with the front only filtered ambient temperature 29.7'c
frontfiltered.jpg


and last up is front and side filtered, note the ambient temperature is a little higher than it was when i run the above 2 tests at 31.6'c
fullyfiltered.jpg


now i know it's only 3d mark and don't really test the system as much as let's say prime or occt but i did run the test's 3 times on each config and the max temp after the 3rd run was recorded using windows snipping tool (so hope this is in win7 HP)
and as you can see not much difference if any and when you factor in the difference in ambient temperature you get an about 1'c increase in GPU and GPU-PCB temps and the CPU :confused: there's a 1'c increase over the un filtered and totally filtered but the ambient temp is about 2'c higher so not sure how to conclude on that???:confused:

i have a new cooler coming soon (Tuniq Tower 120) so will update when it's fitted, hopefully it will help me get past the 3.5GHz barrier :cool:

anyway thanks for all the support from you guys and i hope i have inspired you to hunt some of this stuff down and have a go yourself and i would be interested to know what some of the better modders out there come up with :cool:
 
Going to give this a try when i get my HAF. My dad works for a pipeline filtration company and is going to get me loads of stainless steel cloth offcuts to use :)
cool :cool: if you need any help just leave a message on here or something, would also be nice to have some other pics on here of what other have

how much dust does it stop a lot of it ?
doe's this anwser your question :D
SS100617.jpg

SS100619.jpg

this is the intake filter of the cool clean air box i have under my computer that will as soon as i get a new jigsaw will be feeding nice cool air into the bottom of the HAF i made 2 days ago and this is how much dust and other crap it's hovered up, it is on the floor but as you can see does a good job of blocking dust and on a pc on a desk won't get anywhere as dusty :D

i'm going to get a couple of cans of spray duster soon and give the hole case a good clean out and then check it once a week for signs of dust :)

I love the look and features it's just the lack of dust filters bothers me, I'm fairly certain come payday I'll be ordering one though :D

good man you won't regret it, as i said above would really like to see how you get on so feel free to post your pic's here
 
What grade mesh did you use for the final product?

I did read the thread but hadn't noticed it mentioned anywhere.

Nice going by the way. I am considering a new case. I currently have A+ Case Twin-Engine Tower. Decent for cooling but not overly impressed by the build quailty esp for the front fan.

I was considering the Antec 1200 OR the Coolmaster Storm Sniper now the HAF has caught my eye and I don't know what to get. Decision decisions hmmm

i used the medium fine mesh for the filters, the ultra fine was way to ristrictive but the medium fine is just about perfect:cool:

as for your new case dilemma, i had a antec 900 and was happy with it so the 1200 should be good as well, if the build quality is as good as on the HAF then the sniper is also a nice case, it really boils down to what you want out of a case, the most important things to me were massive airflow, cable management and options like multi rad mounting possibility's, hole on motherboard tray for easy access to cpu back plate and top or bottom psu mounting oh and it's quite, much quieter than my old 900:)

i was also considering the 1200 and tjo7 but the HAF had everything i needed and more

also i know with my old 900 it was quite hard to strip the case so getting at the top fan was a mission where as with the HAF it's just 4 screws :D
 
Back
Top Bottom