Lean and Green - modular dual PC scratch build

Associate
Joined
1 Nov 2008
Posts
1,222
Design

Wanted a low power good capacity HTPC & looked at the range of available ones at retail that could hold what I want it to but thought I want something worthy enough to replace Stealthlow with so wanted to make it a dual system to use a lot less electric when I don't need the extra power of a normal system which is most of the time, I didn't think I'd manage making an ok looking dual system where they can still be used as completely separate rigs but I think I got there in the end & went much further, it does look top heavy but I have it figured out nicely & it will be very Heavy Bottom not the other way around ;) & I still haven't designed the case feet, want to have a good idea of it's weight before I do those.

I added a porthole window where the psu cables come out from for giggles in an otherwise super neat system internally with interesting exterior from any angle & this dual system is also highly functional, everything is easily removable & the gaming rig can be removed & placed on alternative feet & the top of the HTPC can be replaced with a plain top or test bench rig very quickly, I know this design rocks for my PC wants with it being very modular :D but as always with my designs if anything lets it down it will be the style not appealing to many but it will brighten up my eyes each day if I manage to make it as good as I hope to :D.

I took another good final examination of the design before marking the materials & tweaked it a little more to perfect it & so it will support slightly higher mobo standoffs & give it a little more strength & a little extra on the looks.

LAG-01.jpg


LAG-02.jpg


LAG-03.jpg


LAG-04.jpg


LAG-05.jpg


LAG-06.jpg


Name
Lean & Green - Yes I would have chosen a better name for it but my mind goes nicely blank caught up in the detail when I look at the concept & only random words find their way out so I'm quite happy it has that effect on me where it leaves me kind of speechless, I considered the name of Heavy Bottom because of people saying it looks top heavy but gave it a miss lol :D.


Why
Needed another reason to do a good personal build & the how much does your rig cost to run blog on bit-tech caught my curiosity to go find out & it came to about £210 for the rig alone each year, I figured I could trim that down to about £60 per year with a better use of electric separating low performance needs to high performance wants & still be able to have a performance rig to enjoy when I want so totally managed to convince myself this was a good idea so got on with it :).


System components

HTPC
ATX PSU, mini-ITX on board CPU/GPU 18w motherboard with hdmi & DVI, good low profile sound card, 4 HDD, 1 SSD, 1 full size optical, full size 140mm custom fan.

Gaming rig
ATX PSU, Full ATX motherboard, moderately overclocked quad core, 8GB RAM, high performance & quiet air cooler, 3 custom fans, good GPU, good sound card, full size optical, 1 ssd, 1 hdd.

Control of the systems, good quality cable splitters.


Materials

Aluminium 0.5, 1, 2, 3, 4, 5, 8, 10mm sheet/plate & some bars round ones, square ones & angled ones. Screws & precision DIY fittings :).
LAG-07.jpg
LAG-08.jpg
LAG-09.jpg


Acrylic 3 & 5mm sheets, Black, Opal frosted, Brown tint. tensol 12 adhesive.

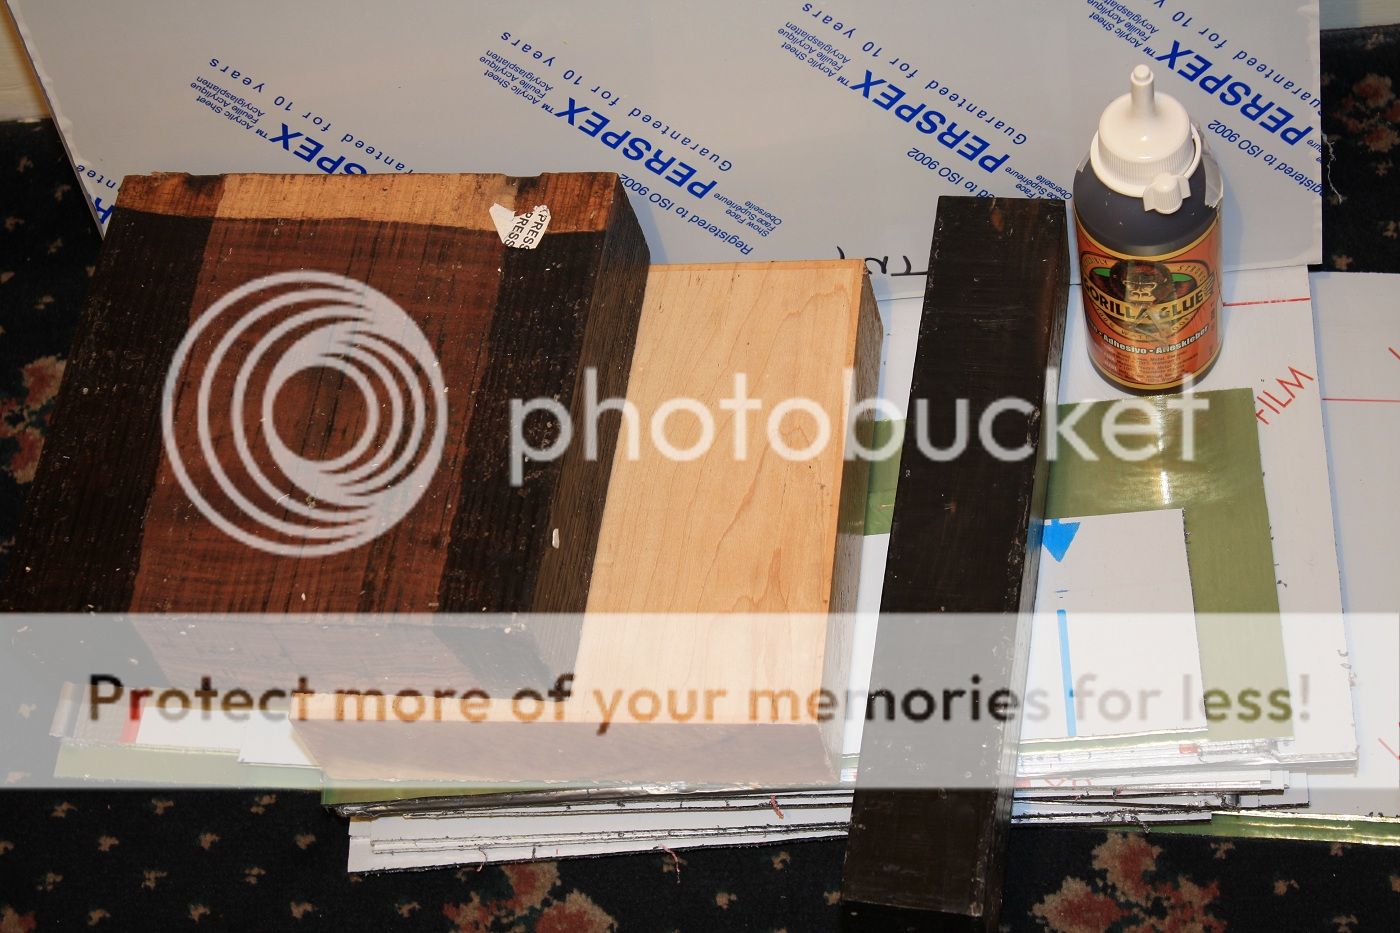
Wood 3 types, Cocobolo, Ebony & Maple. gorilla glue bought the wood as turning blanks & they come coated in wax.


Manual modding is my approach of choice still & no plans on changing after grinding through the difficult barely skilled wondering if I can make anything phase up to feeling pretty confident about my increasing skills phase but I'm always learning & know I always will be which is probably a big part of why I enjoy it so much & feeding the difficulty a few notches higher each time in some way is making me get pretty good at this :).


Reason I am a week late on starting the thread is I've been waiting for deliveries & the last of them came today nearly 2 weeks after ordering them :D scroll saw blades, drill bits & a quality dormer tapping set so as long as I don't screw up anything I should be able to go at it until it's done but what are the chances of me getting through all this without screwing up, place your bets now :D.

First slice of progress, minimal but it's enough progress to warrant for the new thread :D.

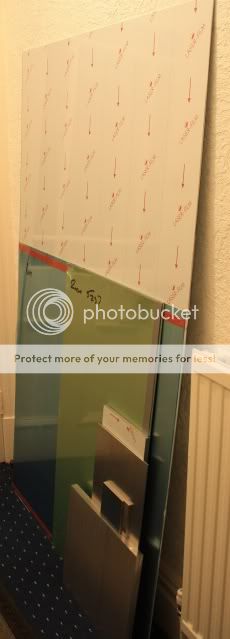
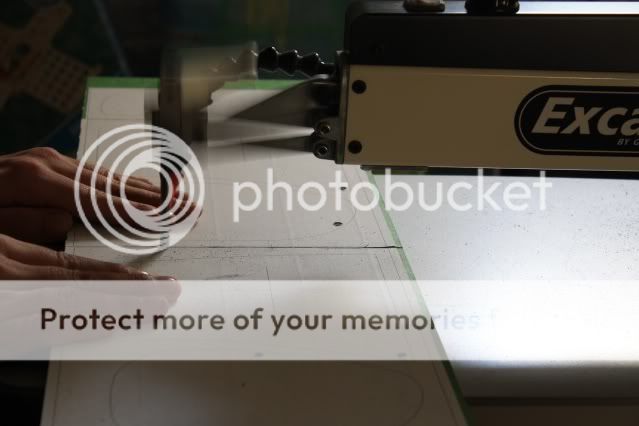
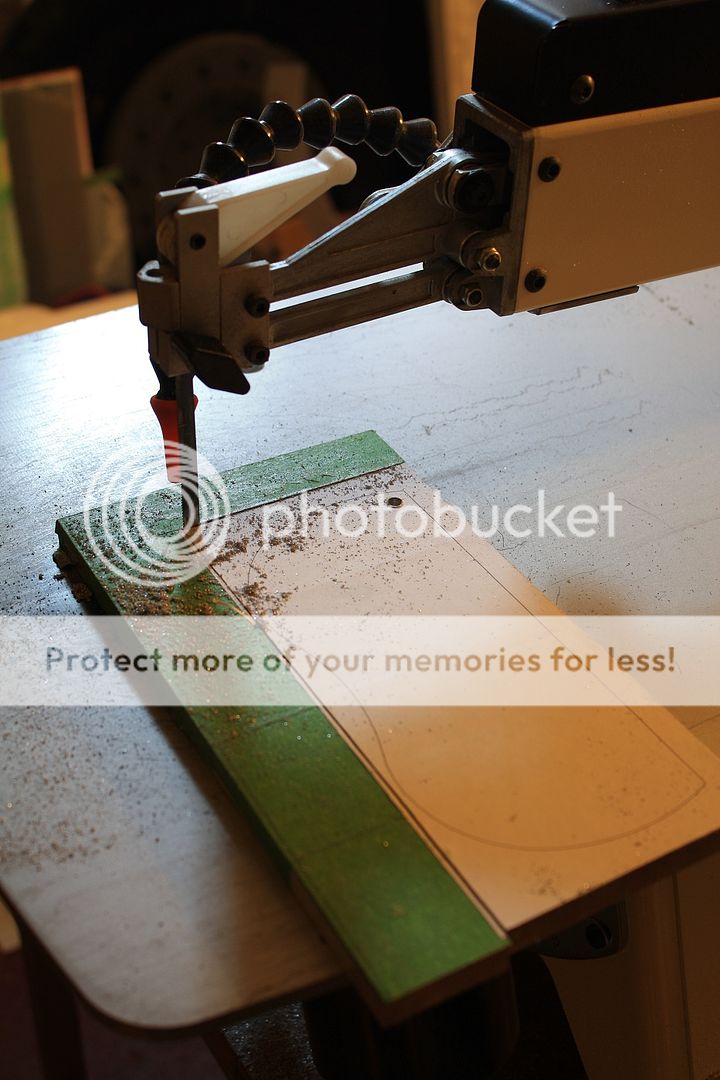
Tackled the 3mm sheets first with them being the hardest to manage being so massive, really should have ordered smaller easier to manage sheets, d'oh, the small work bench is waaaaaay too small for the 1650x1000 sheet & the kitchen work top I used to use I found my dad made it into a fixed side table for the garage so had to improvise, quick look around & seen a bunch of beer packs :D used 5 or 6 12 packs of beer :D they made for an awesome make shift cutting table in fact they worked better than the work bench because of the even load of the packs spread out in the right places :D but it put a good bit of strain on the back from leaning over a lot & about an hour later of a jigsaw frenzy session they are to rough size within a 3mm safety measure ready for detailing, but when I marked the cut lines I forgot to make notes of which pieces are which so need to work that one out lol, should be easy enough & I'll cut up all the other sheets next, it's interesting how much I can do in a short time when going at it with a solid determined plan, I think the days of standing around for hours thinking what next? might be behind me :D.

Needed a map to get good use of the material cutting layout.
LAG-10.jpg


Nearly as tall as me.
LAG-11.jpg


After the 1 hour jigsaw frenzy, all the 3mm alu cut to rough size within a 3mm safety gap.
LAG-12.jpg


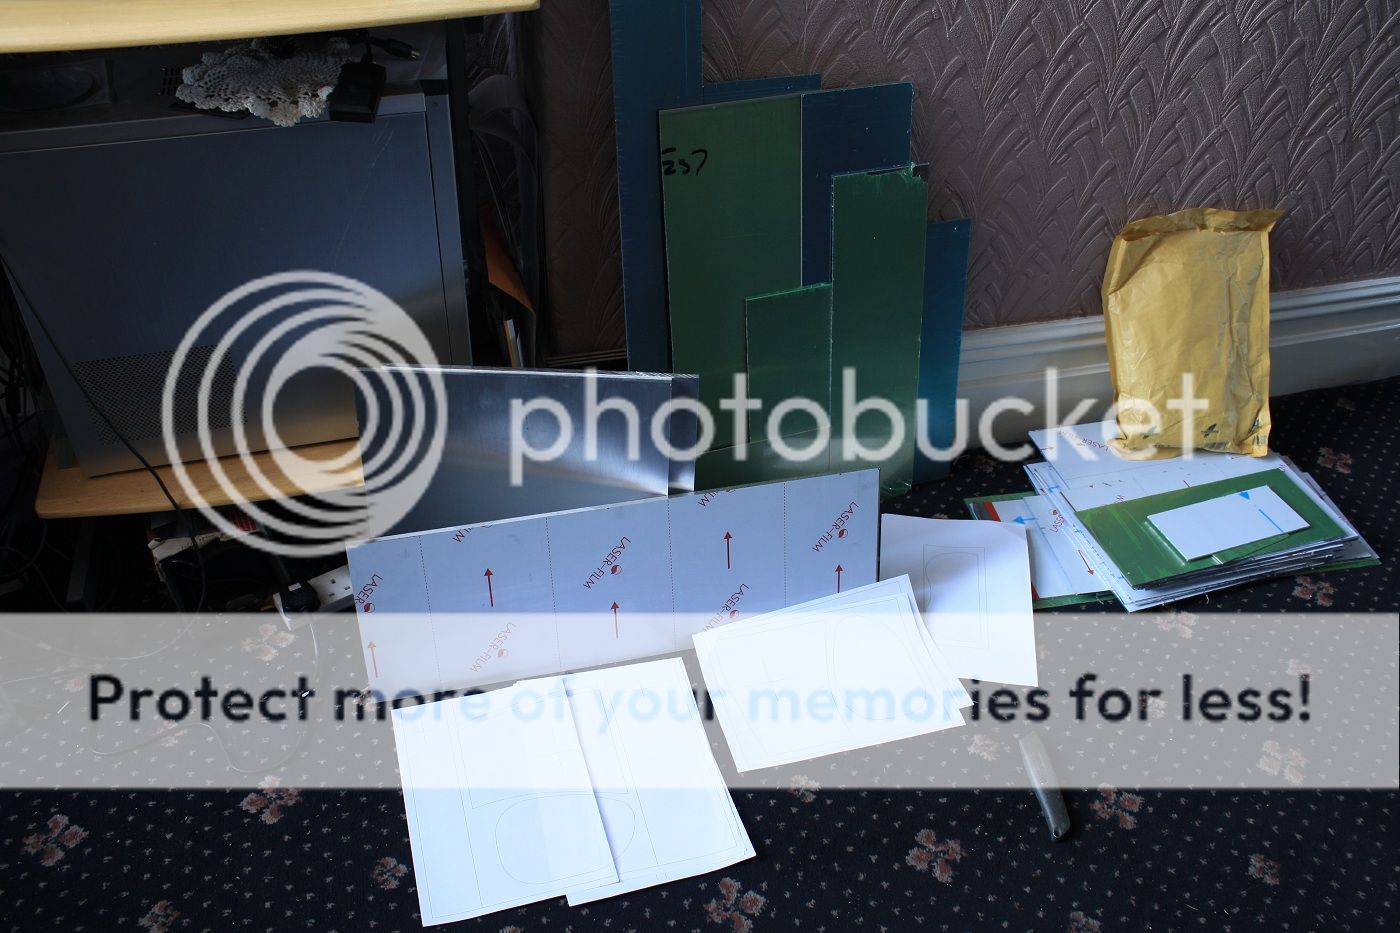
Shot of the wood ready & waiting to be worked.
LAG-13.jpg


I didn't take my ok camera to the garage though, it's too cold & would be bad for it & it was a quick get in there & get it done type task :D not faff about with a camera in the cold :) & was only me using a beer table lol which yeah I suppose would have made a good fun opening work shot really now I think of it sat in the warmth :D.

More tomorrow I hope :).


-------------
23rd May 2012
Changes :D

The design has been a work in progress all along but I thought the first update would have been the final look of this, it's a big relatively complex design so it needed quite a bit more effort going into it so it would turn out as I want it to look & to function, I also chickened out of the wood work for fear of it being a big hassle with my tools & lack of experience of working wood & as you can see they are square 2 inch thick blocks of wood which I'd have to make slithers of to form panels so not exactly something for a wood work newb. :D

Here is how the design looks now with a side by side comparison. :)
LAG-374.jpg
LAG-375.jpg
 
Last edited:
Associate
OP
Joined
1 Nov 2008
Posts
1,222
cant wait to see the final thing :D

Me too :D I have no idea how difficult or easy it all may be but I'm very familiar with 4mm & below alu, the type of wood work I am not a bit familiar with & never cut plate alu of such thickness before so hope I'm up to & my tools are up to the challenge :).

its different thats for sure, this has got epic written all over it!

its nice to see people breaking the mould every so often.
your last build was amazing, although not to my tastes, but i can appreciate great work when i see it.

Thanks Steve :) I don't see a lot of point in doing regular forms if scratch building because it completely frees you from standard case style, case modders mod to improve a standard style or make it perform better or simply make it really tidy, scratch build your going from nothing but to still support regular hardware, good fun when everything works out as it should :D, I could have a go at doing what I think would be a crowd pleaser but I'll save those types for after this last personal build :cool:.
 
Associate
OP
Joined
1 Nov 2008
Posts
1,222
Aha! Nice to see this now has it's own thread. Going to be interesting seeing you work with wood I must say.

kd
Yeah good to be busy again with a nice challenge, hope I can work the wood as I can alu & not be too heavy handed with it, cheers King :D.


Some people are just not satisfied with the amount of pure win they think they need!!

This looks a little... different... to say the least lol but it certainly looks epic!


steve45, is that your quattro in your sig?

>edit<
And now he changes his sig to make me look fick lol - there WAS a quattro in there, promise!!
Lol Cheers Enigama, need dual power or is my excuse for a new rig :D.

Wahoo! Another waynio build!!

Design does look top heavy but as you metnioed it looks like you've thought of that already. Can't want to see how this progresssess! (I know to many "s")
:D lol Cheers red & the project has 2 surprises when it's further developed I think everyone will be like whaaaaaaat, really??? :D.


oh my :o are you building a space station? xD
I look forward to seeing this!
Might be lol :D cheers mate :).

your eyes didnt deceive you, its on sigrotor along with 5 other pics:p, it was my quattro, had it for a good 3 years, sold it a couple of years back though, now got an Evo VI,
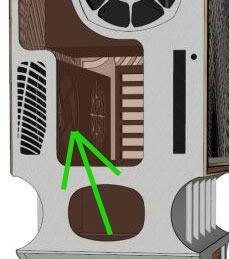
sorry for derailing thread:o

to get back on topic, can you enlighten me as to what this is? looks like a fan mount or something like, so as not to ruin the exterior asthetics, but maybe i'm just being dumb.
Untitled-1.jpg
No worries Steve :D, those are intake & exhaust 120mm fan ducts, thought it was a good use of the usual wasted space next to the expansion area & it allows for a shorter depth of case & still support long GPU's & the fan duct piece removes as 1 very easy to allow access to the system :) I've done very similar ducts on mods before & they work excellent ;).

Since first update of cutting all the 3mm sheet to size I have been busy, marked & cut the 1mm & 2mm sheet to size & made layouts ready for printing & sticking, worked out a good way to span big designs over multiple pages accurately when using an a-4 printer.

I print & stuck the 10mm plate designs for the HTPC which just about fit on an a-4 sheet :D & drilled the holes for scroll saw access & I believe I'm tackling the toughest part of the project as the first bit lol, not because of complexity but because of tough material, good grade 10mm alu is very flipping tough :D, my small 18TPI blades cut it well but takes ages & will be great for curve cuts so since I was cutting the outer edges of the HTPC sides & front first which are straight I put the cut up band saw blades to the job but still took countless hours, was up good & early & about 5pm called it a day after getting those pieces ready for the next phase of cutting the holes out.

The bigger stand sides I will do 1 at a time trying to get 1 done each day rather than be an idiot trying to do them both in 1 day lol & that is being optimistic, I will amaze myself if I get the holes cut out of the HTPC 10mm panels in 1 day tomorrow lol I said the scroll saw is like a manual laser cutter but boy oh boy it's a slow one for chunkier materials lol.

Pictures of the day.

All the sheet alu ready & waiting for detail & the sign of 10mm plate, need glue spray to get things done quicker & better so will get some on Wednesday.
LAG-14.jpg


10mm HTPC side panels & front panel printed & stuck.
LAG-15.jpg


The blades & drill bits which held the start off for a week.
LAG-16.jpg


Starting off with normal scroll saw blades at 18 TPI for thicker materials.
LAG-17.jpg


Switched over to the band saw blades for doing quicker straight cuts.
LAG-18.jpg


Each & every line I had to cut took a while & took a lot of concentration.
LAG-19.jpg

LAG-20.jpg

LAG-21.jpg

LAG-22.jpg


Sneaky peeky at the chop saw in the background & the thinnest slither I took off the 10mm plate :D.
LAG-23.jpg


My view all day today lol.
LAG-24.jpg


More soon :).
 
Associate
OP
Joined
1 Nov 2008
Posts
1,222
Can't wait to see what it look like when it's complete. The case looks so unusual, but awesome :D Hope everything turns out okay.

Thanks mate :), looks really insignifficant what I did in the last update but that 10mm alu takes ages to cut so without a video will go completely not understood how much time this will take lol can't wait to get this thick stuff completed :D.
 
Associate
OP
Joined
1 Nov 2008
Posts
1,222
I can appreciate how long that would've taken mate - alu is an absolute bitch to cut as it's so soft and clogs up the blades doesn't it - awful stuff!!

Can't wait to see this one taking shape - the epicness (and massiveness) of stealthlow could well be overshadowed by this badboy!!

The wood should give a nice touch to the finish too :)

As I said, can't wait mate!!

:D Thanks for the awesome comment mate :) copper is even worse, that really sticks :eek:.

The lighting in the cellar was pretty bad, too dim so took the daylight bulb from my room & used 1 of my clip on light fixings so no more cast shadows in way of the cutting line & far better lighting for good work & better photos but my eye focus is carry on wandering off with it taking so long so have to stop every few minutes to regain it, taken over an hour to get the cut this far, could really do with some kind of magnifying aid, it cuts so slow you sometimes think it isn't cutting even though it is but agonisingly slow, I hate cutting thick tough material it's easily the biggest test on my patience I ever had & this is the smallest piece to be done, ugh lol :D think I'll mark every couple of mm so I can tell it is cutting :D.

LAG-25.jpg


LAG-26.jpg


LAG-27.jpg
 
Associate
OP
Joined
1 Nov 2008
Posts
1,222
If I did this on my first scroll saw coffee would be everywhere from vibrations :D.
LAG-28.jpg


Half way point of the curve cut.
LAG-29.jpg


Lol after getting to half way around the curve cut I decided it's really going way too slow for my liking & would have taken a really long time to do the way I was doing so gambled the lifespan of the blades but carefully :D.

Glad I did, I found by pushing them close to snapping point but a little bit away from that I was getting though it pretty well indeed, took quite a few hours to realise this though so I think I shouldn't have a problem getting the 2 bigger side panels done tomorrow :).

And any straight cuts in thick materials I'll stick to using the cut up band saw blades, much quicker.
LAG-30.jpg


LAG-31.jpg


LAG-32.jpg


LAG-33.jpg


Also I must have been rusty or struggling with the never tried before thickness of alu on the scroll saw when doing the first cuts so ideally I should buy a little more 10mm plate so I can remake this piece but having said that I could mod the design a touch to hide the tiny mistake & hiding it would allow for a touch more detail which isn't a bad thing so think I'll do that with it being a faint cosmetic flaw rather than a structural flaw so the game plan has already changed a tiny bit but thought of something which will just make it more detailed :D.
 
Associate
OP
Joined
1 Nov 2008
Posts
1,222
Looks pretty cool!

How on earth do you find time to spend days doing this at once?!

kd

Cheers KD, I've been ill for years mate & I got tired of doing nothing with my time & most mainstream things don't really interest me much, I'd sooner poke my own eyes out than sit & watch TV lol :D but even if I worked I'd find at the very least 1 hour a day for it beccause I enjoy creating things :), gives me a sense of purpose & builds good work ethic & I get a nice natural high from doing this :D.

Wow, this looks sick, subbed :)
Cheers Mawat :).

This is gonna be unique, for sure. Looking awesome at the moment, subbed!
Thanks Scryus :).

Not started anything yet today but will do, off to get some glue spray so I can put the printed designs on easier :).
 
Associate
OP
Joined
1 Nov 2008
Posts
1,222
Going at the slow pace I was before figuring how to do it faster it would have taken a week of many hours a day to get through all the 10mm alu :eek: but with knowing how to go faster now I'd say a couple of days instead :) still a long time but not bad really :D.

Also found it does the thick stuff best on slowest speed.

Got some adhesive spray & more masking tape so good to go but I think if I started right now I'd end up doing it until it's done which would probably be in the early hours so I'll pass until tomorrow so I can maintain a proper sleep pattern & put a good solid day into it :D.
 
Associate
OP
Joined
1 Nov 2008
Posts
1,222
Started a bit late but because of skipping yesterday I just wouldn't stop until I got 1 of them done. :)

Tried the 12 TPI & they cut really well but only for about 2 inches & then they get pretty blunt & struggle to cut more so I'll stick to the 18 TPI, seem to get a whole lot more done with those on the 10mm alu.
LAG-34.jpg


Snap, this happens more than I like but not too often. :D
LAG-35.jpg


Continue
LAG-36.jpg


LAG-37.jpg


Neeeeeed fuel :D awesome pasta pesto 10 minute quick fix of goodness with a good kick of scorching chillies. :cool::D
LAG-38.jpg


Woo hoooooo feeling 50 times better so time to get this panel finished. :)
LAG-39.jpg


LAG-40.jpg


LAG-41.jpg


:D More soon :cool:
 
Associate
OP
Joined
1 Nov 2008
Posts
1,222
My patience ran out with the weak fretsaw blades, was taking way too long to cut.

Figured it would only take a couple of minutes to mod a band saw blade by grinding it so went & done it & tested it & it works awesome. :D
LAG-42.jpg


Took a few seconds to get from the start hole to be just inside the line for the cutting & can easily do the curves I need it to while eating though it nicely. :)
LAG-43.jpg


And since I'm not 100% happy with the front chunky piece for the HTPC because of a tiny error while getting used to the 10mm alu I will continue to do the whole project & make notes of any bits I botch so I can make another order to re do any bad parts so it all stays to plan.

I looked on ebay for 10mm alu plate & it is far more expensive than the place I buy from, to get a replacement piece from the shop it would be £3 on ebay it would be £21 for double what I need so if I wait until I have all panels & bars ready to fix together then I won't waste money on postage unnecessarily. :)
 
Associate
OP
Joined
1 Nov 2008
Posts
1,222
Look's very interesting, can't wait to see how it all comes together. I'm an engineer my self, spent the last 23 years fabricating, fitting, tool making etc, would love to have the time and my own equipment to do something like this. You now have a very jealous subscriber. I know you will be very busy,but could you include as much detail as possible (fixing methods tool used etc etc. Alu is a bitch to work some times, WD-40 is a good cutting fluid but I guess this could be messy and screw with your patterns. Anyway all the best with an epic project

:o Not more jealous subscribers lol :D this scroll saw is causing a lot of that :D but at least people will see I'm really putting the tools I bought to good use, thanks Wazz :cool:.
I have too much free time but virtually no money, usually the other way around for most so have to save hard & long to do this so my life isn't anything to be envious about but my mind might be with being quite happy when I have so little. :D
23 years of fabrication experience you should be absolutely awesome at this kind of stuff :) I only have a smidge over 3 years only doing little bits & with no formal training in any of it. :D

I'll cover all the details though mate, just have an absolute ton of scroll saw work to do first lol, starting with the most grueling stuff first. :D

Soooooo much better than days getting nowhere, took about 2 hours to do this whole panel & to be honest it's done better than the other. :D
LAG-44.jpg


LAG-45.jpg


LAG-46.jpg


LAG-47.jpg


Next up is the bigger plates shown here. :D
 
Associate
OP
Joined
1 Nov 2008
Posts
1,222
I measure marked in sketchup so I could fit the stands design on 4 a-4 sheets then drew aligning crosses with circles (2 for each joining edge), used layout to make a 4 page pdf, printed, then used a ruler & razor to cut where needed, then joined together as spot on as humanly possible & tacked together with a tiny piece of cello tape & tacked all pieces together & then completed any gaps that missed cello tape to aid in none tear application, then took the masked up panel & design to the garage, gave the work piece a good spray with the adhesive & stuck the design on it, ready for cutting. :)

These are 4 a-4 prints cut to size with a ruler & razor.
LAG-48.jpg


Joined together carefully with cello tape.
LAG-49.jpg


Stuck on the masking tape covered alu plate ready for drilling & cutting.
LAG-50.jpg


Quite a process & botched the first one so needed to print another 4 :o but much easier & more precise than manual marking which takes a heck of a long time for me & the glue spray is a much better method than pritt stick. :D

I did consider using a CAD printing company to upload the designs to so they could print them onto bigger sheets of paper but thought I'd give joing a-4 sheets together to learn a new trick. :D

This process is a bit time consuming with it being new to me so I'll do the cutting tomorrow & attempt to get these last 2 10mm plates done.
 
Associate
OP
Joined
1 Nov 2008
Posts
1,222
I,ve seen guy's come through years of training with more qualifications than you can shake a stick at that can't cut a straight line, You have a real talent mate keep up the good work.

Lol :D Thanks for the compliment Wazz. :)

Could really do with making an extension table for the front & sides although I suppose I could flip the blade the other way around & pull instead of push, might be trickier though but I'll give it a try, my arms keep going dead from holding the heavy plate while guiding it with 1 hand so need to stop every few minutes. :D

Anyway taking off the excess weight from the outside edges, hopefully I can dig deep & do all the outside edges at least today, still about 6 or 7 hours until I'll call it a day.

LAG-51.jpg


LAG-52.jpg
 
Associate
OP
Joined
1 Nov 2008
Posts
1,222
Had a 17 hour sleep lol, this cold or whatever it is really kicked my rear for the first day, 17 hours :eek::o:D but I'm feeling a lot better & my nose isn't dribbling like it were, just a slightly sore throat & temporary damaged sleep pattern so a quick passing cold.

Since the work I'm doing is noisy due to the table not being big enough to support bigger pieces on the front I'll use tonight to get all the designs ready for printing.

I made the extension surface piece last night, just need a base & bars or blocks of wood to make the height right & then fix it to the table which the saw is on, could have ordered a 6mm large alu sheet to replace the stock one but it costs £70 with VAT & delivery.

If I bought 2 3mm sheets it would be £55 delivery included & I know the seller sends them out fast, it's tempting because it won't require a complex mod, just add the mounting holes, cutting hole & dust holes & smooth off the holes & edges & replace the stock one, very tempted but I'll see if I can make an easy to remove one first with scraps lying around. :D
 
Associate
OP
Joined
1 Nov 2008
Posts
1,222
Hope your feeling better, hate to see this build delayed!


My god!! you'll mod anything!:eek: Next you'll be making spoliers for your car!!:D
Ahh feeling heaps better now :) & got something made to make scroll saw work go along smoother :cool: & oh yes I'll mod anything. :D

Wow, 17 hours is impressive! :)

Hope you get better, and can get on with building :)

kd
Lol much better now, must have been a quick passing cold. :) thanks

What I wouldn't give for 17 hours sleep. -_-

I'mma do it after exams in a couple of weeks.
Going short of sleep sucks, especially when using your mind, always good to catch up on it whenever possible & all the best with your exams mate. :cool:

Finally got the extension for the front of the scroll saw made. :D
LAG-53.jpg


LAG-54.jpg


LAG-55.jpg


LAG-56.jpg


I'll be able to use both hands now for parts like this. :cool:

Progress resumes tomorrow, wooo hoooooo. :D
 
Associate
OP
Joined
1 Nov 2008
Posts
1,222
this is simply amazing great work so far
Thanks HUNTER :) I'll try to keep the pace & quality up.

Ok since my sleep pattern is knackered once again but I was feeling highly focused I decided to just get on with it through the night but at a slow gentle pace so it didn't create noise & slowly but surely got it done. :D
LAG-57.jpg


LAG-58.jpg


LAG-59.jpg


LAG-60.jpg


1 of the big 10mm pieces done, 1 more to go.
LAG-61.jpg


And pulled all the templates & masking tape & protective film off the other 10mm pieces for a few group photos of 4 out of the 5 10mm alu pieces.
LAG-62.jpg


LAG-63.jpg


LAG-64.jpg


Warning, cutting 10mm good grade alu even with a good tool like the scroll saw I have tests a persons focus & patience, zombie mode with keeping control high is required. :D
 
Associate
OP
Joined
1 Nov 2008
Posts
1,222
very good - best of luck with this.
Thanks booyaka, not sure if I'm being delusional but I think I might get this one done a lot quicker than usual, just feel like I really know what I'm doing after Stealthlow :D we'll see. :)

Looking good! are you able to place the bits next to something so we can see what the size is going to be like?
Thanks redfist :) I seen this comment & I meant to throw in something for showing an idea of it's size but it skipped my mind when taking photos, will do on the next progress update. ;)

Ok Got all the 10mm alu cut but I have crap news & good news. :( :D

The crap news is the HTPC sides are 2 to 3mm too big on the size of the outside edges & inside edges so is no good for my design, I must have printed the design of an earlier revision, had about 10 revisions in my folder so mucked up good there, here is how they would have looked if I printed the right one.
LAG-65.jpg


And this is how it looks in reality, missing the inside lips because of the size difference.
LAG-66.jpg


LAG-67.jpg


I have checked all my newer prints & they all measure up spot on like the sketchup model so it was a pure muck up by me for using the wrong flipping model, d'oh.

Good news is I have ordered some more 10mm alu to re do them & the HTPC side panels made won't go to waste & I will make a tweaked version of the HTPC & sell it, but I won't be doing that one until I've completed Lean & Green.
LAG-68.jpg


So at least I have the stands panels done spot on at least & they were much harder to do because of the size & weight of them when they were stock plate alu.
LAG-69.jpg


LAG-70.jpg


LAG-71.jpg


LAG-72.jpg


Now I'm waiting for the extra 10mm alu it's time to pick what I'll do next, plan was to start off with doing all the difficult or patience testing bits first lol. :D
 
Associate
OP
Joined
1 Nov 2008
Posts
1,222
Preparations, wow nearly a week of prep work lol as well as waiting for other bits.

Figured I should do an update of some sort & make this as a mini tutorial project interval, :D not been slacking much at all & this bit took many many hours to do overall although I have been enjoying some more skyrim with some of the time I been waiting for extra supplies :D but mostly been preparation work.

3d concept, I keep all individual pieces as groups which keeps them as individual components so they don't become stuck together in the design that are easy to move around so I can just select 1 & edit it whenever with minimal fuss.
LAG-73.jpg


Here is how I work out what dimensions of material I need for curve pieces, triple click a curve piece & measure each section on the outside of a curve which gives really close accuracy, would give perfect accuracy but when you get odd measurements like 1.56mm or 1.63 is says it like 1.6~mm so I add up to the closest big measurement which I note as 1.7 to be safe so I work entirely with 0.1mm difference for any pieces like that & then I can sand down the super faint difference to perfection & do the same for any cut outs like the round bars I'll be using on this piece, makes the holes a bit oval when it's laid out in 2d but should allow for the same as the model.
LAG-74.jpg


Separating every piece including curved pieces ready for 2d printing on a-4 paper & adding 2 2mm squares with crosses inside them for every joining edge, then finalise the last save with camera parallel projection & then standard camera view as top, ready for layout.

A-4 is 297mm x 210mm but when setting things up to print I pretend it is 280mm x 190mm which prevents where it won't print on the paper so you keep all your needed lines, yes you can choose to print without borders but I think this way give best accuracy especially on a budget printer. :D I could give it a bit more than what I do but I like to keep it safe.
LAG-75.jpg


Layout which lets you dump your sketchup model & make multi page printable pdf file templates, you don't get this part of sketchup on the free version though but if you look around you can find ways to buy a student license which is a heck of a lot cheaper than the retail version meant for commercial use. ;)
LAG-76.jpg


LAG-77.jpg


Multipage pdf file ready for printing.
LAG-78.jpg


And all the little files ready to print.
LAG-79.jpg


Printed all of them & I have them in 2 different stacks, 1 for the gaming rig & the other for the HTPC, next stage is to cut them perfectly with a nice steel ruler & razer, tack them together perfectly measuring all the while & then using the spray glue to mount the templates to the materials ready to cut/drill, think prep work takes the longest to be honest but it should let the progress really flow fast once it's done.
LAG-80.jpg


LAG-81.jpg


One of the stands side panels after cutting, I have quite a bit of spare 10mm alu from the big cut outs & 1 of the pieces I will make drilling, tapping helpers which can clamp to any panels, even edges & ends of bars so I can drill perfectly where I want to & drill perfectly straight with a manual power drill, so yep more custom tools to be made for doing this how I want it. :D
LAG-82.jpg


Currently at 5 big steps forward & 3 big steps back but with a load of prep work done lol. :D
 
Associate
OP
Joined
1 Nov 2008
Posts
1,222
Wow! An amazing amount of work and skill going into this build.

It's looking good so far and I'll definitely be keeping an eye on this as it continues.
Cheers Jim, got a lot ahead. :)

Wow yet another build waynio only just getting over stealthlow tbh.

subbed.
:D Cheers alex. :cool:

Here is the bits I needed to cut the prints nicely.
LAG-84.jpg


Back to the 10mm alu, turned out it was delivered next door & the courier didn't leave a note so I waited in 2 full days for nothing, annoying to say the least.

As soon as I lost a cold, my bro gave me the flu arrrrrgh lol but I wouldn't let it hold me down, figured if I stay in bed groaning or sit at my pc moaning I may as well mod on because I'll feel like crap whatever I do except making progress really appealed to me after so little lately. :D

I could have done pictures again but I already done that for these htpc pieces but in wrong size so I thought an ultra speed video of the whole cutting process which is 3 hours 38 minutes at normal speed but I reencoded it twice at 12 speed so 24 speed but doesn't add up for the 1 minute 30 seconds of fast video but whatever. :D

:cool: Ooohh I wish I could work that fast. :D
My first & only youtube vid until I get around to upgrading my camera to a 550d. :D

I only intended to do an example of how slow it cuts for 1 straight edge but thought meh I'll do a full panel, used my old kodak z950 which is why it isn't great quality.

I'll be going quiet again now until I have the other panel & the front low piece done so I can move on to the easier to cut panels. :)
 
Back
Top Bottom