Mini but Mighty - [Sponsored Parvum ITX Build!]

Associate
Joined
10 Dec 2005
Posts
203
Location
Woking UK
MiniMightlogoV1ThinPNGBG.png


Sponsored by:
2425e4e9_highflow.png


Thanks to Parvum I'm back again for another build. 2 Projects in one year cant be a bad thing :D

Parvum saw my ROTM winning build based on a custom S2.0 they produced for me and asked if I'd be interesting in testing out their unreleased, but forthcoming mini ITX case... how could I refuse!

Thanks to Parvum for the support. For those of you who dont know them, they are a small UK based company (2 people!) specialising in acrylic cases that are extremely mod-able and based on community feedback. Their current case, the mATX S2.0 can be bought here in the UK via OCUK. Those outside the UK would do well to contact them directly via their website:

http://www.parvumsystems.com/

For those interested, my previous builds can be found below:

Micro but Mighty:

http://www.guru3d.com/articles-pages/guru3d-rig-of-the-month-april-2014,1.html

http://forums.overclockers.co.uk/showthread.php?t=18593650&highlight=micro+mighty

Obsidian Red

http://forums.guru3d.com/showthread.php?t=348082&highlight=Obsidian+red

TJ07 Dual Loop:

http://forums.guru3d.com/showthread.php?t=241936&highlight=TJ07+dual+loop

On to this build!

Hardware so Far:

Case: Parvum Systems mini ITX
Motherboard: MSi Z97I-Gaming
CPU: Pentium G3258 Anniversary Edition
PSU: Silverstone SFX Series 450W Modular.

I'm really looking forward to giving the little pentium a run - it reminds me of the CPU's I used to buy when I first started out - cheap, but v.overclockable!

Hardware will be mid range as you can tell, but well balanced.

I'm intending to use this build to test out a couple of new techniques/ideas for me that I may transfer to my main rig if they work out ok:

1) Heatshrinkless cable braiding using paracord:


2) Rigid tubing!

The system will be watercooled of course!
 
Last edited:
The Case:

As Usual with Parvum Systems, their cases come flat packed, and you have to construct them yourself. Pretty novel, but they are incredibly solid once build & the finish is fantastic.

Now, rather than post loads of photos on how it goes together, I did a little video:

https://www.youtube.com/watch?v=fdDBBCagCCY&feature=youtu.be

A couple of shots of the case:

ParvumConstruction-1.jpg


ParvumITXbuilt-3.jpg


ParvumITXbuilt-2.jpg


The case really is tiny, even compared to my mATX, but parvum assure me there is enough room for a full size GPU + think 120mm rad :)
 
The Hardware:

CPU & Motherboard came last week:

MSIZ97IPentium-1.jpg


MSIZ97I-1.jpg


Cant quite get my head around how small the board is considering how much stuff is actually on it!

PentiumAniversaryEdition-2.jpg


The PSU:

SilverstoneSFX450w-3.jpg


Small, but 37amps on the 12v rail means it can supply virtually all that power down the 12v line!

And to give some context for size... this is it vs. my Enermax 1250watt revo!

SilverstoneSFX450w-4.jpg
 
It is really tiny! I'm impressed Silverstone managed to make such a small power supply fully modular too - that will make a big difference in such a small case.
 
Thanks everyone. Glad you are looking forward to it. Expecting the rest of the hardware to arrive over the next couple of days so look out for updates!
 
Annoyingly I missed the delivery guy today, so rather than testing all the components I thought id test fit the mobo and measure up ready to start thinking about how to Watercool in such a tight space.

The case design has clearly been well thought through:

Plenty of clearence for the thickest 120mm rads + fan, maybe even push pull too. Just about 110mm between the midwall edge and front of the case here:

ParvumTestFit-1.jpg


GPU clearence is also pretty reasonable for such a small case. The case measures 290mm wide, so most high end GPU's should fit (for reference an R9 290x is 278mm long):

ParvumTestFit-2.jpg


Cable management options look good. I was slightly concerned about the positioning of some of the connectors on the board, but the cable holes in the midwall align almost perfectly with the ATX connecter & SATA ports at the bottom. The top hole should help with PCI-E power. The only one that remains a pain is the placement of the 8 pin CPU power connector, but thats more down to MSI's board design. I should also say, that motherboard will be made to match the overall system colours... the red heatsinks look rather out of place!

ParvumTestFit-3.jpg


Finally, the advantage of the SFX PSU is it leaves a decent amount of space around the back for cable management. I may even consider placing the pump here.

ParvumTestFit-4.jpg


I'm now looking into paracord for the sleeving so I can get started on that rather long job! Any tips welcome regarding heatshrinkless sleeving methods etc!
 
Last edited:
Looks good so far, especially with the cute PSU but I have to say, I don't like the look of that MSI Motherboard. I mean that logo. ew.

Yes I know, that logo will be going! I'm going to do something about the heatsink as it just doesn't fit in. Couldn't find any half decent blue themed ITX boards anywhere (decent blue boards seem to be harder to find these days...) so I'll do my best with this one!
 
Lol... Would love that! What would you do... Put them back to back with a fan sandwiched in between? Lol!
 
Yes that would be awesome. Especially with acrylic in-between the fittings with pastel coolant.

For an extreme example look at the 9ine04 Project

I'm very tempted to do this now! LOL. I was going to use Mayhems pastel for coolant anyway. Im using it on my other rig and its v.nice.

I am doing exactly this for a show rig ;D with TEENY fans:

Which fans are they? They are very thin! Did you position one between the case and first rad, as well as between the two rads?
 
More hardware arrived yesterday, thanks to a couple of good bargains on ebay:

ParvumHarwareTest-1.jpg


Got a great deal on the memory, its like new, and while not top of the line, the GTX 670 is still a very capable 1080p gaming card, especially as this isnt going to be my primary rig!

ParvumHarwareTest-2.jpg


Finally got around to installing it tonight. Hardware testing tomorrow before taking it back down again ready for watercooling, cable braiding etc.

ParvumHarwareTest-3.jpg
 
Erm, where do the HDDs/SSDs go ?

They go around the back, you screw them into a kind of false roof. If you watch the video I posted in the 2nd post you should be able to make it out. (its transparent which makes it hard to pic up in photos).

Looking awesome! Can't wait to see how it turns out. Glad to see the positioning of the 24 pin on that board wont be an issue :)

Thanks... yes, the positioning is very good.


Im just installing windows right now ready to do a few quick hardware tests before moving on to the next stage :)
 
This shows it more clearly. Its a photo from my Extended Parvum S2.0 build, but its the same principle on the ITX case. You can see how the HDD & Fan controller screw into the shelf bit. The holes are all pre drilled.

iwad.jpg
 
I wouldn't worry too much. It's pretty solid. And with SSDs being so light they mount even better.
 
Last edited:
Not doubting the sturdiness, mainly the looks. Doesnt look very elegant just having them dangling like that to me.

Either make a proper show peice of them, or hide them, in my opinion.

The drives are all hidden. Once the case side is on you can't see them at all.

On another note, I'm away until the end of the week so no progress for a few days. I have ordered a load of paracord and a few other bits to start the cable sleeving, so I'm hoping that has arrived by the time I get back!
 
Partly down to cost, partly as I wanted to try out a new material myself and this build gave me the opportunity.
 
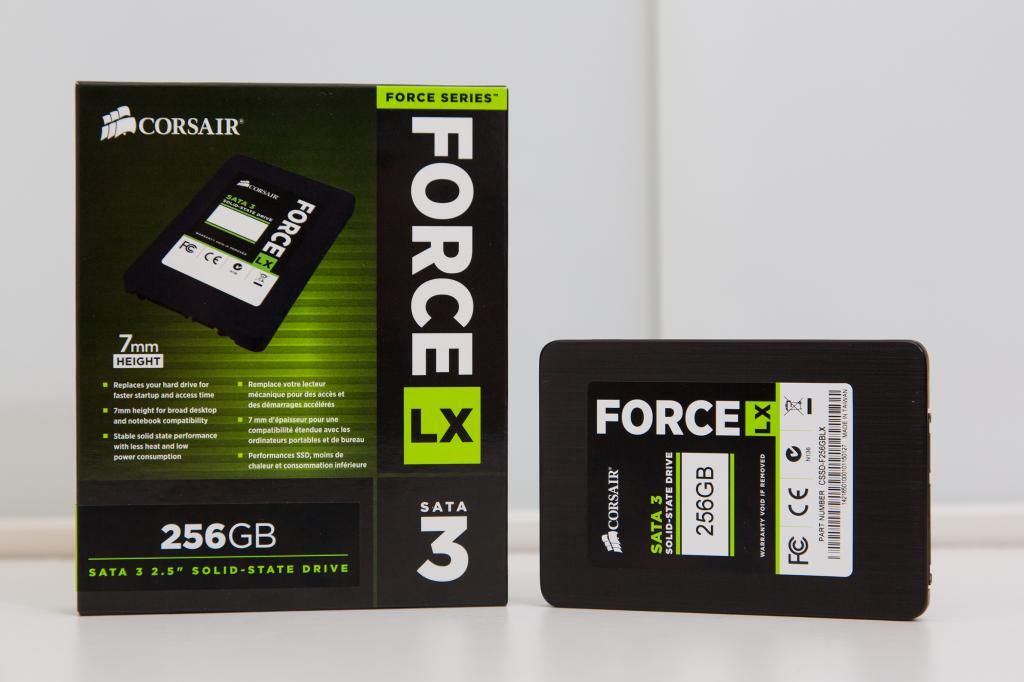
Thanks guys, not much to report, still awaiting for things to arrive before I can progress... however this little package did arrive direct from Corsair...

CorsairForceLX-1.jpg


Much appreciated Corsair! :D
 
Ok, sorry for the lack of updates, been away a bit for work and then for a long weekend mini break with the other half!
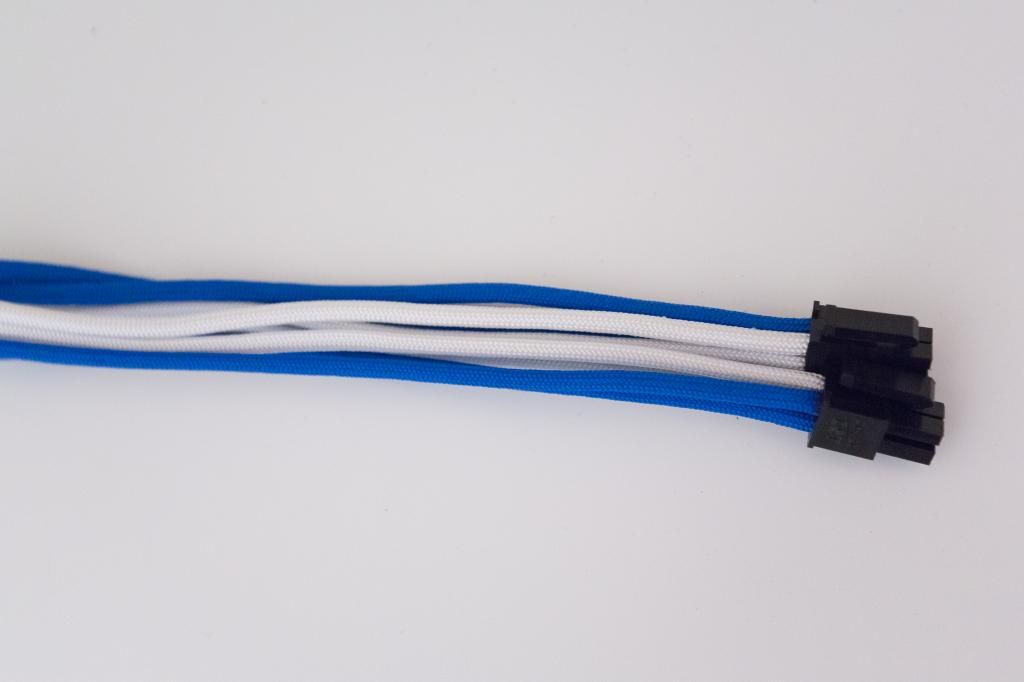
Anyhow, the cable braiding stuff has arrived, so I started work on the cables... here's the first one!

Firstcable-1.jpg


Lots more to do! Starting to get the hang of the paracord now, although I think i'm going to have very sore fingers by the time I finish!

Watercooling gear should start arriving soon I hope :) although I'm waiting for a mobo block EK are due to release for this board. Should be available pretty soon I believe.
 
Ok, getting things ready for the final push to complete the build. Here are some designs to choose from for the build logo.

This will be sprayed on the side of the 120mm rad (which will be white) and possibly somewhere else on the case if I can find a paint that I am confident will adhere to the acrylic without being too easy to scratch off!

Can't take credit for these Alec** (my brother in-law) knocked a whole load of them up and these 3 are the ones I liked the best. Thoughts please!

MiniMightyLogo1.jpg~original


MiniMightyLogo2.jpg~original


MiniMightyLogo3.jpg~original


I think I like the first one best, as it incorporates the parvum symbol around but.
 
Back
Top Bottom